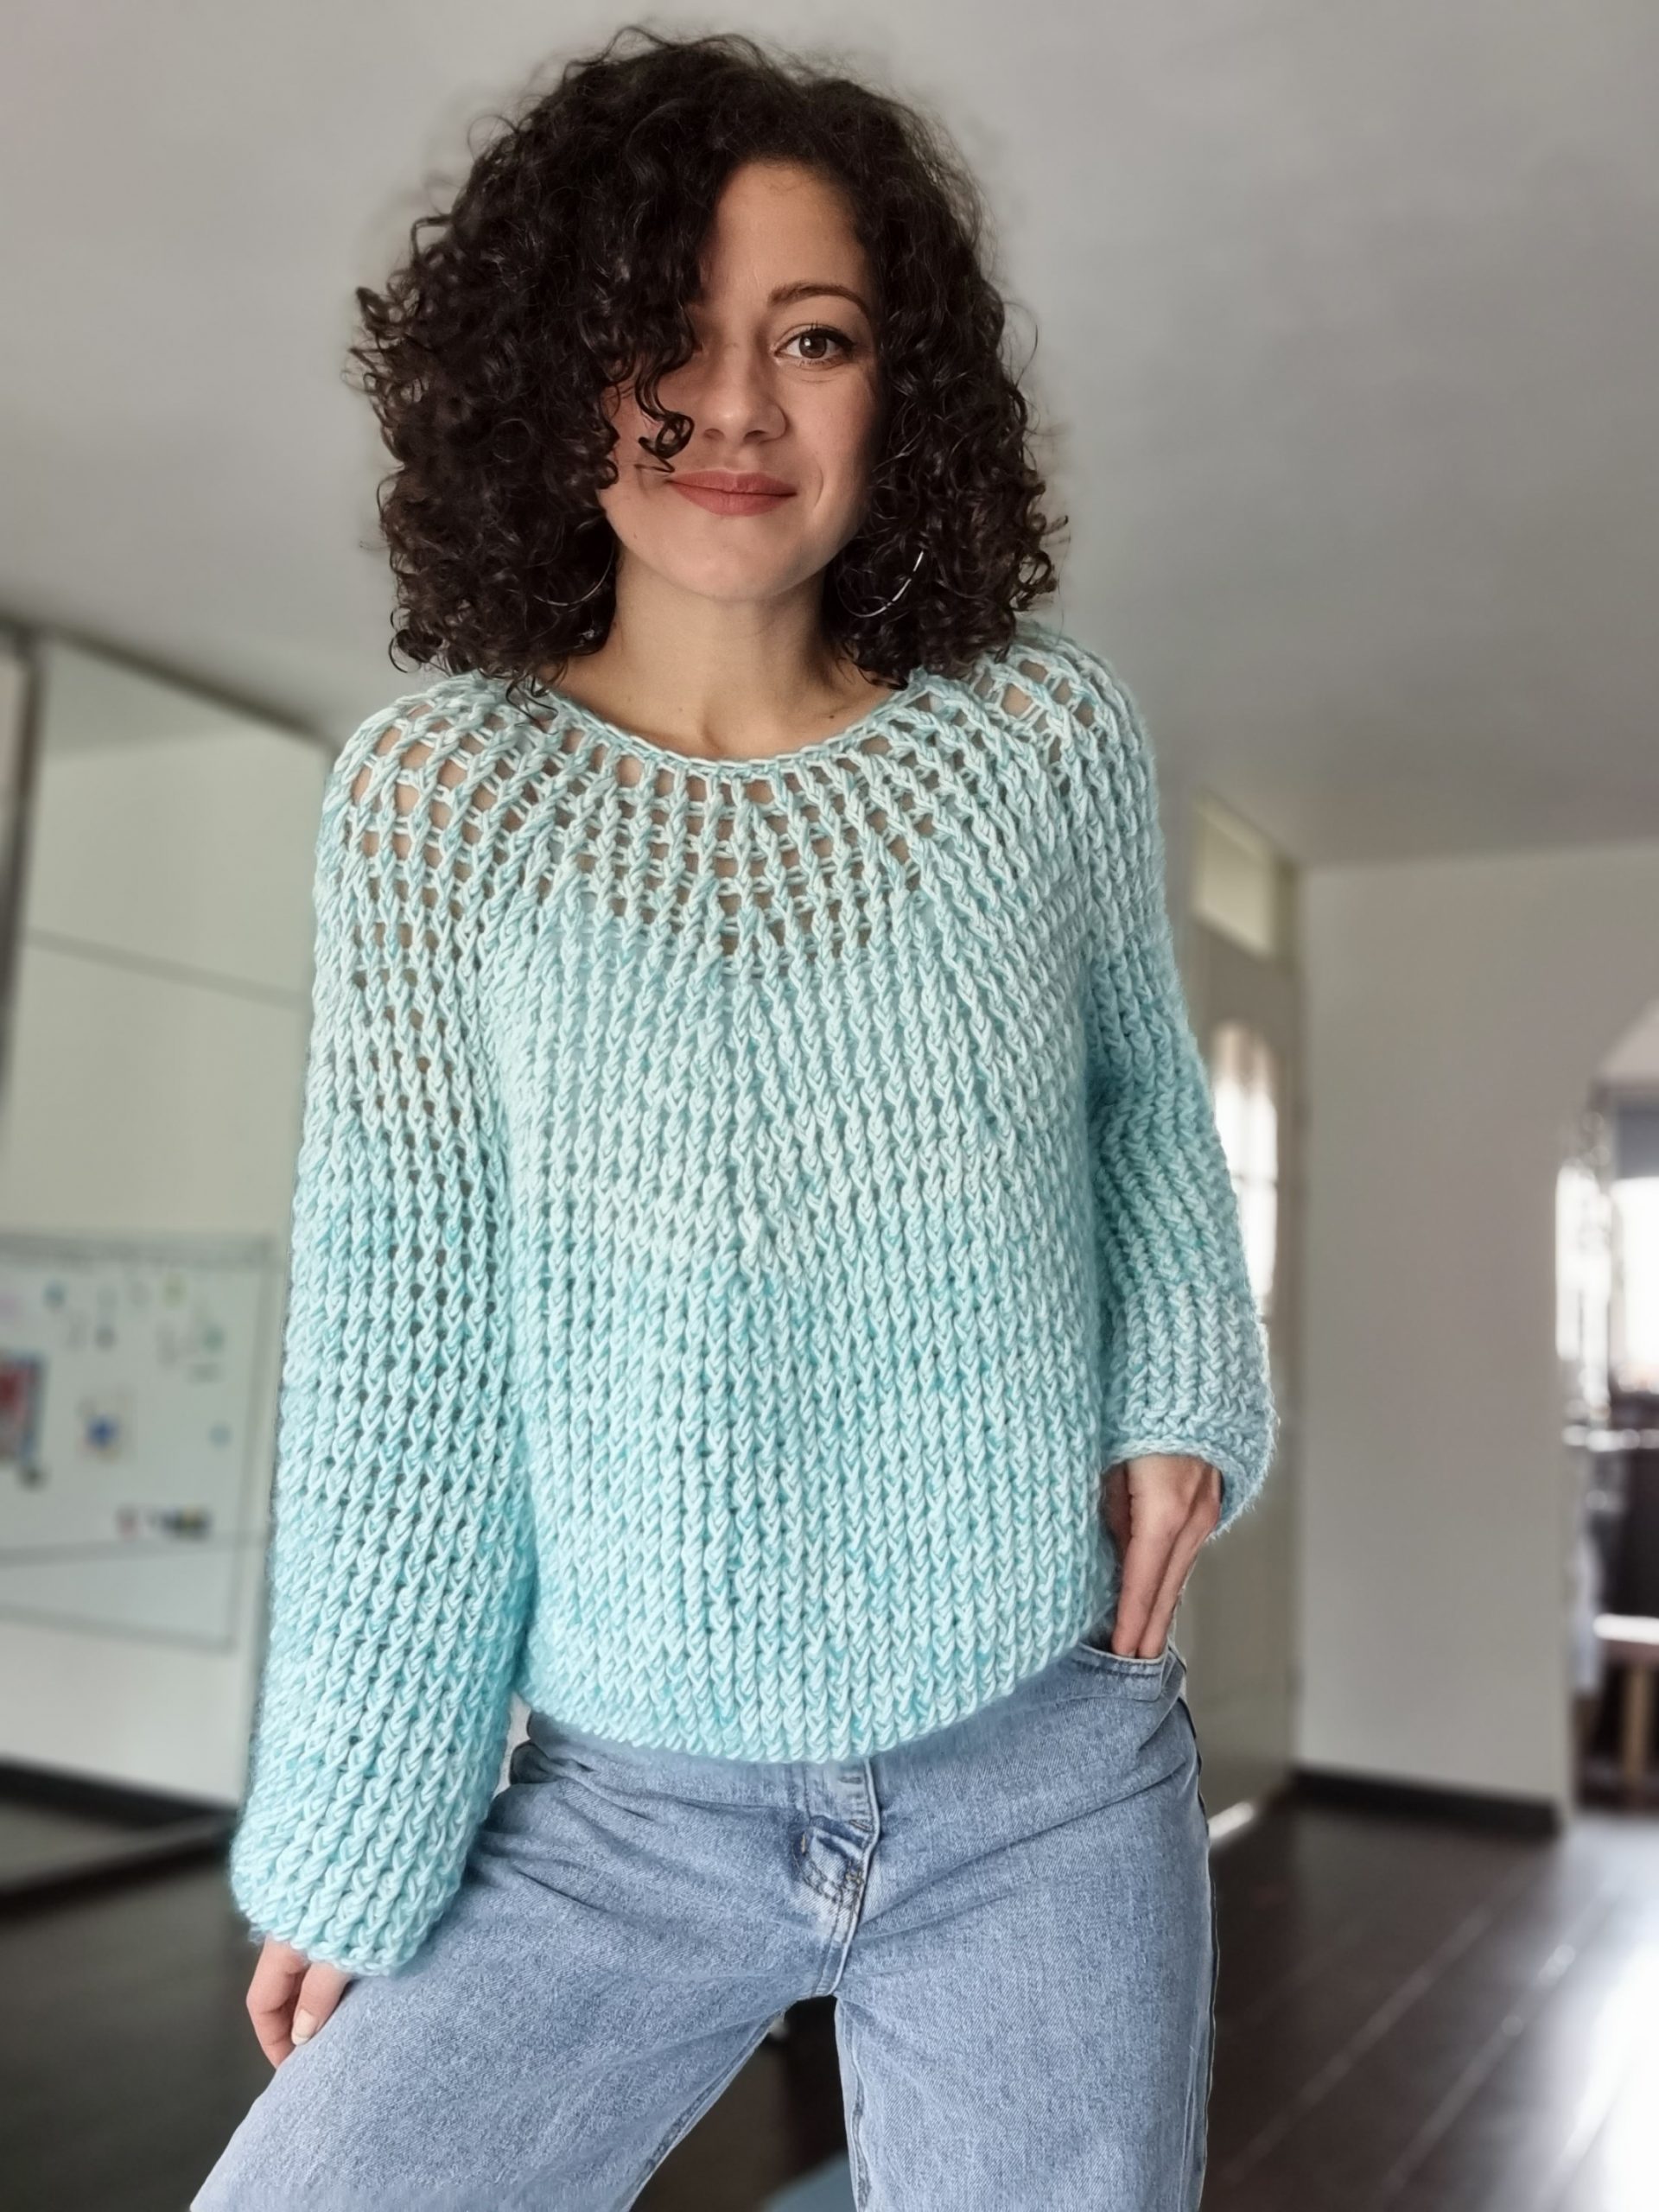
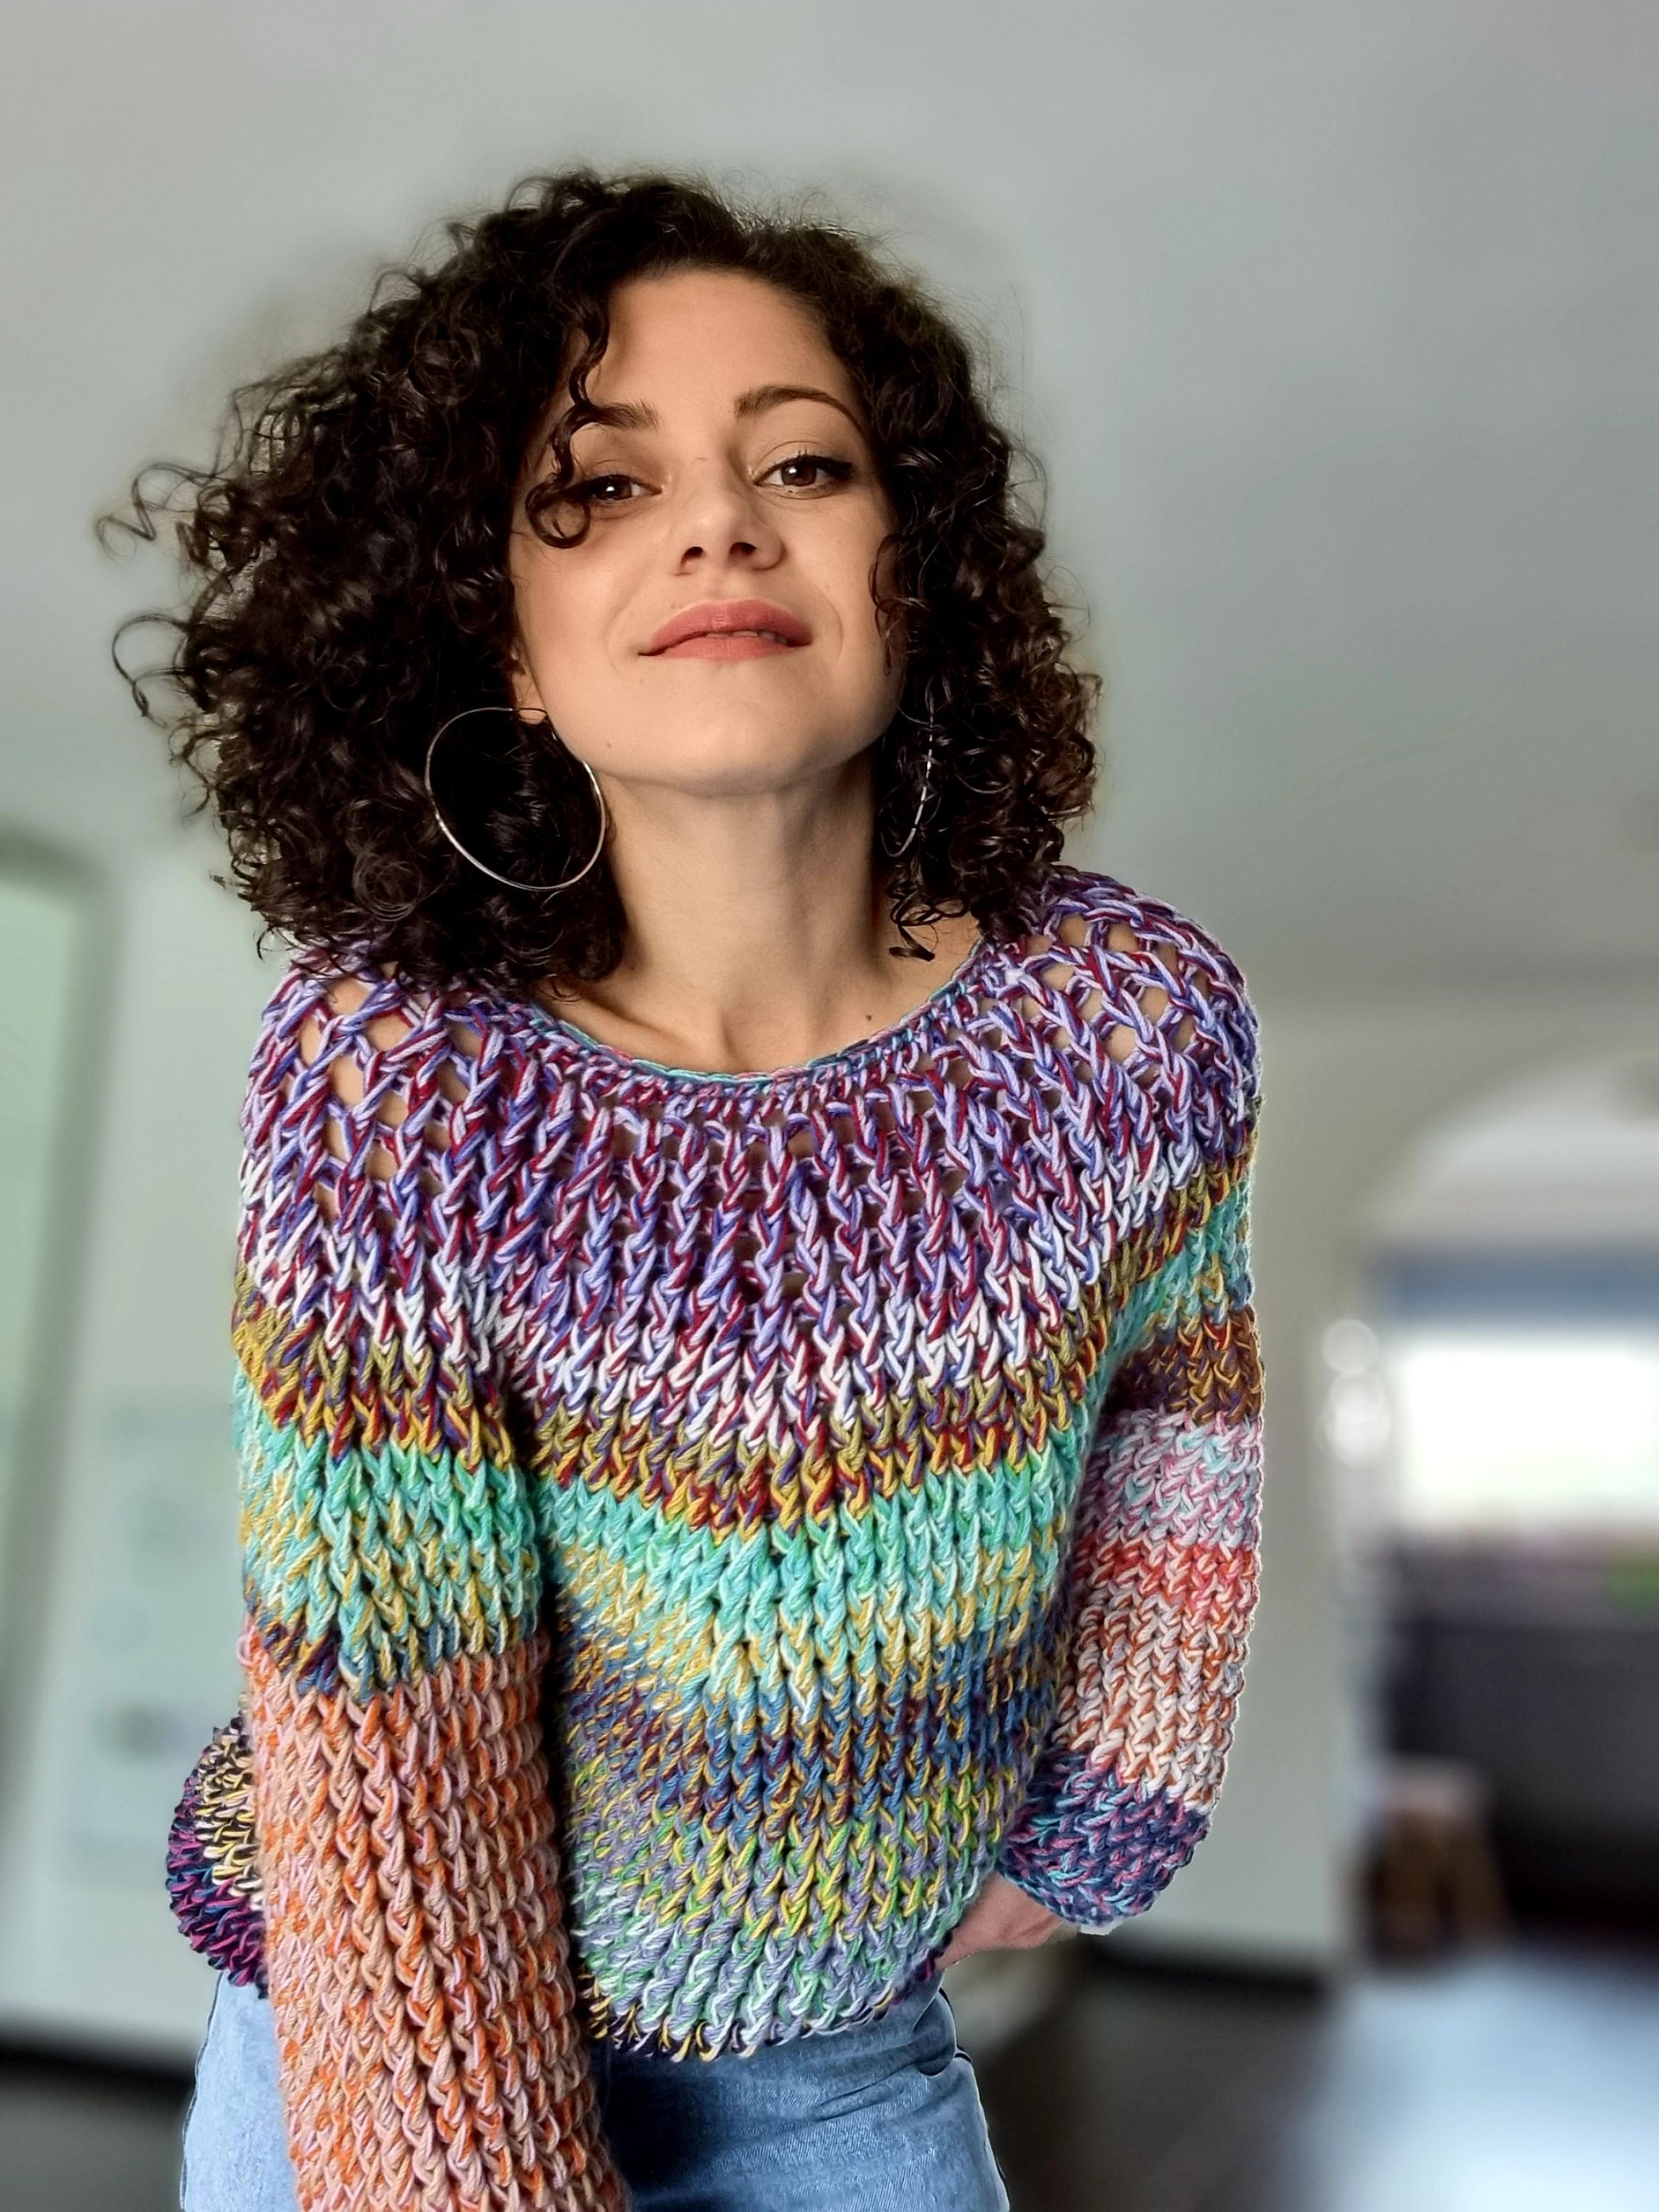
I started the Nuage Sweater a long time ago and I finally managed to finish this pattern and share it with you.
The idea of this sweater came from last year when I made the Cookie Cardigan using the same stitch pattern! I was thinking that working only on the right side, being a design in the round will be easier. And I was right!
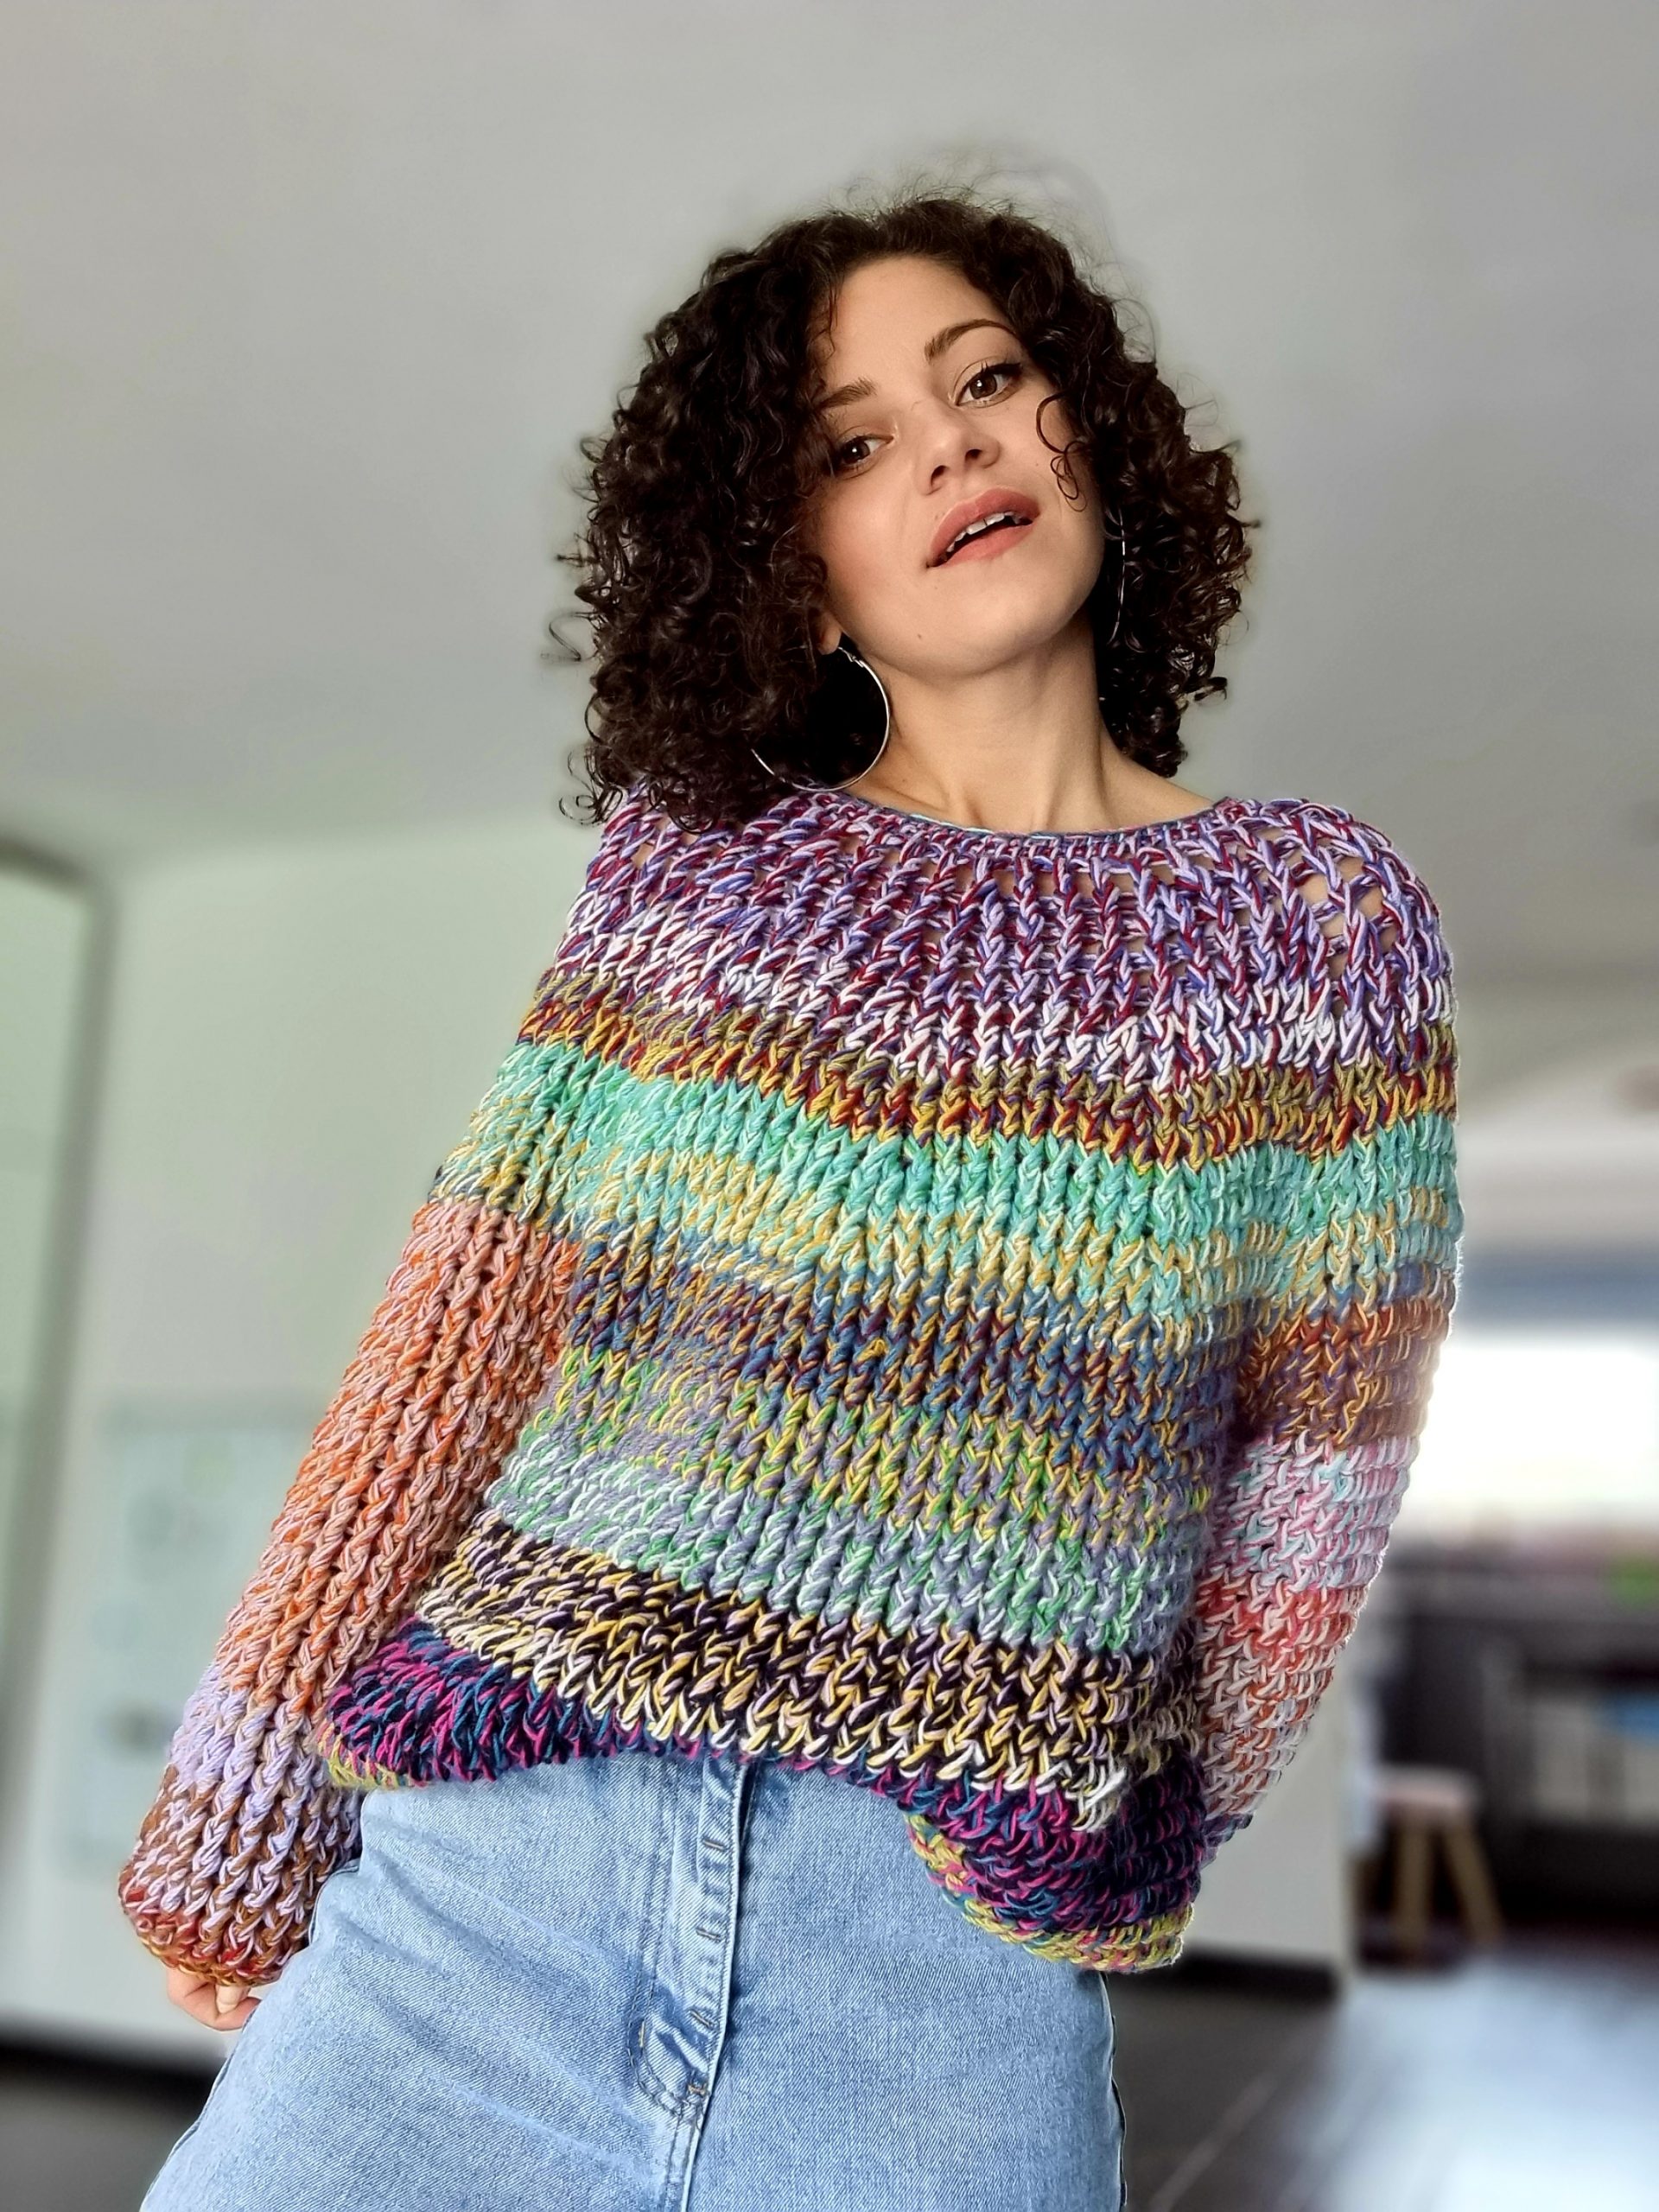
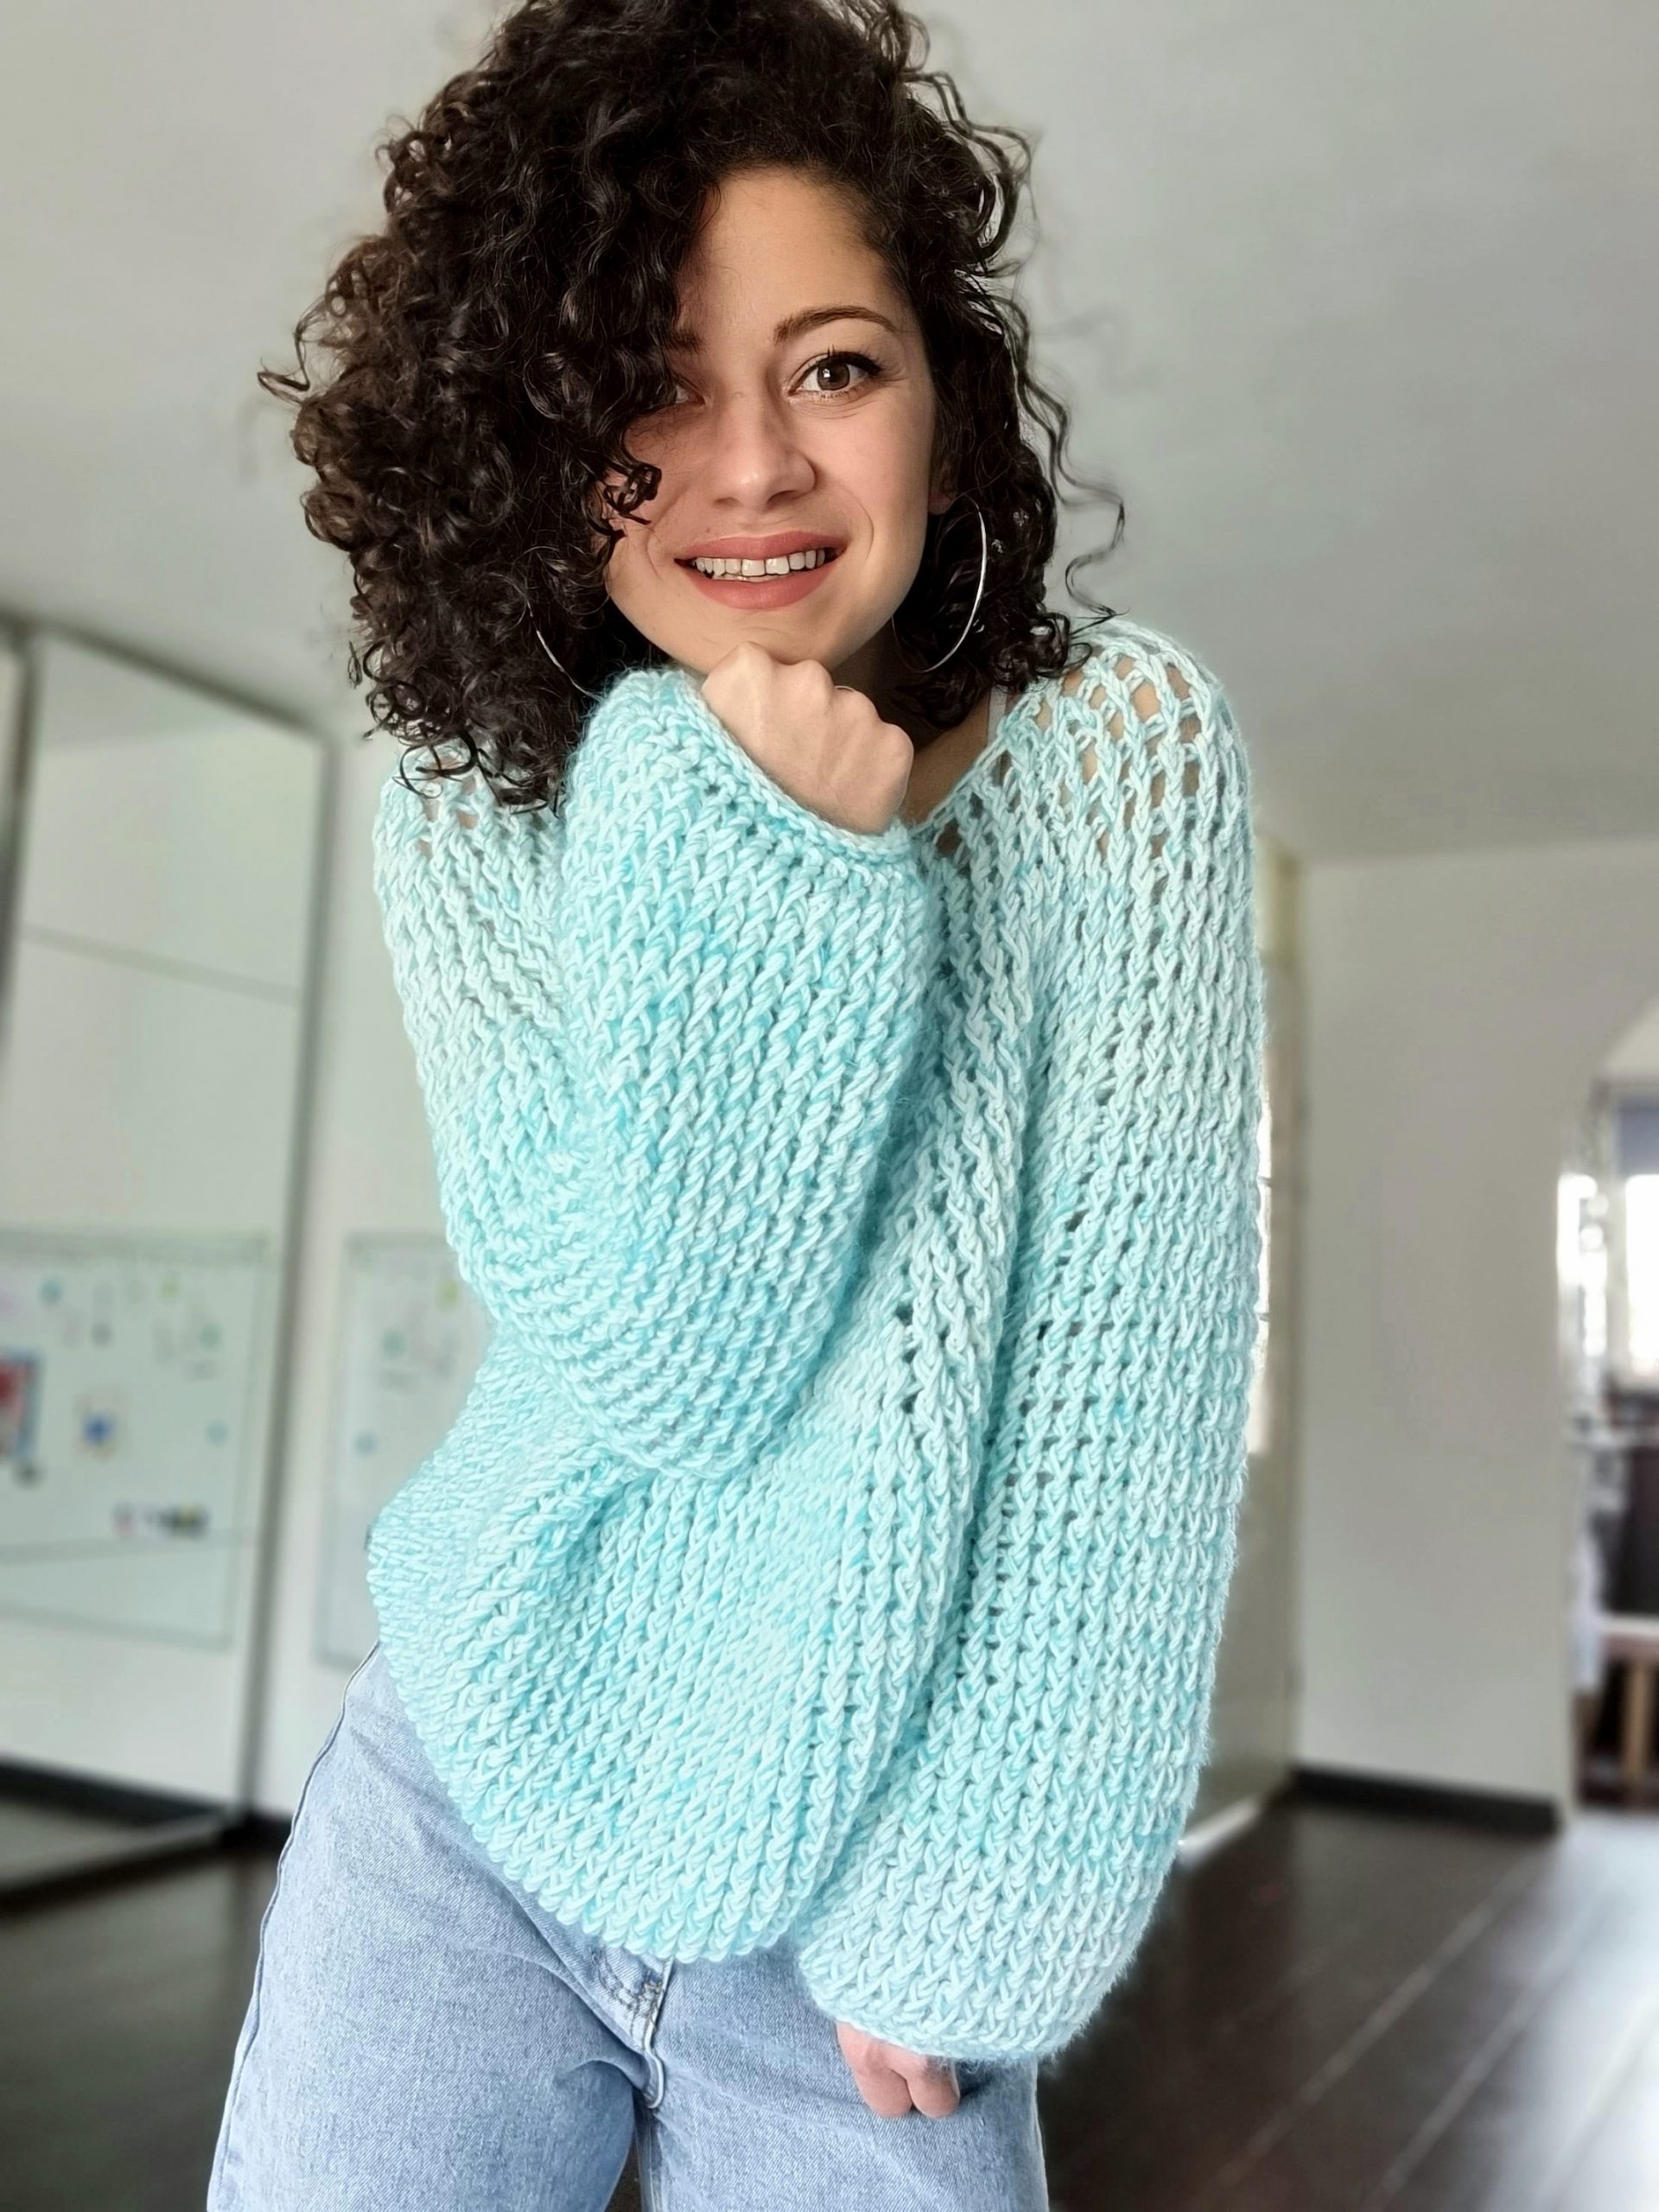
The only thing that I had to test was the hook size and yarn because I wanted big stitches. I started the first sample using leftover yarn and everything was going as I wanted except one thing: I wanted the sweater to be lighter. So, I end up making another sample using thinner yarn, but the same hook size, and I was so in love.
The name of this design doesn’t match the left-over yarn sample, but it was the first thing that came into my head when I saw the second sample.
This post contains affiliate links. By purchasing from this page I may receive some commissions. This won’t cost you anything, no additional costs for you as the commission is paid by the merchant.
In this way you support me and I will be extremely grateful.
You can Purchase the easily printable PDF pattern here:
I posted a lot these two sweaters on my social media accounts and I know you are so anxious about the pattern, so I won’t say too much about it and get into action. 🙂
MATERIALS
• Yarn: Aran (heavy worsted) yarn weight (Size 4) – 1 strand DK, 2 strands fingering held together
1 strand of DK weight and one of Lace (mohair)
*find more details in the Yarn section
• Crochet Hook:
o 10 mm crochet hook
o 6 mm crochet hook (for the bottom, neckline and sleeves edging)
• yarn needle for weave in ends
• Stitch markers
• Scissors
NOTES ABOUT DESIGN
The Nuage Sweater has a top-down construction with a round yoke. It has a relaxed fit with a positive ease of about 22 cm around the bust circumference.
The sweater is worked in the round, only on the right side. Along the yoke section, there are several increases accordingly with the needed yoke depth and, bust and sleeves circumference.
The yoke is then divided into sleeves and body. The 3 parts are then worked individually until completing the desired length.
To finish the sweater work one more round in single crochet stitches, using a smaller hook size.
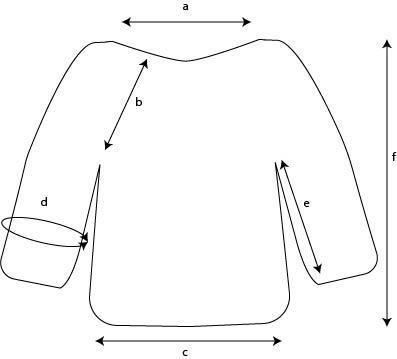
MEASUREMENTS AND SIZES
The Nuage Sweater Pattern is available in 8 sizes, from Small up to 5X Large.
The model is 168 cm tall and wears size Small.
Neckline a: 21 cm (23, 23, 25, 25, 25, 26, 25 )
Yoke depth b: 20 cm (21, 23, 24, 25, 26, 28, 29)
Bust width c: 54 cm (59, 64, 69, 74, 78, 83, 89)
Sleeve circ. d: 31 cm (33, 35, 40, 44, 46, 51, 55)
Sleeve Length e: 34 cm (34, 36, 36, 37, 37, 38, 38)
Length f: 43 cm (43, 45, 47, 49, 52, 53, 54)
How much yarn do you need?
I made two samples following the Nuage Sweater Pattern.
One it’s made from left-over yarn, holding together 3 strands of yarn at once: 2 strands of fingering weight yarn and 1 strand of DK weight yarn.
The total weight is Aran or Heavy Worsted, having about 122 meters in 100 grams.
For the second sample, I used 1 strand of DK weight yarn ( Katia Basic Merino, 50 grams and 120 meters) and one strand of Lace (50 Shades Mohair by Katia, 20 grams and approximately 200 meters).
For each size you will need:
Left over sweater: 1220 m (1340, 1520, 1680, 1860, 1980, 2200, 2400)
Basic Merino and Mohair: 900 m (980, 1110, 1250, 1410, 1540, 1690, 1840) or
8 (9,10,11,12,13,15,16) balls of Basic Merino (Off-white) and 5 (5,6,7,8,8,9,10) of Mohair (turquoise)
You can Purchase the easily printable PDF pattern here:
ABBREVIATIONS
Ch – chain
sc – single crochet
dc – double crochet
FPdc – front post double crochet
St(s) – stitch(es)
R – rows
** – repeated section.
TENSION
Using a 10 mm crochet hook in front post double crochet
9.5 sts = 10 cm
7 rows = 10cm
STITCH PATTERN AND TECHNIQUES
The main stitch pattern for the Nuage Sweater is Front Post Double Crochet.
Front Post Double crochet (FPdc): yarn over and insert the hook into the space between the previous and next stitch, from front to back, and go around the next stitch. Yarn over and pull out a loop. Yarn over and pass it through the first two loops on your hook, yarn over and pass it through the last two loops on your hook.
When making an increase, work 2 front post double crochet around the same stitch.
To make an invisible join in the round, start the round without a starting chain, simply work the first front post double crochet. To close the round, pull out the hook from the working loop; insert the hook from back to front into the first front post double crochet; take the working loop and pass it through the first front post double crochet.
PATTERN NOTES
Work the piece in the round only on the right side
To make an invisible join in the round, start the round without a starting chain, simply work the first front post double crochet.
To close the round, pull out the hook from the working loop; insert the hook from back to front, into the first front post double crochet; take the working loop and pass it through the first front post double crochet.
Close each round with an invisible slip stitch and start each round as indicated above.
In the PDF version of this pattern, you will find the charts for the YOKE section for all sizes
The chart represents one repeated section; repeat this section as many times as indicated in the chart
You can Purchase the easily printable PDF pattern here:
INSTRUCTIONS
The pattern for the yoke is written for sizes S, M, and L and separately for sizes XL, XXL, 3XL, 4XL, and 5XL.
Numbers for sizes M, L, and then 2XL, 3XL, 4XL, and 5XL are written between brackets; if not the pattern applies for all sizes.
YOKE
Sizes S, M, and L
Start: Ch 40 (44, 44) sts; slip stitch to make a circle.
R1: 2ch, 1dc in each st until the end of the round.
R2: *1FPdc in next 3 sts, 2FPdc in the next st. *rep. 10 (11, 11) times.
total: 50 (55, 55) sts
R3: 1FPdc in each stitch until the end of the row.
total: 50 (55, 55) sts
R4:2FPdc in next st, 1FPdc in next 4sts.
*rep. 10 (11, 11) times.
Total: 60 (66, 66) sts
R5:1FPdc in next 5sts, 2FPdc in next st.
*rep. 10 (11, 11) times.
Total: 70 (77, 77) sts
You can Purchase the easily printable PDF pattern here:
R6: 2FPdc in next st, 1FPdc in next 6sts
*rep. 10 (11, 11) times.
Total: 80 (88, 88) sts
R7: 1FPdc in next 7sts, 2FPdc in next st.
*rep. 10 (11, 11) times.
Total: 90 (99, 99) sts
R8:2FPdc in the next st, 1FPdc in next 8sts.
*rep. 10 (11, 11) times.
Total:100 (110, 110)
R9:1 FPdc in each st until the end of the round.
Total:100 (110, 110)
R10: 1FPdc in next 9sts, 2FPdc in next st.
*rep. 10 (11, 11) times.
Total: 110 (121, 121)
R11: 1FPdc in each st until the end of the round.
Total: 110 (121, 121)
R12: 2FPdc in next st, 1FPdc in next 10sts.
*rep. 10 (11, 11) times.
Total: 120 (132, 132) sts
R13: 1Fpdc in next 11sts, 2FPdc in next st.
*rep. 10 (11, 11) times.
Total: 130 (143, 143)
R14: 2FPdc in next st, 1FPdc in next 12sts
*rep. 10 (11, 11) times.
Total: 140 (154, 154)
For size Small, the YOKE is done. Move to the BODY section
R15: Size M only: 1FPdc in each st until the end of the row.
Total: 154sts
For size Medium the YOKE is done. Move to the BODY section
R15 Size L: 1FPdc in next 13sts, 2FPdc in next st.
Rep. 11 times
Total: 165sts
R16 Size L: 1FPdc in each st until the end of the round.
Total: 165sts
For size Large, the YOKE is done. Move to the BODY section
YOKE
SIZES XL, XXL, 3XL, 4XL, and 5XL
Start: Ch 48 (48, 50, 50, 50)
R1: 2ch, 1dc in each st until the end of the round.
R2: 1FPdc in next 5 (5, 4, 4, 4) sts, 2FPdc in next st.
Rep. 8 (8, 10, 10, 10) times
Total: 56 (56, 60, 60, 60) sts
R3:2FPdc in next st, 1FPdc in next 6 (6, 5, 5, 5) sts
Rep. 8 (8, 10, 10, 10) times
Total: 64 (64, 70, 70, 70) sts
R4: 1FPdc in next 7 (7, 6, 6, 6) sts, 2FPdc in next st.
Rep. 8 (8, 10, 10, 10) times
Total: 72 (72, 80, 80, 80) sts
R5:2FPdc in next st, 1FPdc in next 8 (8, 7,7,7) sts
Rep. 8 (8, 10, 10, 10) times
Total: 80 (80, 90, 90, 90) sts
R6: 1FPdc in next 9 (9, 8, 8, 8) sts, 2FPdc in next st.
Rep. 8 (8, 10, 10, 10) times
Total: 88 (88, 100, 100, 100) sts
R7 Sizes XL, XXL: 2FPdc in next st, 1FPdc in next 10sts.
Rep. 8 times
Total: 96 (96) sts
R7 Sizes 3XL, 4XL, and 5XL: 1FPdc in each st until the end of the round.
Total: 100 (100, 100)
R8:Sizes XL, XXL: 1FPdc in next 11sts, 2FPdc in next st.
Rep. 8 times
Total: 104 (104)sts
R8 Sizes 3XL, 4XL, and 5XL: 2FPdc in next st, 1 FPdc in next 9 sts.
Rep. 10 times
Total: 110 (110, 110) sts
R9 Sizes XL, XXL: 2FPdc in next st, 1FPdc in next 12 sts.
Rep. 8 times
Total: 112 (112) sts
R9 Sizes 3XL, 4XL, and 5XL: 1 FPdc in next 10sts, 2FPdc in next st.
Rep. 10 times
Total: 120 (120, 120) sts
R10 Size XL, XXL:1FPdc in next 13sts, 2FPdc in next st.
Rep. 8 times
Total: 120 (120)
R10 Sizes 3XL, 4XL, and 5XL: 2FPdc in next st, 1FPdc in next 11sts
Rep. 10 times
Total: 130 (130, 130)
R11 Sizes XL, XXL: 2FPdc in next st, 1FPdc in next 14sts.
Rep. 8 times
Total: 128 (128) sts
R11 Sizes 3XL, 4XL, and 5XL: 1FPdc in next 12sts, 2FPdc in next st.
Rep. 10 times
Total: 140 (140, 140)
R12 Sizes XL, XXL: 1FPdc in next 15sts, 2FPdc in next st.
Rep. 8 times
Total: 136 (136)
R12 Sizes 3XL, 4XL, and 5XL: 2FPdc in next st, 1FPdc in next 13sts
Rep. 10 times
Total: 150 (150, 150)
R13 Sizes XL, XXL: 2FPdc in next st, 1FPdc in next 16sts
Rep. 8 times
Total: 144 (144)
R13 Sizes 3XL, 4XL: 1FPdc in each st until the end of the round
Total: 150 sts
R13 Size 5XL: 1FPdc in next 14sts, 2FPdc in next st.
Rep. 10 times
Total: 160 sts
R14: 1Fpdc in next 17sts, 2FPdc in next st
Rep. 8 times
Total: 152 (152) sts
R14: Sizes 3XL, 4XL: 1FPdc in next 14sts, 2FPdc in next st.
Rep. 10 times
Total: 160 sts
R14 Size 5XL: 2FPdc in next st, 1FPdc in next 15sts
Rep. 10 times
Total: 170 sts
R15:Sizes XL, XXL: 2FPdc in next st, 1FPdc in next 18sts
Rep. 8 times
Total: 160 (160) sts
R15 Sizes 3XL, 4XL:2FPdc in next st, 1FPdc in next 15sts
Rep. 10 times
Total: 170 sts
R15 Size 5XL: 1FPdc in next 16sts
2FPdc in next st
Rep. 10 times
Total: 180 sts
R16 Sizes XL, XXL: 1FPdc in next 19sts, 2FPdc in next st.
Rep. 8 times
Total: 168 sts
R16 Sizes 3XL, 4XL: 1FPdc in next 16sts, 2FPdc in next st.
Rep. 10 times.
Total: 180
R16 Size 5XL: 2FPdc in next st, 1FPdc in next 17 sts
Rep. 10 times
Total: 190 sts
R17 Sizes XL, XXL: 2FPdc in next st, 1FPdc in next 20sts.
Rep. 8 times
Total: 176 sts
For size X Large the YOKE is done. Move to the BODY section
R17 Sizes 3XL, 4XL: 2FPdc in next st, 1FPdc in next 17 sts
Rep. 10 times
Total: 190 sts
R17 Size 5XL: 1FPdc in next 18sts, 2FPdc in next st.
Rep. 10 times
Total: 200 sts
R18 Size XXL: 1FPdc in next 21 sts, 2FPdc in next st.
Rep. 8 times
Total: 184 sts
For size XXL the YOKE is done. Move to the BODY section
R18 Sizes 3XL, 4XL: 1FPdc in next 18 sts, 2FPdc in next st.
Rep. 10 times
Total: 200 sts
For size 3XL the YOKE is done. Move to the BODY section
R18 Size 5XL: 2FPdc in next st, 1FPdc in next 19sts
Rep. 10 times
Total: 210 sts
R19 Size 4XL: 2FPdc in next st, 1FPdc in next 19 sts.
Rep. 10 times
Total: 210 sts
R19 Size 5XL: 1Fpdc in next 20 sts, 2FPdc in next st.
Rep 10 times
Total: 220 sts
R20 Size 4XL: 1FPdc in each st until the end of the round
Total: 210 sts
R20 Size 5XL: 2FPdc in next st, 1FPdc in next 21 sts
Rep. 10 times
Total: 230 sts.
Now the YOKE is done for sizes 4XL and 5XL. Move to the BODY section.
BODY
Before moving into the BODY section, let’s summarize the number of stitches for the YOKE
S – 140 sts
M – 154 sts
L – 165 sts
XL – 176 sts
XXL – 184 sts
3XL – 200 sts
4XL – 210 sts
5XL – 230 sts
For the next step use st markers to mark the sleeves and body sts.
The first st in the round will be the first st of the BACK.
S – 47 sts for Back and Front 23 sts for sleeves
M – 52 sts for Back and Front 25 sts for sleeves
L – 56 sts Back, 57 sts Front and 26 sts sleeves
XL – 59 sts for Back and Front 29 sts for sleeves
XXL – 61 sts for Back and Front 31 sts for sleeves
3XL – 66 sts for Back and Front 34 sts for sleeves
4XL – 66 sts for Back and Front 34 sts for sleeves
5XL – 75 sts for Back and Front 40 sts for sleeves
You can Purchase the easily printable PDF pattern here:
R1:SEPARATING ROW: 1FPdc in next 47 (52, 56, 59, 61, 66, 69, 75) sts, ch 4 (4, 4, 6, 8, 8, 10, 10) sts, skip next 23 (25, 26, 29, 31, 34, 36, 40) sts, 1FPdc in next 47 (52, 57, 59, 61, 66, 69, 75) sts, ch 4 (4, 4, 6, 8, 8, 10, 10) sts and slip stitch into the first FPdc.
R2: 1FPdc in next 47 (52, 56, 59, 61, 66, 69, 75) sts, 1dc in next 4 (4, 4, 6, 8, 8, 10, 10), 1FPdc in next 47 (52, 57, 59, 61, 66, 69, 75) sts, 1dc in next 4 (4, 4, 6, 8, 8, 10, 10) sts and slip stitch into the first FPdc.
R3: 1FPdc in each stitch around.
Rep. R3 until you have in total 16 rounds for the body or until you reach the desired length.
Next row: Change the hook to a 6. mm size
1ch, 1sc in each st around
Last row: 1ch, 1slip stitch into each st around.
Fasten off.
SLEEVES
Rejoin yarn at the armpit.
To avoid holes between armpit sts and sleeve sts, work 2FPdc together.
R1: 1Fpdc in each st around.
Repeat R1 until you have in total 23 rounds or until you reach the desired length.
Next row: Change the hook to a 6. mm size
1ch, 1sc in each st around
Last row: 1ch, 1slip stitch into each st around.
Fasten off.
NECKLINE EDGE
Using the 6. mm hook, rejoin yarn and work one round in single crochet stitches.
TO FINISH
Weave in all looser ends and block to measurements.
I hope you will like this sweater as much as I do!





1 Comment
This sweater is amazing! Brilliant choice of colors!
xoxo
Lovely
http://www.mynameislovely.com