Author

Bykaterina

Browsing

Join me on an in-depth journey as we delve into the luxurious world of Symfonie Yarns and Lantern Moon premium fiber tools by KnitPro. This unique collaboration offers a wide range of hand-dyed yarns, made from the finest materials, and exquisite wooden needles, crafted with precision and attention to detail. The yarns come in a variety of colors, from subtle earth tones to vibrant jewel tones, and are perfect for a wide range of knitting and crocheting projects. The wooden needles are made from high-quality materials, such as rosewood, ebony, and birch, and are designed to be both functional and beautiful. Together, these premium fiber tools will not only enhance your knitting and crocheting experience but also inspire you to create stunning and unique projects.

**Symfonie Yarns: A Feast for the Senses**

Explore an extensive range of exquisite, hand-dyed yarns that indulge your senses with their vivid shades and soft texture. Made from a blend of 75% merino wool and 25% nylon, these yarns offer the perfect combination of comfort and durability, ensuring your projects stand the test of time. Whether you opt for sock weights or DK options, each hank comes with generous yardage, providing you with endless possibilities to bring your creative vision to life.


I had the pleasure of working with Terra variegated in the color Valentine, and I must say the yarn’s professional color setting was exceptional, preventing any unwanted bleeding. The smooth, squishy texture of the yarn made it an absolute delight to work with, effortlessly gliding on the needles and creating a knitting experience like no other. The yarn’s softness and durability make it ideal for a wide range of projects, from cozy blankets to delicate shawls and everything in between.

**Lantern Moon Needles: Tools of Elegance**

Indulge in the world of luxurious knitting with Lantern Moon’s exquisite wooden needles, crafted to perfection for the ultimate knitting experience. The needles are made from the finest ebony, which is known for its warm, silky surface that glides smoothly through your fingers. The natural beauty of the wood is enhanced by the intricate carving and attention to detail, making these needles a true work of art. Get ready to experience a new level of comfort and ease as you knit with these magnificent tools that provide a looser, more relaxing grip.

The product boasts several impressive features. The brass connector, finished with 24K gold, adds a touch of luxury to the overall design. The smooth cable connection allows for seamless stitching. Additionally, the cable tightening tools are a game-changer, replacing outdated T pins and making the knitting process much easier..

**A Symphony of Delightful Accessories**

No knitting experience can be considered complete without the perfect accessories that are essential for a fulfilling crafting experience. Lantern Moon, a well-known brand in crafting accessories, offers a wide range of fiber tools and hand-dyed yarns that are designed to elevate your knitting journey to the next level. 

The accessories from Lantern Moon are meticulously crafted, keeping even the tiniest details in mind. These accessories are sure to fill your crafting heart with joy and provide you with an unparalleled knitting experience. Pairing these accessories with Symfonie Yarns, which are known for their high quality and durability, will take your knitting session to a whole new level.

To explore the complete range of Lantern Moon accessories and Symfonie Yarns, visit their respective websites. These premium fiber tools and hand-dyed yarns are perfect for both beginners and seasoned professionals, as they are sure to inspire and delight at every stitch. So, whether you are looking to create a masterpiece or just trying to hone your knitting skills, these accessories and yarns are sure to make your crafting journey more enjoyable.

**In Conclusion**

As I come to the end of my exploration into the world of Symfonie Yarns and Lantern Moon, I am delighted to share with you the exquisite beauty, exceptional quality, and pure joy that these products bring to the art of knit

Whether you’re a seasoned knitter or a curious beginner, Symfonie Yarns and Lantern Moon offer a wide range of yarns and needles that cater to your every preference. From the smooth and vibrant colors of the Symfonie Wood to the warm and luxurious feel of the Lantern Moon Ebony, every yarn and needle is crafted with precision and care.

The Symfonie Wood is made from sustainable and eco-friendly materials, creating a smooth and warm surface that glides effortlessly through every stitch. The Lantern Moon Ebony, on the other hand, is known for its incredible durability and luxurious feel that will turn every knitting project into a masterpiece.

So why not dive into the world of Symfonie Yarns and Lantern Moon today and experience the thrill of creating something beautiful, cozy, and unique? With every knit and purl, you’ll unleash your creativity and discover the endless possibilities that await you.

I’m excited to share the Medley Sweater Crochet Pattern with you, which has undergone about six months of trial and refinement.

The concept for this sweater, which utilizes the Overlay Mosaic Crochet technique, emerged after I designed the Sensu Skirt, where I also employed the same technique. It took several attempts until I achieved a sample that met my satisfaction.

My initial experimentation began in September, but I was unsatisfied with the color choices. Although I initially liked them, this design sparked numerous ideas I couldn’t resist exploring. Consequently, I decided to reorder some ombre purple shades of yarn to start anew. While I did complete the first sweater, I found the resulting fabric to be too stiff and thick for my liking

You can purchase the easily printable PDF pattern here at the links below.

NEW!!! you can now purchase the PDF Written Pattern and the KIT here: Yarnsea.com

Pentru Postarea In limba Romana, click aici

I experimented with a new Mohair blend yarn version, resulting in a wonderfully lightweight fabric. However, I only had two contrasting colors, and I felt the design needed more variety.

Since I wasn’t keen on ordering more yarn, I decided to put the design on hold and let time resolve the situation naturally.

Then, unexpectedly, the generous folks at Durable Yarn offered to send me some yarn to test. Upon reviewing the characteristics of their Durable Comfy yarn, I realized it had everything I needed for the Mosaic Sweater Design. Excitedly, I accepted their offer. However, upon trying the yarn with the existing pattern, it became evident that adjustments were necessary. I had to switch to a smaller hook size and recalculate everything. Eventually, everything fell into place, and I completed the beautiful sweater.

But the journey didn’t end there. Throughout this process, I couldn’t shake the idea of utilizing leftover yarn for the sweater, a notion that had lingered since the Lava Sweater project. So, I embarked on another Medley Sweater using leftover yarn scraps. I simply selected abundant colors in my stash, regardless of their compatibility. Surprisingly, while they didn’t look cohesive together, the result was stunning, and I couldn’t be happier. I believe it’s the best piece I’ve ever created using leftover yarn.


You can purchase the easily printable PDF pattern here at the links below.

NEW!!! you can now purchase the PDF Written Pattern and the KIT here: Yarnsea.com

I hope you will try this design and love the process as much as I did.

MATERIALS

• Yarn: Size 2, Sport weight yarn
• Crochet Hook:
o 4mm crochet hook for the bottom, neckline and cuff Ribbing
o 5 mm crochet hook for the rest of the sweater
• yarn needle for weaving in ends
• stitch markers optional
• Scissors

NOTES ABOUT DESIGN

The Medley Sweater is a top-down sweater with a round yoke.

The entire sweater is worked in the innovative overlay mosaic crochet technique. The design is exclusively worked from the front side, using two contrasting colors at a time, A and B, and each row alternates between the two. This method is ideal for round designs as it obviates the need for yarn breaks. Switching between colors is accomplished simply by dropping the current color and picking the other one.

After finishing the yoke, the piece is split into sleeves and body. The three parts are worked individually until the desired length.

MEASUREMENTS AND SIZES

The Medley Sweater Pattern is available in 9 sizes, from XS up to 5X Large. The model is 168 cm tall, with an 86 cm Bust circumference, and wears a size Extra Small.
The numbers are written below as follows: XS (S, M, L) (XL, 2XL, 3XL, 4XL, 5XL); US sizes 0/2 (4/6, 8/10, 12/14) (14/16W, 18/20W, 22/24W, 26/28W, 30/32W)
All the measurements use as reference Standard Body Measurements by ASTM International.

Final Measurements of the Medley Sweater
Neckline circ a: 55 cm (55, 55, 55, 55) (55, 55, 65, 65)
Armhole depth b: 18cm (19, 20, 21, 22) (22, 24, 25, 27)
Bust Circ. c: 93 cm (99, 107, 112, 120) (128, 141, 149, 165)
Sleeve Circ. d: 28 cm (28, 31, 32, 40) (43, 44, 47, 47)
Sleeve length. e: 32cm (33, 33, 36, 36) (38, 38, 39, 39)
Length f:51cm (53, 53, 55, 57) (57, 59, 60, 63)

YARN

For the MedleySweater, I used Durale Comfy by Durable Yarn which is composed of 100% microfiber acrylic. The colors I used were 2172 (Cream), 2212 (Linen), 2192 (Pale Pink), and 2210 (Caramel). Each skein of yarn weighs 100 grams and has approximately 266 meters of yarn. 
Here’s an approximate breakdown of the yarn required for each size:

2172 (Cream) : 240 (260, 280, 310, 350) (390, 420, 460, 500) meters
2212 (Linen): 410 (430,470, 510, 580) (640, 710, 760, 820) meters
2192 (Pale Pink): 460 (490, 530, 580, 660) (730, 800, 860, 930) meters
2210 (Caramel): 540 (570, 620, 680, 780) (860, 940, 1010, 1100) meters

Please note that the yardage requirements may vary depending on your chosen length and color pattern.

ABBREVIATIONS

Ch – chain
Sc – single crochet
Sssblo – slip stitch back loop
dc – double crochet
dcflo – dc in the front loop only
ss – slip stitch
St(s) – stitch(es)
R – round
** – repeated section.


You can purchase the easily printable PDF pattern here at the links below.

NEW!!! you can now purchase the PDF Written Pattern and the KIT here: Yarnsea.com

TENSION

Using 4mm crochet hook in the Ribbing Stitch Pattern (ssblo)
10sts = 5cm
20 rows = 10cm
Using a 5 mm crochet hook in mosaic st pattern (counting only the surface sts)
15sts = 10cm
9 rounds = 10cm
Using a 5mm crochet hook in dc, worked flat:
15sts = 10 cm
8.5 rows = 10cm

STITCH PATTERN AND TECHNIQUES

OVERLAY MOSAIC CROCHET

The Medley Sweater pattern employs the innovative overlay mosaic crochet technique, where the design is exclusively worked from the front side, using two contrasting colors, A and B, and each row alternates between the two. This method is ideal for round designs as it obviates the need for yarn breaks. Switching between colors is accomplished simply by dropping the current color and picking the other one.

The Medley Sweater’s color pattern is uncomplicated, and the mosaic crochet technique makes it even easier, eliminating the need for color changes within the same round.

The mosaic pattern is created by working all single crochet (SC) stitches into the top-back loops of the same row and dropping down all double crochet (DC) stitches into the front loops of the row below of the same color. This is where the term “overlay” comes from. The DC stitches cover up the SC stitches from the previous row, allowing you to overlay different colors.

INVISIBLE SLIP STITCH

To close each round, use an invisible slip stitch.
Step 1: remove the crochet hook from the working loop;
Step 2: Insert the hook through the back loop of the first st, from back to front;
Step 3: Insert the hook through the working loop and pass the loop through the back loop of the first st;

CHANGING COLORS

After closing the round, with the invisible slip stitch explained above, take the following color to be used and pass it through the working loop; you now have the new working color yarn on the hook; pull the previous color strand and drop it until the next round;

STARTING THE ROUND

After changing the colors, start the next round by working the first st as the pattern requires (either a back loop sc or a front loop dc), without any additional chain.

COLOR PATTERN:

The following instructions do not specify particular colors, allowing you to select any colors that suit your project. To provide a reference, the sample utilized four colors: Cream, Linen, Pale Pink, and Caramel.
After creating the gauge swatch and determining the number of rows within a 10cm span, you can calculate the total rows needed based on your desired length. Divide this number into three sections and ascertain the number of rows to be worked in each section:

Section 1: Choose two colors of your preference.
Section 2: Select the next color you’d like to use and alternate it with one color from Section 1.
Section 3: Opt for the fourth color and alternate it with one color from Section 2.
For the sleeves, work the same number of rows per section, except for the last one. In the final section, complete the required length by working as many rounds as necessary.

HOW TO CALCULATE THE YOKE
(according to your gauge and desired measurements)

Step 1: Begin by creating a gauge swatch in the mosaic pattern. Refer to the video tutorial for guidance, emphasizing work on the right side.

Step 2: Take essential measurements, including neckline, armhole depth, upper arm, and bust circumference. Factor in desired positive ease, and if needed, refer to the fit of a well-fitting sweater as a guide.

Now, let’s outline the yoke section:

Neckline Circumference: This determines the initial stitches required for the yoke.
Armhole Depth: Measure from shoulder to armpit, representing the number of rows for your gauge.
Bust Circumference and Upper Arm: Aid in calculating the stitches needed after completing the yoke.
Step 3: Utilize measurements and the gauge swatch to convert them into stitches and rows. This yields the stitches for the neckline, rows for armhole depth, and stitches for bust and upper arm. Combining bust and upper arm stitches provides the total stitches after completing the yoke. If incorporating an armpit chain, subtract its stitches from both bust circumference and sleeves.

For armpit stitch calculation, divide the sleeve stitches by 8, where 1/8 represents the armpit stitches.

Now, with the stitch count for bust and sleeves, including armpit stitches, calculate the total stitches needed at the yoke’s end by summing up bust stitches and sleeve stitches: bust + sleeve + sleeve = yoke stitches.

Step 4: Determine the number of stitches to increase by subtracting the neckline stitches from the final yoke stitches.

Step 5: Identify numbers that evenly divide your neckline stitches. For instance, if your neckline stitches are 120, the applicable divisors are: 1, 2, 3, 4, 5, 6, 8, 10, 12, 15, 20, 24, 30, 40, 60, 120. These numbers represent the stitches you can add in each round. While you have the flexibility to choose any number, it’s advisable to opt for a larger one. Selecting a larger number of stitches to increase allows for more rounds between the increase rounds.

For example, if you choose to increase by 40 stitches per round, it facilitates a smoother progression and affords you the opportunity to work more rounds between the increase rounds.
By dividing the stitches in the current row by the targeted increase per round, you can determine the number of stitches within each increase section.

For instance, if you have 120 stitches and plan to increase by 40 stitches per round, the calculation would be 120 / 40 = 3 stitches per increase section. In practical terms, this means that every 3rd stitch will be an increase point in your work.

Step 6: Following the selection of the sts to increase for each round, proceed to calculate the number of increase rounds required to add the predetermined number of stitches (as determined in Step 4). Achieve this by dividing the total number of stitches needed for the increase by the chosen increment per round.

For clarification, consider an example: In my sample, I aimed to add a total of 80 stitches (increasing from 120 neckline stitches to 200 final yoke stitches). The calculation would be 80 stitches / 40 stitches per round, resulting in 2 increase rounds needed.

Step 7: Calculate the number of rounds per increase section by dividing the total number of yoke rounds by the determined increase rounds: total number of yoke rounds / increase rounds = rounds per increase section.

A valuable note from my experience with multiple round yokes: It’s not mandatory to rigidly adhere to the number of rows per increase section. Feel free to integrate the increase rounds into the yoke rounds as needed or as your fabric dictates. Personally, I often observe the fabric’s behavior to make decisions; for instance, if the fabric stops lying flat, and the edges begin to curl or lift, it signals the need for additional increase rounds.
A noteworthy aspect specific to this design is that each increase involves adding 2 stitches by working 3 stitches into the same stitch instead of 2. This alteration affects the calculation of stitches in an increase section.

For instance, if the goal is to increase by 40 stitches, and each increase involves 2 stitches, the calculation becomes 40/2 = 20 increase points or stitches. If your current row has 120 stitches, this translates to 120/20 = 6 stitches per increase section, meaning an increase occurs every 6th stitch

You can purchase the easily printable PDF pattern here at the links below.

NEW!!! you can now purchase the PDF Written Pattern and the KIT here: Yarnsea.com

INSTRUCTIONS

NECKLINE RIBBING

Use a 4 mm crochet hook.

Start: ch 9
R1: starting into the second st, 1sc in each st to the end of the row; 1ch and turn;
R2: 1sc in the fist st, 1scblo in each of the next sts, except the last one, 1sc into the last st; 1ch and turn;
Rep. R2 until you have 110 (110, 110, 110, 110) (110, 110, 130, 130) rows;

Join the ends of the ribbing using slip stitches. Turn your work on the right side, ch1.

For size XL, XXL, and 3XL if you find the neckline too small, you can work 120 rows for ribbing and skip R1 from Set-up Rounds section

YOKE

Before starting work on the YOKE section, several key points should be noted:

The total number of rows for the YOKE will vary based on size, with options for 16 (17, 18, 19, 20) (20, 21, 22, 24) rows, counting only the surface stitches.

For each size, there will be 2 (2, 2, 2, 3) (3, 3, 6, 7) increase rounds within the yoke. During these rounds, 40 (40, 40, 40, 40) (40, 40, 28, 28) stitches will be added per increase round. Additionally, some increases will be made in the first round after the ribbing. In cases where the number of stitches to be increased for the yoke is not evenly divisible, there will be extra stitches to add. These additional stitches should be incorporated in the last few rounds of the yoke; More details in the pattern.

After finishing the yoke you will have: 200 (200, 220, 232, 260) (280, 288, 308, 336) sts

The placement of increase rounds within the yoke can be customized according to your preferred pattern, as long as the total number of increase rounds and yoke rounds is maintained.
For the Extra Small size, I experimented with two variations of the yoke. In the first version (neutral colors), I divided the yoke into two equal sections, each consisting of 8 rounds. Increases were implemented in the first round of each section, specifically in rounds 1 and 9.

However, due to the additional increases in the first round after the ribbing and subsequent increases when introducing the mosaic pattern, the edges started to curl.

After progressing through the subsequent rounds of the section without incorporating any increases, the edge gradually straightened out, resulting in the anticipated final outcome.

In the second version (the colorful one), I divided the yoke into three sections, with two increase rounds. The increases were placed at rounds 6 and 12. This arrangement did not yield a perfectly circular yoke (though not mandatory), as it took on more of a boat shape when folded.

It’s worth noting that both methods ultimately lead to the same final result. For a more visual explanation of the Yoke section, you can refer to the video tutorial available here.

FOR ALL SIZES
Set up rounds:
Change to 5mm hook size and use the same color as the neckline ribbing
R1: work into the side rows of the neckline ribbing; each side row counts as 1stitch
Ch1, *1sc in next 10 (10, 10, 10, 11) (11, 11, 12, 12)sts, 2sc in next st; *rep 10 times; close the round with an invisible slip stitch
Total sts: 120 (120, 120, 120, 130) (130, 130, 140, 140) sts
R2: scblo in each st around
R3: change to color B; 1scblo in each st around

YOKE SIZES XS, S, M, and L

The rounds will become visible from the upcoming round onward, signifying the beginning of the Yoke. When counting the yoke rounds, consider only the surface stitches.
We will start counting from R1, using the notation R1A for the first round in color A, followed by R1B for the next round in color B. Continue with R2A, R2B, R3A, R3B, and so forth.

You will start by changing to color A and remember to change the color after each round;

R1A: *1dcflo into the correspondent st 2rounds below (the round in color A), 1scblo into the next st; *rep. to the end of the rouns

R1B: *1scblo, 1dcflo into the corespondent st 2rows below (the round in color B) ;*rep to the end of the round;

Rep. R1A and R1B up to R5A and R5B
R6A (Increase Round): *(1dcflo, 1scblo) x 2, 1dcflo, 3scblo into the next st; *rep. to the end of the row.
Total sts: 160
R6B: *(1scblo, 1dcflo) x2 times, 1scblo, 1dcflo into the front loop of the st 2 round below, 1scblo into the second st of the increase, 1dcflo into the same front loop of the previous dc; *rep. to the end of the round
R7A: (1dcflo, 1scblo) x 2, 1dcflo, 1scblo into the next st, 1dcflo into the front loop of the second st in the increase 2rounds below (you can find it in between the 2dc in the same st), 1scblo; *rep. to the end of the round
R7B: Rep. R1B
Continue into the established stitch pattern to the R11A and R11B
R12A(Increase Round): *(1dcflo, 1scblo) x 3, 1dcflo, 3scblo into the next st; *rep. to the end of the row.
Total sts: 200
R12B: *(1scblo, 1dcflo) x 3 times, 1scblo, 1dcflo into the front loop of the st 2 round below, 1scblo into the second st of the increase, 1dcflo into the same front loop of the previous dc; *rep. to the end of the round
R13A: (1dcflo, 1scblo) x 3, 1dcflo, 1scblo into the next st, 1dcflo into the front loop of the second st in the increase 2rounds below (you can find it in between the 2dc in the same st), 1scblo; *rep. to the end of the round

R13B: rep. R1B

Note: Depending on the desired length of the sweater, changing the color block within the yoke might be necessary. If you wish to substitute color A, work the next round using the color intended to replace it. For instance, in the case of size XS, I worked R14A using the color initially designated for color B. Simply attach the desired replacement color to introduce the new color for B.
You can refer to the video tutorial available here for a more visual explanation.

Sizes XS and S only

Continue in the established pattern up to the R16A, R16B for size XS and R17A, R17B for size S. After completing these round, the YOKE is done, and you can move to the BODY section.

Sizes M and L only
Continue int the established pattern up to the R16A, R16B for size M and R17A, R17B for size L.

To achieve the required number of stitches for the YOKE for sizes M and L we will work one more round with increases

Size M only
We currently have 200 stitches and aim to increase by an additional 20 stitches. Given that each increase involves adding 2 stitches, this implies the need for 10 increase sections within the round (20 stitches to increase divided by 2 stitches added per section). This results in 20 stitches per increase section (200 stitches divided by 10 increase sections).
R17A: *(1dcflo, 1scblo) x 9, 1dcflo, 3scblo into the next st; *rep. to the end of the row.
R17B: *(1scblo, 1dcflo) x 9 times, 1scblo, 1dcflo into the front loop of the st 2 round below, 1scblo into the second st of the increase, 1dcflo into the same front loop of the previous dc; *rep. to the end of the round
R18A:(1dcflo, 1scblo) x 9, 1dcflo, 1scblo into the next st, 1dcflo into the front loop of the second st in the increase 2rounds below (you can find it in between the 2dc in the same st), 1scblo; *rep. to the end of the round
R18B: Rep.R1B

The YOKE is done and you can move to the BODY section.

Size L only
We currently have 200 stitches and aim to increase by an additional 32 stitches. Given that each increase involves adding 2 stitches, this implies the need for 16 increase sections within the round (32 stitches to increase divided by 2 stitches added per section). This results in 12 stitches per increase section (200 stitches divided by 16 increase sections = 12.5). because is not exat divizible we will habe 8 more sts to work to finish the row (200 – (12×16) = 8)
R18A: *(1dcflo, 1scblo) x 5, 1dcflo, 3scblo into the next st; *rep. 16 times, (1dcflo, 1scblo) x 4
R18B: *(1scblo, 1dcflo) x 5 times, 1scblo, 1dcflo into the front loop of the st 2 round below, 1scblo into the second st of the increase, 1dcflo into the same front loop of the previous dc; *rep. 16 times, (1scblo, 1dcflo) x 4 times.
R19A:(1dcflo, 1scblo) x 9, 1dcflo, 1scblo into the next st, 1dcflo into the front loop of the second st in the increase 2rounds below (you can find it in between the 2dc in the same st), 1scblo; *rep. 16 times; (1dcflo, 1scblo) x 4
R19B: Rep.R1B

The YOKE is done and you can move to the BODY section.

YOKE SIZES XL, XXL, and 3XL

The rounds will become visible from the upcoming round onward, signifying the beginning of the Yoke. When counting the yoke rounds, consider only the surface stitches.
We will start counting from R1, using the notation R1A for the first round in color A, followed by R1B for the next round in color B. Continue with R2A, R2B, R3A, R3B, and so forth.

You will start by changing to color A and remember to change the color after each round;

R1A: *1dcflo into the correspondent st 2rounds below (the round in color A), 1scblo into the next st; *rep. to the end of the rouns

R1B: *1scblo, 1dcflo into the corespondent st 2rows below (the round in color B) ;*rep to the end of the round;

Rep. R1A and R1B up to R4B
R5A (Increase Round): *(1dcflo, 1scblo) x 2, 1dcflo, 3scblo into the next st; *rep. to the end of the row.Total sts: 160
R5B: *(1scblo, 1dcflo) x2 times, 1scblo, 1dcflo into the front loop of the st 2 round below, 1scblo into the second st of the increase, 1dcflo into the same front loop of the previous dc; *rep. to the end of the round
R6A: (1dcflo, 1scblo) x 2, 1dcflo, 1scblo into the next st, 1dcflo into the front loop of the second st in the increase 2rounds below (you can find it in between the 2dc in the same st), 1scblo; *rep. to the end of the round
R6B: Rep. R1B
Continue into the established stitch pattern to the R9A and R9B
R10A(Increase Round): *(1dcflo, 1scblo) x 3, 1dcflo, 3scblo into the next st; *rep. to the end of the row.
Total sts: 200
R10B: *(1scblo, 1dcflo) x 3 times, 1scblo, 1dcflo into the front loop of the st 2 round below, 1scblo into the second st of the increase, 1dcflo into the same front loop of the previous dc; *rep. to the end of the round
R11A: (1dcflo, 1scblo) x 3, 1dcflo, 1scblo into the next st, 1dcflo into the front loop of the second st in the increase 2rounds below (you can find it in between the 2dc in the same st), 1scblo; *rep. to the end of the round
R11B: rep. R1B
Continue into the established stitch pattern to the R14A and R14B

You can purchase the easily printable PDF pattern here at the links below.

NEW!!! you can now purchase the PDF Written Pattern and the KIT here: Yarnsea.com

R15A(Increase Round): *(1dcflo, 1scblo) x 4, 1dcflo, 3scblo into the next st; *rep. to the end of the row.
Total sts: 240
R15B: *(1scblo, 1dcflo) x 4 times, 1scblo, 1dcflo into the front loop of the st 2 round below, 1scblo into the second st of the increase, 1dcflo into the same front loop of the previous dc; *rep. to the end of the round
R16A: (1dcflo, 1scblo) x 4, 1dcflo, 1scblo into the next st, 1dcflo into the front loop of the second st in the increase 2rounds below (you can find it in between the 2dc in the same st), 1scblo; *rep. to the end of the round
R16B: rep. R1B
Continue int the established pattern up to the R18A, R18B for size XL and XXL and R19A, R19B for size 3XL.

Size XL only
We currently have 240 stitches and aim to increase by an additional 20 stitches. Given that each increase involves adding 2 stitches, this implies the need for 10 increase sections within the round (20 stitches to increase divided by 2 stitches added per section). This results in 24 stitches per increase section (240 stitches divided by 10 increase sections).

R19A: *(1dcflo, 1scblo) x 11, 1dcflo, 3scblo into the next st; *rep. to the end of the row.
R19B: *(1scblo, 1dcflo) x 11 times, 1scblo, 1dcflo into the front loop of the st 2 round below, 1scblo into the second st of the increase, 1dcflo into the same front loop of the previous dc; *rep. to the end of the round
R20A:(1dcflo, 1scblo) x 11, 1dcflo, 1scblo into the next st, 1dcflo into the front loop of the second st in the increase 2rounds below (you can find it in between the 2dc in the same st), 1scblo; *rep. to the end of the round
R20B: Rep.R1B

The YOKE is done and you can move to the BODY section.

Size XXL only
We currently have 240 stitches and aim to increase by an additional 40 stitches. Given that each increase involves adding 2 stitches, this implies the need for 20 increase sections within the round (40 stitches to increase divided by 2 stitches added per section). This results in 12 stitches per increase section (240 stitches divided by 20 increase sections).

We currently have 240 stitches and aim to increase by an additional 40 stitches. Given that each increase involves adding 2 stitches, this implies the need for 20 increase sections within the round (40 stitches to increase divided by 2 stitches added per section). This results in 12 stitches per increase section (240 stitches divided by 20 increase sections).
For size XXL it is basically one more repeated increase pattern of 5 rounds. Because the Yoke Pattern has 20 rounds for size XXL you can work the increase pattern into the last round of the yoke.
R19A(Increase Round): *(1dcflo, 1scblo) x 5, 1dcflo, 3scblo into the next st; *rep. to the end of the row.
Total sts: 280
R19B: *(1scblo, 1dcflo) x 5 times, 1scblo, 1dcflo into the front loop of the st 2 round below, 1scblo into the second st of the increase, 1dcflo into the same front loop of the previous dc; *rep. to the end of the round
R20A: (1dcflo, 1scblo) x 5, 1dcflo, 1scblo into the next st, 1dcflo into the front loop of the second st in the increase 2rounds below (you can find it in between the 2dc in the same st), 1scblo; *rep. to the end of the round
R20B: rep. R1B

The YOKE is done and you can move to the BODY section.

Size 3XL only
We currently have 240 stitches and aim to increase by an additional 48 stitches. Given that each increase involves adding 2 stitches, this implies the need for 24 increase sections within the round (40 stitches to increase divided by 2 stitches added per section). This results in 10 stitches per increase section (240 stitches divided by 24 increase sections).
R20A(Increase Round): *(1dcflo, 1scblo) x 4, 1dcflo, 3scblo into the next st; *rep. to the end of the row.
Total sts: 288
R20B: *(1scblo, 1dcflo) x 4 times, 1scblo, 1dcflo into the front loop of the st 2 round below, 1scblo into the second st of the increase, 1dcflo into the same front loop of the previous dc; *rep. to the end of the round
R21A: (1dcflo, 1scblo) x 4, 1dcflo, 1scblo into the next st, 1dcflo into the front loop of the second st in the increase 2rounds below (you can find it in between the 2dc in the same st), 1scblo; *rep. to the end of the round
R21B: rep. R1B
The YOKE is done and you can move to the BODY section.

YOKE SIZES 4XL, and 5XL

Starting from the upcoming round onward, the rounds will become visible, signifying the beginning of the Yoke. When counting the yoke rounds, consider only the surface stitches.
We wil start counting from R1, using the notation R1A for the first round in color A, followed by R1B for the next round in color B. Continue with R2A, R2B, R3A, R3B, and so forth.

You wil start by changing to color A and remeber to change the color after each round;

R1A: *1dcflo into the corespondent st 2rounds below (the round in color A), 1scblo into the next st; *rep. to the end of the rouns

R1B: *1scblo, 1dcflo into the corespondent st 2rows below (the round in color B) ;*rep to the end of the round;

Rep. R1A and R1B up to R2B
R3A (Increase Round): *(1dcflo, 1scblo) x 4, 1dcflo, 3scblo into the next st; *rep. to the end of the row.Total sts: 168
R3B: *(1scblo, 1dcflo) x4 times, 1scblo, 1dcflo into the front loop of the st 2 round below, 1scblo into the second st of the increase, 1dcflo into the same front loop of the previous dc; *rep. to the end of the round
R4A: (1dcflo, 1scblo) x 4, 1dcflo, 1scblo into the next st, 1dcflo into the front loop of the second st in the increase 2rounds below (you can find it in between the 2dc in the same st), 1scblo; *rep. to the end of the round
R4B: Rep. R1B
Continue into the established stitch pattern to the R5A and R5B
R6A(Increase Round): *(1dcflo, 1scblo) x 5, 1dcflo, 3scblo into the next st; *rep. to the end of the row.Total sts: 196
R6B: *(1scblo, 1dcflo) x 5 times, 1scblo, 1dcflo into the front loop of the st 2 round below, 1scblo into the second st of the increase, 1dcflo into the same front loop of the previous dc; *rep. to the end of the round
R7A: (1dcflo, 1scblo) x 5, 1dcflo, 1scblo into the next st, 1dcflo into the front loop of the second st in the increase 2rounds below (you can find it in between the 2dc in the same st), 1scblo; *rep. to the end of the round
R7B: rep. R1B
Continue into the established stitch pattern to the R8A and R8B

R9A(Increase Round): *(1dcflo, 1scblo) x 6, 1dcflo, 3scblo into the next st; *rep. to the end of the row.Total sts: 224
R9B: *(1scblo, 1dcflo) x 6 times, 1scblo, 1dcflo into the front loop of the st 2 round below, 1scblo into the second st of the increase, 1dcflo into the same front loop of the previous dc; *rep. to the end of the round
R10A: (1dcflo, 1scblo) x 6, 1dcflo, 1scblo into the next st, 1dcflo into the front loop of the second st in the increase 2rounds below (you can find it in between the 2dc in the same st), 1scblo; *rep. to the end of the round
R10B: rep. R1B
Continue into the established stitch pattern to the R11A and R11B
R12A(Increase Round): *(1dcflo, 1scblo) x 7, 1dcflo, 3scblo into the next st; *rep. to the end of the row.Total sts: 252
R12B: *(1scblo, 1dcflo) x 7 times, 1scblo, 1dcflo into the front loop of the st 2 round below, 1scblo into the second st of the increase, 1dcflo into the same front loop of the previous dc; *rep. to the end of the round
R13A: (1dcflo, 1scblo) x 7, 1dcflo, 1scblo into the next st, 1dcflo into the front loop of the second st in the increase 2rounds below (you can find it in between the 2dc in the same st), 1scblo; *rep. to the end of the round
R13B: rep. R1B
Continue into the established stitch pattern to the R14A and R14B
R15A(Increase Round): *(1dcflo, 1scblo) x 8, 1dcflo, 3scblo into the next st; *rep. to the end of the row.Total sts: 280
R15B: *(1scblo, 1dcflo) x 8 times, 1scblo, 1dcflo into the front loop of the st 2 round below, 1scblo into the second st of the increase, 1dcflo into the same front loop of the previous dc; *rep. to the end of the round
R16A: (1dcflo, 1scblo) x 8, 1dcflo, 1scblo into the next st, 1dcflo into the front loop of the second st in the increase 2rounds below (you can find it in between the 2dc in the same st), 1scblo; *rep. to the end of the round
R16B: rep. R1B
Continue into the established stitch pattern to the R17A and R17B
R18A(Increase Round): *(1dcflo, 1scblo) x 9, 1dcflo, 3scblo into the next st; *rep. to the end of the row.Total sts: 308
R18B: *(1scblo, 1dcflo) x 9 times, 1scblo, 1dcflo into the front loop of the st 2 round below, 1scblo into the second st of the increase, 1dcflo into the same front loop of the previous dc; *rep. to the end of the round

R19A: (1dcflo, 1scblo) x 9, 1dcflo, 1scblo into the next st, 1dcflo into the front loop of the second st in the increase 2rounds below (you can find it in between the 2dc in the same st), 1scblo; *rep. to the end of the round
R19B: rep. R1B
Continue into the established stitch pattern to the R20A and R20B

Size 4XL only
Continue into the established stitch pattern to the R22A and R22B
The YOKE is done and you can move to the BODY section.

Size 5XL only

R21A(Increase Round): *(1dcflo, 1scblo) x 10, 1dcflo, 3scblo into the next st; *rep. to the end of the row.Total sts: 336
R21B: *(1scblo, 1dcflo) x 10 times, 1scblo, 1dcflo into the front loop of the st 2 round below, 1scblo into the second st of the increase, 1dcflo into the same front loop of the previous dc; *rep. to the end of the round
R22A: (1dcflo, 1scblo) x 10, 1dcflo, 1scblo into the next st, 1dcflo into the front loop of the second st in the increase 2rounds below (you can find it in between the 2dc in the same st), 1scblo; *rep. to the end of the round
R22B: rep. R1B
Continue into the established stitch pattern to the R24A and R24B

The YOKE is done and you can move to the BODY section.

If you wish to increase the yoke depth, you can work a few extra rounds without introducing any additional increases.

BODY

Before starting to work on the BODY of the Sweater you can check one more time the stitch count. You can find it written at the beginning of the INSTRUCTIONS

R1: Work into the established pattern for the next 64 (66, 72, 76, 80) (86, 92, 98, 110) sts (back panel), ch 6 (8, 8, 8, 10) (10, 14, 14, 14) sts, skip 36 (34, 38, 40, 50) (54, 52, 56, 58) sts (sleeve), continue into the established pattern for the last 4 (66, 72, 76, 80) (86, 92, 98, 110) sts (front panel), ch 6 (8, 8, 8, 10) (10, 14, 14, 14) sts, skip 36 (34, 38, 40, 50) (54, 52, 56, 58) sts (sleeve) and join with the first st.

R2: work into the established pattern up to the armpit chain, sc into the back loop of the armpit chain, continue into the established pattern to the next armpit chain, sc into the back loop of the armpit chain, join with the first st.
R3: work into the established pattern up to the armpit chain, scblo into the armpit sts, continue into the established pattern to the next armpit chain, scblo into the armpit sts, join with the first st.
You can refer to the video tutorial available here for a more visual explanation.

Next: Now that we worked the set-up rounds on the armpit sts, we can continue into the established pattern until we get to the desired length or until we will have: 23 (23, 23, 23, 24) (24, 25, 25, 25) rows.

Next: After finishibg the length, you need to work the Ribbing. You can find the RIBBING section after the sleeve section;

SLEEVE (work both the same)

The main challenge in dealing with the sleeves was achieving a smooth transition from the armpit, which is somewhat difficult for me to articulate in words. You may refer to the video tutorial provided here for a clearer demonstration.

R1: rejoin the yarn at the armpit, making sure it matches the designated color in accordance with your pattern and aligns with the last round yoke color. You will rejoin the yarn into the middle stitch at the armpit 3 (4, 4, 4, 5) (5, 7, 7, 7). Because on the body section we worked the armpit sts into the back loop of the chain, the armpit stitches now, apear with the “v” on top. you will work through both; work 1sc into the first 3 (4, 4, 4, 5) (5, 7, 7, 7) armpit sts; next we need to pass the body side row; to do that we will work 2 stitches together into the side st of the body row; depending on the first st of the sleeve (if it should be a dcflo or ascblo) you will work the 2 stitches together as sc or as dc; next continue into the established stitch pattern until the next body side row; work again 2 stitches together into the body side row; finish the round with 3 (4, 4, 4, 5) (5, 7, 7, 7)sc into the armpit sts.

R2: 1scblo into the first 3 (4, 4, 4, 5) (5, 7, 7, 7), continue into the established stitch pattern and finish the round with 1scblo into the last 3 (4, 4, 4, 5) (5, 7, 7, 7) sts.

R3: Starting with R3 incorporate the armpit stitches into the existing pattern, alternating between dcflo and scblo. Prior to beginning, examine the first stitch following the armpit chain and identify the stitch type required.

Proceed to count back to the initial position round to see with what stitch you need to start. When working the dcflo into the armpit sts, ensure that the stitch is worked as a front post around the stitches on the body round. This technique contributes to a more seamless transition between the body and sleeve sections.
Considering these notes, work into the established pattern to the end of the round.

Next, Continue working into the established pattern until you reach the desired sleeve length or until you have 29 (30, 30, 32, 32) (34, 34, 35, 35) rounds.

After finishibg the length, you need to work the Ribbing. You can find the RIBBING section after the sleeve section;

RIBBING

To work the ribbing for the cuffs and the bottom hem we will size down the hook size, using a 4mm.
Start from where your yarn is, into the desired color, and ch11.
R1: start with the second st, 1sc into each st, 1ss into the next 2sts of the edge (bottom hem or sleeve), and turn
R2: skip the 2ss, 1scblo in each st, except the last one, 1sc into the last st, 1ch and turn
R3: 1sc into the first st, 1scblo into the next sts, 1ss into the next 2sts of the edge, turn
Rep. R2 and R3 until you complete the entire circumference; join the ribbing ends using slip stitches.

TO FINISH
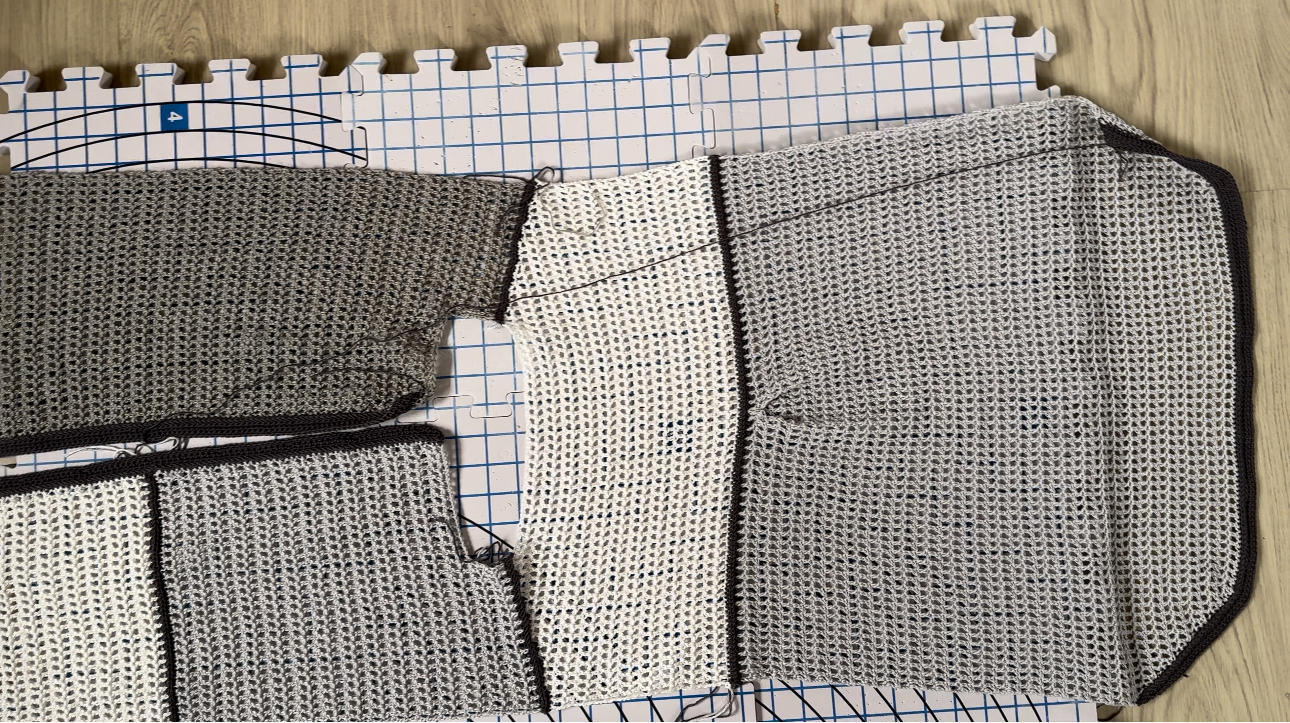
Weave in all looser ends and block to measurements.

I hope you like it! Happy Crocheting 

You can purchase the easily printable PDF pattern here at the links below.

NEW!!! you can now purchase the PDF Written Pattern and the KIT here: Yarnsea.com

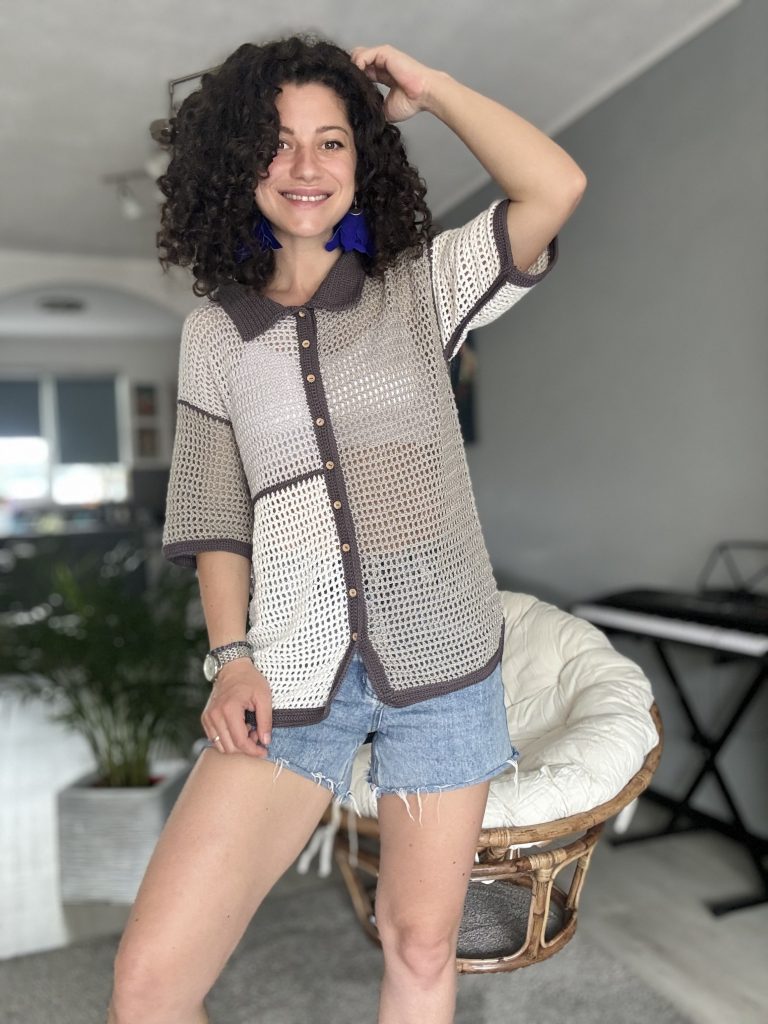
I am thrilled to introduce the latest pattern for the Dare To Be Cozy Cardigan!

This cardigan design emerged spontaneously, unplanned but destined to become something special. When the wonderful team at Durable Yarn approached me to test their new Durable Dare yarn, I was genuinely grateful. I casually mentioned that I envisioned crafting an oversized cardigan with their yarn. Upon receiving the yarn, I committed to the idea and began experimenting with various half-double crochet variations—one of my favorite basic stitches.

After several iterations, I arrived at a final stitch pattern variation that captivated me. This variation not only aligns with my vision for the oversized cardigan but also creates a fascinating texture effortlessly. Join me on this creative journey as we explore the unique charm of the Dare To Be Cozy Cardigan, a design born out of spontaneity and enhanced by the delightful qualities of Durable Dare yarn.

Pentru postarea in Limba Romana, click aici

You can purchase the easily printable PDF pattern here at the links below. 

NEW!!! you can now purchase the PDF Written Pattern and the KIT here: Yarnsea.com

MATERIALS

• Yarn: Size 5 , Bulky weight yarn
• Crochet Hook:
o 8 mm crochet hook
• yarn needle for weaving in ends
• Scissors

NOTES ABOUT DESIGN
Introducing our latest crochet pattern: The Dare To Be Cozy Cardigan!

Crafted with care and comfort in mind, this cardigan is a stylish addition to your wardrobe. Using a size 5 yarn in a textured stitch pattern, the Cozy Cardigan boasts a warm and inviting feel, perfect for those chilly days.

Designed with a drop-shoulder construction and an oversized fit, this cardigan exudes a relaxed and laid-back vibe. The back panel features carefully shaped shoulders, creating a higher neckline and a lower edge next to the sleeves for an enhanced and flattering fit.

What sets this cardigan apart is its unique construction. The front panels seamlessly continue from the back, forming a slightly V-shaped neckline that adds a touch of sophistication. One standout detail is the cleverly concealed pockets. These hidden gems are skillfully integrated into the design by creating pocket holes while working on the front panels and then crafting the inside pocket for added functionality.

With its cozy texture, stylish drop-shoulder silhouette, and thoughtful pocket detailing, the Cozy Cardigan is a must-have piece for those who appreciate both fashion and comfort. Elevate your handmade wardrobe with this versatile and chic crochet pattern.

MEASUREMENTS AND SIZES

The Dare To Be Cozy Cardigan Pattern is available in 9 sizes, from XS up to 5X Large. The model is 168 cm tall, with a 88 cm bust circumference, and wears a size Small.
The numbers are written below as follows: XS (S, M, L, XL) ( 2XL, 3XL, 4XL, 5XL);

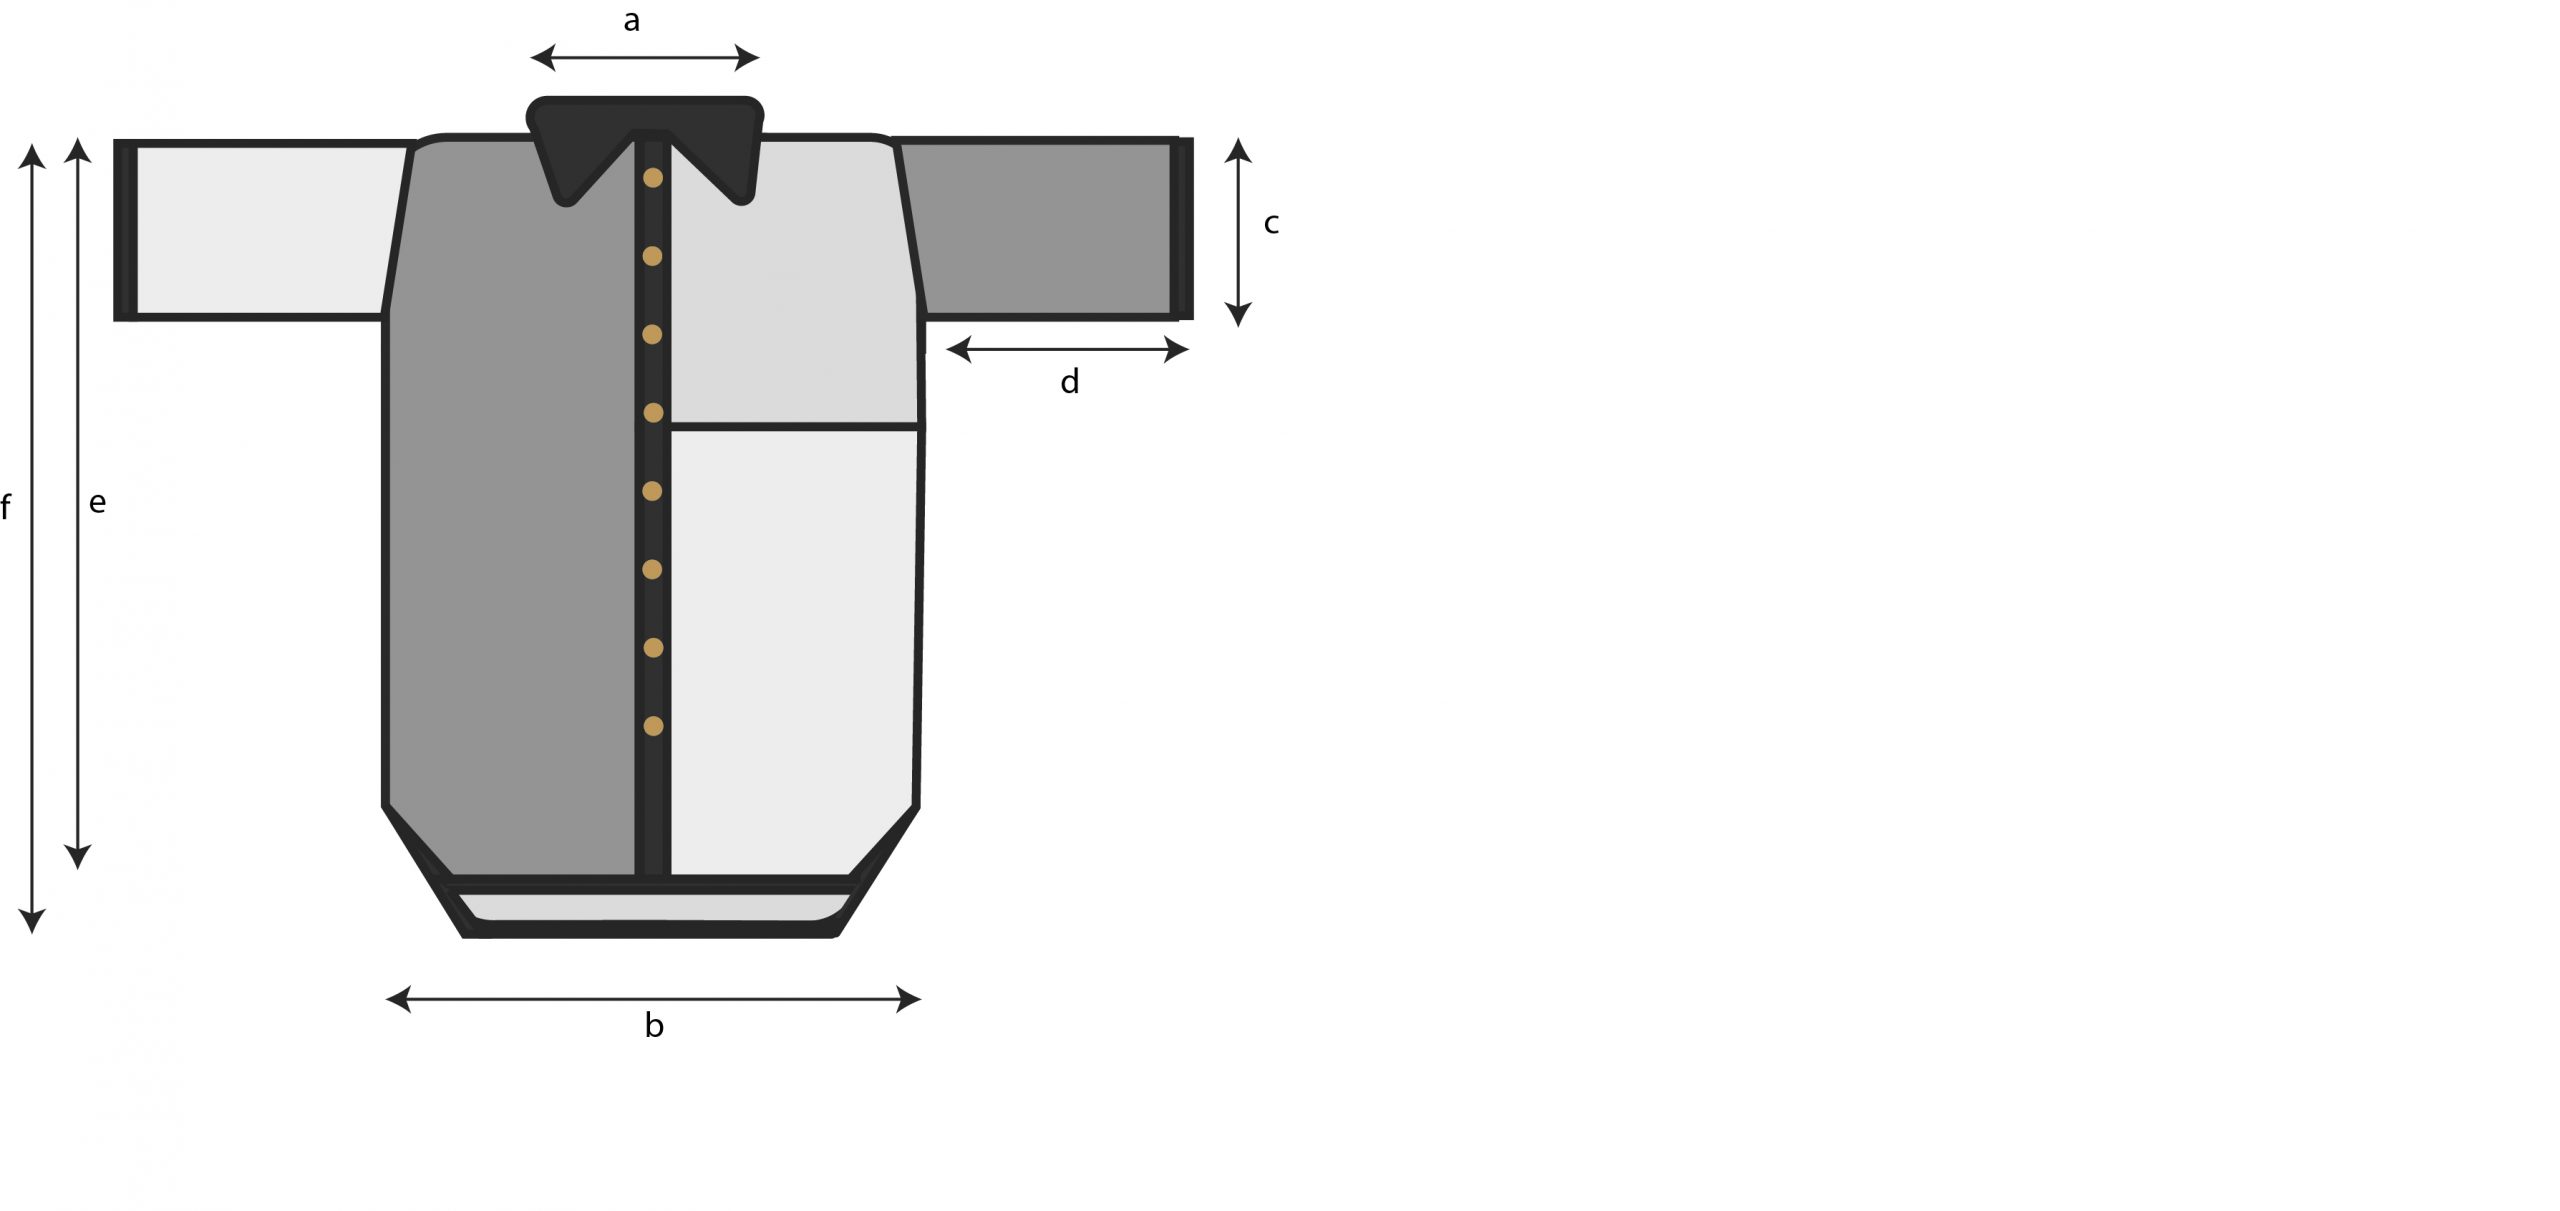
Final Measurements of the Dare To Be Cozy Cardigan
Neck Width a: 14 cm (16, 16, 19, 19) (19, 21, 21, 21)
Width b: 56 cm (59, 61.5, 65, 68.5) (73.5, 78.5, 83.5, 88.5)
Armhole depth. c: 19 cm (21, 21, 23, 25) (25, 27, 29, 30)
Sleeve length d: 46 cm (46, 48, 48, 49) (49, 51, 51, 51)
Length e: 63 (63, 65, 65, 68) (69, 69, 69, 71)

YARN

For the Dare To Be Cozy Cardigan, I used: Durable Dare By Durable yarn, in color Mustang (413). Yarn composition:80% Antipiling Acryl, 20% Polyamide; Each ball has 100 grams and is approximately 99 meters.

For each size, you will approximately need:
1010 (1080, 1150, 1220, 1350) (1430, 1550, 1660, 1780) meters
11 (11, 12,13, 14) (15, 16, 17, 18) balls of Durable Dare

You can purchase the easily printable PDF pattern here at the links below. 

NEW!!! you can now purchase the PDF Written Pattern and the KIT here: Yarnsea.com

ABBREVIATIONS

Ch – chain
Sc – single crochet
scblo – single crochet in back loop only
hdc – half double crochet
hdcblo – half double crochet in the back loop only
hdcflo – half double crochet in the front loops only (the side V in front of the stitch)
ss – slip stitch
St(s) – stitch(es)
R – row
** – repeated section.

TENSION

Using 8mm crochet hook in the hdc front loop, hdc back loop pattern

8sts = 10 cm
6.5 rows = 10 cm

STITCH PATTERN AND TECHNIQUES

The primary stitch pattern used in the Dare To Be Cozy Cardigan is a variation of the half-double crochet stitch, requiring an odd number of stitches. The texture is achieved by alternating between one stitch of half-double crochet into the back loop only and the next stitch of half-double crochet into both front loops. This method creates a subtle yet visually interesting texture.

The second stitch pattern integrated into the Dare To Be Cozy Cardigan is the single crochet in the back loop only. This specific stitch pattern will be utilized for the bottom, cuffs, and collar ribbing, introducing a subtle texture to enhance these areas. The inside of the pockets will showcase the single crochet stitch, contributing to a uniform and dense fabric that enhances the functionality of the pockets.

INSTRUCTIONS

BACK PANEL RIBBING
Start| Ch 7
R1: Starting in the second st, 1sc in each st, 1ch and turn;
R2: 1sc, 1scblo in each st except the last one, 1sc in last st.
Rep. R2 until you have: 45 (47, 51, 53, 57) (61, 63, 67, 71) rows;

BACK PANEL
Upon finishing the ribbing, transition to working along the side rows. Crochet one half-double crochet (hdc) in each side row, considering the initial 2 chain stitches as the first hdc.

R1: 2ch, 1hdc in each st (side row) to the end of the row; 2ch and turn
R2: *1hdcblo in next st, 1hdcflo in next st; *rep. until the last st, 1hdc in the last (second ch)
Rep. R2 until you have in total: 34 (34, 34, 34, 36) (36, 36, 36, 36) rows

*Note: You can adjust the number of rows according to the desired length

SHAPING THE SHOULDERS

*Note: If you prefer a more beginner-friendly approach, you have the option to skip this section of short rows.

Shaping the shoulders, is for creating a higher neckline and a lower edge next to the sleeves for a better fit.

Before beginning the short rows, consider marking the stitches for the neckline. While the short rows will involve the neckline stitches, marking them allows for flexibility in adjusting the number of rows or the number of stitches to decrease in each short row.

Having the remaining stitches for the shoulders is essential for calculating the number of short rows and the corresponding decreases. For instance, in the case of size Small, 17 stitches are allotted for each shoulder. As 17 is not easily divisible, we will use 16 as a reference, which divides evenly by 2, 4, and 8. These numbers represents potential options for the number of stitches to decrease on each short row:
2 stitches will result in 7 short rows (8-1, as the 2 remaining stitches stay unchanged).
4 stitches will lead to 3 short rows.
8 stitches will lead to 1 short row.

I opted for a decrease of 4 stitches, resulting in 3 short rows. Given the initial count of 17 stitches, I made a decrease of 5 stitches on the first row.

XS – 17sts for the shoulders. 11sts for the neckline
S – 17sts for the shoulders, 13sts for the neckline
M – 19sts for the shoulders, 13sts for the neckline
L – 19sts for the shoulders, 15sts for the neckline
XL – 21sts for the shoulders, 15sts for the neckline
2XL – 23sts for the shoulders, 15sts for the neckline
3XL – 23sts for the shoulders, 17sts for the neckline
4XL – 25sts for the shoulders, 17sts for the neckline
5XL – 27sts for the shoulder, 17sts for the neckline

Use stitch markers to mark these sts and remove and place the stitch marker back everytime you need to work in that st.

1st Short Row: start from where your yarn is;
ss 6 (6, 4, 4, 6,) ( 4, 4, 6, 4) sts (this means you wil start your row into the 6 (6, 4, 4, 6,) ( 4, 4, 6, 4) and you will skip 5 (5, 3, 3, 5,) ( 3, 3, 5, 3) sts at the beginning of the row; 2ch, *1hdcblo in next st, 1hdcflo in next st; *rep. until you have 5 (5, 3, 3, 5,) ( 3, 3, 5, 3) left; 2ch and turn
Total sts left: 35 (37, 45, 47, 47) (55, 57, 57, 65)

2nd Short Row (for all sizes): ss 5 sts, 2ch, 1hdcblo in next st, 1hdcflo in next st; *rep. until you have 4sts left, 2ch and turn
Total sts left: 27 (29, 37, 39,39) (47, 49, 49, 57)

Rep. 2nd Short Row until you have 19 (21, 21, 23,23) (23, 25, 25, 25) sts left.
This means you will work: 3 (3, 4, 4, 4) (5, 5, 5, 6) short rows.
If you marked at the beginning the neckline sts, you need to have 4 sts more on each side.
Cut the yarn

RIGHT FRONT PANEL

We’ll straighten the edge of the shoulder by working single crochet stitches over the short rows. It’s important to note that this single crochet row should be on the right side of your work.

Reattach the yarn to the first stitch on the outer edge of the shoulder. To pass the bridge between the short rows, work 2 single crochets together – 1 into the last stitch before the bridge and 1 into the side of the first stitch of the next short row.
For a more comprehensive visual guide, refer to the video tutorial available here.

1ch, 1sc into the next 4 (4, 2, 2, 4,) ( 2, 2, 4, 2) sts, sc2tog (as explained above), *1sc into the next 3sts, sc2tog; *rep this section until you 4sts left before the first marked stitch of the neckline, 1sc into the last 4 sts. 2ch and turn
Total sc: 17 (17, 19, 19, 21) (23, 23, 25, 27) sts

Let’s begin working on the front panel. To provide clearer instructions, we will start counting from R1

R1: 1fphdc in each st to the end of the row; 2ch and turn
R2: *1hdcblo in next st, 1hdcflo in next st; *rep. until the last st, 1hdc in the last (second ch), 2ch and turn
R3: Rep. R2
R4: *1hdcblo in next st, 1hdcflo in next st; *rep. until the last st, 2hdc into the last st (making an increase)
R5: Rep. R2
Rep. R4 and R5 5 (5, 5, 7, 7,) (7, 7, 7, 7) times.

You will have in total 6 (6, 6, 8, 8,) (8, 8, 8, 8) increase rows and 6 (6, 6, 8, 8,) (8, 8, 8, 8) more stitches than initial

After completing the increased rows, the total number of rows worked for the front panel is 15 (15, 15, 19, 19) (19, 19, 19, 19). To ensure the continuity of the stitch pattern, it’s important to maintain a stitch count that is a multiple of 2+1.
You will now have 23 (23, 25, 27, 29) (31, 31, 33, 35) sts for the front panel.

Next, continue to work into the established pattern until the pocket hole. More exactly, until you have for the front panel 25 (25, 27, 27, 29) (29,29,29,31) rows.

Next Row: POCKET HOLE

The Pocket hole needs to be proportional to the front panel width.

Work in the establish pattern first, 4 (4, 5, 5, 5) (6, 6, 6, 7) sts, ch 14 (14, 15, 16, 18) (19, 19, 20, 21) sts, skip 14 (14, 15, 16, 18) (19, 19, 20, 21) sts, continue with the established pattern for the last 5 (5, 5, 6, 6) (6, 6, 7, 7) sts, 2ch and turn

Next Row: work into the established pattern for the first 5 (5, 5, 6, 6) (6, 6, 7, 7) sts, then 1hdc in each ch st, and finish the row with the established pattern for the last 4 (4, 5, 5, 5) (6, 6, 6, 7) sts

Next, continue to work into the established pattern until you complete the front panel, 10 (10, 9, 9, 9) (10, 10, 10, 9) more rows.

After completing the front panel length, you will have in total: 37 (37, 38, 38, 40) (41, 41, 41, 42) rows

To finish off the front panel, work the bottom ribbing

Ch7
R1: Start into the second st, 1sc in all 6sts, 1ss into the next 2sts of the front panel bottom edge, turn
R2: skip the 2ss, 1scblo in next 5st, 1sc in last st
R3: 1sc in first st, 1scblo in next 5sts, 1ss in next 2sts of the front panel edge.
Rep. R2 and R3 until you complete the front panel width.
Fasten off.

LEFT FRONT PANEL

Create the Left Front Panel as a mirror image of the Right Front Panel.

Start by straightening the shoulder edge with single crochet stitches over the short rows. Ensure this single crochet row is on the right side of your work.

Reattach the yarn to the first stitch of the shoulder immediately following the marked neckline stitch. To pass the bridge between the short rows, work 2 single crochets together – 1 into the side of the last stitch of the current short row and 1 into the first stitch of the next short row.
For a more comprehensive visual guide, refer to the video tutorial available here.

1ch, 1sc into the next 4 (4, 4, 4, 4,) ( 4,4, 4, 4) sts, sc2tog (as explained above), *1sc into the next 3sts, sc2tog; *rep this section until you have 4 (4, 2, 2, 4,) ( 2, 2, 4, 2) sts to the end of the row, 1sc into the last sts, 2ch and turn
Total sc: 17 (17, 19, 19, 21) (23, 23, 25, 27) sts
Let’s begin working on the front panel. To provide clearer instructions, we will start counting from R1

R1: 1fphdc in each st to the end of the row; 2ch and turn
R2: *1hdcblo in next st, 1hdcflo in next st; *rep. until the last st, 1hdc in the last (second ch), 2ch and turn
R3: Rep. R2

You can purchase the easily printable PDF pattern here at the links below. 

NEW!!! you can now purchase the PDF Written Pattern and the KIT here: Yarnsea.com

R4: 1hdc into the first st (same as 2ch, making an increase), *1hdcblo in next st, 1hdcflo in next st; *rep. until the last st, 1hdc in the last (second ch), 2ch and turn
R5: Rep. R2
Rep. R4 and R5 5 (5, 5, 7, 7,) (7, 7, 7, 7) times.

You will have in total 6 (6, 6, 8, 8,) (8, 8, 8, 8) increase rows and 6 (6, 6, 8, 8,) (8, 8, 8, 8) more stitches than initial

After completing the increase rows, the total number of rows worked for the front panel is 15 (15, 15, 19, 19) (19, 19, 19, 19). To ensure the continuity of the stitch pattern, it’s important to maintain a stitch count that is a multiple of 2+1.
You will now have: 23 (23, 25, 27, 29) (31, 31, 33, 35) sts for the front panel.

Next, continue to work into the established pattern until the pocket hole. More exactly, until you have the front panel 25 (25, 27, 27, 29) (29,29,29,31) rows.

Next Row: POCKET HOLE

The Pocket hole needs to be proportional to the front panel width.

Work in the establish pattern first, 5 (5, 5, 6, 6) (6, 6, 7, 7) sts, ch 14 (14, 15, 16, 18) (19, 19, 20, 21) sts, skip 14 (14, 15, 16, 18) (19, 19, 20, 21) sts, continue with the established pattern for the last, 4 (4, 5, 5, 5) (6, 6, 6, 7) sts 2ch and turn

Next Row: work into the established pattern for the first 4 (4, 5, 5, 5) (6, 6, 6, 7) sts, then 1hdc in each ch st, and finish the row with the established pattern for the last 5 (5, 5, 6, 6) (6, 6, 7, 7) sts.

Next, continue to work into the established pattern until you complete the front panel, 10 (10, 9, 9, 9) (10, 10, 10, 9) more rows.

After completing the front panel length, you will have in total: 37 (37, 38, 38, 40) (41, 41, 41, 42) rows

To finish off the front panel, work the bottom ribbing

Ch7
R1: Start into the second st, 1sc in all 6sts, 1ss into the next 2sts of the front panel bottom edge, turn

R2: skip the 2ss, 1scblo in next 5st, 1sc in last st
R3: 1sc in first st, 1scblo in next 5sts, 1ss in next 2sts of the front panel edge.
Rep. R2 and R3 until you complete the front panle width.
Fasten off.

SLEEVES

Apply the same pattern to both sleeves.

Begin by marking the side rows to define the sleeve width on both the back and front panels:
11 (12, 12, 13, 14) (14, 15, 16, 17) rows on each side.

With the armhole now marked, let’s begin working the sleeves directly into the armhole side rows.

The number of stitches required for working into the armholes depends on your tension and the height of the edge stitches. As a guideline, for the initial row, I worked 3 half-double crochets in every 2 side rows. Feel free to modify the stitch count based on your tension, but maintain a multiple of 2+1 stitches.

R1: Reattach yarn into the marked stitch, 2ch, 1hdc in each st (as mentioned above) to the end of the row; 2ch and turn
Total sts: 33 (37, 37, 39, 43) (43, 45, 49, 51) sts
R2: *1hdcblo in next st, 1hdcflo in next st; *rep. until the last st, 1hdc in the last (second ch), 2ch and turn
Rep. R2 until you reach the desired sleeve length or until you have: 26 (26, 27, 27, 30) (30, 32, 32, 32) rows.
Last sleeve row: *1sc in the first st, sc2tog; rep to the end of the row.

To finish off the sleeve, work the bottom ribbing

Ch7
R1: Start into the second st, 1sc in all 6sts, 1ss into the next 2sts of the edge, turn
R2: skip the 2ss, 1scblo in next 5st, 1sc in last st
R3: 1sc in first st, 1scblo in next 5sts, 1ss in next 2sts of the edge.
Rep. R2 and R3 until you complete the sleeve width.
Fasten off.

ASSEMBLING

Before proceeding with the collar ribbing and pockets, I find it more convenient to assemble the cardigan first.

Fold the piece at the shoulders, bringing the front panels over the back panels.

Grab a yarn needle and measure the sewing yarn to be three times the length needed.

Next, sew the side edges together; you can commence from the cuff and finish at the bottom of the cardigan or do it in reverse.

For sewing, I prefer the ladder stitch technique but feel free to use any method you feel comfortable with. If you’d like a visual demonstration of this technique, you can refer to the video tutorial available here.

NECKLINE AND FRONT EDGES RIBBING

Work the foundation row of the ribbing in single crochet on the right side of the cardigan.
Rejoin yarn into the first st of the right front panel bottom corner
Ch1 and work 1sc in each st until the bottom corner of the left front panel;

Note:
When crocheting along the edges of the front panel, you’ll be working into the side rows. Here’s what to do:

In one side row, make 2 single crochets (2sc).
In the next side row, make just one single crochet (1 sc).
By following these steps, you’ll have a total of 3 single crochets (3sc) for every 2 side rows. Keep in mind that the result can vary depending on your tension and how tall the stitches are at the edge of the front panel. Feel free to adjust the pattern based on your own tension preferences.
After finishing the sc row;
Start: ch7 and turn

R1: starting with the second st, 1sc in each st to the end, 1ss into the next 2sts of the edge; turn
R2: skip the 2ss, 1scblo into each st, except the last one, 1sc into the last st; 1ch and turn;
R3: 1sc in the first st, 1scblo in each st to the end; 1ss into the next 2sts of the edge; turn;
Rep. R2 and R3 until you complete the entire length;

POCKET

Work both pockets the same

Start by crocheting the inside layer of the pocket.

Reattach the yarn to the first stitch at the top edge of the pocket hole and chain 1.
R1: 1sc in each of the top edge’s stitches, 1ch and turn
R2: 1sc in each st, 1ch ch and turn
Rep. R2 until you complete the depth of the pocket.

The next step is to sew the inside layer of the pocket onto the back of the front panel. To finish the pocket, we need to work on ribbing on the bottom edge of the pocket hole.

Reattach the yarn to the first stitch at the bottom edge of the pocket hole and chain 4
R1: starting with the second st, 1sc in each st to the end, 1ss into the next 2sts of the edge; turn
R2: skip the 2ss, 1scblo into each st, except the last one, 1sc into the last st; 1ch and turn;
R3: 1sc in the first st, 1scblo in each st to the end; 1ss into the next 2sts of the edge; turn;
Rep. R2 and R3 until you complete the entire length;

To finish off, sew the edges of the ribbing.

TO FINISH
Weave in all looser ends and block to measurements

I hope you love it as much as I do.

You can purchase the easily printable PDF pattern here at the links below. 

NEW!!! you can now purchase the PDF Written Pattern and the KIT here: Yarnsea.com