Author

Bykaterina

Browsing

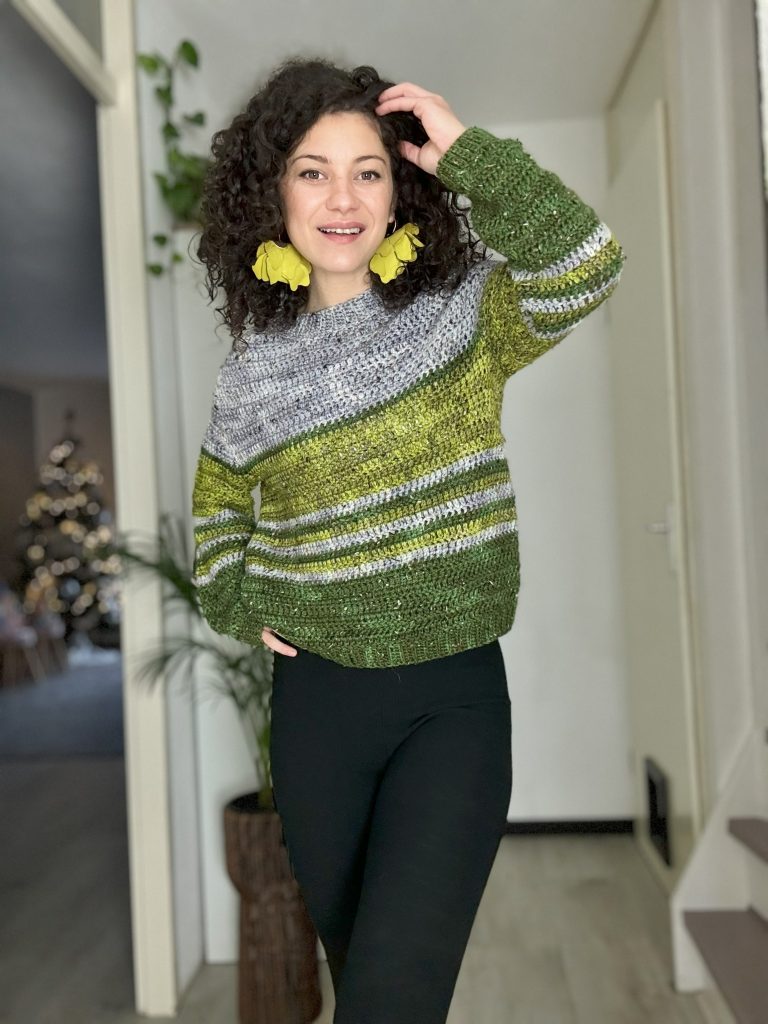
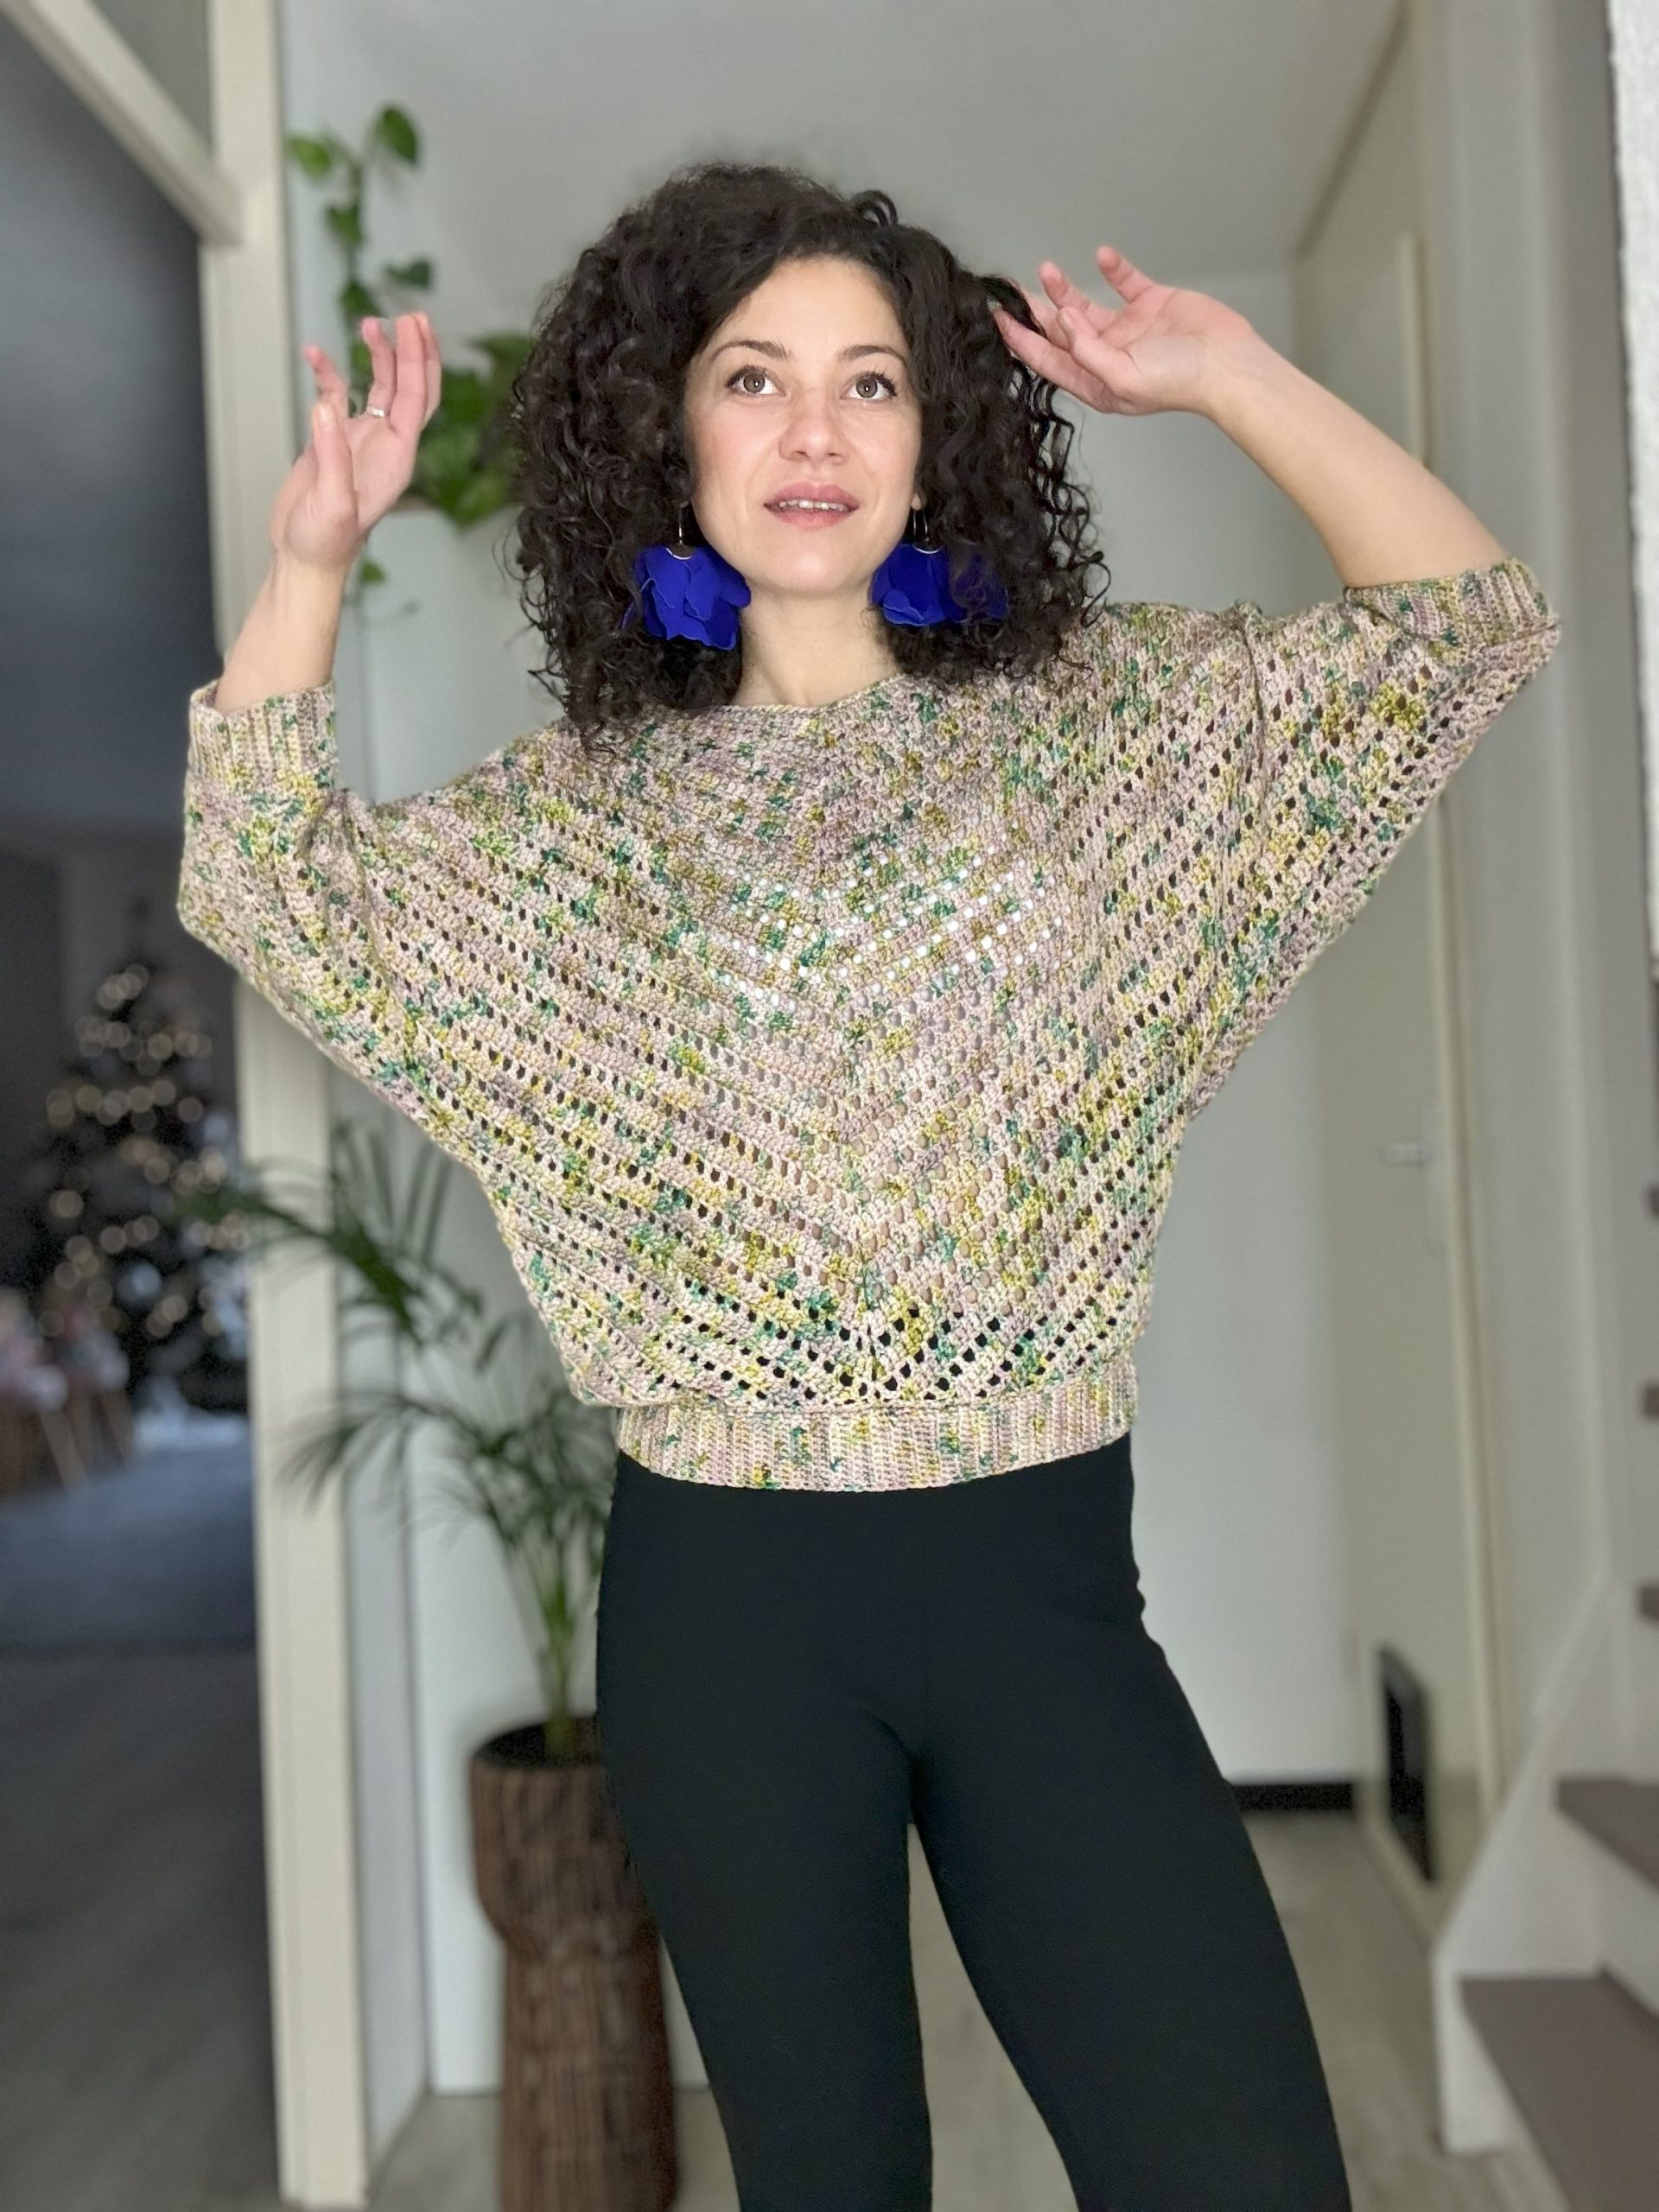
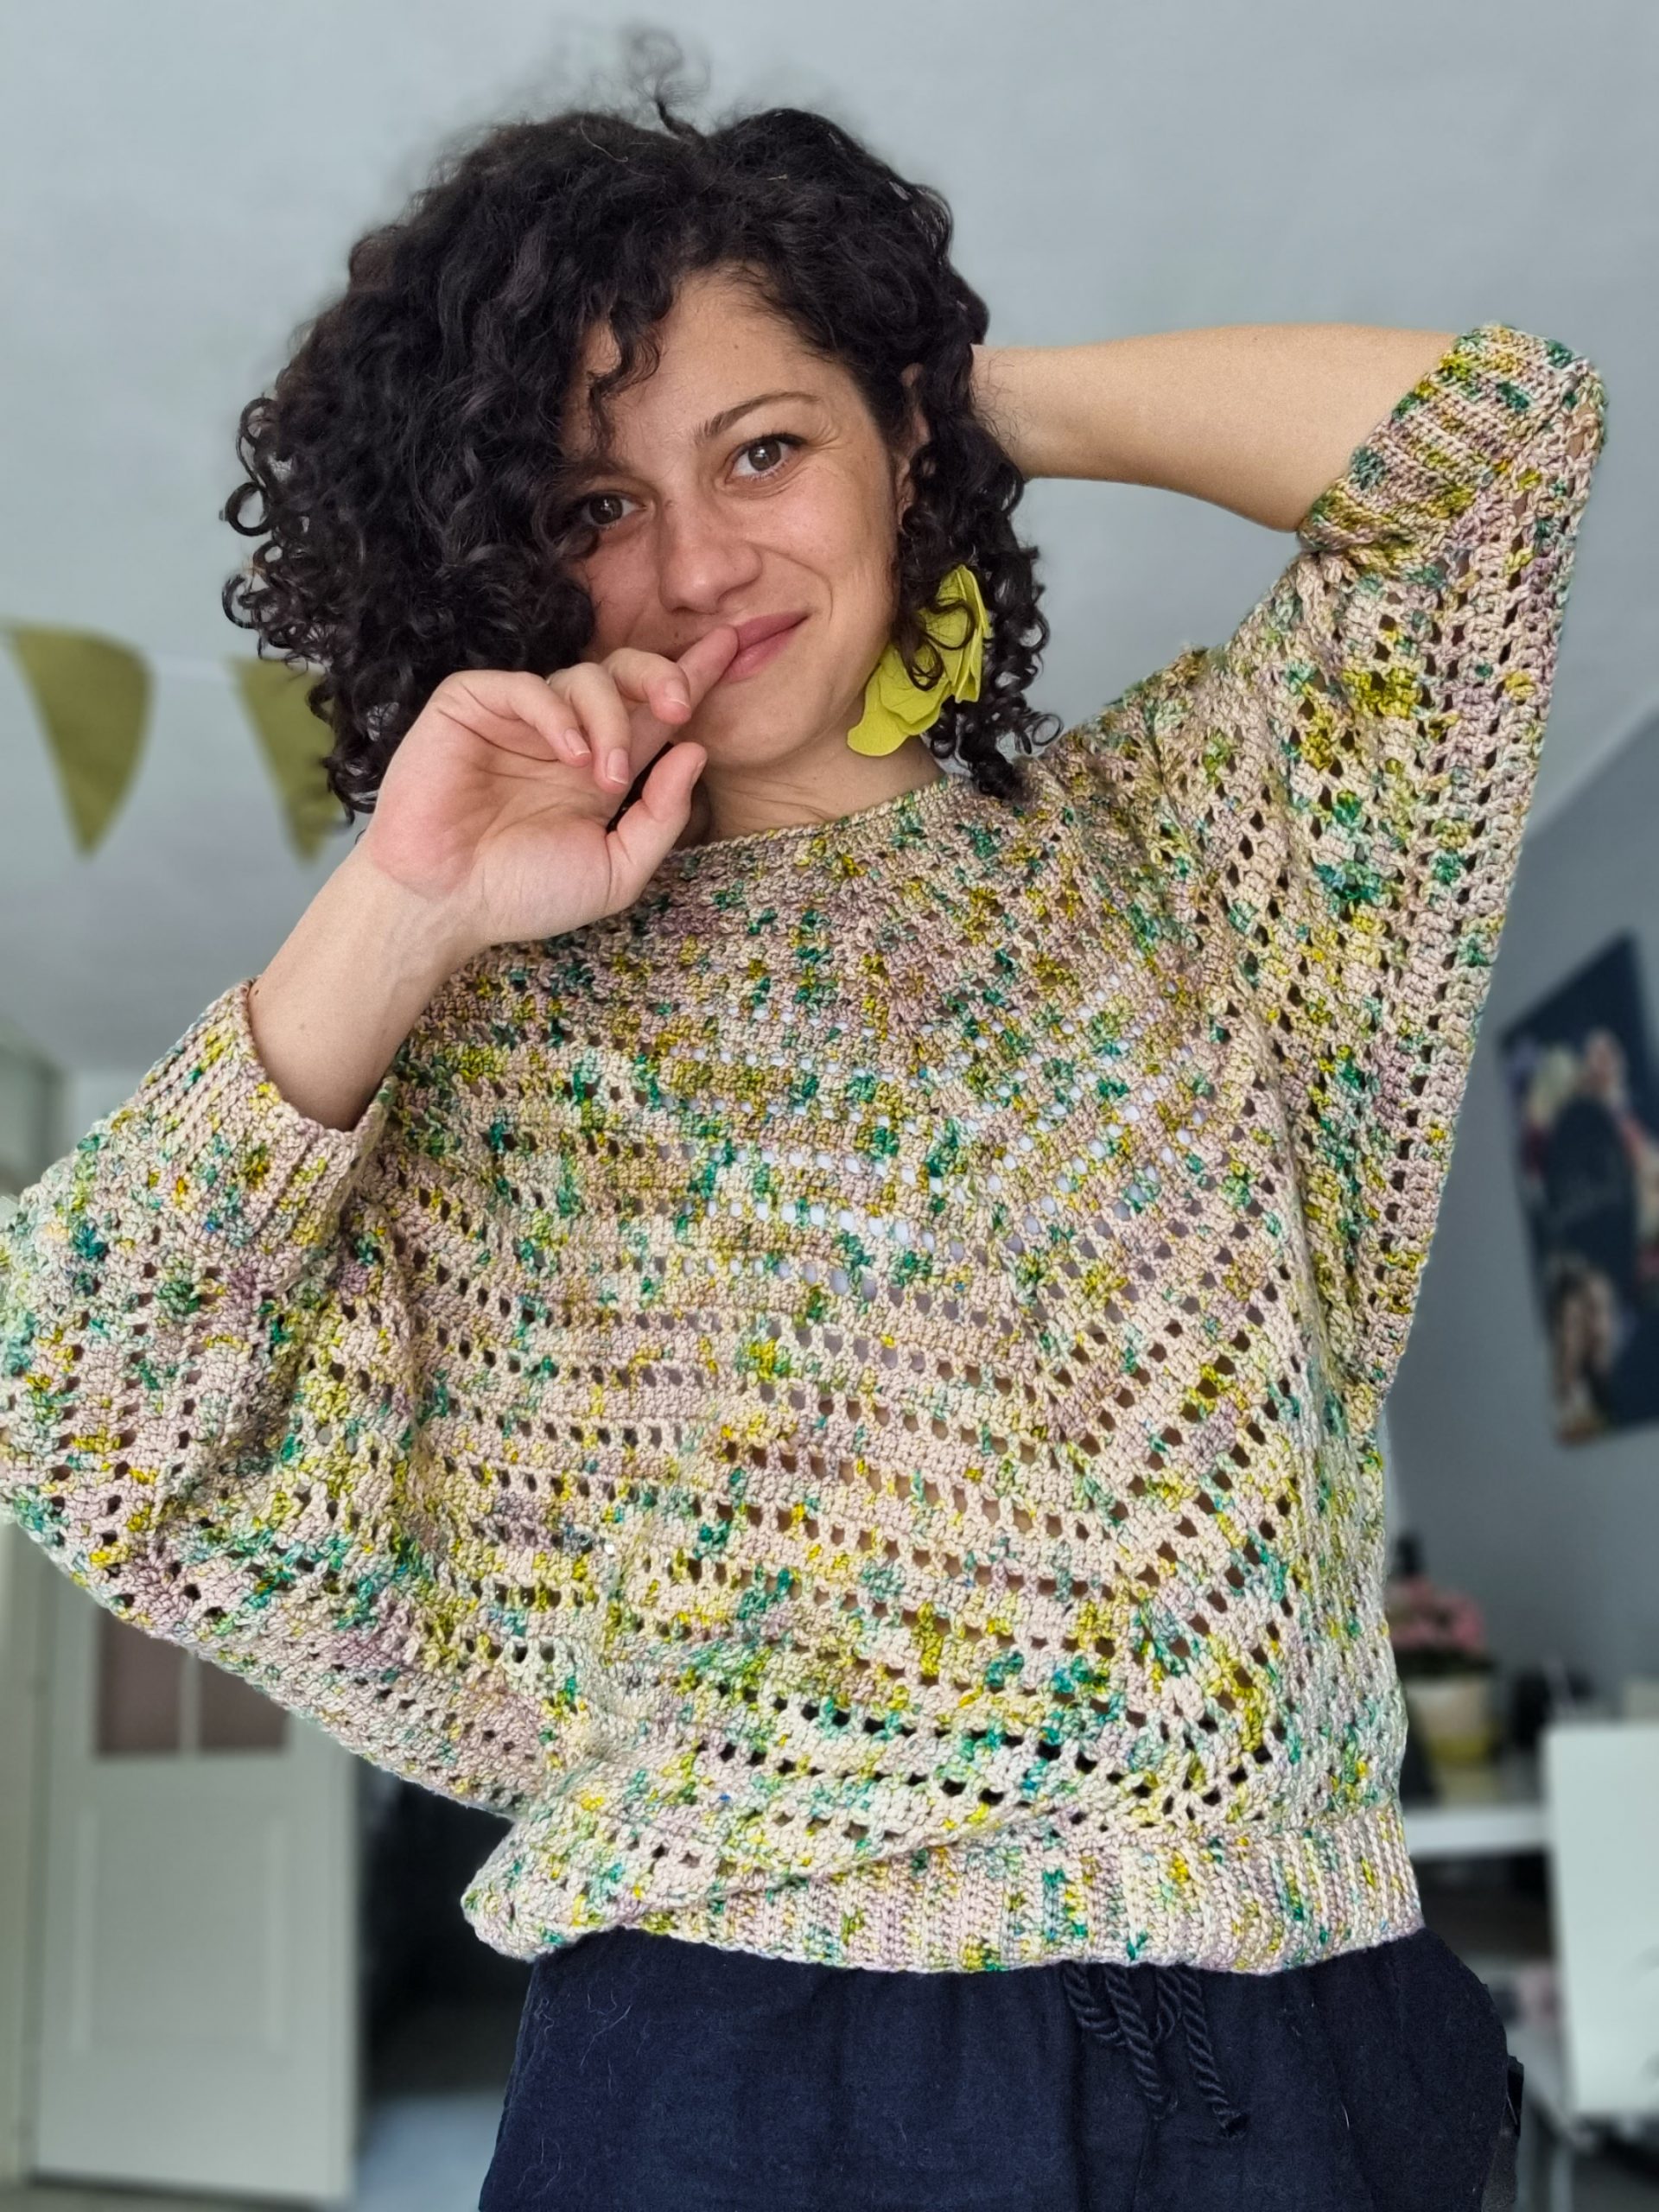
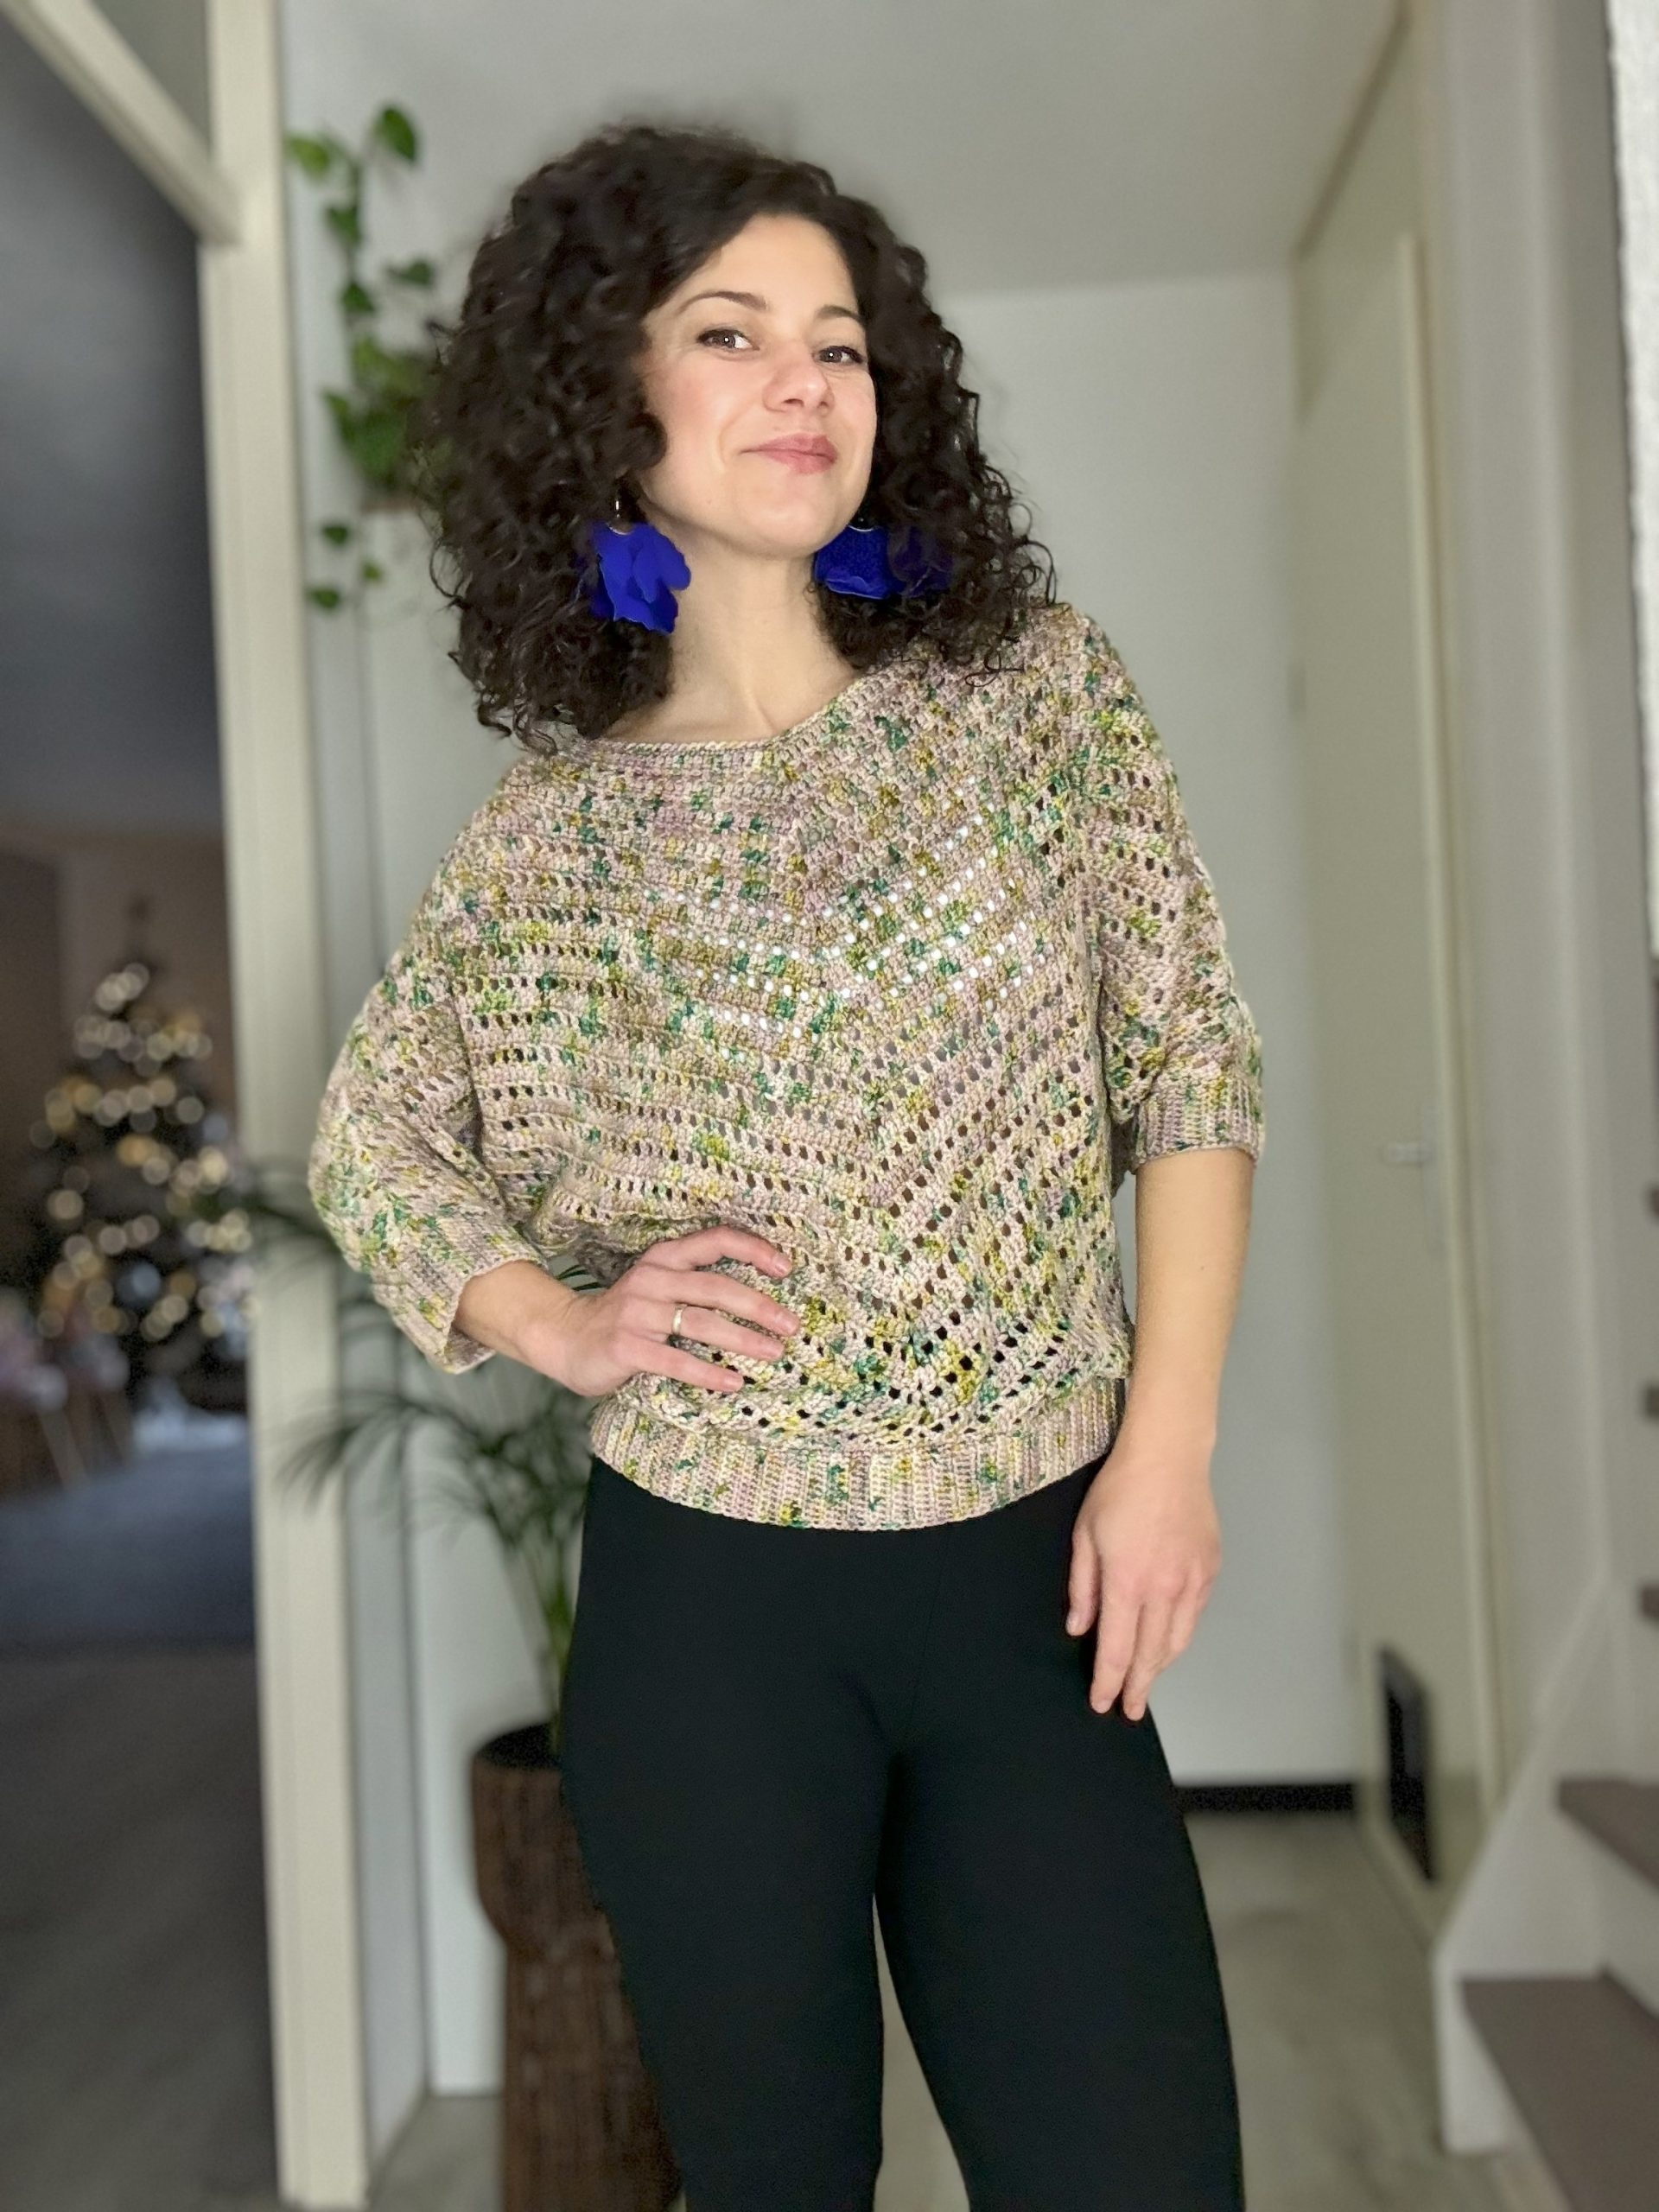
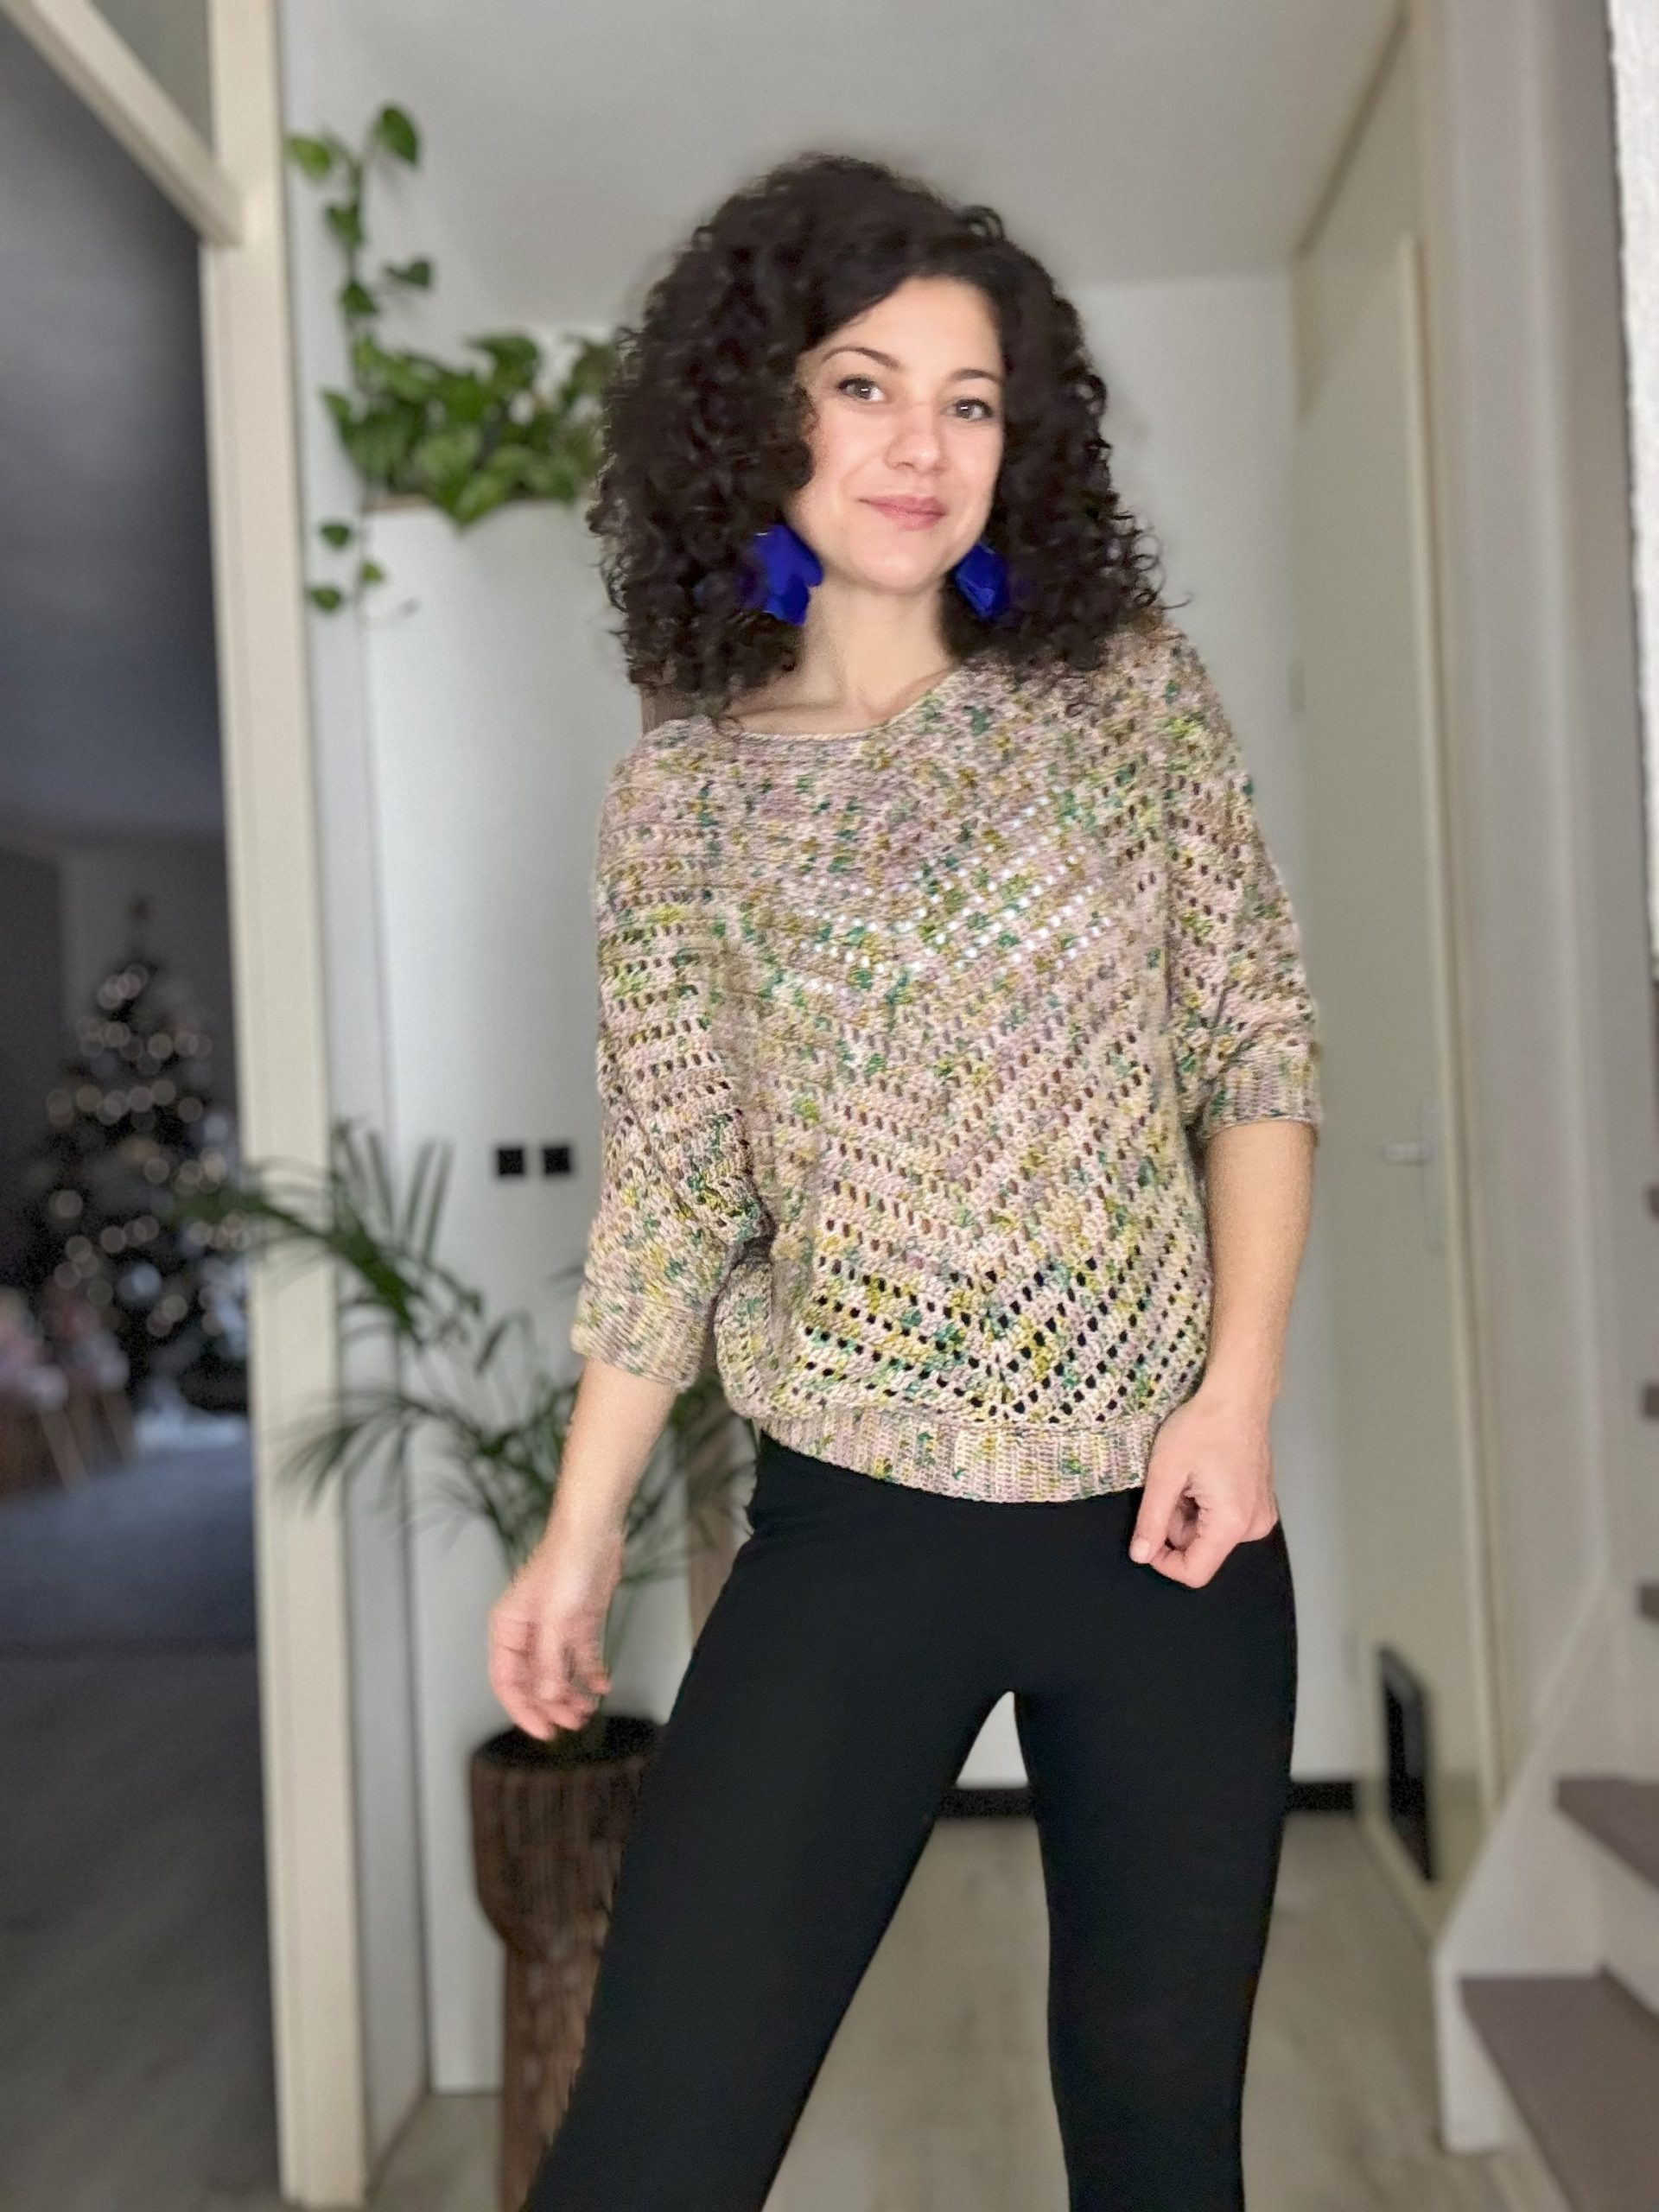
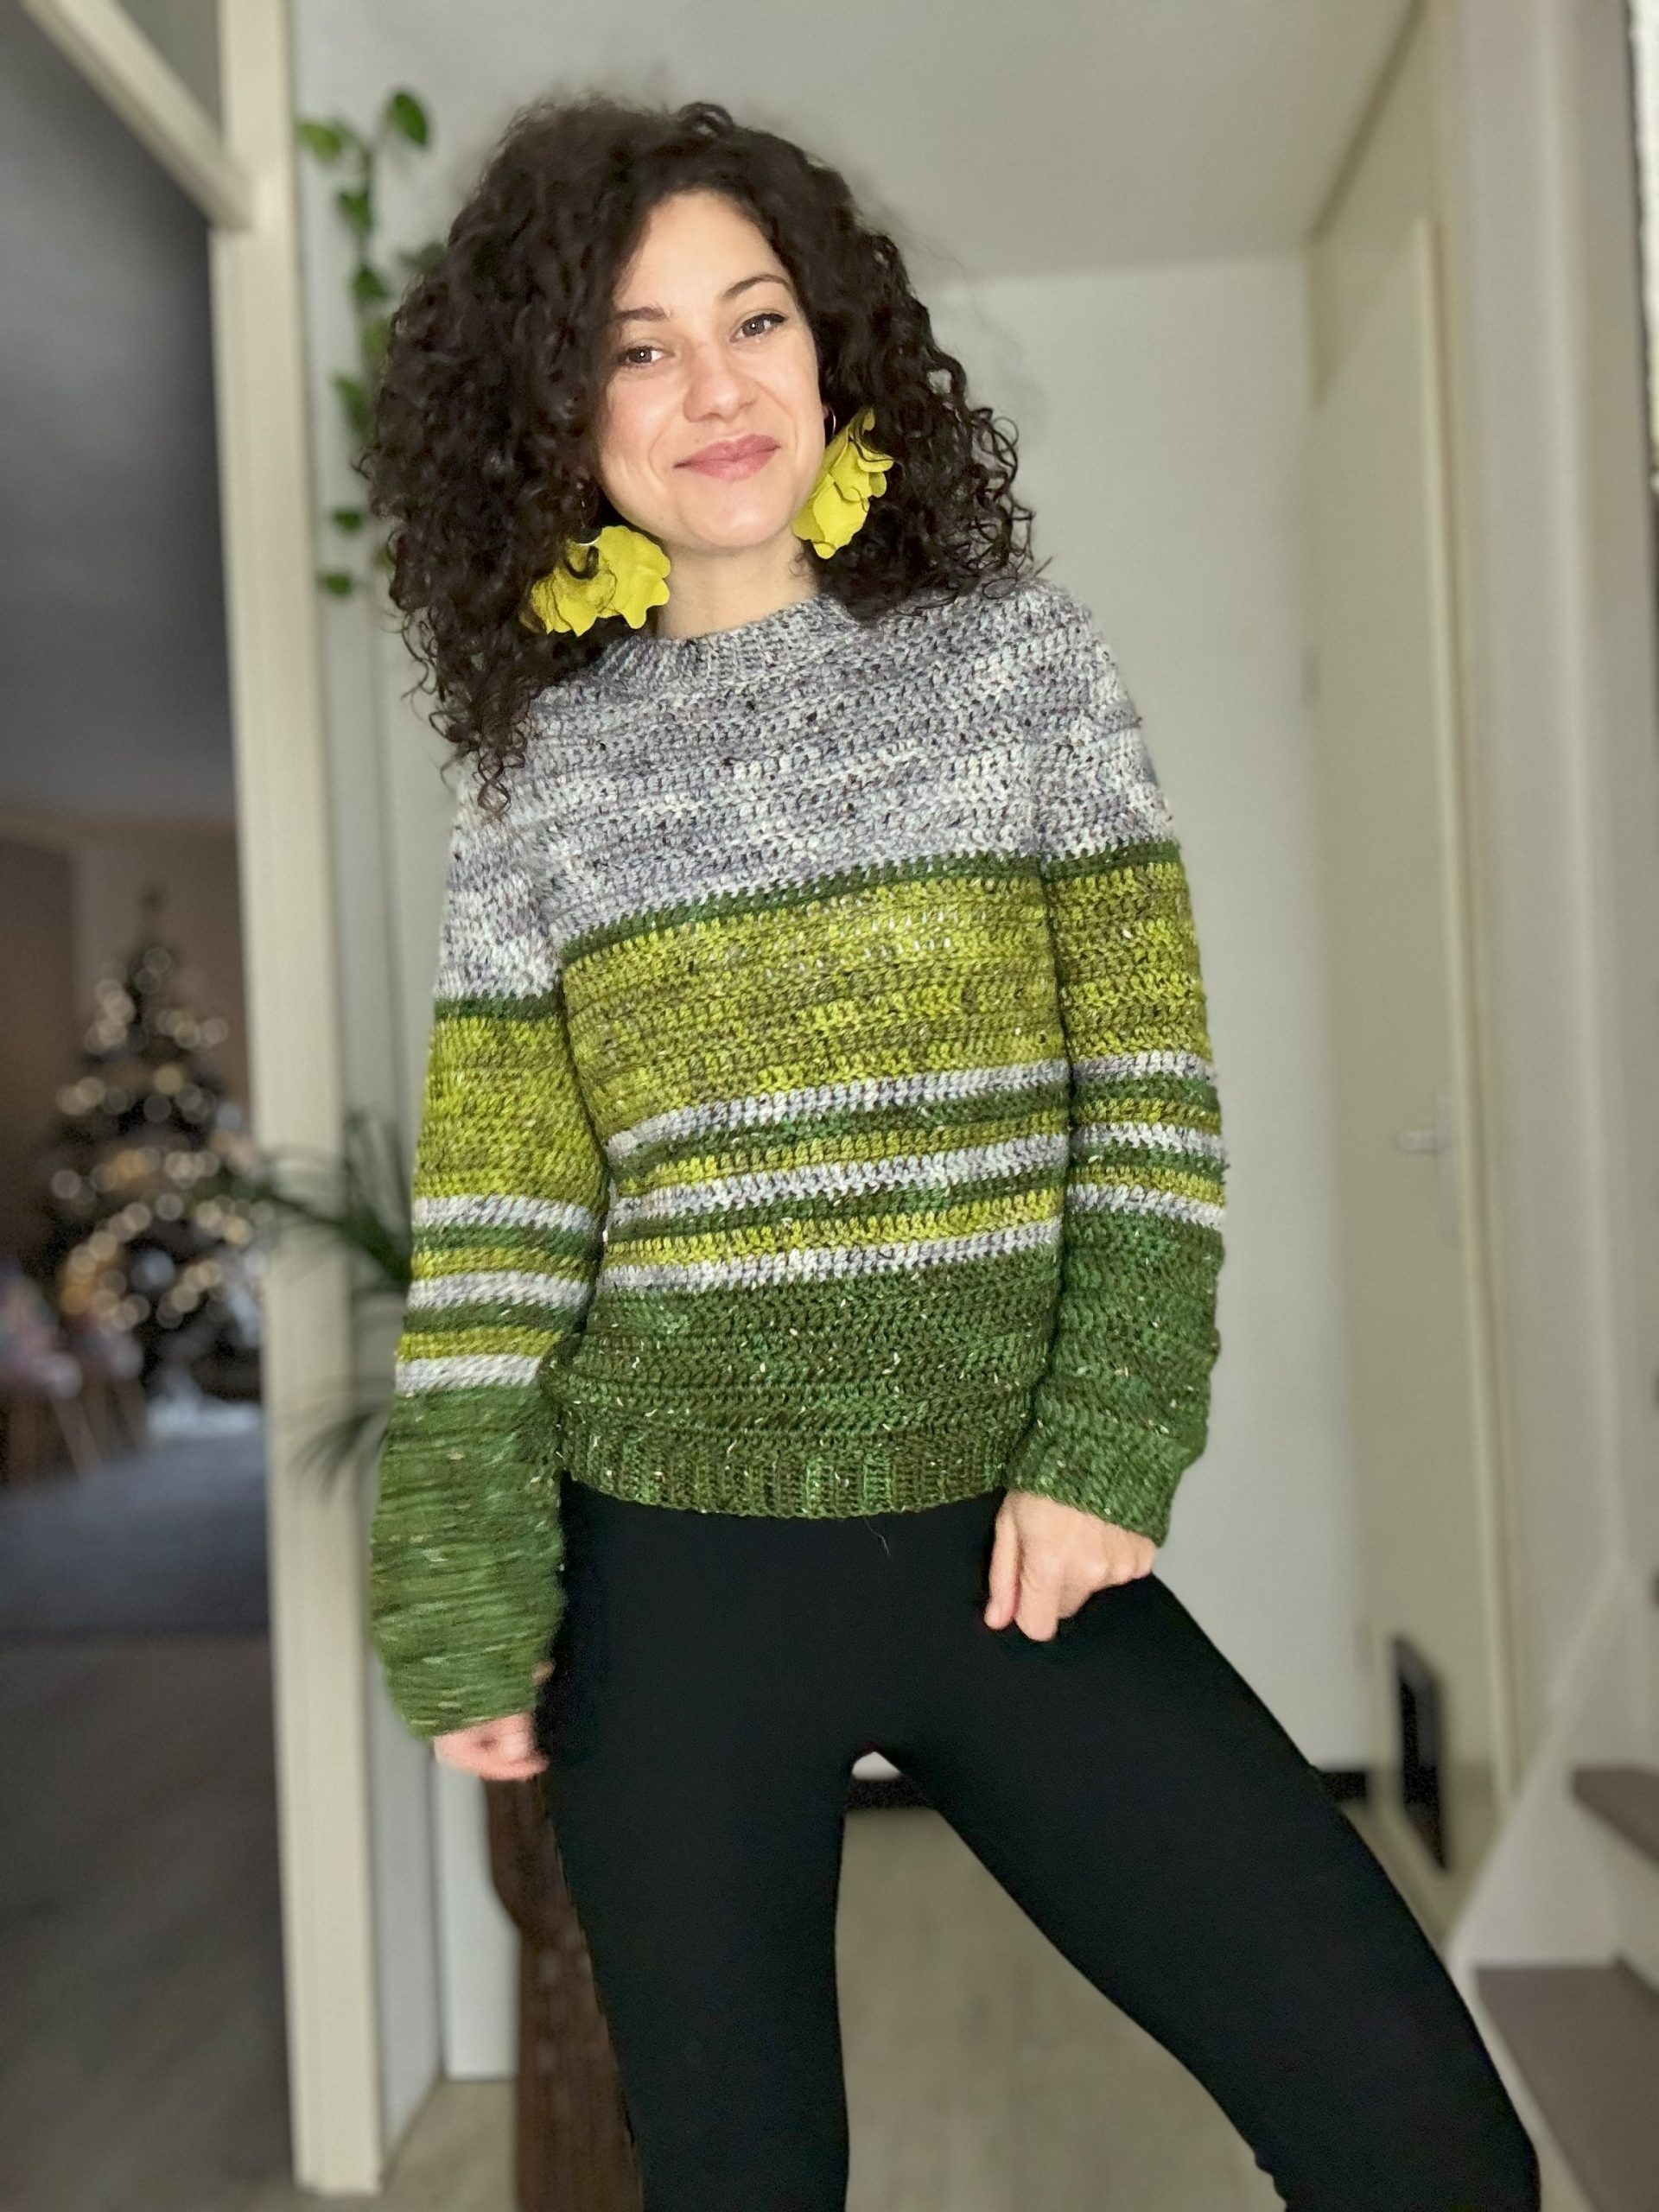
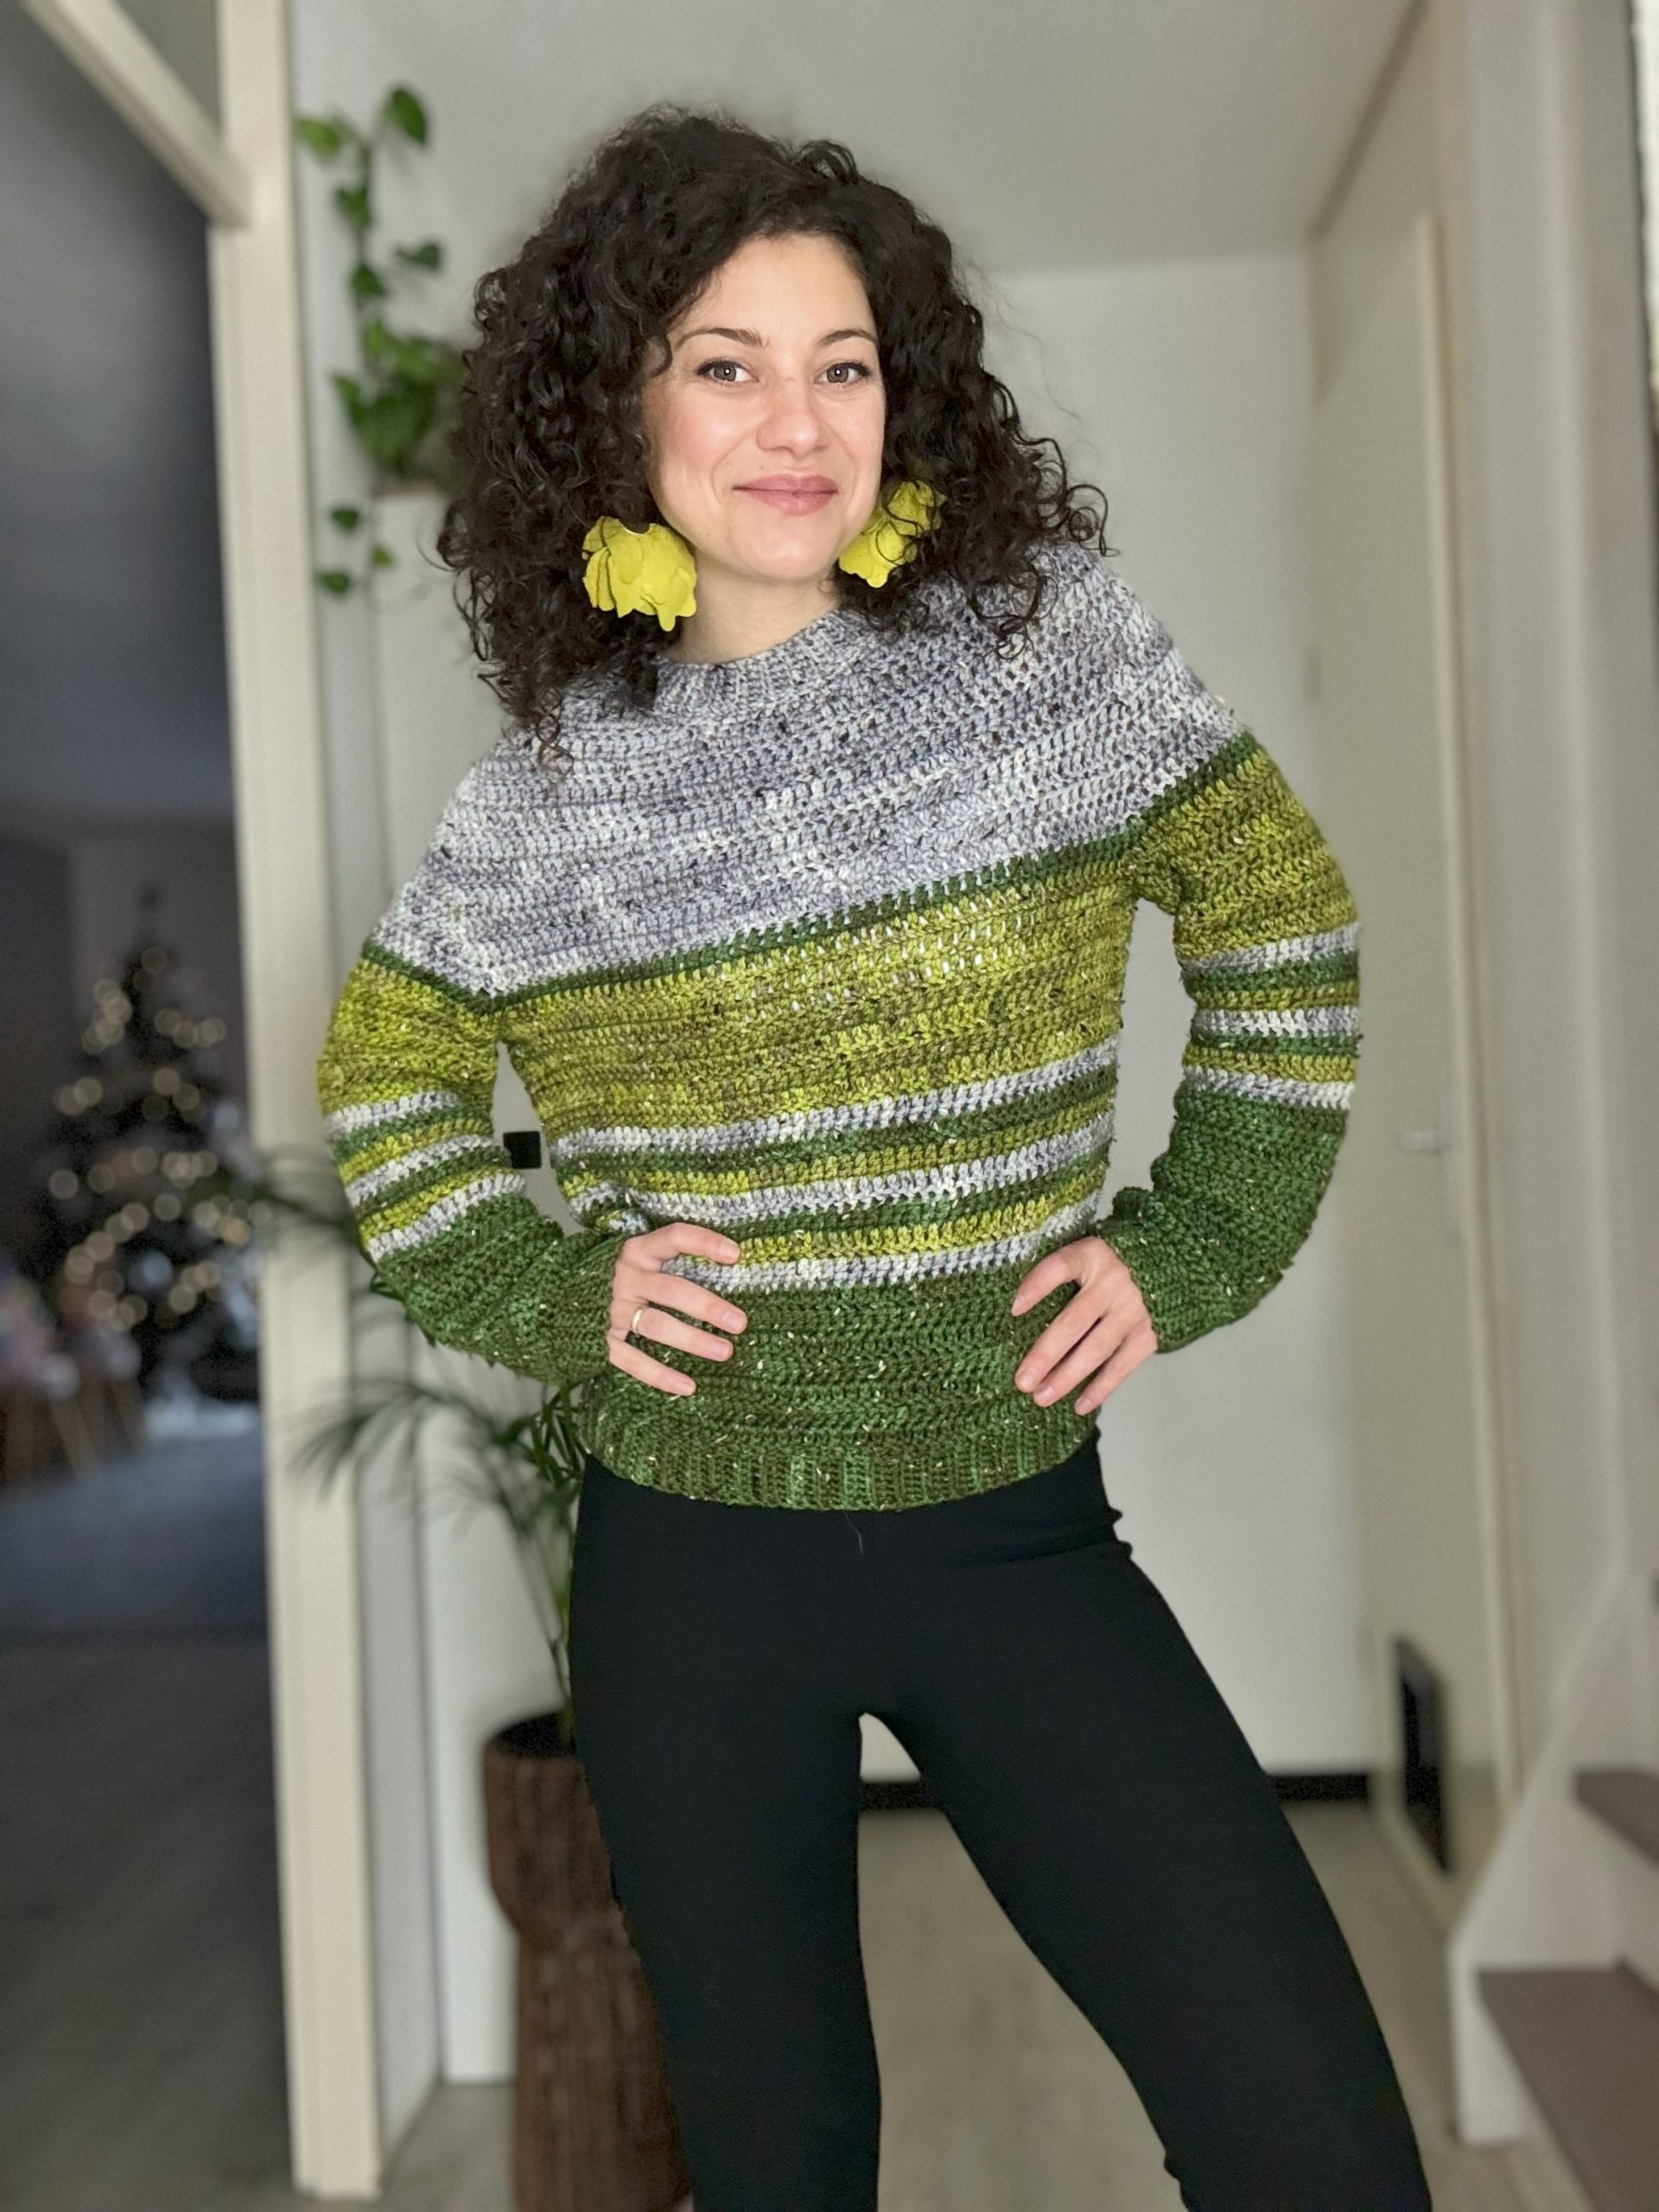
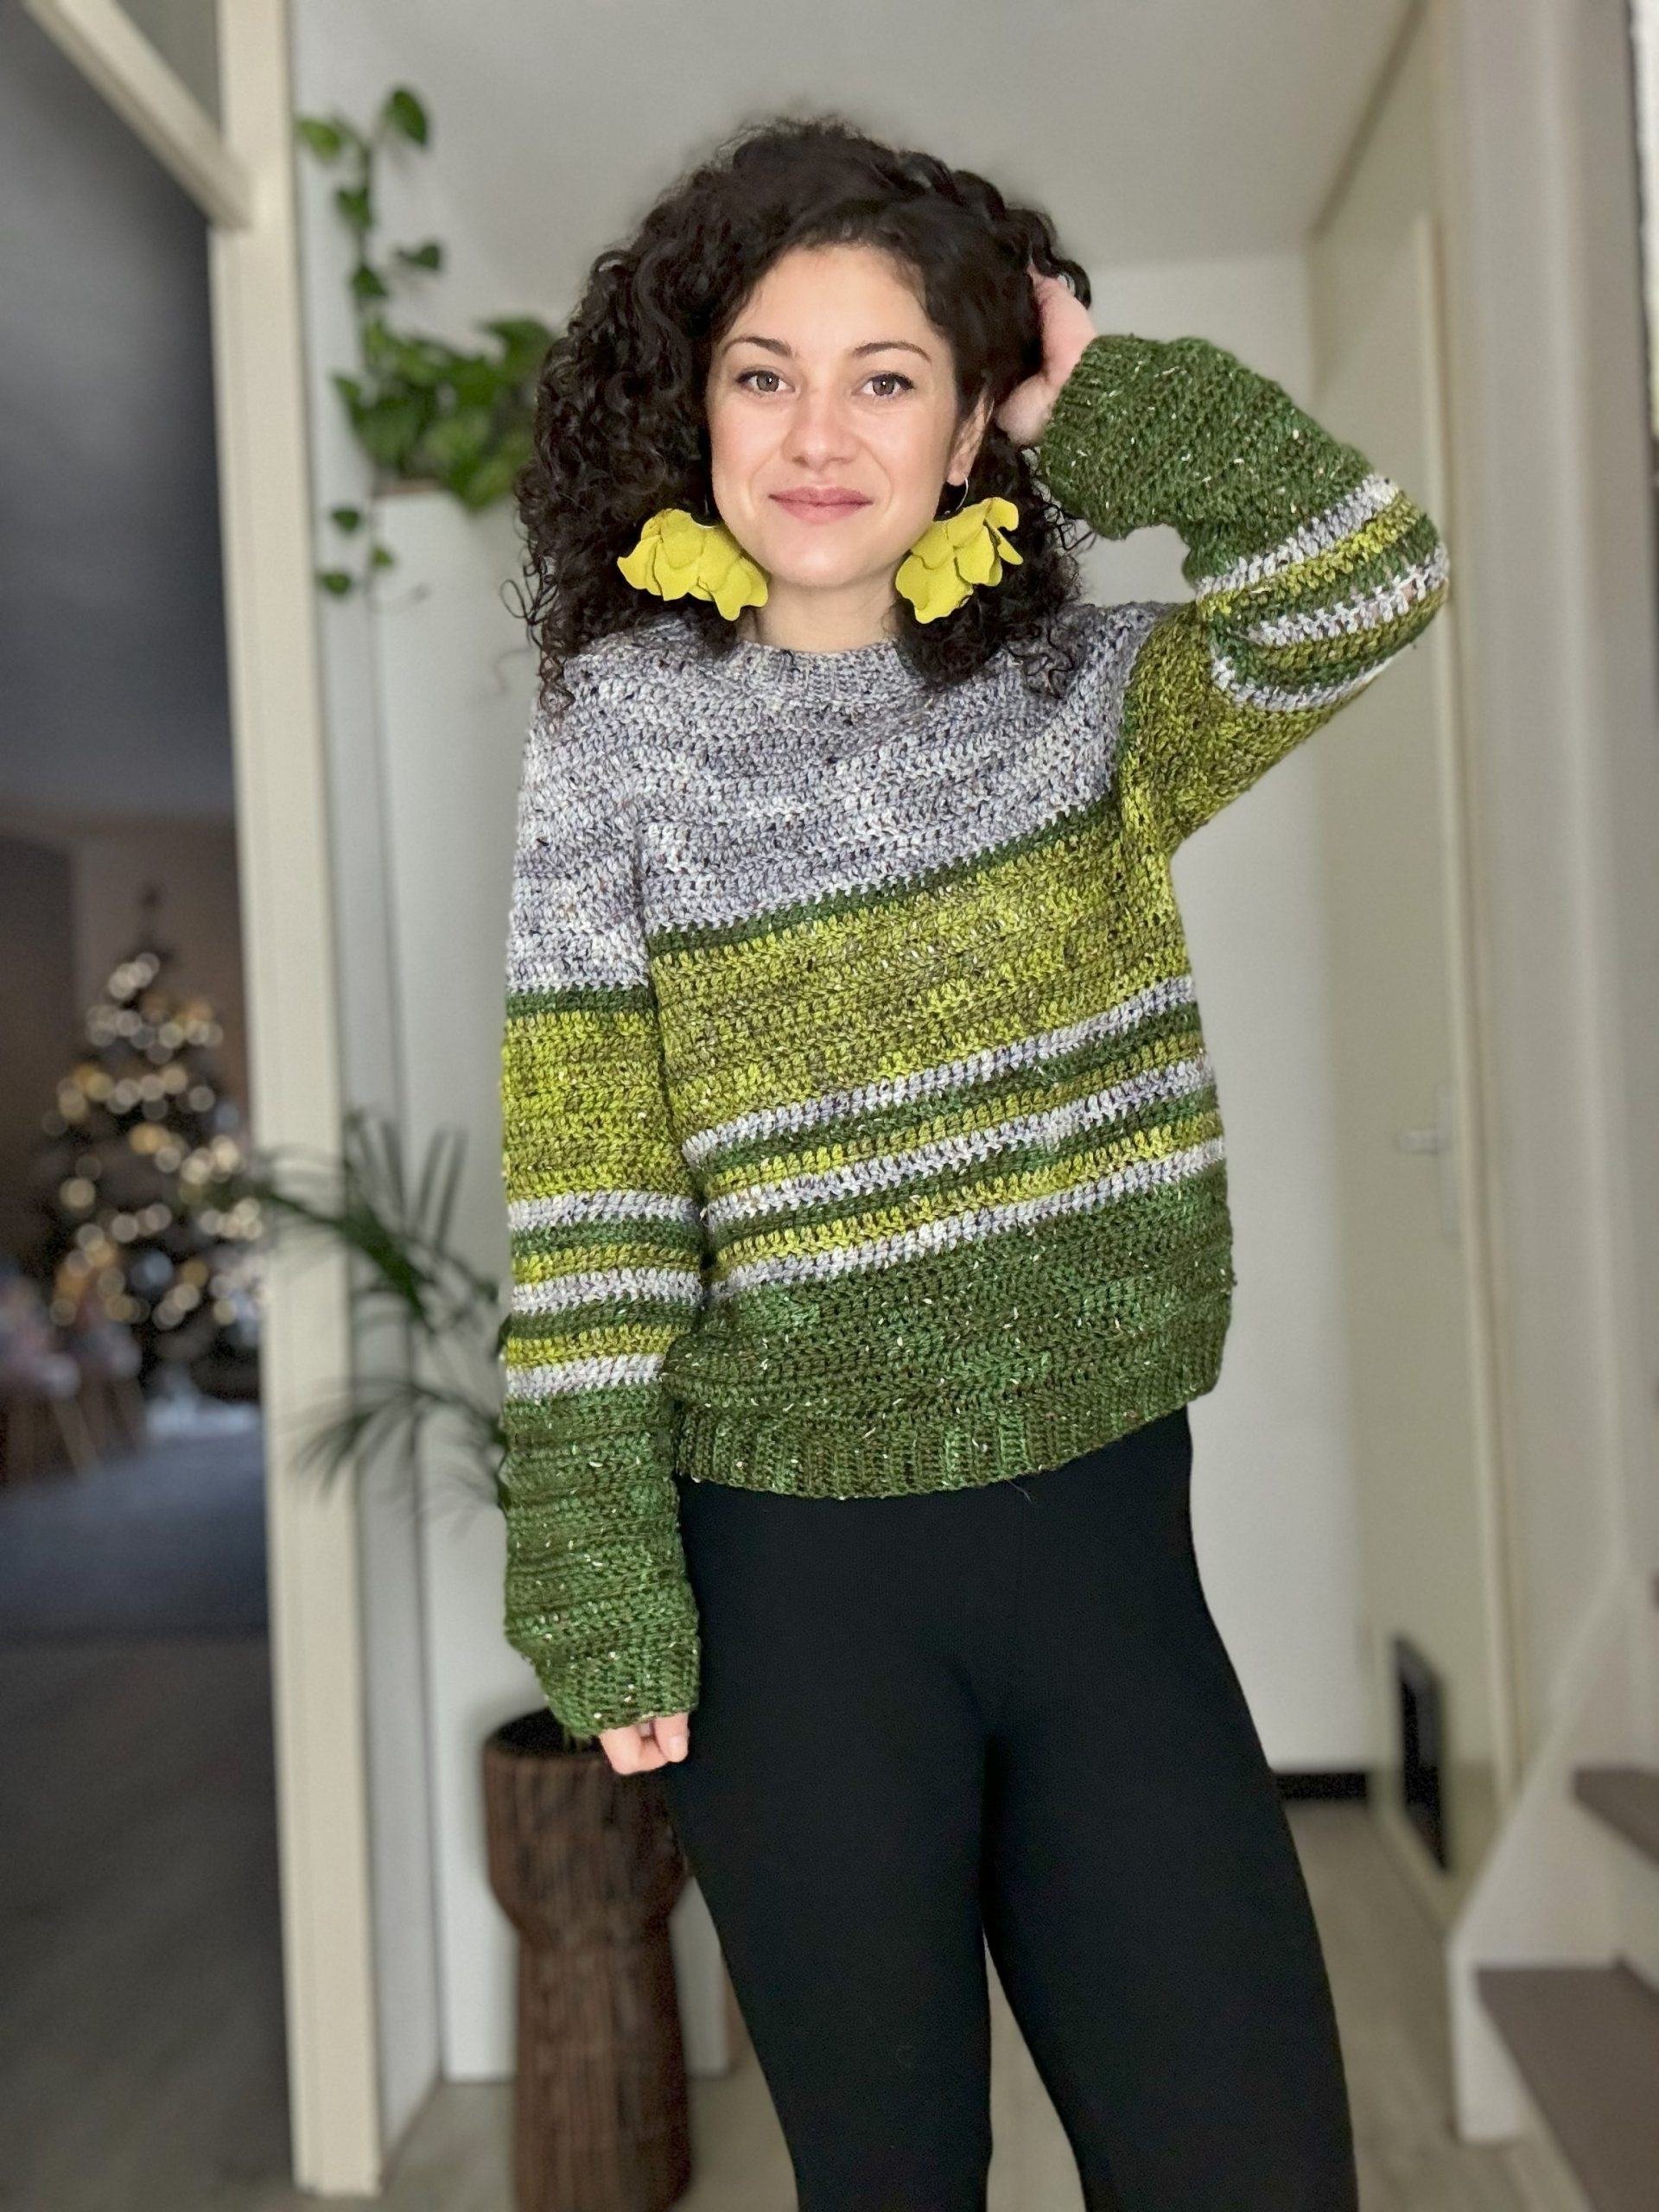
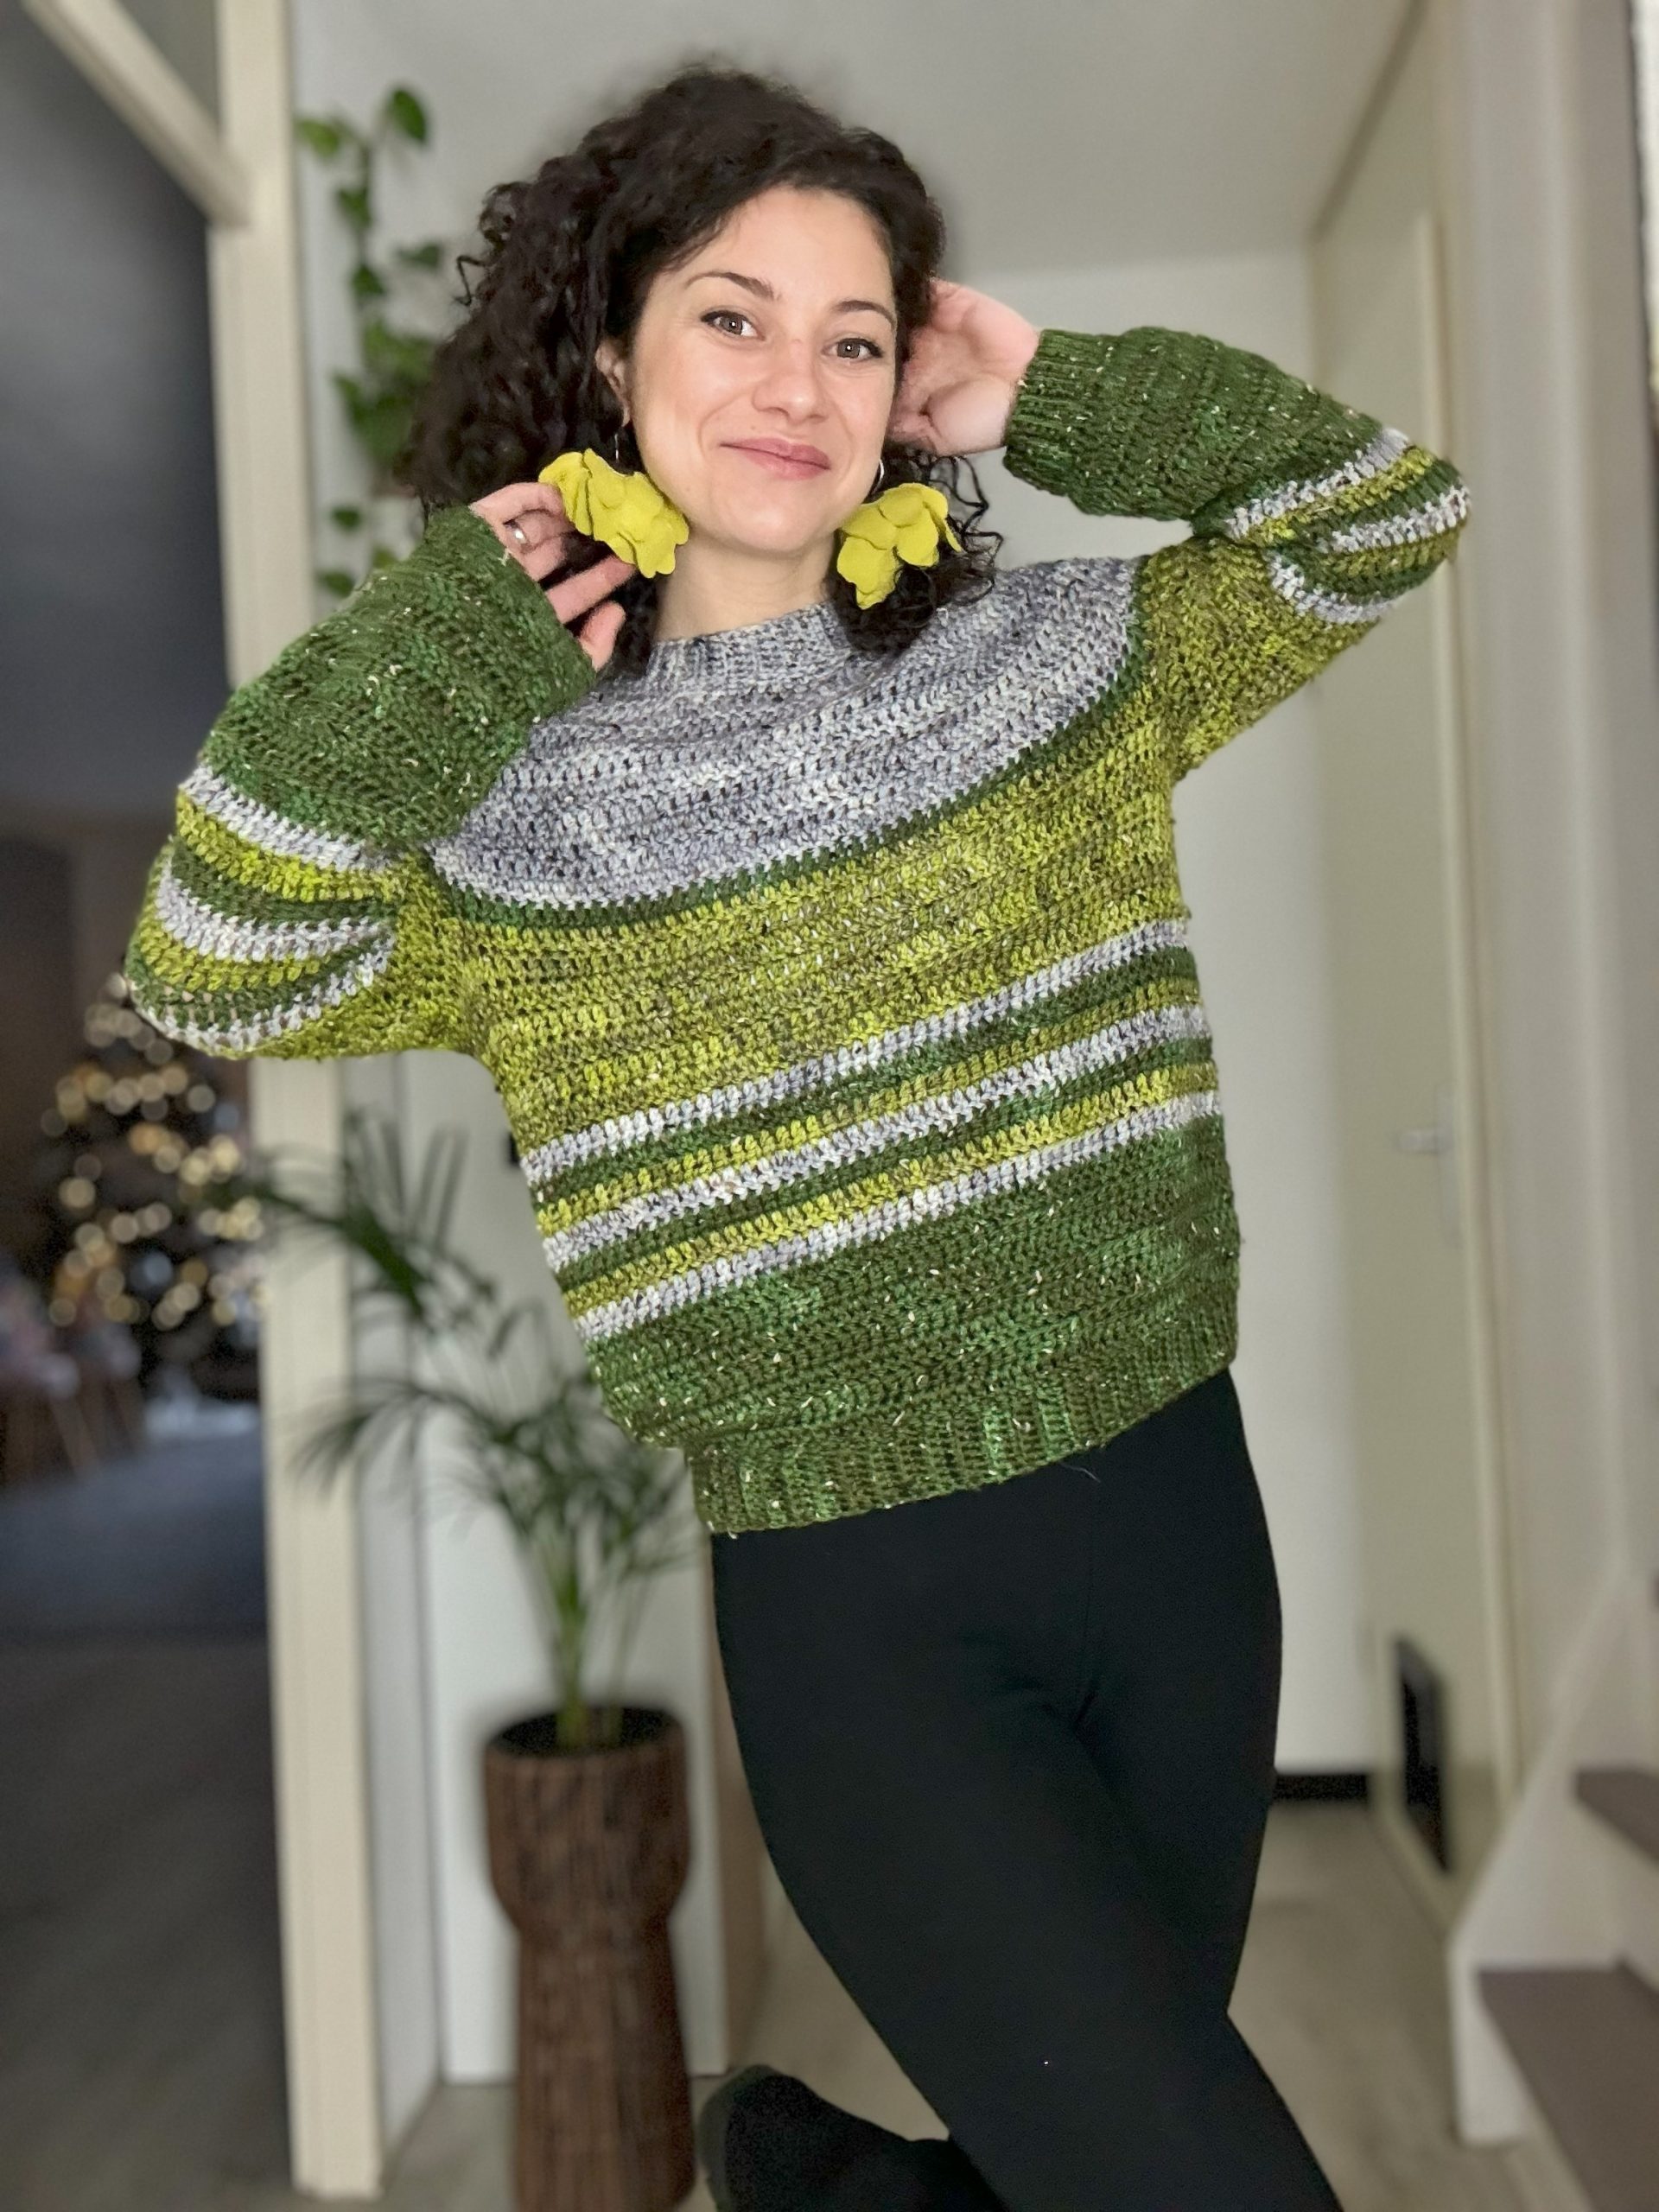
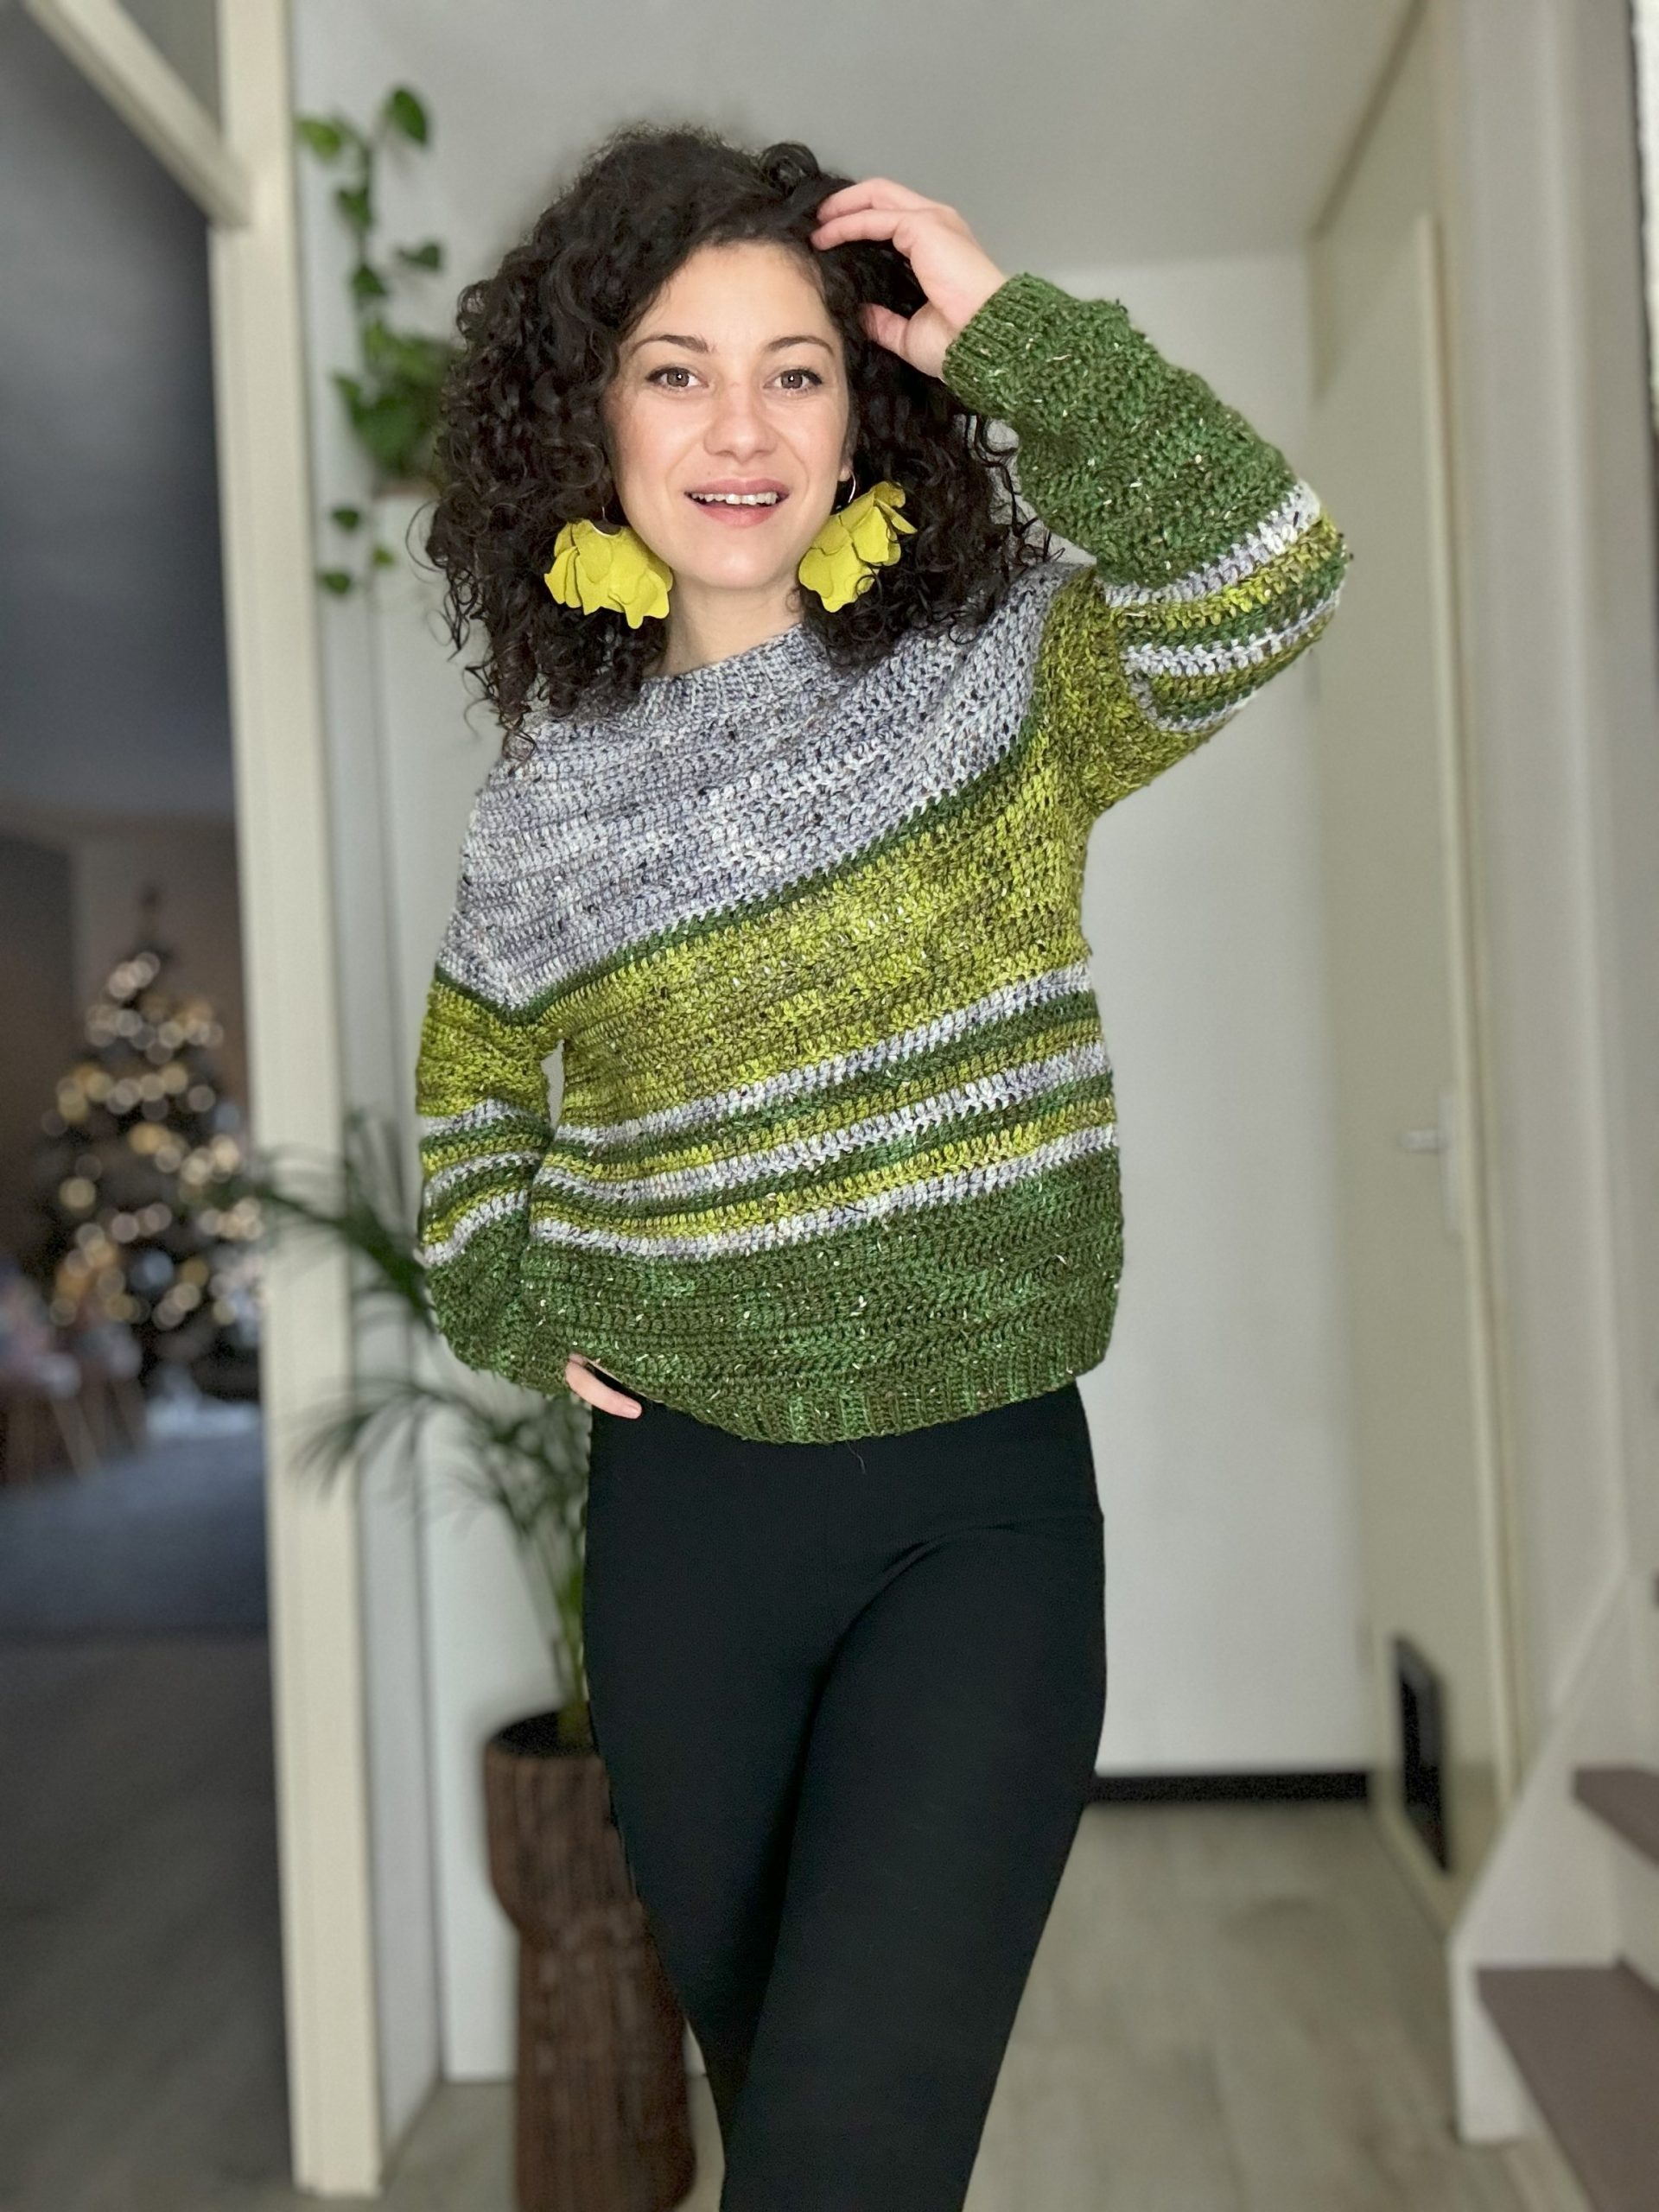
Hello, fellow crochet enthusiasts! I am excited to share something special with you today – the Fusion Sweater. Imagine this: I couldn’t decide whether to make it with stripes or color blocks, so I combined both ideas! This pattern will guide you through the process of creating your own Fusion Sweater, step by step. Even if the construction is new to you, I hope you will find the instructions easy to follow, making your crochet project easier.

I have also created a video tutorial to provide a more comprehensive understanding and visual demonstration. You can find the link at the end of this post.

So, get your hooks and yarn ready, and let’s create something amazing together!

Pentru Postarea in Limba Romana click aici

You can purchase the easily printable PDF pattern here at the links below.
MATERIALS

• Yarn: Size 4, Worsted weight yarn
• Crochet Hook:
o 4.5 mm crochet hook for the bottom and neckline Ribbing
o 4 mm crochet hook for the cuff Ribbing
o 5.5 mm crochet hook for the rest of the sweater
• yarn needle for weaving in ends
• at least 4 stitch markers
• Scissors

NOTES ABOUT DESIGN

The Fusion Sweater is a top-down sweater with a unique yoke construction.

The yoke is worked in 2 sections: the first one, increasing only the front and back panel, and the second one, increasing the sleeves. For bigger sizes, Section 2 has 2 Parts: one, increasing only the sleeves, and second, increasing the sleeves and the front and back panels.

After finishing the yoke, the piece is split into sleeves and body. The three parts are worked individually until the desired length.

MEASUREMENTS AND SIZES

The Fusion Sweater Pattern is available in 9 sizes, from XS up to 5X Large. The model is 168 cm tall, with an 86 cm Bust circumference, and wears a size  Small.
The numbers are written below as follows: XS (S, M, L) (XL, 2XL, 3XL, 4XL, 5XL); US sizes 0/2 (4/6, 8/10, 12/14) (14/16W, 18/20W, 22/24W, 26/28W, 30/32W)
All the measurements use as reference Standard Body Measurements by ASTM International.


Final Measurements of the Fusion Sweater
Neckline circ a: 43 cm (46, 49, 49) (49, 51, 54, 54, 54)
Cross Back b: 38cm (39, 40, 41), (41, 41, 43, 44, 46)
Bust Circ. c: 92 cm (95, 102, 108), (118, 128, 138, 148, 155)
Sleeve length d: 59 cm (61, 63, 65), (68, 68, 69, 75, 79)
Sleeve Circ. e: 33cm (34, 38, 39), (43, 44, 49, 53, 56)
Length f:53cm (55, 56, 59) (60, 60, 61, 65, 68)

YARN

For the Fusion Sweater, I used Genna Yarn Tweed Worsted which is composed of 85% Superwash Merino and 15% Dondegal Nep. The colors I used were Silver, Kaki, and Conifere. Each hank of yarn weighs 100 grams and has approximately 166 meters of yarn. 

Here’s an approximate breakdown of the yarn required for each size:

Conifere: 330 (360, 400, 440) (490, 530, 580, 670, 740) meters

Silver: 290 (310, 340, 380) (420, 450, 500, 570, 630) meters

Kaki: 200 (220, 240, 270) (300, 320, 350, 400, 440) meters

You will need the following number of hanks for each color, depending on the size you’re making:

Conifere: 2 (3, 3, 3) (3, 4, 4, 5, 5) hanks

Silver: 2 (2, 3, 3) (3, 3,4, 4, 4) hanks

Kaki: 2 (2, 2, 2) (2, 2, 3, 3, 3) hanks

Please note that the yardage requirements may vary depending on the length and color pattern you choose.

ABBREVIATIONS

Ch – chain
Sc – single crochet
Scblo – single crochet back loop
dc – double crochet
ss – slip stitch
St(s) – stitch(es)
RS – right side
WS – wrong side
R – round
** – repeated section.

TENSION

Using 4.5.mm crochet hook in the Ribbing Stitch Pattern
14sts (scblo) = 10cm
14 rows = 10cm

Using a 5.5 mm crochet hook in double crochet
12sts = 10cm
7.5 rounds = 10cm

You can purchase the easily printable PDF pattern here at the links below.
STITCH PATTERN AND TECHNIQUES

The Fusion Sweater stitch patterns are double crochet, and single crochet in the back loop only for Ribbing.

Single crochet in the back loop
Insert the hook into the back loop of the next st, yarn over, pull out a loop, yarn over, and pass through both loops on your hook.

Double Crochet
Yarn over, insert the hook into the next stitch, yarn over, pull out a loop, yarn over, pull it through the first 2 loops on your hook, yarn over, and pass it through both loops on your hook.

The way we’re making this sweater is called “saddle sleeve.” It means we’re doing the top part, the yoke, in two steps.

First, in Section 1, we increase stitches to shape the back and front panels. Then, in Section 2, we increase stitches to shape the sleeves. This way, we get a nice and comfy fit for the sweater.

PATTERN NOTES

To begin with, work the first section of the yoke flat, and remember to turn after each row. After completing this section, work the rest of the sweater in the round, ensuring to close each round with a slip stitch into the first double crochet. To avoid any twisting of the work, remember to turn after each round and begin each round with two chains. The two chains do not count as the first double crochet. Optionally, you can start each round with one single crochet on top of the other single crochet. For a better understanding of this starting stitch, you can refer to the video tutorial available here.

Stitch markers can be used to mark the raglan stitches. This will make it easier to identify the stitches where you need to increase and help ease the increasing rows.

COLOR PATTERN:

The instructions below don’t have specific colors mentioned, so you can choose any colors you like for your project.

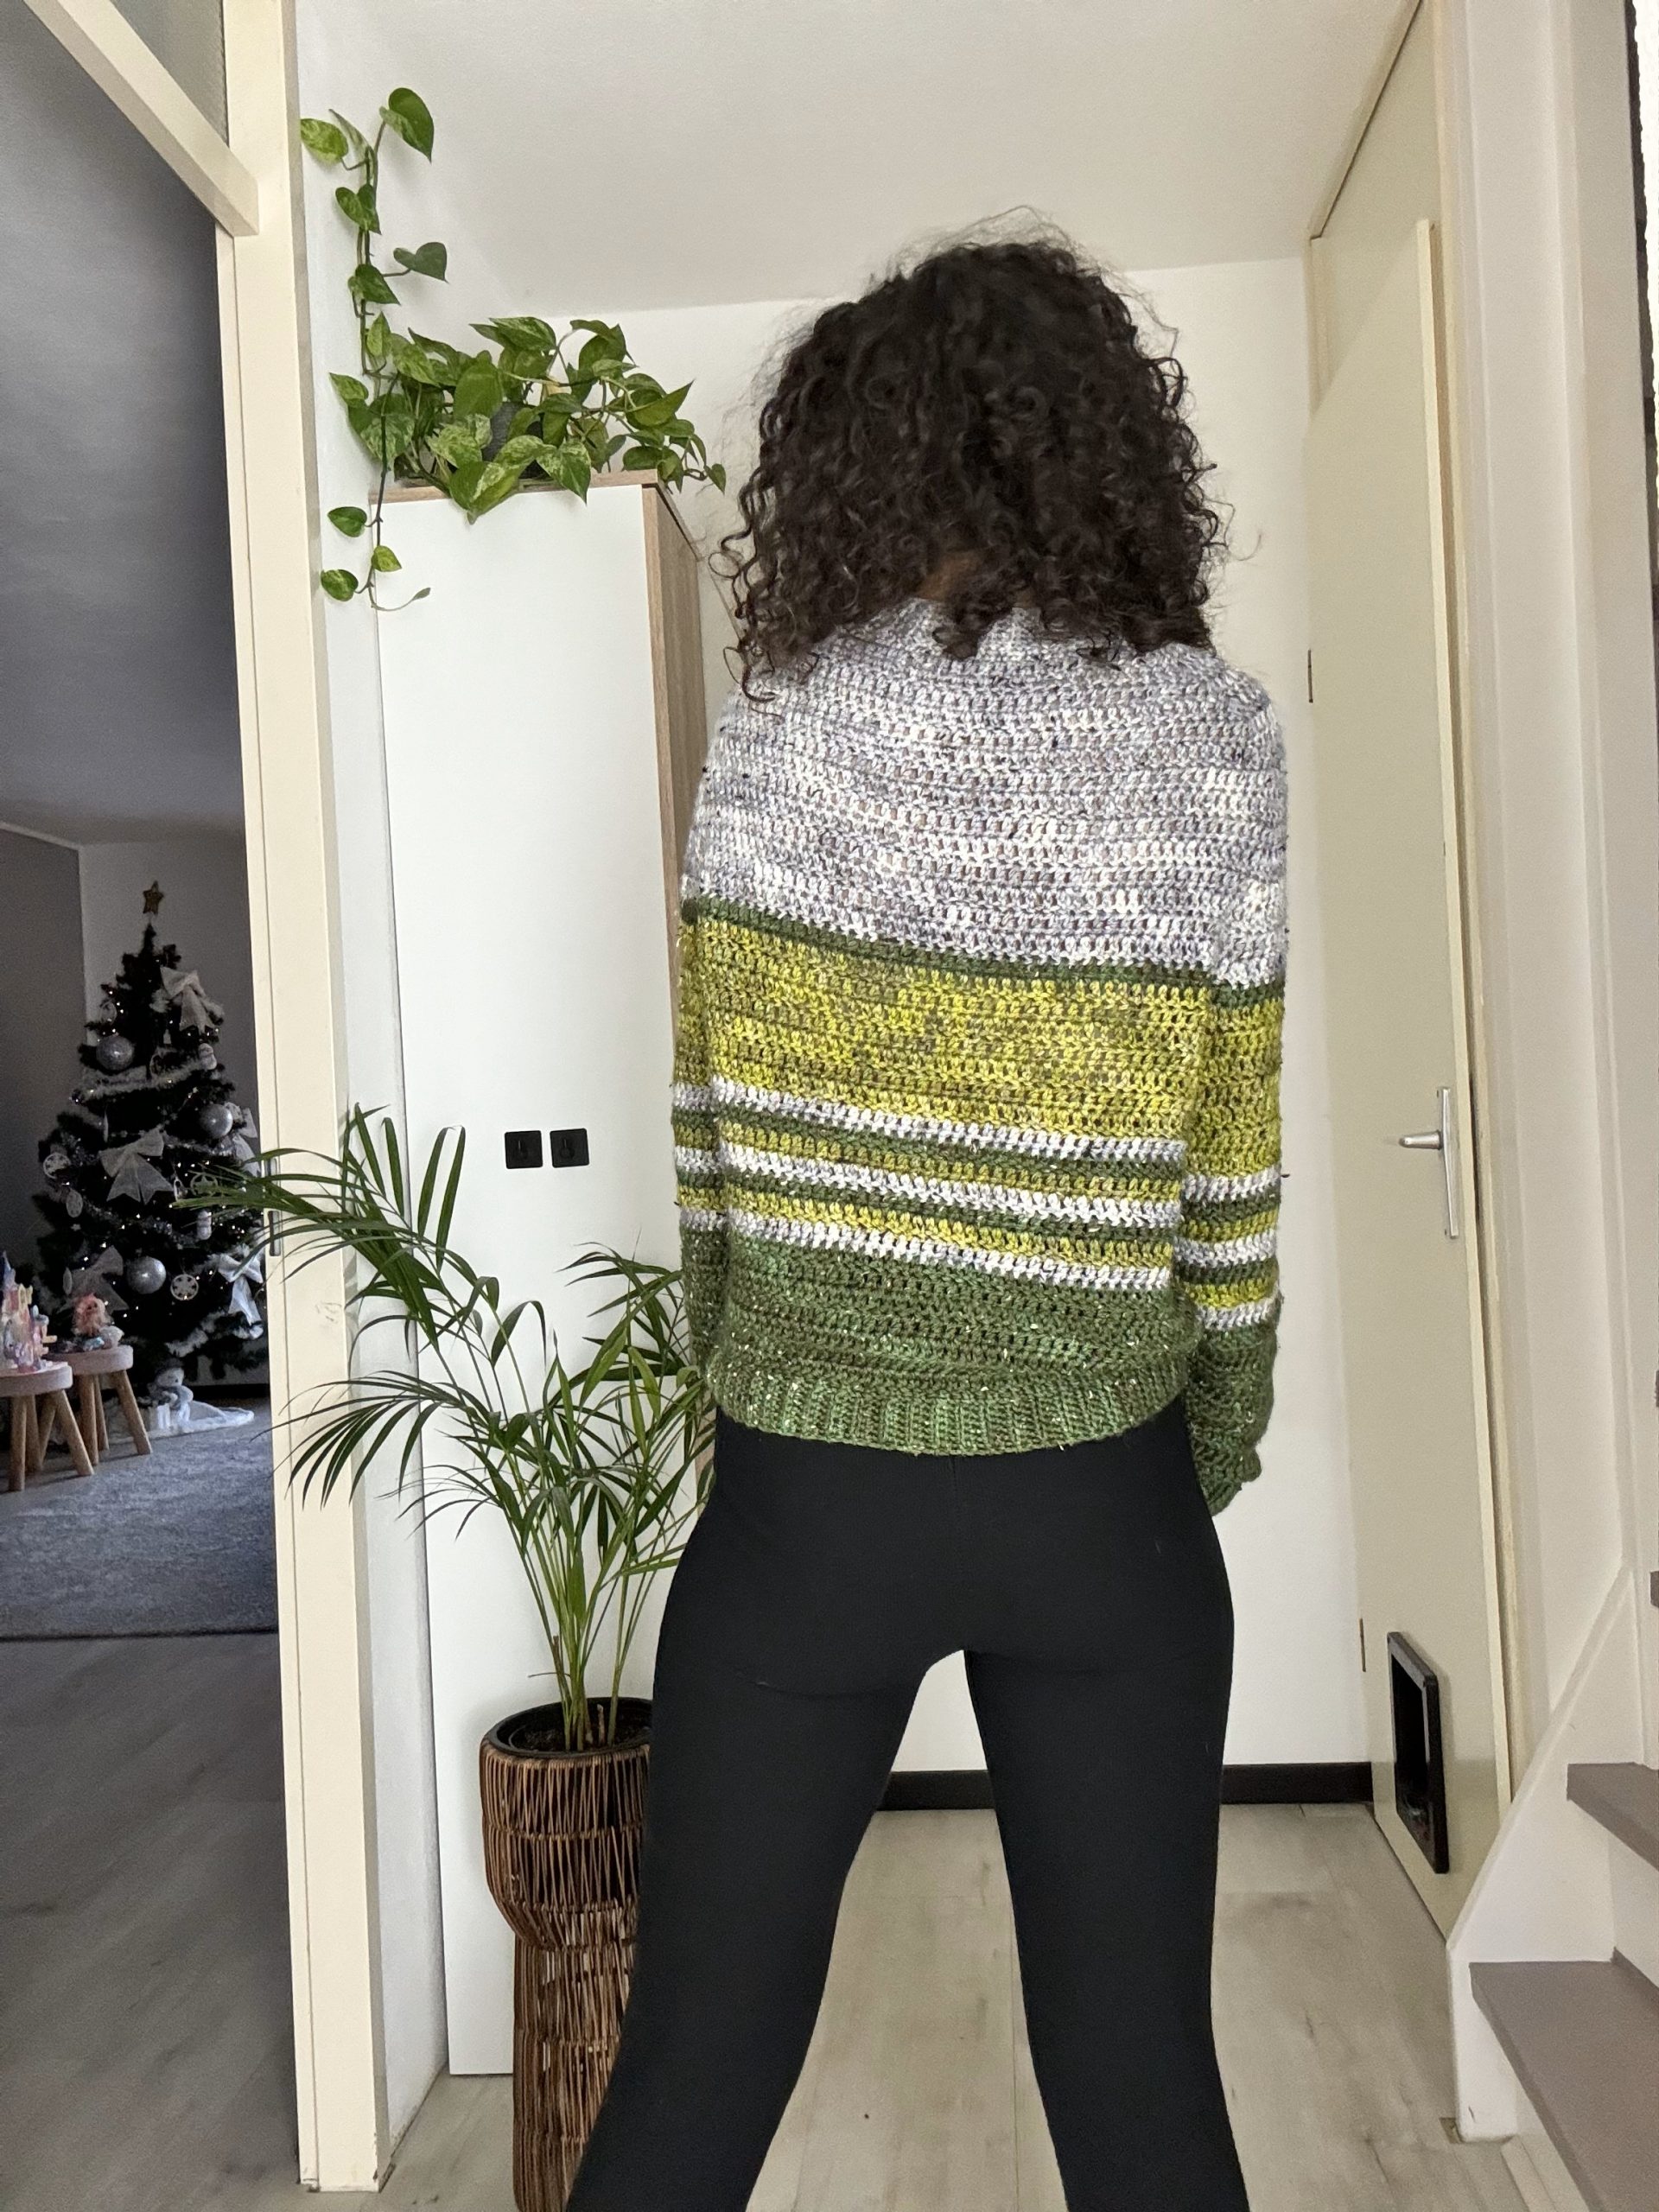
For a reference, here’s how the colors were used in the sample:

Use Silver Color for the entire yoke, except the last round.
Switch to Conifere for the last round of the yoke.
Divide the body into three sections. In the sample, I did 21 rounds for the length, with each section having 7 rounds.
Start the first 7 rounds with the Kaki color.
In the second section, create stripes by changing the color after each round.
In the third section, use Conifere.
For the sleeves, follow the same pattern. If you need more length, add more rounds in the third section.
Feel free to get creative with your color choices!

You can purchase the easily printable PDF pattern here at the links below.
INSTRUCTIONS

YOKE SECTION 1 – INCREASING FRONT AND BACK PANELS

Use a 5.5 mm crochet hook.

The Yoke section incorporates four additional stitches designated as raglan stitches. All increases will occur both before and after these stitches.

Initiating the Yoke, our primary focus is on shaping the neckline by lowering the front panel, using short rows. The Yoke section starts with a single stitch allocated to the left and right sides of the front panel. Gradual increases will be made in each row, building upon these stitches. In the final row of the Yoke’s initial segment, we add extra stitches to ensure parity between the stitch count on the front and back panels.

The entire first section of the YOKE is worked with these short rows; this means that for bigger sizes the neckline will be lower in front as we work more short rows. If you want to make it higher, you can join the front panels before finishing the first section of the YOKE.

For a more comprehensive understanding, refer to the visual demonstration in the video tutorial linked here,

For the Yoke Section 1 we will work 5 (5, 5, 6) (6, 6, 6, 7, 7) rows

At the end of section 1 we will have:
– 45 (47, 49, 53) (53, 53, 55, 59, 59) sts for – the back and front panels
– 5 (5, 5, 5) (5, 7, 7, 7, 7) sts for the sleeves
– 4 raglan stitches

Start: ch 41 (43, 45, 45) (45, 49, 51, 51, 51) sts

All these stitches will be divided as follows:
– 25 ( 27, 29, 29) (29, 29, 31, 31, 31) sts for the back panel;
– 5 (5, 5, 5) (5, 7, 7, 7, 7) sts for the sleeves
– 1st for the right and 1st for the left of the front panel
– 4 stitches for the raglan lines

R1: ch3, 2dc in the 4th ch, 1dc in next st (raglan stitch – place a stitch marker) 1dc in next 5 (5, 5, 5) (5, 7, 7, 7, 7) sts, 1dc in next st (raglan st – place a stitch marker), 3dc in next st, 1dc in next 23 (25, 27, 27) (27, 27, 29, 29, 29) sts, 3dc in next st, 1dc in next st (raglan st – place a stitch marker, 1dc in next 5 (5, 5, 5) (5, 7, 7, 7, 7) sts, 1dc in next st (raglan st – place a st marker), 3dc in last st; ch3 and turn

Total sts:
– 29 (31, 33, 33) (33, 33, 35, 35, 35) sts for the back panel
– 5 (5, 5, 5) (5, 7, 7, 7, 7) sts for the sleeves
– 3sts for each side of the front panel
– 4 raglan stitches

R2: 2dc in the first st, 1dc in next st, 3dc in next st (raglan increase front panel), 1dc in next st (raglan stitch – place a stitch marker) 1dc in next 5 (5, 5, 5) (5, 7, 7, 7, 7) sts, 1dc in next st (raglan st – place a stitch marker), 3dc in next st, 1dc in next 27 (29, 31, 31) (31, 31, 33, 33, 33) sts, 3dc in next st, 1dc in next st (raglan st – place a stitch marker, 1dc in next 5 (5, 5, 5) (5, 7, 7, 7, 7) sts, 1dc in next st (raglan st – place a st marker), 3dc in next st (raglan increase front panel), 1dc in next st, 3dc in last st; ch3 and turn
Total sts:
– 33 (35, 37, 37) (37, 37, 39, 39, 39) sts for the back panel
– 5 (5, 5, 5) (5, 7, 7, 7, 7) sts for the sleeves
– 7sts for each side of the front panel
– 4 raglan stitches

R3: 2dc in the first st, 1dc in next 5sts, 3dc in next st (raglan increase front panel), 1dc in next st (raglan stitch – place a stitch marker) 1dc in next 5 (5, 5, 5) (5, 7, 7, 7, 7) sts, 1dc in next st (raglan st – place a stitch marker), 3dc in next st, 1dc in next 31 (33, 35, 35) (35, 35, 37, 37, 37) sts, 3dc in next st, 1dc in next st (raglan st – place a stitch marker, 1dc in next 5 (5, 5, 5) (5, 7, 7, 7, 7) sts, 1dc in next st (raglan st – place a st marker), 3dc in next st (raglan increase front panel), 1dc 1n next 5sts, 3dc in last st; ch3 and turn
Total sts:
– 37 (39, 41, 41) (41, 41, 43, 43, 43) sts for the back panel
– 5 (5, 5, 5) (5, 7, 7, 7, 7) sts for the sleeves
– 11sts for each side of the front panel
– 4 raglan stitches

R4: 2dc in the first st, 1dc in next 9sts, 3dc in next st (raglan increase front panel), 1dc in next st (raglan stitch – place a stitch marker) 1dc in next 5 (5, 5, 5) (5, 7, 7, 7, 7) sts, 1dc in next st (raglan st – place a stitch marker), 3dc in next st, 1dc in next 35 (37, 39, 39) (39, 39, 41, 41, 41) sts, 3dc in next st, 1dc in next st (raglan st – place a stitch marker, 1dc in next 5 (5, 5, 5) (5, 7, 7, 7, 7) sts, 1dc in next st (raglan st – place a st marker), 3dc in next st (raglan increase front panel), 1dc 1n next 9sts, 3dc in last st; ch3 and turn
Total sts:
– 41 (43, 45, 45) (45, 45, 47, 47, 47) sts for the back panel
– 5 (5, 5, 5) (5, 7, 7, 7, 7) sts for the sleeves
– 15sts for each side of the front panel
– 4 raglan stitches

You can purchase the easily printable PDF pattern here at the links below.
Sizes XS, S and M only

Please note that R5 (Round 5) is the final row of the first section of the YOKE, designed specifically for sizes XS, S, and M. During this round, we need to join the front panels. We will follow the usual procedure for this row, and upon completion of the row, we will work foundation double crochet stitches to finalize the front panel. For a more comprehensive understanding of this process, please refer to the video tutorial linked here, which includes a visual demonstration.

R5: 2dc in the first st, 1dc in next 13sts, 3dc in next st (raglan increase front panel), 1dc in next st (raglan stitch – place a stitch marker) 1dc in next 5 (5, 5) sts, 1dc in next st (raglan st – place a stitch marker), 3dc in next st, 1dc in next 39 (41, 43) sts, 3dc in next st, 1dc in next st (raglan st – place a stitch marker, 1dc in next 5 (5, 5) sts, 1dc in next st (raglan st – place a st marker), 3dc in next st (raglan increase front panel), 1dc in next 13sts, 3dc in last st, 7 (9, 11) foundation double crochet, sl st into the third ch to close the round.

Cut the yarn;

We cut the yarn so that the joining line would not be in the front in the upcoming rounds. Now, we’ll start again by attaching the yarn to the right raglan stitch on the back panel

Total sts:
– 45 (47, 49) sts for the back and front panels
– 5 (5, 5) sts for the sleeves
– 4 raglan stitches

For sizes XS, S, and M, YOKE SECTION 1 is done; move to YOKE SECTION 2

Sizes L, XL, 2XL, 3XL, 4XL, and 5XL only

R5: 2dc in the first st, 1dc in next 13sts, 3dc in next st (raglan increase front panel), 1dc in next st (raglan stitch – place a stitch marker) 1dc in next – (-, -, 5) (5, 7, 7, 7, 7) sts, 1dc in next st (raglan st – place a stitch marker), 3dc in next st, 1dc in next – (-, -, 43) (43, 43, 45, 45, 45) sts, 3dc in next st, 1dc in next st (raglan st – place a stitch marker, 1dc in next – (-, -, 5) (5, 7, 7, 7, 7) sts, 1dc in next st (raglan st – place a st marker), 3dc in next st (raglan increase front panel), 1dc in next 13sts, 3dc in last st; ch3 and turn

Total sts:
– – (-, -, 49) (49, 49, 51, 51, 51) sts for the back panel
– – (-, -, 5) (5, 7, 7, 7, 7) sts for the sleeves
– 19sts for each side of the front panel
– 4 raglan stitches

Sizes L, XL, 2XL, and 3XL only

Please note that R6 is the final row of the first section of the YOKE, designed specifically for sizes L, XL, 2XL, and 3XL. During this round, we need to join the front panels. We will follow the usual procedure for this row, and upon completion of the row, we will work foundation double crochet stitches to finalize the front panel. For a more comprehensive understanding of this process, please refer to the video tutorial linked here, which includes a visual demonstration.

R6:2dc in the first st, 1dc in next 17sts, 3dc in next st (raglan increase front panel), 1dc in next st (raglan stitch – place a stitch marker) 1dc in next – (-, -, 5) (5, 7, 7)sts, 1dc in next st (raglan st – place a stitch marker), 3dc in next st, 1dc in next – (-, -, 47) (47, 47, 49) sts, 3dc in next st, 1dc in next st (raglan st – place a stitch marker, 1dc in next- (-, -, 5) (5, 7, 7)sts, 1dc in next st (raglan st – place a st marker), 3dc in next st (raglan increase front panel), 1dc in next 17sts, 3dc in last st, – (-, -, 7) (7, 7, 9)foundation double crochet, sl st into the third ch to close the round.

Cut the yarn;

We cut the yarn so that the joining line not to be in the front in the upcoming rounds. Now, we’ll start again by attaching the yarn to the right raglan stitch on the back panel

Total sts:
– – (-, -, 53) (53, 53, 55)sts for the back and front panels
– – (-, -, 5) (5, 7, 7)sts for the sleeves
– 4 raglan stitches

For sizes L, XL, 2XL, and 3XL, YOKE SECTION 1 is done; move to YOKE SECTION 2

Sizes 4XL, and 5XL only

R6: 2dc in the first st, 1dc in next 17sts, 3dc in next st (raglan increase front panel), 1dc in next st (raglan stitch – place a stitch marker) 1dc in next – (-, -, -) (-, -, -, 7, 7) sts, 1dc in next st (raglan st – place a stitch marker), 3dc in next st, 1dc in next – (-, -, -) (-, -, -, 49, 49) sts, 3dc in next st, 1dc in next st (raglan st – place a stitch marker, 1dc in next – (-, -, -) (-, -, -, 7, 7) sts, 1dc in next st (raglan st – place a st marker), 3dc in next st (raglan increase front panel), 1dc in next 17sts, 3dc in last st; ch3 and turn

Total sts:
– – (-, -, -) (-, -, -, 55, 55) sts for the back panel
– – (-, -, -) (-, -, -, 7, 7) sts for the sleeves
– 23sts for each side of the front panel
– 4 raglan stitches

R7: 2dc in the first st, 1dc in next 21sts, 3dc in next st (ragrlan increase front panel), 1dc in next st (raglan stitch – place a stitch marker) 1dc in next – (-, -, -) (-, -, -, 7, 7) sts, 1dc in next st (raglan st – place a stitch marker), 3dc in next st, 1dc in next – (-, -, -) (-, -, -, 53, 53) sts, 3dc in next st, 1dc in next st (raglan st – place a stitch marker, 1dc in next – (-, -, -) (-, -, -, 7, 7) sts, 1dc in next st (raglan st – place an st marker), 3dc in next st (raglan increase front panel), 1dc in next 21sts, 3dc in last st, – (-, -, -) (-, -, -, 5, 5) foundation double crochet, l st into the third ch to close the round.

Cut the yarn;

We cut the yarn so that the joining line not to be in the front in the upcoming rounds. Now, we’ll start again by attaching the yarn to the right raglan stitch on the back panel

Total sts:
– – (-, -, -) (-, -, -, 59, 59) sts for the back and front panels
– – (-, -, -) (-, -, -, 7, 7) sts for the sleeves
– 4 raglan stitches

For sizes 4XL, and 5XL, YOKE SECTION 1 is done; move to YOKE SECTION 2

After finishing the YOKE SECTION 1 you should have:
– 45 (47, 49, 53) (53, 53, 55, 59, 59) sts for – the back and front panels
– 5 (5, 5, 5) (5, 7, 7, 7, 7) sts for the sleeves
– 4 raglan stitches

YOKE SECTION 2 – INCREASING SLEEVES

For all sizes, cut the yarn after completing YOKE SECTION 1, then reconnect it to the right raglan stitch on the back panel.

The rest of the sweater will be made in the round, but turn after each round.

The first stitch in each round is the right raglan stitch of the back panel, worked as 2 single crochets stacked on top of each other. You can start the round with any stitch you find comfortable; in the pattern below you will find this stitch written as “dc”
During Yoke Section 2, we’ll increase the sleeves by working 2 double crochets in the same stitch.

For larger sizes, starting from XL, in the final rounds, we’ll also increase the body.

In YOKE SECTION 2, work for 9 (10, 11, 12) (13, 13, 14, 16, 18) rows.

Increase both sleeves and body panels for the last – (-, -, -) (2, 5, 5, 6, 8) rounds.
In this section the increases for the body panels, if you need to make them, will be 2dc in the same st.

To enhance clarity in this pattern, let’s begin counting for YOKE SECTION 2 from Round 1 (R1).

Before you start, insert stitch markers into the 4 raglan stitches. Keep these stitch markers in place throughout your work on the raglan.
Additionally, ensure that you’ve turned your work to the corresponding side to prevent any confusion. Depending on the size, the first round of Section 2 may fall on the wrong side for some sizes and on the right side for others.

R1: *1dc (the raglan stitch), 1dc in the next sts up to the next raglan st, 1dc into the raglan stitch, 2dc in the next st (first sleeve increase), 1dc in the next sts until 1st before the next raglan st, 2dc in next st (second sleeve increase)*; Rep. from * to * one more time. Turn
R2: 1dc (raglan st), 2dc in next st, 1dc in each st until 1st before the next raglan st, 2dc in the next st, 1dc in next st (raglan st), 1dc in each of the next sts until the next raglan st, 1dc in next st (raglan st), 2dc in next st, 1dc in each of the next sts until 1st before the raglan st, 2dc in next st, 1dc in next st (raglan st) 1 dc in each st to the end of the round; turn;

You can purchase the easily printable PDF pattern here at the links below.

Sizes XS, S, M, and L
Rep. R1 and R2 until you have 8(9, 10, 11)

Work one more round for YOKE SECTION 2 and this time increase the sleeves by working 3dc in the same st
Last Round Sizes XS and M: *1dc (the raglan stitch), 1dc in the next sts up to the next raglan st, 1dc into the raglan stitch, 3dc in the next st (first sleeve increase), 1dc in the next sts until 1st before the next raglan st, 3dc in next st (second sleeve increase)*; Rep. from * to * one more time. Turn

Last Round Sizes S and L:
1dc (raglan st), 3dc in next st, 1dc in each st until 1st before the next raglan st, 3dc in the next st, 1dc in next st (raglan st), 1dc in each of the next sts until the next raglan st, 1dc in next st (raglan st), 3dc in next st, 1dc in each of the next sts until 1st before the raglan st, 3dc in next st, 1dc in next st (raglan st) 1 dc in each st to the end of the round; turn;

For sizes XS, S, M and L the YOKE is done and you can move to the BODY section.

Sizes XL, XXL, 3XL, 4XL, and 5XL

Rep. R1 and R2 until you have 11 (8, 9, 10, 10) rounds

For the last 2 (5, 5, 6, 8) rounds, we will increase the sleeves and also the back and front panels.

Next Round Sizes XL and 3XL
1dc (raglan st), 2dc in next st, 1dc in each st until 1st before the next raglan st, 2dc in the next st, 1dc in next st (raglan st), 2dc in next st, 1dc in each of the next sts until 1st before next raglan st, 2dc in next st, 1dc in next st (raglan st), 2dc in next st, 1dc in each of the next sts until 1st before the raglan st, 2dc in next st, 1dc in next st (raglan st), 2dc in next st, 1dc in each st until 1st left, 2dc in last st; turn;
Next Round Sizes XL and 3XL

*1dc (the raglan stitch), 2dc in next st,1dc in the next sts until 1st before the next raglan st, 2dc in next st, 1dc into the raglan stitch, 2dc in the next st (first sleeve increase), 1dc in the next sts until 1st before the next raglan st, 2dc in next st (second sleeve increase)*; Rep. from * to * one more time. Turn
After completing these 2 rounds the YOKE for size XL is done and you can move to the BODY section;

Size 3XL only
Rep. the last 2 rounds until you have 14 rounds for the Yoke Section 2

Next Round Size XXL, 4XL and 5XL

*1dc (the raglan stitch), 2dc in next st,1dc in the next sts until 1st before the next raglan st, 2dc in next st, 1dc into the raglan stitch, 2dc in the next st (first sleeve increase), 1dc in the next sts until 1st before the next raglan st, 2dc in next st (second sleeve increase)*; Rep. from * to * one more time. Turn

Next Round Size XXL, 4XL and 5XL

1dc (raglan st), 2dc in next st, 1dc in each st until 1st before the next raglan st, 2dc in the next st, 1dc in next st (raglan st), 2dc in next st, 1dc in each of the next sts until 1st before next raglan st, 2dc in next st, 1dc in next st (raglan st), 2dc in next st, 1dc in each of the next sts until 1st before the raglan st, 2dc in next st, 1dc in next st (raglan st), 2dc in next st, 1dc in each st until 1st left, 2dc in last st; turn;
Rep. The last 2 rounds until you have 13 (16, 18) rounds.
The YOKE for size for sizes XXL, 3XL, 4XL and 5XL is done and you can move to the BODY section;

Before moving to the body section let’s summarize the Yoke;

For the Yoke Section 1 we worked 5 (5, 5, 6) (6, 6, 6, 7, 7) rows

At the end of section 1 we had:
– 45 (47, 49, 53) (53, 53, 55, 59, 59) sts for – the back and front panels
– 5 (5, 5, 5) (5, 7, 7, 7, 7) sts for the sleeves
– 4 raglan stitches

For the Yoke section 2 we worked 9 (10, 11, 12) (13, 13, 14, 16, 18) rows.

– 45 (47, 49, 53) (57, 63, 65, 71, 75) sts for – the back and front panels
– 25 (27, 29, 31) (31, 33, 35, 41, 45) sts for the sleeves
– 4 sts for raglan lines

We worked in total for the YOKE, Section 1 and Section 2: 14 (15, 16, 18) (19, 19, 20, 23, 25) rows

BODY

Let’s begin the BODY section by splitting things up. Depending on which side you’re looking at, the split can go from the raglan stitch to either the sleeve or the back panel stitches.

Depending on the size you are making you will need to add a few armpit stitches when skipping the sleeve stitches: 8 (8, 10,10) (14, 14, 18, 18, 18)

Splitting Round Starting the back panel: 1dc (raglan st) 1dc in each st until the next raglan st, 1dc in the raglan st, work the number of sts for the armpit as indicated above, skip the sts for the sleeve, 1dc into the next raglan st, 1dc in each st until the next raglan st, 1dc in the raglan st, ch the armpit sts, skip the sleeve sts and join with the first st; turn

Splitting Round Starting with the sleeve:
1dc (raglan st) ch the armpit sts, skip the sleeve sts, 1dc in next raglan st, 1dc in each st to the next raglan st, 1dc in the raglan st, ch the armpit sts, skip the sleeve sts, 1dc in next raglan st, 1dc in each st to the end of the round.

Next: Continue working 1dc in each st until you have 21 rounds or until you get to the desired length.

SLEEVES

Rejoin yarn at the armpit

Work the sleeves in the round but turn after each round;

R1: 1dc in each st around; join with a slip stitch and turn;

Repe R1 until you have 26 rounds or until you reach the desired length

RIBBING

We will work the ribbing for the bottom hem, cuffs and neckline

Use a 4mm crochet hook
Start: 7ch
R1: start into the second st, 1sc into the next 6sts, 1sl st into the next 2sts of the Body/sleeve edge, turn
R2: 1scblo in next sts, except the last one, 1sc into the last st, 1ch and turn
R3: 1sc in the first st, 1sc blo into the next sts, 1ss into the next 2sts of the edge. Turn.
Rep. R2 and R3 until you complete the circumference of the body/sleeve.
Join the ends of the ribbing using slip stitches.

To create the Neckline Ribbing, we will use the same ribbing pattern as before. However, before starting the ribbing, you will need to work a round in single crochet stitches. When working into the side rows, make sure to work two single crochets in each double crochet side row.

TO FINISH
Weave in all looser ends and block to measurements.

For a more comprehensive understanding, refer to the visual demonstration in the video tutorial linked here:

Part 1: The Yoke :

Part 2: Body and Sleeves

You can purchase the easily printable PDF pattern here at the links below.
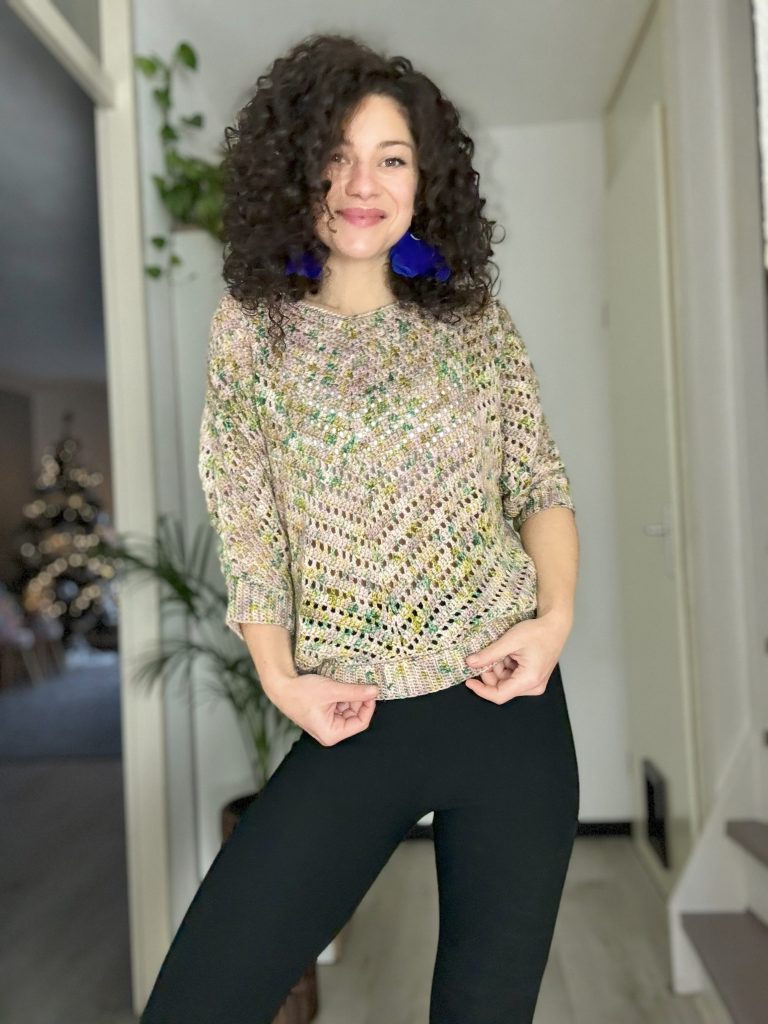
In 2018, when I started designing crochet stuff, I made the first Starry Night Blouse. It was my first year doing this.

I feel like my best designs come from back then because I was more into making things and less into writing down how to do it. Writing patterns is tough. Sometimes it’s hard to explain in words how to crochet something. It’s not because it’s too hard to make, but explaining it can be wordy and tricky. Making a crochet or knitting pattern that’s clear and easy to follow is not easy.

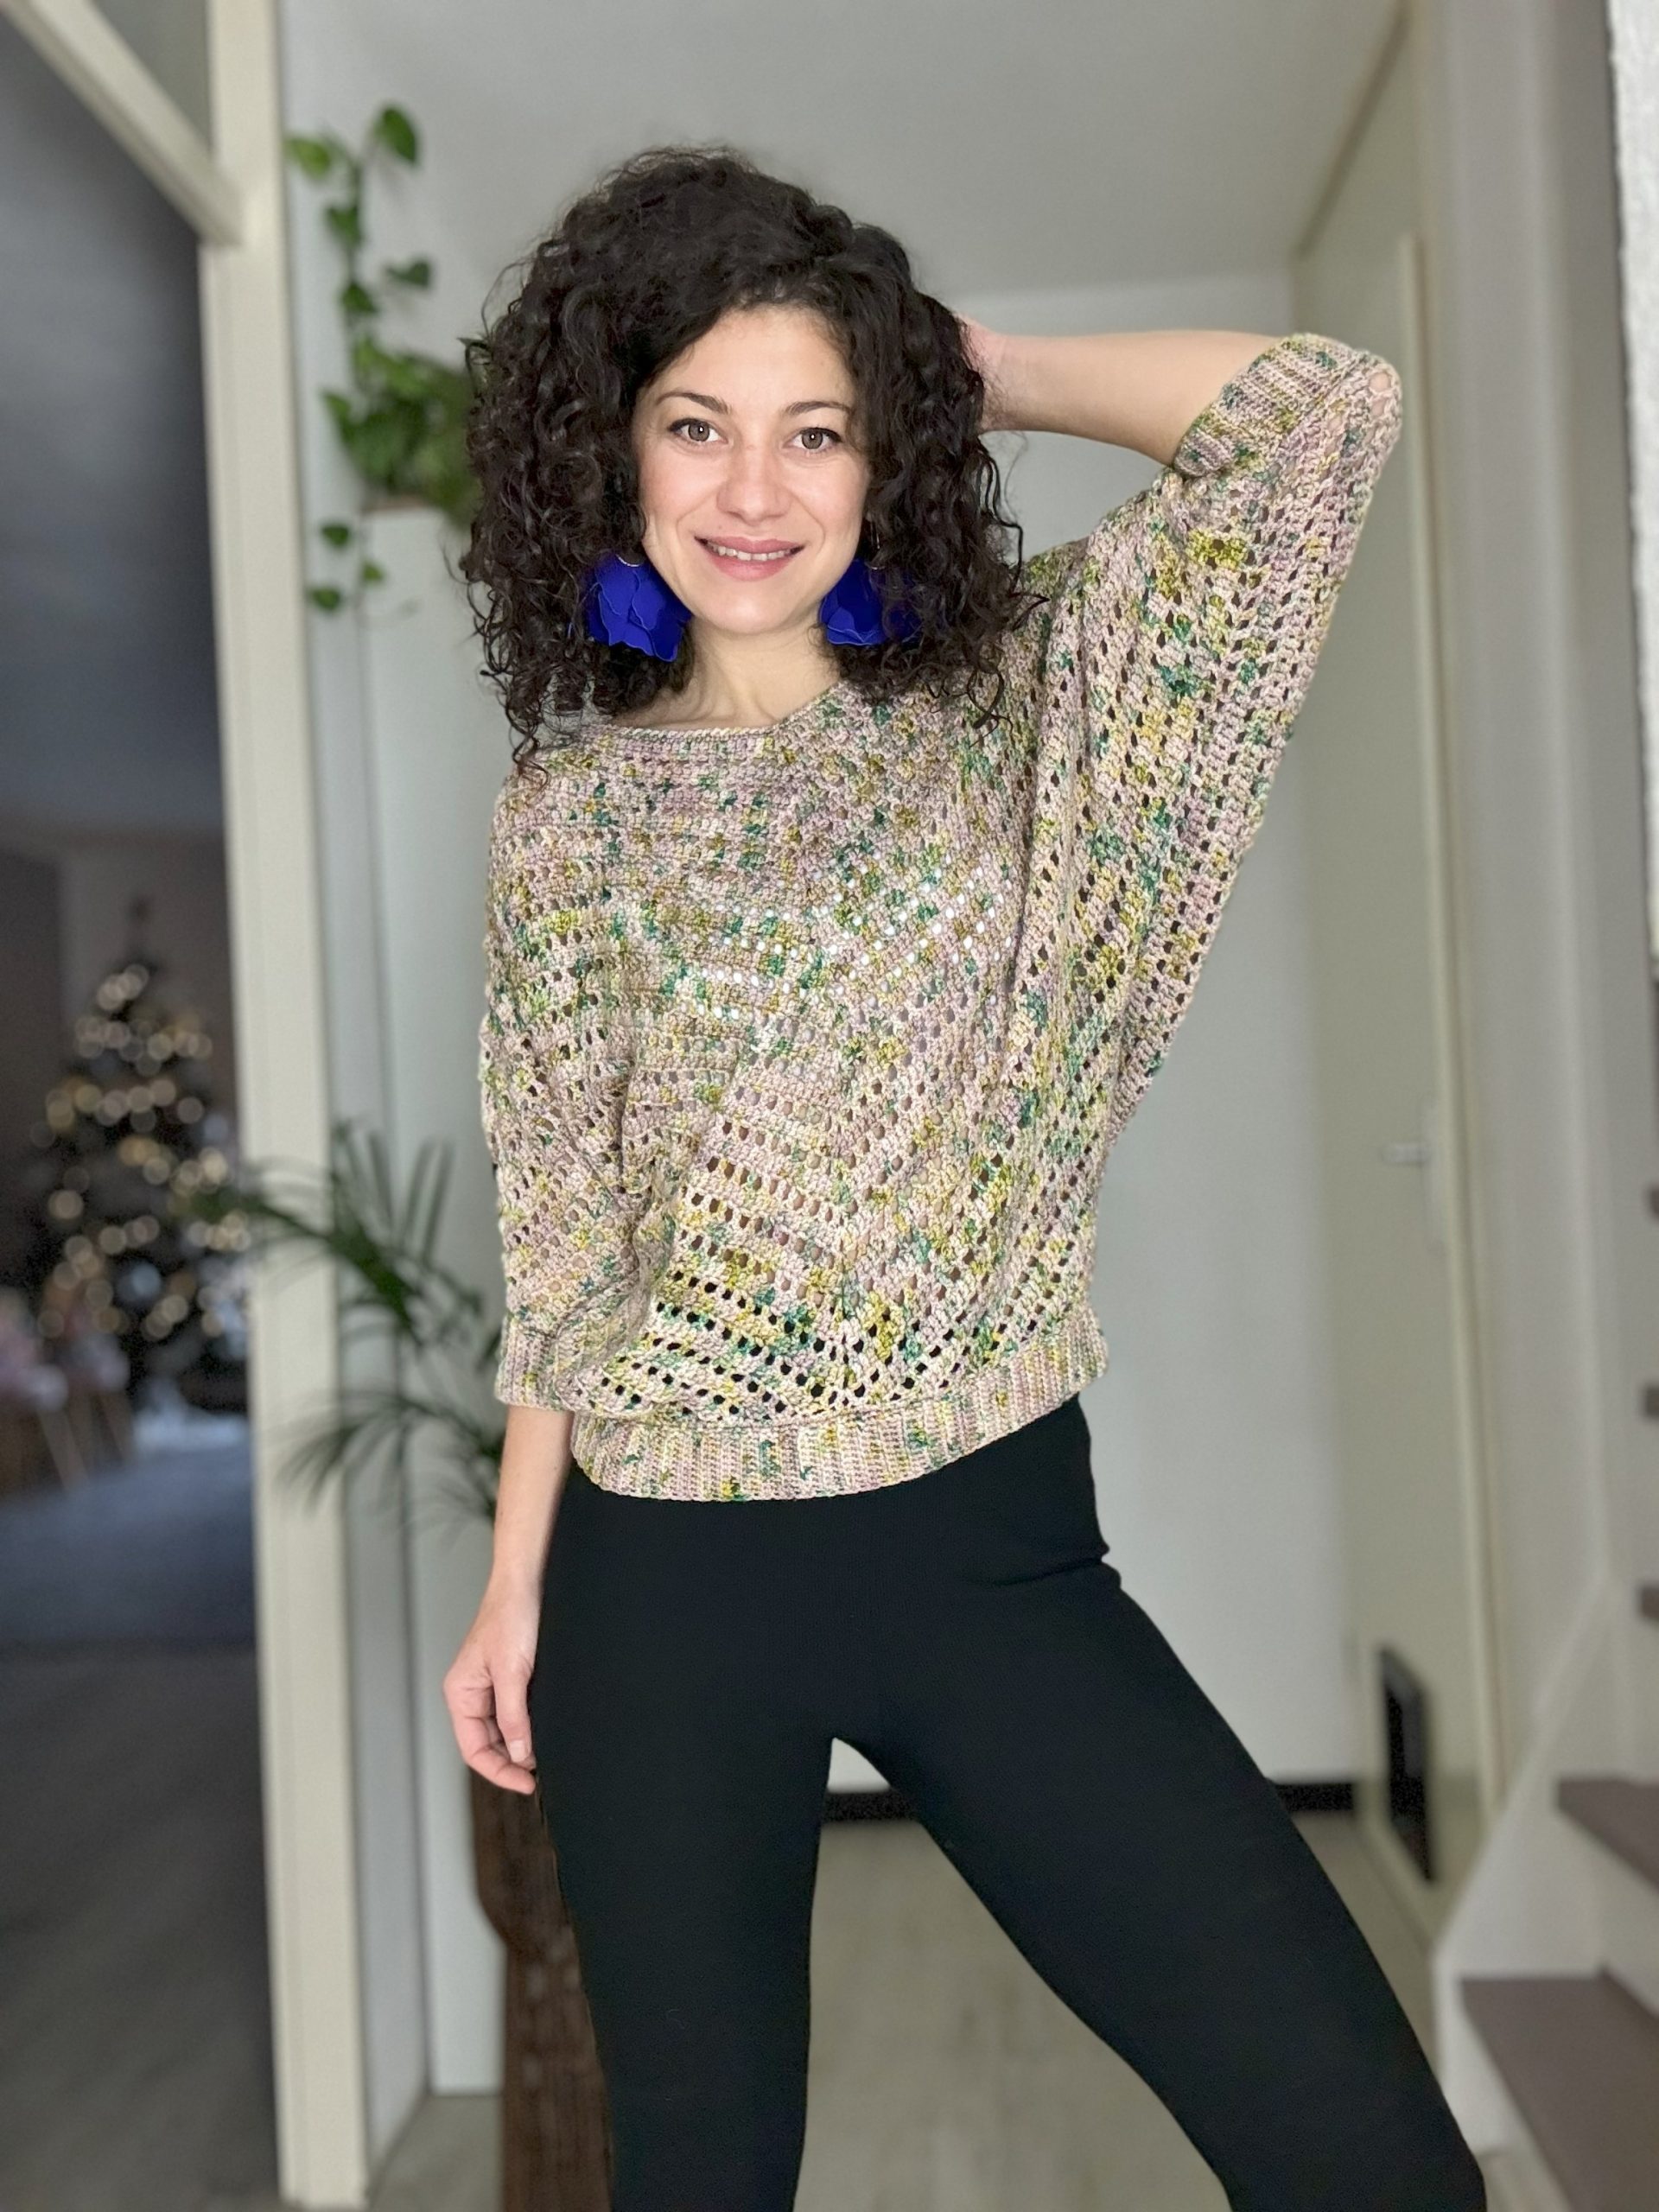
Anyway, this year, with the help of the awesome folks at Expression Fiber Arts, I crocheted a new Starry Night Blouse using their beautiful yarn.

I changed a few things in this new one. I used the same stitch pattern all through, and I made the whole blouse in pieces. I added cuffs, a ribbed bottom, and a V neckline for the front.

Modelul In Limba Romana, il puteti gasi aici

The PDF version of this pattern includes stitch charts. You can purchase the easily printable PDF pattern here:

I hope you will enjoy this new pattern and I can’t wait to see your makes.

MATERIALS

• Yarn: Size 3, Sport) weight yarn
• Crochet Hook:
o 4 mm crochet hook
• stitch markers
• yarn needle for weaving in ends
• Scissors

NOTES ABOUT DESIGN

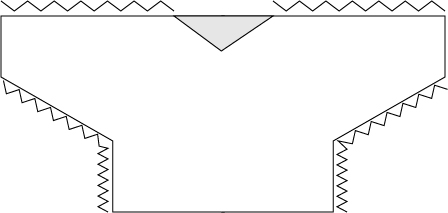
The Starry Night Blouse is designed with batwing sleeves. It is constructed by working individual panels for the front and back, which are then sewn together.

Each panel consists of four sections that require different techniques to shape the blouse:

Section 1: The main triangle. This section is worked to achieve the desired width from cuff to cuff. As you work on this width, it will also add length to the blouse. It’s important to maintain the proportions while doing so.

Section 2: Creating the armhole or sleeve opening. To achieve this, we decrease stitches at the beginning and end of each row. This helps keep the edges of the armhole straight.

Sections 3 and 4: These sections are worked to make the bottom of the blouse straight and fill the sides of the blouse.

MEASUREMENTS AND SIZES

The Starry Night Blouse pattern is available in 8 sizes, S (M, L, XL) (2XL, 3XL, 4XL, 5XL). In this pattern, you will find information about how to adjust the pattern to your own measurements.

Final Measurements of the Starry Night Blouse
– Cuff to cuff a: 113 cm (120, 127, 127) (133, 147, 153, 160)
– Neck Width b*: 28 cm (28, 28, 28) (28, 28, 28, 28)
– sleeve opening width c: 12 cm (14, 14, 19) (19, 22, 22, 22)
– Bottom hem width d: 43cm (48, 53, 58) (63, 68, 73, 78); measured without stretching
Sleeve length. e: 31 cm (31, 31, 31) (31, 31, 31, 31)
– Length f: 53 cm (57, 60, 66) (68, 73, 75, 77)
*The neck width is measured across the back panel; If you want to adjust it, you have a couple of options mentioned in the pattern

The PDF version of this pattern includes stitch charts. You can purchase the easily printable PDF pattern here:

YARN

For the Starry Night Blouse, I used Palm Breeze by Expression Fiber Arts, in color Buttery; Yarn composition: 100% superwash Merino Wool. Each hank has 100 grams and is approximately 274 meters / 300 yd.

For each size, you will need:
1050 (1190, 1330, 1460) (1580, 1870, 2000, 2150) meters
4 (5, 5, 6) (6, 7, 8, 8) hanks.

ABBREVIATIONS

Ch – chain
Sc – single crochet
Scblo – single crochet in the back loop only
Tsc – twisted single crochet
dc – double crochet
dc2tog – 2 double crochet worked together
dc2tog wide – 2 dc worked together, but skip 1st in between
ss – slip stitch
St(s) – stitch(es)
R – row

TENSION

Using a 4mm crochet hook working in a triangle pattern:

After 6 rows the triangle base measures 20 cm;

17dc = 10 cm
9 rows (alternating 1 solid row with 1 window row) = 10 cm

Note: all the gauge measurements are taken after wet blocking

STITCH PATTERN AND TECHNIQUES

The Starry Night blouse features a stitch pattern that alternates between a solid row and a “windows” row or mesh stitch row. The solid row is worked using double crochet stitches, while the windows row consists of alternating double crochet stitches and chain stitches.
In the description of the Starry Night design, you could see that one panel of the blouse is constructed with three sections:

Section 1: The main triangle. This section has three increases: one at the beginning, one at the middle (also known as the center point), and one at the end of the row. The increases at the beginning and end are achieved by working three stitches in the same stitch. On the solid row, it’s 3 double crochet stitches in the same stitch, and on the windows row, it’s (1 double crochet, 1 chain, 1 double crochet) in the same stitch. The middle row increase is the same in both Section 1 and Section 2: (1 double crochet, 1 chain, 1 double crochet) in the same chain space.

Section 2: In this section, we create the sleeve opening or armhole. To maintain a straight edge for the armhole, we need to decrease at the beginning and end of each row. The rule for decreasing is to reduce the same number of stitches that we added with the middle increase. With the middle increase, we added 2 stitches, one on each side of the triangle. To decrease these stitches at the beginning and end of the row, we use the dc2tog (double crochet two together) stitch. Here’s how to do it: yarn over, insert the hook into the next stitch, yarn over, pull up a loop, yarn over, and pass it through two loops on the hook. Repeat this process once more, then yarn over and pull it through all the loops on your hook. At the beginning of the row, the decrease will be made with 3 chain stitches and 1 double crochet into the next stitch, where the 3 chain stitches do not count as a stitch.

The PDF version of this pattern includes stitch charts. You can purchase the easily printable PDF pattern here:

Sections 3 and 4: These sections are designed to create a straight bottom hem and fill the sides of the panels.

To begin, we need to pick up the desired number of stitches, depending on the width of the bottom hem. Start counting from the middle point towards the left and right sides. Once we have the required number of stitches, we will work exclusively within those stitches for this section. We will decrease at the beginning and end of each row until there are no stitches remaining.

To make the decreases, we will use a wider version of the dc2tog stitch. The process is similar to dc2tog, but with one stitch skipped in between. This allows us to decrease by 2 stitches at each end.

At the beginning of the row, the decrease is made by chaining 3, skipping the next stitch, and then working 1 double crochet in the next stitch. Remember that the initial chain of 3 does not count as a stitch.

HOW TO ADJUST THE STARRY NIGHT BLOUSE PATTERN SO IT CAN FIT YOUR BODY

To ensure a perfect fit for the Starry Night Blouse, it’s important to consider your measurements for cuff to cuff, desired length, armhole opening (upper arm), and bust.

Since the blouse is constructed in panels, we will focus on the width rather than the circumference as a reference.

Let’s break down each part and explain what needs to be done:

Cuff to cuff: This part encompasses the length of the sleeves and the width of the body. In this design, it’s not possible to achieve the full sleeve length right from the start, as increasing the width for cuff to cuff would also add length to the blouse. Therefore, it’s crucial to maintain good proportions.
Step 1: Once you have the desired width for cuff to cuff, you can start working on the main triangle. When the base of the triangle matches the desired measurements, you can proceed to Section 2.

To focus on Section 2, we will concentrate on creating the sleeve opening. To determine the width of the opening, measure your upper arm and divide the measurement by 2. Add an additional 1 to 2 centimeters to ensure the sleeve opening is not too tight.

Step 2: Begin working on Section 2. Once you reach the desired measurements for the sleeve opening, you can proceed to Section 3, followed by Section 4.

Before starting Sections 3 and 4, we need to establish the necessary number of stitches to work with. To do this, we will use the bust width measurements or the widest part of our body as a reference. While this design allows for ample room around the bust, we need to ensure that the bottom hem covers the circumference of the bust to make the blouse easy to wear.

Using a measuring tape, start from the middle point and move upwards, holding the measuring tape perpendicular to the blouse panel. Once you have the desired measurements, considering your bust width, mark those stitches.

Important note: As we work on Sections 3 and 4, the bottom hem will become narrower than our initial measurement. Make sure to add between 10 to 15 centimeters to your bust width measurement. For example, if you started with a desired width of 55 centimeters, the final width of the bottom hem may measure around 43 centimeters.
Make sure you have the same number of sts from middle point to the left and to the right.

Step 3: Begin working on Sections 3 and 4.

PATTERN NOTES

– work the pieces flat; turn after each row;
– ch3 at the end of each row; for Section 1 ch3 will count as a double crochet; for Sections 2, 3, and 4, ch3 will not count as a stitch, it will be part of the decrease
– the follwing pattern includes stitch charts and a video tutorial; the video tutorial is for size small but you can use it as guidance for all the sizes;

The PDF version of this pattern includes stitch charts. You can purchase the easily printable PDF pattern here:

INSTRUCTIONS

BACK PANEL
Section 1 – Main Triangle

Start: Make a magic ring (or you can ch4 and slip stitch to make a circle)

R1: 3ch, 6dc inside the ring (7sts)
R2:(4ch, 1dc) in the first st, 1ch skip 1st, 1dc in next, 1ch, (1dc, 1ch, 1dc) – center point, into the next st, 1ch, 1dc in next st, 1ch, skip 1 st, (1dc, 1ch, 1dc) into the third ch, 3ch and turn (15 sts)
R3: 2dc in the first st, 1dc in each st until the 1ch-sp center point, (1dc, 1ch, 1dc) into the 1ch-sp, 1dc in each st until the last ch3, 3dc into the third ch; (21 sts)
R4: (ch4, 1dc) into the first st, 1ch, skip the next st, *1dc in next st, 1ch, skip next st; *rep. until the 1ch-sp center point, (1dc, 1ch, 1dc) into the 1ch-sp, 1ch, skip next st, **1dc in next st, 1ch, skip next st; **rep. until the last 3ch, (1dc, 1ch, 1dc) into the third ch; 3ch and turn; (27sts)
Rep. R3 and R4 until you have in total 34 (36, 38, 40) (42, 44, 46, 48) rows.

Note: you will increase 6sts with every row;

At the end of section 1 you should have 207 (219, 231, 243) (255. 267, 279, 291) – counting the 1ch-sp center point as well
If you count from the center point to the left and right you should have 103 (109, 115, 121) (127, 133, 139, 145)

Section 2 – Working accross the armholes

Continue from where your yarn is. We will start counting from R1 as all the sizes are different row numbers to start with.

R1: 3ch, 1dc in next st (3ch will not count as st), 1dc in each st until the 1ch-sp center point (1dc, 1ch, 1dc) into the 1ch-sp, 1dc in each st until you have 2sts left, dc2tog (See the Stitch Pattern and techniques section)
R2: 3ch, 1dc in the next st, 1ch, skip next st, *1dc in next st, 1ch, skip next st; *rep. until the 1ch-sp center point, (1dc, 1ch, 1dc) into the 1ch-sp, 1ch, skip next st, **1dc in next se, 1ch, skip next st; ** rep. until you have 2sts left, dc2tog.

Rep. R1 and R2 until you have in total: 10 (12, 12, 16) (16, 18, 18, 18) rows.

At the end of Section 2 you should have the same number of sts as at the end of Section 1

Section 3 and 4 – make the bottom hem straight and fill the sides of the panel

Both panels are worked the same, only that for Section 3 your last st in the row will be the stitch before the 1ch-sp center point and for Section 4, the stitch after the 1ch-sp center point will be the first st in the row.

Step 1: Establish the number of sts yo work with; this number has to be a multiple of 2+1.

Count from the center point 1ch-sp to the left and right, 55 (61, 67, 73) (81, 87, 93, 99). These sts will be the base for Section 3 and Section 4.

Now that you have the sts you need to start with you can follow the pattern below:

R1: 3ch (this will not count as a st), skip next st, 1dc in next, 1dc in each st until you have 3sts, left, dc2tog wide (See the Stitch Pattern and techniques section.
R2: 3ch, skip next st, *1dc in next, 1ch, skip next st; *rep until you have 3dc left, dc2tog wide;

Rep. R1 and R2 until you have no sts left.

Then Repeat the same pattern for the other side

The PDF version of this pattern includes stitch charts. You can purchase the easily printable PDF pattern here:

FRONT PANEL

When working on the front panel of the blouse, you have the flexibility to adjust the width of the neckline.

In this particular pattern, regardless of the size, the front panel begins at Row 11 of the back panel, creating a V-neckline shape.

To modify the neckline width according to the pattern instructions, you have a couple of options:

Starting the front panel with a few rows up: By beginning the front panel at a higher row, you can change the width of the neckline to your preference.

Working both panels without a V-neck: If you prefer not to have a V-neck, you can sew additional stitches for the shoulders. This will allow you to adjust the neckline width accordingly.

Front Panel Section 1

Start: ch64
R1: Start into the 5th st, 2dc, into the 5th st, 1dc in next 29sts, (1dc, 1ch, 1dc) – center point in next st, 1dc in next 29sts, 3dc in last st. (67sts) – this row has the same number of sts as R11 of the back panel.
R2: (4ch, 1dc) in the first st, 1ch skip 1st, 1dc in next, 1ch, (1dc, 1ch, 1dc) – center point, into the next st, 1ch, 1dc in next st, 1ch, skip 1 st, (1dc, 1ch, 1dc) into the third ch, 3ch and turn (73sts)
R3: 2dc in the first st, 1dc in each st until the 1ch-sp center point, (1dc, 1ch, 1dc) into the 1ch-sp, 1dc in each st until the last ch3, 3dc into the third ch; (79 sts)
R4: (ch4, 1dc) into the first st, 1ch, skip the next st, *1dc in next st, 1ch, skip next st; *rep. until the 1ch-sp center point, (1dc, 1ch, 1dc) into the 1ch-sp, 1ch, skip next st, **1dc in next st, 1ch, skip next st; **rep. until the last 3ch, (1dc, 1ch, 1dc) into the third ch; 3ch and turn; (85sts)
Rep. R3 and R4 until you have in total 24 (26, 28, 30) (32, 34, 36, 38) rows.

At the end of section 1 You should have the same number of sts as for the Back Panel.

For section 2, 3 and 4 follow the same pattern as for the BACK PANEL.

ASSEMBLING

Before assembling it is important, depending the yarn you are using to block the panels before sewing. This will prevent the stitches from stretching more than the seam.

Place the panels one on top of the other, facing the right side.
Stitch first the shoulders and the stitch the sides.

Sewing Method

Prepare the yarn by threading it onto a darning needle, making it about three times longer than the length you are about to sew.
Since we are working with double crochet stitches, we will refer to the stitches as follows:

– Bottom of the double crochet: 1stitch
– Top of the double crochet: 1 stitch
– First chain of the chain-3: 1 stitch
– Last chain of the chain-3: 1 stitch
Step 1: Start by inserting your needle from the back to the front through the first stitch on the right side. Then, bring the needle from the front to the back through the first stitch on the left side. Tie a knot to secure the yarn.

Step 2: Insert the needle into the same stitch on the right side and pull it out through the next stitch on the right side. Then, insert the needle into the same stitch on the left side and pull it out through the next stitch on the left side.
Continue weaving in this manner until you have finished sewing the piece.

EDGING

To prepare the piece for the neckline edging, bottom hem, and sleeves cuff, work first 1 round in single crochet.

When working in to the side rows, consider working 2sc in each dc or ch3 side row; you can adjust the number of sts according with your tension;

Neckline edging

After the first single crochet round, work one more round in a twisted single crochet.
Insert the hook into the next st, yarn over, pull out a loop, twist your hook 180 Degrees clockwise, yarn over, and pass it through both twisted loops. Repeat the process for the entire round.

Bottom hem and cuffs ribbing

Start: rejoin yarn and ch11
R1: start in the second st, 1sc in each of the next 10sts, 1ss into the next 2sts of the bottom hem/sleeves edge; turn
R2: 1scblo in next 10sts, 1ch and turn
R3: 1scblo in each of the next 10sts, 1ss in next 2sts of the bottom hem/sleeves edge; turn

Rep. R2 and R3 until you complete the entire circumference.
Use slip stitch to join the ribbing edges.

TO FINISH

Weave in all the ends and block to measurements.

The PDF version of this pattern includes stitch charts. You can purchase the easily printable PDF pattern here:


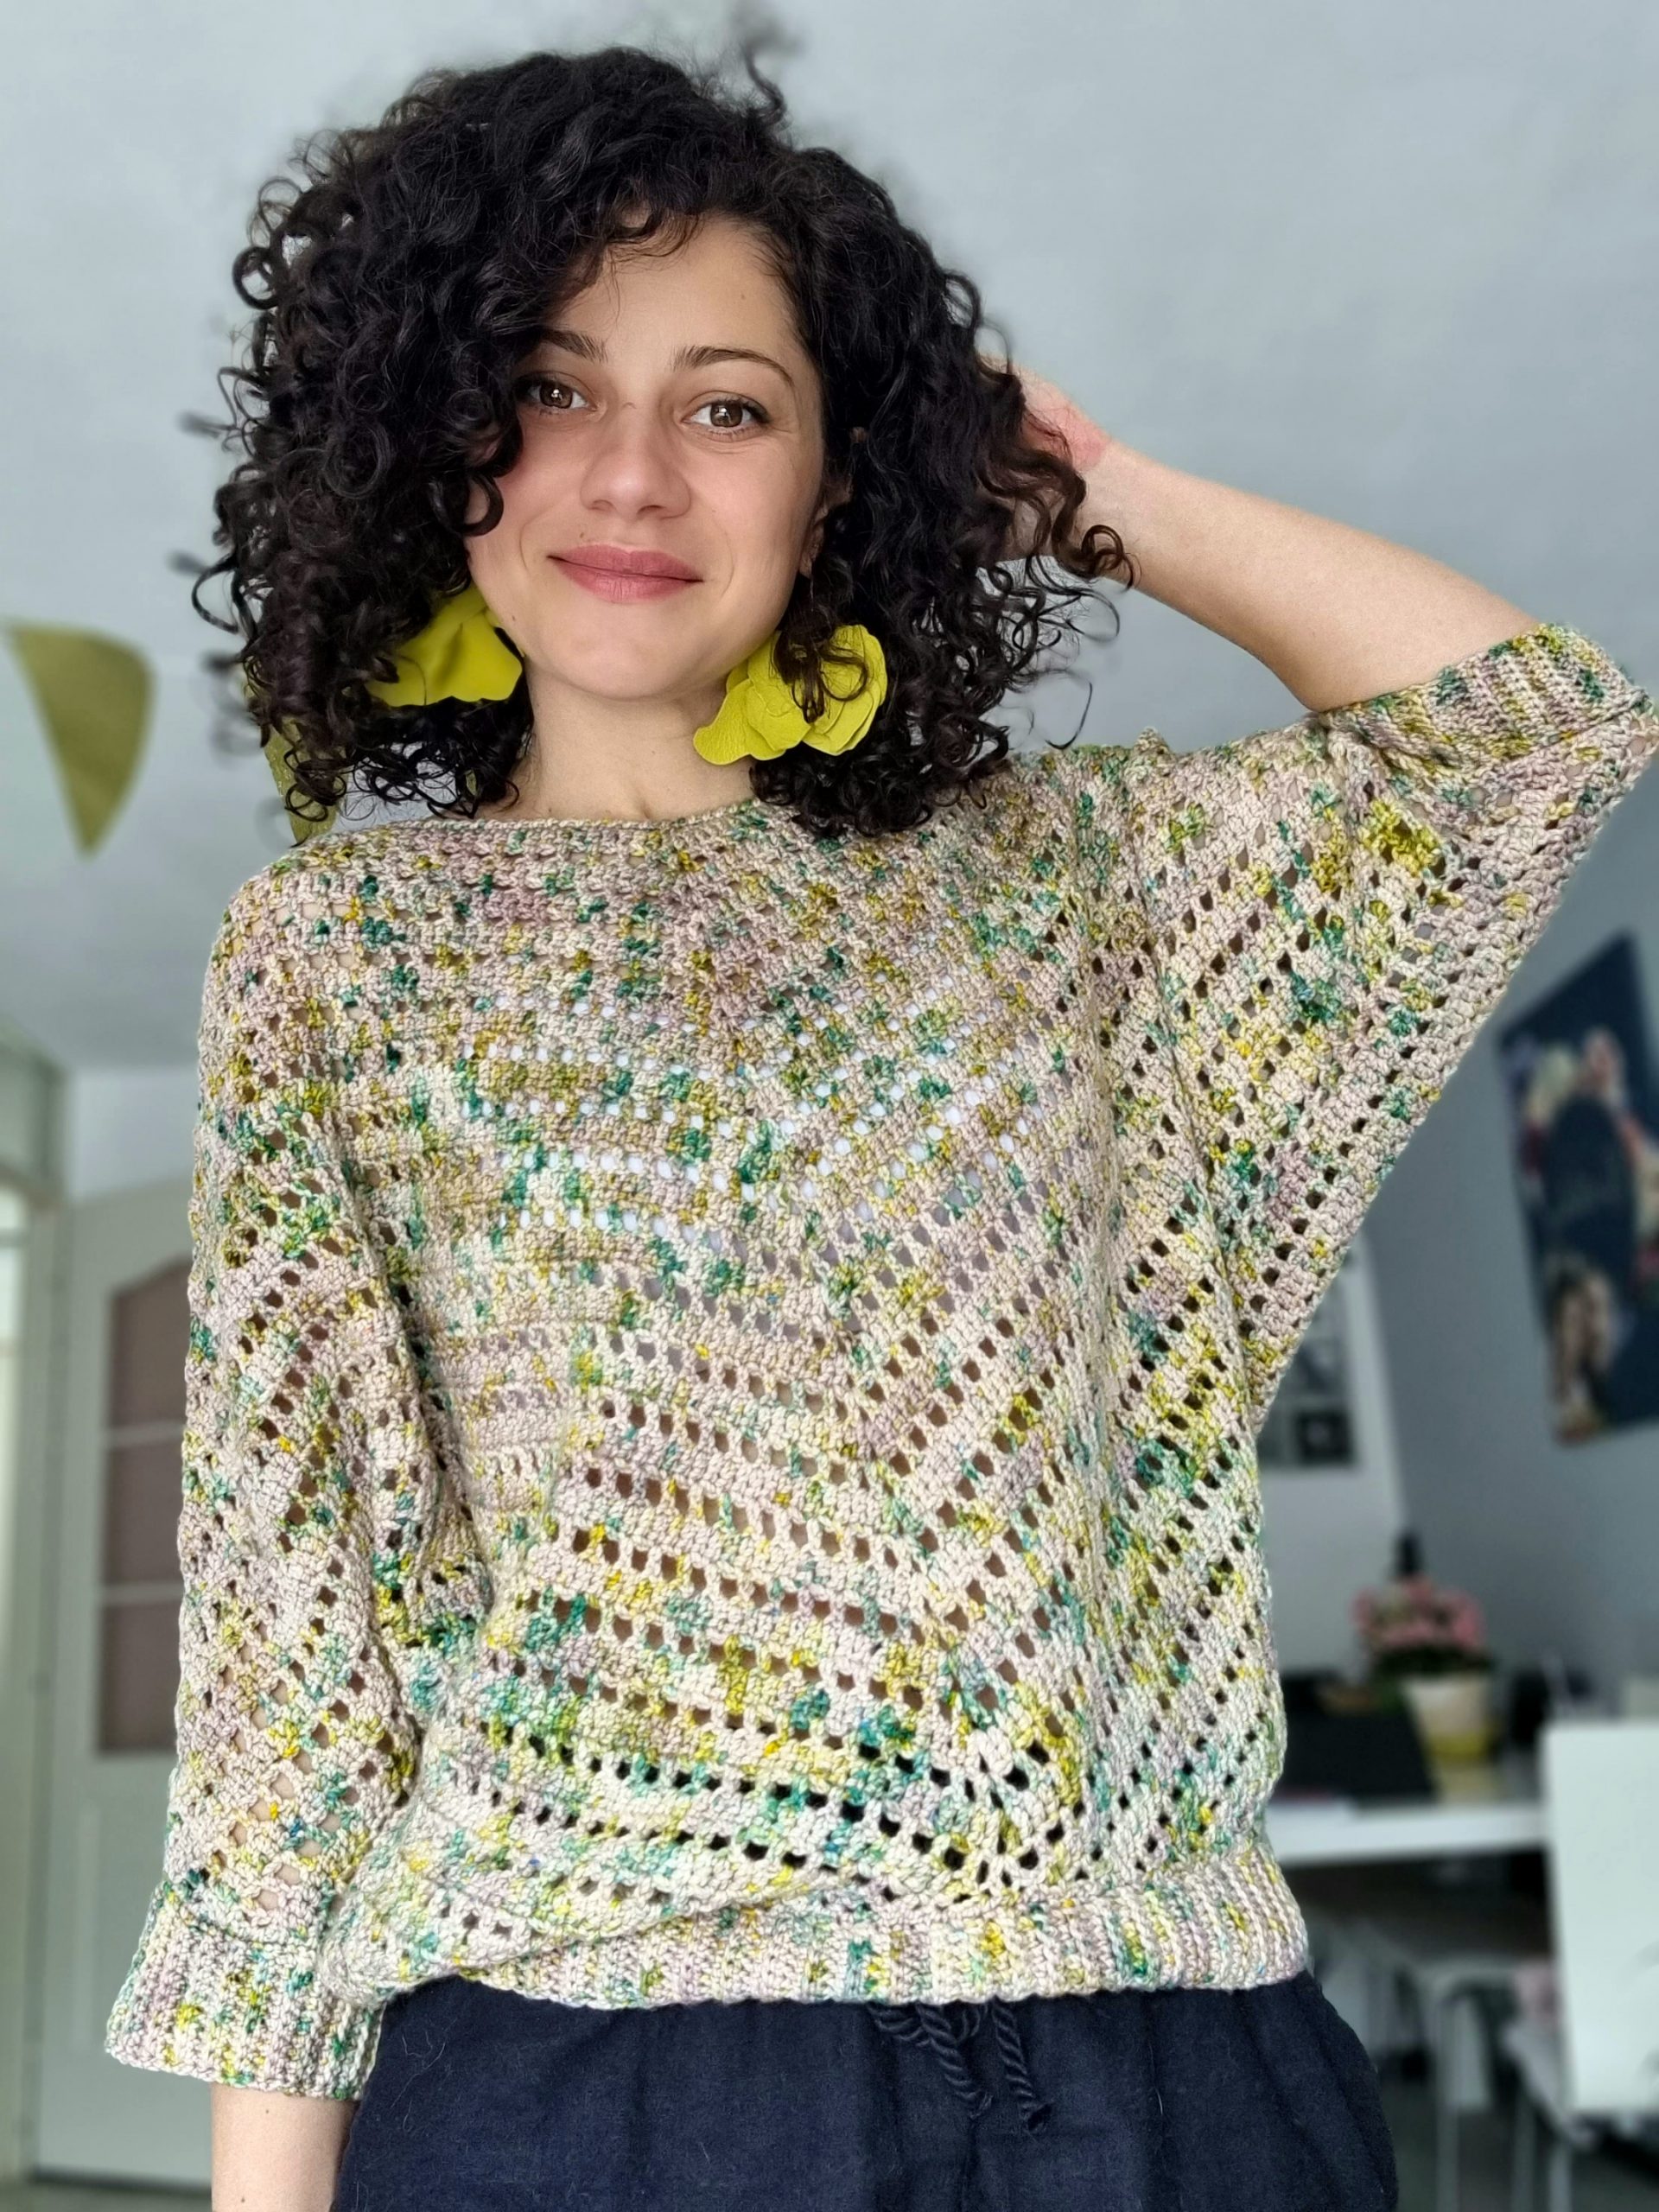
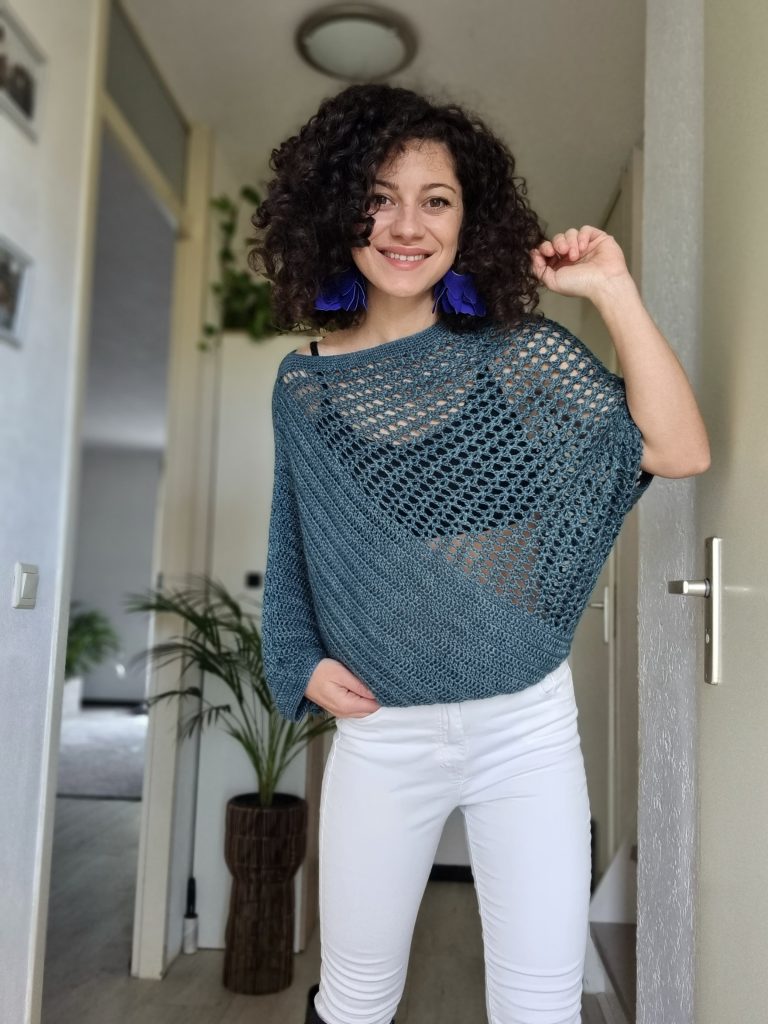
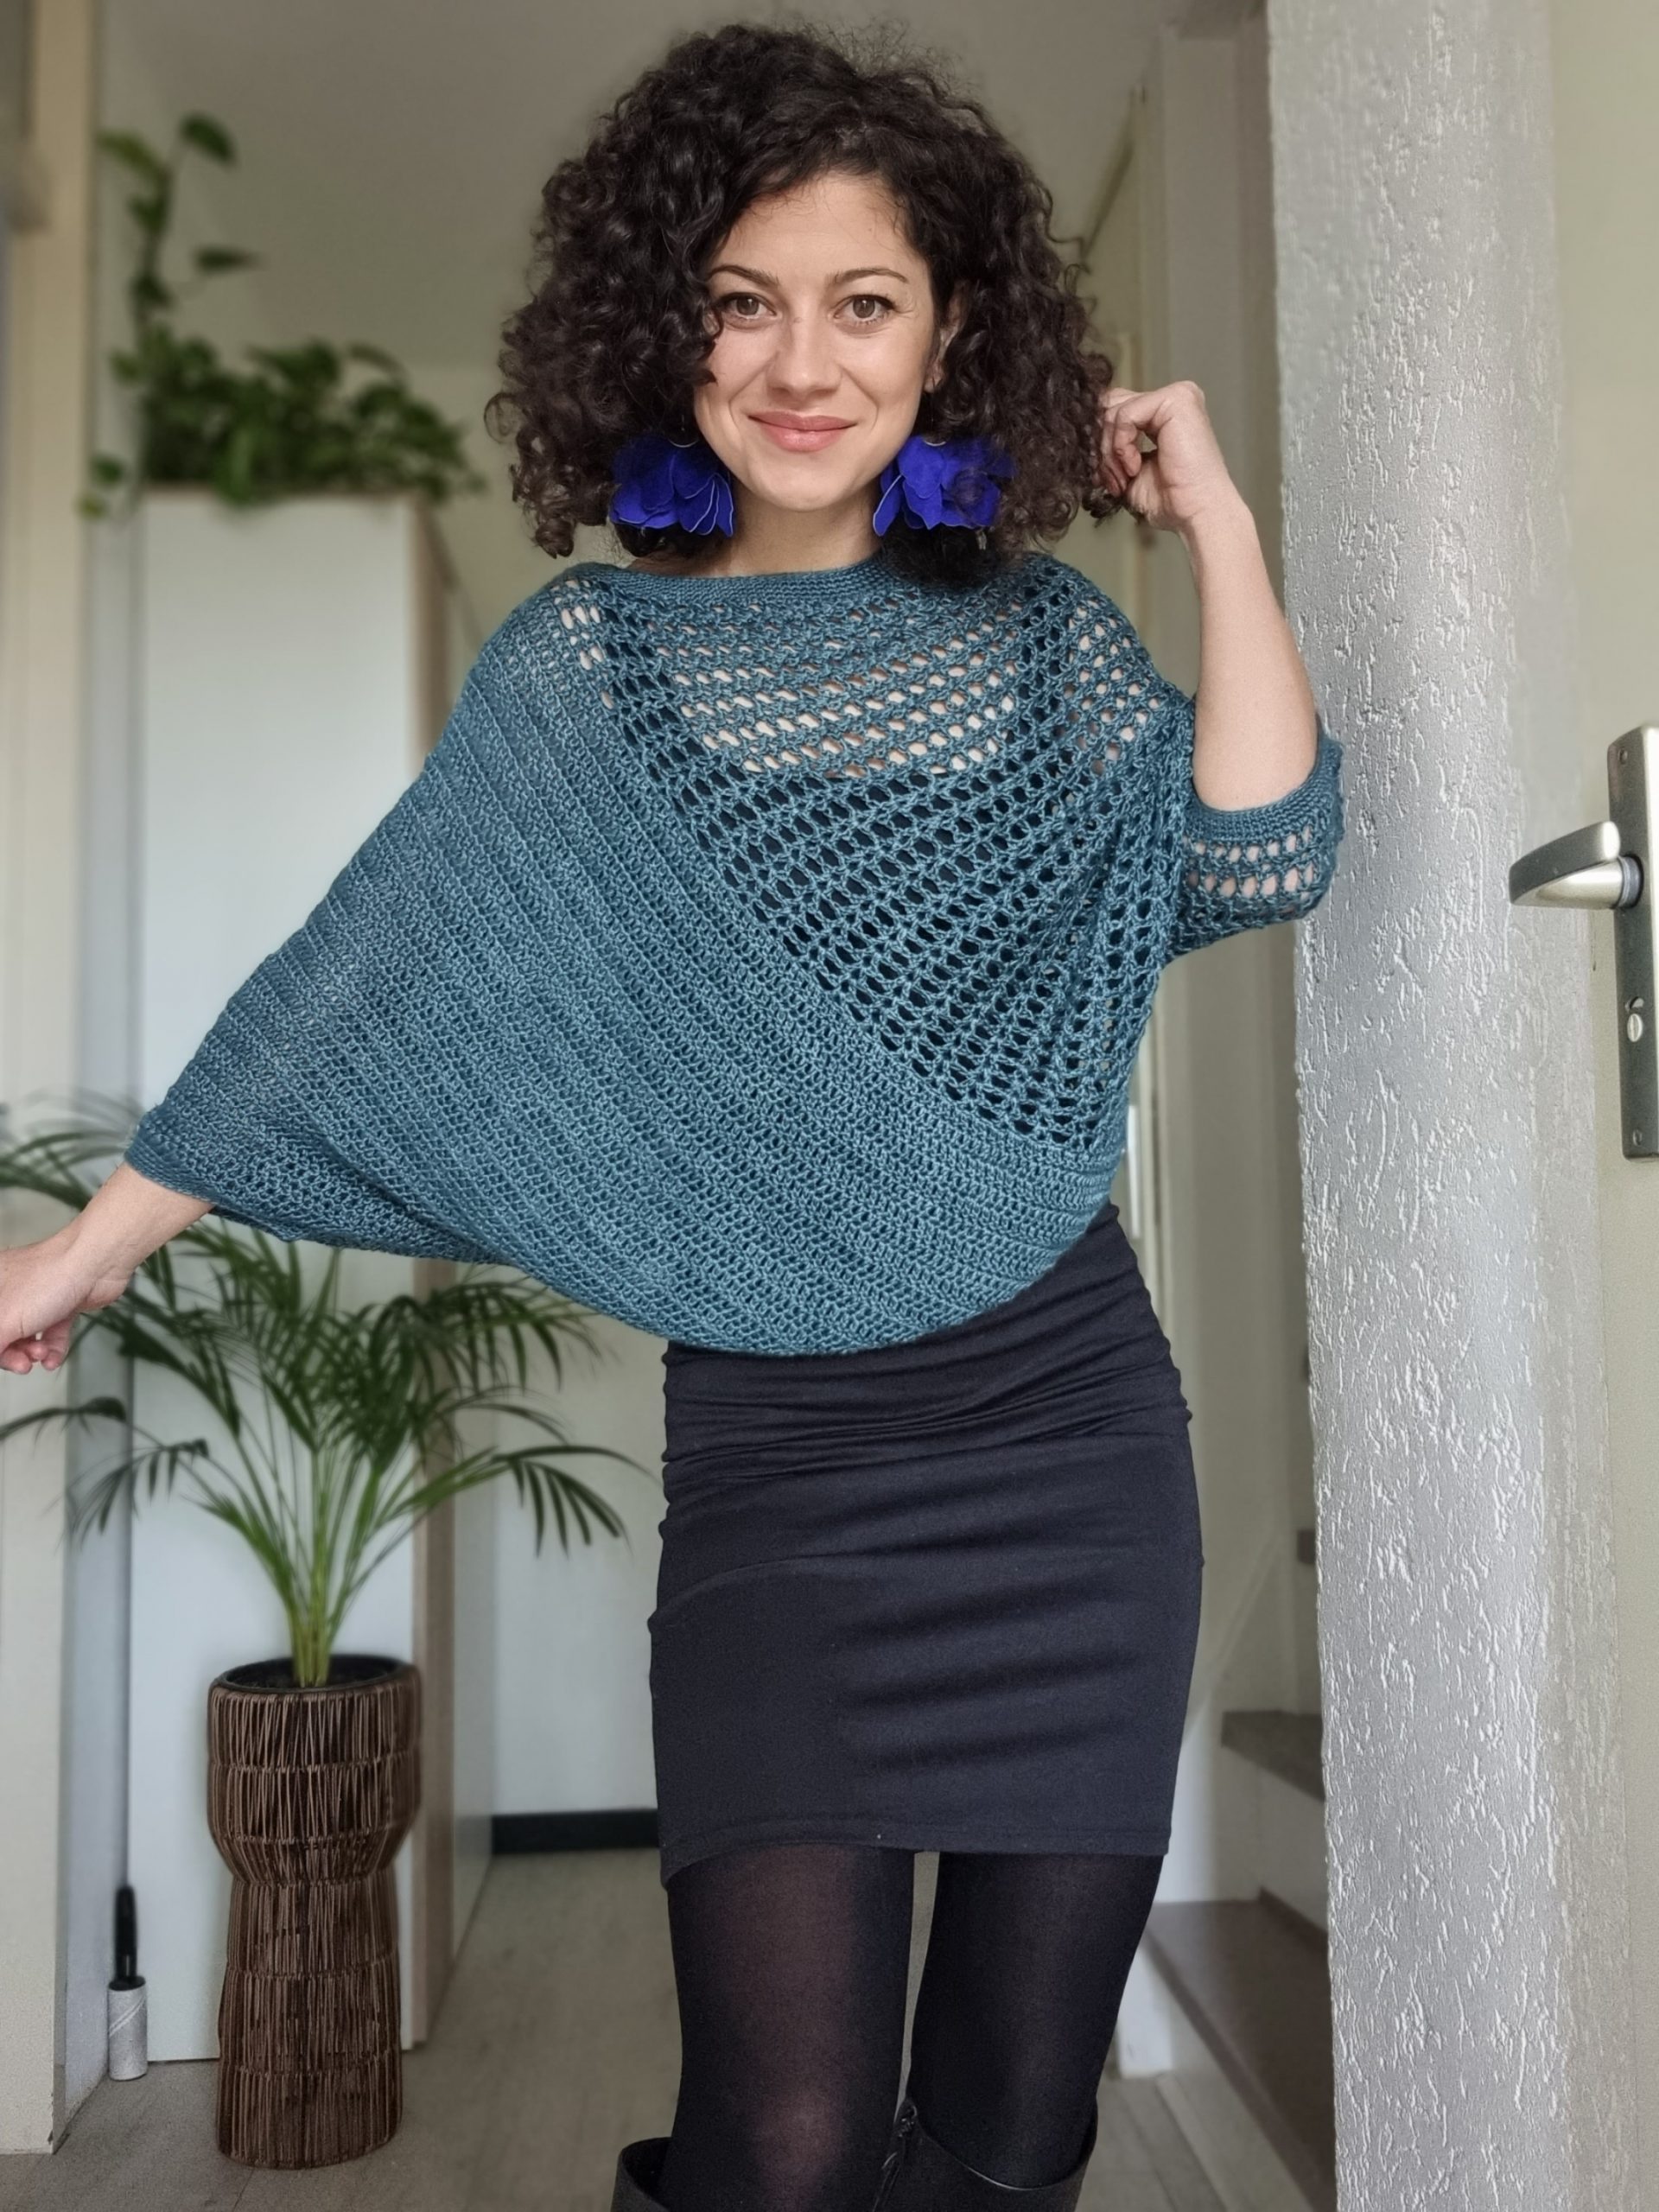
I was absolutely thrilled when Expression Fiber Arts generously offered to provide me with some of their stunning yarns for a remake of the Be Glam Poncho Blouse. This blouse holds a special place in my heart as I initially designed it in 2019. I used the Be Glam yarn by Durable Yarn in black with silver metallic accents, creating the perfect garment for New Year’s Eve.

As the years have passed, my journey in designing and pattern writing has deepened. I’m now eager to breathe new life into many of my earlier designs, each of which holds sentimental value for me. This creative process allows me to evolve my craft while cherishing the unique stories woven into each piece.

The PDF version of this pattern includes stitch charts. You can purchase the easily printable PDF pattern here:

I know you can’t wait to see what you need and how to make the Be Glam Poncho Blouse, so let’s get started.

MATERIALS

• Yarn: DK Weight yarn (Size 3)

• Crochet Hook:
o 4.5 mm crochet hook
o 3.5 mm crochet hook for edges
• yarn needle for weaving in ends
• Stitch markers
• Scissors

NOTES ABOUT DESIGN

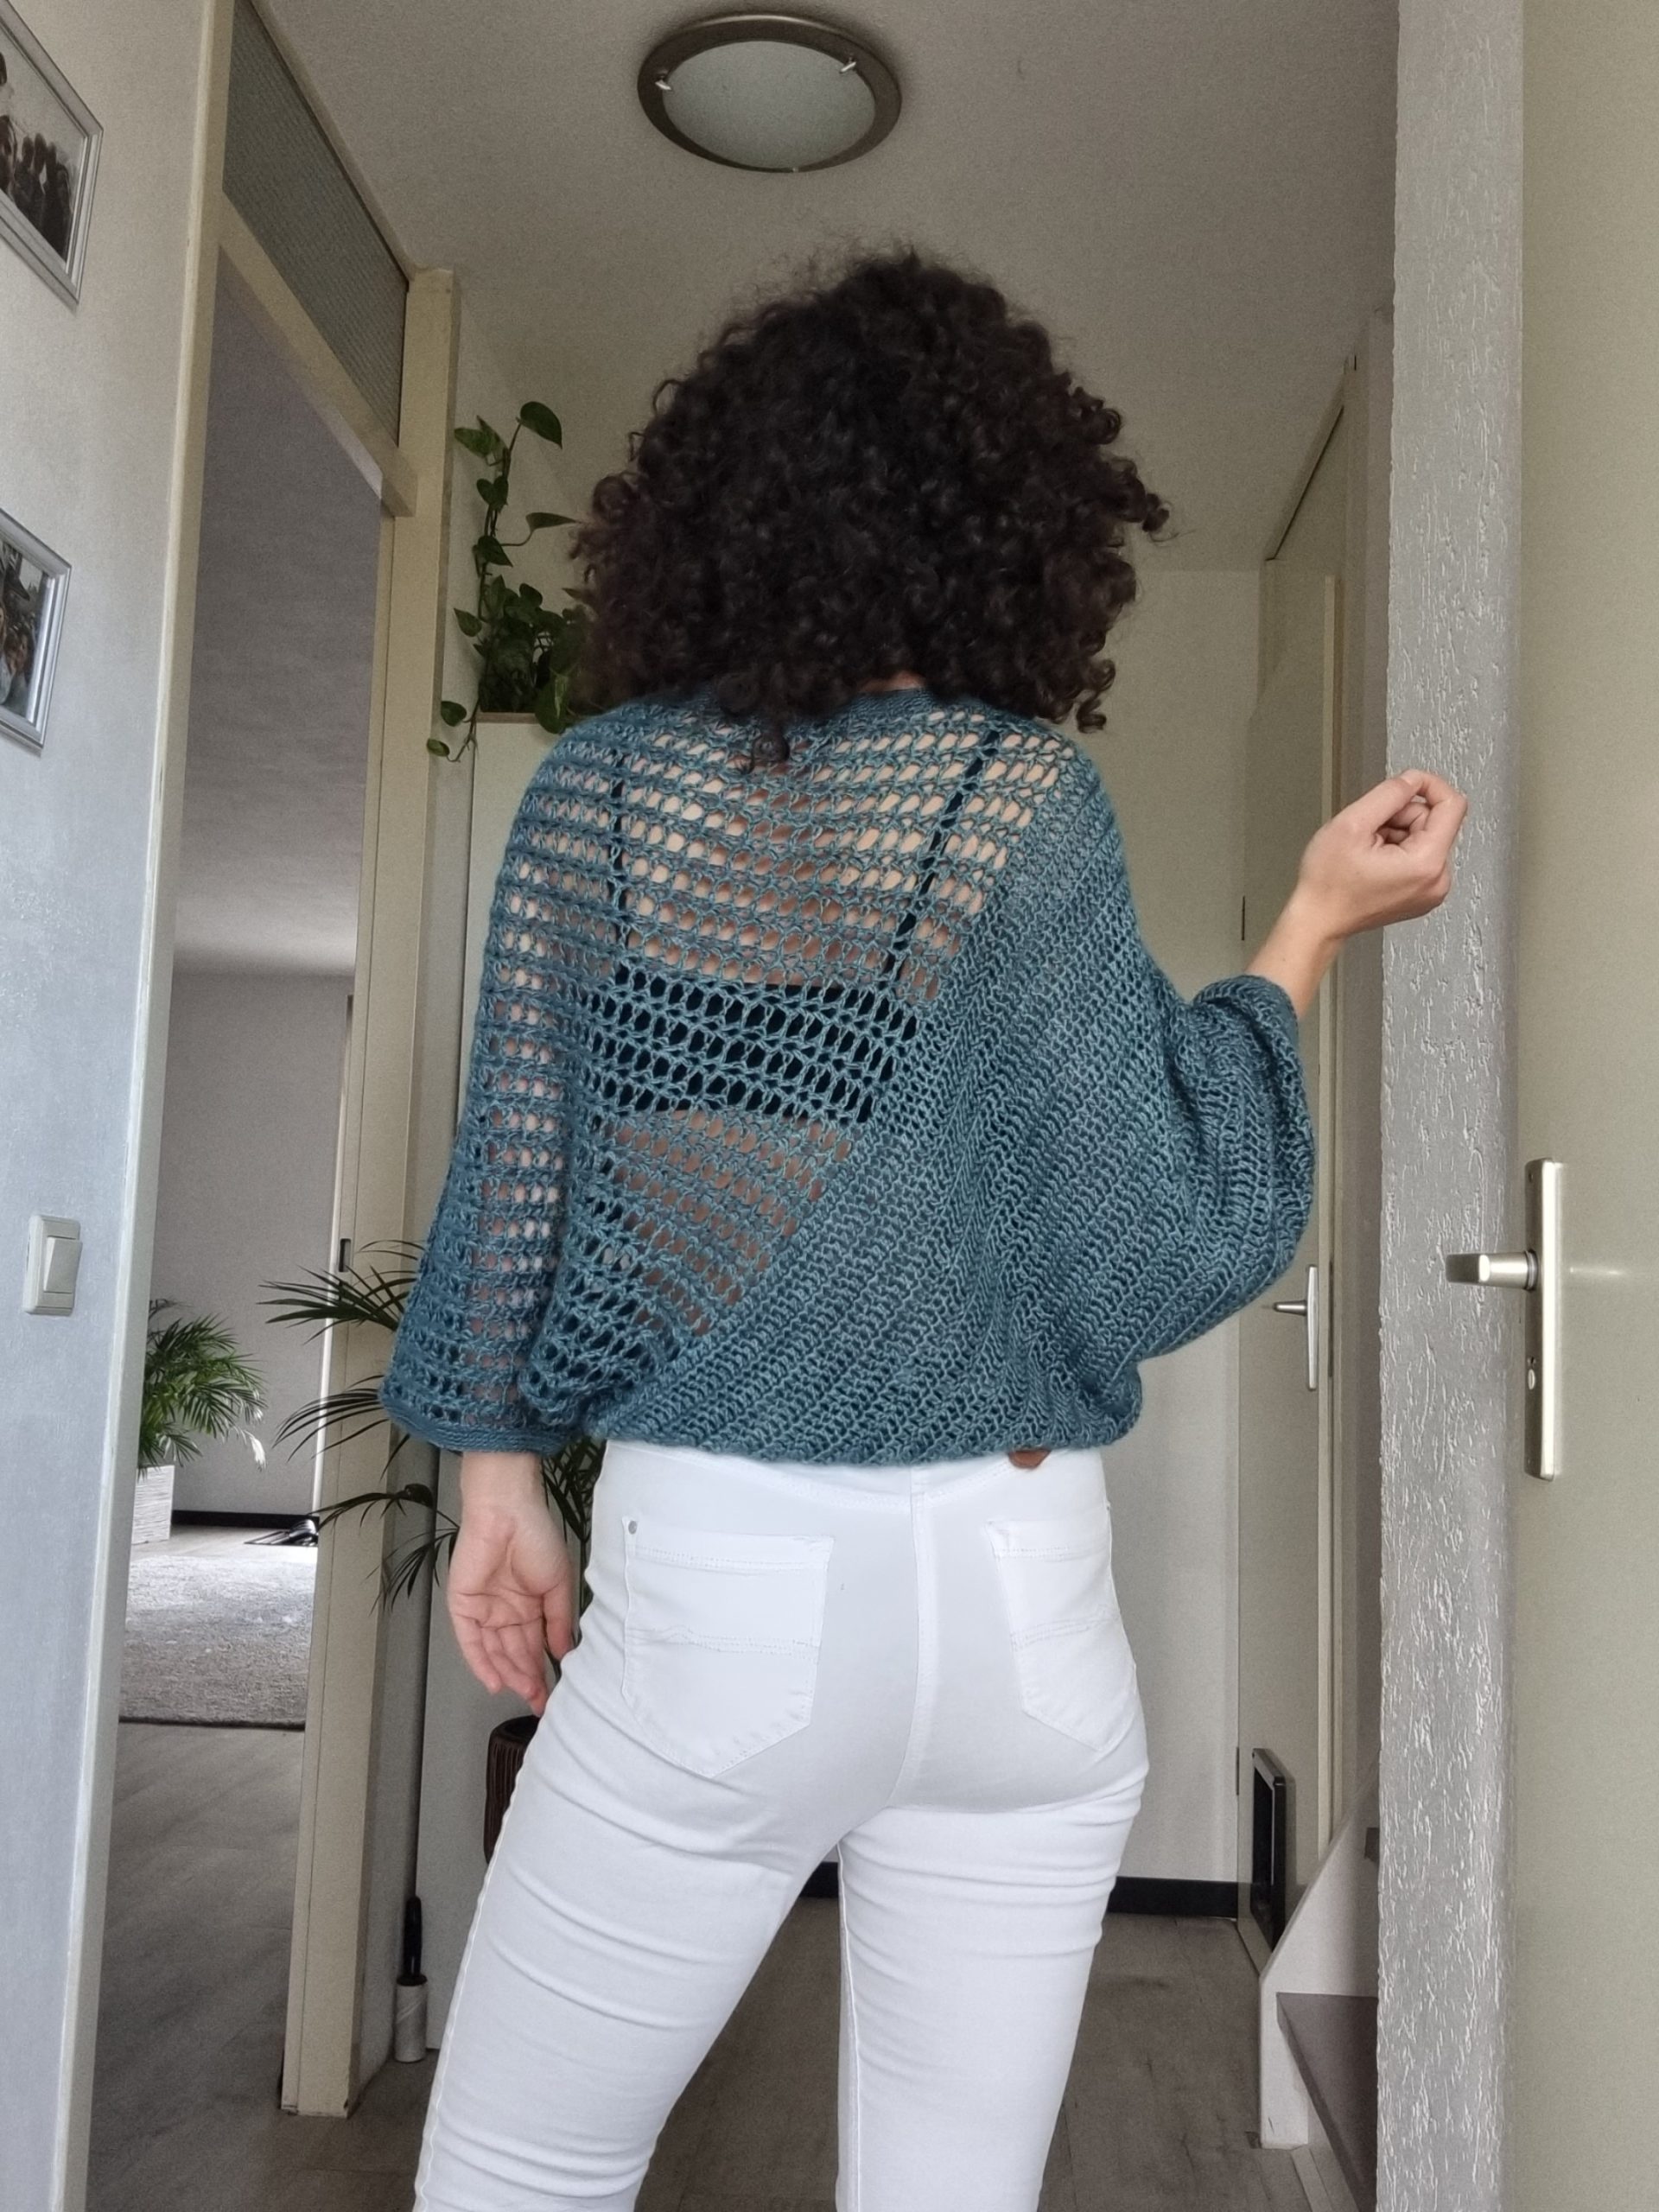
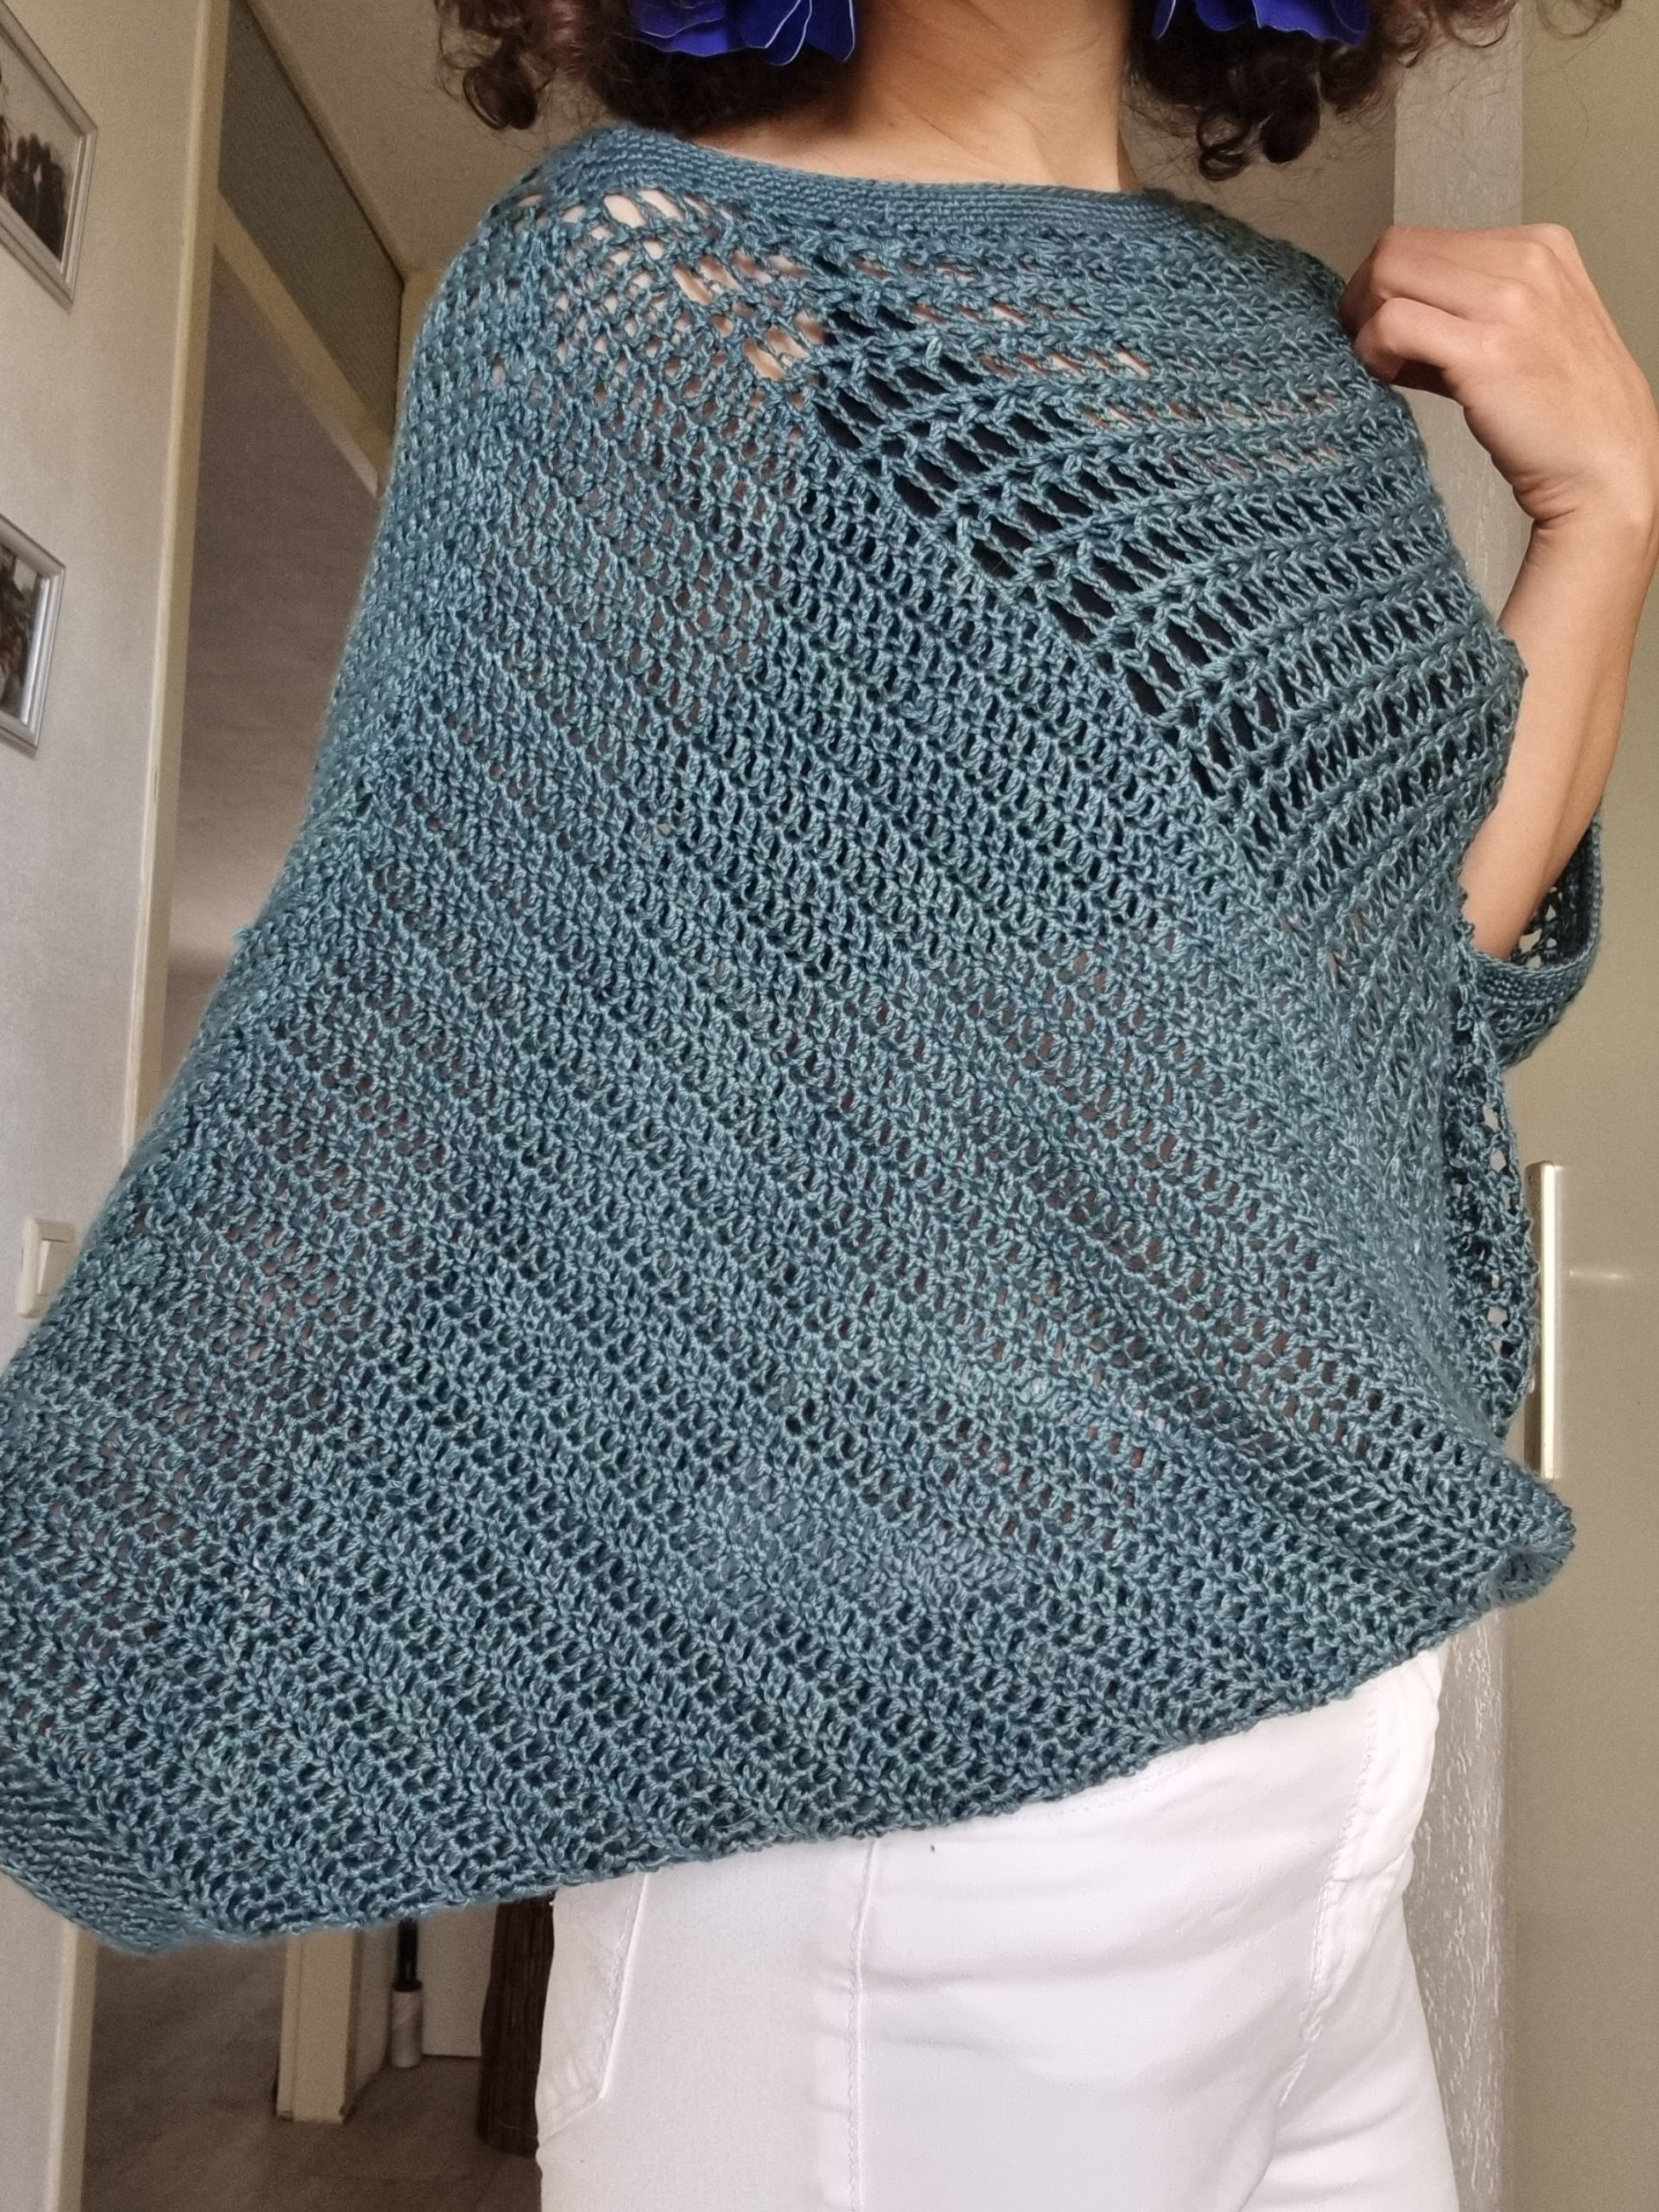
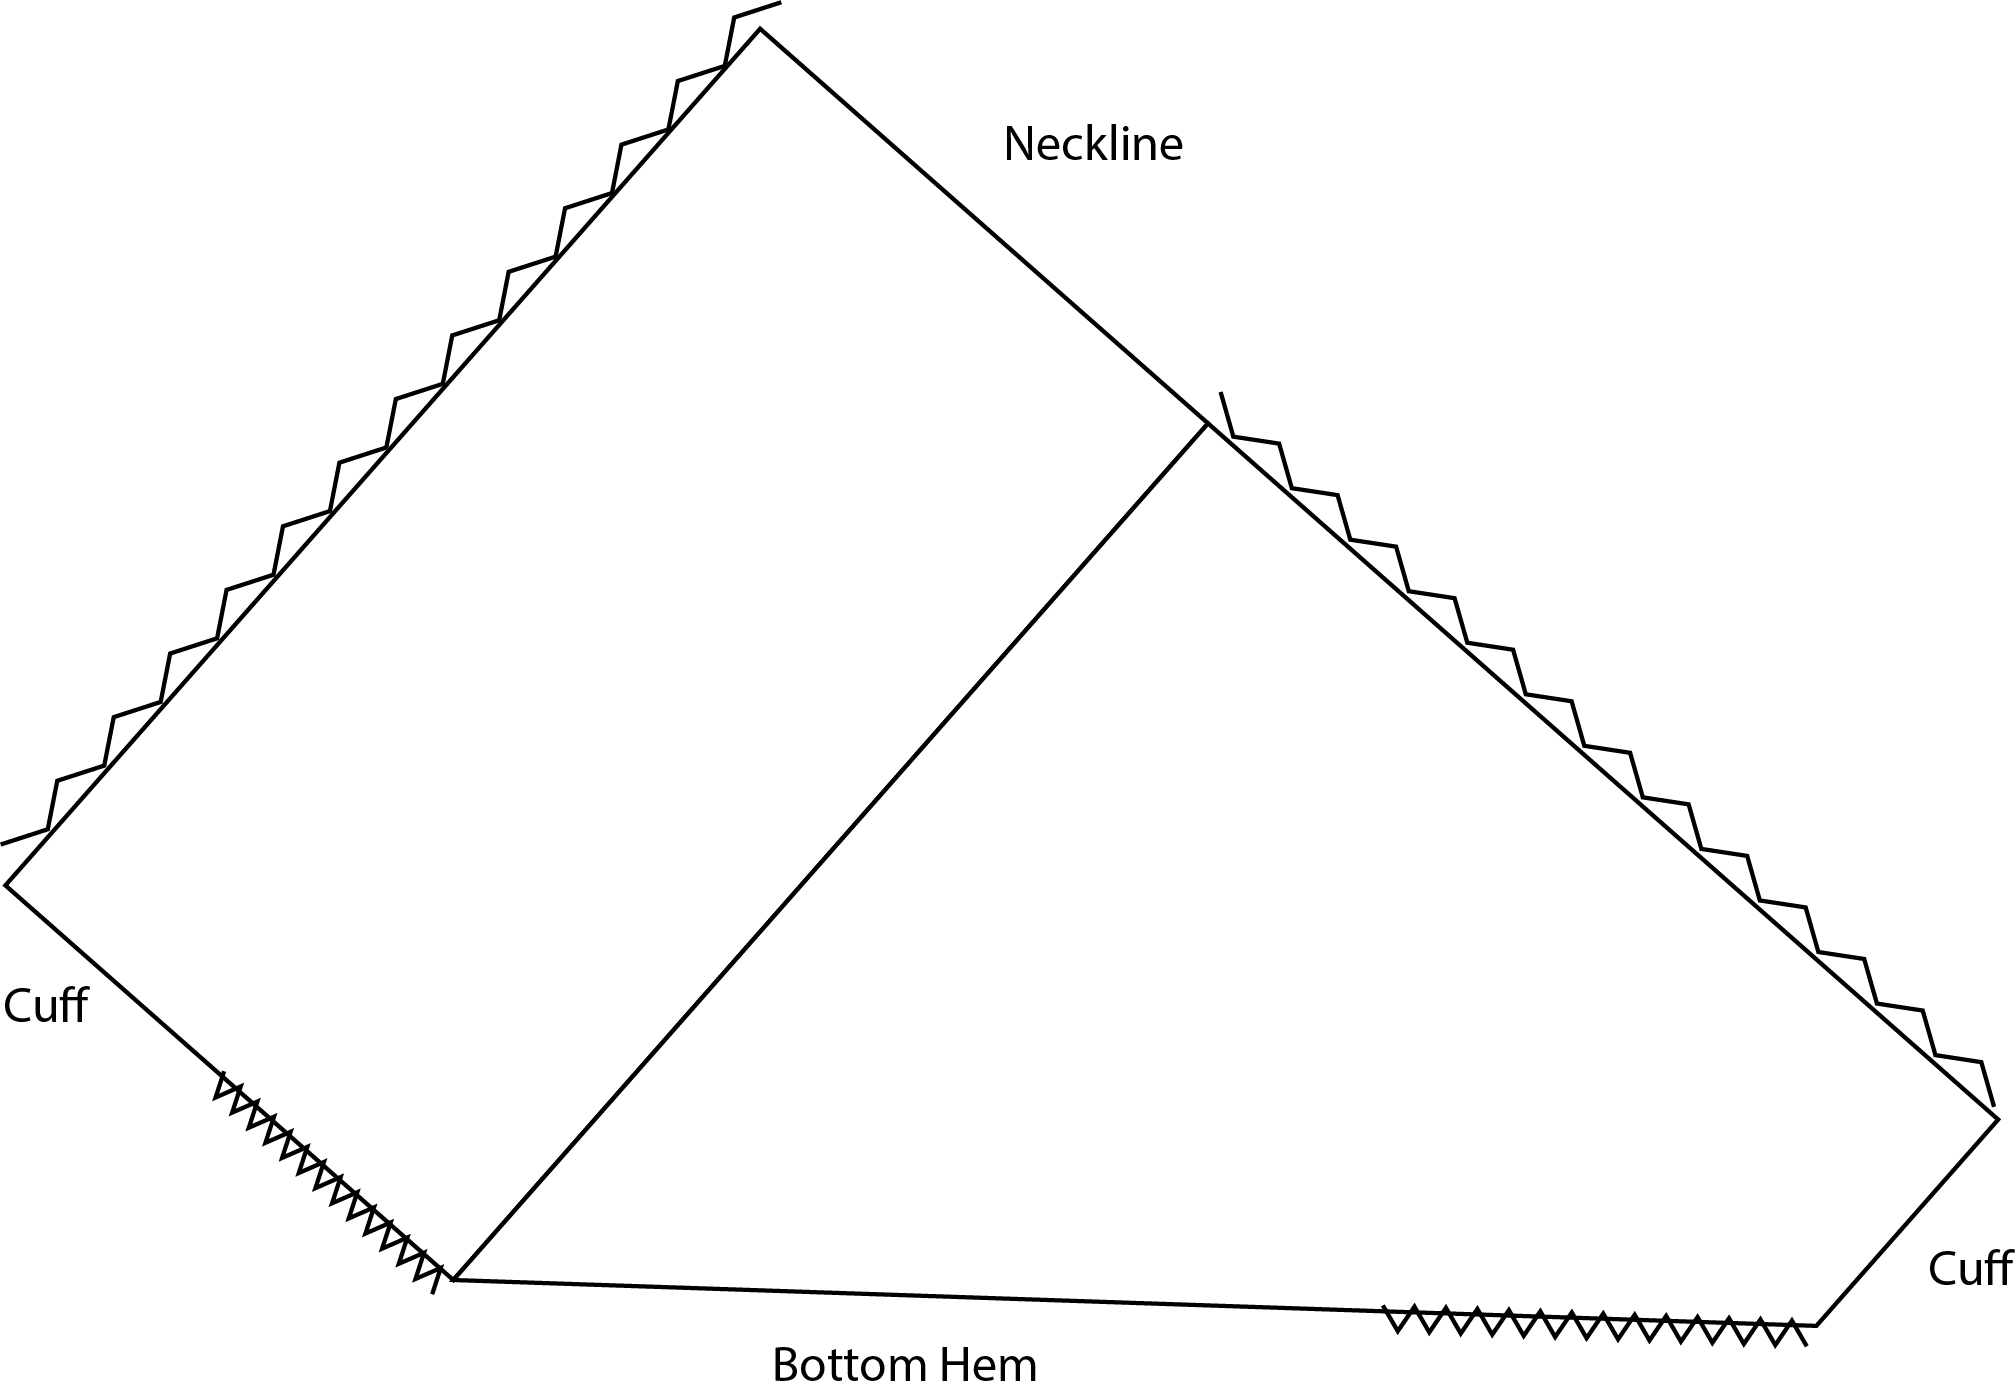
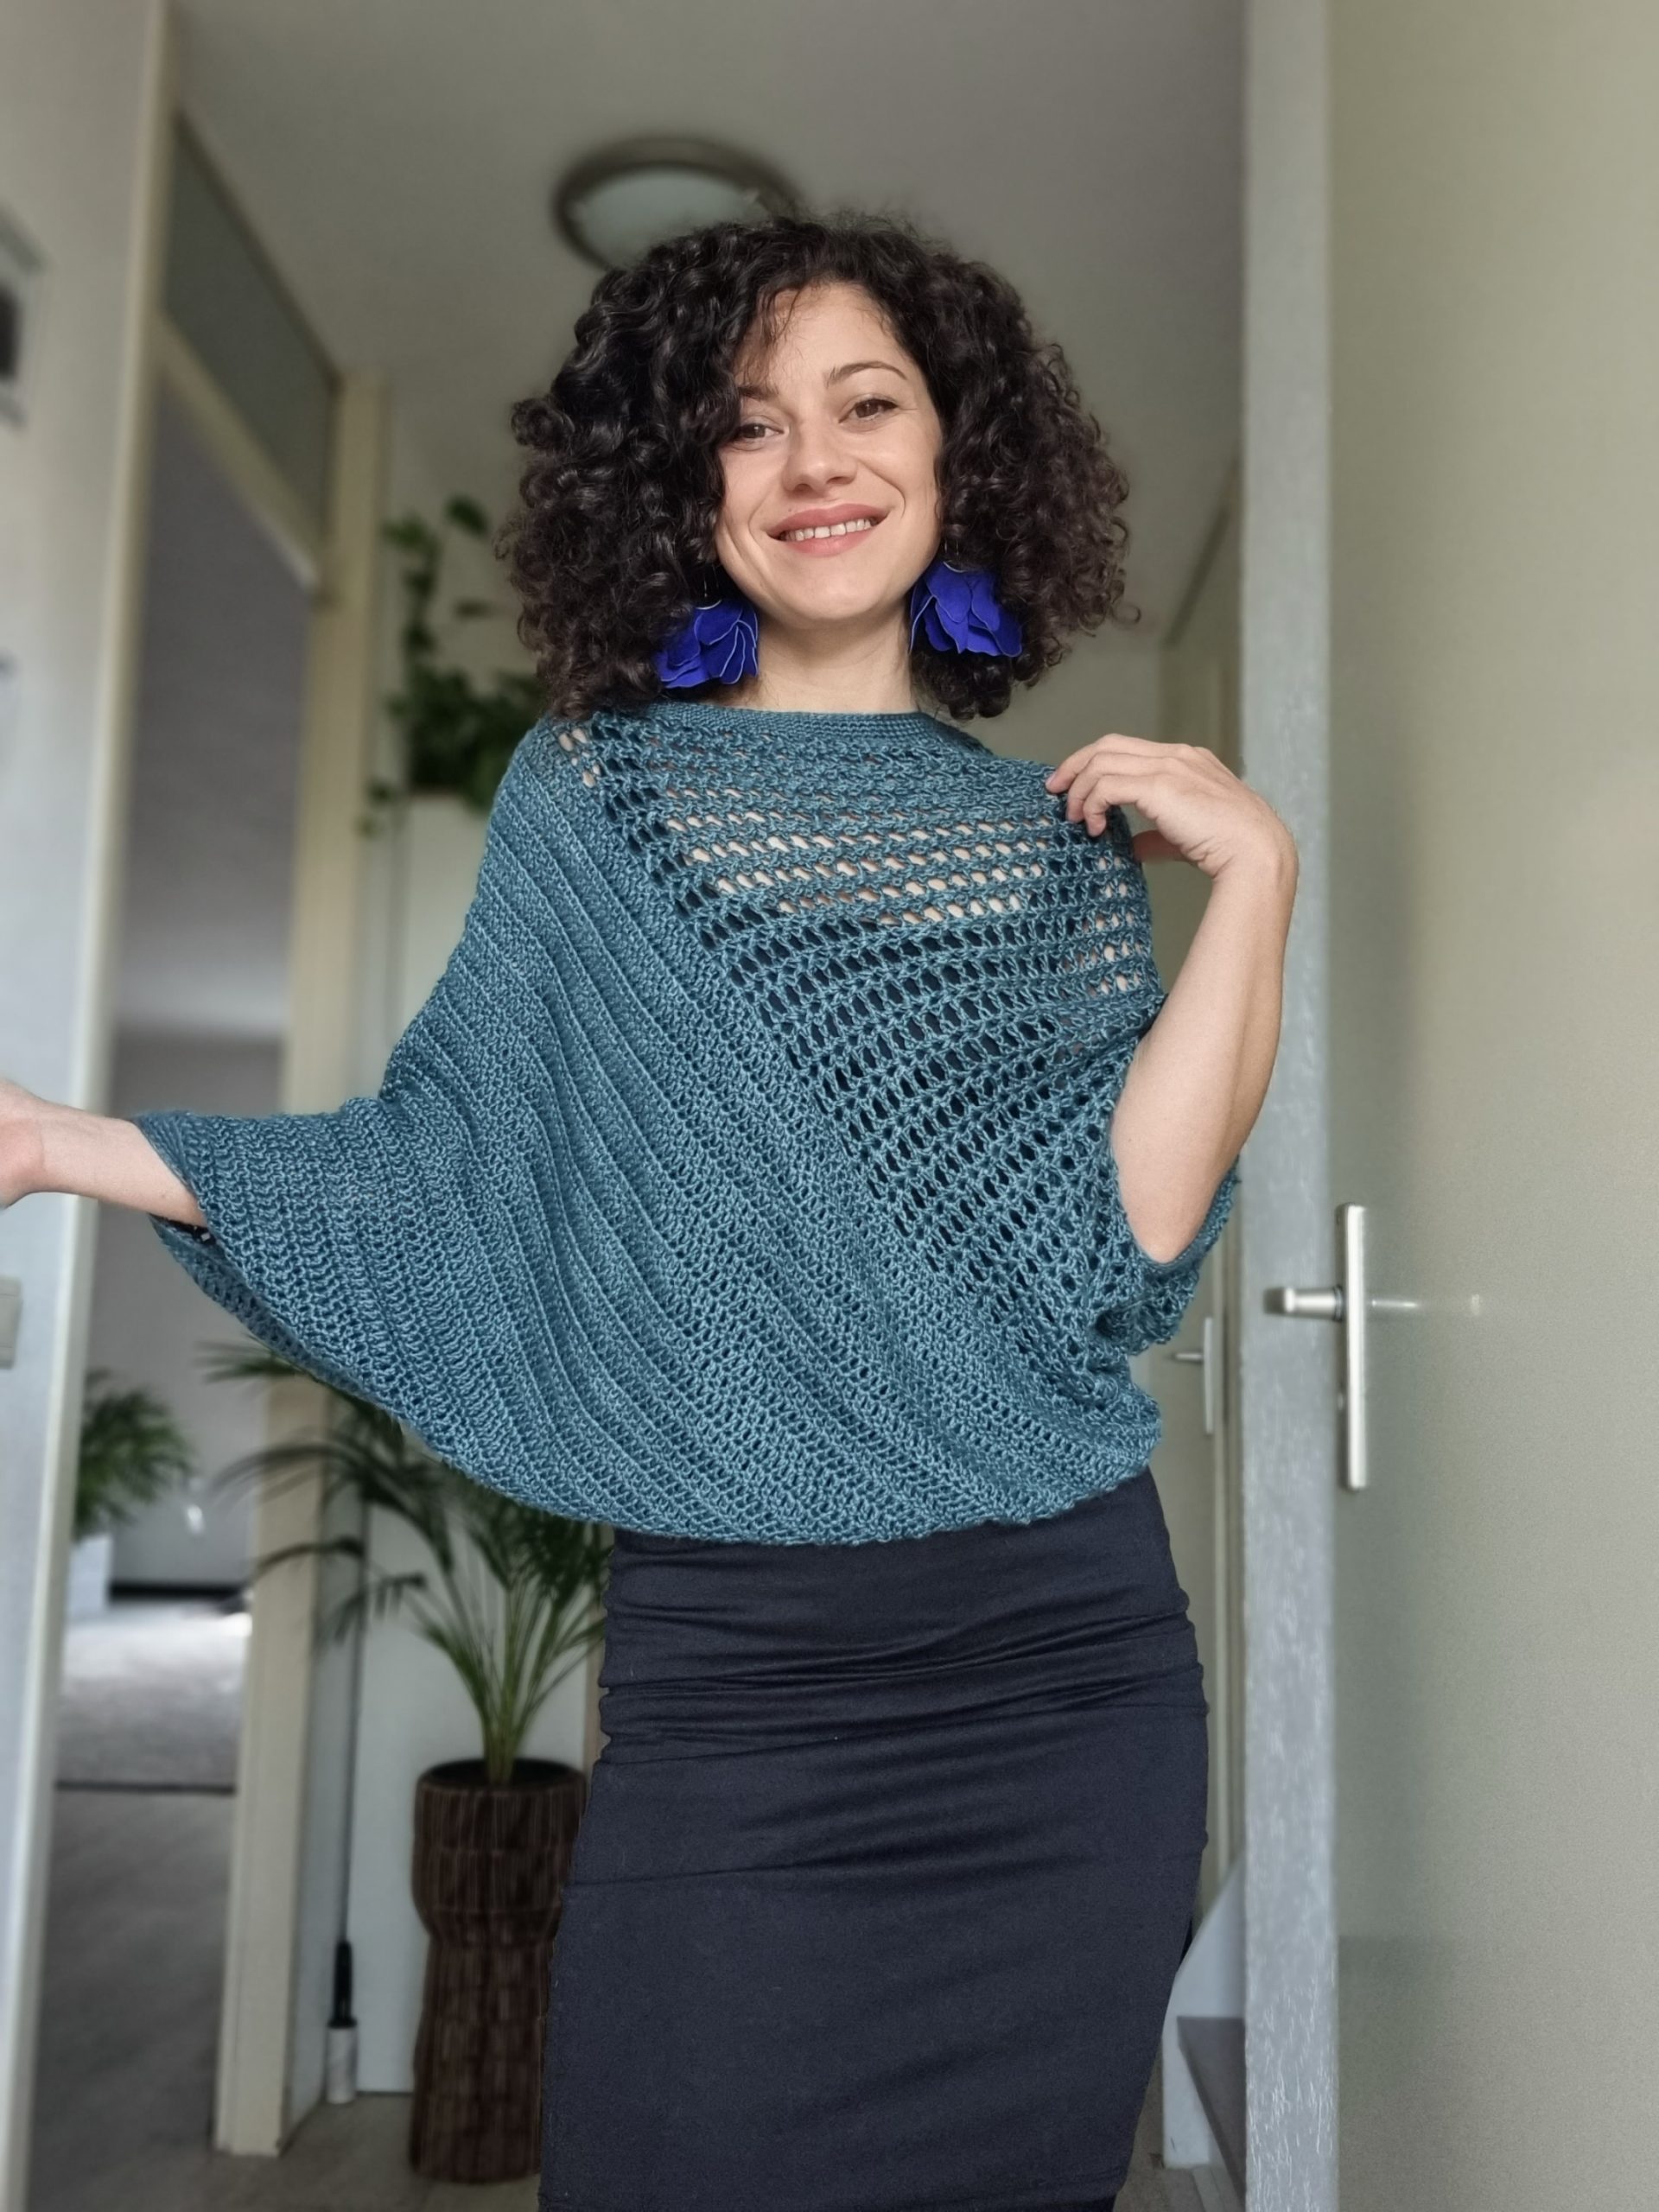
Introducing the Be Glam Poncho Blouse, a crochet design that redefines style and construction. This exquisite poncho blouse is made from two identical panels, thoughtfully designed to complement both the front and back of this fashionable garment.

The innovative pyramid construction is the hallmark of this design, offering a fresh and captivating twist to traditional crochet fashion.

Each panel comprises two distinct sections, each flaunting its own intricate stitch pattern.

The combination of these stitch patterns not only adds visual interest but also enhances the texture and drape of the garment. The play of stitches creates an appealing interplay of light and shadow, making the Be Glam Poncho Blouse a true work of art.

This versatile poncho blouse is suitable for various occasions. Whether paired with jeans for a casual outing or layered over a dress for a formal event, the Be Glam Poncho Blouse effortlessly combines comfort and style.

MEASUREMENTS AND SIZES

The PDF version of this pattern includes stitch charts. You can purchase the easily printable PDF pattern here:


The Be Glam Poncho Blouse Pattern is thoughtfully designed to cater to a wide range of sizes, with options available from Small all the way up to 5 Extra Large. To provide a helpful point of reference, our model stands at 5.5 feet tall and is wearing a size Small

Sleeve a: 51cm (56, 60, 64, 69, 76, 80, 84)
Neckline b: 25 cm (27, 30, 30, 32, 32, 34, 34)
Sleeve c: 41cm (45, 48, 53, 56, 61, 64, 67)
Cuff Width d: 15cm (16, 17, 17, 18, 21, 22, 23)
Bottom Hem Width e: 43cm (48, 53, 58, 63, 68, 73, 78)

YARN

I used Beacon DK by Expression Fiber Arts in color Torrent. Yarn Composition: 25% Baby Camel, 25% Mulberry Silk, 50% Lyocell. Each hank has 228 meters.

How much yarn do you need?

For each size you will need: 3 (4, 5, 5, 6, 6, 7, 7) hanks

680 (810, 940, 1040, 1180, 1350, 1490, 1590) meters

The PDF version of this pattern includes stitch charts. You can purchase the easily printable PDF pattern here:

ABBREVIATIONS

Ch – chain
Sc – single crochet
dc – double crochet
Vst – 1dc, 1ch, 1dc into the same st or space
Slst – slip stitch
St(s) – stitch(es)
R – rounds
** – repeated section.

TENSION

Using 4.5 mm crochet hook in:
Vst: 4.5 Vsts = 10 cm / 8.5 rows = 10 cm
Dc: 17sts = 10 cm / 7 rows = 8 cm

The Gauge is measured after blocking

STITCH PATTERN

The 2 stitch patterns used for the Be Glam Poncho Blouse are V stitch and double crochet.
For this particular design, the Vst is worked as follows;

Chain a multiple of 4+1 sts
R1: ch3, and start into the 6th ch, 1Vst, *1ch, skip the next 3sts, 1Vst in next; *rep. until you have 2sts left, 1ch, skip 1st, 1dc in the last st; 4ch and turn
R2: *1Vst in the 1ch-sp of the next Vst, 1ch; *rep to the end of the row, 1dc into the third ch; ch4 and turn;
Rep. R2 until the desired length

CONSTRUCTION

Each panel is divided into two distinctive sections, each showcasing its own stitch pattern. Section 2 is worked continuing Section 1. In this second section, we commence the decreases exclusively at one end. This technique not only lays the foundation for a flawlessly flat and straight bottom for the blouse but also defines and shapes the sleeves.

Furthermore, as you assemble the four openings of the blouse, you have the flexibility to tailor them to your personal preferences. By sewing fewer or more stitches, you can effortlessly customize the fit to suit your individual needs.

INSTRUCTION

PANEL (MAKE 2 FOR BACK AND FRONT)

Pattern Notes:
The panel is worked flat; turn after each row;
The panel construction is out of 2 sections: section 1 in Vsts and section 2 in dc;
3ch at the beggining of a row will count as a first dc.

Start: ch93 (101, 109, 117, 125, 137, 145, 153)

Section 1
R1: ch3, and start into the 6th ch, 1Vst, *1ch, skip the next 3sts, 1Vst in next; *rep. until you have 2sts left, 1ch, skip 1st, 1dc in the last st; 4ch and turn
R2: *1Vst in the 1ch-sp of the next Vst, 1ch; *rep to the end of the row, 1dc into the third ch; ch4 and turn;
Rep. R2 until you have: 28 (30, 32, 32, 34, 34, 36, 36) rows

Section 2
Notes:
– Upon completing the final row of Section 1, work 3ch and turn your work.
– In this section, we will initiate decreases exclusively at one end, which serves the dual purpose of establishing a flat,

straight bottom for the blouse and shaping the sleeve.
– The number of rows required for this section will vary depending on the size you’re making to achieve the desired measurements.
– Starting from the next row, we will begin the decreasing process. Please note that on the row where the decreases occur, the initial chain of 3 (ch3) will not count as your first double crochet (dc). Instead, consider the first double crochet you made at the beginning of the row as your first stitch.
– When it comes to decreasing at the end of a row, follow these steps to work a wide 2 dc together:

– Insert your hook into the next stitch.
– Yarn over and pull up a loop.
– Yarn over again and pass it through 2 loops on your hook.
– Skip the following stitch.
– Insert your hook into the next stitch.
– Yarn over, pull up a loop.
– Yarn over once more and pass it through 2 loops on your hook.
-Finally, yarn over and pass it through all the loops on your hook
Next row:
Start from where your yarn is;
R1: 1dc in each st to the end of the row; ch3 and turn
Total sts: 95 (103, 111, 119, 127, 139, 147, 155)

The PDF version of this pattern includes stitch charts. You can purchase the easily printable PDF pattern here:

Next row: ch3 (don’t make it if you already worked ch3 before turning your work), skip the next st, 1dc in next st, 1dc n each st to the end of the row; 3ch and turn
Sts: 93 (101, 109, 117, 125, 137, 145, 153)

Next row: 1dc in each st until you have 3sts left, wide dc2tog (see explanation above); 3ch and turn

Rep. last 2 rows until you have fors Section 2:
36 (39, 42, 46, 49, 53, 56, 59) rows

Notes:
You worked in total 35 (38, 41, 45, 48, 52, 55, 58) rows decreasing at one end. You decreased with 2sts per row and you should have left at the end of Section 2: 25 (27, 29, 29, 31, 35, 37, 39 ) sts

Fasten off. The panel is done. Repeat the pattern one more time for the second panel

ASSEMBLING

To assemble the pieces, follow these steps:

Note: for joining the Vsts pieces I used crochet hook and using chain sts and single crochet I’ve created a lace joining.

You can see the process in the video tutorial here:

Start by sewing together the side edges of section 1.

Next, sew together the side edges of section 2, the edge without decreases. If you wish to adjust the neckline, you have the option to attach a few side rows from the first section at this point as well.

Mark the openings at the bottom and cuffs, then proceed to sew the segments located between the cuffs and the bottom hem together. This step will complete the assembly of your garment

Sts for cuff 1 (on Section 2): 25 (27, 29, 29, 31, 35, 37, 39)
Side rows cuff 2 (on Section 1): 13 (14, 15, 15, 16, 18, 19, 20)
Bottom hem side rows: 29 (32, 36, 39, 43, 46, 49, 53)

EDGING

Notes:

Be sure to add the edging around the cuffs, neckline, and the bottom hem for a polished finish.
We recommend using a 3.5 mm crochet hook for this project.
When working into the side rows, remember to crochet 2 single crochet stitches (2sc) in each side row.
On the neckline, decrease on each side where the sleeves’ seams are, by working 3 single crochet stitches together (3sc together).
Crochet 5 rounds in single crochet (sc) stitches, and complete the final round using slip stitches. If you prefer the last round of slip stitches to be less tight, feel free to switch to a larger hook size for that round.

TO FINISH

Weave in all ends and block to measurements.

I hope you enjoyed this pattern and can’t wait to see yours Be Glam Poncho Blouses.

The PDF version of this pattern includes stitch charts. You can purchase the easily printable PDF pattern here: