I had in mind for so long to make a crocheted vest perfect to overlay in Spring or Autumn, and when I first saw this Concept Tribu Yarn by Katia, I knew that I would make it.
At first, I wanted to make it using some faux fur yarn, but personally, I wouldn’t say I like the fact that it will look almost like a store piece of clothes and that the stitches won’t be visible. I love to wear crochet, and I love to show that I wear crochet.
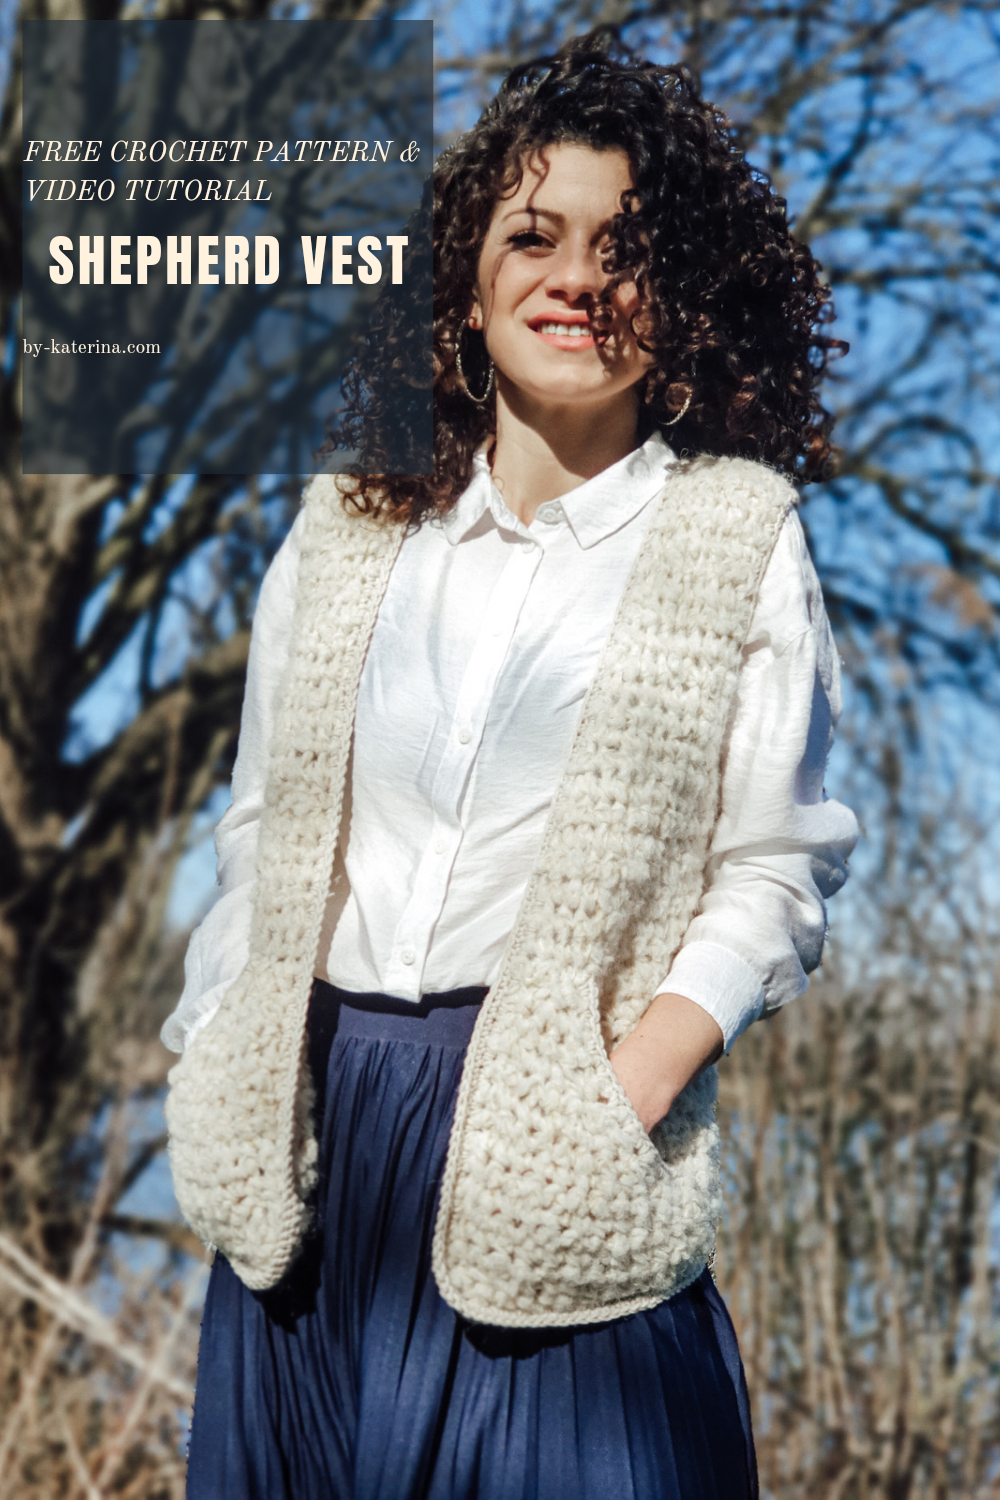
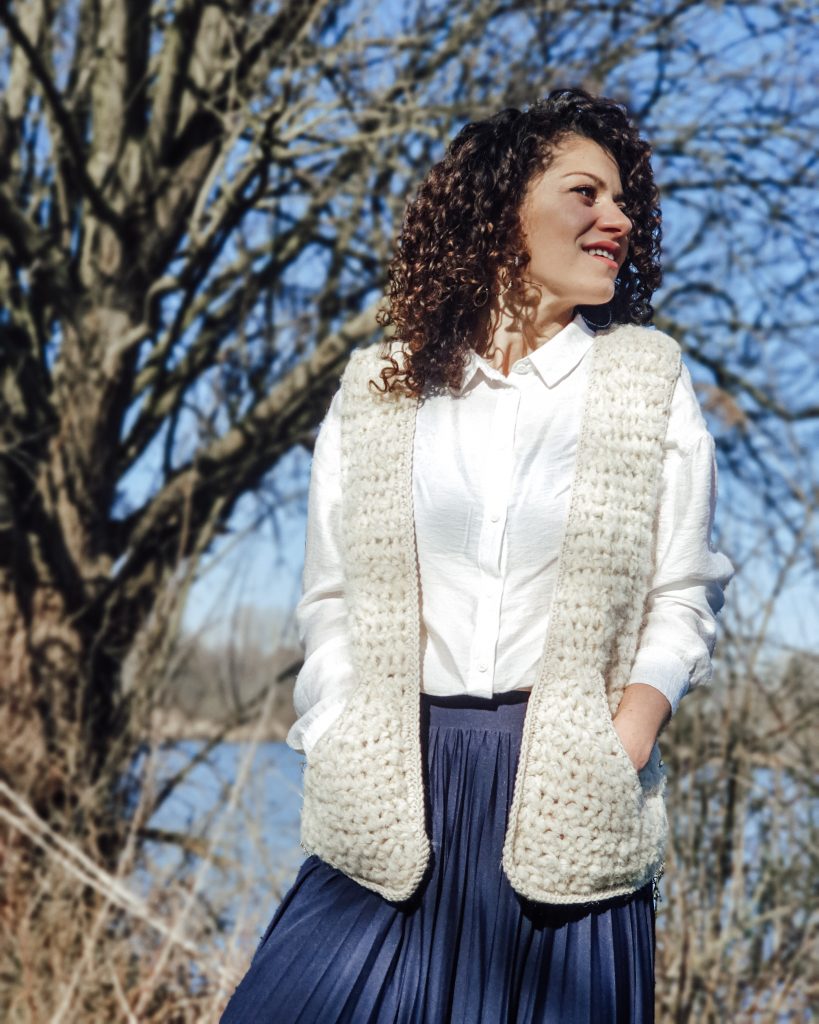
The name wasn’t difficult to choose. The yarn itself reminds me of the actual wool, and the vest is pretty similar to what I remember that shepherds were wearing back in time (maybe still do).
Anyway, I am super happy with my Shepherd Vest, and of course, I had to share the pattern with you! I hope you will like this design. This vest is not that difficult to make; it’s a fast project and a useful final garment piece.

You can Purchase the easily printable PDF version of this pattern here:
Next, let’s see what we will need and how to make this Shepherd Vest:
MATERIALS
- Yarn
- Category 6 ( Super Bulky)
- Category 4 (Medium) for edging
- Crochet Hook
- 10 mm crochet hook and a 4.5 mm for edging
- You will need a yarn needle for weave in ends
- Scissors
- stitch markers (optional)
*the yarn used for the vest (except edging) is categorized being a Medium weight yarn, but it is fuzzy and requires a bigger crochet hook
NOTES ABOUT DESIGN
This pattern requires techniques for single crochet, single crochet decrease.
The vest construction is straightforward. Start by working front and back panels together up to the armpit, then split it into 3 pieces: 2 front panels and 1 back panel.
For the armhole depth, the 3 pieces are worked individually. The armholes and the neckline have a bit of shaping.
The edging is worked with a smaller hook size and a different yarn. This is optional.
The pockets are worked individually and then stitch on the vest’s front panels.
The pattern is available in 8 sizes, from Small to 2X Large, and wrote in US terms.
MEASUREMENTS AND SIZES
The Shepherd Vest has a slightly oversized fit, with a positive ease of about 14 cm around the bust circumference.
Final measurements of the Shepherd Vest are listed below.
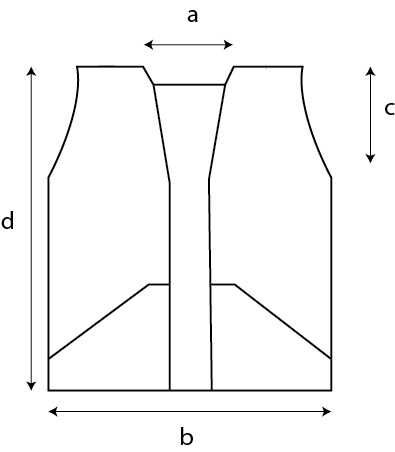
Neck Line a: 17 cm (17, 20, 20, 23, 23, 26, 26)
Bust Width b: 50 cm (55, 60, 65, 70, 75, 80, 85)
Armhole Depth c: 19 cm (22, 22, 25, 25, 28, 28, 28)
Length d: 51.5 cm (54.5, 54.5, 57.5, 57.5, 60.5, 60.5, 60.5)
These measurements will fit:
| To Fit cm |
S |
M |
L |
XL |
2XL |
XL |
2XL |
3XL |
4XL |
5XL |
| Bust | 86 | 96 | 106 | 116 | 126 | 116 | 126 | 136 | 146 | 156 |
How much Yarn do you need?
I used Concept Tribu by Katia Yarns in Color Ocher (81) as the primary color, and Concept Sweet Fleece by Katia in color Beige (61)
Each Ball of Tribu has 50 grams and approximately 75 meters, and Concept Sweet Fleece has 50 grams and approximately 120 meters.
Below you can find how much Yarn you will need for each size.
For each size, you will approximate need:
| S | M | L | XL | XXL | 3XL | 4XL | 5XL | |
| Katia Tribu | 3.5 | 4 | 5 | 5 | 5 | 6 | 6 | 7 |
| Katia Sweet Fleece | 1 | 2 | 2 | 2 | 2 | 2 | 2 | 2 |
You can Purchase the easily printable PDF version of this pattern here:

STITCH PATTERN AND TECHNIQUES
The entire vest is worked in single crochet stitches.
The piece is worked flat, except the ribbing, which is worked in rounds
ABBREVIATIONS
- Ch – chain
- sc – single crochet
- Dec – Decrease: sc2tog: insert the hook in the next available stitch, yarn over and pull out a loop, insert the hook into the next st, yarn over and pull out a loop, yarn over and pass it through all the loops on your hook
- St(s) – stitch(es)
- R – rows
- ** – repeated section.
TENSION (GAUGE)
Using a 10 mm crochet hook in single crochet stitches
- 6 sts and 8 rows = 10 cm
NOTES
Always ch1 at the end of each row. Ch1 does not count as the first dc.
All pieces are worked flat. Turn after each row.
Work the decrease after the first st, at the beginning of the row, and before the last st at the end of the row (will give a nice even edge)
To adjust the length of the vest, work more or fewer rows up to the armpit.
The pocket has the same size for all sizes. Adjust the width by adding more stitches and the length by working more rows. Choose to decrease more rows if needed.

You can Purchase the easily printable PDF version of this pattern here:
INSTRUCTIONS
Numbers for sizes M, L, XL, XXL, 3XL, 4XL, and 5XL are written between brackets.
LENGTH TO THE ARMPIT
Start: ch 60 (68, 72, 80, 84, 88, 96, 100)
R1: ch1, starting with the 2BD st, 1Sc in each st until the end of the row.
R2: 1sc in each st to the end of the row.
R3 to R26: Rep. R2
ARMHOLE DEPTH
Use stitch markers to mark the 3 panels:
Back Panel:30 (34, 36, 40, 42, 44, 48, 50) sts
Front Panels: 15 (17, 18, 20, 21, 22, 24, 25) sts
SIZE Small
LEFT FRONT PANEL
Start: from where your yarn is
R1: 1sc, 1dec, 1sc in the next sts, except the last 3, 1dec, 1sc
R2: 1sc, 1dec, 1sc in next sts until the end of the row.
R3: 1sc in next sts, except the last 3, 1dec, 1sc in last st.
R4: 1sc in next sts, except the last 3, 1dec, 1sc in last st.
R5, R6: 1sc in each st until the end of the row
R7: 1sc, 1dec, 1sc in each st until the end of the row.
R8, R9: 1sc in each st until the end of the row
R10: Rep. R4
R11, R12: 1sc in each st until the end of the row.
R13: Rep. R7
R14, R15: 1sc in each st until the end of the row
Fasten off.
Sts left: 7
BACK PANEL
Rejoin yarn into the first st.
R1: 1sc, 1dec, 1sc in next sts, except the last 3, 1dec, 1sc.
R2, R3: Rep. R1
R4 – R15: 1sc in each st until the end of the row.
Fasten off.
Sts. Left 24
RIGHT FRONT PANEL
Rejoin yarn in the first st (the one next to the back panel)
R1: 1sc, 1dec, 1sc in each of the next sts, except the last 3, 1dec, 1sc in the last st.
R2: 1sc in each of the next sts, except the last 3, 1dec, 1sc in the last st.
R3: 1sc, 1dec, 1sc in each of the next sts until the end of the row.
R4: Rep.R3
R5, R6: 1sc in each st until the end of the row.
R7: 1sc in each st, except the last 3, 1dec, 1sc in last st.
R8, R9: Rep. R4, R5
R10: Rep. R3
R11, R12: Rep. R4, R5
R13: Rep. R7
R14, R15: rep. R4, R5
Fasten off.
Sts. Left 7
Move to the ASSEMBLING section.
SIZE Medium
LEFT FRONT PANEL
Start: from where your yarn is
R1: 1sc, 1dec, 1sc in the next sts, except the last 3, 1dec, 1sc
R2: 1sc, 1dec, 1sc in next sts until the end of the row.
R3: 1sc in next sts, except the last 3, 1dec, 1sc in last st.
R4: Rep. R1
R5, R6: 1sc in each st until the end of the row
R7: 1sc, 1dec, 1sc in each st until the end of the row.
R8, R9: 1sc in each st until the end of the row
R10: Rep. R3
R11, R12: 1sc in each st until the end of the row.
R13: Rep. R7
R14 – R17: 1sc in each st until the end of the row
Fasten off
Sts left 8

You can Purchase the easily printable PDF version of this pattern here:
BACK PANEL
Rejoin yarn into the first st.
R1: 1sc, 1dec, 1sc in next sts, except the last 3, 1dec, 1sc.
R2-R4: Rep. R1
R5 – R17: 1sc in each st until the end of the row.
Fasten off.
Sts. Left 26
RIGHT FRONT PANEL
Rejoin yarn in the first st (the one next to the back panel)
R1: 1sc, 1dec, 1sc in each of the next sts, except the last 3, 1dec, 1sc in the last st.
R2: 1sc in each of the next sts, except the last 3, 1dec, 1sc in the last st.
R3: 1sc, 1dec, 1sc in each of the next sts until the end of the row.
R4: Rep.R1
R5, R6: 1sc in each st until the end of the row.
R7: 1sc in each st, except the last 3, 1dec, 1sc in last st.
R8, R9: Rep. R4, R5
R10: Rep. R3
R11, R12: Rep. R4, R5
R13: Rep. R7
R14-R17: rep. R4, R5
Fasten off.
Sts. Left 8
Move to the ASSEMBLING section.
SIZE Large
LEFT FRONT PANEL
Start: from where your yarn is
R1: 1sc, 1dec, 1sc in the next sts, except the last 3, 1dec, 1sc
R2: 1sc, 1dec, 1sc in next sts until the end of the row.
R3: 1sc in next sts, except the last 3, 1dec, 1sc in last st.
R4: Rep. R1
R5: Rep. R3
R6: 1sc in each st until the end of the row
R7: Rep. R2
R8, R9: Rep. R6
R10: Rep. R3
R11, R12: Rep. R6
R13: Rep. R2
R14-R18: rep. R6
Fasten off
Sts left: 8
BACK PANEL
Rejoin yarn into the first st.
R1: 1sc, 1dec, 1sc in next sts, except the last 3, 1dec, 1sc.
R2-R5: Rep. R1
R6 – R18: 1sc in each st until the end of the row.
Fasten off.
Sts. Left 26
RIGHT FRONT PANEL
Rejoin yarn in the first st (the one next to the back panel)
R1: 1sc, 1dec, 1sc in each of the next sts, except the last 3, 1dec, 1sc in the last st.
R2: 1sc in each of the next sts, except the last 3, 1dec, 1sc in the last st.
R3: 1sc, 1dec, 1sc in each of the next sts until the end of the row.
R4: Rep.R1
R5: Rep. R3
R6: 1sc in each st until the end of the row.
R7: Rep. R2
R8, R9: Rep. R6
R10: Rep. R3
R11, R12: Rep. R6
R13: Rep. R2
R14-R18: rep. R6
Fasten off.
Sts. Left 8
Move to the ASSEMBLING section.
SIZE X Large
LEFT FRONT PANEL
Start: from where your yarn is
R1: 1sc, 1dec, 1sc in the next sts, except the last 3, 1dec, 1sc
R2: 1sc, 1dec, 1sc in next sts until the end of the row.
R3: 1sc in next sts, except the last 3, 1dec, 1sc in last st.
R4: Rep. R1
R5: Rep. R3
R6: Rep. R2
R7: Rep. R2
R8, R9: 1sc in each st until the end of the row
R10: Rep. R3
R11, R12: Rep. R8, R9
R13: Rep. R2
R14, R15: rep. R8, R9
R16: Rep. R3
R17-R20: Rep. R8, R9
Fasten off
Sts left: 8
BACK PANEL
Rejoin yarn into the first st.
R1: 1sc, 1dec, 1sc in next sts, except the last 3, 1dec, 1sc.
R2-R6: Rep. R1
R7 – R20: 1sc in each st until the end of the row.
Fasten off.
Sts. Left 28
RIGHT FRONT PANEL
Rejoin yarn in the first st (the one next to the back panel)
R1: 1sc, 1dec, 1sc in each of the next sts, except the last 3, 1dec, 1sc in the last st.
R2: 1sc in each of the next sts, except the last 3, 1dec, 1sc in the last st.
R3: 1sc, 1dec, 1sc in each of the next sts until the end of the row.
R4: Rep.R1
R5: Rep. R3
R6: Rep.R2
R7: Rep. R2
R8, R9: 1sc in each st until the end of the row
R10: Rep. R3
R11, R12: Rep. R8, R9
R13: Rep. R2
R14, R15: rep. R8, R9
R16: Rep. R3
R17-R20: rep. R8, R9
Fasten off.
Sts. Left 8
Move to the ASSEMBLING section.
SIZE 2X Large
LEFT FRONT PANEL
Start: from where your yarn is
R1: 1sc, 1dec, 1sc in the next sts, except the last 3, 1dec, 1sc
R2: 1sc, 1dec, 1sc in next sts until the end of the row.
R3: 1sc in next sts, except the last 3, 1dec, 1sc in last st.
R4: Rep. R1
R5: Rep. R3
R6: Rep. R2
R7: Rep. R1
R8, R9: 1sc in each st until the end of the row
R10: Rep. R3
R11, R12: Rep. R8, R9
R13: Rep. R2
R14, R15: rep. R8, R9
R16: Rep. R3
R17-R20: Rep. R8, R9
Fasten off
Sts left: 8
BACK PANEL
Rejoin yarn into the first st.
R1: 1sc, 1dec, 1sc in next sts, except the last 3, 1dec, 1sc.
R2-R7: Rep. R1
R8 – R20: 1sc in each st until the end of the row.
Fasten off.
Sts. Left 28
RIGHT FRONT PANEL
Rejoin yarn in the first st (the one next to the back panel)
R1: 1sc, 1dec, 1sc in each of the next sts, except the last 3, 1dec, 1sc in the last st.
R2: 1sc in each of the next sts, except the last 3, 1dec, 1sc in the last st.
R3: 1sc, 1dec, 1sc in each of the next sts until the end of the row.
R4: Rep.R1
R5: Rep. R3
R6: Rep.R2
R7: Rep. R1
R8, R9: 1sc in each st until the end of the row
R10: Rep. R3
R11, R12: Rep. R8, R9
R13: Rep. R2
R14, R15: rep. R8, R9
R16: Rep. R3
R17-R20: rep. R8, R9
Fasten off.
Sts. Left 8
Move to the ASSEMBLING section.
SIZE 3X Large
LEFT FRONT PANEL
Start: from where your yarn is
R1: 1sc, 1dec, 1sc in the next sts, except the last 3, 1dec, 1sc
R2: 1sc, 1dec, 1sc in next sts until the end of the row.
R3: 1sc in next sts, except the last 3, 1dec, 1sc in last st.
R4: Rep. R1
R5: Rep. R3
R6: Rep. R2
R7: Rep. R1
R8: Rep. R2
R9: 1sc in each st until the end of the row
R10: Rep. R3
R11, R12: Rep. R9
R13: Rep. R2
R14, R15: rep.R9
R16: Rep. R3
R17-R22: Rep. R9
Fasten off
Sts left: 8
BACK PANEL
Rejoin yarn into the first st.
R1: 1sc, 1dec, 1sc in next sts, except the last 3, 1dec, 1sc.
R2-R8: Rep. R1
R9 – R22: 1sc in each st until the end of the row.
Fasten off.
Sts. Left 28
RIGHT FRONT PANEL
Rejoin yarn in the first st (the one next to the back panel)
R1: 1sc, 1dec, 1sc in each of the next sts, except the last 3, 1dec, 1sc in the last st.
R2: 1sc in each of the next sts, except the last 3, 1dec, 1sc in the last st.
R3: 1sc, 1dec, 1sc in each of the next sts until the end of the row.
R4: Rep.R1
R5: Rep. R3
R6: Rep.R2
R7: Rep. R1
R8: Rep. R2
R9: 1sc in each st until the end of the row
R10: Rep. R3
R11, R12: Rep. R9
R13: Rep. R2
R14, R15: rep.R9
R16: Rep. R3
R17-R22: rep. R9
Fasten off.
Sts. Left 8
Move to the ASSEMBLING section.

SIZE 4X Large
LEFT FRONT PANEL
Start: from where your yarn is
R1: 1sc, 1dec, 1sc in the next sts, except the last 3, 1dec, 1sc
R2: 1sc, 1dec, 1sc in next sts until the end of the row.
R3: 1sc in next sts, except the last 3, 1dec, 1sc in last st.
R4: Rep. R1
R5: Rep. R3
R6: Rep. R2
R7: Rep. R1
R8: Rep. R2
R9: Rep. R3
R10: Rep. R3
R11, R12: 1sc in each st until the end of the row
R13: Rep. R2
R14, R15: rep.R11, R12
R16: Rep. R3
R17-R22: Rep. R11, R12
Fasten off
Sts left: 9
BACK PANEL
Rejoin yarn into the first st.
R1: 1sc, 1dec, 1sc in next sts, except the last 3, 1dec, 1sc.
R2-R9: Rep. R1
R10 – R22: 1sc in each st until the end of the row.
Fasten off.
Sts. Left 30
RIGHT FRONT PANEL
Rejoin yarn in the first st (the one next to the back panel)
R1: 1sc, 1dec, 1sc in each of the next sts, except the last 3, 1dec, 1sc in the last st.
R2: 1sc in each of the next sts, except the last 3, 1dec, 1sc in the last st.
R3: 1sc, 1dec, 1sc in each of the next sts until the end of the row.
R4: Rep.R1
R5: Rep. R3
R6: Rep.R2
R7: Rep. R1
R8: Rep. R2
R9: Rep.R3
R10: Rep. R3
R11, R12: 1sc in each st until the end of the row.
R13: Rep. R2
R14, R15: rep.R11, R12
R16: Rep. R3
R17-R22: rep. R11, R12
Fasten off.
Sts. Left 9
Move to the ASSEMBLING section.
SIZE 5X Large
LEFT FRONT PANEL
Start: from where your yarn is
R1: 1sc, 1dec, 1sc in the next sts, except the last 3, 1dec, 1sc
R2: 1sc, 1dec, 1sc in next sts until the end of the row.
R3: 1sc in next sts, except the last 3, 1dec, 1sc in last st.
R4: Rep. R1
R5: Rep. R3
R6: Rep. R2
R7: Rep. R1
R8: Rep. R2
R9: Rep. R3
R10: Rep. R1
R11, R12: 1sc in each st until the end of the row
R13: Rep. R2
R14, R15: rep.R11, R12
R16: Rep. R3
R17-R22: Rep. R11, R12
Fasten off
Sts left: 9
BACK PANEL
Rejoin yarn into the first st.
R1: 1sc, 1dec, 1sc in next sts, except the last 3, 1dec, 1sc.
R2-R10: Rep. R1
R11 – R22: 1sc in each st until the end of the row.
Fasten off.
Sts. Left 30
RIGHT FRONT PANEL
Rejoin yarn in the first st (the one next to the back panel)
R1: 1sc, 1dec, 1sc in each of the next sts, except the last 3, 1dec, 1sc in the last st.
R2: 1sc in each of the next sts, except the last 3, 1dec, 1sc in the last st.
R3: 1sc, 1dec, 1sc in each of the next sts until the end of the row.
R4: Rep.R1
R5: Rep. R3
R6: Rep.R2
R7: Rep. R1
R8: Rep. R2
R9: Rep.R3
R10: Rep. R1
R11, R12: 1sc in each st until the end of the row.
R13: Rep. R2
R14, R15: rep.R11, R12
R16: Rep. R3
R17-R22: rep. R11, R12
Fasten off.
Sts. Left 9
Move to the ASSEMBLING section.
ASSEMBLING
Use sc crochet stitches to join the shoulders.
EDGING
Notes
Work the edging in the round.
Use the thinner yarn (Sweet Fleece) and a 4.5 mm crochet hook.
Work the edging around the armholes and the entire vest.
Work in every single crochet or single crochet row, 2sc.
In the bottom corners, work 3sc in the same st (where you will place only one)
Work sc3tog in the neckline corners (where the back panel join the front panel)
Armhole Edging
Rejoin yarn at the armpit
R1: 2sc in each st around.
Optional: Repeat R1 as many times as you want to get a thicker edge.
Vest Edging
Rejoin yarn in one st at the back of the neck.
R1: 1sc in each st around. (see Edging Notes for increasing and decreasing)
Repeat R1 until the edging is thick as you want.
POCKETS (make 2)
Notes:
The pockets have the same measurements for all sizes:
Start: ch 16
R1: 1sc in each st until the end of the row
R2, R3: Rep. R1
R4: 1sc, 1dec, 1sc in each st to the end of the row
R5: 1sc in each st except the last 3, 1dec, 1sc in last st
R6 – R15: rep. R4, R5
Pockets edging
Use the same thinner yarn and the 4.5 mm crochet hook.
Work 2sc in each sc row, only along the rows with decreases (R4 to R15)
Assembling Pockets
Place the pocket with the bottom side next to the vest’s bottom edge and the longer side next to the front edge.
Use safety pins optional to keep the pocket in place.
Stitch the pocket to the front panel vest using the main yarn.
TO FINISH
Weave in all looser ends and block to measurements.
You can Purchase the easily printable PDF version of this pattern here:





2 Comments
What a fantastic knit! Your hair looks amazing!
xoxo
Lovely
http://www.mynameislovely.com
Thank You!