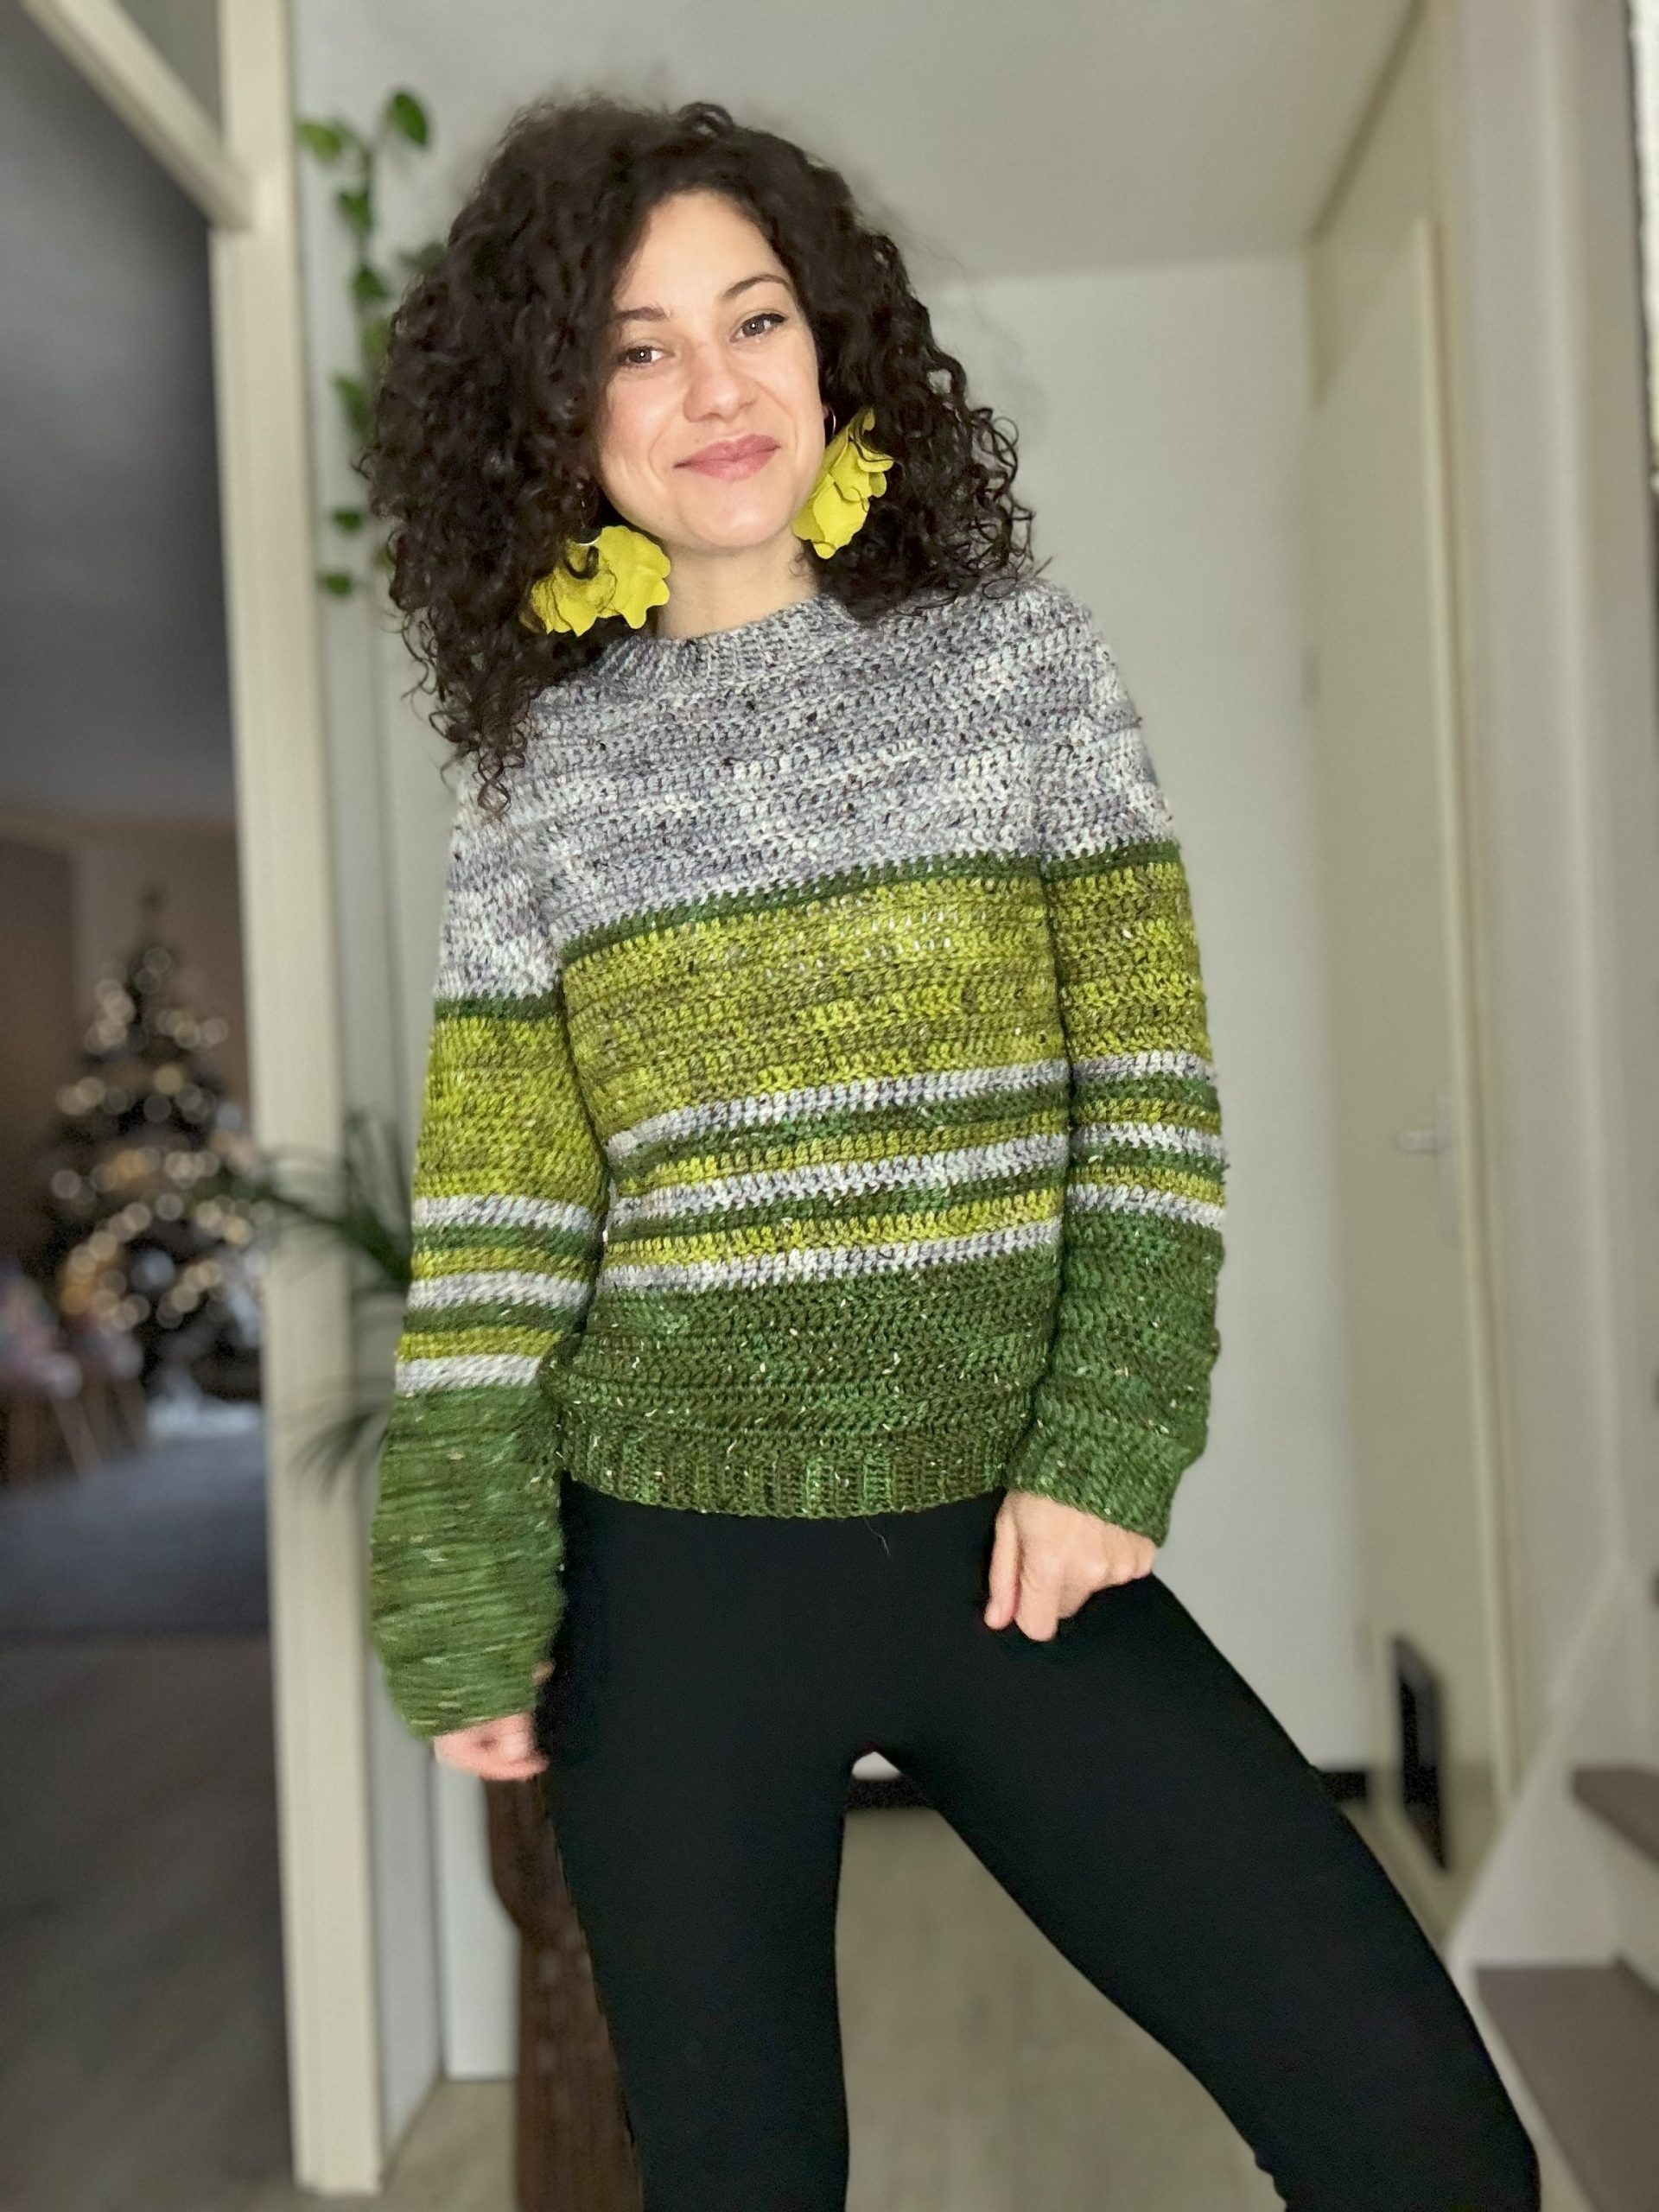
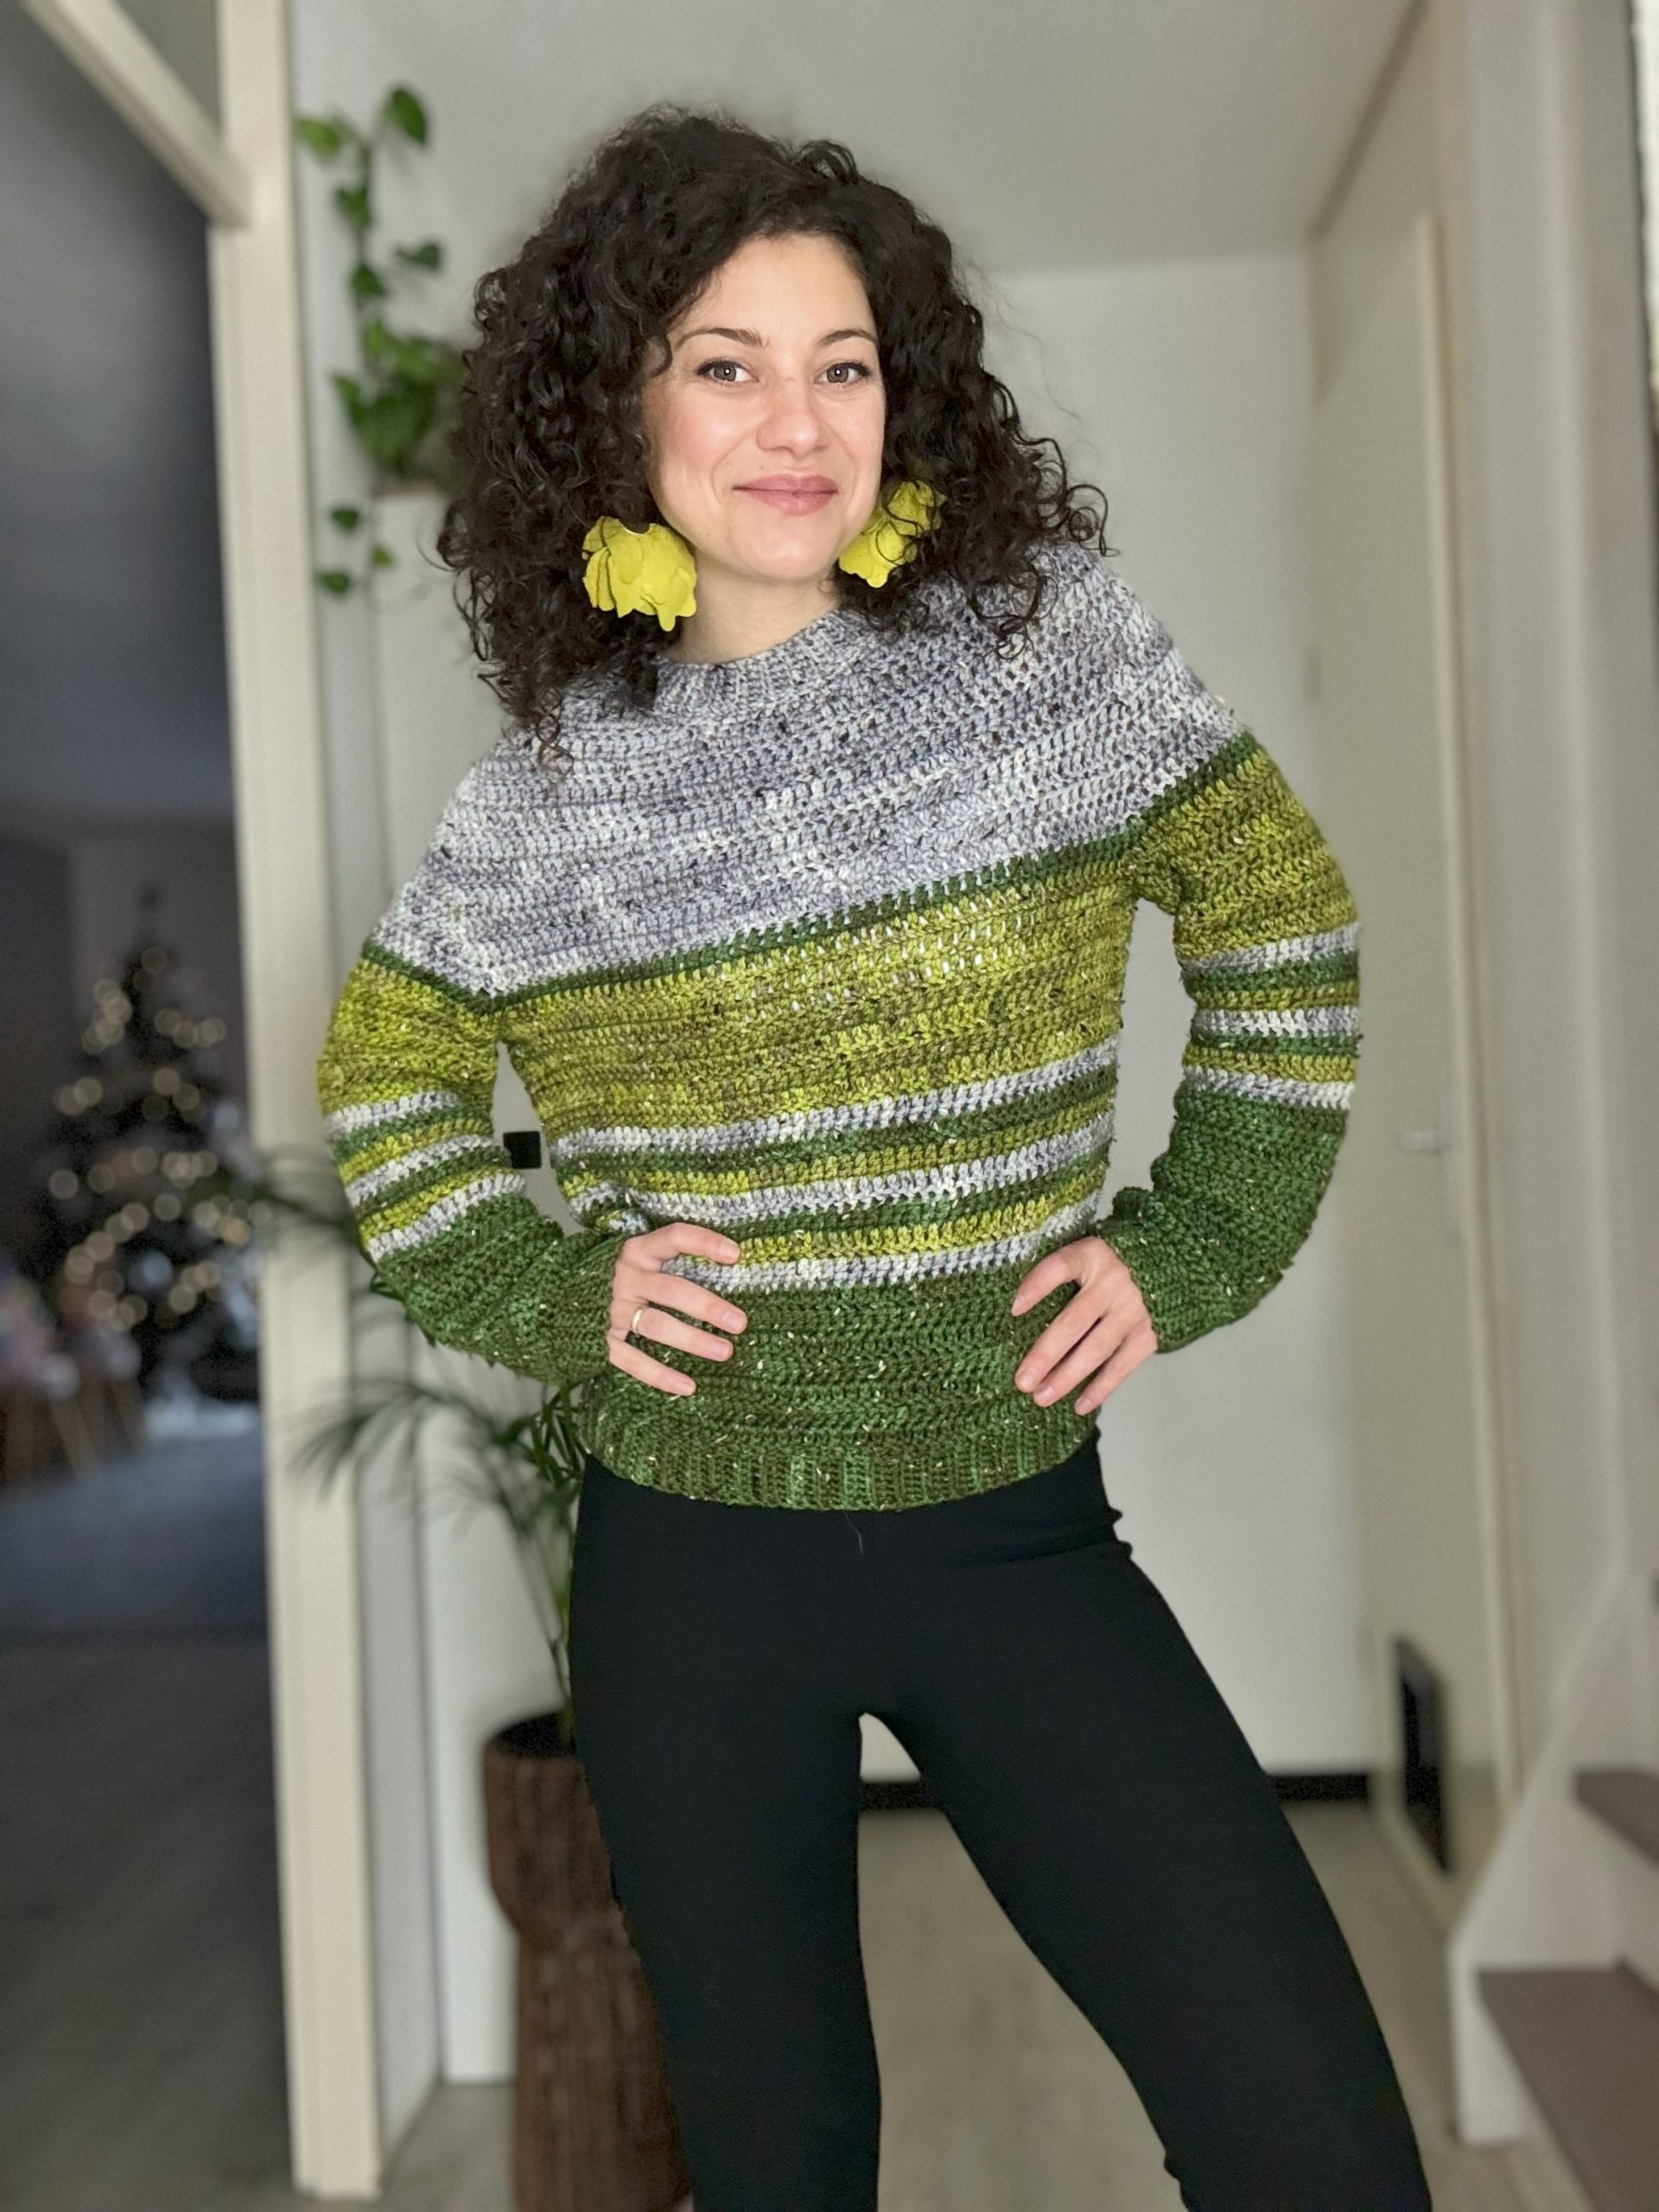
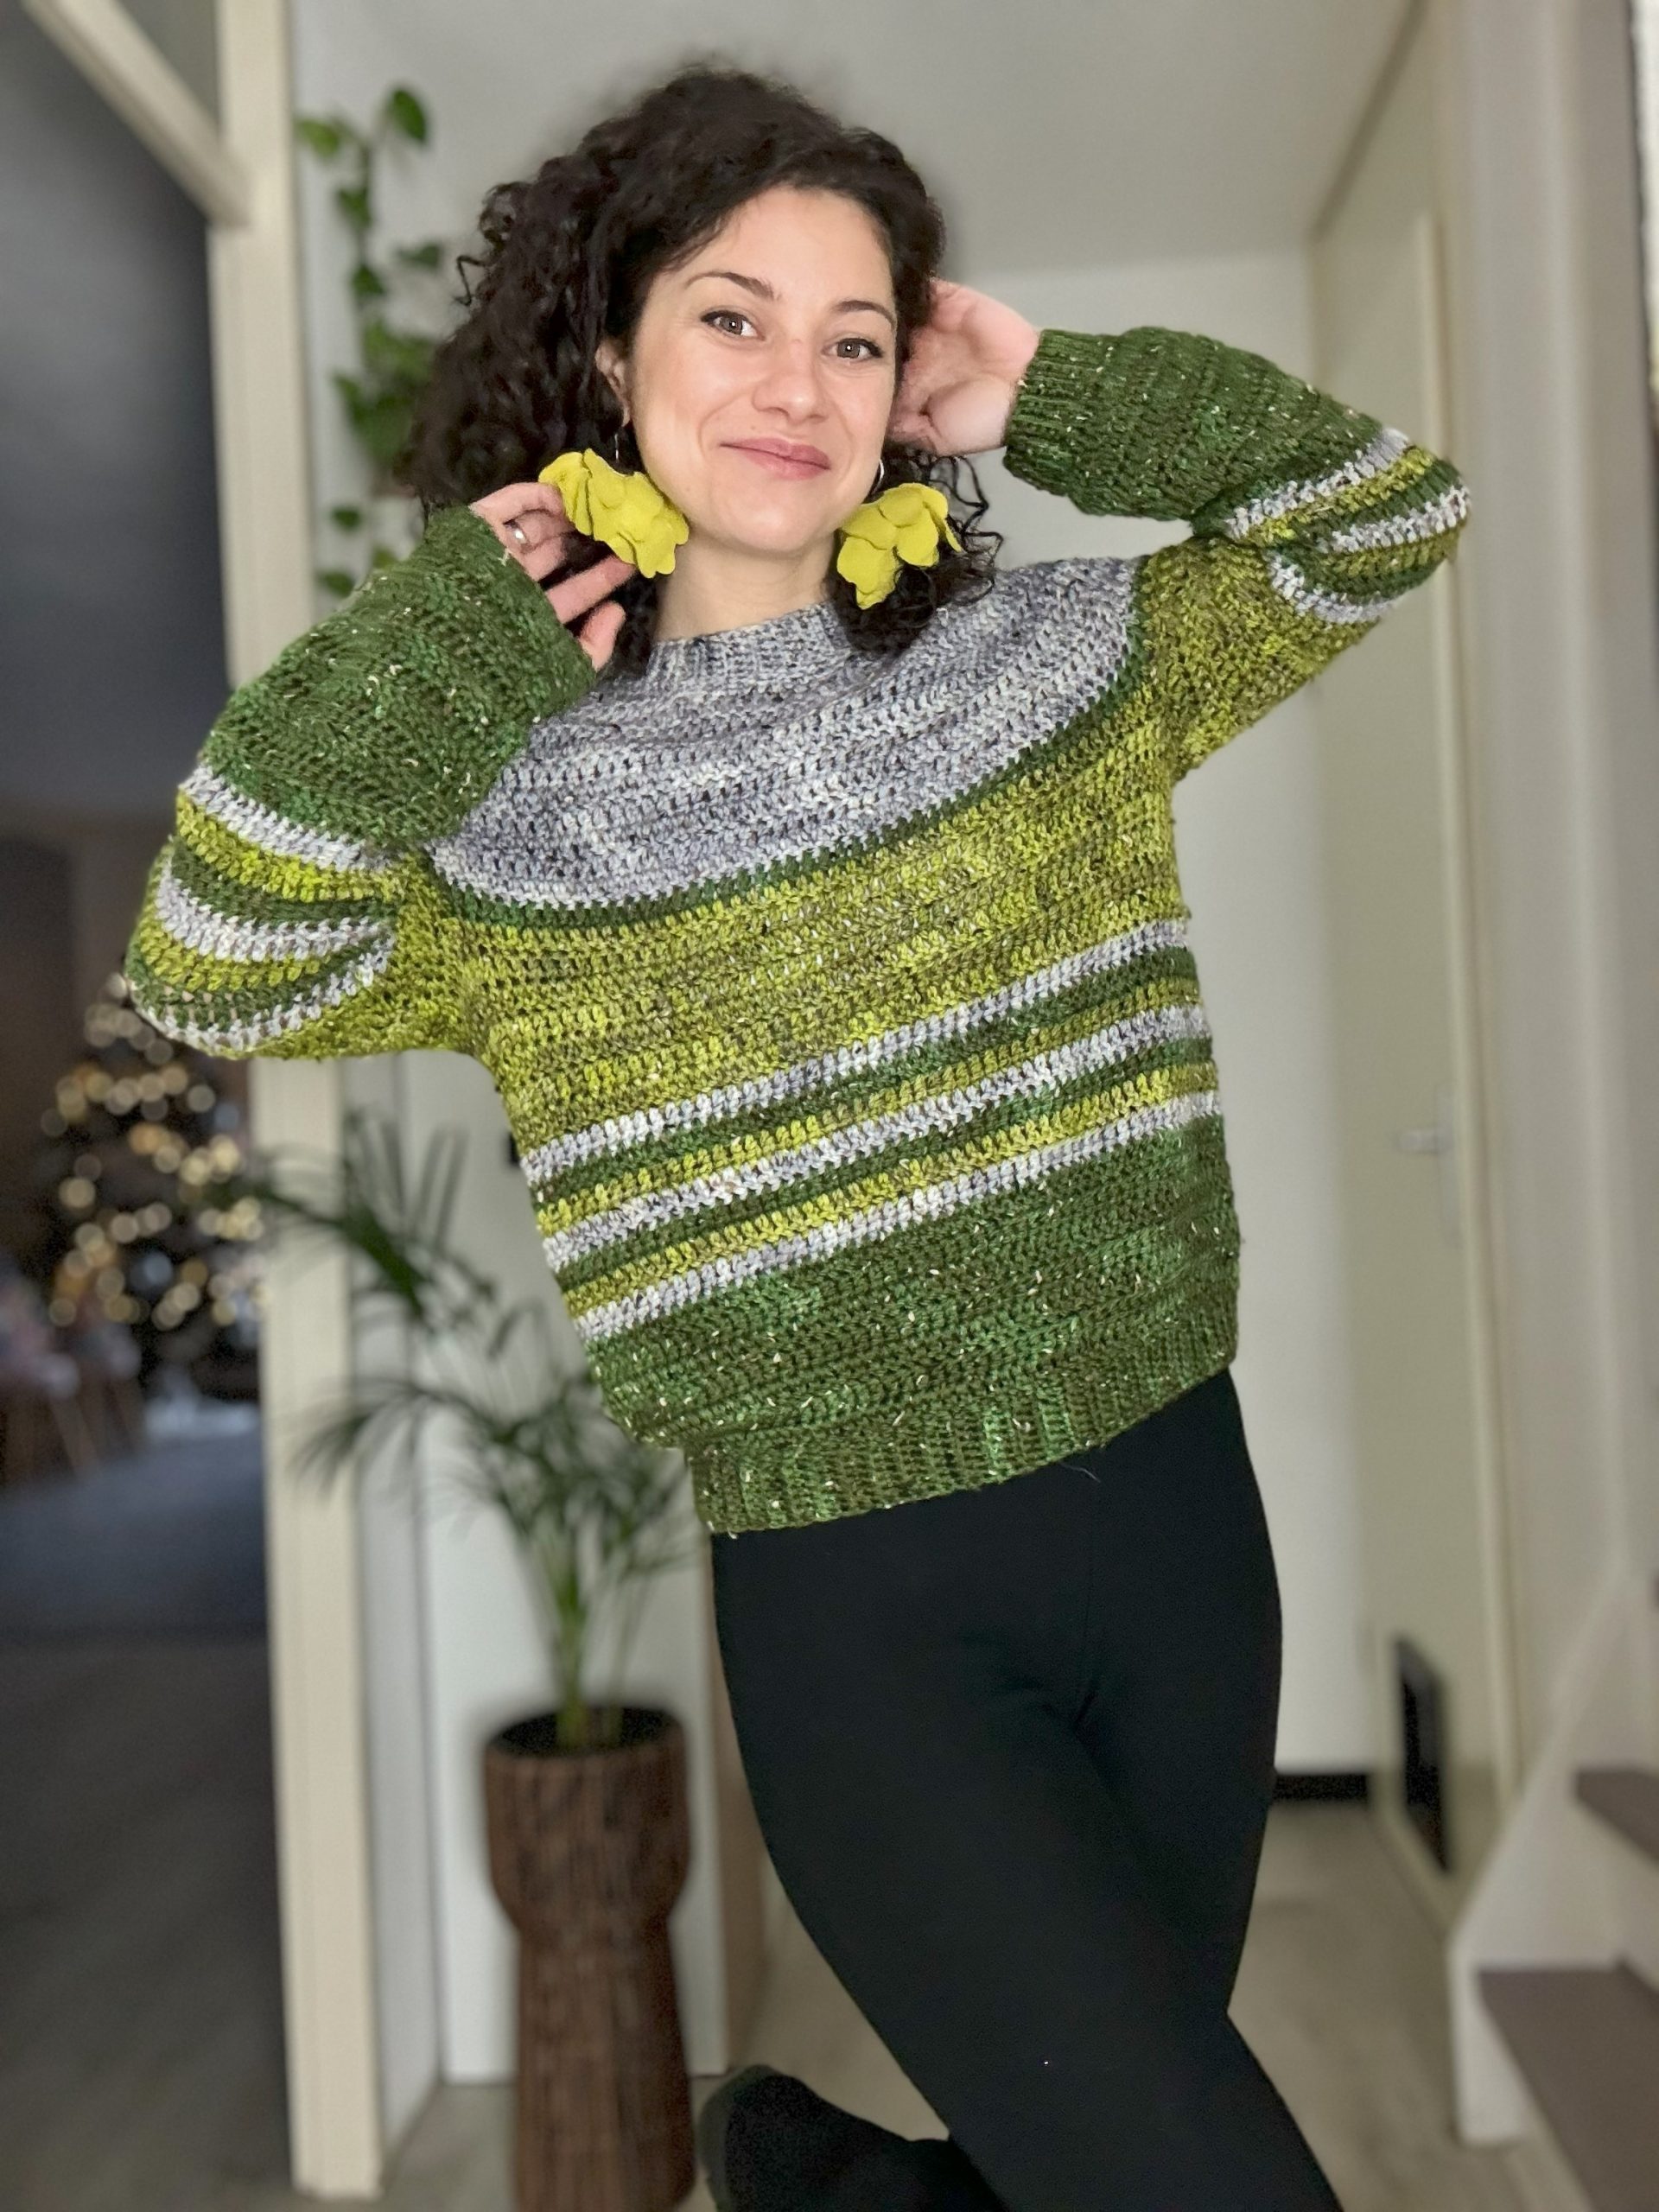
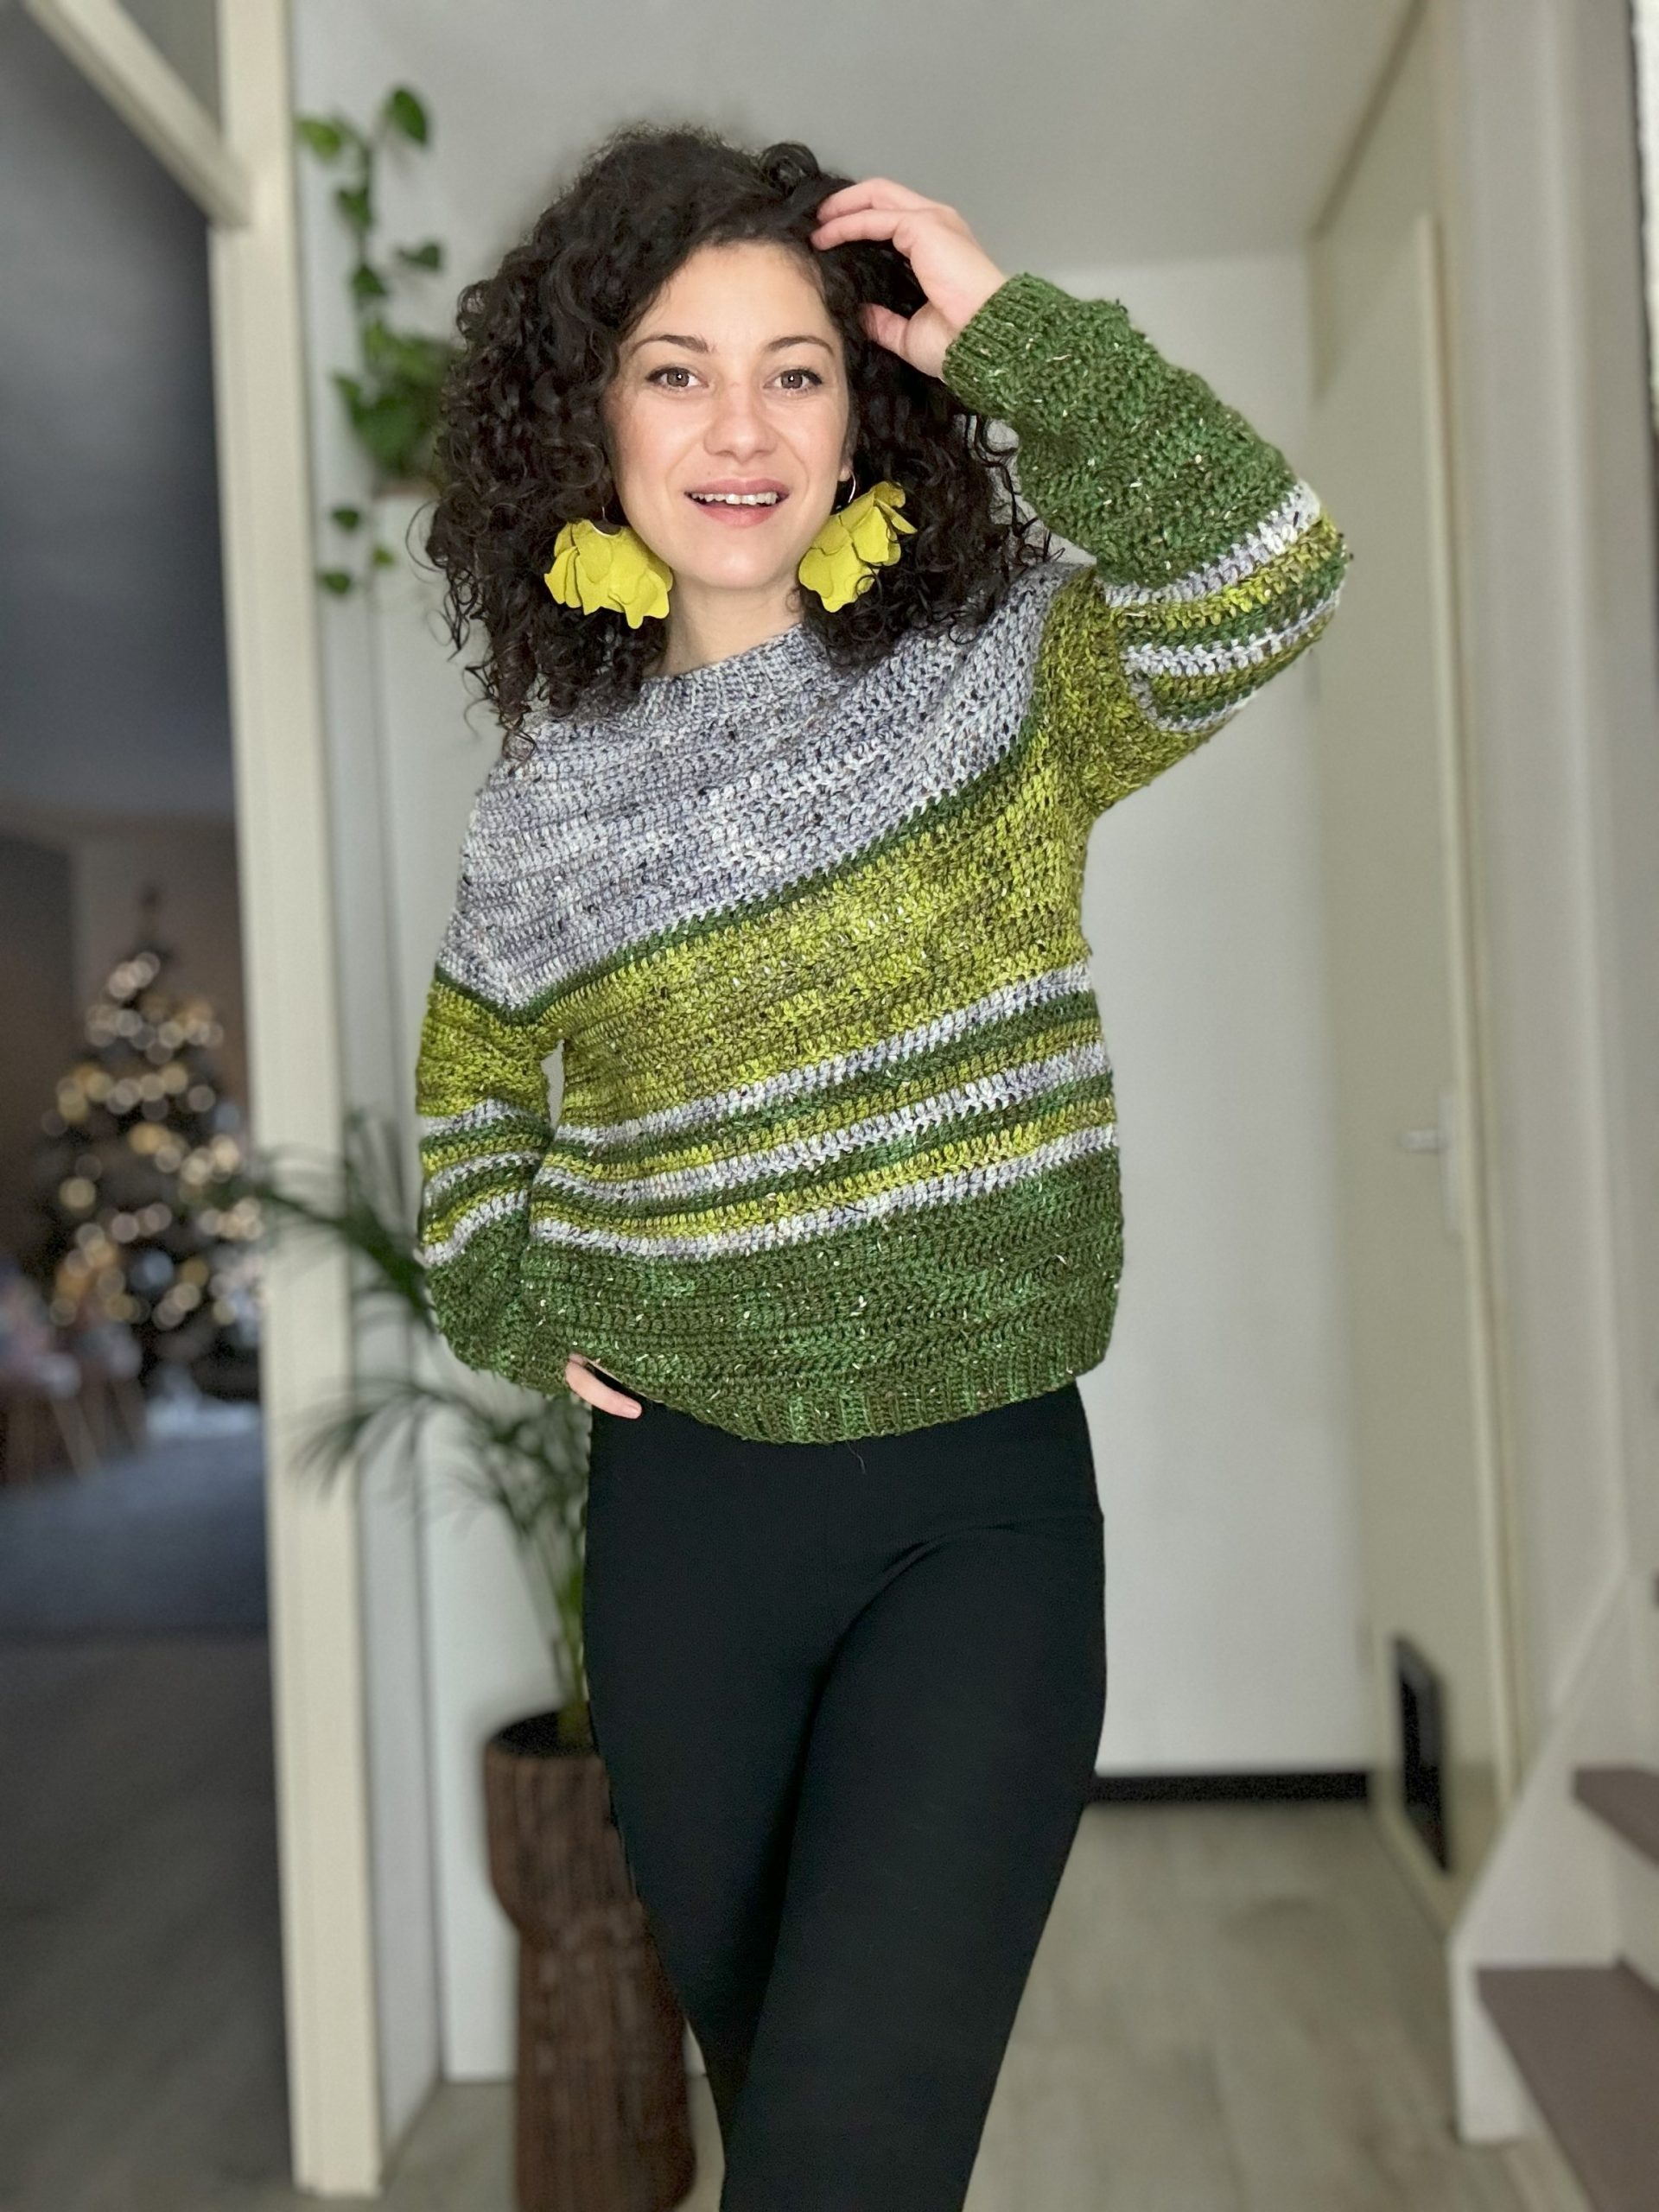
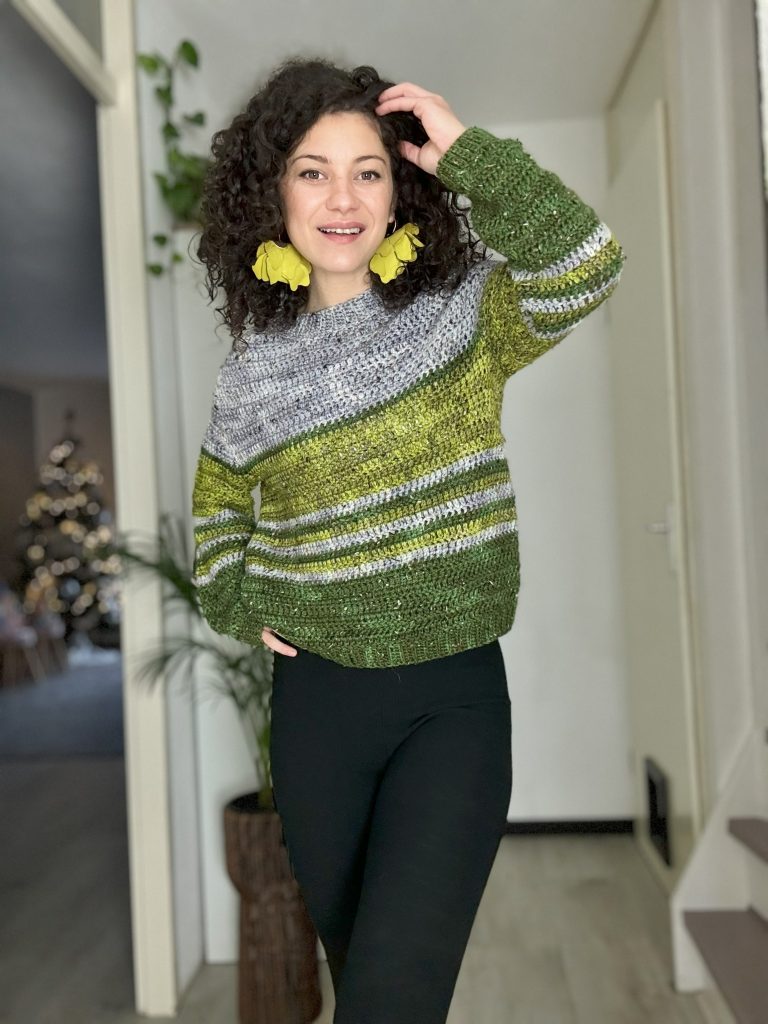
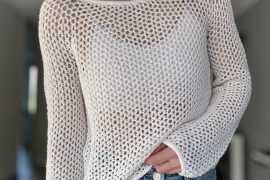
Hello, fellow crochet enthusiasts! I am excited to share something special with you today – the Fusion Sweater. Imagine this: I couldn’t decide whether to make it with stripes or color blocks, so I combined both ideas! This pattern will guide you through the process of creating your own Fusion Sweater, step by step. Even if the construction is new to you, I hope you will find the instructions easy to follow, making your crochet project easier.
I have also created a video tutorial to provide a more comprehensive understanding and visual demonstration. You can find the link at the end of this post.
So, get your hooks and yarn ready, and let’s create something amazing together!
Pentru Postarea in Limba Romana click aici
You can purchase the easily printable PDF pattern here at the links below.
MATERIALS
• Yarn: Size 4, Worsted weight yarn
• Crochet Hook:
o 4.5 mm crochet hook for the bottom and neckline Ribbing
o 4 mm crochet hook for the cuff Ribbing
o 5.5 mm crochet hook for the rest of the sweater
• yarn needle for weaving in ends
• at least 4 stitch markers
• Scissors
NOTES ABOUT DESIGN
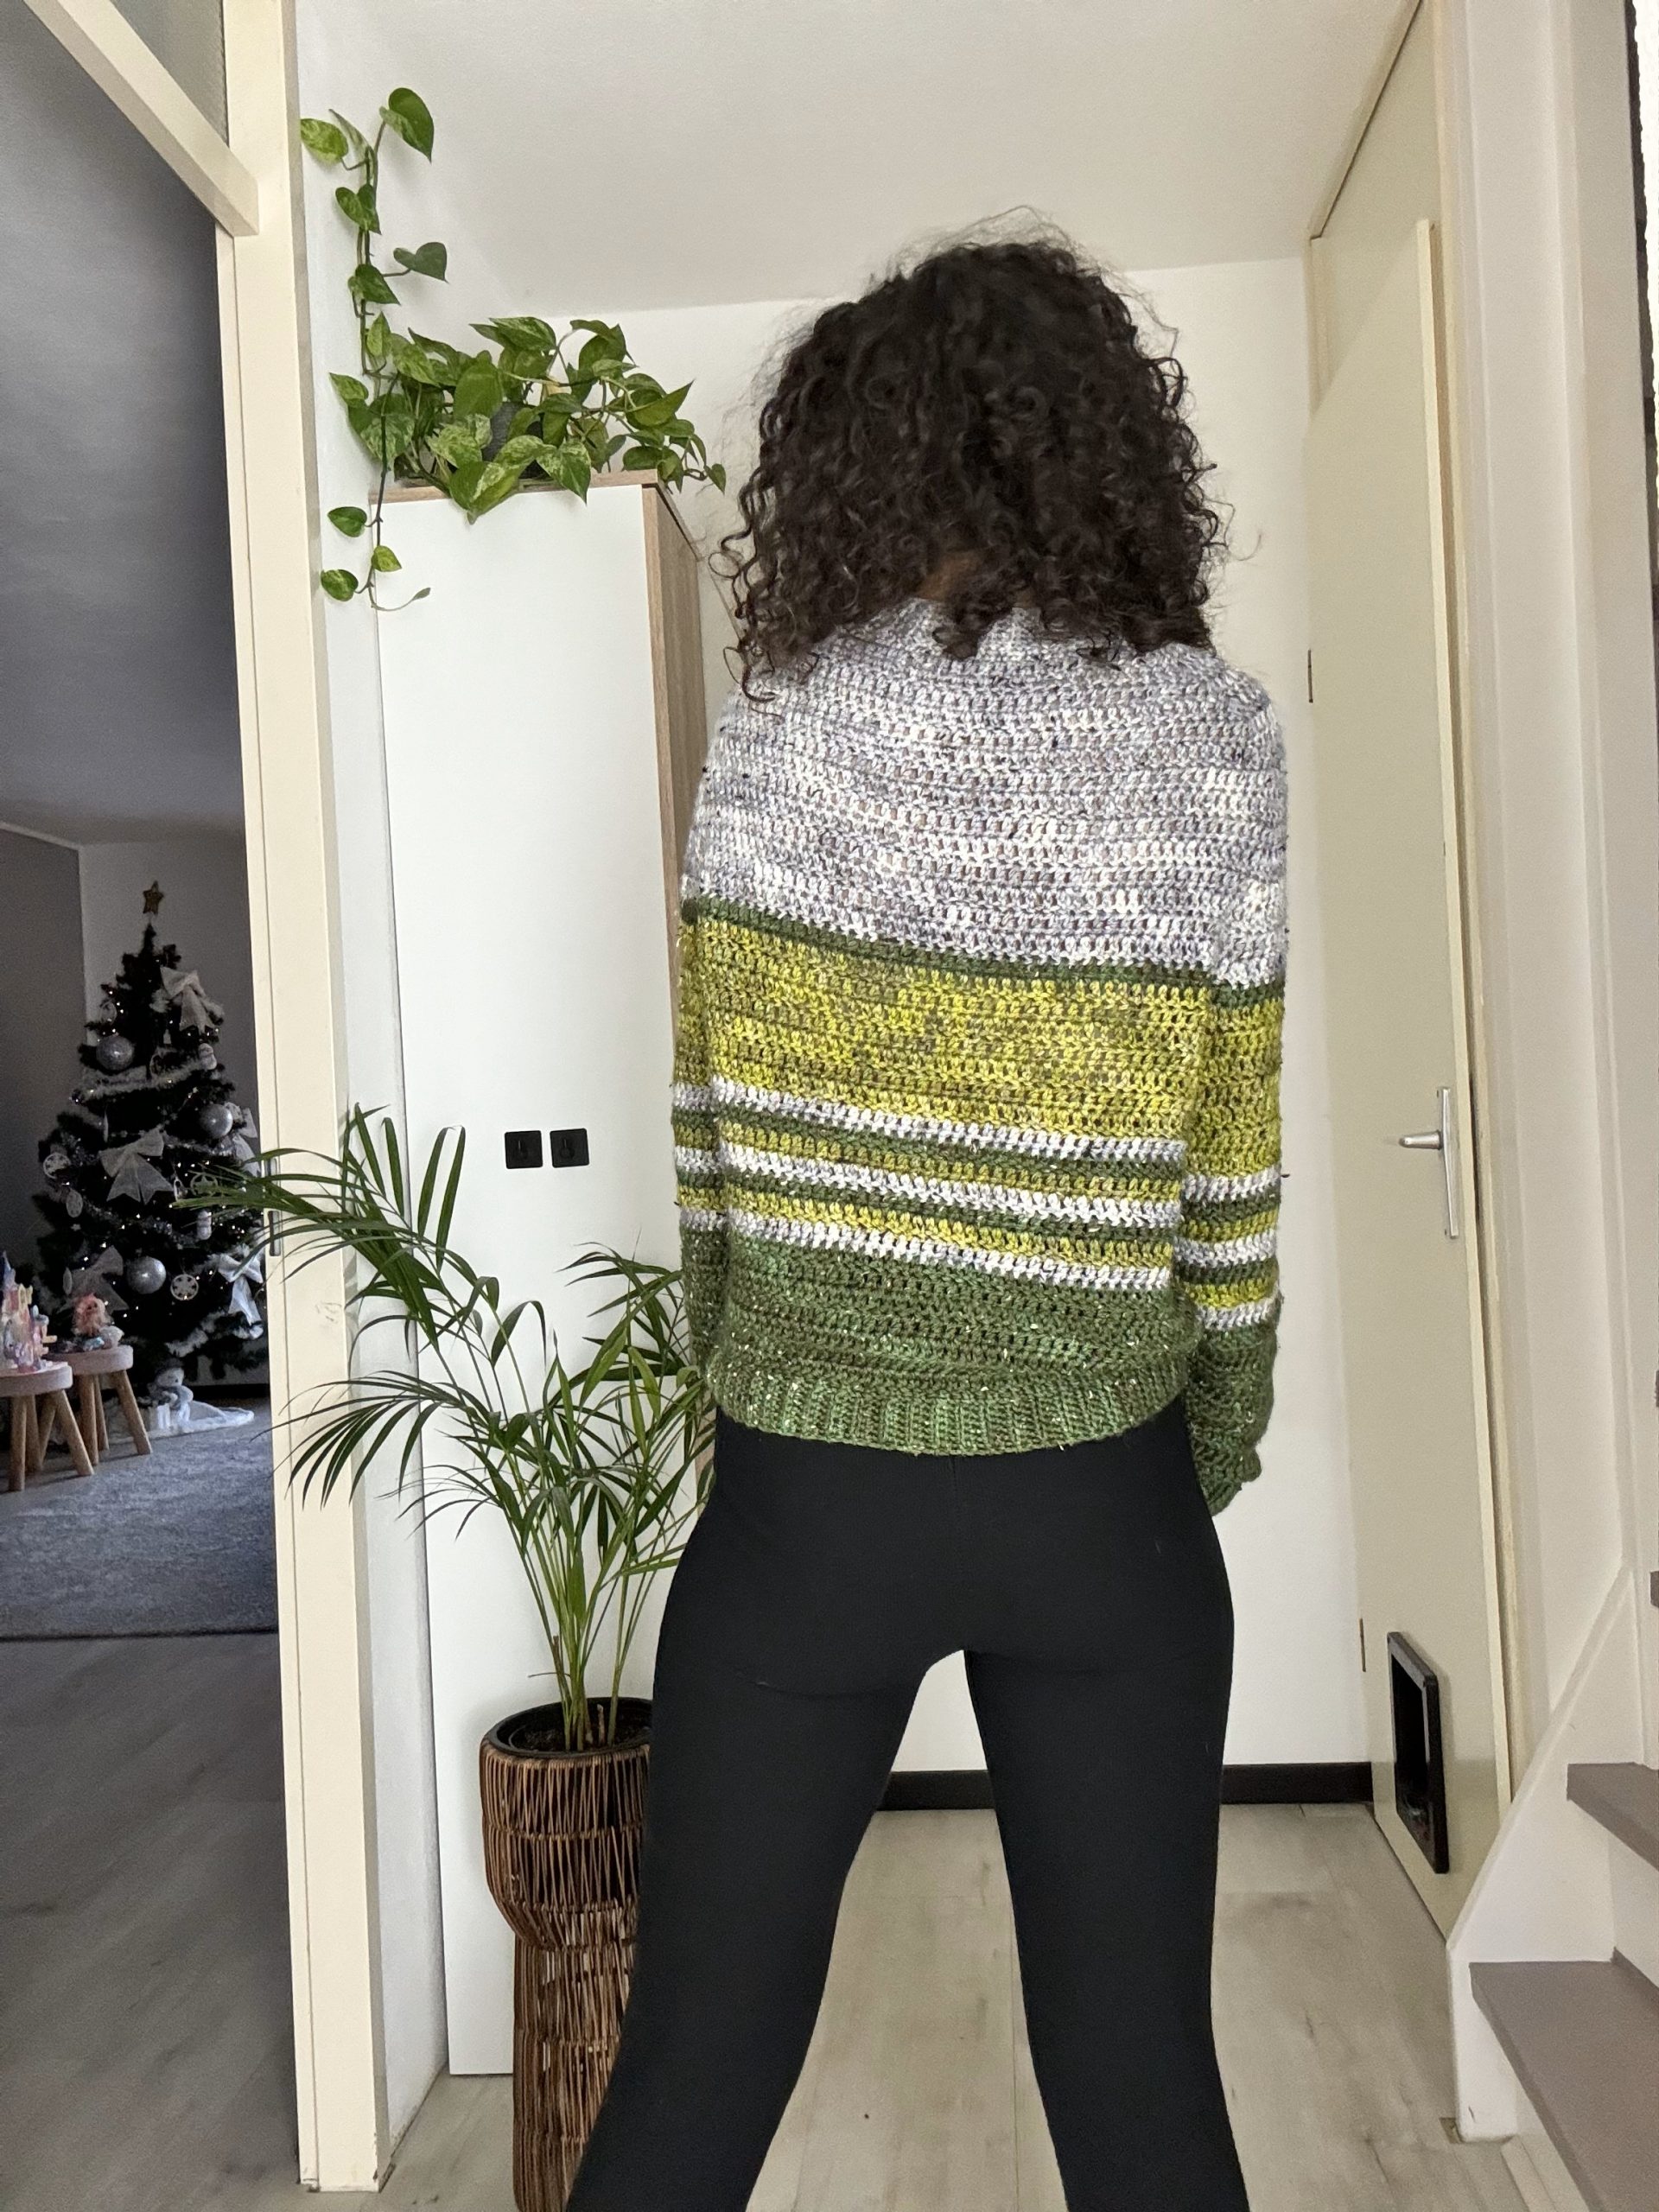
The Fusion Sweater is a top-down sweater with a unique yoke construction.
The yoke is worked in 2 sections: the first one, increasing only the front and back panel, and the second one, increasing the sleeves. For bigger sizes, Section 2 has 2 Parts: one, increasing only the sleeves, and second, increasing the sleeves and the front and back panels.
After finishing the yoke, the piece is split into sleeves and body. The three parts are worked individually until the desired length.
MEASUREMENTS AND SIZES
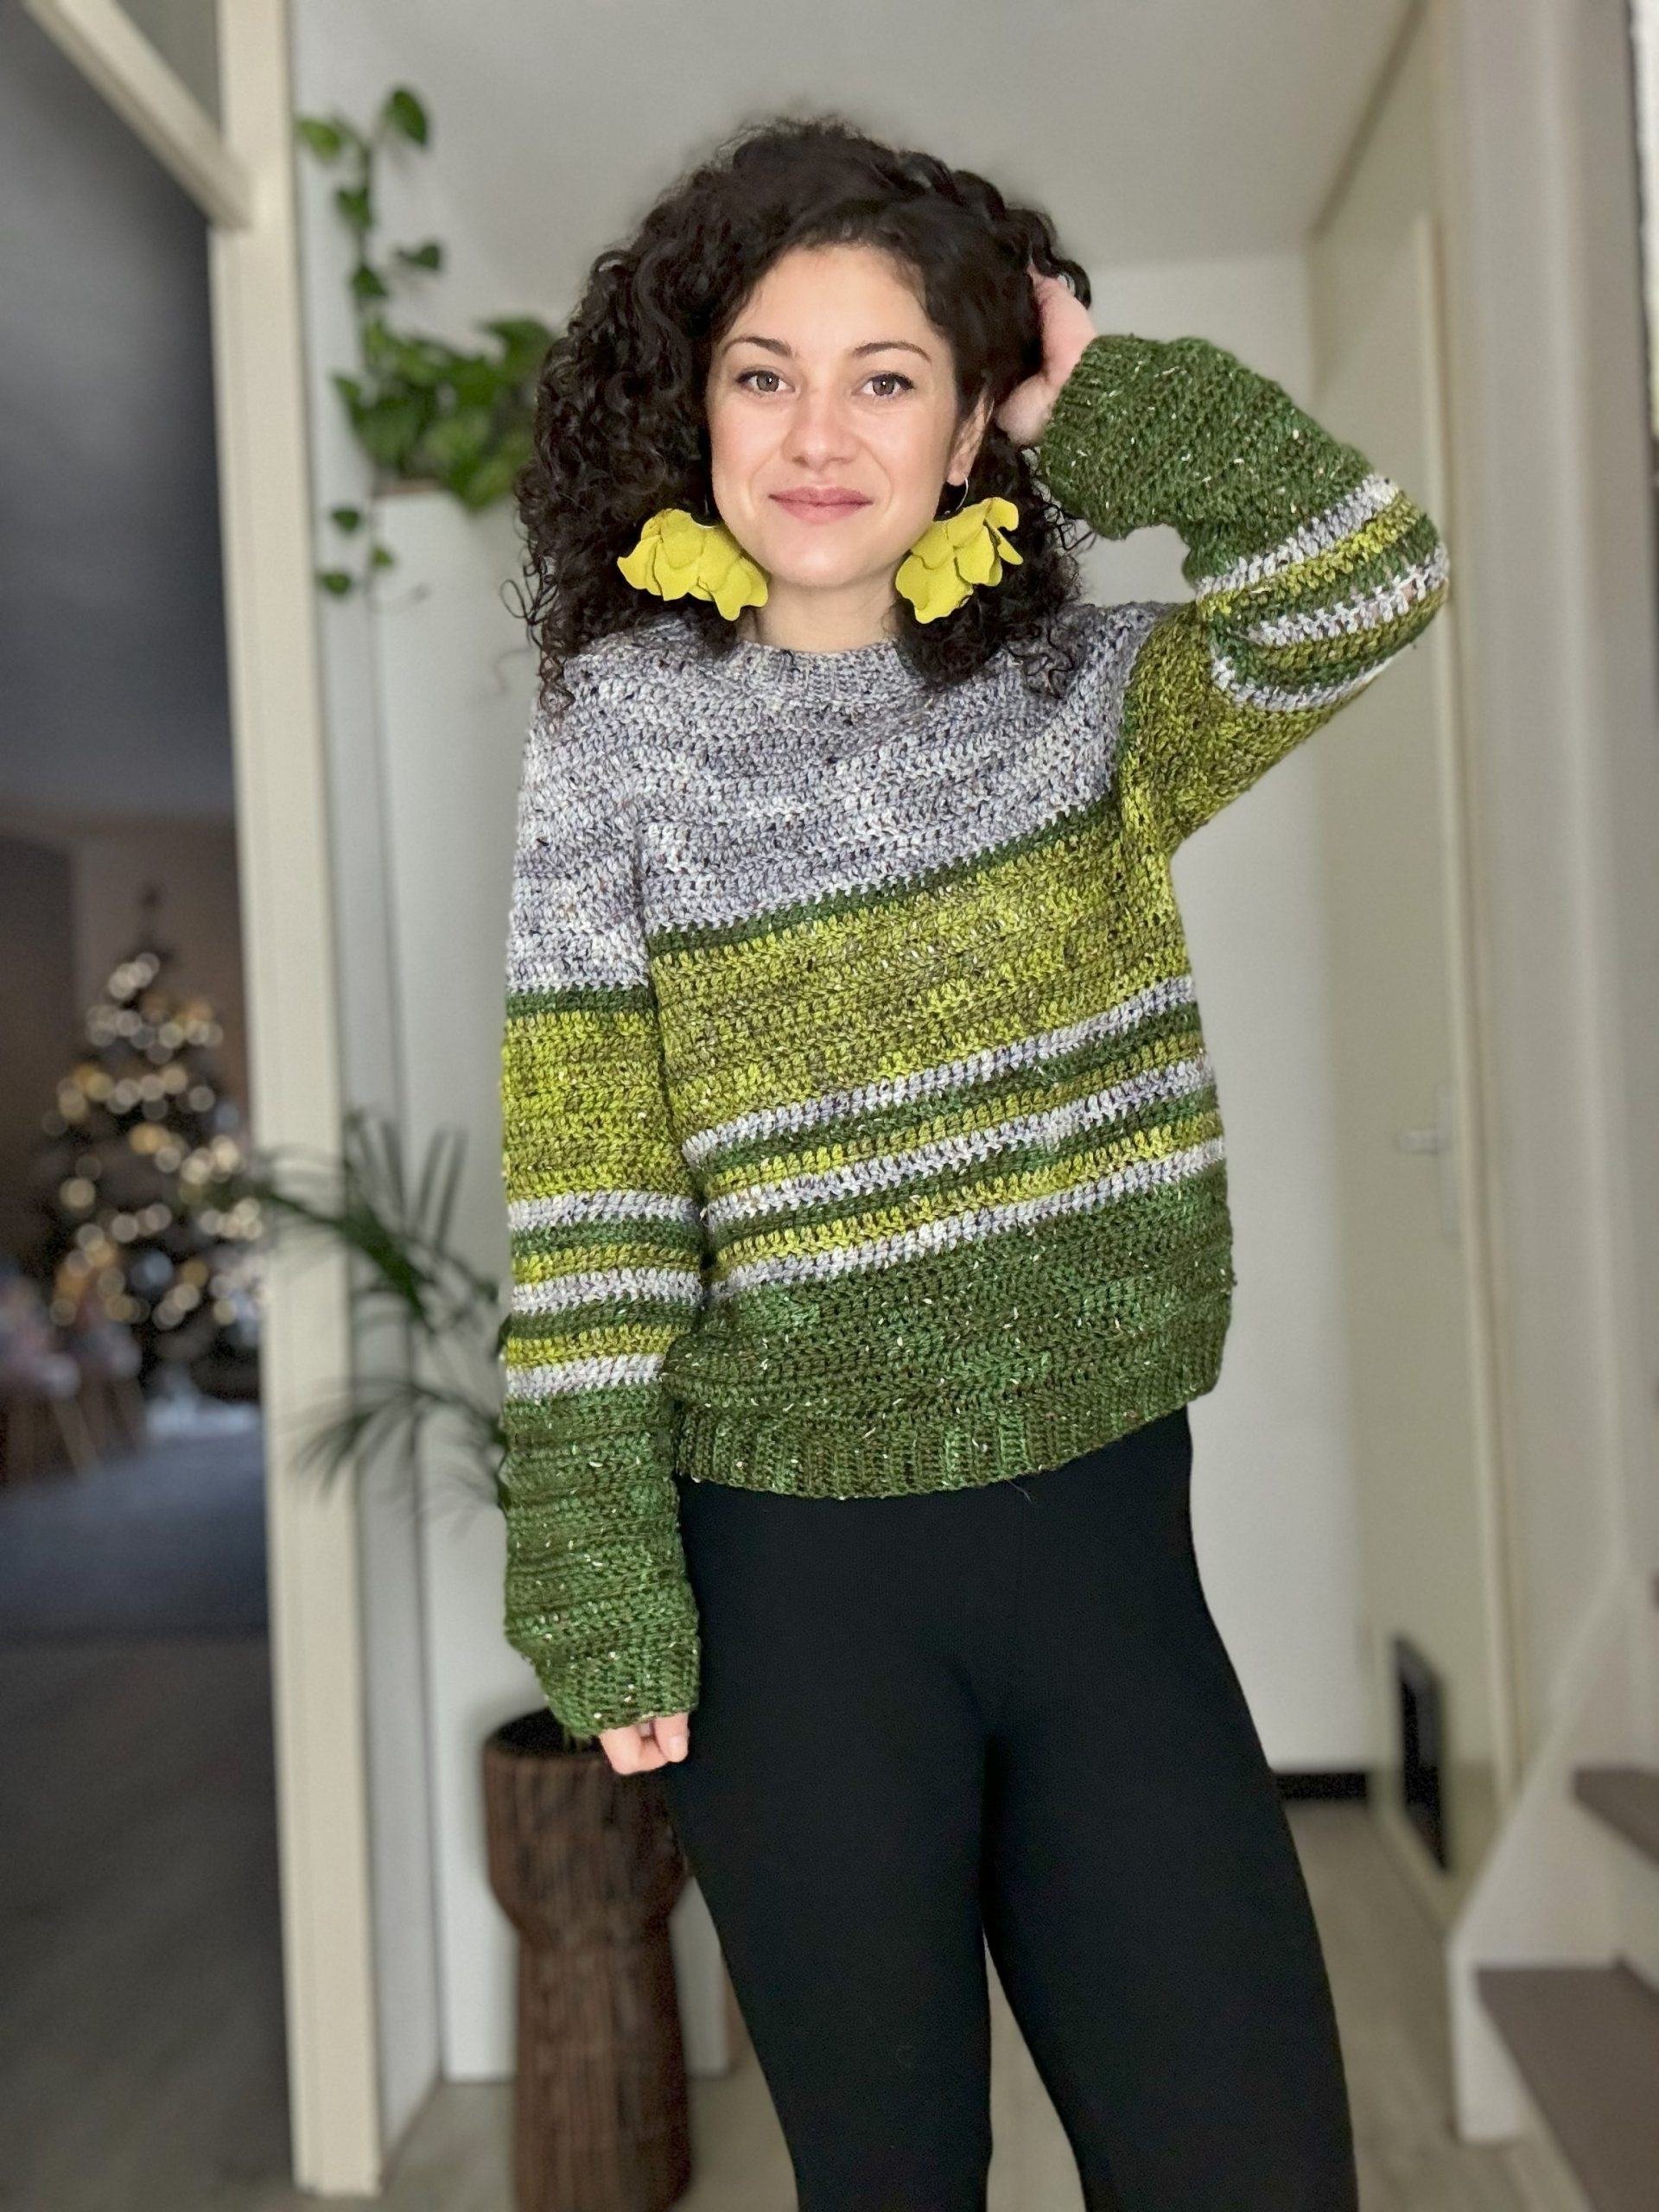
The Fusion Sweater Pattern is available in 9 sizes, from XS up to 5X Large. The model is 168 cm tall, with an 86 cm Bust circumference, and wears a size Small.
The numbers are written below as follows: XS (S, M, L) (XL, 2XL, 3XL, 4XL, 5XL); US sizes 0/2 (4/6, 8/10, 12/14) (14/16W, 18/20W, 22/24W, 26/28W, 30/32W)
All the measurements use as reference Standard Body Measurements by ASTM International.

Final Measurements of the Fusion Sweater
Neckline circ a: 43 cm (46, 49, 49) (49, 51, 54, 54, 54)
Cross Back b: 38cm (39, 40, 41), (41, 41, 43, 44, 46)
Bust Circ. c: 92 cm (95, 102, 108), (118, 128, 138, 148, 155)
Sleeve length d: 59 cm (61, 63, 65), (68, 68, 69, 75, 79)
Sleeve Circ. e: 33cm (34, 38, 39), (43, 44, 49, 53, 56)
Length f:53cm (55, 56, 59) (60, 60, 61, 65, 68)
YARN
For the Fusion Sweater, I used Genna Yarn Tweed Worsted which is composed of 85% Superwash Merino and 15% Dondegal Nep. The colors I used were Silver, Kaki, and Conifere. Each hank of yarn weighs 100 grams and has approximately 166 meters of yarn.
Here’s an approximate breakdown of the yarn required for each size:
Conifere: 330 (360, 400, 440) (490, 530, 580, 670, 740) meters
Silver: 290 (310, 340, 380) (420, 450, 500, 570, 630) meters
Kaki: 200 (220, 240, 270) (300, 320, 350, 400, 440) meters
You will need the following number of hanks for each color, depending on the size you’re making:
Conifere: 2 (3, 3, 3) (3, 4, 4, 5, 5) hanks
Silver: 2 (2, 3, 3) (3, 3,4, 4, 4) hanks
Kaki: 2 (2, 2, 2) (2, 2, 3, 3, 3) hanks
Please note that the yardage requirements may vary depending on the length and color pattern you choose.
ABBREVIATIONS
Ch – chain
Sc – single crochet
Scblo – single crochet back loop
dc – double crochet
ss – slip stitch
St(s) – stitch(es)
RS – right side
WS – wrong side
R – round
** – repeated section.
TENSION
Using 4.5.mm crochet hook in the Ribbing Stitch Pattern
14sts (scblo) = 10cm
14 rows = 10cm
Using a 5.5 mm crochet hook in double crochet
12sts = 10cm
7.5 rounds = 10cm
You can purchase the easily printable PDF pattern here at the links below.
STITCH PATTERN AND TECHNIQUES
The Fusion Sweater stitch patterns are double crochet, and single crochet in the back loop only for Ribbing.
Single crochet in the back loop
Insert the hook into the back loop of the next st, yarn over, pull out a loop, yarn over, and pass through both loops on your hook.
Double Crochet
Yarn over, insert the hook into the next stitch, yarn over, pull out a loop, yarn over, pull it through the first 2 loops on your hook, yarn over, and pass it through both loops on your hook.
The way we’re making this sweater is called “saddle sleeve.” It means we’re doing the top part, the yoke, in two steps.
First, in Section 1, we increase stitches to shape the back and front panels. Then, in Section 2, we increase stitches to shape the sleeves. This way, we get a nice and comfy fit for the sweater.
PATTERN NOTES
To begin with, work the first section of the yoke flat, and remember to turn after each row. After completing this section, work the rest of the sweater in the round, ensuring to close each round with a slip stitch into the first double crochet. To avoid any twisting of the work, remember to turn after each round and begin each round with two chains. The two chains do not count as the first double crochet. Optionally, you can start each round with one single crochet on top of the other single crochet. For a better understanding of this starting stitch, you can refer to the video tutorial available here.
Stitch markers can be used to mark the raglan stitches. This will make it easier to identify the stitches where you need to increase and help ease the increasing rows.
COLOR PATTERN:
The instructions below don’t have specific colors mentioned, so you can choose any colors you like for your project.
For a reference, here’s how the colors were used in the sample:
Use Silver Color for the entire yoke, except the last round.
Switch to Conifere for the last round of the yoke.
Divide the body into three sections. In the sample, I did 21 rounds for the length, with each section having 7 rounds.
Start the first 7 rounds with the Kaki color.
In the second section, create stripes by changing the color after each round.
In the third section, use Conifere.
For the sleeves, follow the same pattern. If you need more length, add more rounds in the third section.
Feel free to get creative with your color choices!
You can purchase the easily printable PDF pattern here at the links below.
INSTRUCTIONS
YOKE SECTION 1 – INCREASING FRONT AND BACK PANELS
Use a 5.5 mm crochet hook.
The Yoke section incorporates four additional stitches designated as raglan stitches. All increases will occur both before and after these stitches.
Initiating the Yoke, our primary focus is on shaping the neckline by lowering the front panel, using short rows. The Yoke section starts with a single stitch allocated to the left and right sides of the front panel. Gradual increases will be made in each row, building upon these stitches. In the final row of the Yoke’s initial segment, we add extra stitches to ensure parity between the stitch count on the front and back panels.
The entire first section of the YOKE is worked with these short rows; this means that for bigger sizes the neckline will be lower in front as we work more short rows. If you want to make it higher, you can join the front panels before finishing the first section of the YOKE.
For the Yoke Section 1 we will work 5 (5, 5, 6) (6, 6, 6, 7, 7) rows
At the end of section 1 we will have:
– 45 (47, 49, 53) (53, 53, 55, 59, 59) sts for – the back and front panels
– 5 (5, 5, 5) (5, 7, 7, 7, 7) sts for the sleeves
– 4 raglan stitches
Start: ch 41 (43, 45, 45) (45, 49, 51, 51, 51) sts
All these stitches will be divided as follows:
– 25 ( 27, 29, 29) (29, 29, 31, 31, 31) sts for the back panel;
– 5 (5, 5, 5) (5, 7, 7, 7, 7) sts for the sleeves
– 1st for the right and 1st for the left of the front panel
– 4 stitches for the raglan lines
R1: ch3, 2dc in the 4th ch, 1dc in next st (raglan stitch – place a stitch marker) 1dc in next 5 (5, 5, 5) (5, 7, 7, 7, 7) sts, 1dc in next st (raglan st – place a stitch marker), 3dc in next st, 1dc in next 23 (25, 27, 27) (27, 27, 29, 29, 29) sts, 3dc in next st, 1dc in next st (raglan st – place a stitch marker, 1dc in next 5 (5, 5, 5) (5, 7, 7, 7, 7) sts, 1dc in next st (raglan st – place a st marker), 3dc in last st; ch3 and turn
Total sts:
– 29 (31, 33, 33) (33, 33, 35, 35, 35) sts for the back panel
– 5 (5, 5, 5) (5, 7, 7, 7, 7) sts for the sleeves
– 3sts for each side of the front panel
– 4 raglan stitches
R2: 2dc in the first st, 1dc in next st, 3dc in next st (raglan increase front panel), 1dc in next st (raglan stitch – place a stitch marker) 1dc in next 5 (5, 5, 5) (5, 7, 7, 7, 7) sts, 1dc in next st (raglan st – place a stitch marker), 3dc in next st, 1dc in next 27 (29, 31, 31) (31, 31, 33, 33, 33) sts, 3dc in next st, 1dc in next st (raglan st – place a stitch marker, 1dc in next 5 (5, 5, 5) (5, 7, 7, 7, 7) sts, 1dc in next st (raglan st – place a st marker), 3dc in next st (raglan increase front panel), 1dc in next st, 3dc in last st; ch3 and turn
Total sts:
– 33 (35, 37, 37) (37, 37, 39, 39, 39) sts for the back panel
– 5 (5, 5, 5) (5, 7, 7, 7, 7) sts for the sleeves
– 7sts for each side of the front panel
– 4 raglan stitches
R3: 2dc in the first st, 1dc in next 5sts, 3dc in next st (raglan increase front panel), 1dc in next st (raglan stitch – place a stitch marker) 1dc in next 5 (5, 5, 5) (5, 7, 7, 7, 7) sts, 1dc in next st (raglan st – place a stitch marker), 3dc in next st, 1dc in next 31 (33, 35, 35) (35, 35, 37, 37, 37) sts, 3dc in next st, 1dc in next st (raglan st – place a stitch marker, 1dc in next 5 (5, 5, 5) (5, 7, 7, 7, 7) sts, 1dc in next st (raglan st – place a st marker), 3dc in next st (raglan increase front panel), 1dc 1n next 5sts, 3dc in last st; ch3 and turn
Total sts:
– 37 (39, 41, 41) (41, 41, 43, 43, 43) sts for the back panel
– 5 (5, 5, 5) (5, 7, 7, 7, 7) sts for the sleeves
– 11sts for each side of the front panel
– 4 raglan stitches
R4: 2dc in the first st, 1dc in next 9sts, 3dc in next st (raglan increase front panel), 1dc in next st (raglan stitch – place a stitch marker) 1dc in next 5 (5, 5, 5) (5, 7, 7, 7, 7) sts, 1dc in next st (raglan st – place a stitch marker), 3dc in next st, 1dc in next 35 (37, 39, 39) (39, 39, 41, 41, 41) sts, 3dc in next st, 1dc in next st (raglan st – place a stitch marker, 1dc in next 5 (5, 5, 5) (5, 7, 7, 7, 7) sts, 1dc in next st (raglan st – place a st marker), 3dc in next st (raglan increase front panel), 1dc 1n next 9sts, 3dc in last st; ch3 and turn
Total sts:
– 41 (43, 45, 45) (45, 45, 47, 47, 47) sts for the back panel
– 5 (5, 5, 5) (5, 7, 7, 7, 7) sts for the sleeves
– 15sts for each side of the front panel
– 4 raglan stitches
You can purchase the easily printable PDF pattern here at the links below.
Sizes XS, S and M only
Please note that R5 (Round 5) is the final row of the first section of the YOKE, designed specifically for sizes XS, S, and M. During this round, we need to join the front panels. We will follow the usual procedure for this row, and upon completion of the row, we will work foundation double crochet stitches to finalize the front panel. For a more comprehensive understanding of this process, please refer to the video tutorial linked here, which includes a visual demonstration.
R5: 2dc in the first st, 1dc in next 13sts, 3dc in next st (raglan increase front panel), 1dc in next st (raglan stitch – place a stitch marker) 1dc in next 5 (5, 5) sts, 1dc in next st (raglan st – place a stitch marker), 3dc in next st, 1dc in next 39 (41, 43) sts, 3dc in next st, 1dc in next st (raglan st – place a stitch marker, 1dc in next 5 (5, 5) sts, 1dc in next st (raglan st – place a st marker), 3dc in next st (raglan increase front panel), 1dc in next 13sts, 3dc in last st, 7 (9, 11) foundation double crochet, sl st into the third ch to close the round.
Cut the yarn;
We cut the yarn so that the joining line would not be in the front in the upcoming rounds. Now, we’ll start again by attaching the yarn to the right raglan stitch on the back panel
Total sts:
– 45 (47, 49) sts for the back and front panels
– 5 (5, 5) sts for the sleeves
– 4 raglan stitches
For sizes XS, S, and M, YOKE SECTION 1 is done; move to YOKE SECTION 2
Sizes L, XL, 2XL, 3XL, 4XL, and 5XL only
R5: 2dc in the first st, 1dc in next 13sts, 3dc in next st (raglan increase front panel), 1dc in next st (raglan stitch – place a stitch marker) 1dc in next – (-, -, 5) (5, 7, 7, 7, 7) sts, 1dc in next st (raglan st – place a stitch marker), 3dc in next st, 1dc in next – (-, -, 43) (43, 43, 45, 45, 45) sts, 3dc in next st, 1dc in next st (raglan st – place a stitch marker, 1dc in next – (-, -, 5) (5, 7, 7, 7, 7) sts, 1dc in next st (raglan st – place a st marker), 3dc in next st (raglan increase front panel), 1dc in next 13sts, 3dc in last st; ch3 and turn
Total sts:
– – (-, -, 49) (49, 49, 51, 51, 51) sts for the back panel
– – (-, -, 5) (5, 7, 7, 7, 7) sts for the sleeves
– 19sts for each side of the front panel
– 4 raglan stitches
Sizes L, XL, 2XL, and 3XL only
Please note that R6 is the final row of the first section of the YOKE, designed specifically for sizes L, XL, 2XL, and 3XL. During this round, we need to join the front panels. We will follow the usual procedure for this row, and upon completion of the row, we will work foundation double crochet stitches to finalize the front panel. For a more comprehensive understanding of this process, please refer to the video tutorial linked here, which includes a visual demonstration.
R6:2dc in the first st, 1dc in next 17sts, 3dc in next st (raglan increase front panel), 1dc in next st (raglan stitch – place a stitch marker) 1dc in next – (-, -, 5) (5, 7, 7)sts, 1dc in next st (raglan st – place a stitch marker), 3dc in next st, 1dc in next – (-, -, 47) (47, 47, 49) sts, 3dc in next st, 1dc in next st (raglan st – place a stitch marker, 1dc in next- (-, -, 5) (5, 7, 7)sts, 1dc in next st (raglan st – place a st marker), 3dc in next st (raglan increase front panel), 1dc in next 17sts, 3dc in last st, – (-, -, 7) (7, 7, 9)foundation double crochet, sl st into the third ch to close the round.
Cut the yarn;
We cut the yarn so that the joining line not to be in the front in the upcoming rounds. Now, we’ll start again by attaching the yarn to the right raglan stitch on the back panel
Total sts:
– – (-, -, 53) (53, 53, 55)sts for the back and front panels
– – (-, -, 5) (5, 7, 7)sts for the sleeves
– 4 raglan stitches
For sizes L, XL, 2XL, and 3XL, YOKE SECTION 1 is done; move to YOKE SECTION 2
Sizes 4XL, and 5XL only
R6: 2dc in the first st, 1dc in next 17sts, 3dc in next st (raglan increase front panel), 1dc in next st (raglan stitch – place a stitch marker) 1dc in next – (-, -, -) (-, -, -, 7, 7) sts, 1dc in next st (raglan st – place a stitch marker), 3dc in next st, 1dc in next – (-, -, -) (-, -, -, 49, 49) sts, 3dc in next st, 1dc in next st (raglan st – place a stitch marker, 1dc in next – (-, -, -) (-, -, -, 7, 7) sts, 1dc in next st (raglan st – place a st marker), 3dc in next st (raglan increase front panel), 1dc in next 17sts, 3dc in last st; ch3 and turn
Total sts:
– – (-, -, -) (-, -, -, 55, 55) sts for the back panel
– – (-, -, -) (-, -, -, 7, 7) sts for the sleeves
– 23sts for each side of the front panel
– 4 raglan stitches
R7: 2dc in the first st, 1dc in next 21sts, 3dc in next st (ragrlan increase front panel), 1dc in next st (raglan stitch – place a stitch marker) 1dc in next – (-, -, -) (-, -, -, 7, 7) sts, 1dc in next st (raglan st – place a stitch marker), 3dc in next st, 1dc in next – (-, -, -) (-, -, -, 53, 53) sts, 3dc in next st, 1dc in next st (raglan st – place a stitch marker, 1dc in next – (-, -, -) (-, -, -, 7, 7) sts, 1dc in next st (raglan st – place an st marker), 3dc in next st (raglan increase front panel), 1dc in next 21sts, 3dc in last st, – (-, -, -) (-, -, -, 5, 5) foundation double crochet, l st into the third ch to close the round.
Cut the yarn;
We cut the yarn so that the joining line not to be in the front in the upcoming rounds. Now, we’ll start again by attaching the yarn to the right raglan stitch on the back panel
Total sts:
– – (-, -, -) (-, -, -, 59, 59) sts for the back and front panels
– – (-, -, -) (-, -, -, 7, 7) sts for the sleeves
– 4 raglan stitches
For sizes 4XL, and 5XL, YOKE SECTION 1 is done; move to YOKE SECTION 2
After finishing the YOKE SECTION 1 you should have:
– 45 (47, 49, 53) (53, 53, 55, 59, 59) sts for – the back and front panels
– 5 (5, 5, 5) (5, 7, 7, 7, 7) sts for the sleeves
– 4 raglan stitches
YOKE SECTION 2 – INCREASING SLEEVES
For all sizes, cut the yarn after completing YOKE SECTION 1, then reconnect it to the right raglan stitch on the back panel.
The rest of the sweater will be made in the round, but turn after each round.
The first stitch in each round is the right raglan stitch of the back panel, worked as 2 single crochets stacked on top of each other. You can start the round with any stitch you find comfortable; in the pattern below you will find this stitch written as “dc”
During Yoke Section 2, we’ll increase the sleeves by working 2 double crochets in the same stitch.
For larger sizes, starting from XL, in the final rounds, we’ll also increase the body.
In YOKE SECTION 2, work for 9 (10, 11, 12) (13, 13, 14, 16, 18) rows.
Increase both sleeves and body panels for the last – (-, -, -) (2, 5, 5, 6, 8) rounds.
In this section the increases for the body panels, if you need to make them, will be 2dc in the same st.
To enhance clarity in this pattern, let’s begin counting for YOKE SECTION 2 from Round 1 (R1).
Before you start, insert stitch markers into the 4 raglan stitches. Keep these stitch markers in place throughout your work on the raglan.
Additionally, ensure that you’ve turned your work to the corresponding side to prevent any confusion. Depending on the size, the first round of Section 2 may fall on the wrong side for some sizes and on the right side for others.
R1: *1dc (the raglan stitch), 1dc in the next sts up to the next raglan st, 1dc into the raglan stitch, 2dc in the next st (first sleeve increase), 1dc in the next sts until 1st before the next raglan st, 2dc in next st (second sleeve increase)*; Rep. from * to * one more time. Turn
R2: 1dc (raglan st), 2dc in next st, 1dc in each st until 1st before the next raglan st, 2dc in the next st, 1dc in next st (raglan st), 1dc in each of the next sts until the next raglan st, 1dc in next st (raglan st), 2dc in next st, 1dc in each of the next sts until 1st before the raglan st, 2dc in next st, 1dc in next st (raglan st) 1 dc in each st to the end of the round; turn;
You can purchase the easily printable PDF pattern here at the links below.
Sizes XS, S, M, and L
Rep. R1 and R2 until you have 8(9, 10, 11)
Work one more round for YOKE SECTION 2 and this time increase the sleeves by working 3dc in the same st
Last Round Sizes XS and M: *1dc (the raglan stitch), 1dc in the next sts up to the next raglan st, 1dc into the raglan stitch, 3dc in the next st (first sleeve increase), 1dc in the next sts until 1st before the next raglan st, 3dc in next st (second sleeve increase)*; Rep. from * to * one more time. Turn
Last Round Sizes S and L:
1dc (raglan st), 3dc in next st, 1dc in each st until 1st before the next raglan st, 3dc in the next st, 1dc in next st (raglan st), 1dc in each of the next sts until the next raglan st, 1dc in next st (raglan st), 3dc in next st, 1dc in each of the next sts until 1st before the raglan st, 3dc in next st, 1dc in next st (raglan st) 1 dc in each st to the end of the round; turn;
For sizes XS, S, M and L the YOKE is done and you can move to the BODY section.
Sizes XL, XXL, 3XL, 4XL, and 5XL
Rep. R1 and R2 until you have 11 (8, 9, 10, 10) rounds
For the last 2 (5, 5, 6, 8) rounds, we will increase the sleeves and also the back and front panels.
Next Round Sizes XL and 3XL
1dc (raglan st), 2dc in next st, 1dc in each st until 1st before the next raglan st, 2dc in the next st, 1dc in next st (raglan st), 2dc in next st, 1dc in each of the next sts until 1st before next raglan st, 2dc in next st, 1dc in next st (raglan st), 2dc in next st, 1dc in each of the next sts until 1st before the raglan st, 2dc in next st, 1dc in next st (raglan st), 2dc in next st, 1dc in each st until 1st left, 2dc in last st; turn;
Next Round Sizes XL and 3XL
*1dc (the raglan stitch), 2dc in next st,1dc in the next sts until 1st before the next raglan st, 2dc in next st, 1dc into the raglan stitch, 2dc in the next st (first sleeve increase), 1dc in the next sts until 1st before the next raglan st, 2dc in next st (second sleeve increase)*; Rep. from * to * one more time. Turn
After completing these 2 rounds the YOKE for size XL is done and you can move to the BODY section;
Size 3XL only
Rep. the last 2 rounds until you have 14 rounds for the Yoke Section 2
Next Round Size XXL, 4XL and 5XL
*1dc (the raglan stitch), 2dc in next st,1dc in the next sts until 1st before the next raglan st, 2dc in next st, 1dc into the raglan stitch, 2dc in the next st (first sleeve increase), 1dc in the next sts until 1st before the next raglan st, 2dc in next st (second sleeve increase)*; Rep. from * to * one more time. Turn
Next Round Size XXL, 4XL and 5XL
1dc (raglan st), 2dc in next st, 1dc in each st until 1st before the next raglan st, 2dc in the next st, 1dc in next st (raglan st), 2dc in next st, 1dc in each of the next sts until 1st before next raglan st, 2dc in next st, 1dc in next st (raglan st), 2dc in next st, 1dc in each of the next sts until 1st before the raglan st, 2dc in next st, 1dc in next st (raglan st), 2dc in next st, 1dc in each st until 1st left, 2dc in last st; turn;
Rep. The last 2 rounds until you have 13 (16, 18) rounds.
The YOKE for size for sizes XXL, 3XL, 4XL and 5XL is done and you can move to the BODY section;
Before moving to the body section let’s summarize the Yoke;
For the Yoke Section 1 we worked 5 (5, 5, 6) (6, 6, 6, 7, 7) rows
At the end of section 1 we had:
– 45 (47, 49, 53) (53, 53, 55, 59, 59) sts for – the back and front panels
– 5 (5, 5, 5) (5, 7, 7, 7, 7) sts for the sleeves
– 4 raglan stitches
For the Yoke section 2 we worked 9 (10, 11, 12) (13, 13, 14, 16, 18) rows.
– 45 (47, 49, 53) (57, 63, 65, 71, 75) sts for – the back and front panels
– 25 (27, 29, 31) (31, 33, 35, 41, 45) sts for the sleeves
– 4 sts for raglan lines
We worked in total for the YOKE, Section 1 and Section 2: 14 (15, 16, 18) (19, 19, 20, 23, 25) rows
BODY
Let’s begin the BODY section by splitting things up. Depending on which side you’re looking at, the split can go from the raglan stitch to either the sleeve or the back panel stitches.
Depending on the size you are making you will need to add a few armpit stitches when skipping the sleeve stitches: 8 (8, 10,10) (14, 14, 18, 18, 18)
Splitting Round Starting the back panel: 1dc (raglan st) 1dc in each st until the next raglan st, 1dc in the raglan st, work the number of sts for the armpit as indicated above, skip the sts for the sleeve, 1dc into the next raglan st, 1dc in each st until the next raglan st, 1dc in the raglan st, ch the armpit sts, skip the sleeve sts and join with the first st; turn
Splitting Round Starting with the sleeve:
1dc (raglan st) ch the armpit sts, skip the sleeve sts, 1dc in next raglan st, 1dc in each st to the next raglan st, 1dc in the raglan st, ch the armpit sts, skip the sleeve sts, 1dc in next raglan st, 1dc in each st to the end of the round.
Next: Continue working 1dc in each st until you have 21 rounds or until you get to the desired length.
SLEEVES
Rejoin yarn at the armpit
Work the sleeves in the round but turn after each round;
R1: 1dc in each st around; join with a slip stitch and turn;
Repe R1 until you have 26 rounds or until you reach the desired length
RIBBING
We will work the ribbing for the bottom hem, cuffs and neckline
Use a 4mm crochet hook
Start: 7ch
R1: start into the second st, 1sc into the next 6sts, 1sl st into the next 2sts of the Body/sleeve edge, turn
R2: 1scblo in next sts, except the last one, 1sc into the last st, 1ch and turn
R3: 1sc in the first st, 1sc blo into the next sts, 1ss into the next 2sts of the edge. Turn.
Rep. R2 and R3 until you complete the circumference of the body/sleeve.
Join the ends of the ribbing using slip stitches.
To create the Neckline Ribbing, we will use the same ribbing pattern as before. However, before starting the ribbing, you will need to work a round in single crochet stitches. When working into the side rows, make sure to work two single crochets in each double crochet side row.
TO FINISH
Weave in all looser ends and block to measurements.
For a more comprehensive understanding, refer to the visual demonstration in the video tutorial linked here:
You can purchase the easily printable PDF pattern here at the links below.



Comments are closed.