I know that we still have a full month of summer, but I’m trying to make some stash cleaning to have enough space for the autumn-winter yarn.
This was the idea when I made this purse and because it’s super easy and fast to make and also a stash buster, I was thinking that you might be interested to see how you can make it.
Pentru postarea in limba romana, click aici
![Left Over Yarn Purse I know that we still have a full month of summer, but I’m trying to make some stash cleaning to have enough space for the autumn-winter yarn . This was the idea when I made this purse and because it’s super easy and fast to make and also a stash buster, I was thinking that you might be interested to see how you can make it. About Design The Design of this Left Over Yarn Purse is super simple. We will work one circle and the good part is that with the circle you will have to stop when you have the desired measurements of the purse/bag. This means that you can make it even bigger. The front side is made by starting decreasing without working the entire stitches of the circle. The flap is actually part of the back side, folded over the front side. Materials You will need: • Yarn I used 6 strands of fingering, 4 ply yarn, but you can use 3 strand of DK or sport or 2 strand of worsted weight yarn or you can work with one strand of thicker yarn. Whatever you have left over you can use it. • Crochet Hook 6 mm ( size L) crochet hook • Tapestry needle • Bag Closure (any type, even a magnetic closure or a simple button if you want) • Bag strap (or you can make a crocheted cord) • Scissors • Stitch markers (optional) About the yarn I used As I said I used fingering cotton yarn, Rainbow Cotton 8/4 from Hobbii. Each strand of 6th I used are of different color and that’s why the marble effect which I love. Final measurements The purse measures 24 cm wide and 18 cm high, but if you are working more rounds on the main circle you can make it bigger. About the stitch pattern We will work this Left Over Yarn Purse just in double crochet, so is a perfect project for a beginner also. With this project you will learn how to work in rounds, how to incease and decrease in double crochet. Abbreviations used in this pattern: • ch - chain • dc – double crochet • sl st – slip stitch • st (s) – stitch (es) • Inc – increase (2 dc in the same st) • Dec – Decrese (2 dc worked together) Dc worked together Yarn over, yarn over insert the hook in the next st, yarn over and pull out a loop, yarn over and pull the yarn through first 2 loops on you hook. Repeat one more time and at the end yarn over and pull the yarn through all the loops on you hook. On the last row of the front side you will need to do this 8 times, working 8 dc together. Gauge • After 2 rounds the circle measured 9 cm in diameter. And I think we are done with all details and we can start. Pattern notes *Ch 2 at the beginning of the round, doesn’t count as first dc. *if you want a bigger purse, work more rounds to the main circle until you have in diameter the desired length. You will find in the pattern indication how to start the front side if you worked more round on the back Back Side Round 1 Start with a magic circle, ch 3 and make 11 more dc inside the circle. Pull the end to close the ring and join with a sl st with the 3rd st of the starting chain. Round 2 Ch 2, 2 dc in the same st, 2 dc in each st around. Join with a sl st, with the 1st dc. (24 dc) Round 3 Ch 2, 1 dc in same st, [2 dc in next, 1 dc in next]. Repeat to the end of the round. Join with a sl st with first dc. (36) Round 4 Ch 2, 1 dc in the same st, [2 dc in next, 1 dc in next 2 sts]. Repeat to the end of the round. Finish the round with 1 dc in last st and join with a sl st with 1st dc. (48) Round 5 Ch 2, 1 dc in the same st, 1 dc in next 2 sts, [2 dc in next st, 1 dc in next 3 sts]. Repeat tot the end of the round. Finish the round with 2 dc in last st and join with sl st with first dc. (60) Round 6 Ch 2, 1 dc in the same st, 1 dc in next, [2 dc in next st, 1 dc in next 4 sts] repeat to the end of the round. Finish the round with 1 dc in the last 2 sts and join with sl st with the 1st dc. (72) And the back side of the Left Over Yarn Purse is done. Now we will start decrease and not complete the circle to make the front side. If you want a bigger purse you can work more rounds. You will increase with each next round the number of dc between 2 increases with 1. To be easier to understand what we are doing next, and how to adjust the pattern if you are working more rounds, we will divide the total number of sts, by 3, so we will have 3 sections of the circle. In our case we will have 3 section of 24 sts, one will be the flap and we won’t work those sts on our front side, and 2 section will be the front side. So, we will work the front panel just in next 48 sts and turn after each row. On the last round of the back side we had, 1 inc and 4 dc in between, so on the first row of the front side we will work 4 dc and 1 decrease. If you made your purse bigger, the first row of the front panel will be no of dc you had between increases, 1 decrease. Use 2 stitch markers to mark the 48 sts in which you will work the front side. Front side Row 1 Ch 2, 1 dc in the same st, 1 dc in next 3 sts, [1 dec (2 dc worked together), 1 dc in next 4]. Repeat the section until you finish all 48 sts. Finish the row with 1 dec. Ch 2 and turn (40) Row 2 1 dc in the first st, 1 dc in next 2 sts, [1 dec, 1 dc in next 3]. Repeat tot the end of the rou. Ch 2 and turn. (32) Row 3 1 dc in the 1st st, 1 dc in next, [1 dec, 1 dc in next 2 sts]. Repeat the section to the end of the row. Ch 2 and turn (24) Row 4 1 dc in first st, [ 1 dec, 1 dc in next]. Repeat the section to the end of the row. Ch 2 and turn (16) Row 5 1 dec x 8 times (8 sts) ch 2 and turn Row 6 8 dc together to close the circle. And Done! All you have to do is to sew the closure and the bag strap and you have nice Left over Yarn Purse to wear it this summer. Here you can find the vide tutorial in case you need it:](https://by-katerina.com/wp-content/uploads/2019/07/LRM_EXPORT_166146643831814_20190625_115749338.jpeg)
You can purchase the add free, easy printable, instant download PDF version of this pattern here:
About Design
The Design of this Left Over Yarn Purse is super simple. We will work one circle and the good part is that with the circle you will have to stop when you have the desired measurements of the purse/bag. This means that you can make it even bigger.
The front side is made by starting decreasing without working the entire stitches of the circle. The flap is actually part of the back side, folded over the front side.
Materials You will need:
- Yarn
I used 6 strands of fingering, 4 ply yarn, but you can use 3 strand of DK or sport or 2 strand of worsted weight yarn or you can work with one strand of thicker yarn. Whatever you have left over you can use it.
- Crochet Hook
6 mm ( size L) crochet hook
- Tapestry needle
- Bag Closure (any type, even a magnetic closure or a simple button if you want)
- Bag strap (or you can make a crocheted cord)
- Scissors
- Stitch markers (optional)
About the yarn I used
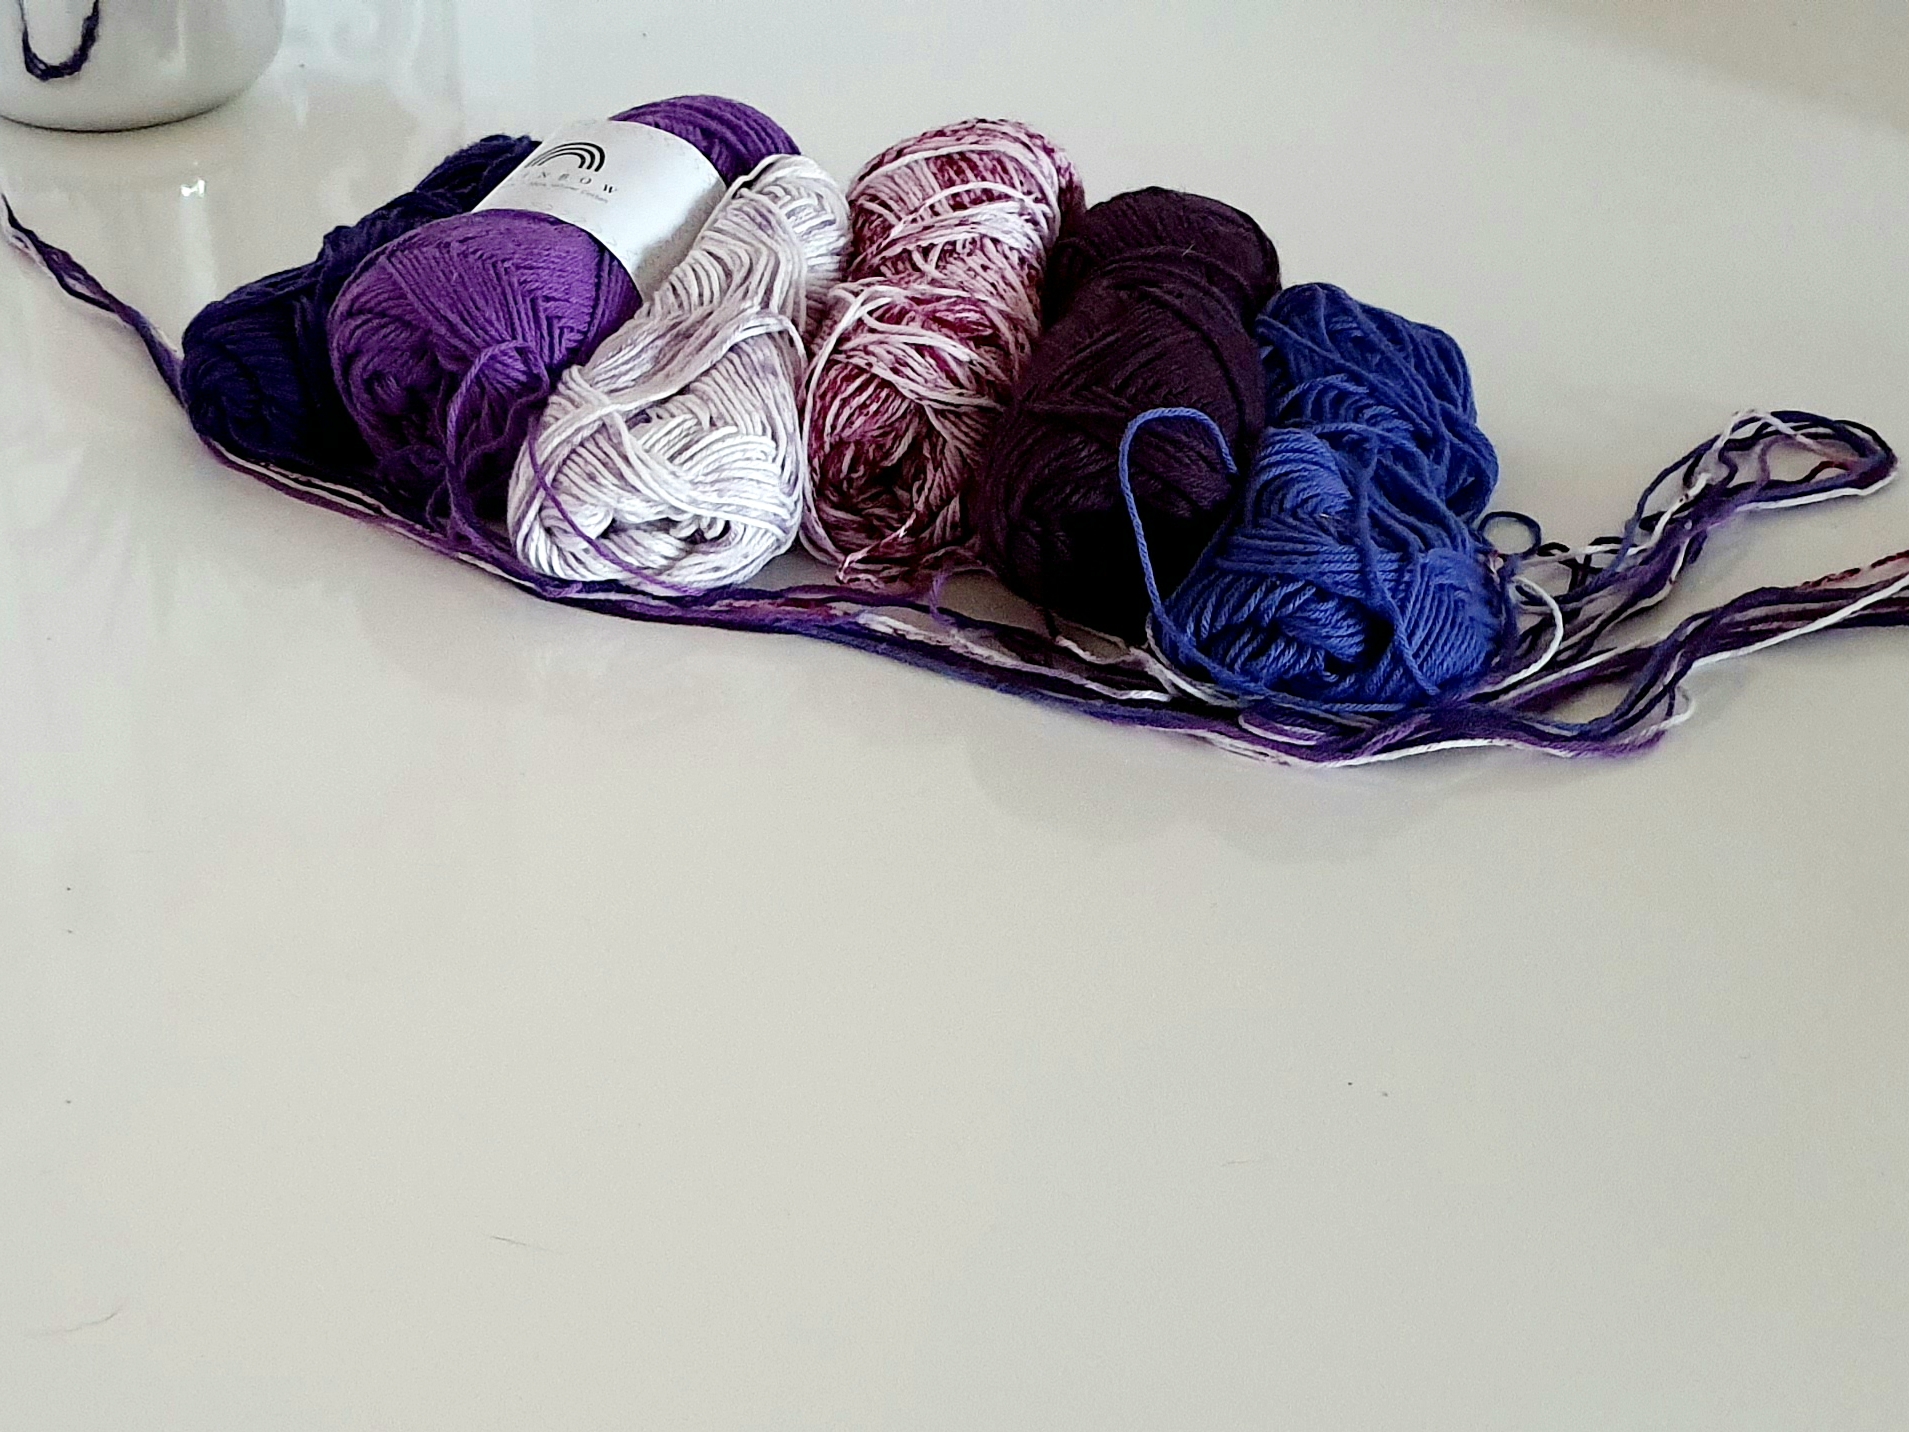
As I said I used fingering cotton yarn, Rainbow Cotton 8/4 from Hobbii. Each strand of 6th I used are of different color and that’s why the marble effect which I love.
Final measurements
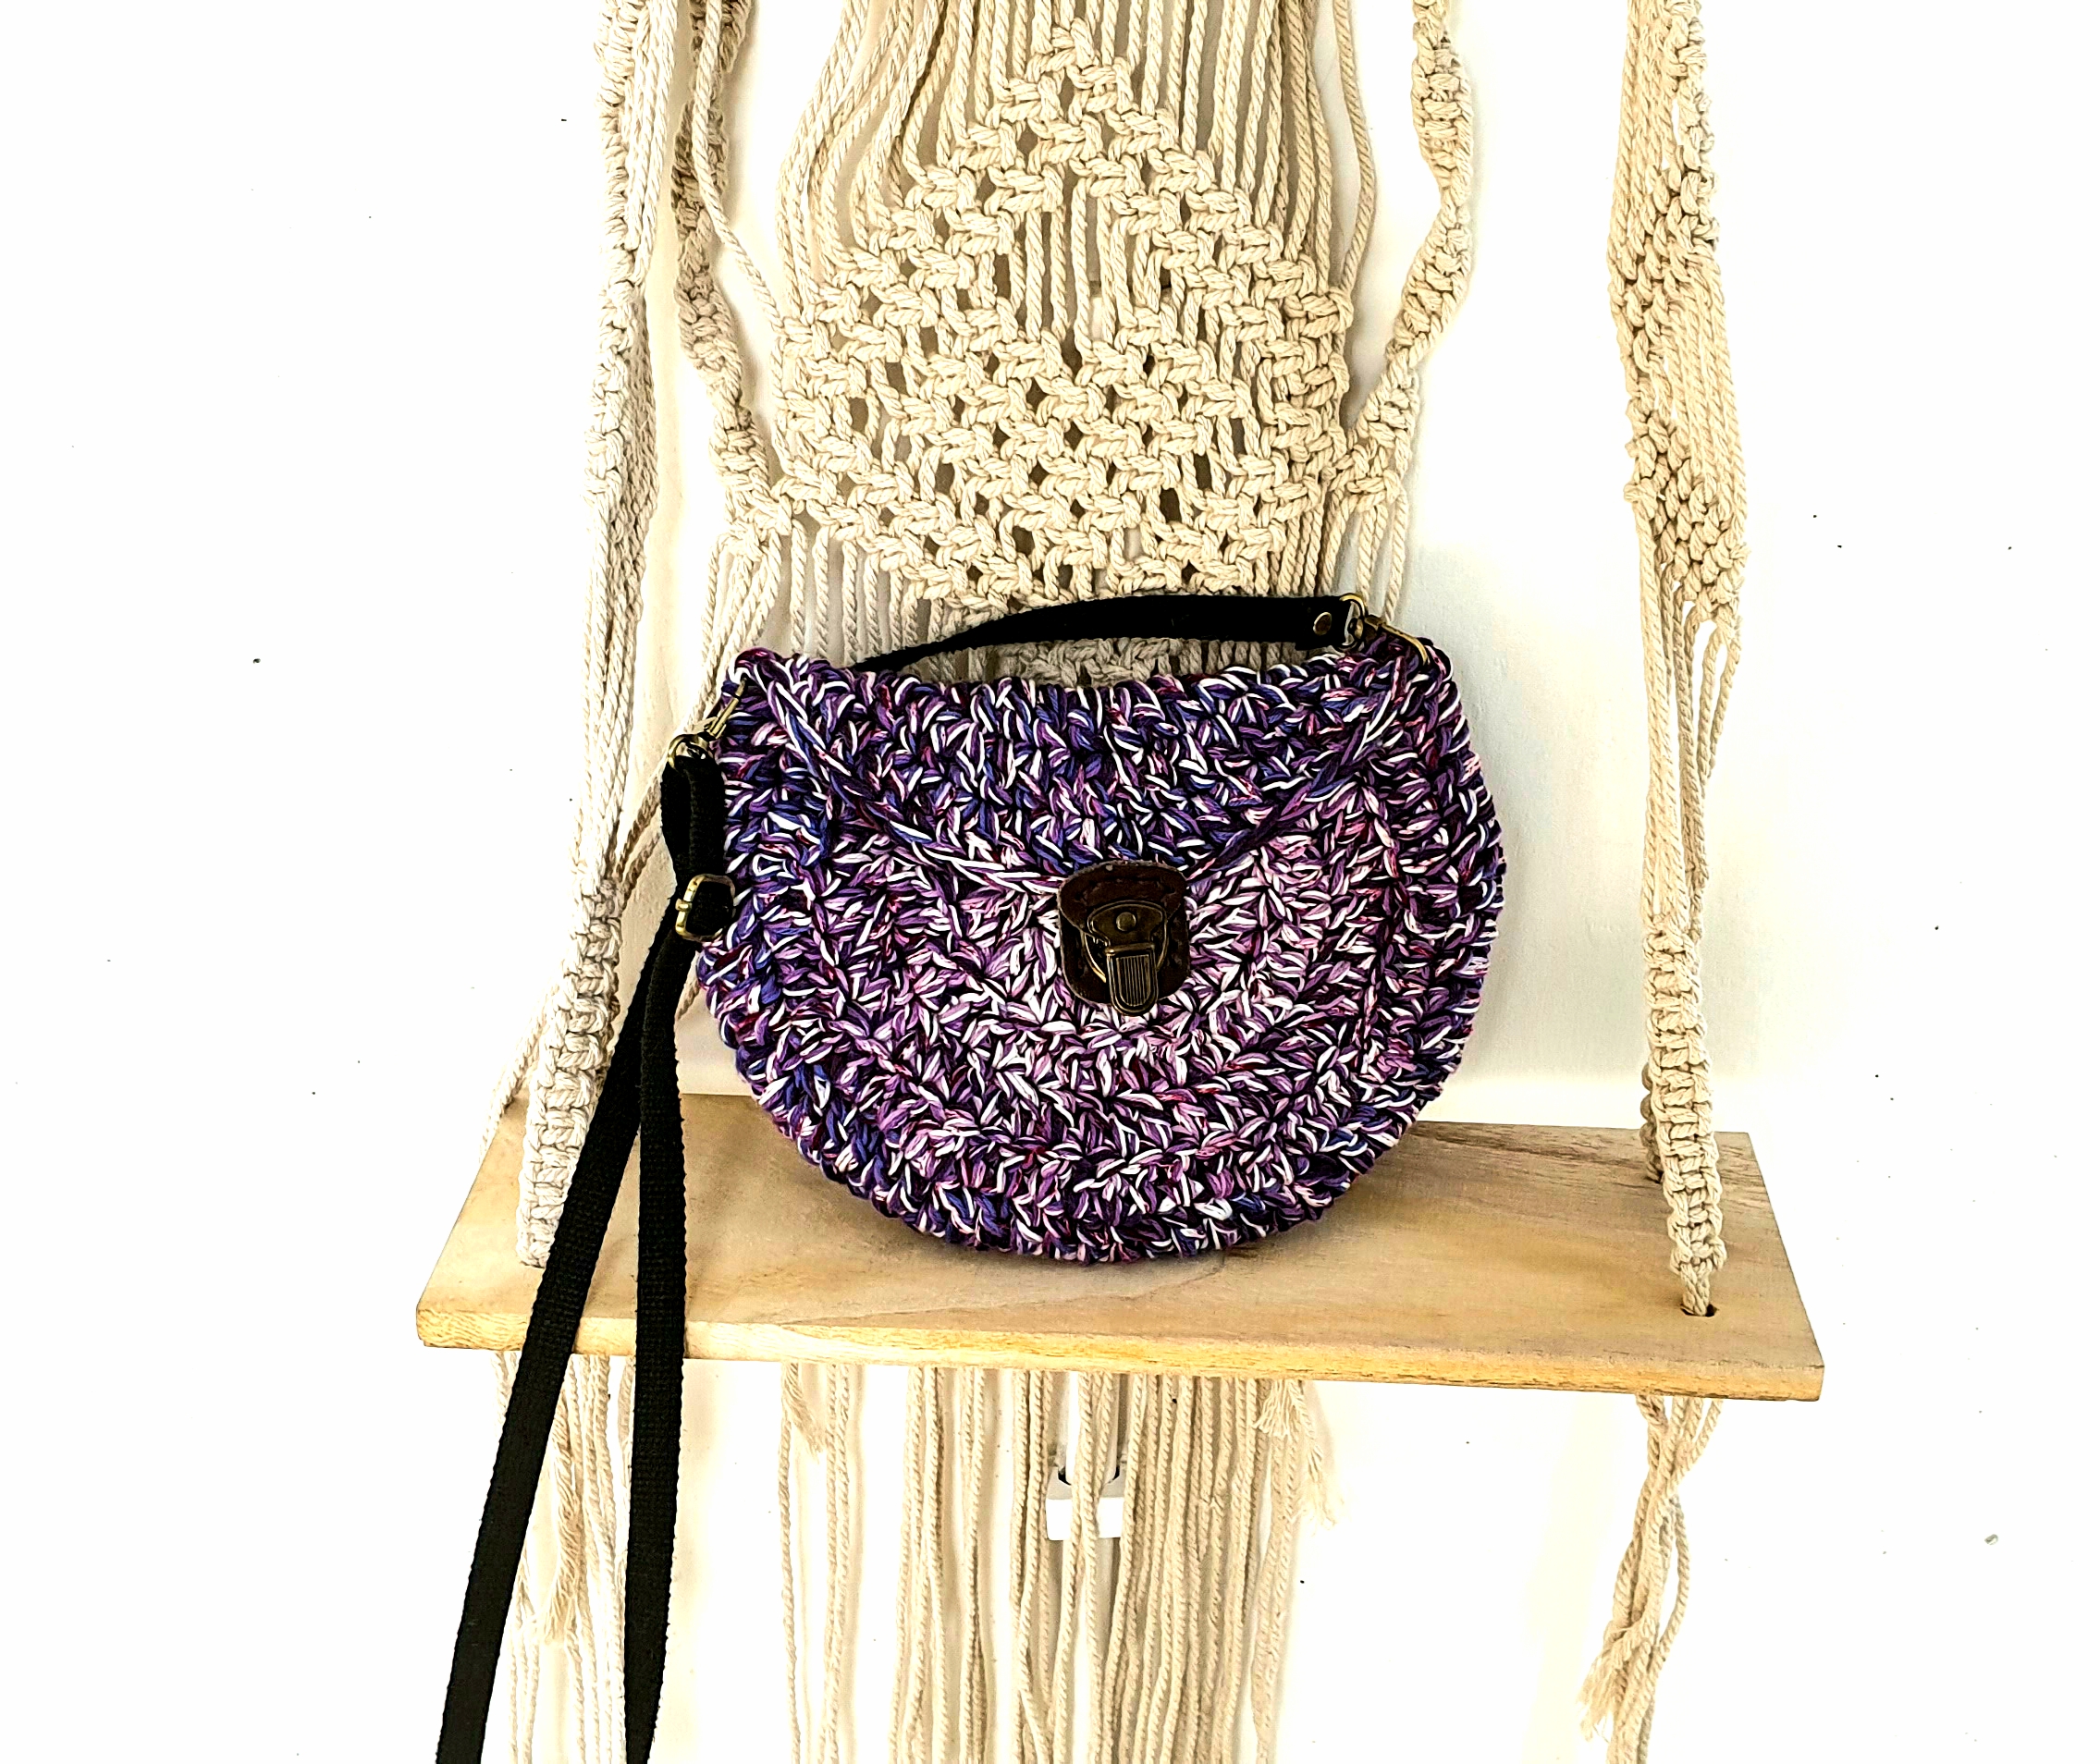
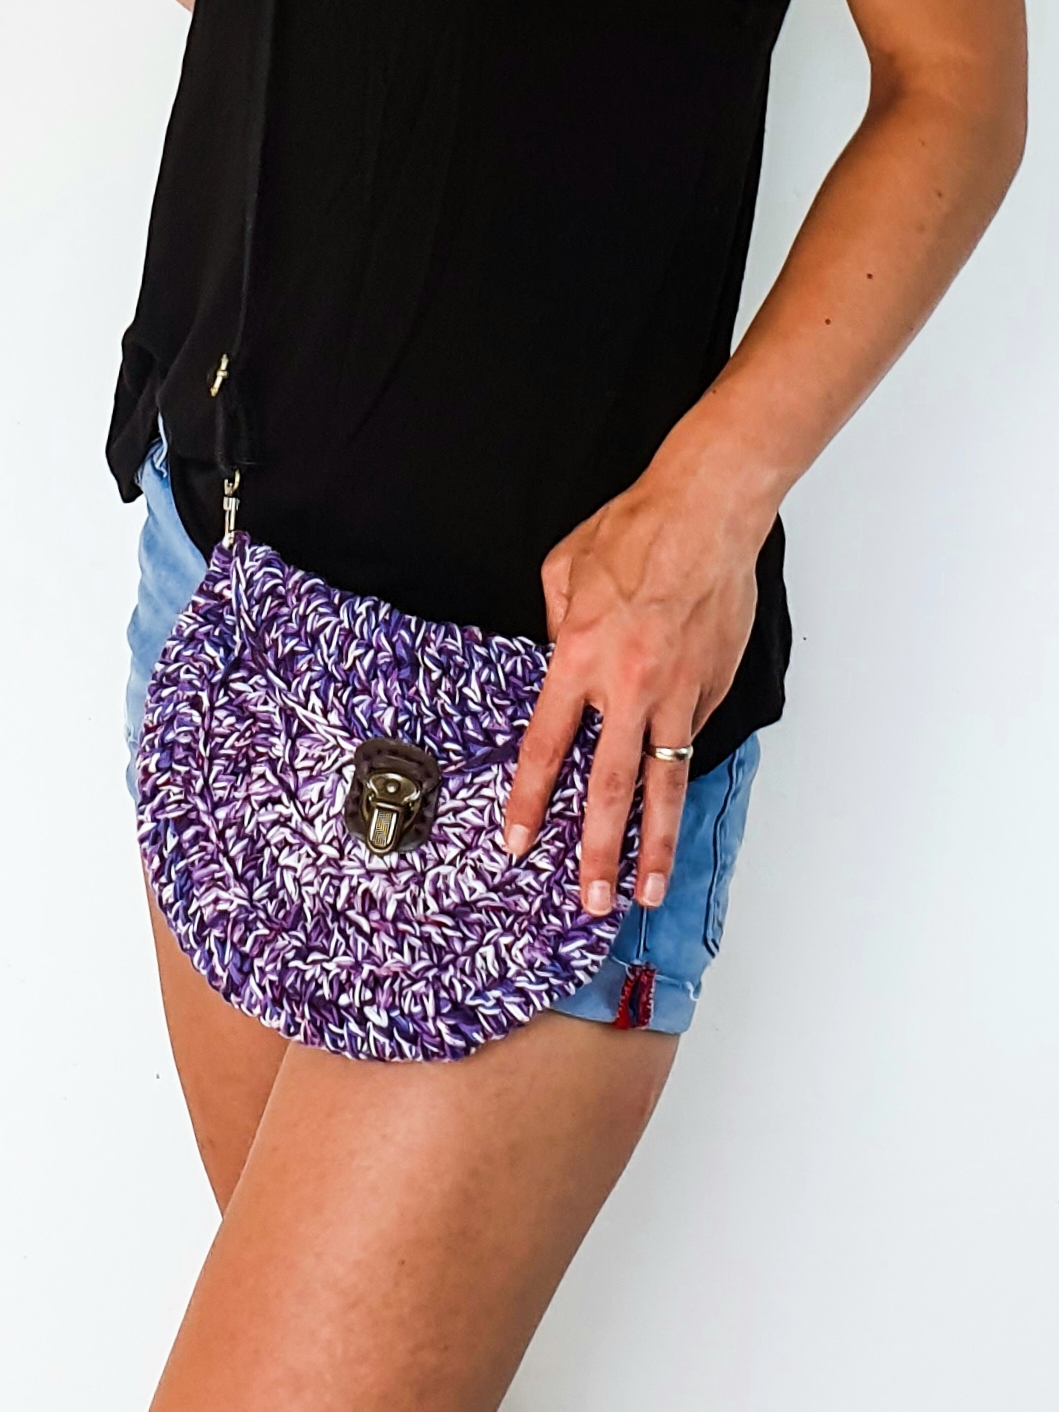
The purse measures 24 cm wide and 18 cm high, but if you are working more rounds on the main circle you can make it bigger.
About the stitch pattern
We will work this Left Over Yarn Purse just in double crochet, so is a perfect project for a beginner also. With this project you will learn how to work in rounds, how to increase and decrease in double crochet.
Abbreviations used in this pattern:
- ch – chain
- dc – double crochet
- sl st – slip stitch
- st (s) – stitch (es)
- Inc – increase (2 dc in the same st)
- Dec – Decrese (2 dc worked together)
Dc worked together
Yarn over, yarn over insert the hook in the next st, yarn over and pull out a loop, yarn over and pull the yarn through first 2 loops on you hook. Repeat one more time and at the end yarn over and pull the yarn through all the loops on you hook. On the last row of the front side you will need to do this 8 times, working 8 dc together.
Gauge
- After 2 rounds the circle measured 9 cm in diameter.
You can purchase the add free, easy printable, instant download PDF version of this pattern here:
And I think we are done with all details and we can start.
Pattern notes
*Ch 2 at the beginning of the round, doesn’t count as first dc.
*if you want a bigger purse, work more rounds to the main circle until you have in diameter the desired length. You will find in the pattern indication how to start the front side if you worked more round on the back
Back Side
Round 1
Start with a magic circle, ch 3 and make 11 more dc inside the circle. Pull the end to close the ring and join with a sl st with the 3rd st of the starting chain.
Round 2
Ch 2, 2 dc in the same st, 2 dc in each st around. Join with a sl st, with the 1st dc. (24 dc)
Round 3
Ch 2, 1 dc in same st, [2 dc in next, 1 dc in next]. Repeat to the end of the round. Join with a sl st with first dc. (36)
Round 4
Ch 2, 1 dc in the same st, [2 dc in next, 1 dc in next 2 sts]. Repeat to the end of the round. Finish the round with 1 dc in last st and join with a sl st with 1st dc. (48)
Round 5
Ch 2, 1 dc in the same st, 1 dc in next 2 sts, [2 dc in next st, 1 dc in next 3 sts]. Repeat tot the end of the round. Finish the round with 2 dc in last st and join with sl st with first dc. (60)
Round 6
Ch 2, 1 dc in the same st, 1 dc in next, [2 dc in next st, 1 dc in next 4 sts] repeat to the end of the round. Finish the round with 1 dc in the last 2 sts and join with sl st with the 1st dc. (72)
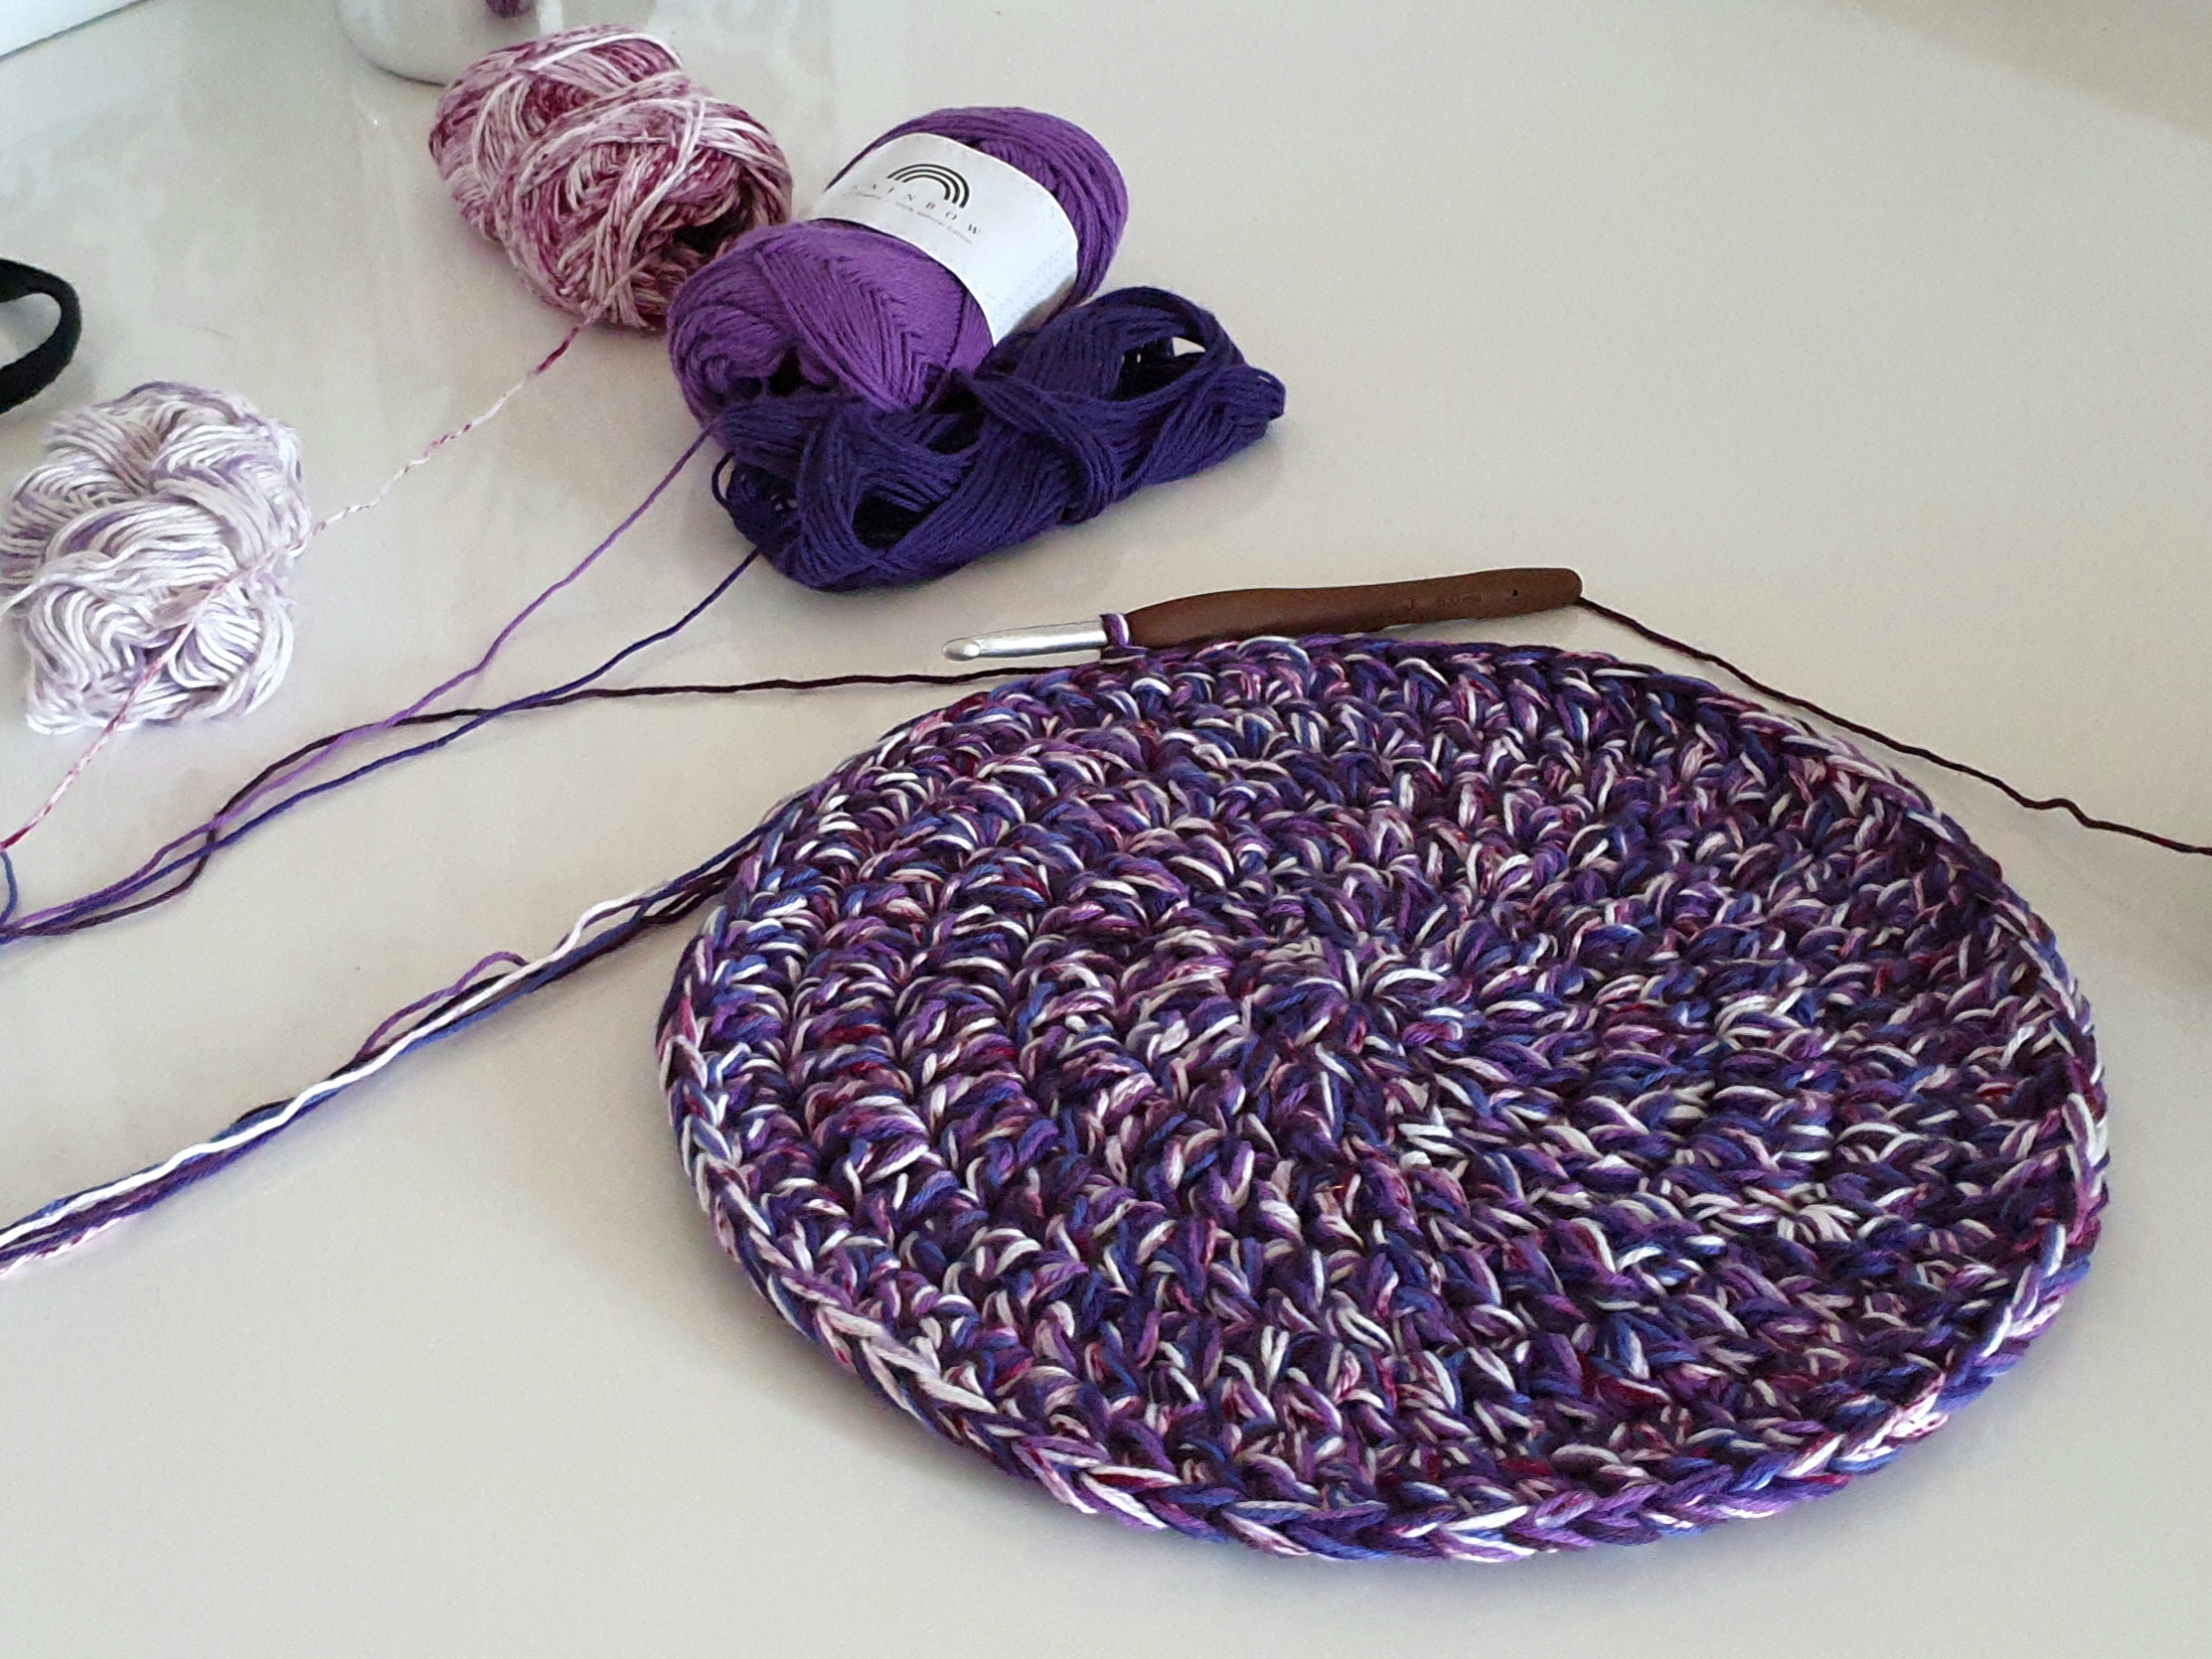
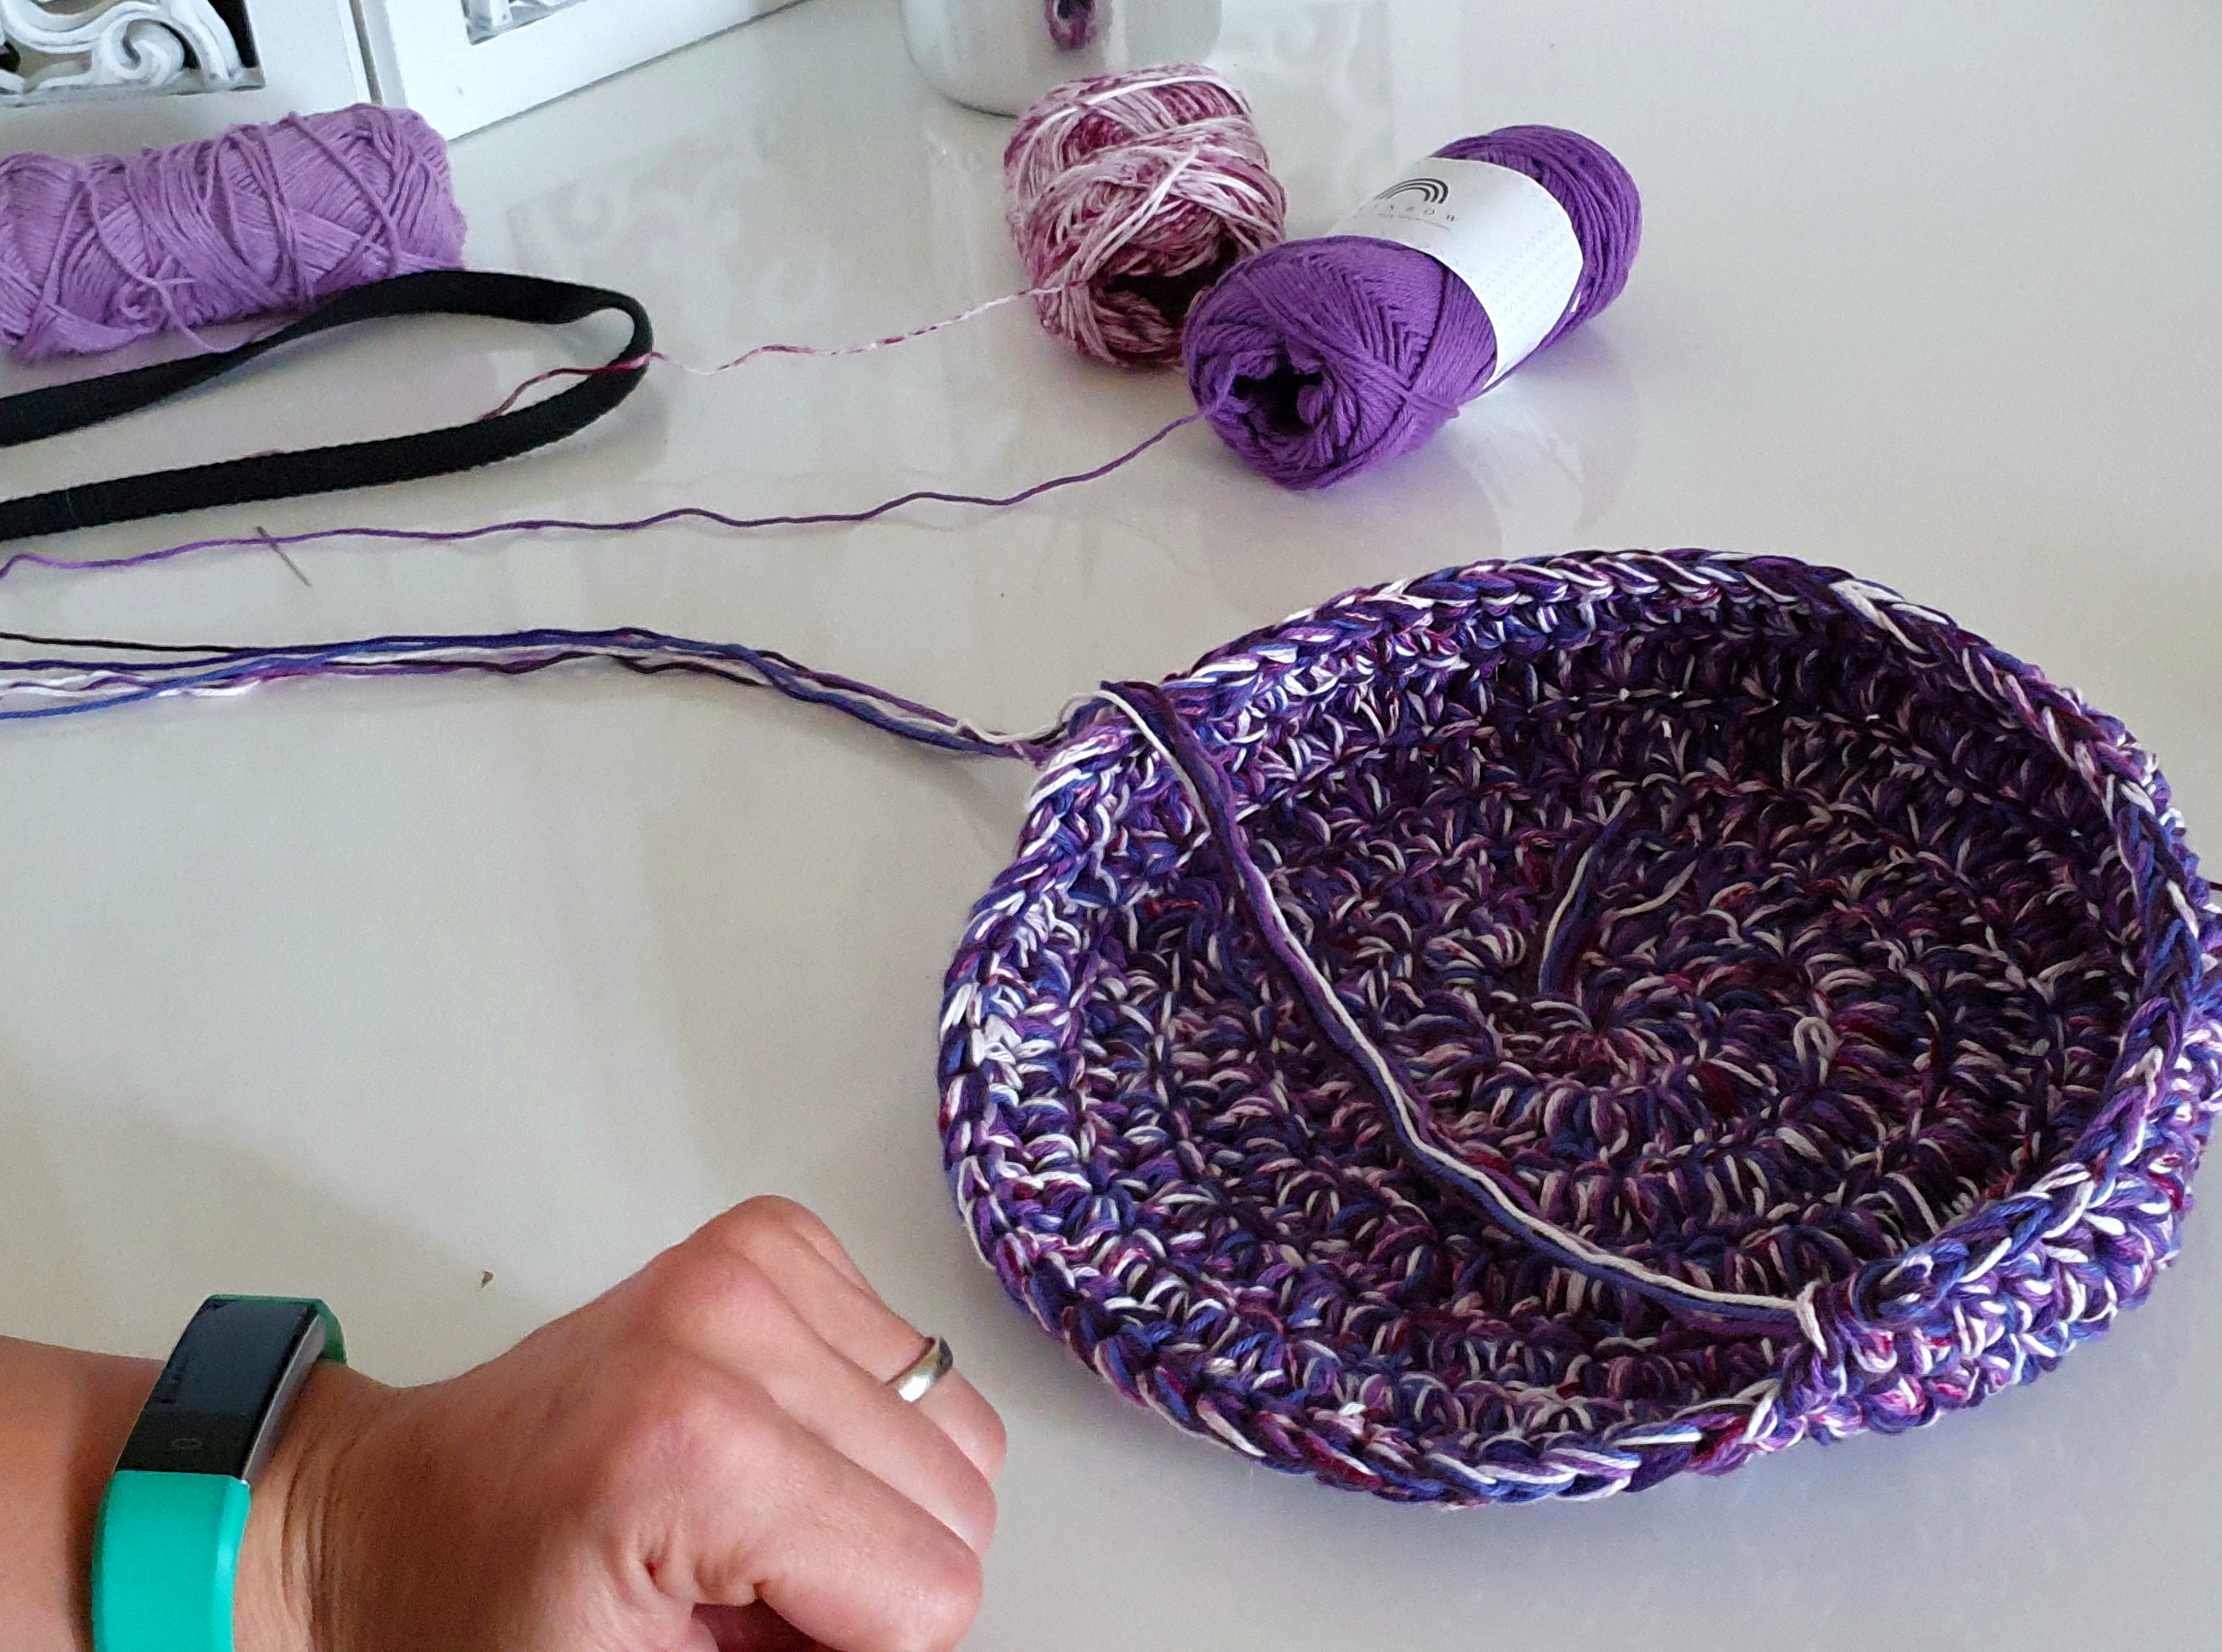
And the back side of the Left Over Yarn Purse is done. Now we will start decrease and not complete the circle to make the front side.
If you want a bigger purse you can work more rounds. You will increase with each next round the number of dc between 2 increases with 1.
To be easier to understand what we are doing next, and how to adjust the pattern if you are working more rounds, we will divide the total number of sts, by 3, so we will have 3 sections of the circle.
In our case we will have 3 sections of 24 sts, one will be the flap and we won’t work those sts on our front side, and 2 section will be the front side.
So, we will work the front panel just in next 48 sts and turn after each row.
On the last round of the back side we had, 1 inc and 4 dc in between, so on the first row of the front side we will work 4 dc and 1 decrease.
If you made your purse bigger, the first row of the front panel will be no. of dc you had between increases, 1 decrease.
Use 2 stitch markers to mark the 48 sts in which you will work the front side.
Front side
Row 1
Ch 2, 1 dc in the same st, 1 dc in next 3 sts, [1 dec (2 dc worked together), 1 dc in next 4]. Repeat the section until you finish all 48 sts. Finish the row with 1 dec. Ch 2 and turn (40)
Row 2
1 dc in the first st, 1 dc in next 2 sts, [1 dec, 1 dc in next 3]. Repeat to the end of the rou. Ch 2 and turn. (32)
Row 3
1 dc in the 1st st, 1 dc in next, [1 dec, 1 dc in next 2 sts]. Repeat the section to the end of the row. Ch 2 and turn (24)
Row 4
1 dc in first st, [ 1 dec, 1 dc in next]. Repeat the section to the end of the row. Ch 2 and turn (16)
Row 5
1 dec x 8 times (8 sts) ch 2 and turn
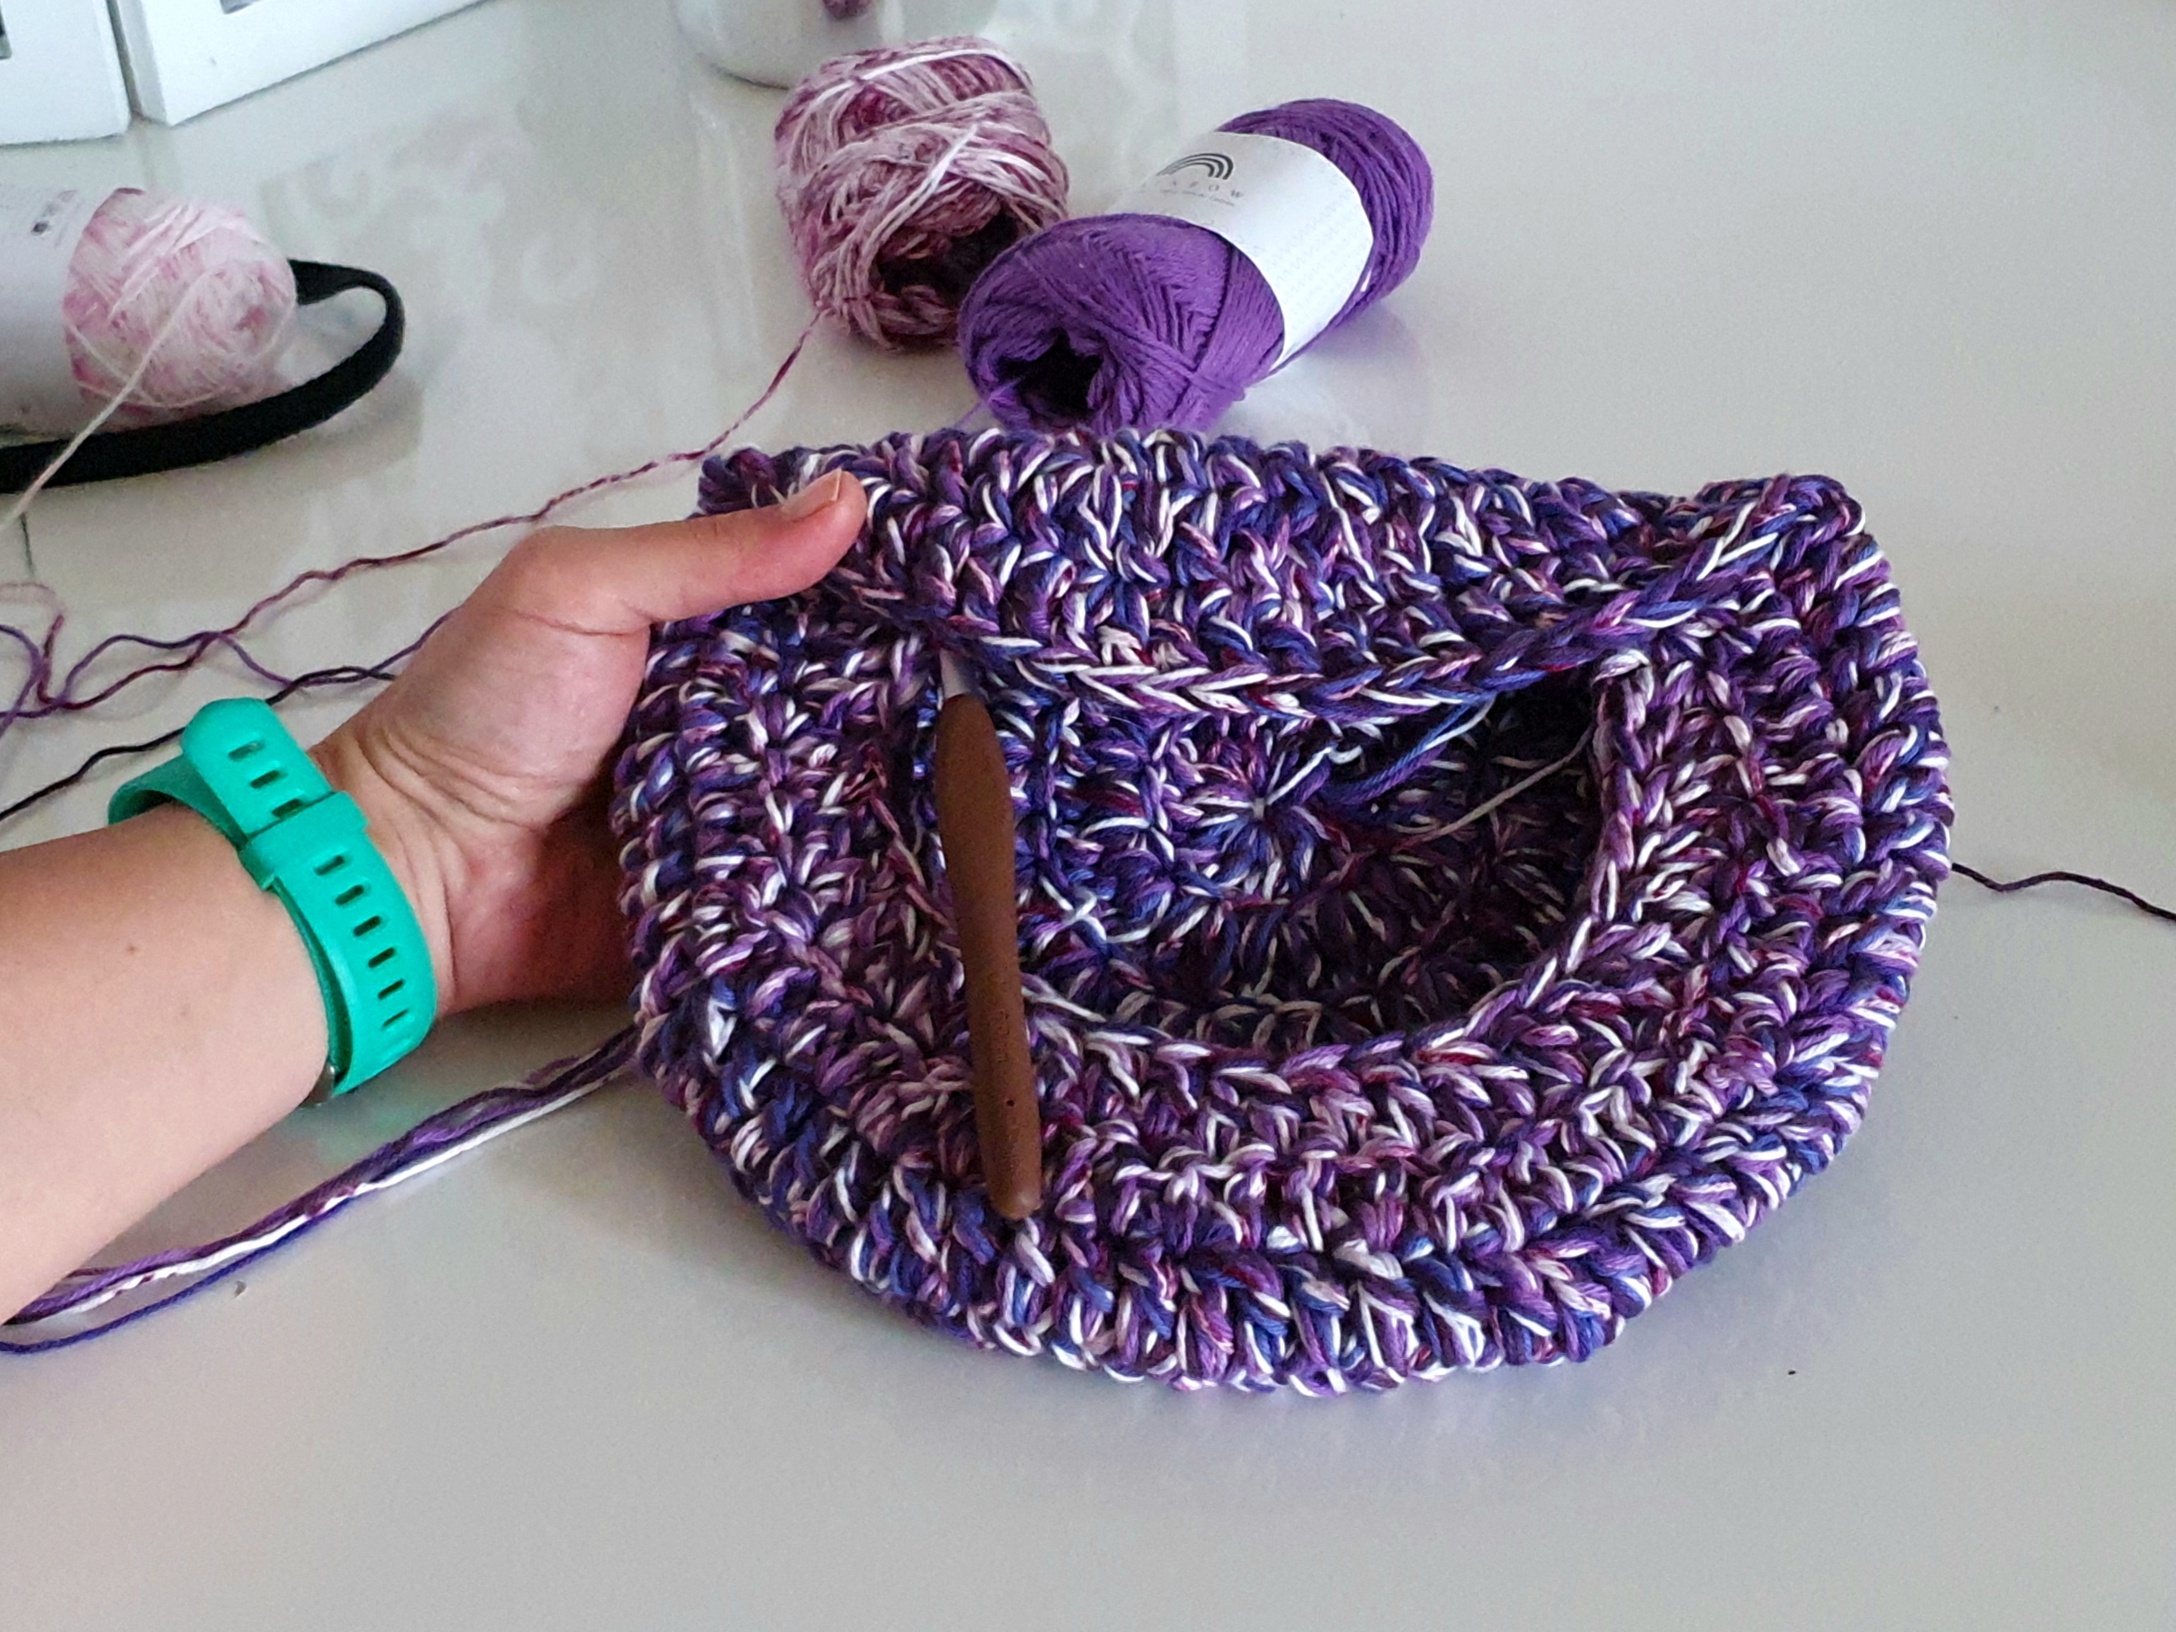
Row 6
8 dc together to close the circle.
And Done! All you have to do is to sew the closure and the bag strap and you have nice Left over Yarn Purse to wear it this summer.

You can purchase the add free, easy printable, instant download PDF version of this pattern here:
Here you can find the video tutorial in case you need it:

![Left Over Yarn Purse Left Over Yarn Purse I know that we still have a full month of summer, but I’m trying to make some stash cleaning to have enough space for the autumn-winter yarn . This was the idea when I made this purse and because it’s super easy and fast to make and also a stash buster, I was thinking that you might be interested to see how you can make it. About Design The Design of this Left Over Yarn Purse is super simple. We will work one circle and the good part is that with the circle you will have to stop when you have the desired measurements of the purse/bag. This means that you can make it even bigger. The front side is made by starting decreasing without working the entire stitches of the circle. The flap is actually part of the back side, folded over the front side. Materials You will need: • Yarn I used 6 strands of fingering, 4 ply yarn, but you can use 3 strand of DK or sport or 2 strand of worsted weight yarn or you can work with one strand of thicker yarn. Whatever you have left over you can use it. • Crochet Hook 6 mm ( size L) crochet hook • Tapestry needle • Bag Closure (any type, even a magnetic closure or a simple button if you want) • Bag strap (or you can make a crocheted cord) • Scissors • Stitch markers (optional) About the yarn I used As I said I used fingering cotton yarn, Rainbow Cotton 8/4 from Hobbii. Each strand of 6th I used are of different color and that’s why the marble effect which I love. Final measurements The purse measures 24 cm wide and 18 cm high, but if you are working more rounds on the main circle you can make it bigger. About the stitch pattern We will work this Left Over Yarn Purse just in double crochet, so is a perfect project for a beginner also. With this project you will learn how to work in rounds, how to incease and decrease in double crochet. Abbreviations used in this pattern: • ch - chain • dc – double crochet • sl st – slip stitch • st (s) – stitch (es) • Inc – increase (2 dc in the same st) • Dec – Decrese (2 dc worked together) Dc worked together Yarn over, yarn over insert the hook in the next st, yarn over and pull out a loop, yarn over and pull the yarn through first 2 loops on you hook. Repeat one more time and at the end yarn over and pull the yarn through all the loops on you hook. On the last row of the front side you will need to do this 8 times, working 8 dc together. Gauge • After 2 rounds the circle measured 9 cm in diameter. And I think we are done with all details and we can start. Pattern notes *Ch 2 at the beginning of the round, doesn’t count as first dc. *if you want a bigger purse, work more rounds to the main circle until you have in diameter the desired length. You will find in the pattern indication how to start the front side if you worked more round on the back Back Side Round 1 Start with a magic circle, ch 3 and make 11 more dc inside the circle. Pull the end to close the ring and join with a sl st with the 3rd st of the starting chain. Round 2 Ch 2, 2 dc in the same st, 2 dc in each st around. Join with a sl st, with the 1st dc. (24 dc) Round 3 Ch 2, 1 dc in same st, [2 dc in next, 1 dc in next]. Repeat to the end of the round. Join with a sl st with first dc. (36) Round 4 Ch 2, 1 dc in the same st, [2 dc in next, 1 dc in next 2 sts]. Repeat to the end of the round. Finish the round with 1 dc in last st and join with a sl st with 1st dc. (48) Round 5 Ch 2, 1 dc in the same st, 1 dc in next 2 sts, [2 dc in next st, 1 dc in next 3 sts]. Repeat tot the end of the round. Finish the round with 2 dc in last st and join with sl st with first dc. (60) Round 6 Ch 2, 1 dc in the same st, 1 dc in next, [2 dc in next st, 1 dc in next 4 sts] repeat to the end of the round. Finish the round with 1 dc in the last 2 sts and join with sl st with the 1st dc. (72) And the back side of the Left Over Yarn Purse is done. Now we will start decrease and not complete the circle to make the front side. If you want a bigger purse you can work more rounds. You will increase with each next round the number of dc between 2 increases with 1. To be easier to understand what we are doing next, and how to adjust the pattern if you are working more rounds, we will divide the total number of sts, by 3, so we will have 3 sections of the circle. In our case we will have 3 section of 24 sts, one will be the flap and we won’t work those sts on our front side, and 2 section will be the front side. So, we will work the front panel just in next 48 sts and turn after each row. On the last round of the back side we had, 1 inc and 4 dc in between, so on the first row of the front side we will work 4 dc and 1 decrease. If you made your purse bigger, the first row of the front panel will be no of dc you had between increases, 1 decrease. Use 2 stitch markers to mark the 48 sts in which you will work the front side. Front side Row 1 Ch 2, 1 dc in the same st, 1 dc in next 3 sts, [1 dec (2 dc worked together), 1 dc in next 4]. Repeat the section until you finish all 48 sts. Finish the row with 1 dec. Ch 2 and turn (40) Row 2 1 dc in the first st, 1 dc in next 2 sts, [1 dec, 1 dc in next 3]. Repeat tot the end of the rou. Ch 2 and turn. (32) Row 3 1 dc in the 1st st, 1 dc in next, [1 dec, 1 dc in next 2 sts]. Repeat the section to the end of the row. Ch 2 and turn (24) Row 4 1 dc in first st, [ 1 dec, 1 dc in next]. Repeat the section to the end of the row. Ch 2 and turn (16) Row 5 1 dec x 8 times (8 sts) ch 2 and turn Row 6 8 dc together to close the circle. And Done! All you have to do is to sew the closure and the bag strap and you have nice Left over Yarn Purse to wear it this summer. Here you can find the vide tutorial in case you need it:](https://by-katerina.com/wp-content/uploads/2019/07/LRM_EXPORT_166146643831814_20190625_115749338-1024x768.jpeg)


Comments are closed.