Stiu ca mai avem inca o luna intreaga de vara, insa deja am inceput sa imi fac ordine printre fire si sa fac loc pentru firele noi pentru toamna-iarna.
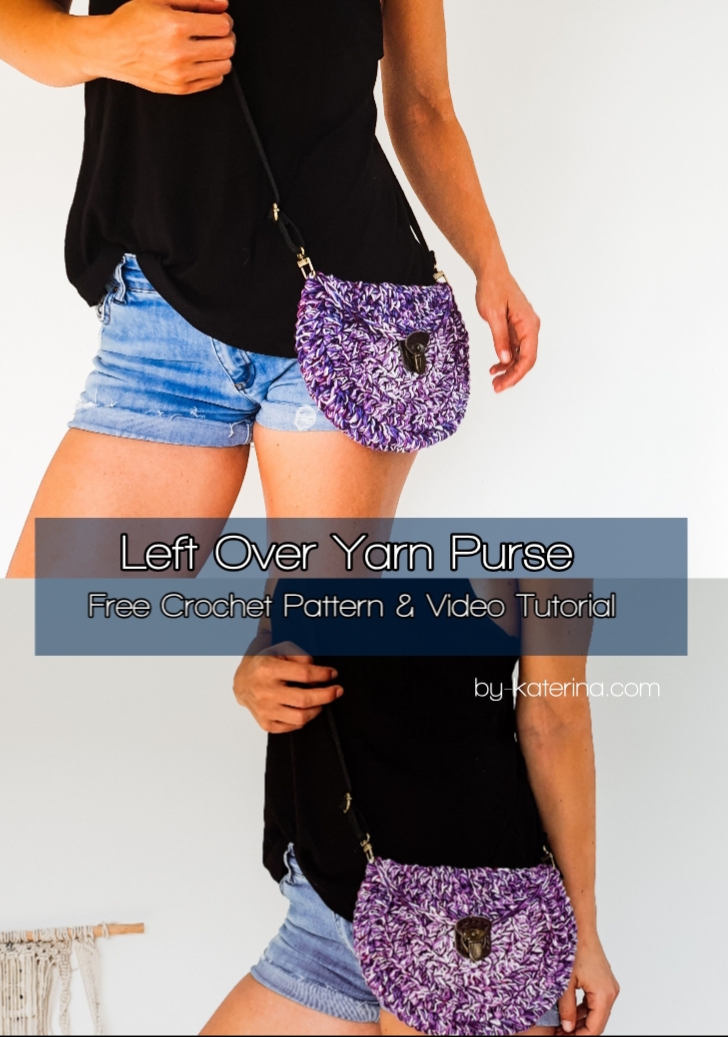
Aceasta a fost ideea can am facut aceasta Gentuta din resturi de fire si pentru ca este atat de usor de facut si de rapid am zis ca poate o sa fiti interesati sa aflati si voi cum se face.
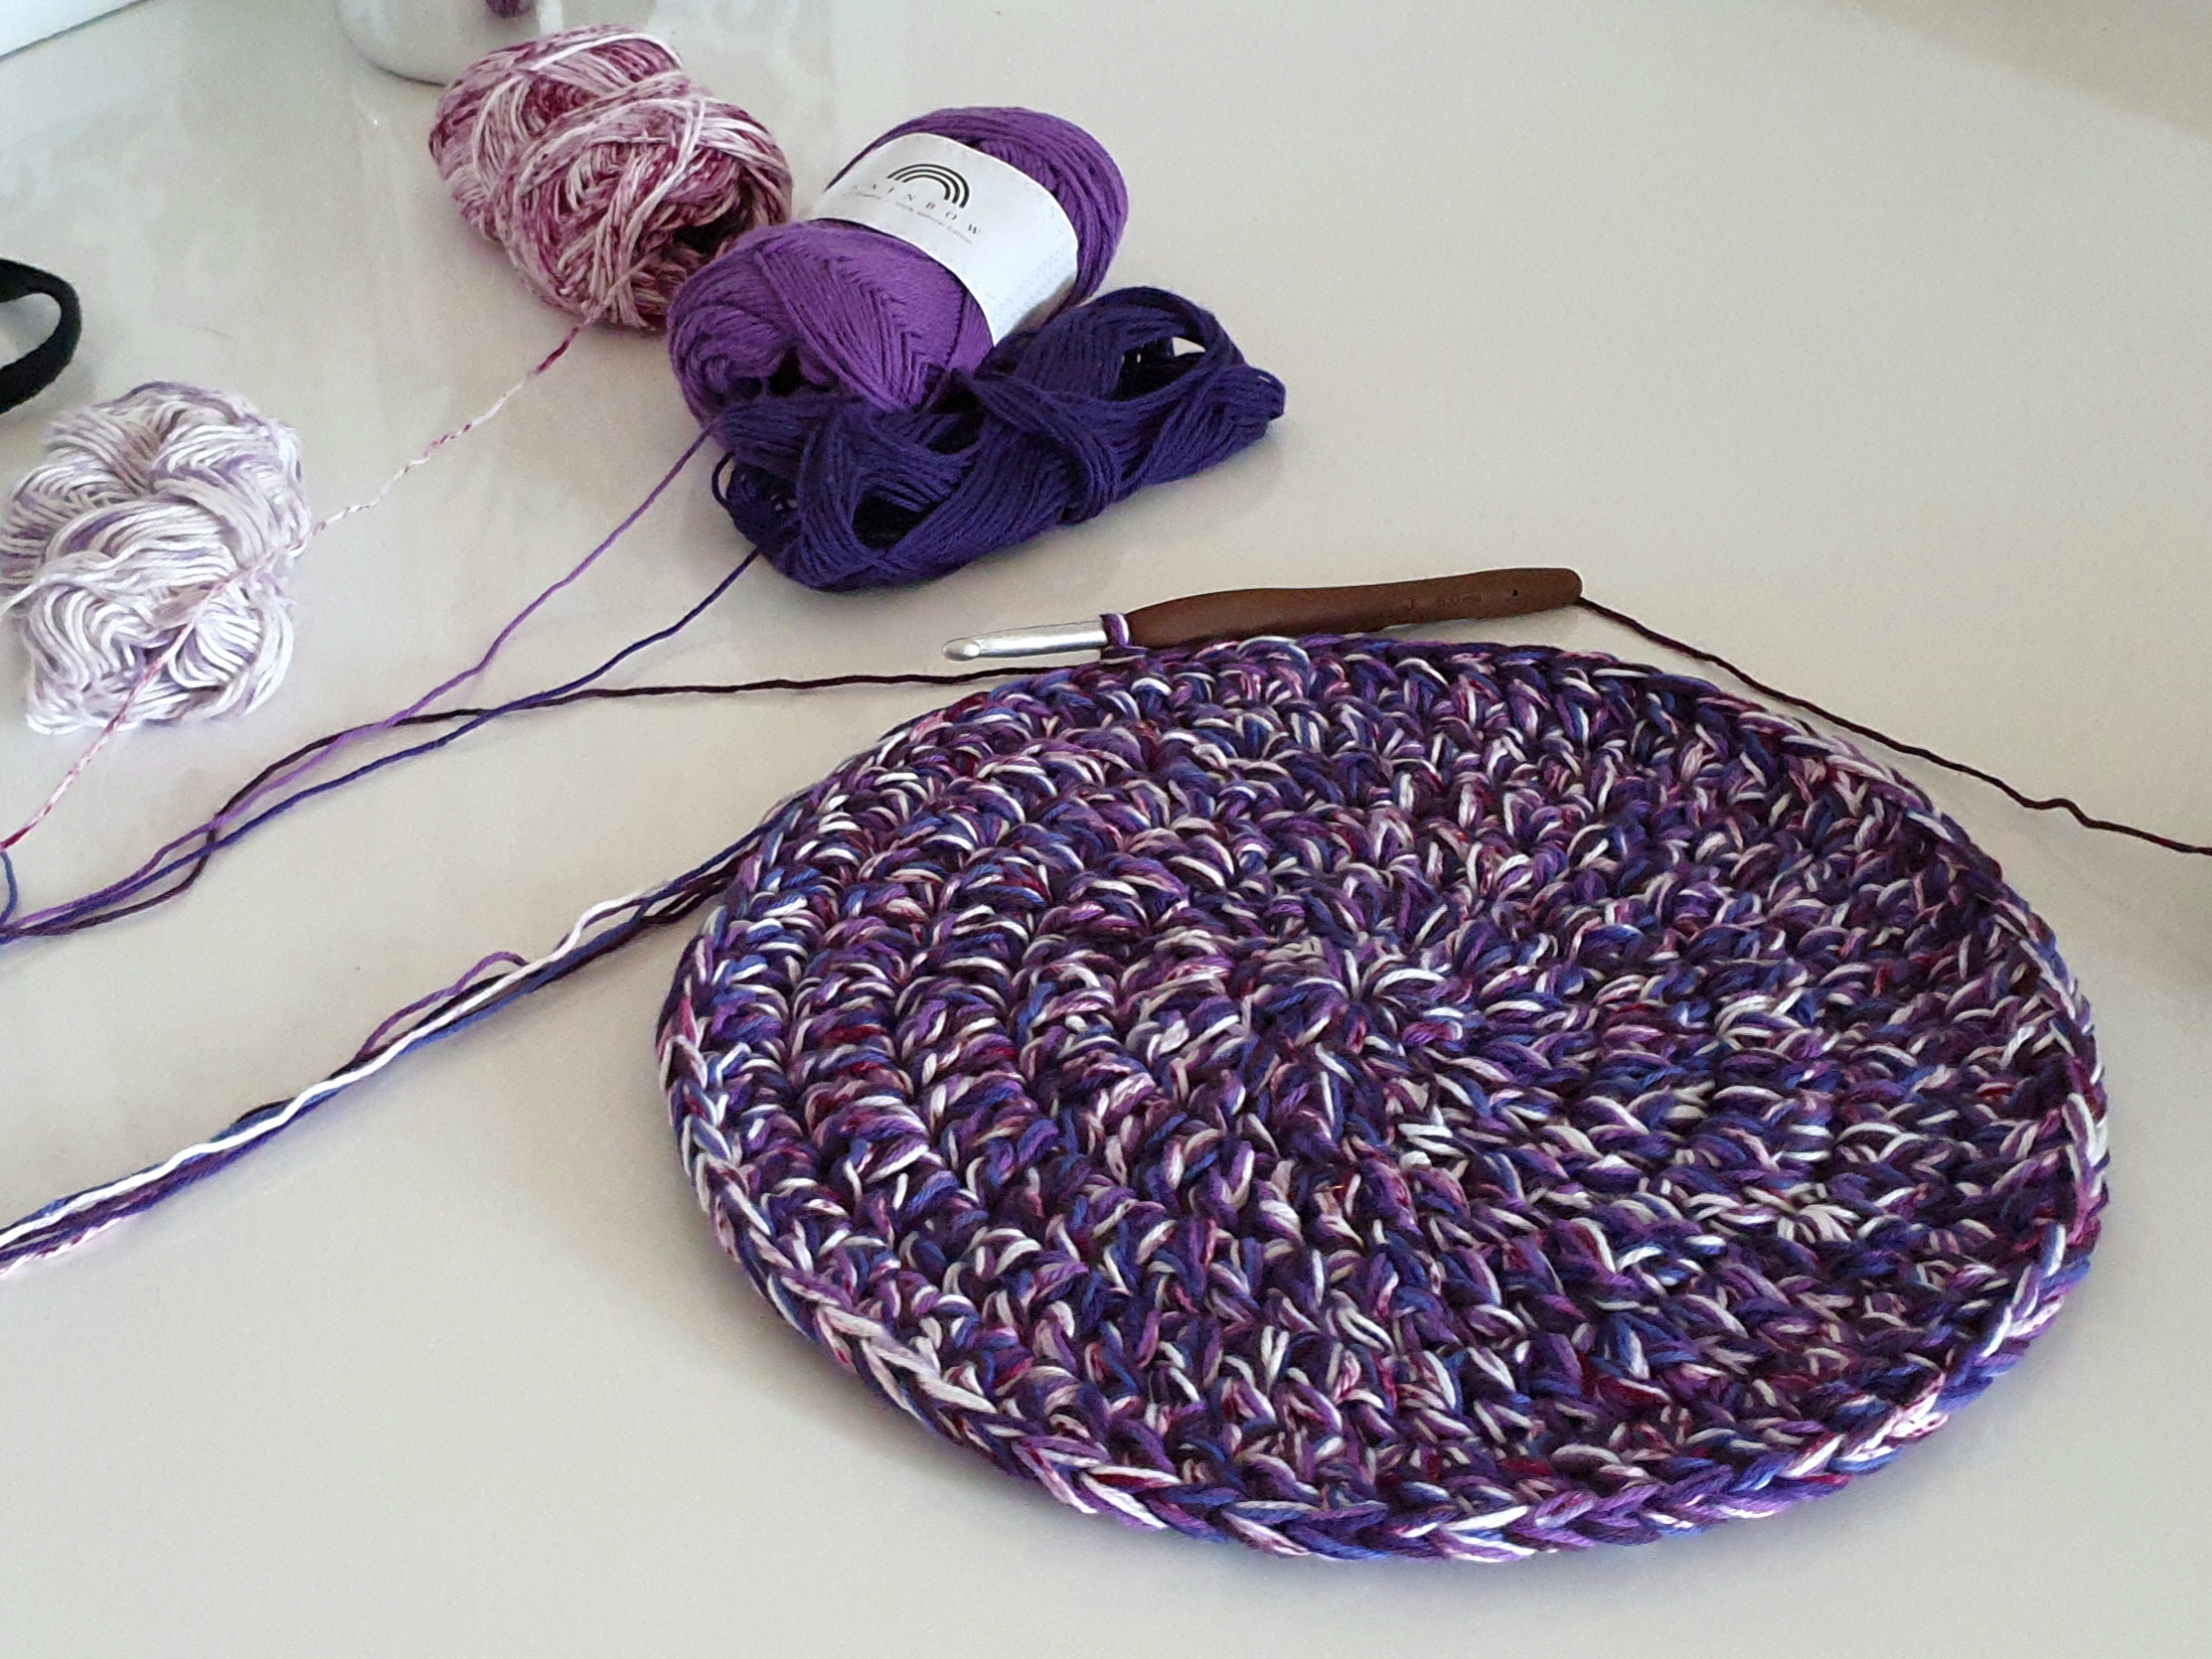
![Left Over Yarn Purse I know that we still have a full month of summer, but I’m trying to make some stash cleaning to have enough space for the autumn-winter yarn . This was the idea when I made this purse and because it’s super easy and fast to make and also a stash buster, I was thinking that you might be interested to see how you can make it. About Design The Design of this Left Over Yarn Purse is super simple. We will work one circle and the good part is that with the circle you will have to stop when you have the desired measurements of the purse/bag. This means that you can make it even bigger. The front side is made by starting decreasing without working the entire stitches of the circle. The flap is actually part of the back side, folded over the front side. Materials You will need: • Yarn I used 6 strands of fingering, 4 ply yarn, but you can use 3 strand of DK or sport or 2 strand of worsted weight yarn or you can work with one strand of thicker yarn. Whatever you have left over you can use it. • Crochet Hook 6 mm ( size L) crochet hook • Tapestry needle • Bag Closure (any type, even a magnetic closure or a simple button if you want) • Bag strap (or you can make a crocheted cord) • Scissors • Stitch markers (optional) About the yarn I used As I said I used fingering cotton yarn, Rainbow Cotton 8/4 from Hobbii. Each strand of 6th I used are of different color and that’s why the marble effect which I love. Final measurements The purse measures 24 cm wide and 18 cm high, but if you are working more rounds on the main circle you can make it bigger. About the stitch pattern We will work this Left Over Yarn Purse just in double crochet, so is a perfect project for a beginner also. With this project you will learn how to work in rounds, how to incease and decrease in double crochet. Abbreviations used in this pattern: • ch - chain • dc – double crochet • sl st – slip stitch • st (s) – stitch (es) • Inc – increase (2 dc in the same st) • Dec – Decrese (2 dc worked together) Dc worked together Yarn over, yarn over insert the hook in the next st, yarn over and pull out a loop, yarn over and pull the yarn through first 2 loops on you hook. Repeat one more time and at the end yarn over and pull the yarn through all the loops on you hook. On the last row of the front side you will need to do this 8 times, working 8 dc together. Gauge • After 2 rounds the circle measured 9 cm in diameter. And I think we are done with all details and we can start. Pattern notes *Ch 2 at the beginning of the round, doesn’t count as first dc. *if you want a bigger purse, work more rounds to the main circle until you have in diameter the desired length. You will find in the pattern indication how to start the front side if you worked more round on the back Back Side Round 1 Start with a magic circle, ch 3 and make 11 more dc inside the circle. Pull the end to close the ring and join with a sl st with the 3rd st of the starting chain. Round 2 Ch 2, 2 dc in the same st, 2 dc in each st around. Join with a sl st, with the 1st dc. (24 dc) Round 3 Ch 2, 1 dc in same st, [2 dc in next, 1 dc in next]. Repeat to the end of the round. Join with a sl st with first dc. (36) Round 4 Ch 2, 1 dc in the same st, [2 dc in next, 1 dc in next 2 sts]. Repeat to the end of the round. Finish the round with 1 dc in last st and join with a sl st with 1st dc. (48) Round 5 Ch 2, 1 dc in the same st, 1 dc in next 2 sts, [2 dc in next st, 1 dc in next 3 sts]. Repeat tot the end of the round. Finish the round with 2 dc in last st and join with sl st with first dc. (60) Round 6 Ch 2, 1 dc in the same st, 1 dc in next, [2 dc in next st, 1 dc in next 4 sts] repeat to the end of the round. Finish the round with 1 dc in the last 2 sts and join with sl st with the 1st dc. (72) And the back side of the Left Over Yarn Purse is done. Now we will start decrease and not complete the circle to make the front side. If you want a bigger purse you can work more rounds. You will increase with each next round the number of dc between 2 increases with 1. To be easier to understand what we are doing next, and how to adjust the pattern if you are working more rounds, we will divide the total number of sts, by 3, so we will have 3 sections of the circle. In our case we will have 3 section of 24 sts, one will be the flap and we won’t work those sts on our front side, and 2 section will be the front side. So, we will work the front panel just in next 48 sts and turn after each row. On the last round of the back side we had, 1 inc and 4 dc in between, so on the first row of the front side we will work 4 dc and 1 decrease. If you made your purse bigger, the first row of the front panel will be no of dc you had between increases, 1 decrease. Use 2 stitch markers to mark the 48 sts in which you will work the front side. Front side Row 1 Ch 2, 1 dc in the same st, 1 dc in next 3 sts, [1 dec (2 dc worked together), 1 dc in next 4]. Repeat the section until you finish all 48 sts. Finish the row with 1 dec. Ch 2 and turn (40) Row 2 1 dc in the first st, 1 dc in next 2 sts, [1 dec, 1 dc in next 3]. Repeat tot the end of the rou. Ch 2 and turn. (32) Row 3 1 dc in the 1st st, 1 dc in next, [1 dec, 1 dc in next 2 sts]. Repeat the section to the end of the row. Ch 2 and turn (24) Row 4 1 dc in first st, [ 1 dec, 1 dc in next]. Repeat the section to the end of the row. Ch 2 and turn (16) Row 5 1 dec x 8 times (8 sts) ch 2 and turn Row 6 8 dc together to close the circle. And Done! All you have to do is to sew the closure and the bag strap and you have nice Left over Yarn Purse to wear it this summer. Here you can find the vide tutorial in case you need it:](https://by-katerina.com/wp-content/uploads/2019/07/LRM_EXPORT_166146643831814_20190625_115749338.jpeg)
Despre Design
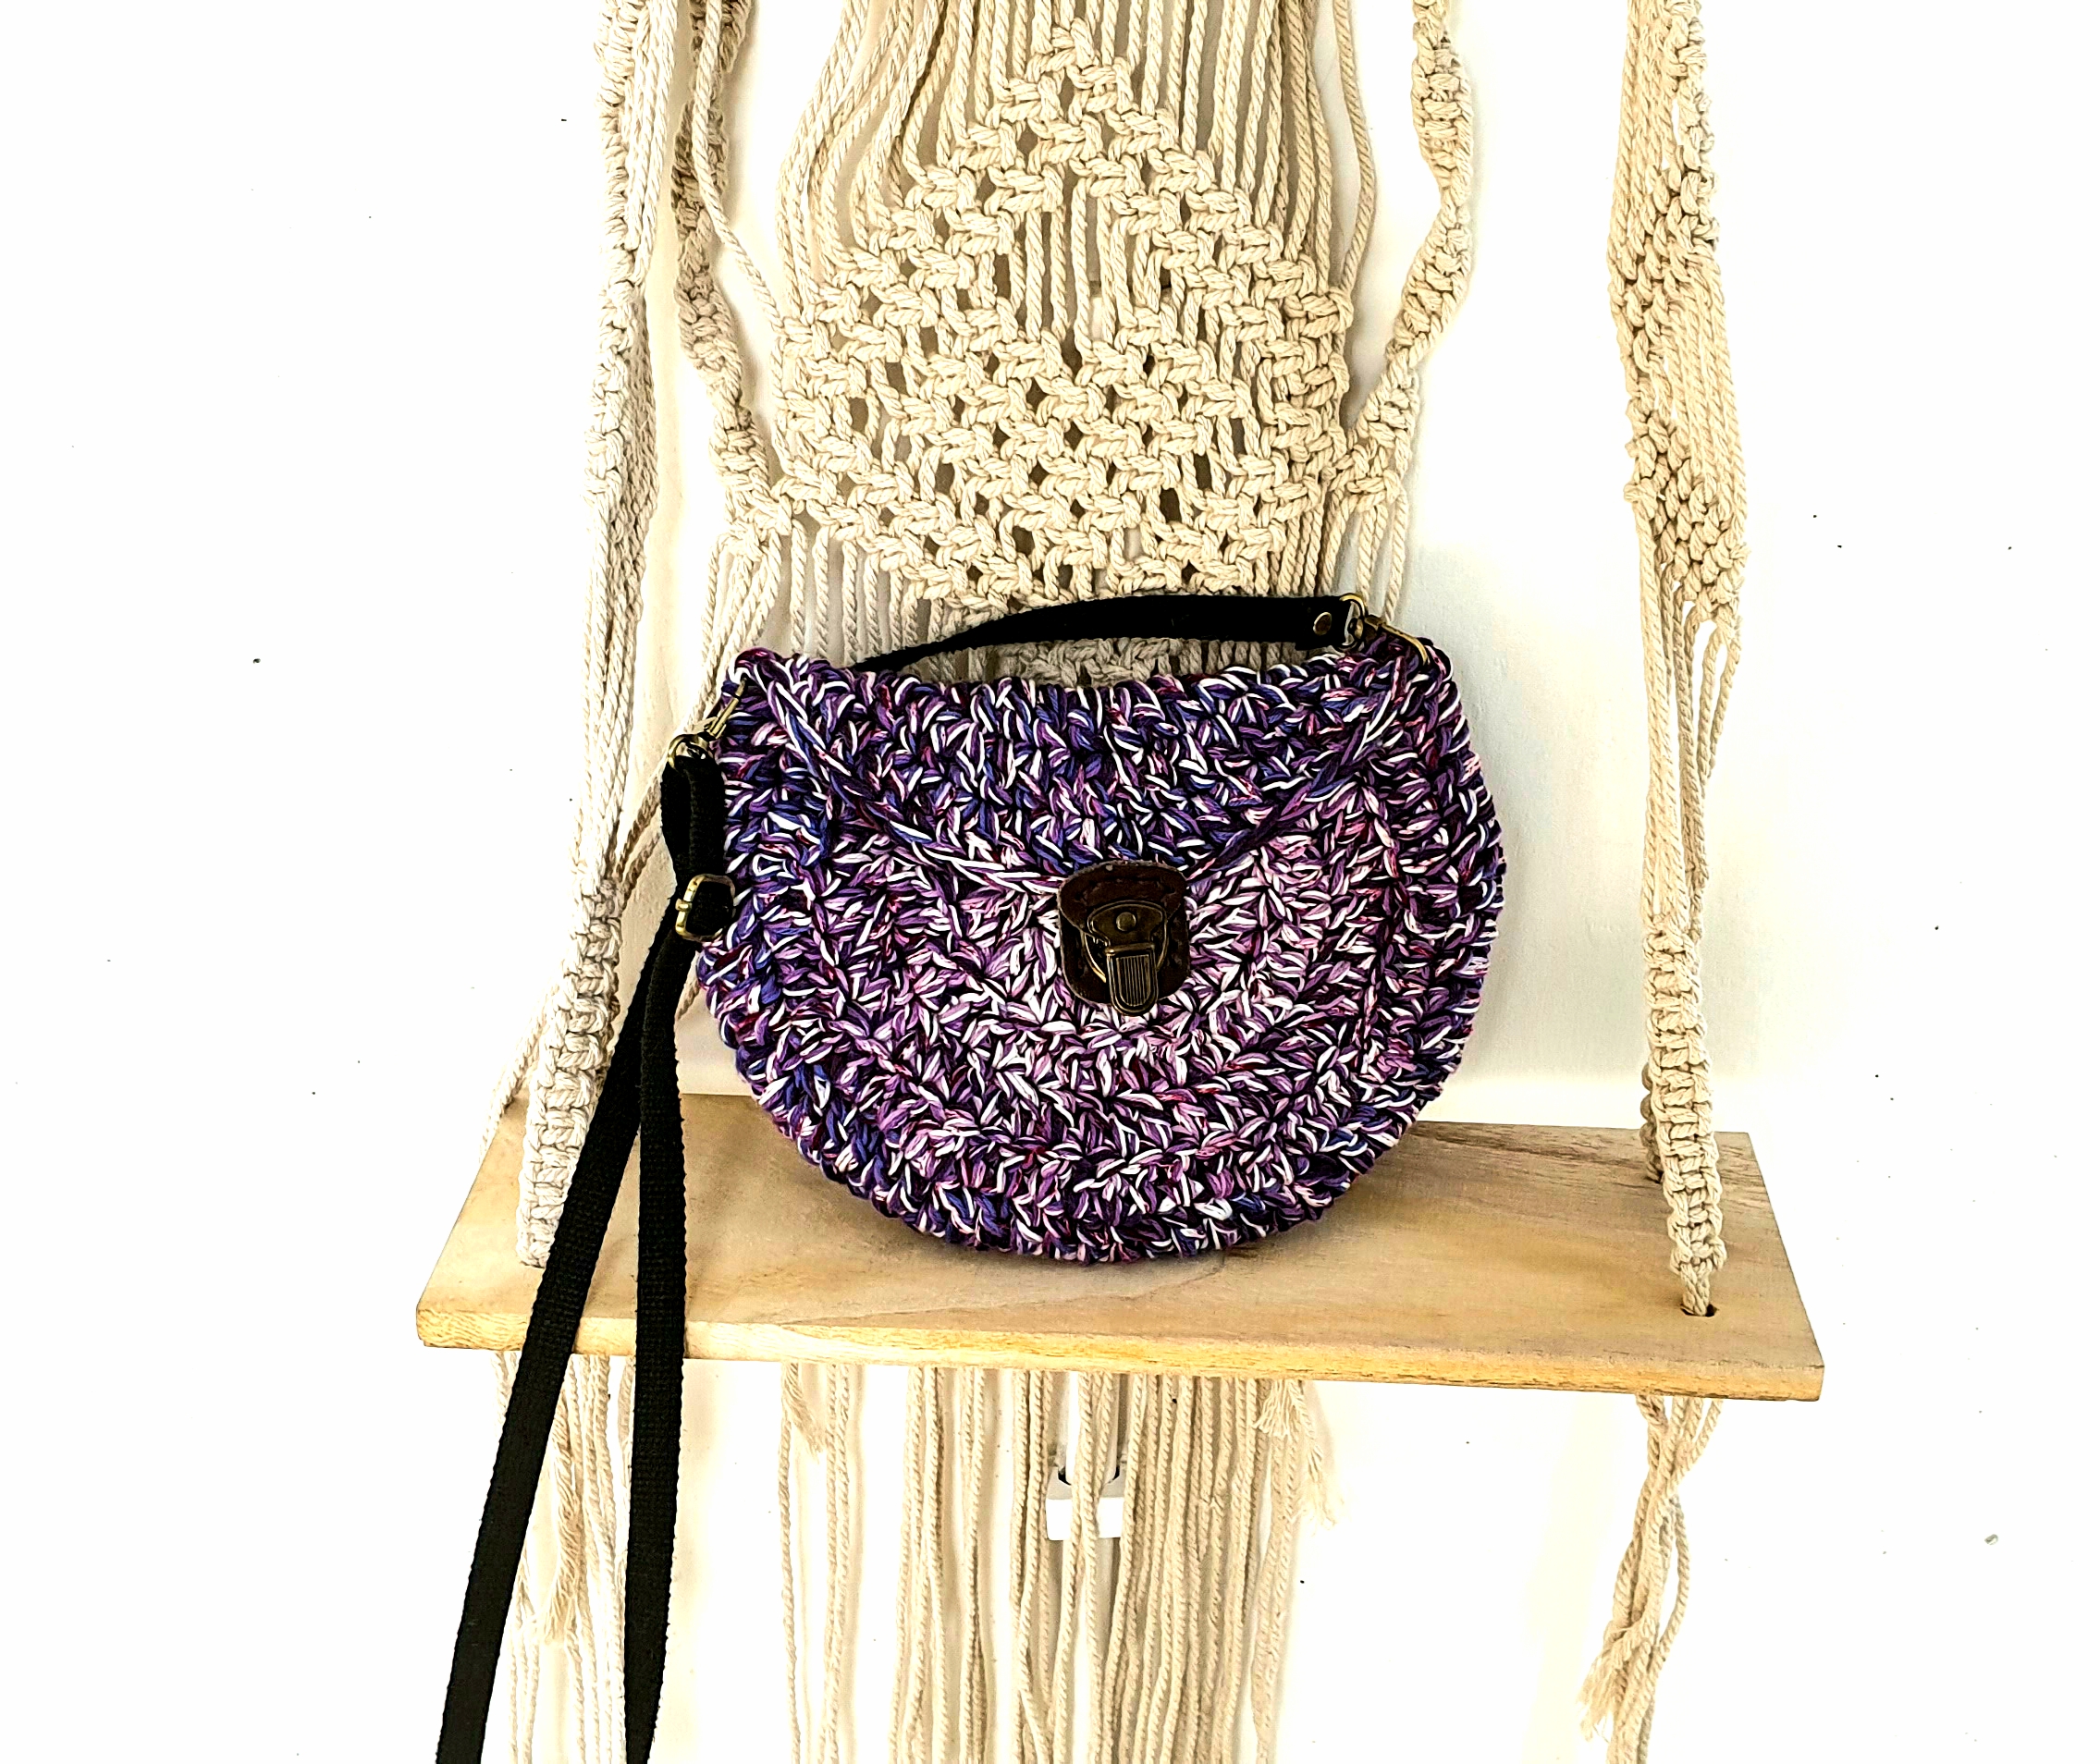
Design-ul acestei Gentute din resturi de fire este foarte simplu. Vom lucra un cerc si partea buna este ca puteti face cercul cat de mare va doriti in funtie de dimensiunile gentii pe care vi le doriti.
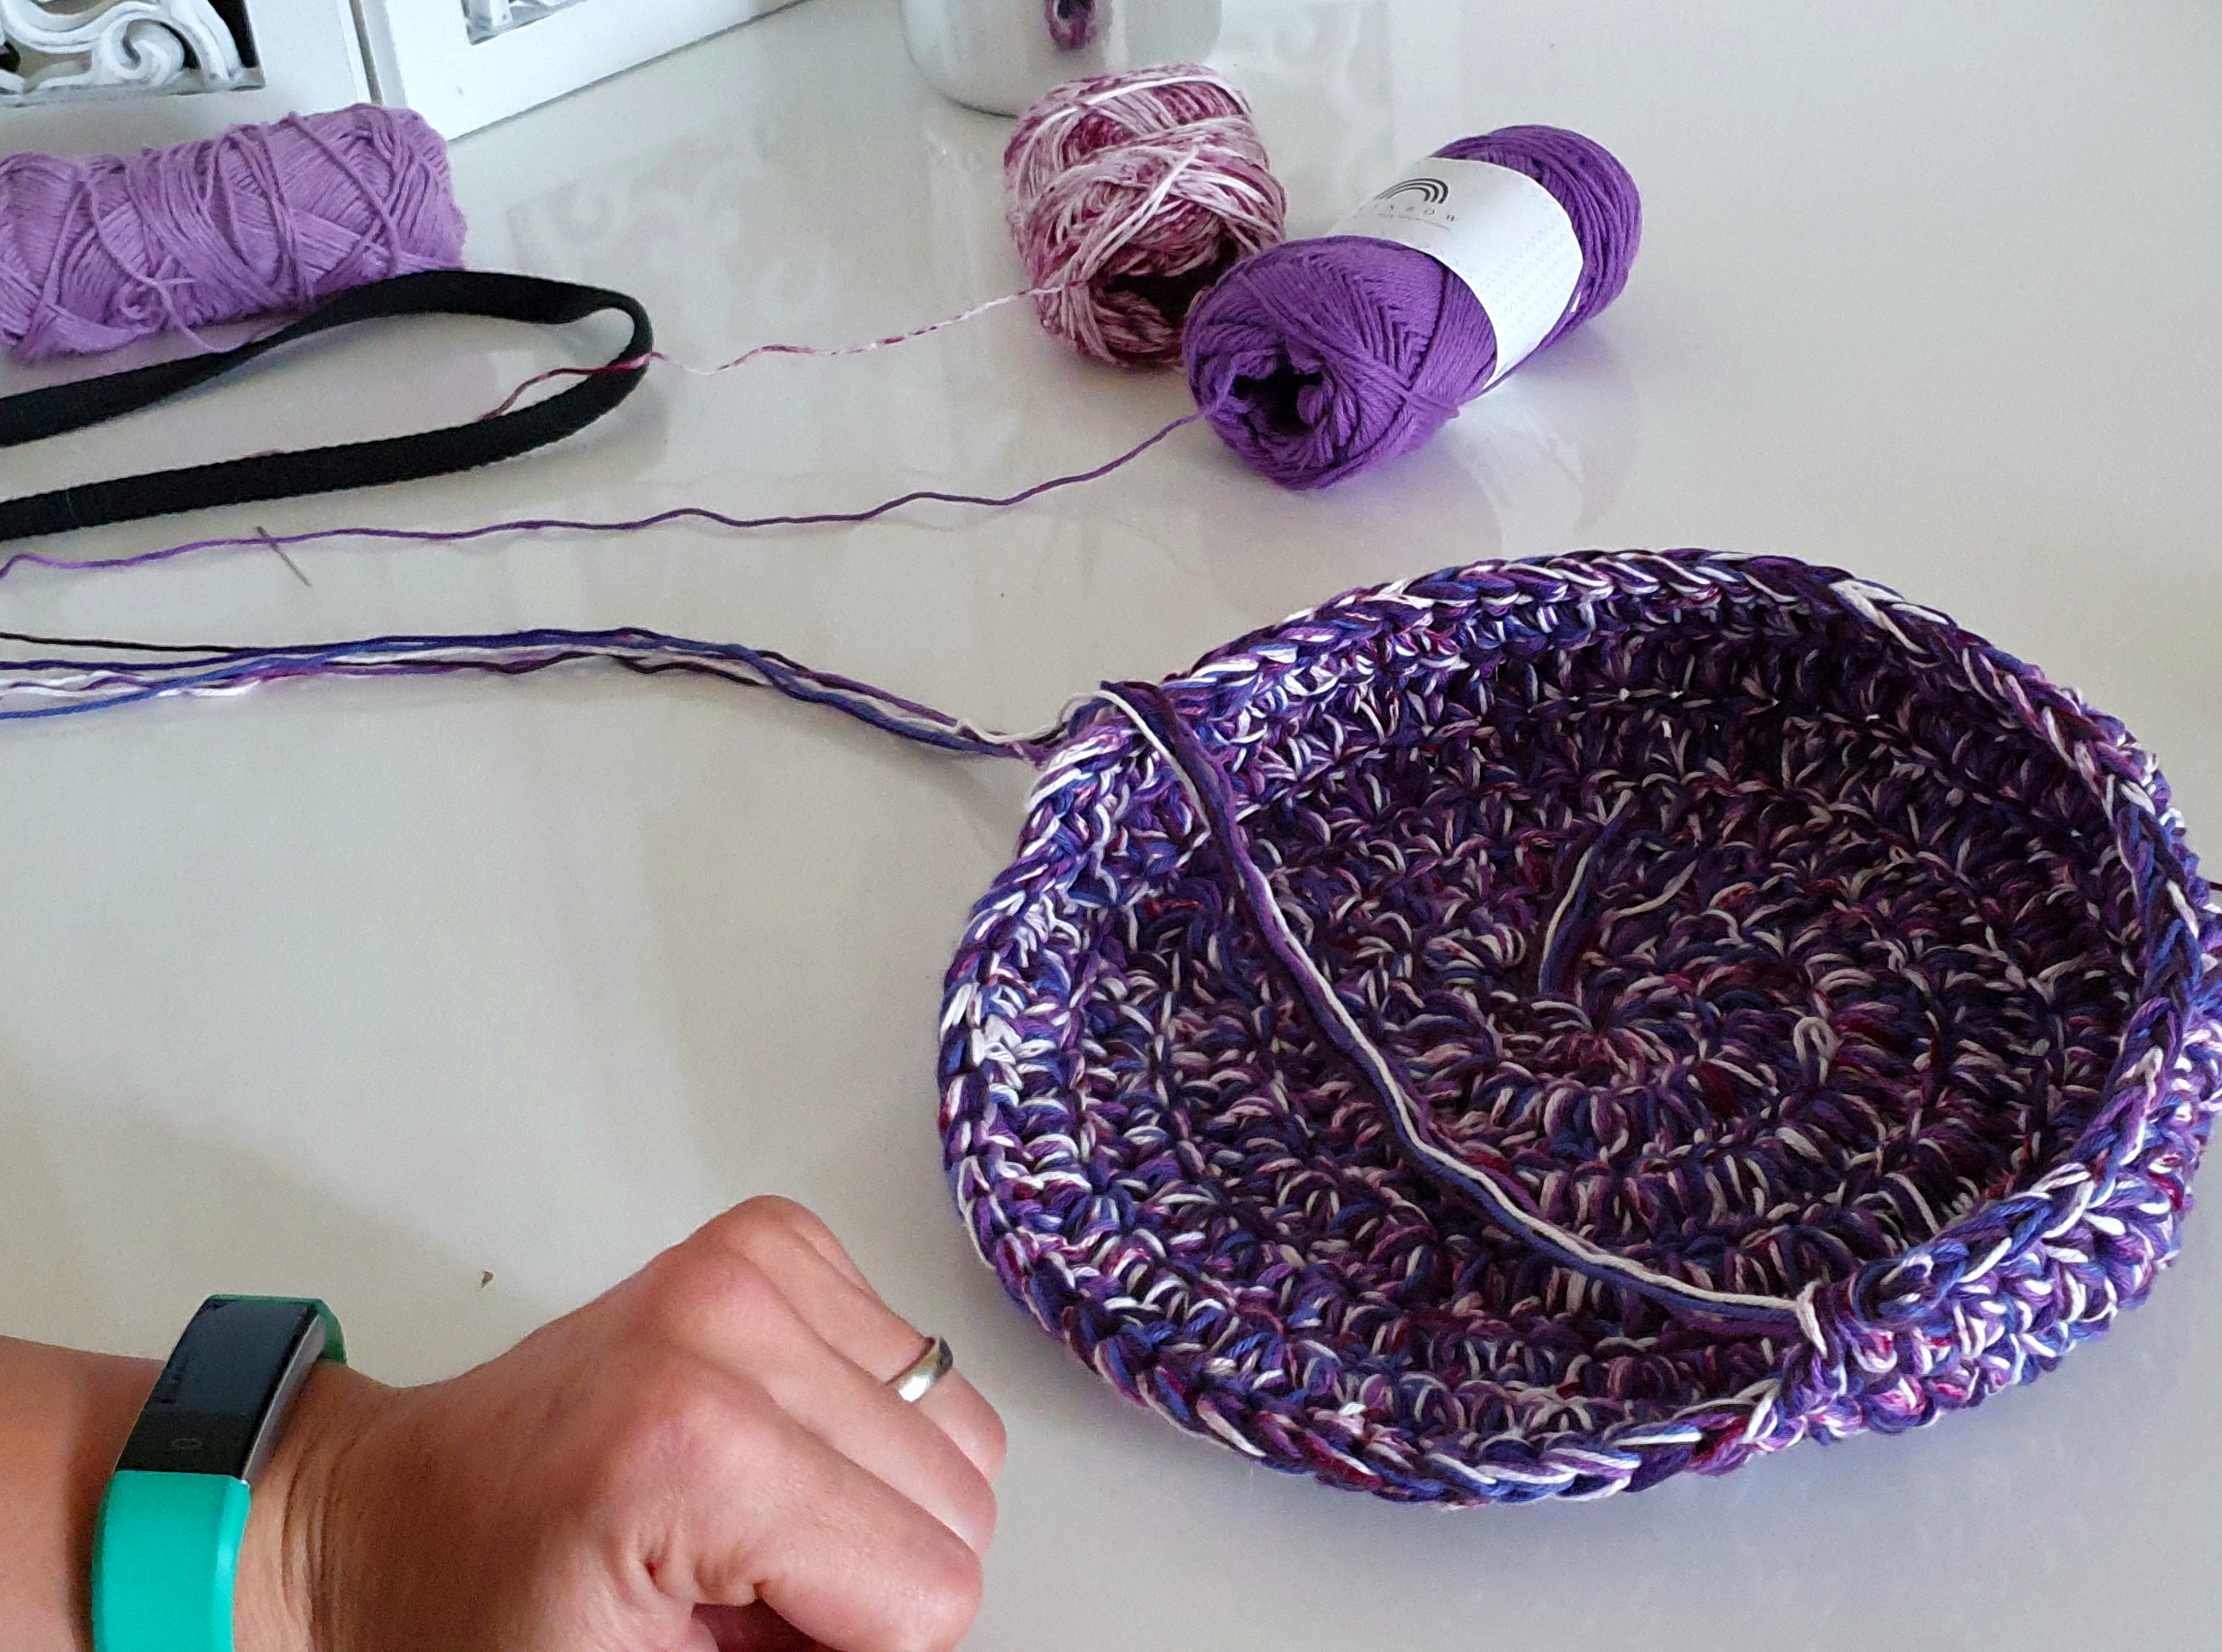
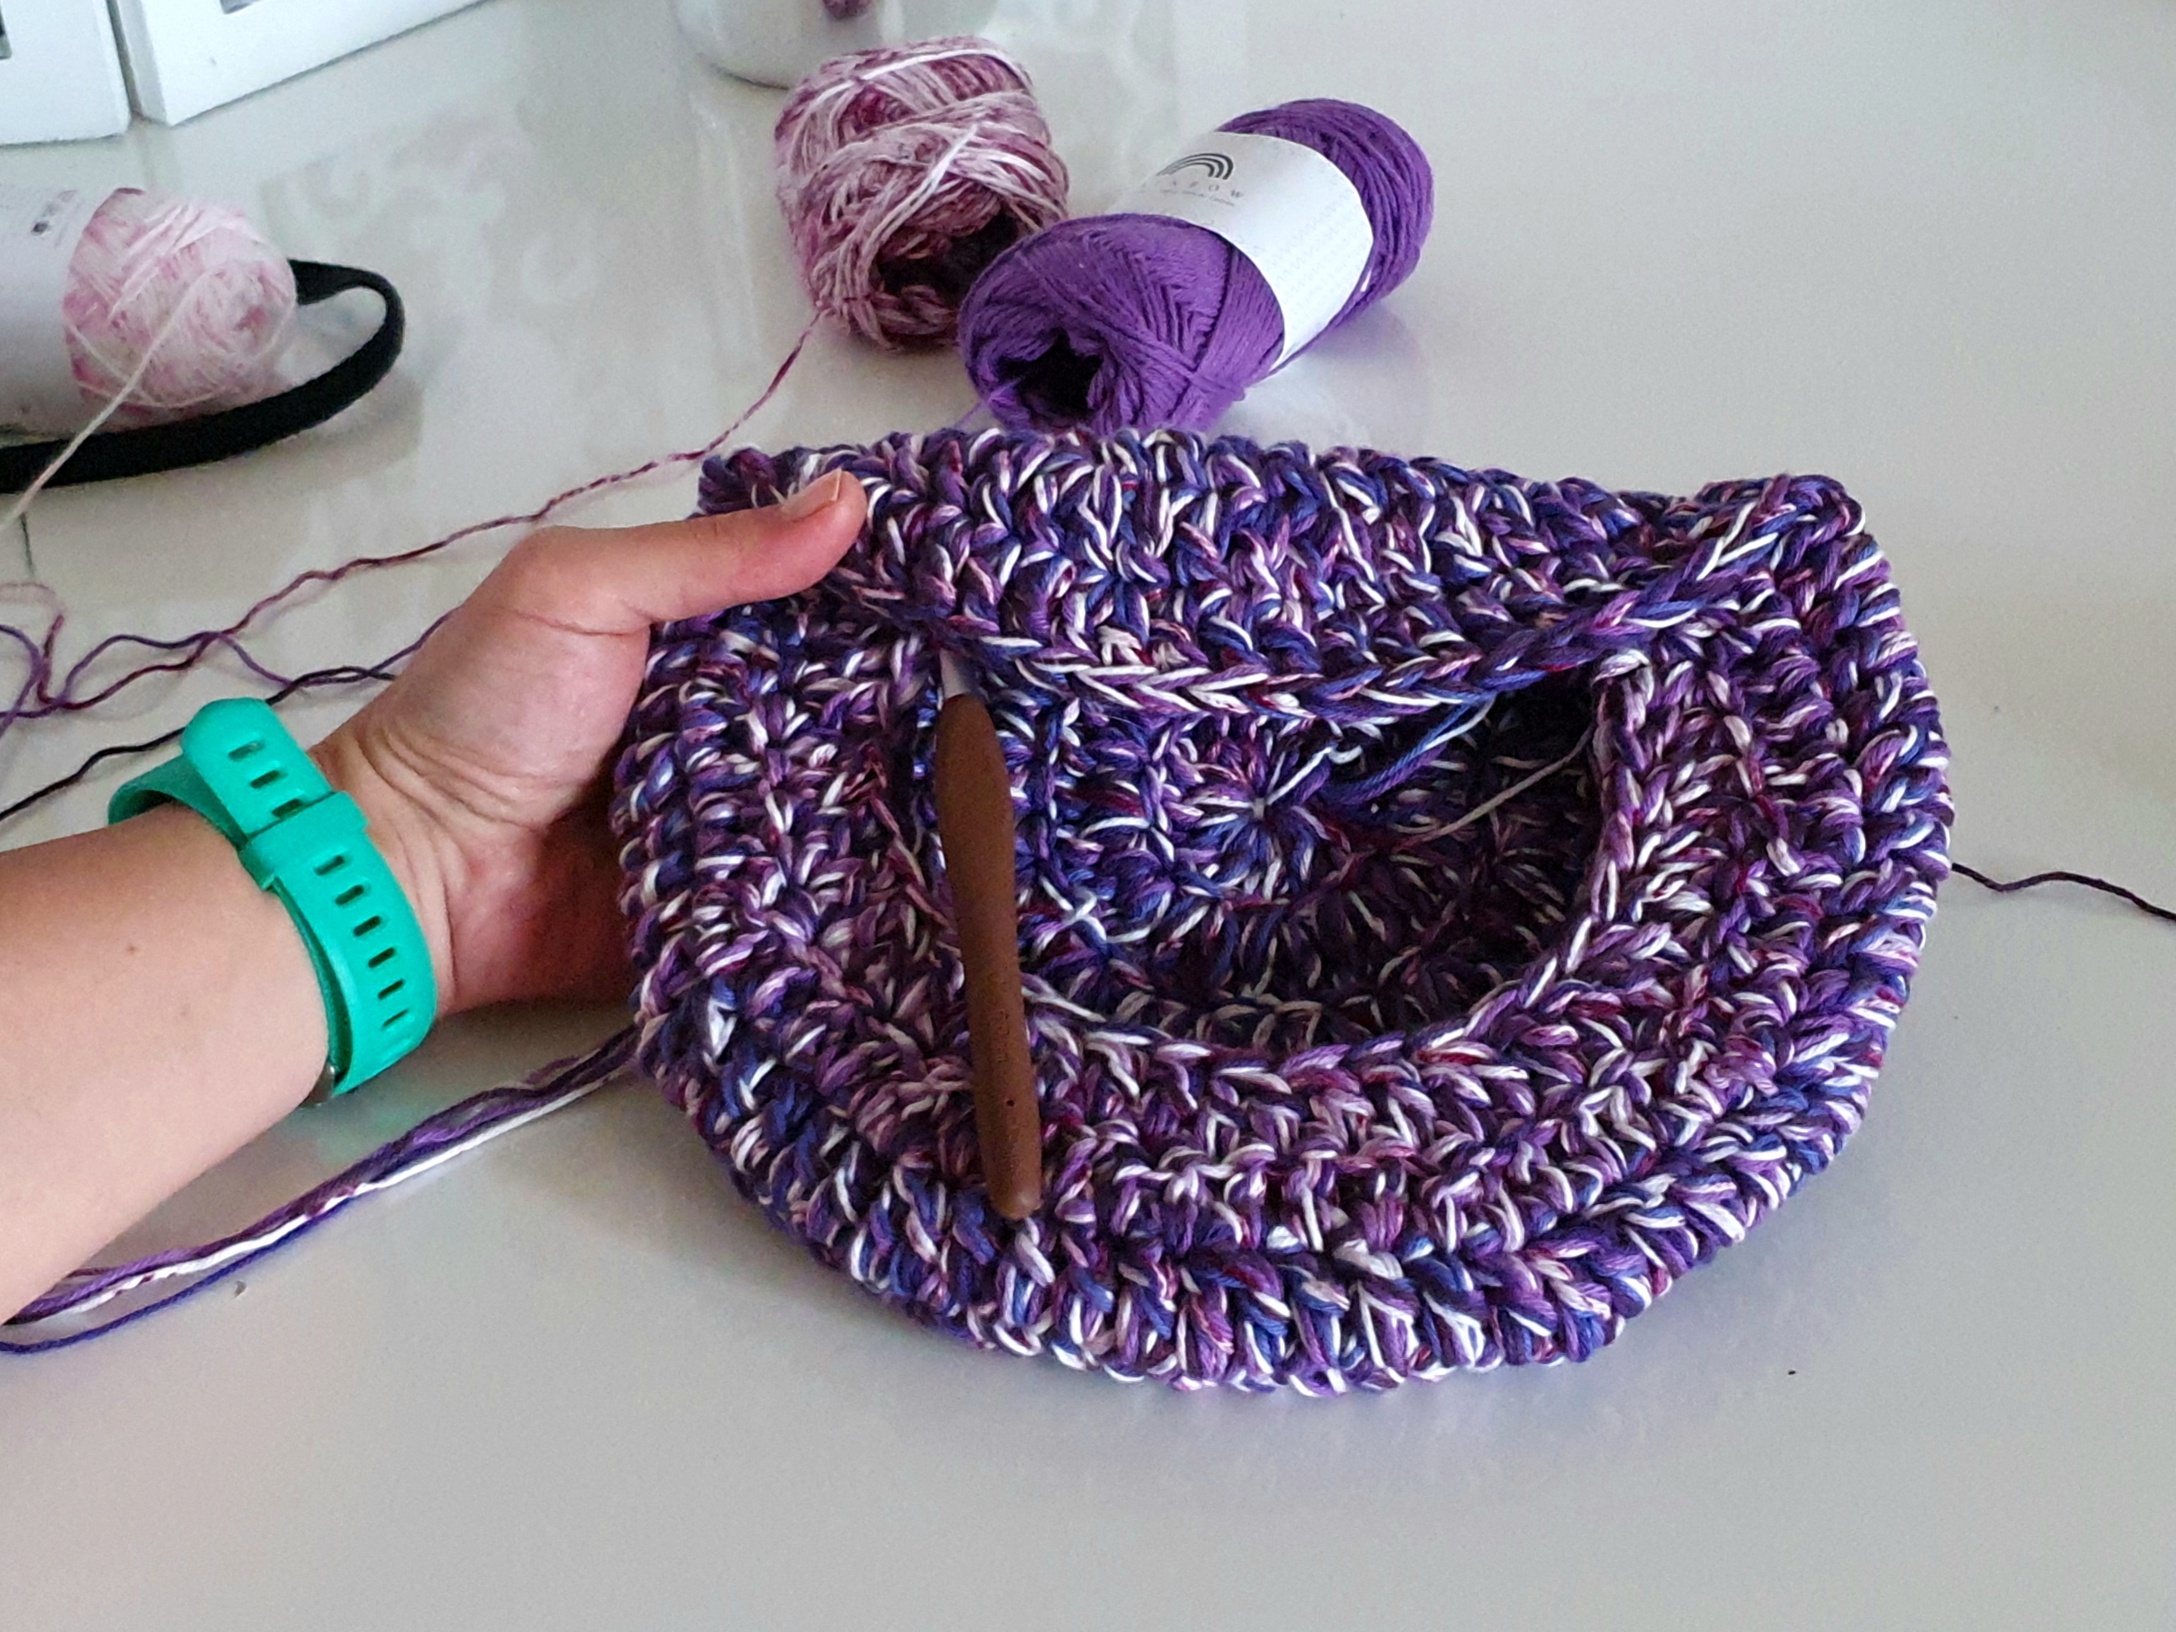
Partea din fata se lucreaza in continuarea partii din spate, scazand si lucrand doar o parte din ochiurile partii din spate. Ochiurile ramase reprezinta clapa care se indoaie peste partea din fata.
Materiale de care ai nevoie:
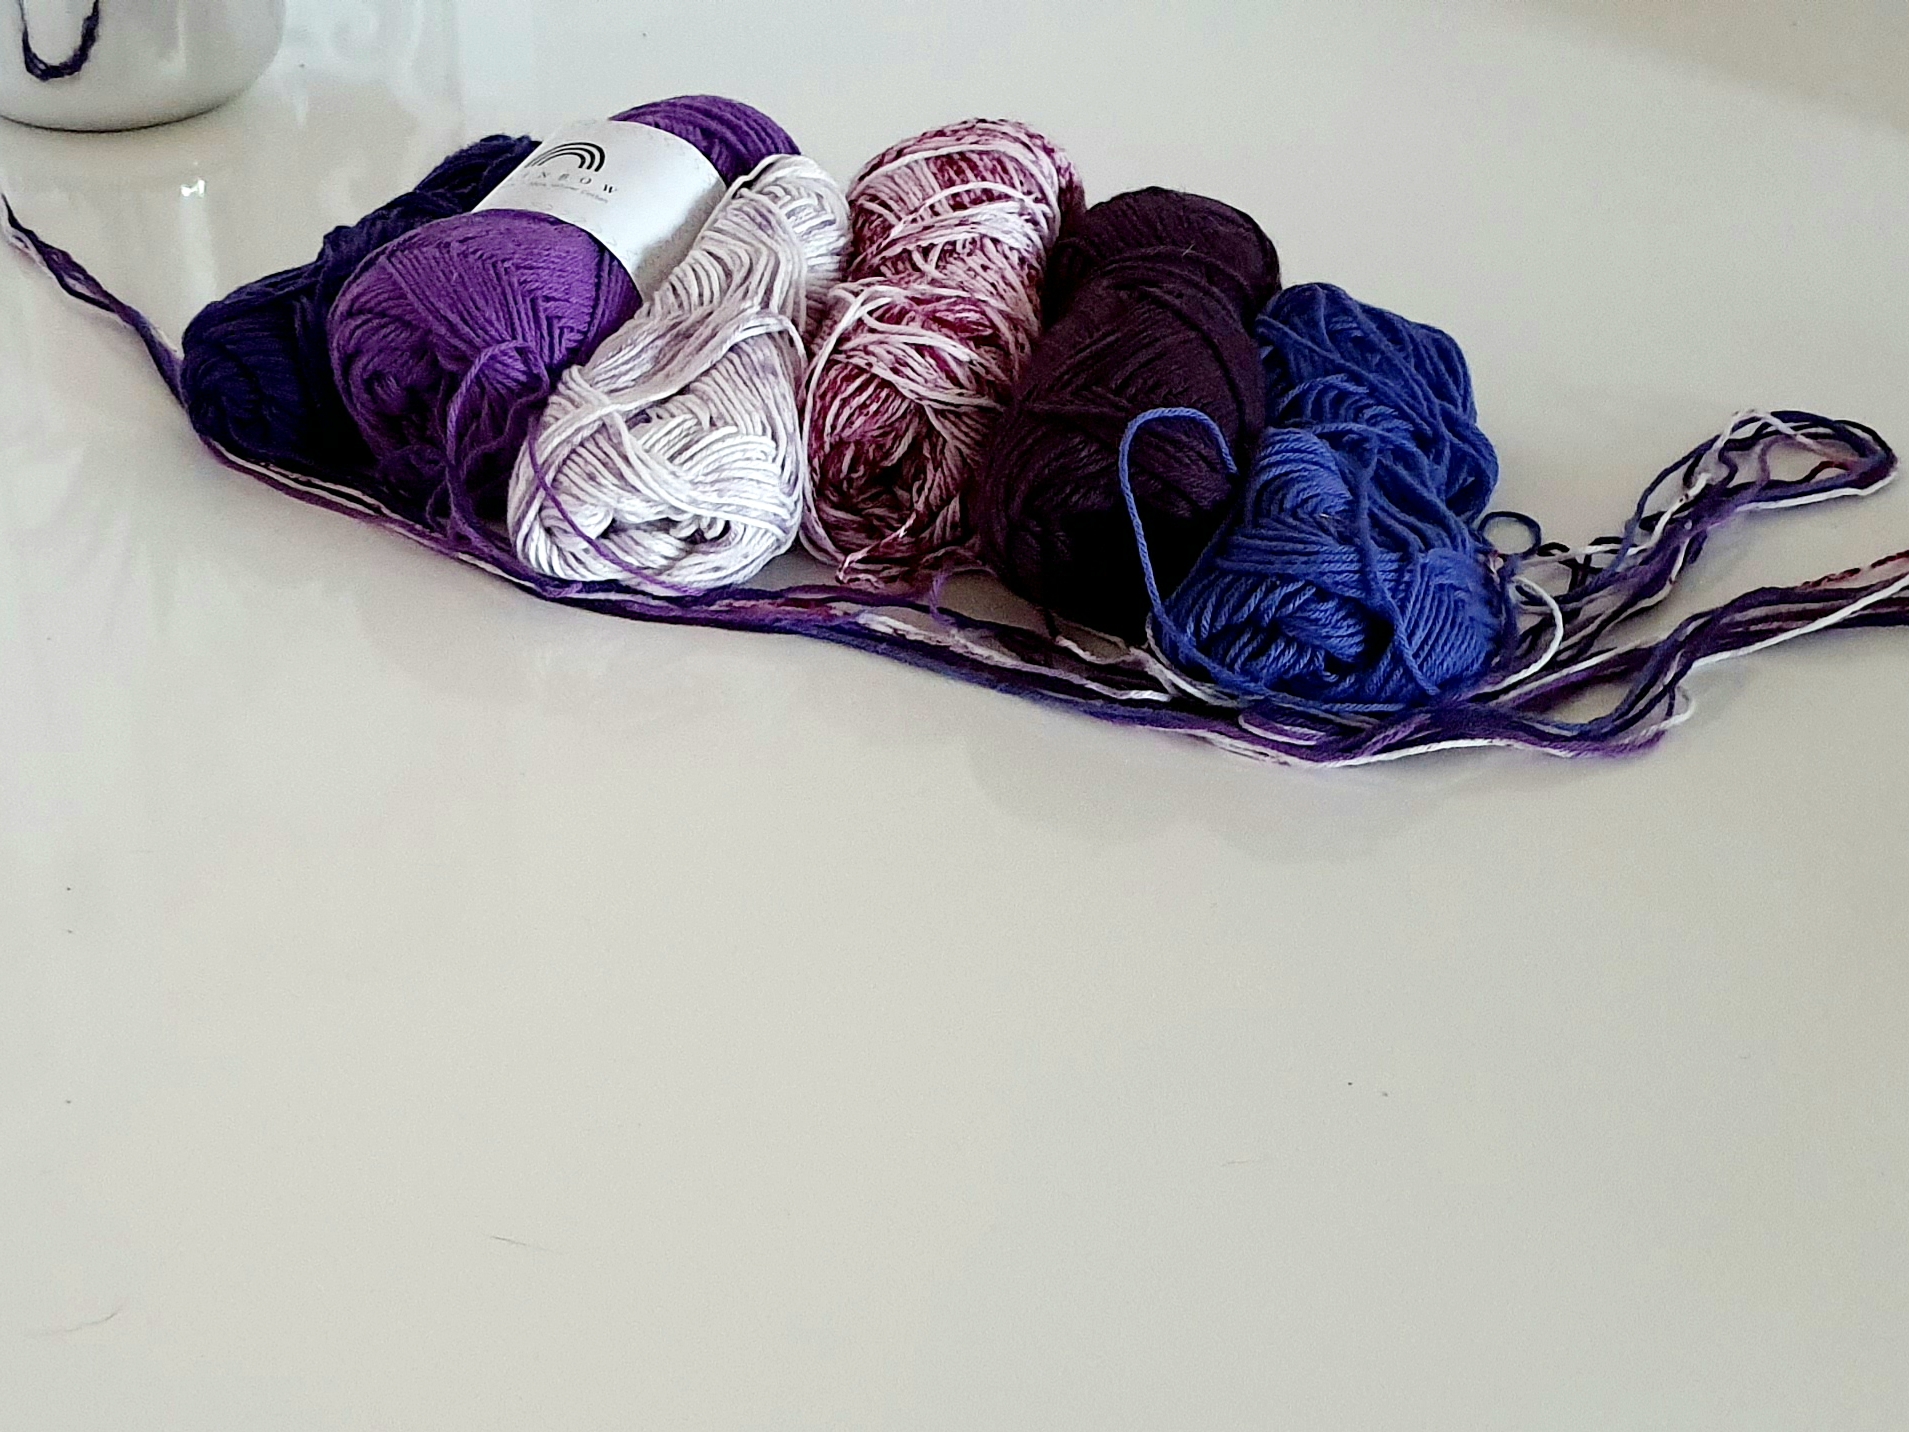
- Fir
Am folosit pentru aceasta Gentuta din resturi de fire 6 fire de bumbac pentru care se recomanda croseta de 2.5, 3.5 mm. Puteti folosi si alt tip de fir mai gros, dar atunci va trebui sa lucrati cu mai putine fire.
- Croseta
6 mm
- Ac de cusut
- catarama pentru genti (puteti folosi chiar si un nasture, sau buton magnetic)
- bretea pentru genti cu carabine (sau puteti croseta una)
- foarfeca
- marcatori
Dimensiuni Finale
Gentuta masoare 24 de cm latime si 18 cm inaltime, insa asa cum am spus si in introducere, puteti sa o faceti si mai mare daca va doriti.
Despre Punctul de crosetat
Vom lucra aceasta Genntuta din resturi de fire doar in piciorus dublu. Este un proiect perfect pentru incepatori. Veti invata cum sa lucrati circular, sa inmultiti si sa scadeti in piciorus dublu, deci merita sa incercati.
Prescurtari folosite in acest tipar:
- ol – ochi de lant
- pd – piciorus dublu
- p al – piciorus alunecat
- Inm – inmultire (2 picioruse duble in acelasi ochi)
- Scd – Scadere (2 picioruse duble lucrate impreuna)
Picioruse Duble Lucrate impreuna
Luam un jeteu, introducem croseta in urm. ochi, luam un jeteu si scoatem obucla, luam un jeteu si il trecem prin primele doua bucle de pe croseta. Repetam inca o data si la final luam un jeteu si il trecem prin toate buclele de pe croseta.
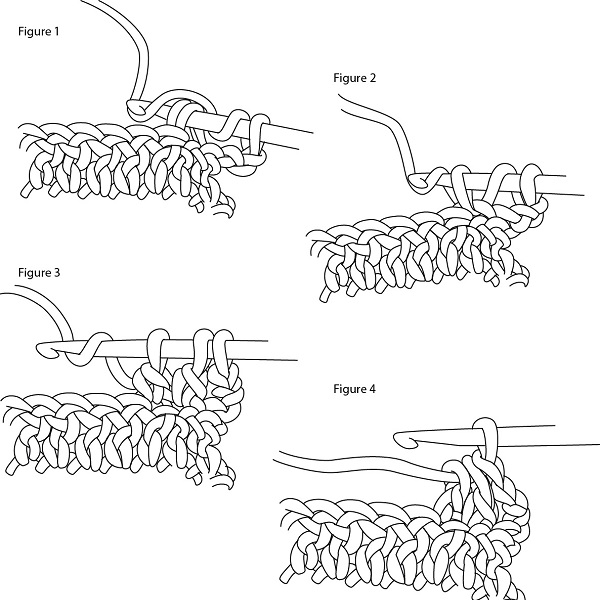
La ultimul rand al partii din fata vom lucra 8 picioruse duble impreuna, folosind aceeasi tehnica.
Esantion
- Dupa 2 randuri, cercul masura 9 cm in diametru
Si daca am stabilit toate detaliile, haideti sa crosetam.
Note
*2 ol de la inceputul fiecarui rand nu se considera piciorus dublu. VEti lucra un piciorus dublu in acelasi ochi de fiecare data.
Partea Spate
Randul 1
Incepem cu un inel magic, 3 ol si 11 pd in interiorul inelului. Tragem de capat sa inchidem inelul si unim cu p al cu al treile ochi al lantului de inceput
Randul 2
2 ol, 2 pd in acelasi ochi, 2 pd in fiecare din urm. ochiuri. Unim cu p al cu primul pd. (24)
Randul 3
2 ol, 1 pd in acelasi ochi, [2 pd in urm., 1 pd in urm.]. Repetam pana la finalul randului. Unim cu P al cu primul pd. (36)
Randul 4
2 ol, 1 pd in acelasi ochi, [2 pd in urm., 2 pd in urm. 2]. Repetam pana la finalul randului. Finalizam randul cu 1 pd in ultimul ochi si unim cu pa la cu primul pd. (48)
Randul 5
2 ol, 1 pd in acelasi ochi, 1 pd in urm. 2 ochiuri, [2 pd in urm., 1 pd in urm 3 puncte]. Repetam pana la finalul randului. Finalizam randul cu 2 pd in ultimul ochi si unim cu p al cu primul pd.(60)
Randul 6
2 ol, 1 pd in acelasi ochi, 1 pd in urm., [2 pd in urm, 1 pd in urm. 4 ochiuri]. Repetam pana la finalul randului. Finalizam randul cu 1 pdin ultimele doua puncte si unim cu p al cu primul pd (72)
Si am finalizat partea din spate.
Daca doriti ca gentuta sa fie mai mare, continuati sa mai lucrati randuri. Cu fiecare rand mai adaugati 1 pd intre 2 inmultiri.
Pentru a fi mai usor de inteles cum procedam mai departe si cum sa ajustam tiparul in situatia in care lucram mai multe randuri, dupa ce am finalizat partea din spate vom imparti numarul total de ochiuri la 3. Deci vom avea 3 segmente ale cercului.
Un va fi clapa, si in aceste ochiuri nu vom lucra partea din fata, iar celelalte 2 segmente vor reprezenta partea din fata.
In cazul nostru vom avea segmente de 24 de ochiuri. Asftel, vom lucra partea din fata doar in primele 48 de ochiuri.
Daca pe ultimul rand la partea din fata am lucrat 4 pd si o inmultire, pe primul rand al partii din fata vom avea 4 pd si o scd.
Puteti folosi 2 marcatori pentru a marca cele 48 de ochiuri
Partea fata
Randul 1
2 ol, 1 pd in acelasi ochi, 1 pd in urm 3, [ 1 scd, 1 pd in urm. 4]. Repetam sectiunea pana finalizam cele 48 de ochiuri. Vom finaliza randul cu o scadere. 2 ol si intoarcem (40)
Randul 2
1 pd in primele 3 ochiuri, [1 scd, 1 pd in urm 3]. Repetam pana la finalul randului. 2 ol si intoarcem. (32)
Randul 3
1 pd in primele 2 ochiuri, [1 scd, 1 pd in urm. 2]. Repetam pana la finalul randului. 2 ol si intoarcem (24)
Randul 4
1 pd in primul ochi, [ 1 scd, 1 pd in urm]. Rpetam pana la finalul randului. 2 ol si intoarcem (16)
Randul 5
1 scd x 8 ori. 2 ol si intoarcem
Randul 6
8 pd lucrate impreuna pentru a inchide cercul.
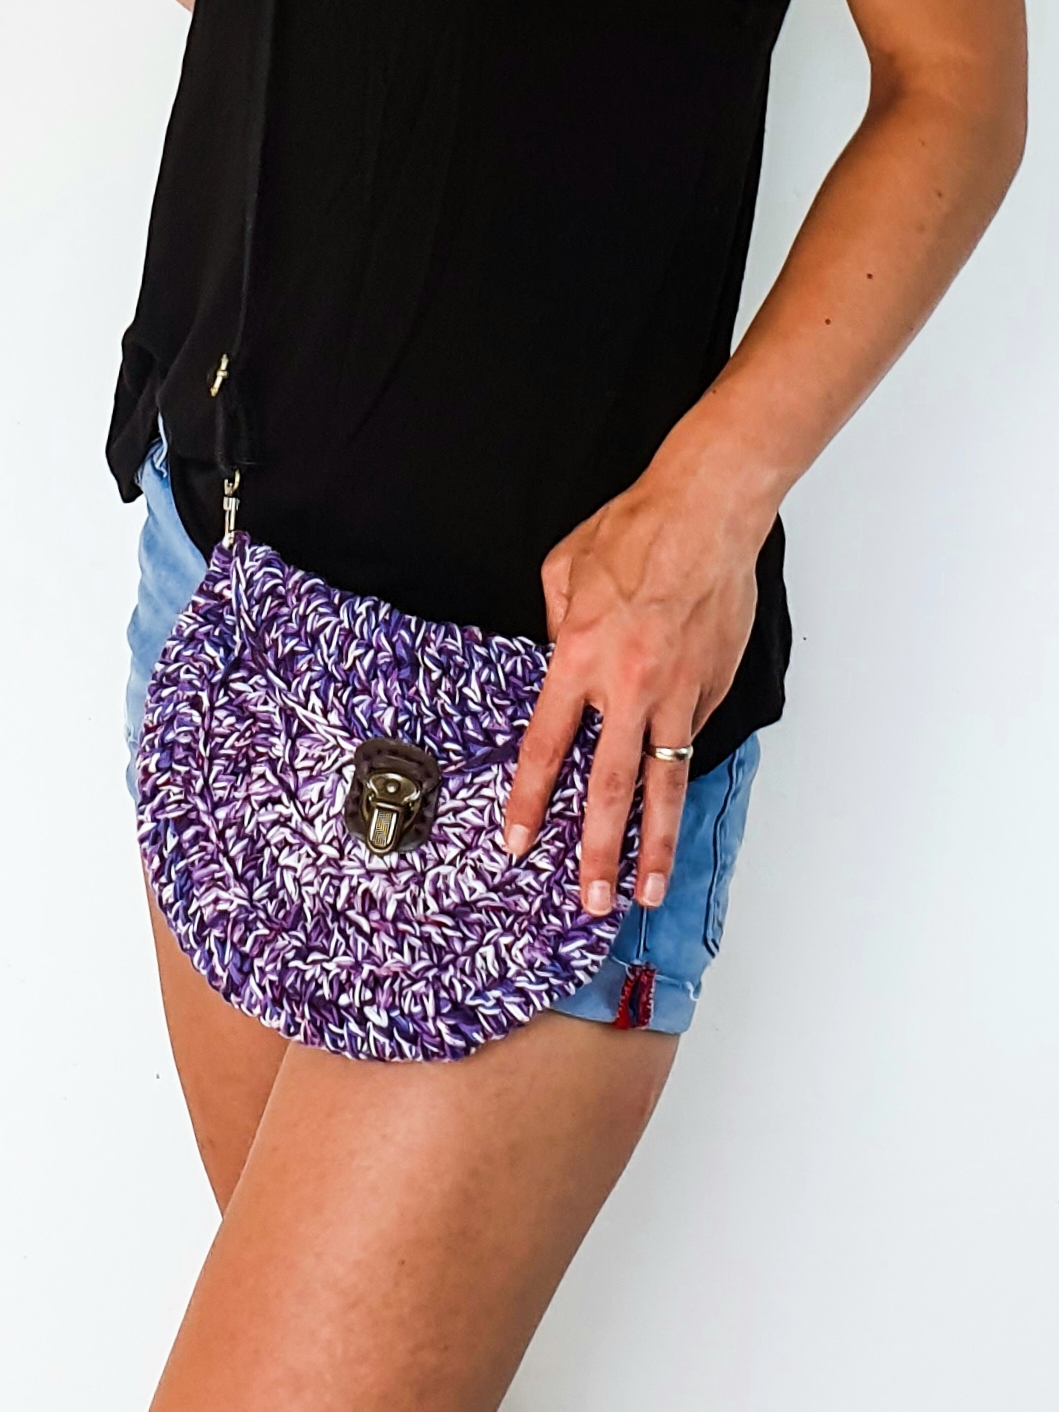
Si gata. Tot ce aveti de facut este sa coaseti catarama si sa atasati breteaua si aveti o gentuta gata de a fi purtata toata vara.
Mai jos regasiti si video tutorialul in cazul in care aveti nevoie.
