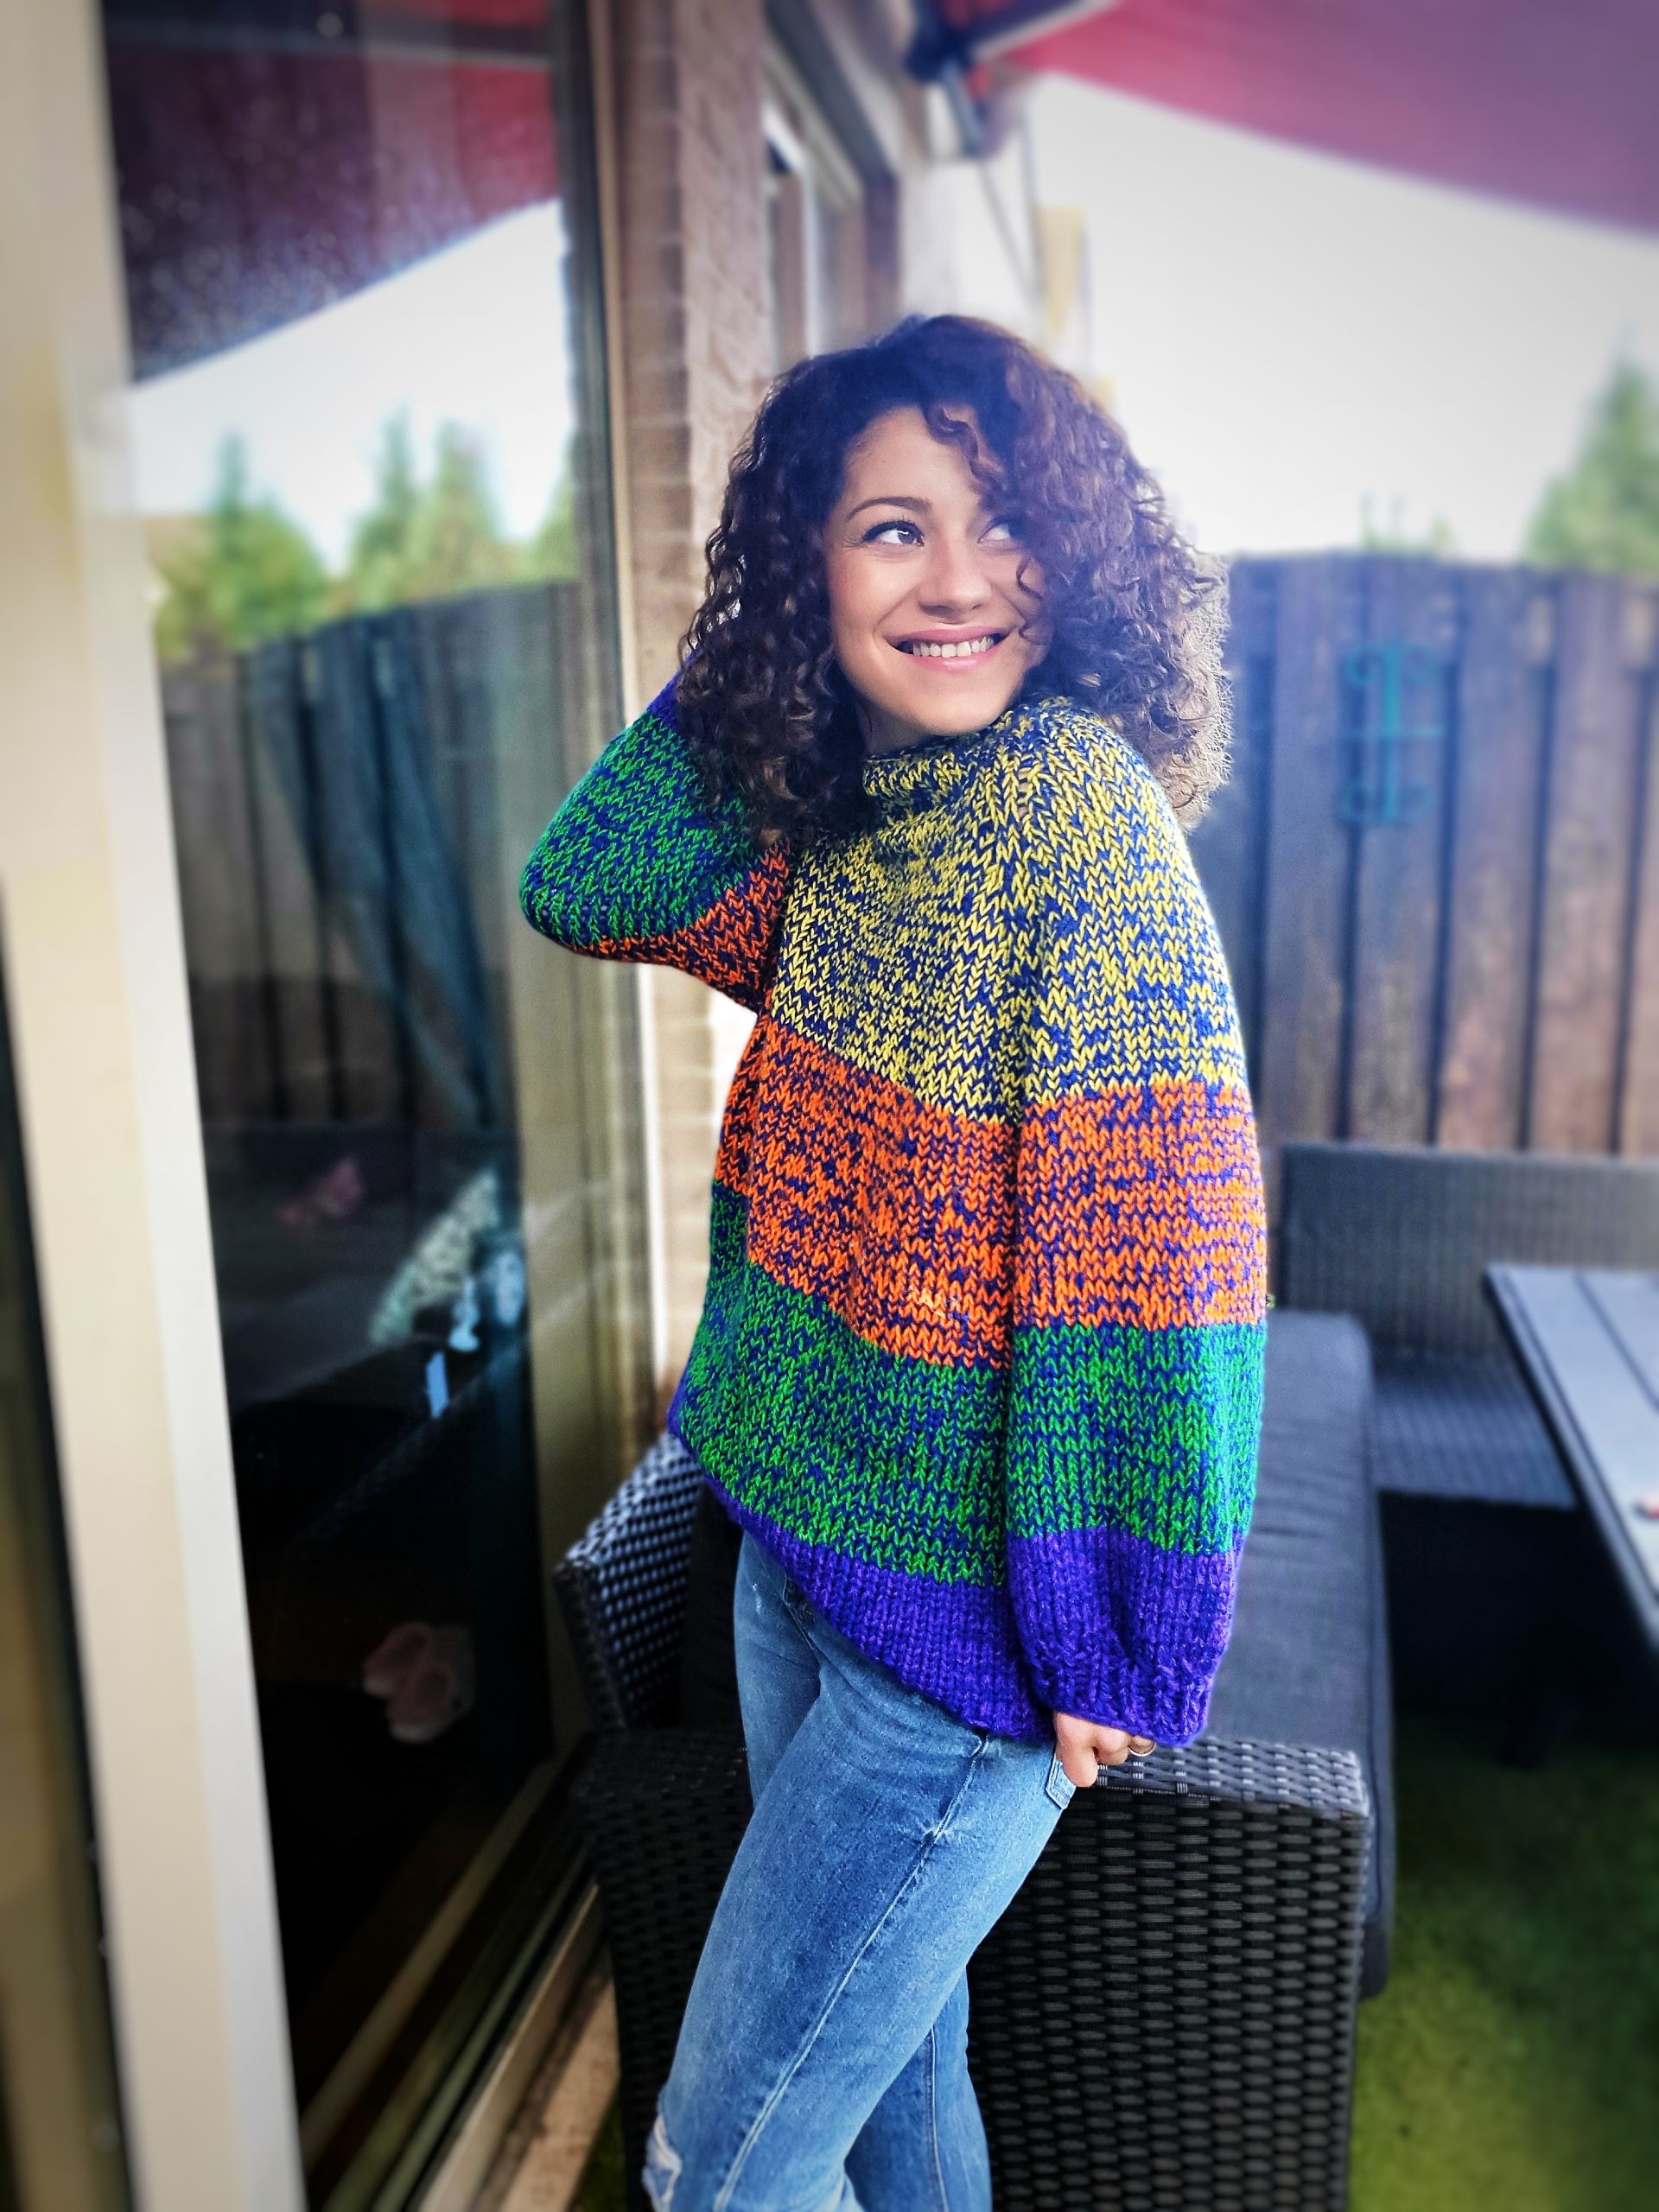
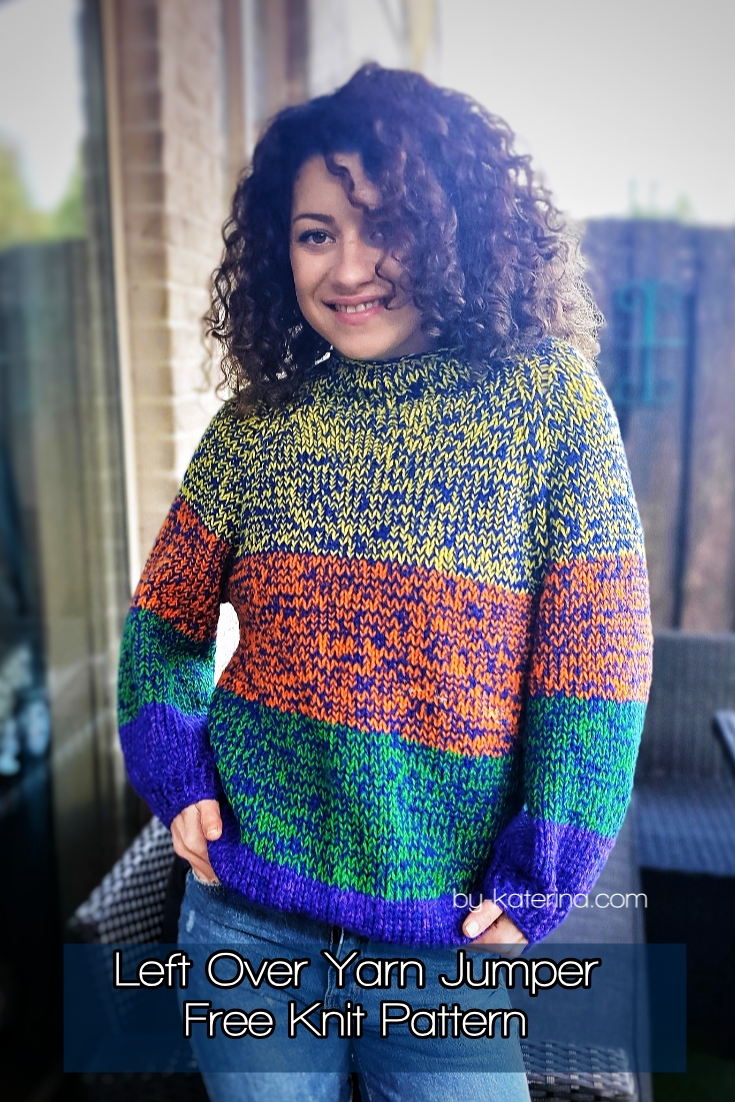
I am so glad that I am about to share with you my second knitting pattern, which is this beautiful Left-Over Yarn Jumper. Sharing also knitting patterns was one of my goals for 2020 and I am happy that I reached this goal from the first month of the year.

You can Purchase the easy printable PDF version of this pattern here:
This Left-Over Yarn Knitted Jumper is my second knitting pattern. If you missed the first one, Easy Knitted Cowl, which by the way is available as a FREE PDF Download, click the image below.
Anyways! I had in mind to make this sweater for so long, and I actually did another one, but it was ruined before posting something, because my husband decided to put it in the dryer.
It took me a while to find time to make another one, because I am not a faster knitter yet, but I did it and I am super proud with it and wear it a lot.
You know already that I love making crocheted top-down sweaters, so I had to make a knit one too. I love the idea of not having pieces to sew and to see with each round how the sweater is getting life.
But, enough talking about it! Let’s get into action and make this Jumper
Materials you will need
- Yarn
- Category 3, DK (the jumper it’s worked holding 2 strands of yarn at ones) or Category 5 if you want to work with one single strand
- Needles
8 mm circular knit needles, 80 cm length for the collar
*by the time you increase for the yoke you might want to change the needles with longer ones (120 cm)
8 mm circular knit needles, 40 cm length for the sleeves
- yarn needle to hide the ends
- Scissors
- 9 stitch markers
- 6 mm crochet hook to cast off
Pattern notes
This Jumper features working in continuous rounds, knit stitch and purl stitch.
It’s a top down sweater, worked with raglan technique.
It’s worked only on the right side.
The Raglan Seams will have 2 sts and we will increase with 1 st before and after the raglan seam.
After each round with increases we will work one round without increases.
Final measurements
This pattern is available in 8 sizes, from Small up to 5X Large.
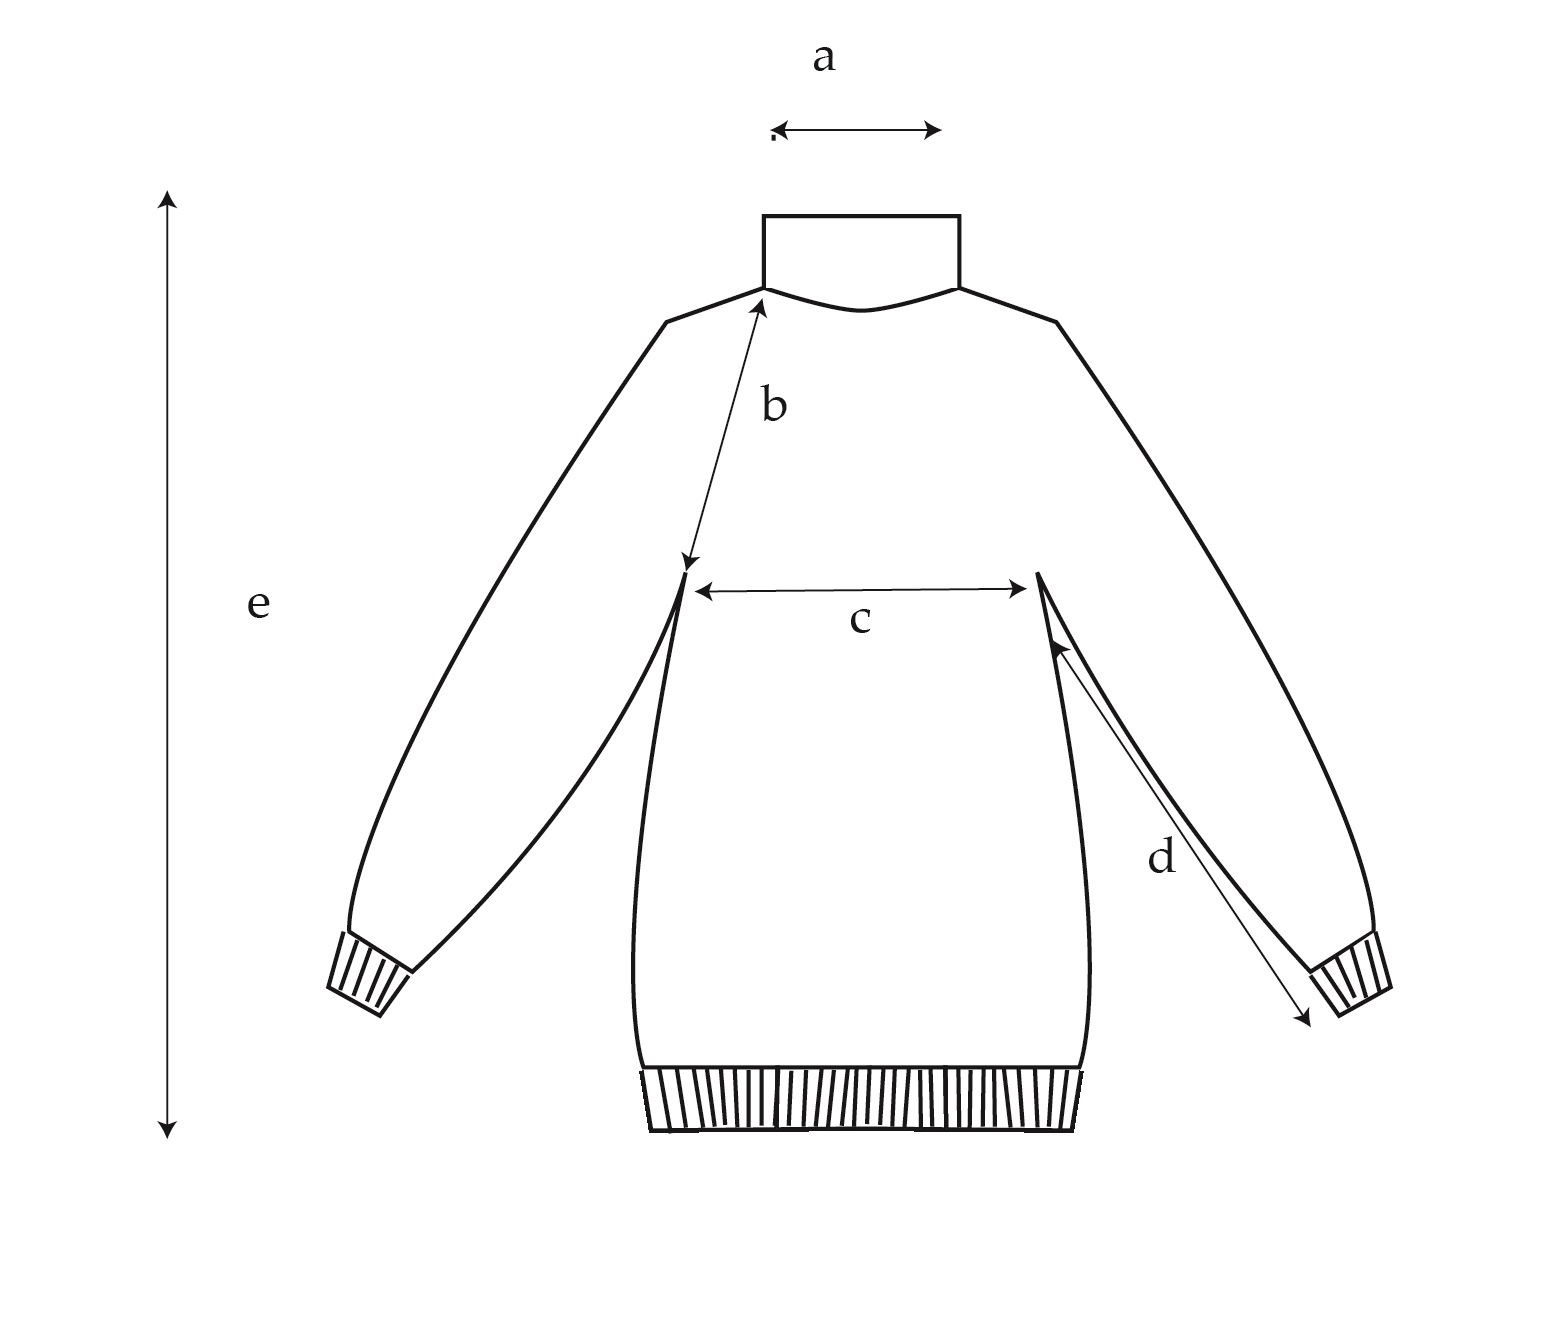
Final measurements of the Jumper are listed below. Values are in Cm. Numbers for sizes M, L, 1X Large, 2X Large, 3X Large, 4X Large and 5X Large are written between brackets.
You can Purchase the easy printable PDF version of this pattern here:
Neck Line a: 17 cm (18, 18, 19, 20, 20, 22, 23)
Yoke Depth b: 26 cm (27, 28, 31. 32, 33, 35, 37)
Bust Width c: 50 cm (55, 60, 65, 70, 75, 80, 85)
Underarm Length d: 34 cm (33,34,32,30,31,28)
- Underarm length can be shorter with bigger sizes because the yoke depth is bigger.
- Sleeves length can be adjusted in case you need them to be longer or shorter just by making more or less rounds.
Length e: 55 cm (56, 57, 57, 58, 58, 59, 59)
How much yarn do you need?
This Jumper is perfect if you have some left-over yarn to use.
For each size you will approximate need:
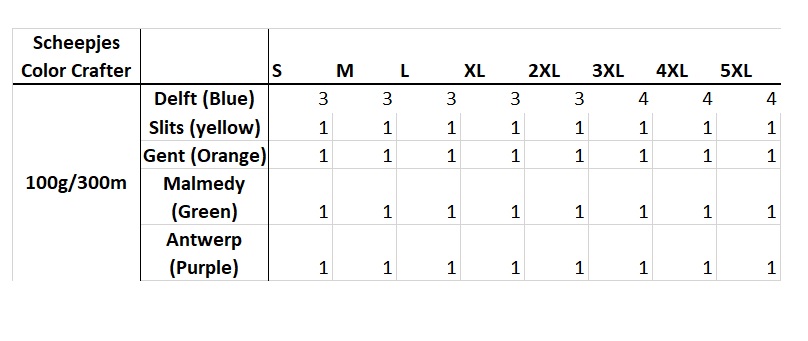
The main color, Blue it’s used for the entire jumper. When changing the color, you will only change the secondary color.
You will find the color changing pattern below, but you can make with each color as many rounds as you want.
The values below don’t count the collar rows.
- S – 27 rounds with yellow, 26 rounds with the other 3 secondary colors
- M – 28 rounds with yellow, 26 with the other 3
- L – 27 rounds with each color
- XL – 27 rounds with each color
- 2XL – 29 rounds with yellow, 27 with the other 3 secondary colors
- 3XL – 29 rounds with yellow, 27 with the other 3 secondary colors
- 4XL – 28 rounds with each color
- 5XL – 28 rounds with each color
With the last color you will have to work with 10 rounds less then indicated, the other 10 will be worked for the ribbed edge.
You can Purchase the easy printable PDF version of this pattern here:
About the stitch pattern.
To make this easy jumper you need to know how to purl and how to knit.
k: Knit
k st (knit stitch)– With yarn at back, insert point of right-hand needle in front of stitch from left to right on left-hand needle, bring yarn under and over the top of point of right needle, draw loop through stitch and drop this stitch off left needle.
p: Purl
p st (purl stitch) – With yarn at front, insert point of right-hand needle in front of stitch from right to left on left needle, bring yarn over and under the top of point of right needle, draw loop through stitch and drop this stitch off left needle.
We will use the purl stitch only for the ribbed edging.
Abbreviations used in this pattern
- K – knit
- P – purl
- Inc – Increase (wrap yarn ones over your left index finger and insert that loop to the right hand needle
- St(s) – stitch (es)
Gauge
- 12 k st = 10 cm (4”)
- 19 k rows = 10 cm (4 “)
Pattern
Cast on:
- S – 60 sts
- M – 60 sts
- L – 60 sts
- XL – 68 sts
- 2XL – 76 sts
- 3XL – 76 sts
- 4XL – 80 sts
- 5XL – 84 sts
Before making the join make sure the sts are oriented inside the circle and your yarn is on your right needle.
Join
With the right needle take the first stitch from the left needle. Then, pull out the second st from the right needle. Let this st between you needles. This will be the join.
Use a stitch marker and put it on your right needle, to mark the beginning of the round.
Collar
Round 1: k all the sts around.
Rounds 2 – 15 (or as many rounds you want to get to the desired high of the collar): Repeat round 1.
Yoke
Numbers for sizes M, L, 1X Large, 2X Large, 3X Large, 4X Large and 5X Large are written between brackets.
Round 1
K 9 (10, 10, 11, 11, 12, 13), Inc 1, put a st marker on the right hand needle, k 2 sts, use a second st marker, Inc 1, k 8 (6, 6, 8, 12, 12, 12, 12) sts, Inc 1, put a st marker, k 2, put a st marker, Inc 1, K 18 (20, 20, 22, 22, 22, 24, 26) sts, Inc 1, put a st marker, k 2 sts, put a st marker, Inc 1, k 8 (6, 6, 8, 12, 12, 12, 12) sts, Inc 1, put a st marker, k 2, put a st marker, Inc 1, k last 9 (10, 10, 11, 11, 12, 13).
Round 2
k all sts
Round 3
k all sts, to the next st marker, 1 Inc, k 2 sts, 1 inc (Inc right is made before the st marker, inc left is made after st marker). Repeat to the end of the round.
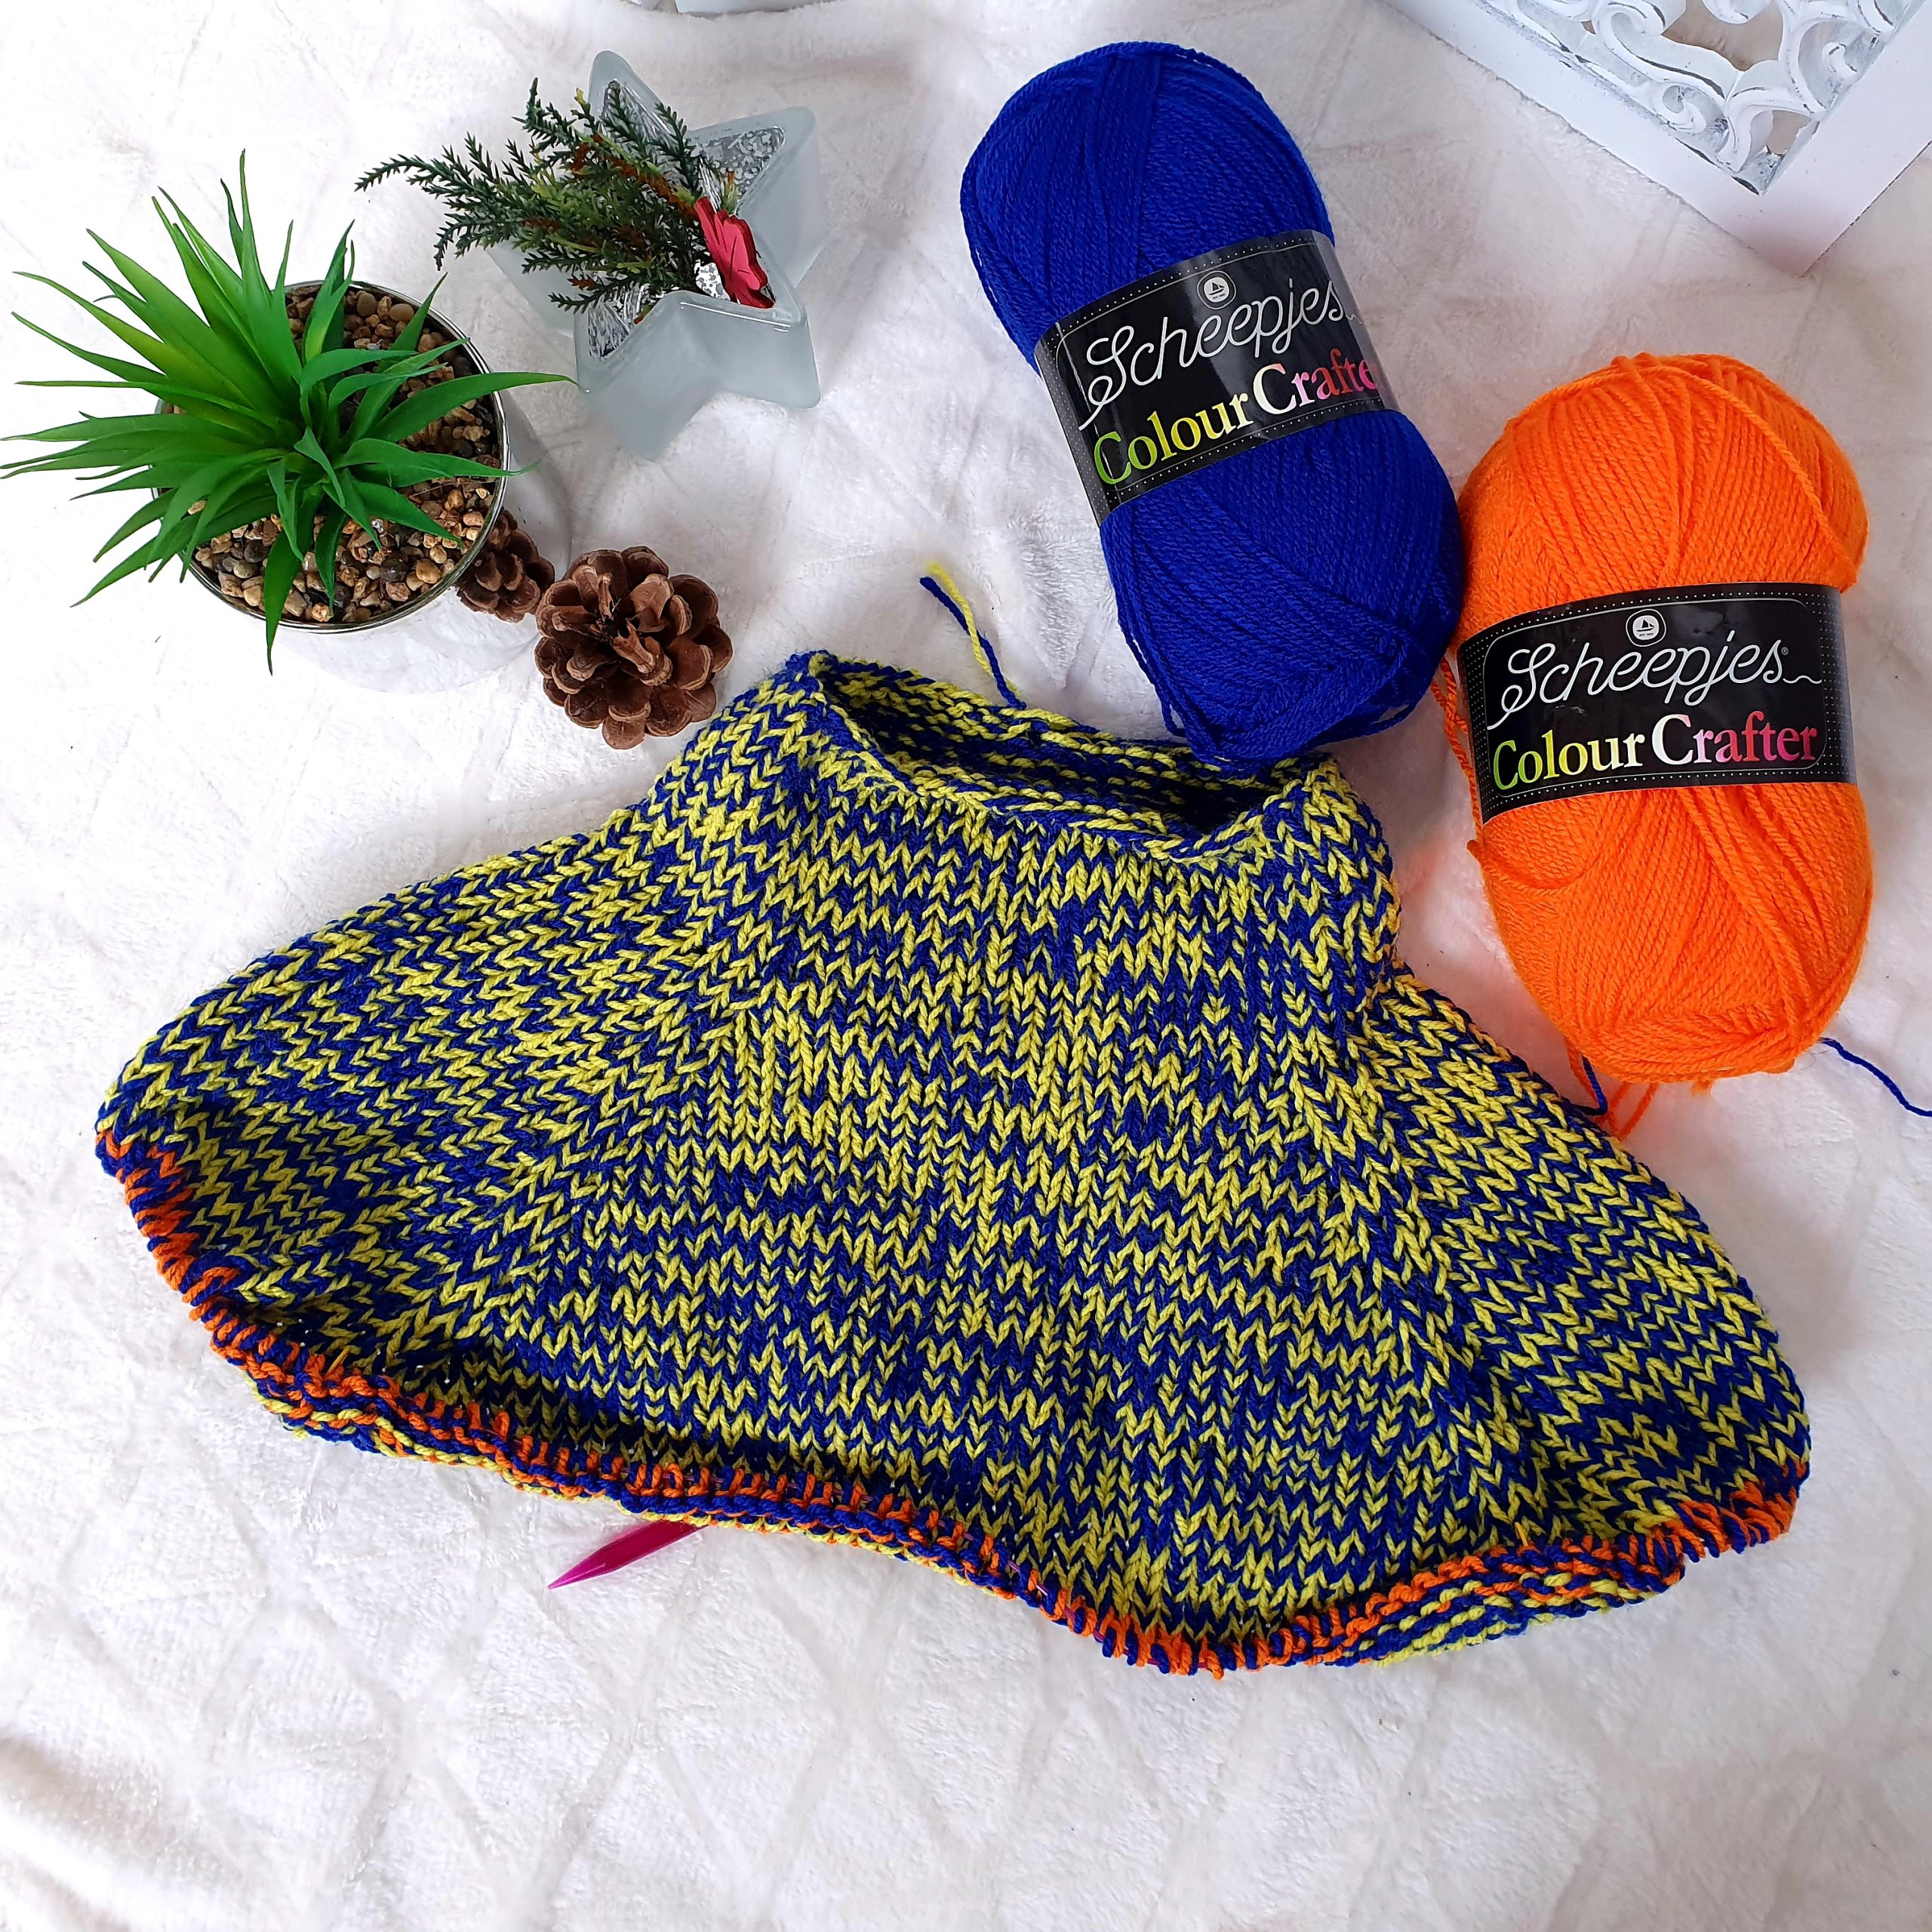
Next, repeat rounds 2 and 3, alternating one round with increases one without until you have in total for the yoke:
- S – 40 rounds
- M – 44 rounds
- L – 44 rounds
- XL – 48 rounds
- 2XL – 50 rounds
- 3XL – 54 rounds
- 4XL – 54 rounds
- 5XL – 58 rounds
Now that the yoke is done, we will continue with the body, but first we have to separate the sleeves.
For bigger sizes you will need to add some underarm sts to get to the needed bust width. Value 0, means that you don’t have to add any sts and you have to knit the next st after skipping the sleeve sts.
To add the underarm sts, proceed the same as for the increase.
Separating round
*values for sizes M, L, XL,2XL, 3XL, 4XL, 5XL are written between brackets
K the sts to the first st marker, remove the st marker and k the first st of the raglan line. Next, you will have to transfer the sts for the sleeve. Use a tapestry needle and a strand of yarn to do this. First st for the sleeve will be the second st of the first raglan line and the last one will be the first st of the next raglan line. After you have all the sts for the sleeve on the yarn, make a knot to secure all sts.
Next we will continue with the body sts. Add 0 (0, 4,4,5,6,8,8) sts on you right needle, then skip the sts for the sleeve and knit the next available st. Continue to k all sts to the second sleeve and proceed the same as with the first one. K all remained sts to the end of the round.
Body
Round 1
K all sts.
Repeat round 1 until you have the desired length of the sweater or until you have in total:
- S – 55 rounds
- M – 52 rounds
- L – 54 rounds
- XL – 50 rounds
- 2XL – 50 rounds
- 3XL – 46 rounds
- 4XL – 48 rounds
- 5XL – 44 rounds
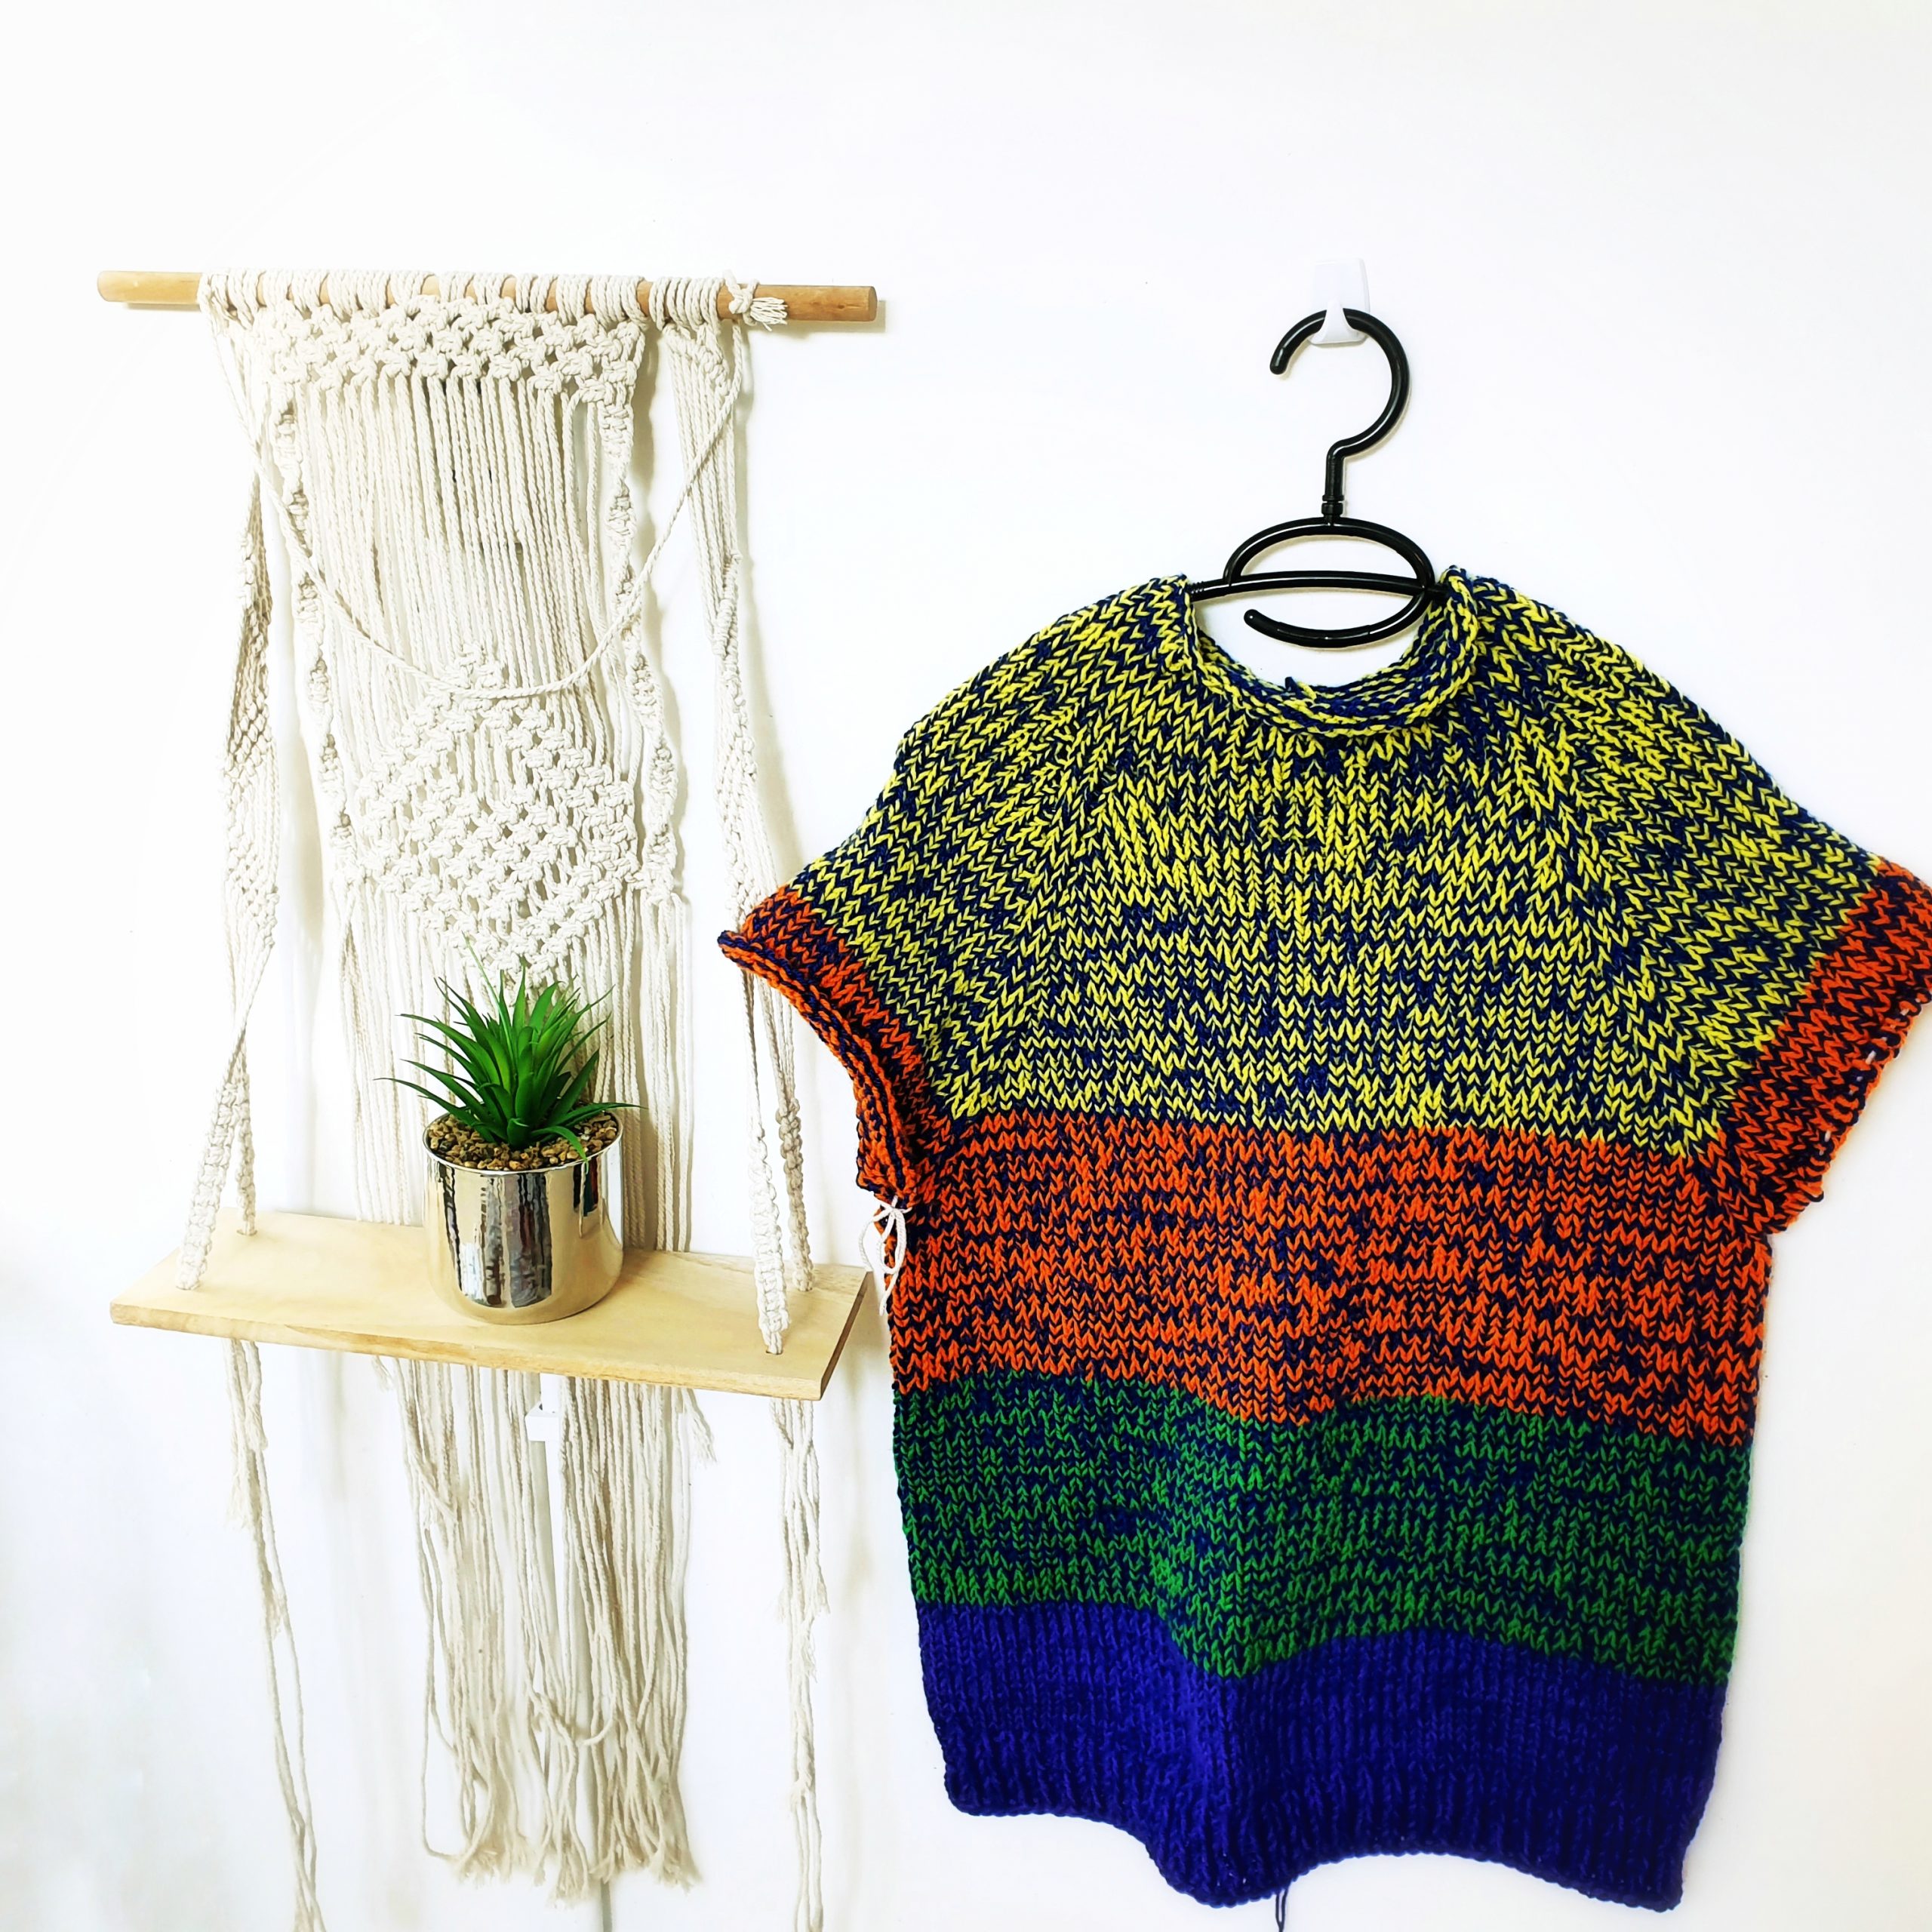
You can Purchase the easy printable PDF version of this pattern here:
*we don’t have more rounds with each bigger size, because the length of the body is calculated taking into consideration the yoke depth.
Edging
To finish the body length, we will work the last 10 rounds, making a ribbed edging.
Round 1
K 1, p1 – repeat to the end of the round
Rounds 2 – 10
Repeat round 1.
Cast off
Use a 6 mm crochet hook as your right needle.
k first st, you have now 1 loop on your hook.
P next st, and pull the loop through the first loop on your hook. K next st and pull the loop through the first loop on your hook. Repeat with all sts. Always you have to have only one loop on your hook. At the end of the round insert the hook in the first st and make a slip st. Chain 1 and cut the yarn.
Sleeves
Transfer the sleeve’s sts on a 40 mm length needle. If you don’t have you can use longer needles but you will have to work the sleeves using the magic loop method. You can find a useful vide here.
Next, make a similar join as you did when starting the jumper. Use a st marker to mark the start of the rouns
Round 1
K all sts.
Repeat round 1 until you have the desired length or until you have the same number of rounds as for the body.
Last round before the ribbed edging you will have to decrease a few sts for the cuff.
Decrease – k 2 sts together
Decrease pattern for the last round before edging:
K 2 sts, 1 Dec. Repeat to the end of the round. Make sure to have at the end of the round an even number of sts for the ribbed edging,
Next, add the last 10 rounds following the same pattern as for the body edging.
Cast off using the same method as for the body.
To finish
Wave in all ends (well there are only 2)
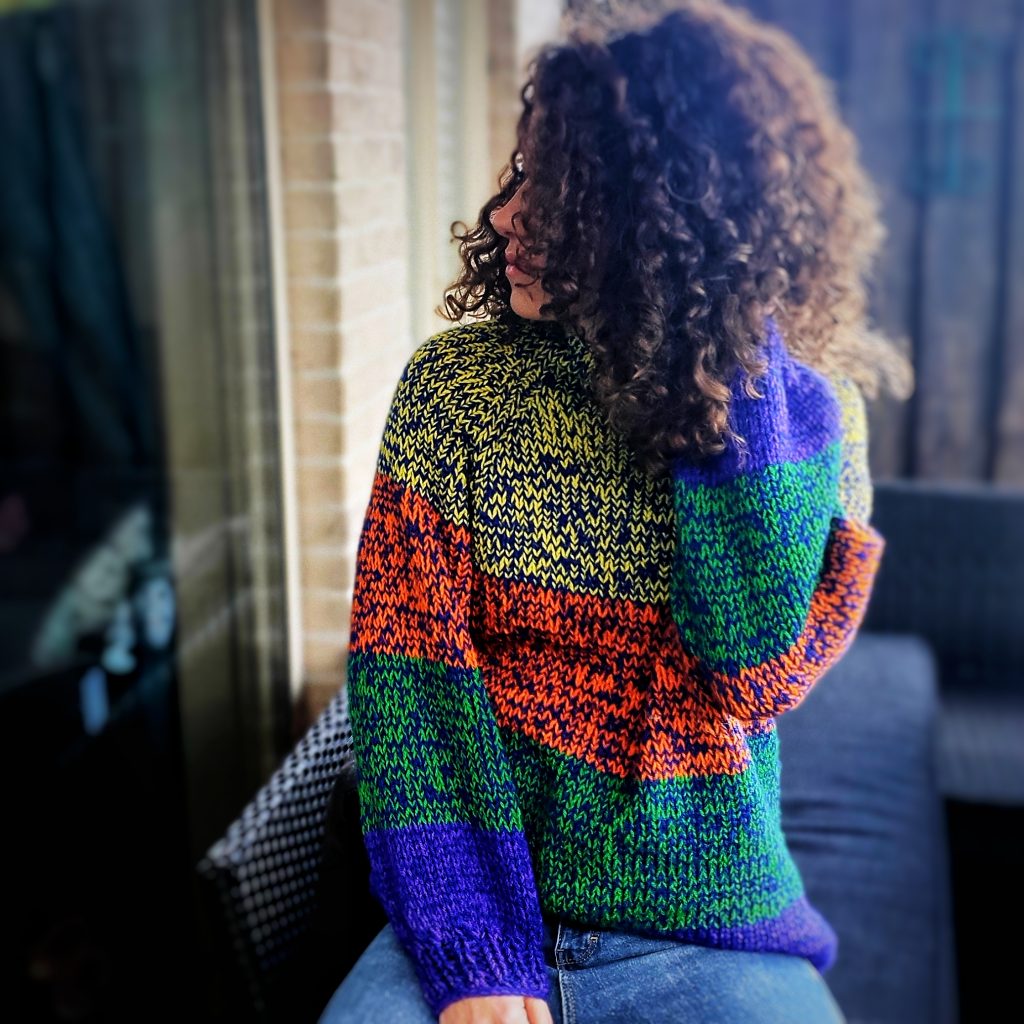
And the Left-Over Knitted Jumper is done!
You can Purchase the easy printable PDF version of this pattern here:




Comments are closed.