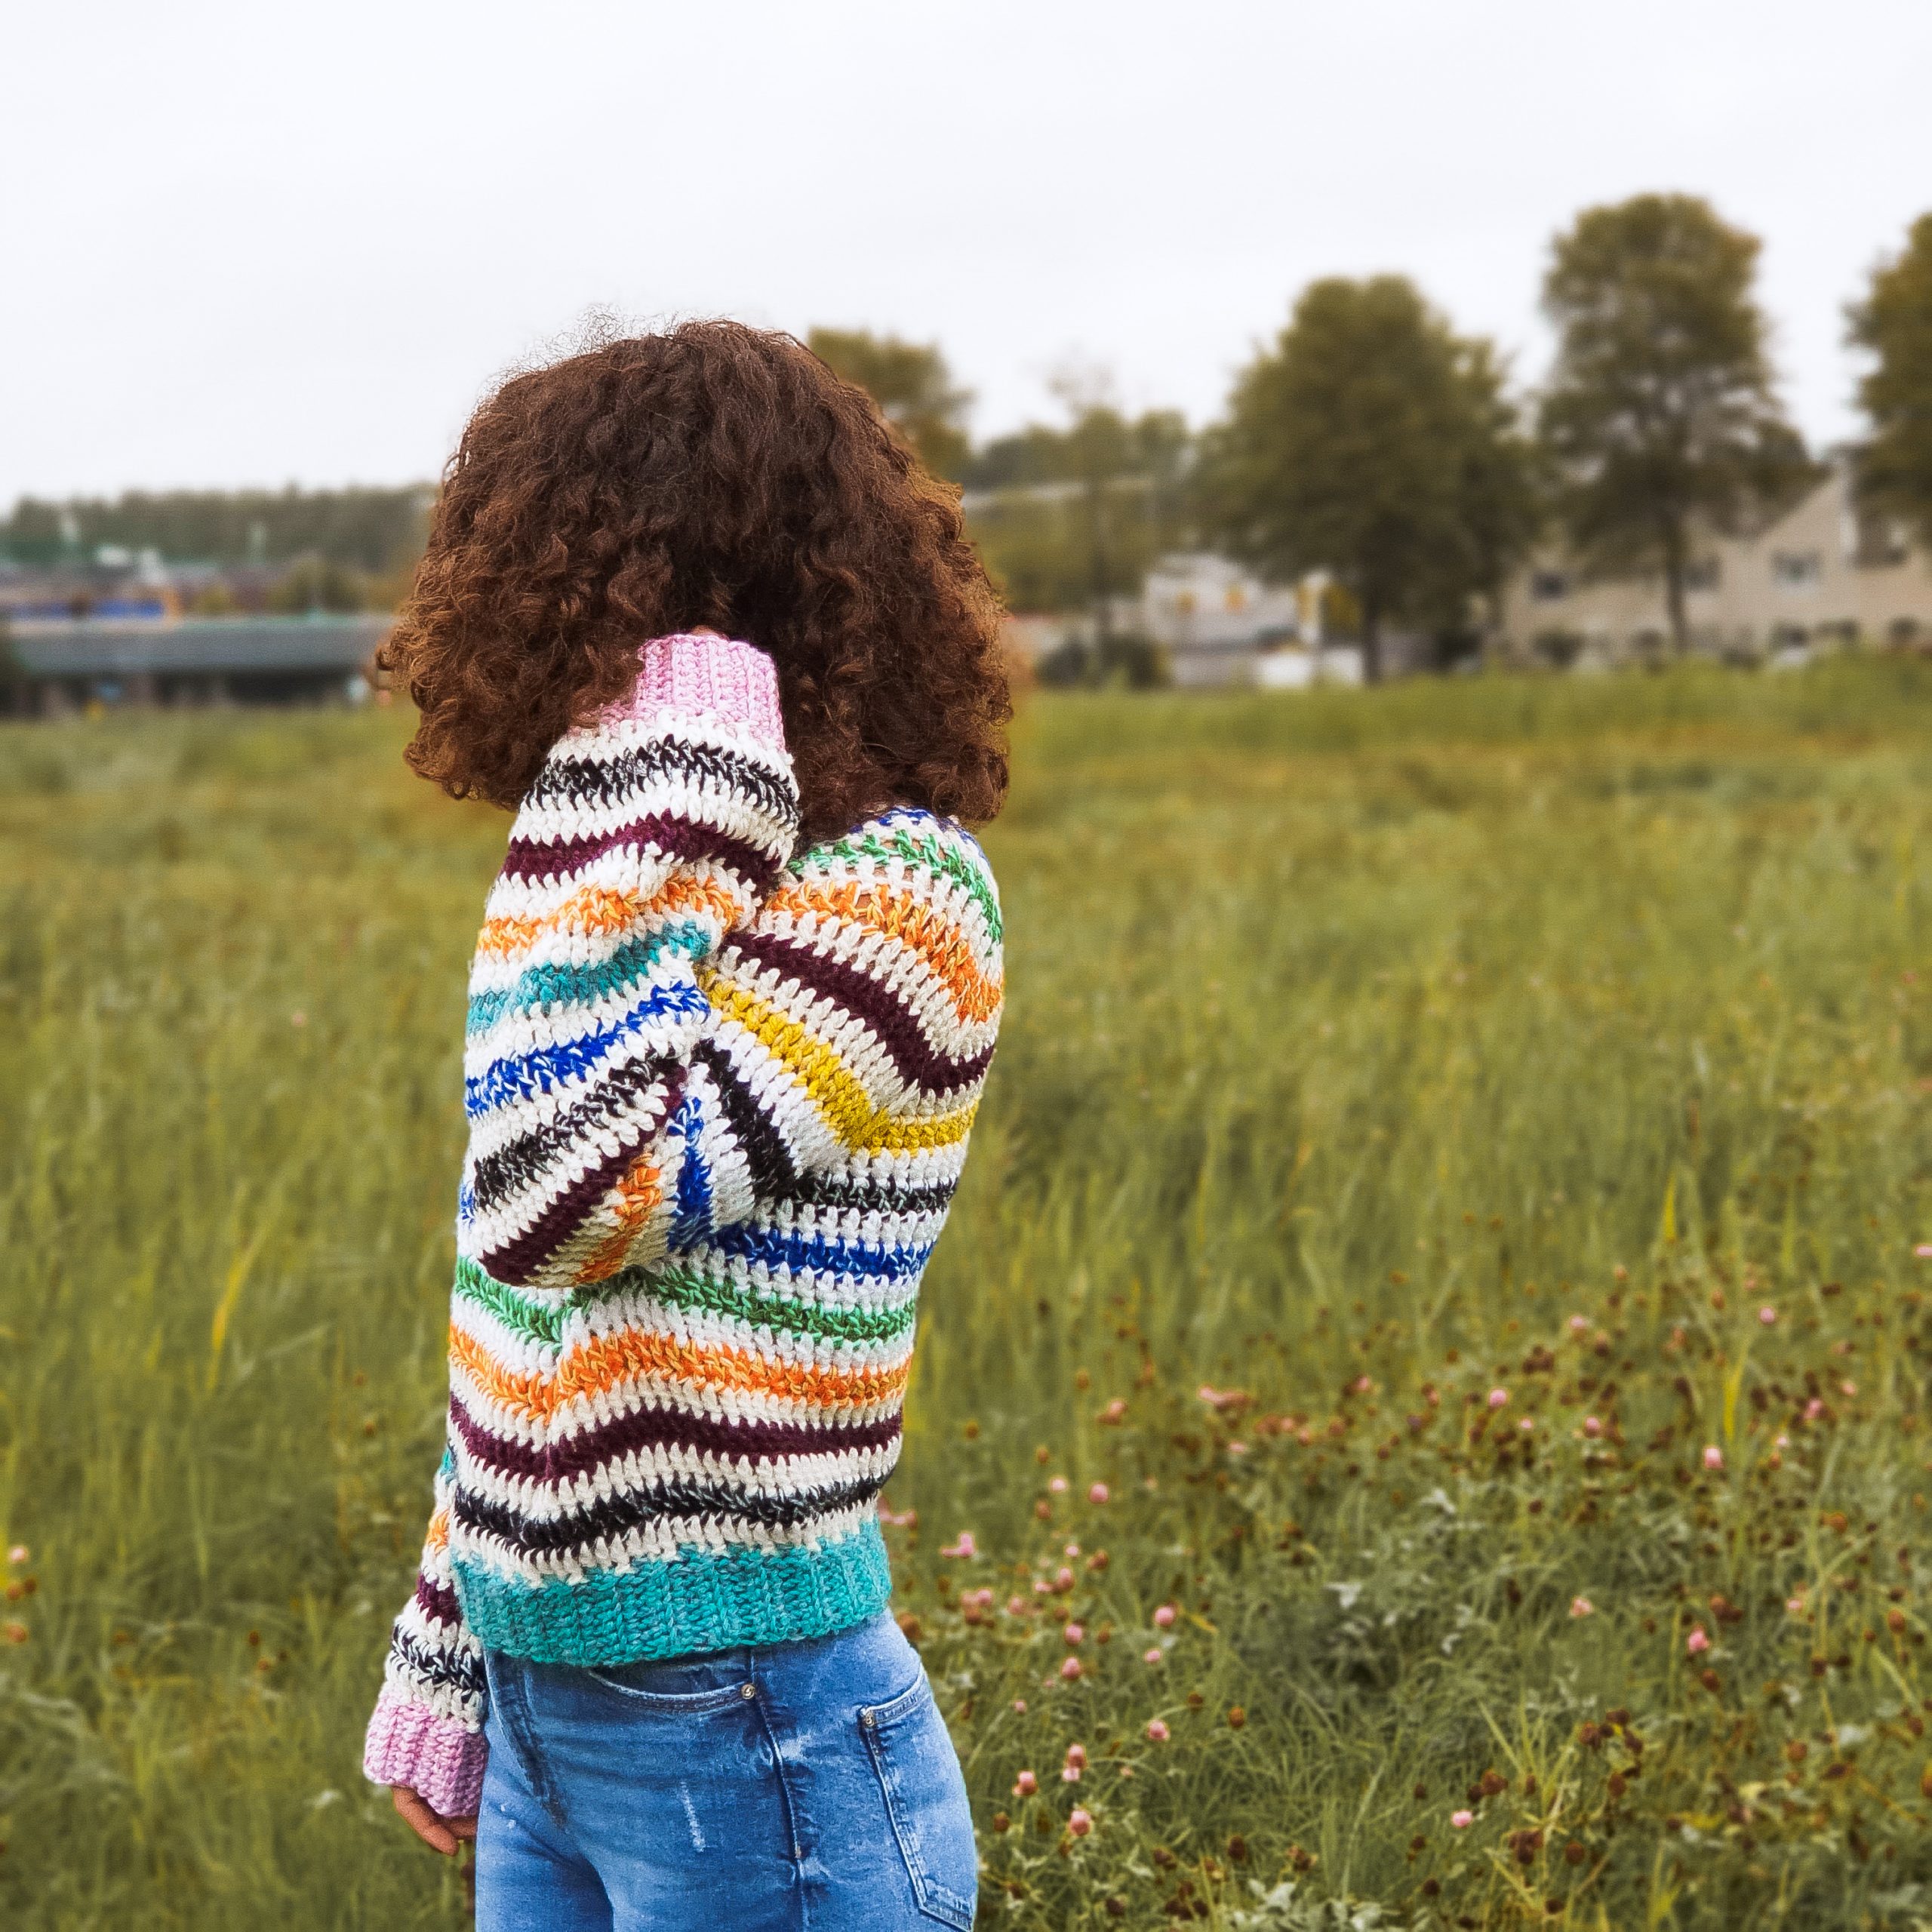
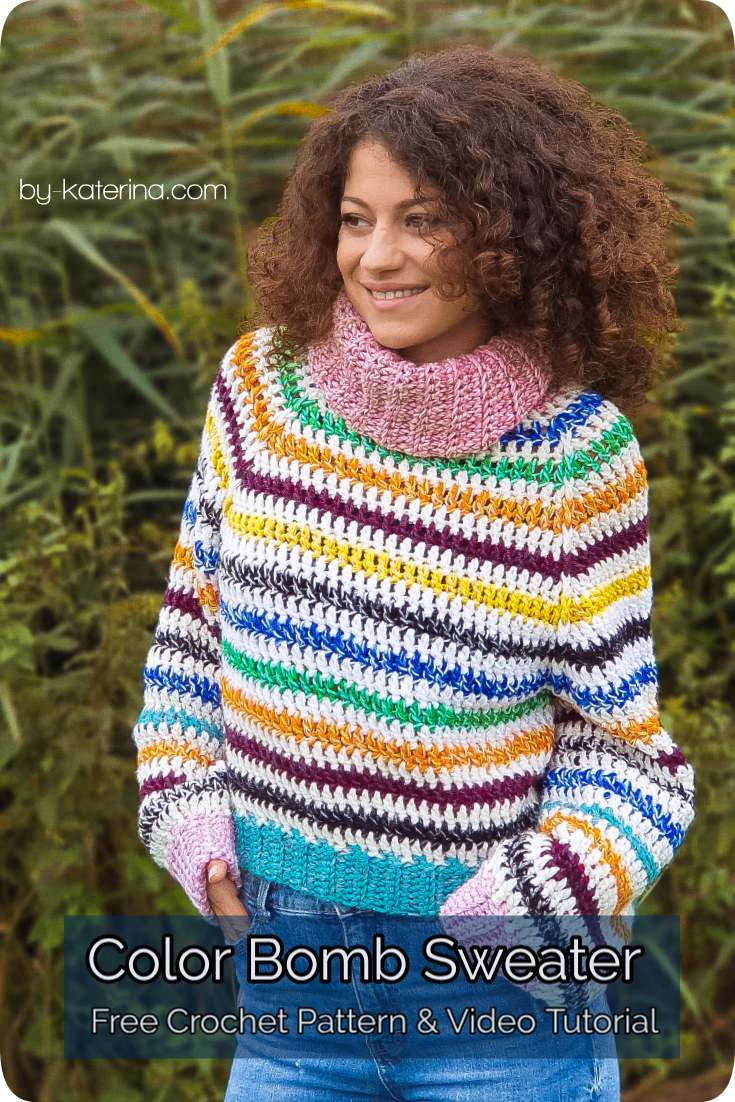
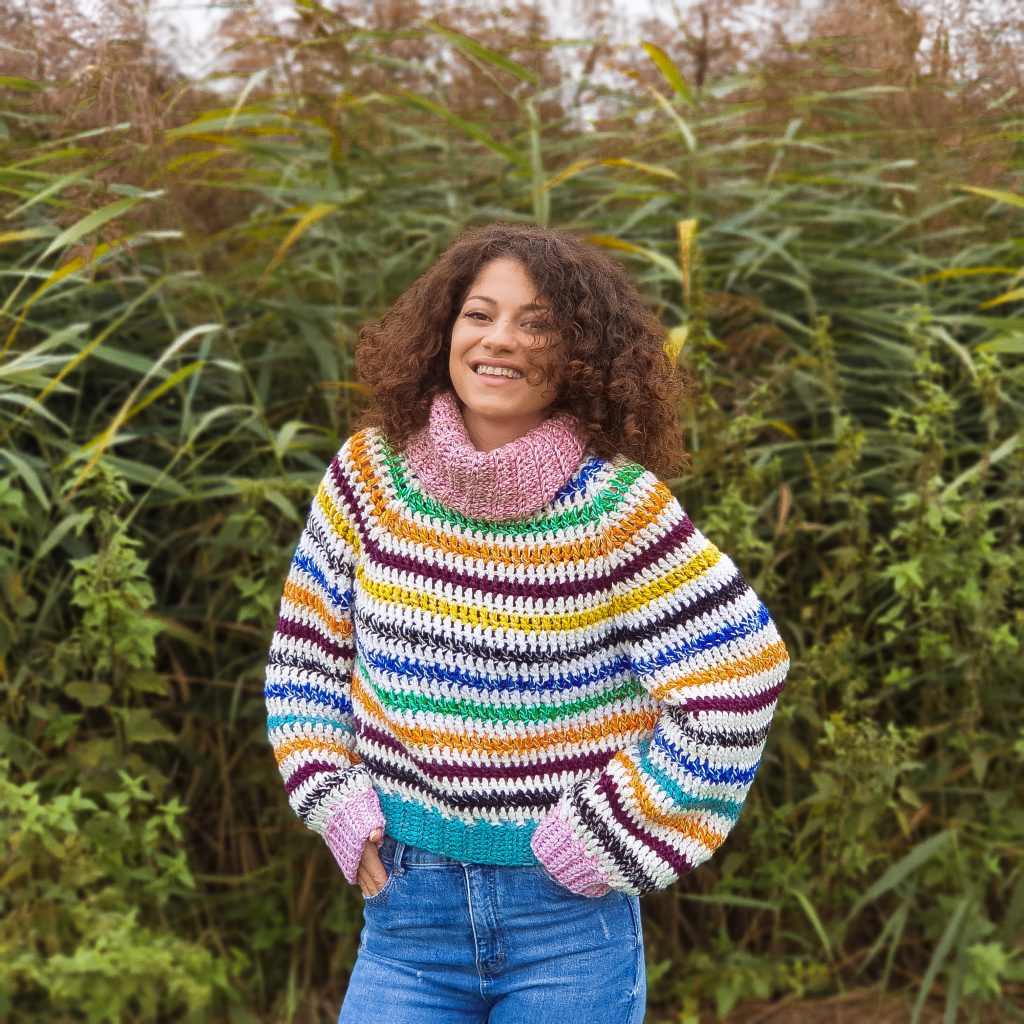
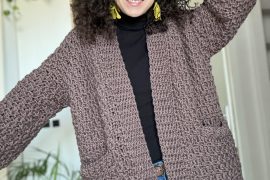
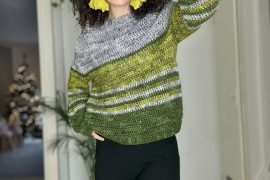
The idea of this sweater was to give you the inspiration and to grab all that left over yarn (because I know you also have some in a corner of your house) and to try to make something with it.
You can Purchase the easy printable PDF version of this pattern here:
I have a box where I throw all the yarn that remains from different projects and when the box is full, I have to make something with it. So, I choose all similar colors and made some big balls of yarn using 2 or 3 strands of yarn, depending on the yarn weight. I didn’t manage to use all of it with this Color Bomb Sweater, but I have another knitting cardigan in the making and I am Planning to make some space for some more left over yarn 😋
In other words, the Color Bomb Sweater Pattern it’s a super easy one. So, if you want to use the pattern to make one single color sweater or maybe 2 colors sweater, then you can do it.
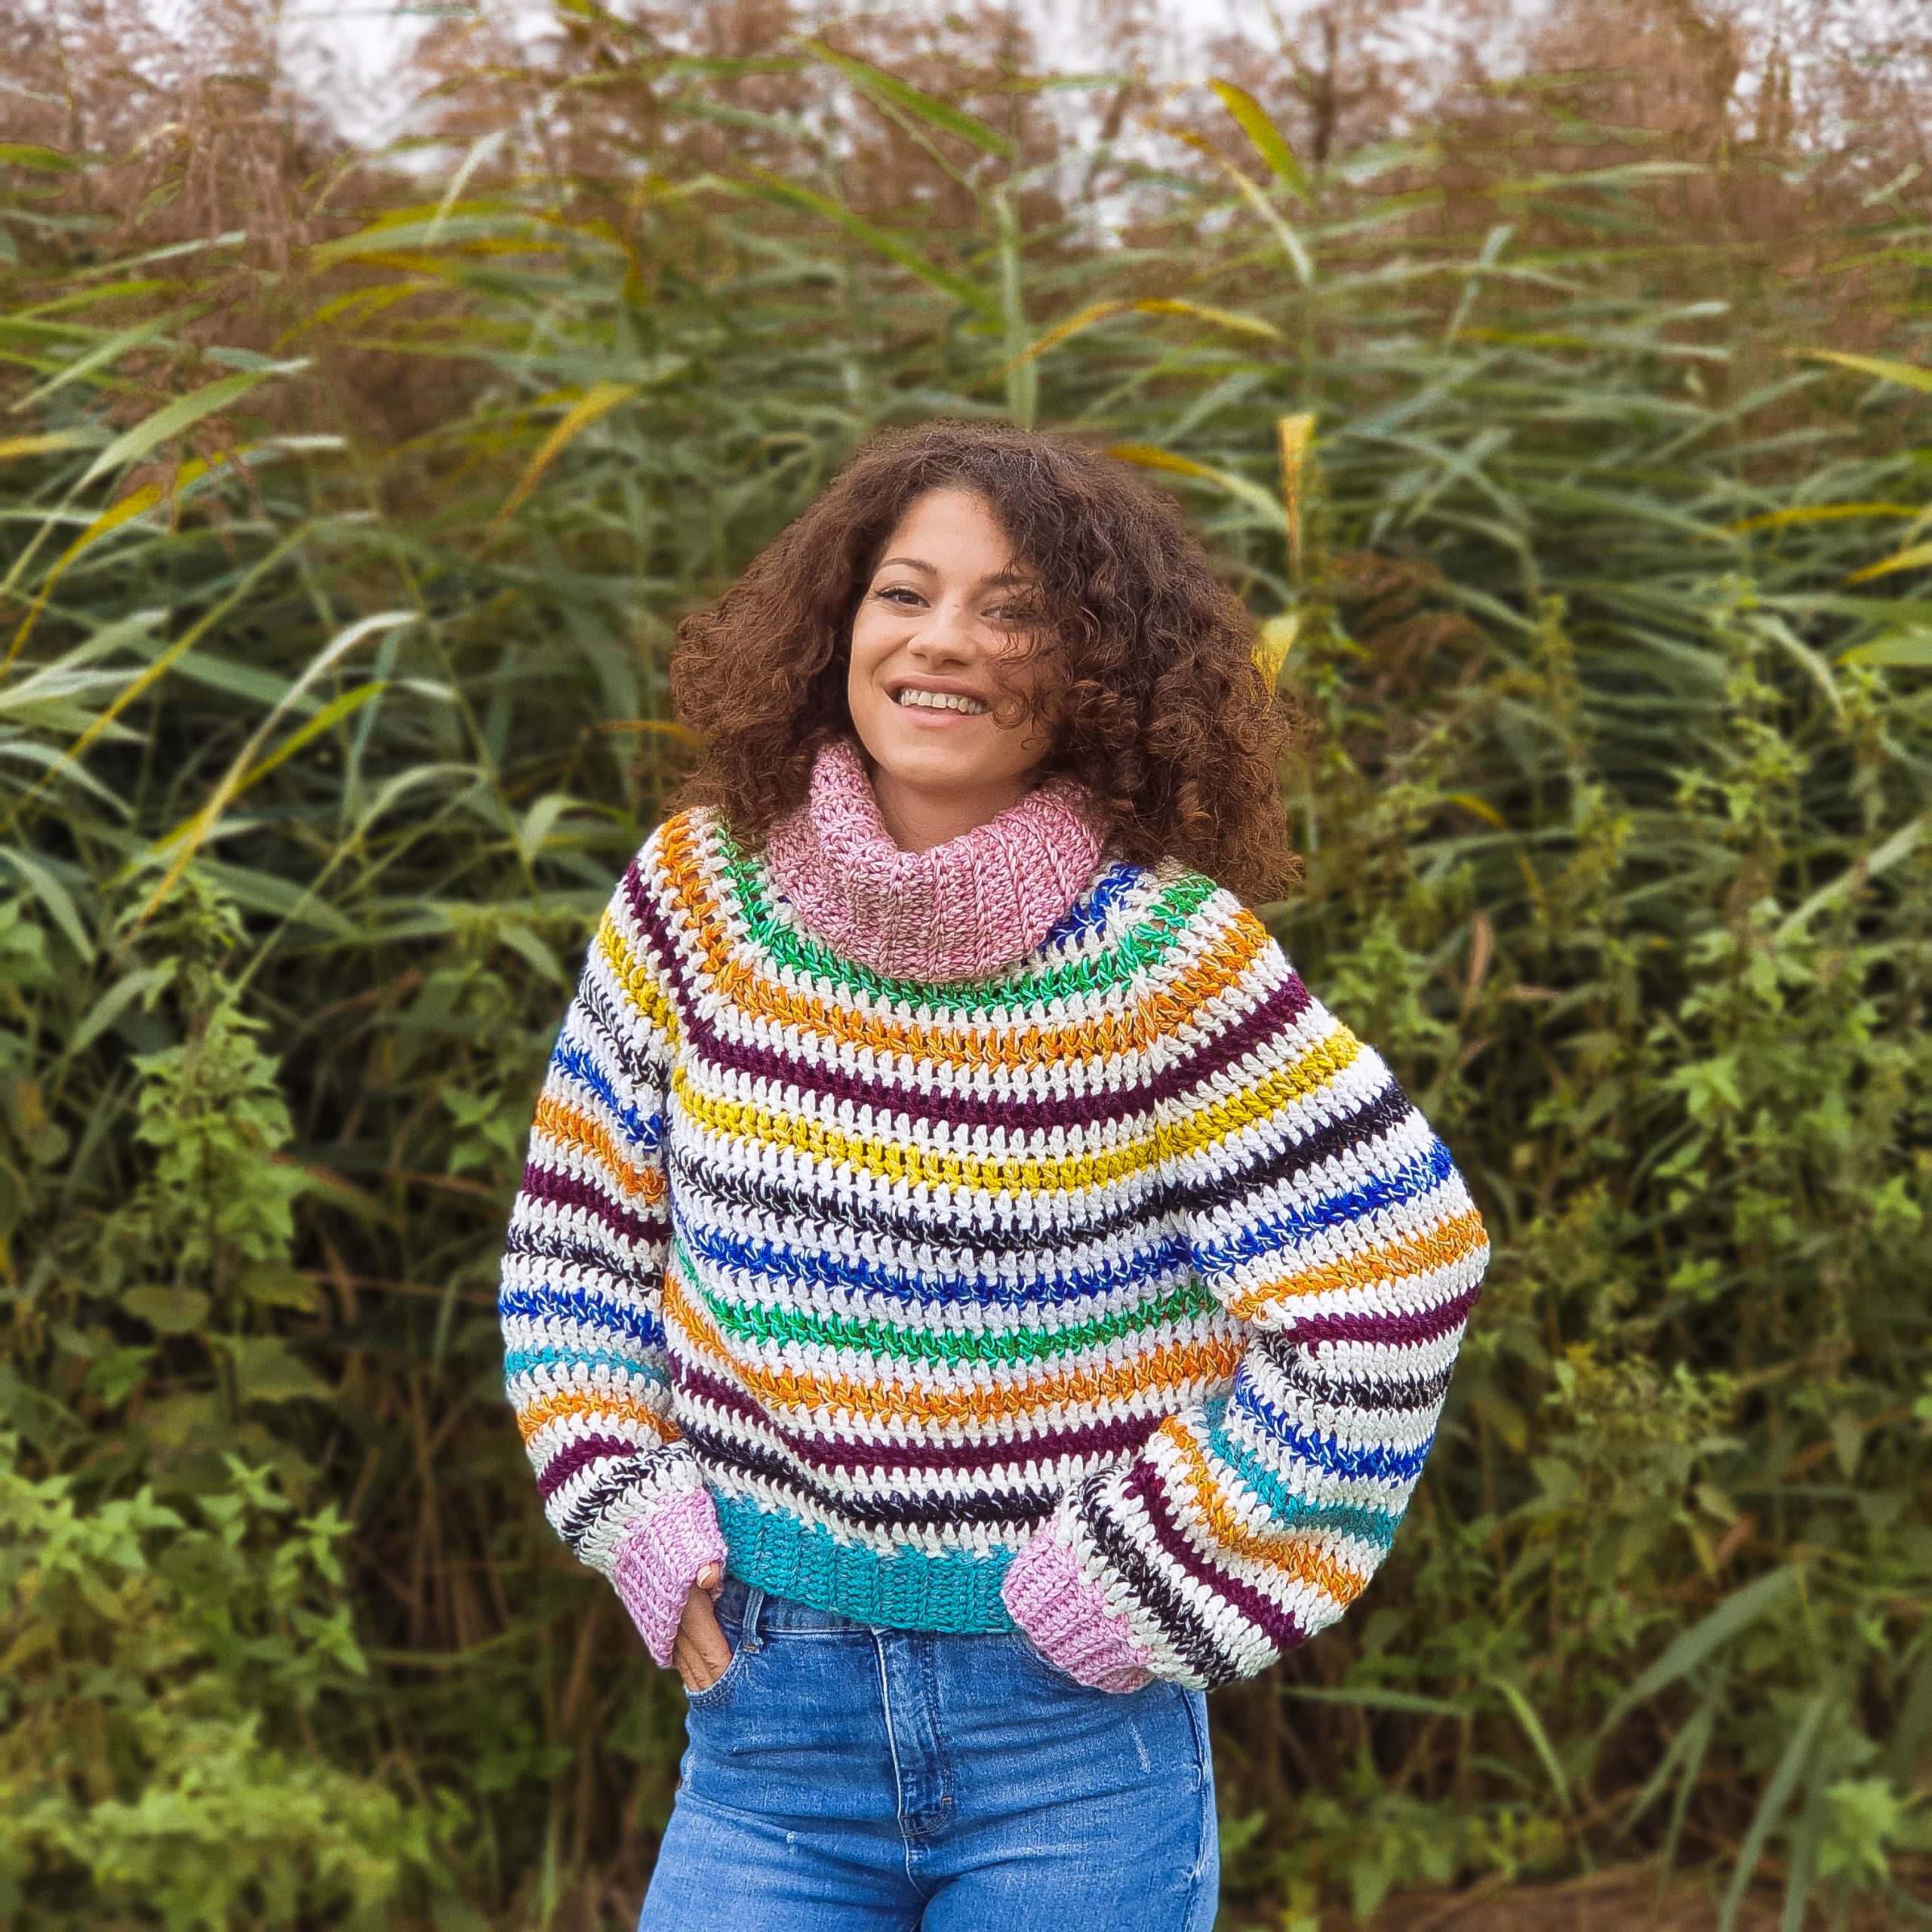
If I got your attention so far, let’s see what we will need and how to make this sweater:
MATERIALS
- Yarn
- Category 4 or 5 ( Aran, worsted, chunky)
- *I obtain the weight by holding more strands at ones (2 strands of DK weight yarn, cat 3, or 3 strands of fingering weight, cat 1). Final weight was aran, worsted or cat 4
- Crochet hook
- 8 mm
- 6 mm for bottom hem ribbing and cuffs
- You will need a yarn needle for wave in ends
- Scissors
- Stitch markers
ABOUT DESIGN
The garment has a top – down construction. First is worked the collar in a ribbed pattern. Then the yoke, with a rectangle raglan by increasing in 4 corners. After the yoke is done, it’s divided into sleeves and body. The 3 parts of the sweater are worked separately.
A ribbing edge is added for cuffs and bottom hem.
MEASUREMENTS
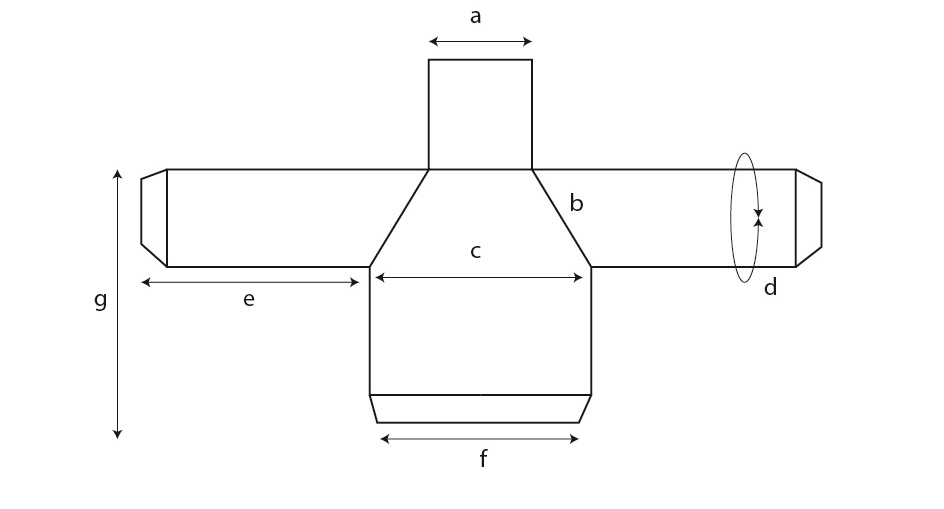
Neck width a: 15 cm (16, 16, 17, 18, 18, 20, 21)
Yoke Depth b: 30 cm, 33, 33, 35, 37, 42, 44, 46)
Bust Width c: 50 cm (55, 60, 65, 70, 75, 80, 85)
Sleeve Circ. d: 42 cm (44, 48, 51, 57, 60, 64, 67)
Underarm Length e: 37 (37, 37, 37, 37, 37, 37, 37)
Waist Circ. f: 75 cm (84, 90, 99, 105, 114, 120, 129)
Length g: 49 cm (50, 51, 53, 54, 55, 56, 58)
Width a: 34 cm (40, 40, 46, 46, 52, 52, 52)
Length b: 39 cm (39, 41, 41, 42,42, 43, 43))
*all measurements are taken after blocking
These measurements will fit:
| To Fit | S | M | L | XL | 2XL | 3XL | 4XL | 5XL |
| Bust | 86 | 96 | 106 | 116 | 126 | 136 | 146 | 156 |
How much yarn do you need?
For the Color Bomb Sweater I used left over yarn. As written in the Materials Section, I worked with many strands of yarn held together.
2 strands of DK weight yarn, category 3, or 3 strands of Fingering weight yarn, category 1.
I got in the end with a category 4, Worsted, Aran weight yarn. Considering that the sweater is worked with 8 mm crochet hook, you can use yarn up to category 5, Chunky.
Combine any yarn you have and feel comfortable to work it with a 8 mm crochet hook and then check the gauge.
I used 9 different colors for the sweater and below you can find the yardage for each color I use.
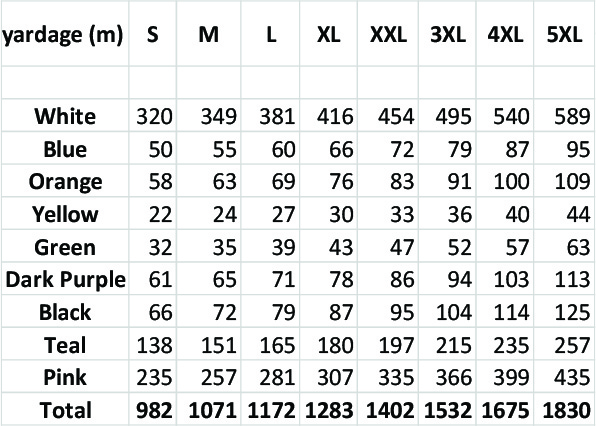
*the numbers are in Meters. 1 meter = 1.09 yards
Considering that final weight was a Category 4 yarn, Aran, Worsted, in number of skeins/balls, you can find below how many will you need:
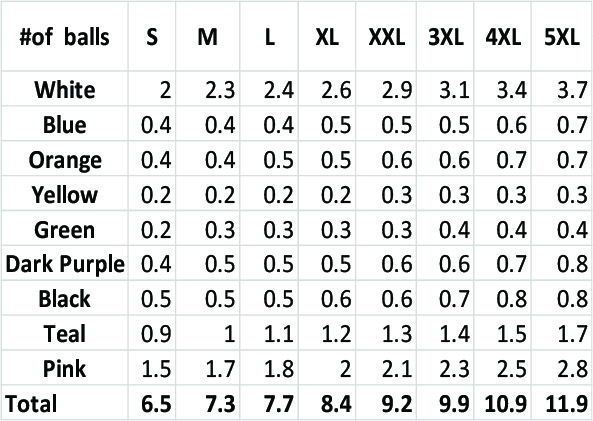
*calculated considering the medium length of an Aran Weight yarn skein (approximate 160 meters)
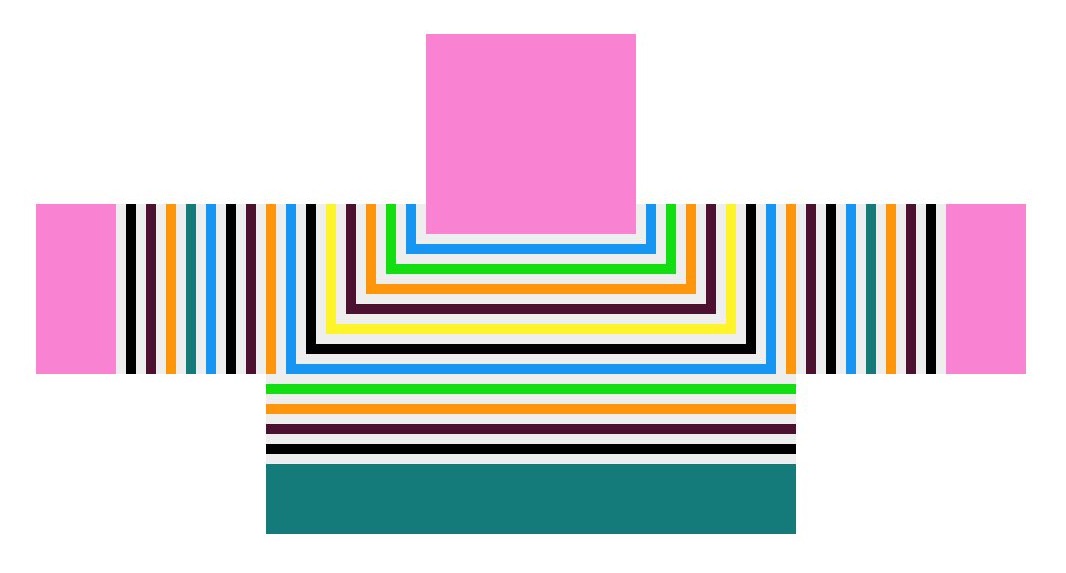
The color pattern is alternating one white round with one color round.
Below you can find a diagram with the colors I used in the exact order.
ABBREVIATIONS
Sc – single crochet
Scblo – single crochet in the back loop
Dc – double crochet
Fpdc – front post double crochet
Inc – increase: 1dc, 1 FPdc (around the previous round Fpdc), 1 dc in the same st
*on the second round the inc is 3 dc in the same st.
Ss – slip stitch
ssDec – slip stitch decrease (used when working the ribbing): insert the hook into next st, yarn over and pull out a loop, insert the hook into the next st, yarn over, pull out a loop and pull the loop through others 2 loops on the hook.
St (s) – stitch (e)
R| – row
** – repeated section
STITCH PATTERNS
The entire sweater is worked in double crochet.
The ribbing is worked in Single crochet in the back loop only
GAUGE
9 dc = 10 cm
5 rows = 10 cm
For ribbing
7 sts = 5 cm
7 rows = 10 cm
*the tension is measured after blocking
You can Purchase the easy printable PDF version of this pattern here:
PATTERN NOTES
All the rounds are starting with a ch 2 and 1st dc in the same st and ending with a ss in the 1st dc.
You can try different joining methods, whatever works for you and you feel comfortable working with.
I used for the start, 1 dc without a ch 2 at the beginning, just twist the loop on your hook and make the dc in the first st.
For the finish, invisible slip st: take off the loop from the hook, insert the hook from back to front, into the 1st dc, grab the loop and pull it through
Change the color after each white row. The color is changed, making the ss with the second color you will want to use, or if you are using the invisible ss method, you will change the color after making the ss.
You don’t have to cut the white color yarn. Carry it on along the joining line.
The entire sweater, except the collar and ribbing, is worked in rounds, only on the right side.
This will cause a slightly move to the right of the stitches. In case you want to avoid this, work on the wrong side as well, turning after each round.
INSTRUCTIONS
The numbers for sizes M, L, XL, XXL, 3XL, 4XL and 5XL are written between brackets. If not, the value applies for all sizes.
COLLAR (In pink)
Start| ch 26
R1| starting with the 2nd st, 1 sc in each st to the end of the row. Ch 1 and turn
R2| 1scblo in each st to the end of the row.
Repeat R2| until you have in total 42 (46, 46, 48, 50, 50, 52, 54) rows.
Join the edges (last row with foundation ch) using slip stitches.
Cut the pink yarn, or the collar color. Change to white
YOKE
Starting with the yoke, alternate a round in color white with a round using a different color.
Change the colors as explained in the PATTERN NOTES section
R1| 1dc in each side row sc. At the end of this round you should have the same number of stitches as the collar number of rows: 42 (46, 46, 48, 50, 50, 52, 54)
Before starting R2, use 4 stitch markers to mark the 4 corner stitches of the raglan line.
You will have 13 (15, 15, 16, 17, 17, 18, 19) sts for back and front and 6 (6, 6, 6, 6, 6, 6, 6) sts for the sleeves. Place the stitch marker in the next st after the number indicated for each side of the yoke.
R2| 1 dc in next 6 (7, 7, 8, 8, 8, 9, 9) sts, 1 Inc in next ( 3 dc in the same st), 1 dc in next 6 sts, 1 Inc, 1 dc in next 13 (15, 15, 16, 17, 17, 18, 19) sts, 1 Inc in next, 1 dc in next 6 sts, 1 Inc in next, 1 dc in last 7 (8, 8, 8, 9, 9, 9, 10) sts.
*place the st marker into the second stitch of the increase
R3|* 1 dc in each st to the next st marker ( or the second st of the previous round inc), 1 Inc in next (1 dc, 1FPdc, 1 dc in the same st). *Repeat on all the sides. Finish the round with 1 dc in each st to the end of the round.
Starting with R4, all the raglan increases are made in the FPdc by making, (1dc, 1Fpdc, 1 dc ) in the same st.
You can place stitch markers into the FPdc to know where you have to make the increases.
After each round, the total number of sts will increase with 8 sts per round.
Next, repeat R3|, considering the note above until you have in total for the YOKE 14 (15, 15, 16, 17, 17, 18, 19) rows.
After finishing the YOKE you should have in total 146 (158, 158, 168, 178, 194, 204, 214) sts.
BODY
Separating round
1 dc in each st to the next FPdc, 1 dc in the FPdc, ch 4 (5, 9, 11, 12, 13, 14, 16) sts, skip the sts for the sleeve, 1 dc in next FPdc, 1 dc in each st st to the next FPdc, 1 dc in the Fpdc, ch 4 (5, 9, 11, 12, 13, 14, 16), skip the sts for the sleeve, 1 dc in next FPdc, 1 dc in each st to the end of the round.
R1| 1 dc in each st around.
R2 – R8| Repeat R1.
*adjust the length of the sweater, by working more or fewer rounds.
Now the BODY section is finished you can add the ribbing. Move to the RIBBING section of the pattern.
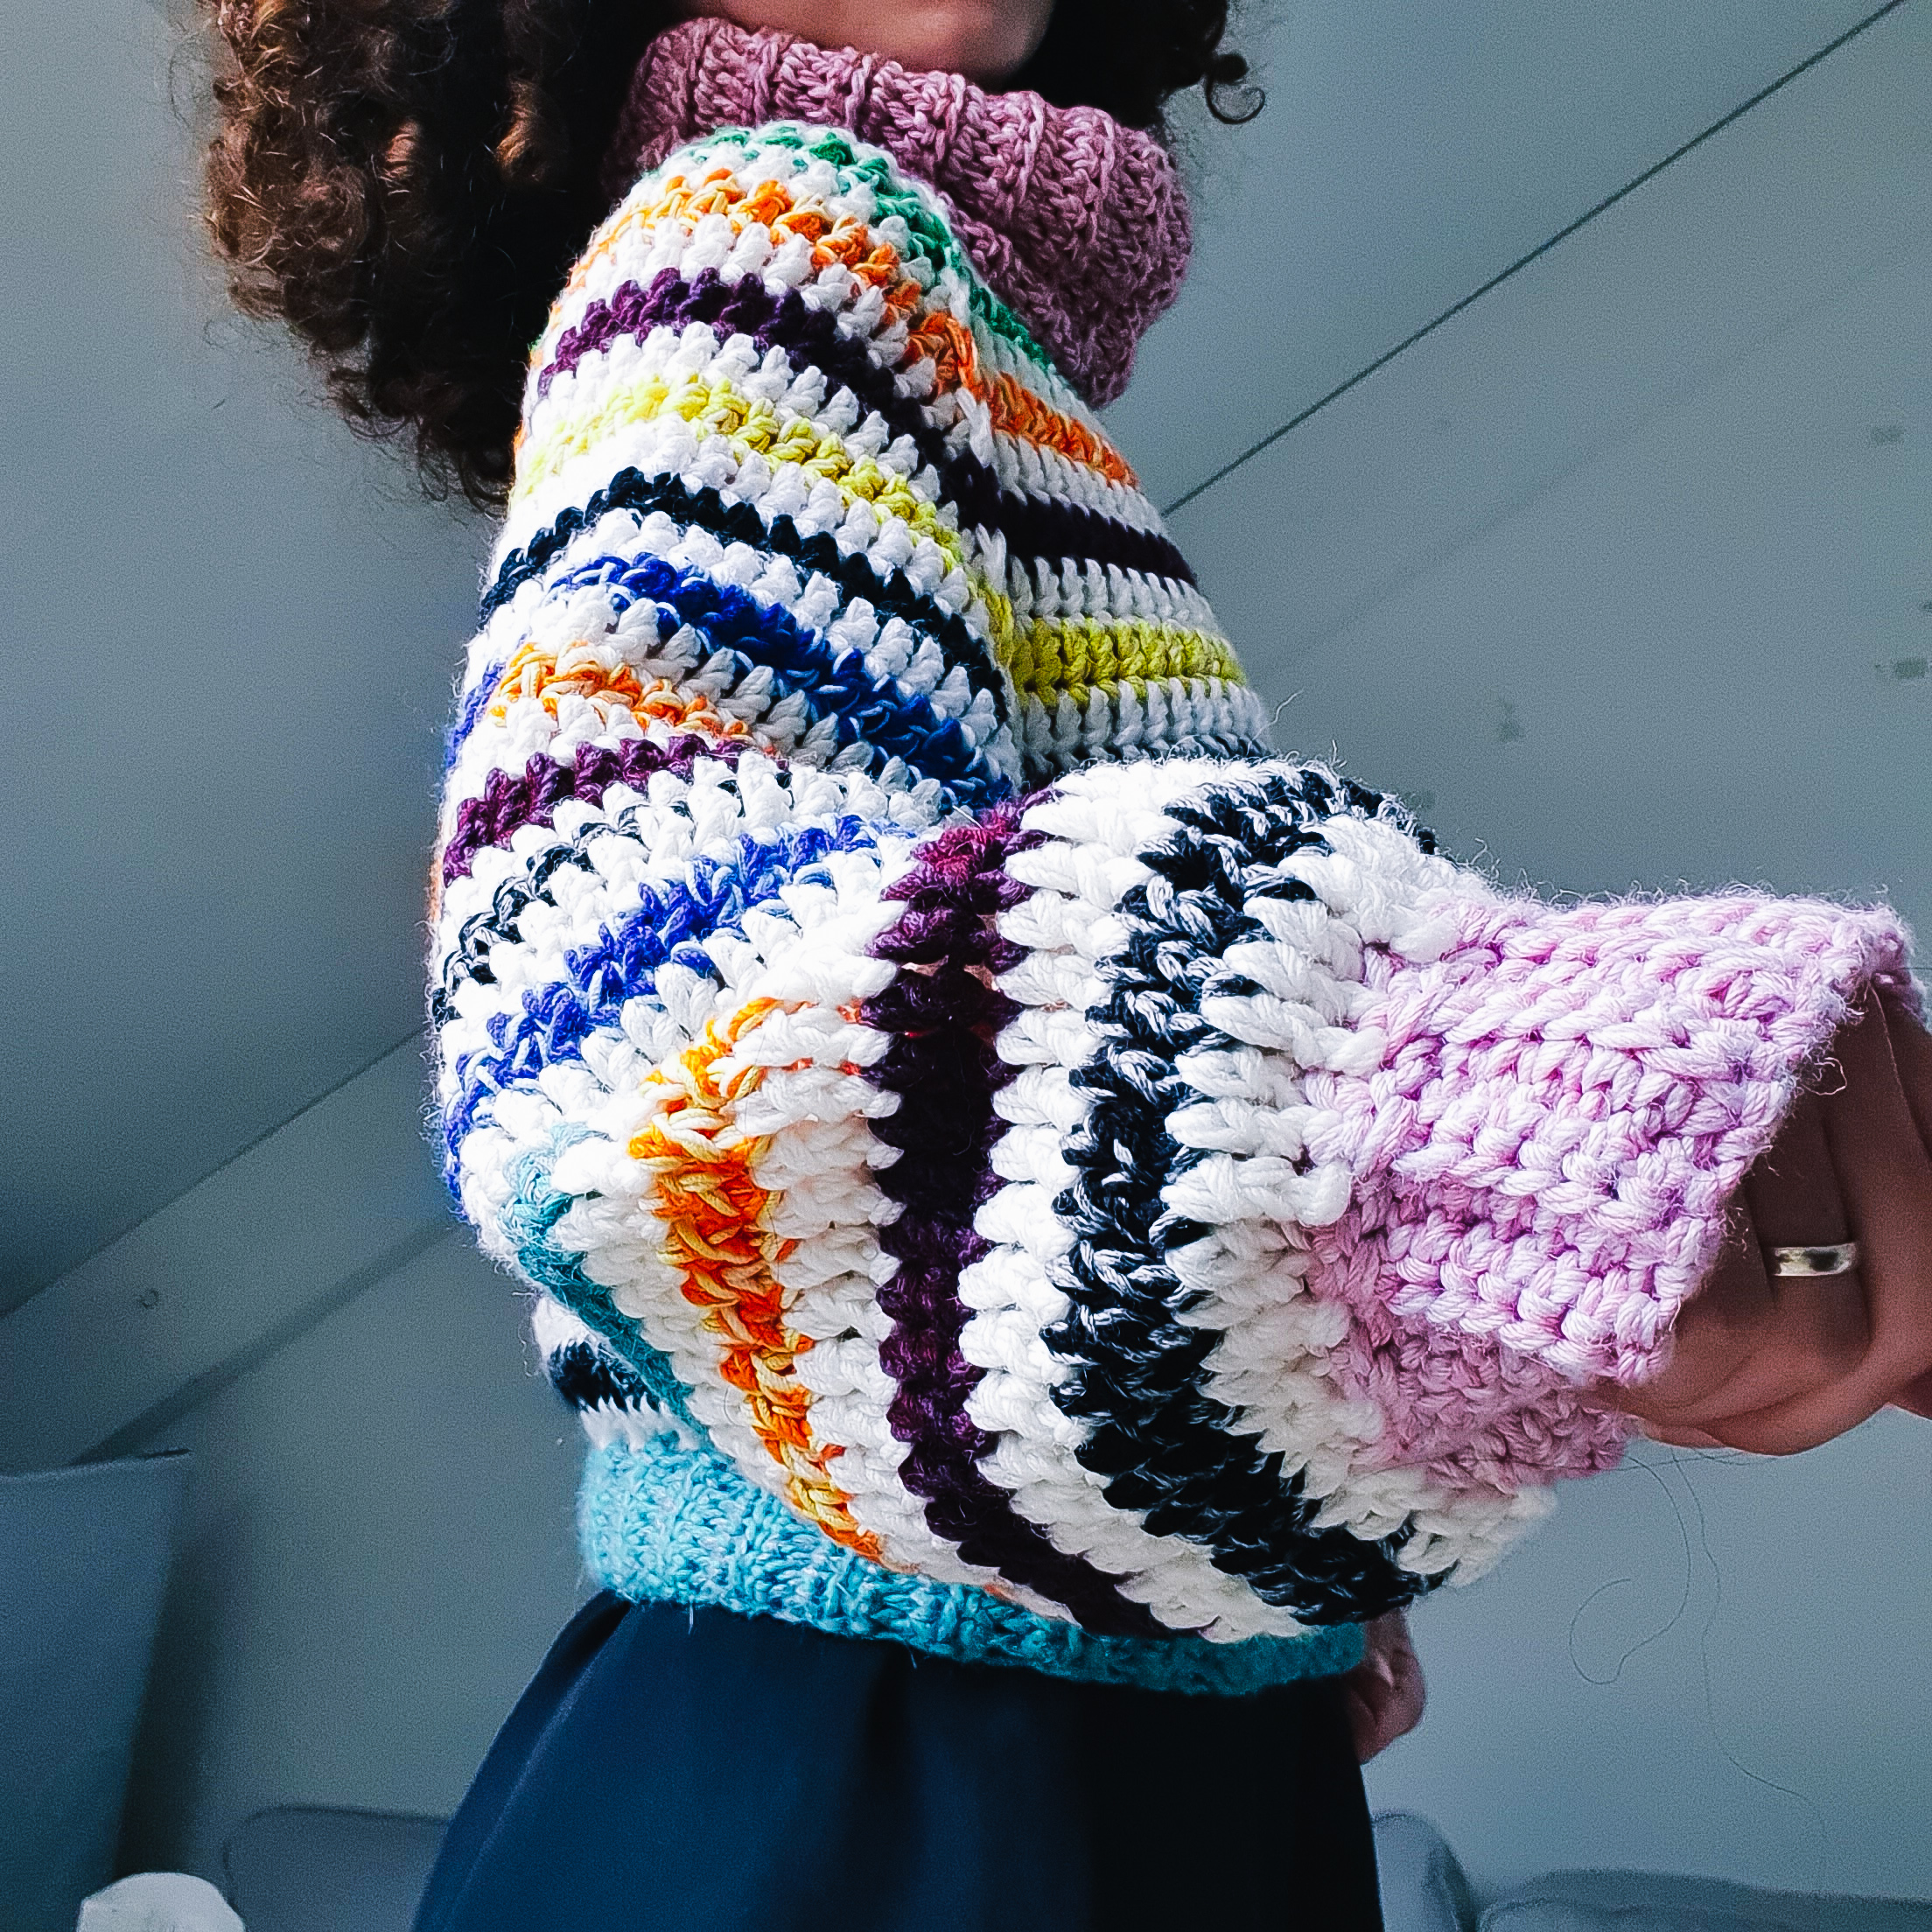
SLEEVES
Start| Rejoin yarn in the middle st at the armpit.
R1| 1 dc in each st around
R2 – R16| Repeat R1
*adjust the length of the sleeve by working more or fewer rounds
To add the cuffs follow, the RIBBING pattern.
You can find a step by step video tutorial here
RIBBING
Notes
Use a 6 mm crochet hook
For the ribbing, some decreases are made when joining the ribbing rows to the bottom hem and sleeves. In case the waist will get to small (you can check measurements in the diagram above) you can make decreases less often than at every join or not make them at all. When you join without making a decrease, instead of a ssdec you will have only a ss into the next st of the hem.
Start| Rejoin yarn in one st along the sleeve/ body circumference and ch 8
R1| starting with the second st, 1 sc in each of the next 7 sts, ssDec (see the Abbreviation section) into the next 2 sts of the hem, 1 ss in next st and turn
R2| 1scblo in all 7 sts, ch 1 and turn.
R3| 1scblo in all 7 sts, ssDec into the next 2 sts of the hem, 1 ss into the next st and turn.
Repeat R2 and R3 until you complete the entire circumference of the sleeve/body.
Stitch the ends using slip stitches.
TO FINISH
Weave in all ends and block to measurements.
And done! The color Bomb Sweater is ready to be worn and you also have cleaned a bit your yarn stash 😁
You can Purchase the easy printable PDF version of this pattern here:


2 Comments
Such a smart idea! I have so much yarn I’m not sure what to do with, this seems like a sweet project!!!
Do you have a suggestion for starting chains if I would make this for a toddler (age 2-4)? I already started one of your hobbii sweaters for my eldest of 4 😉
Thank you so much for all your great designs Catalina! XOXO Nienke
Hi Nienke,
I am so happy you like it. The ribbing made for collar stretches. For size Small, the sample the collar has 30 cm, and fits my head wit no problems (48 cm). So you can go somewhere around 20 cm and should be fine.
Or better to measure one shirt or sweater and see exactly the circumference for the neckline. For 20 cm and calculated at my gauge you will need approximate 14 rows.