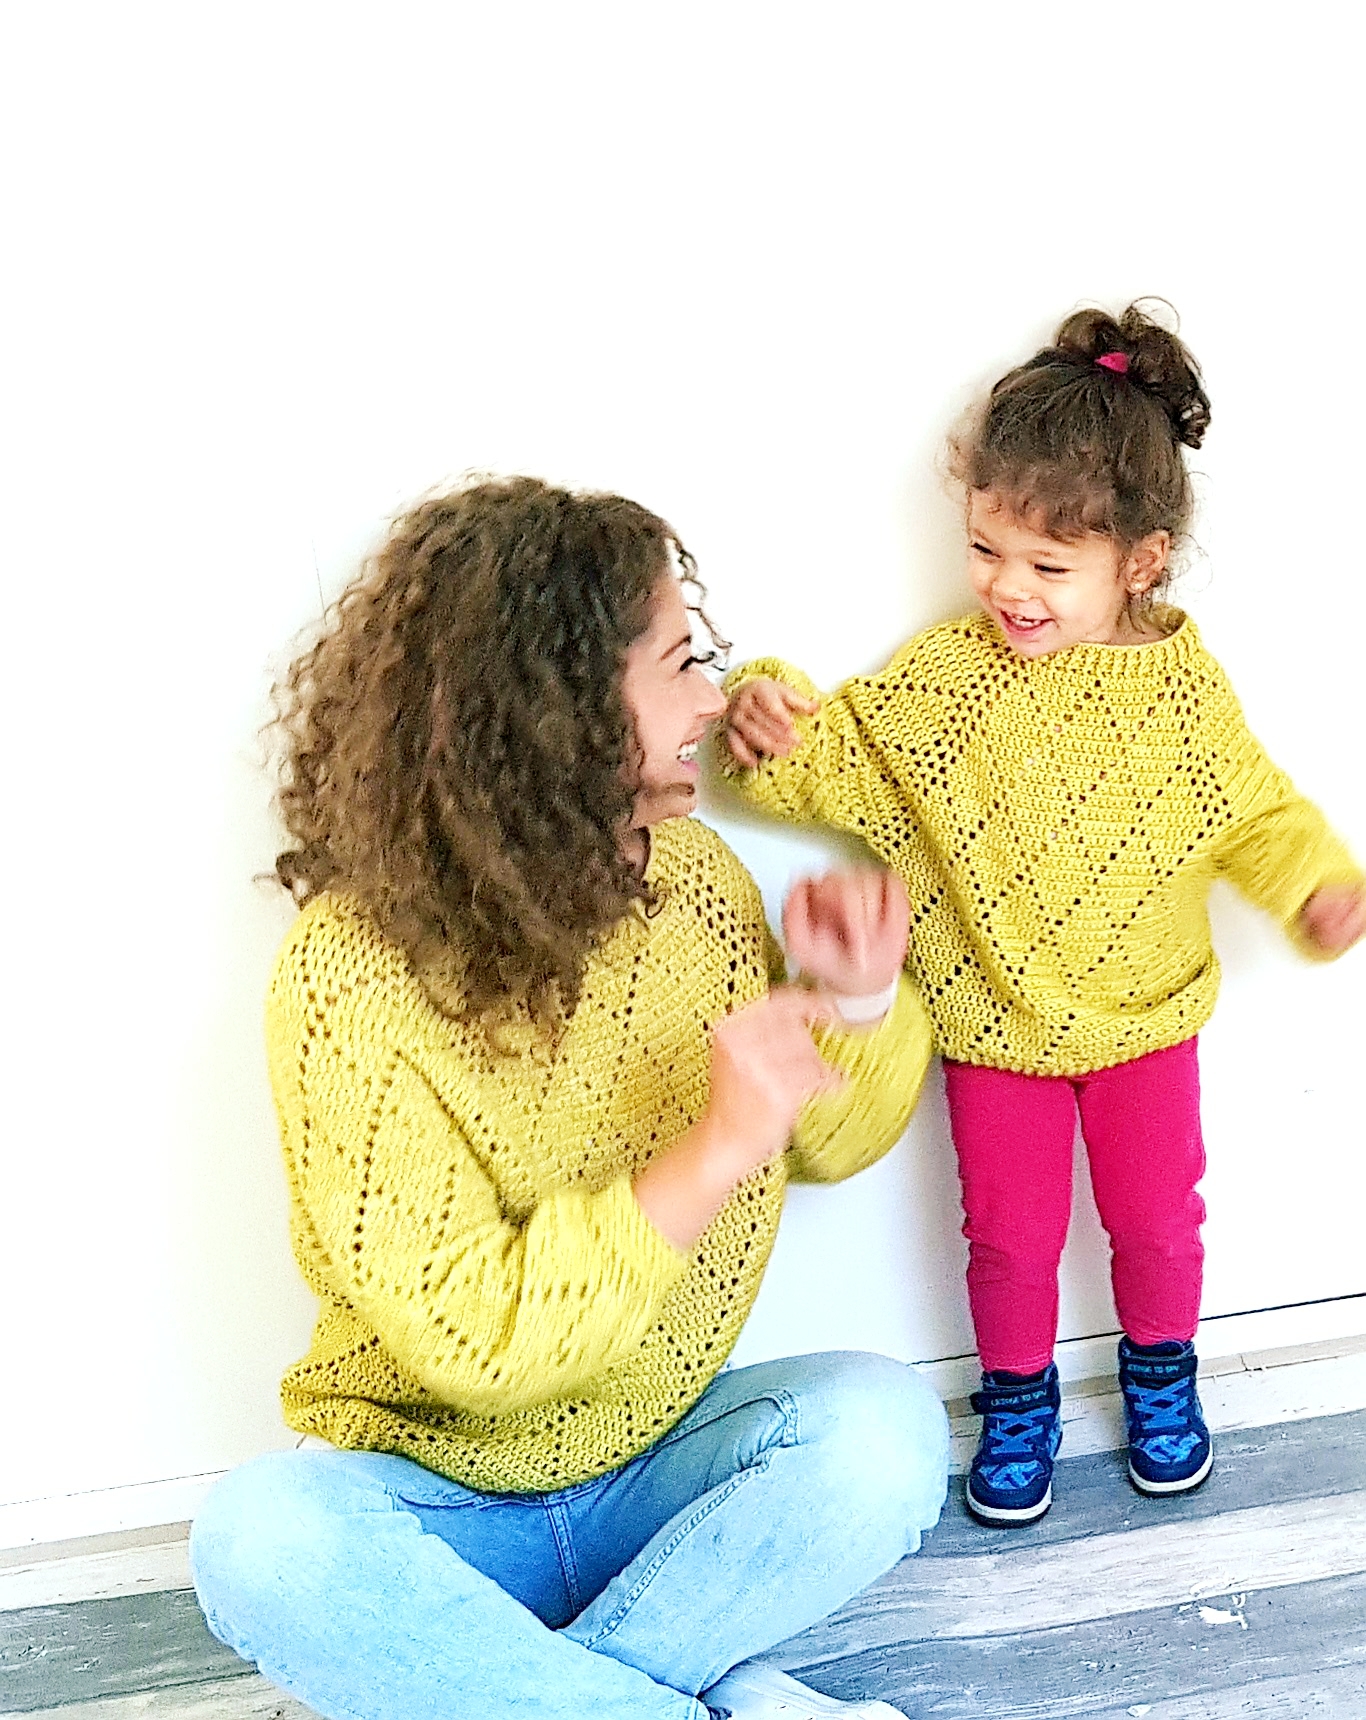
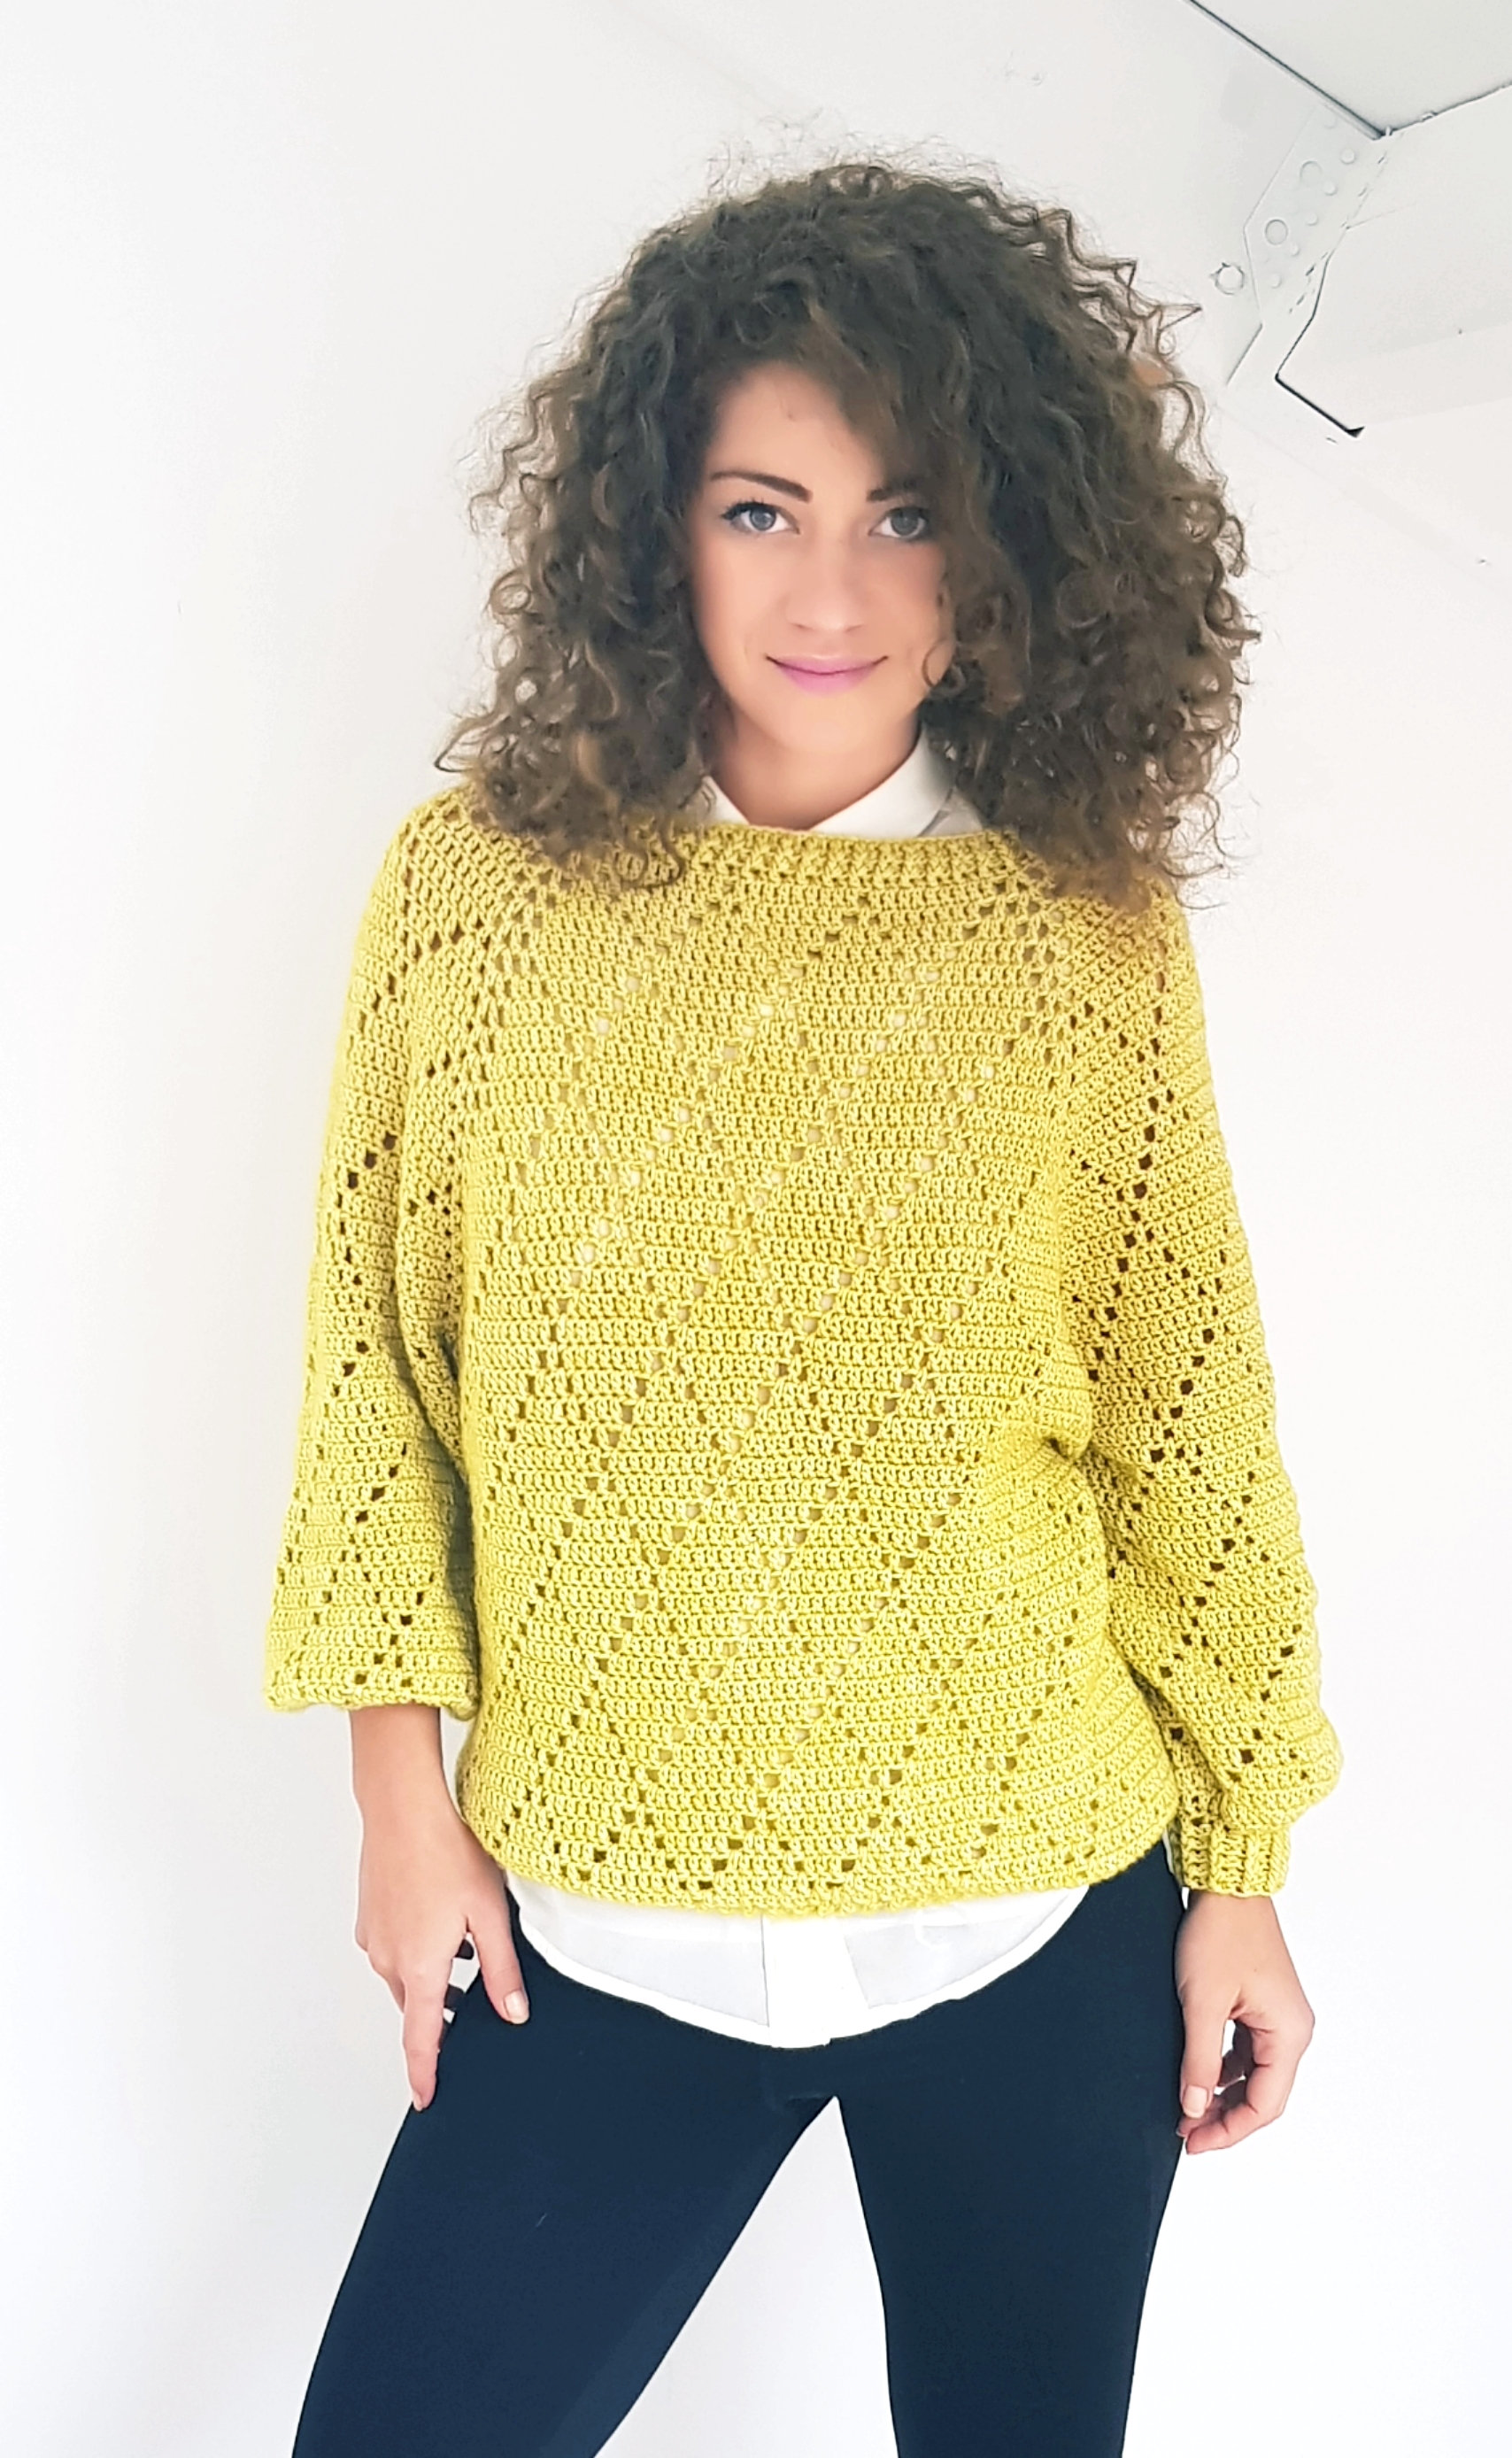
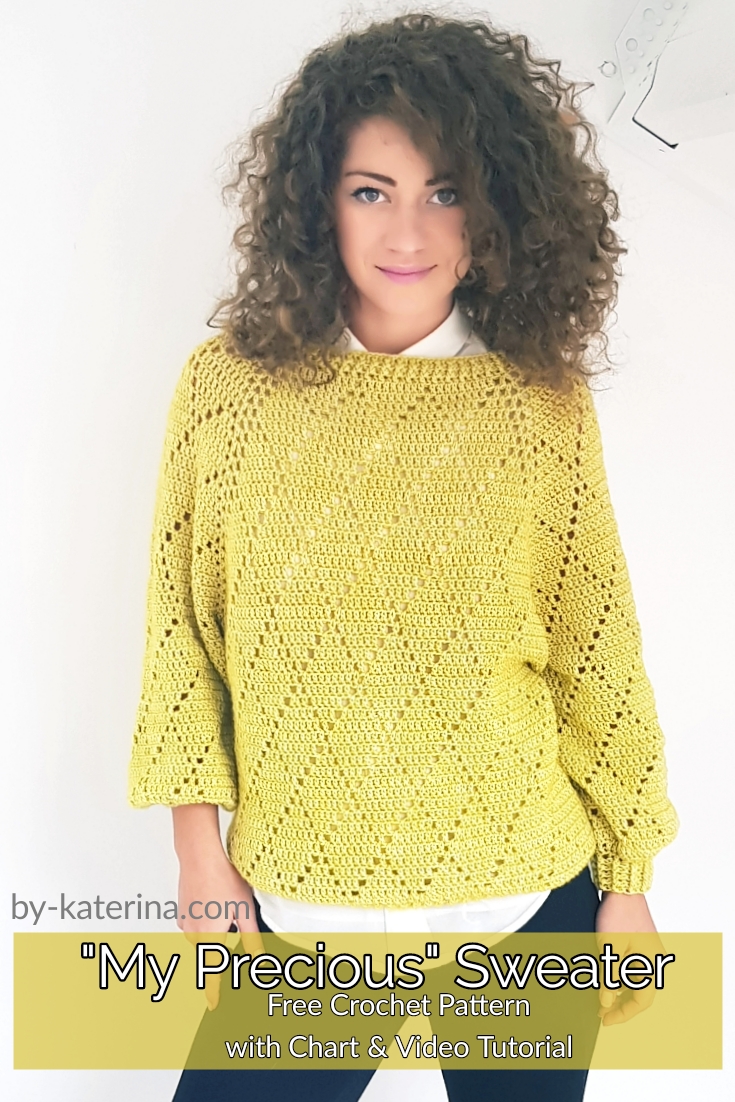
“My precious” Sweater is the crochet project that I love the most.
Is so comfy and stylish and looks amazing. I am in love with it and since it was finished it’s my favorite item in my wardrobe.
Pentru postarea in limba romana, click aici

You can Purchase the easily printable PDF version of this pattern here:
I had to tell you from the beginning and encourage you to try to make this beautiful sweater because even if the written pattern might be long and maybe at first it will look difficult to make, is very easy.
After a few rounds, you will learn the stitch pattern and you’ll be able to make this sweater without even looking at the pattern.
About the design
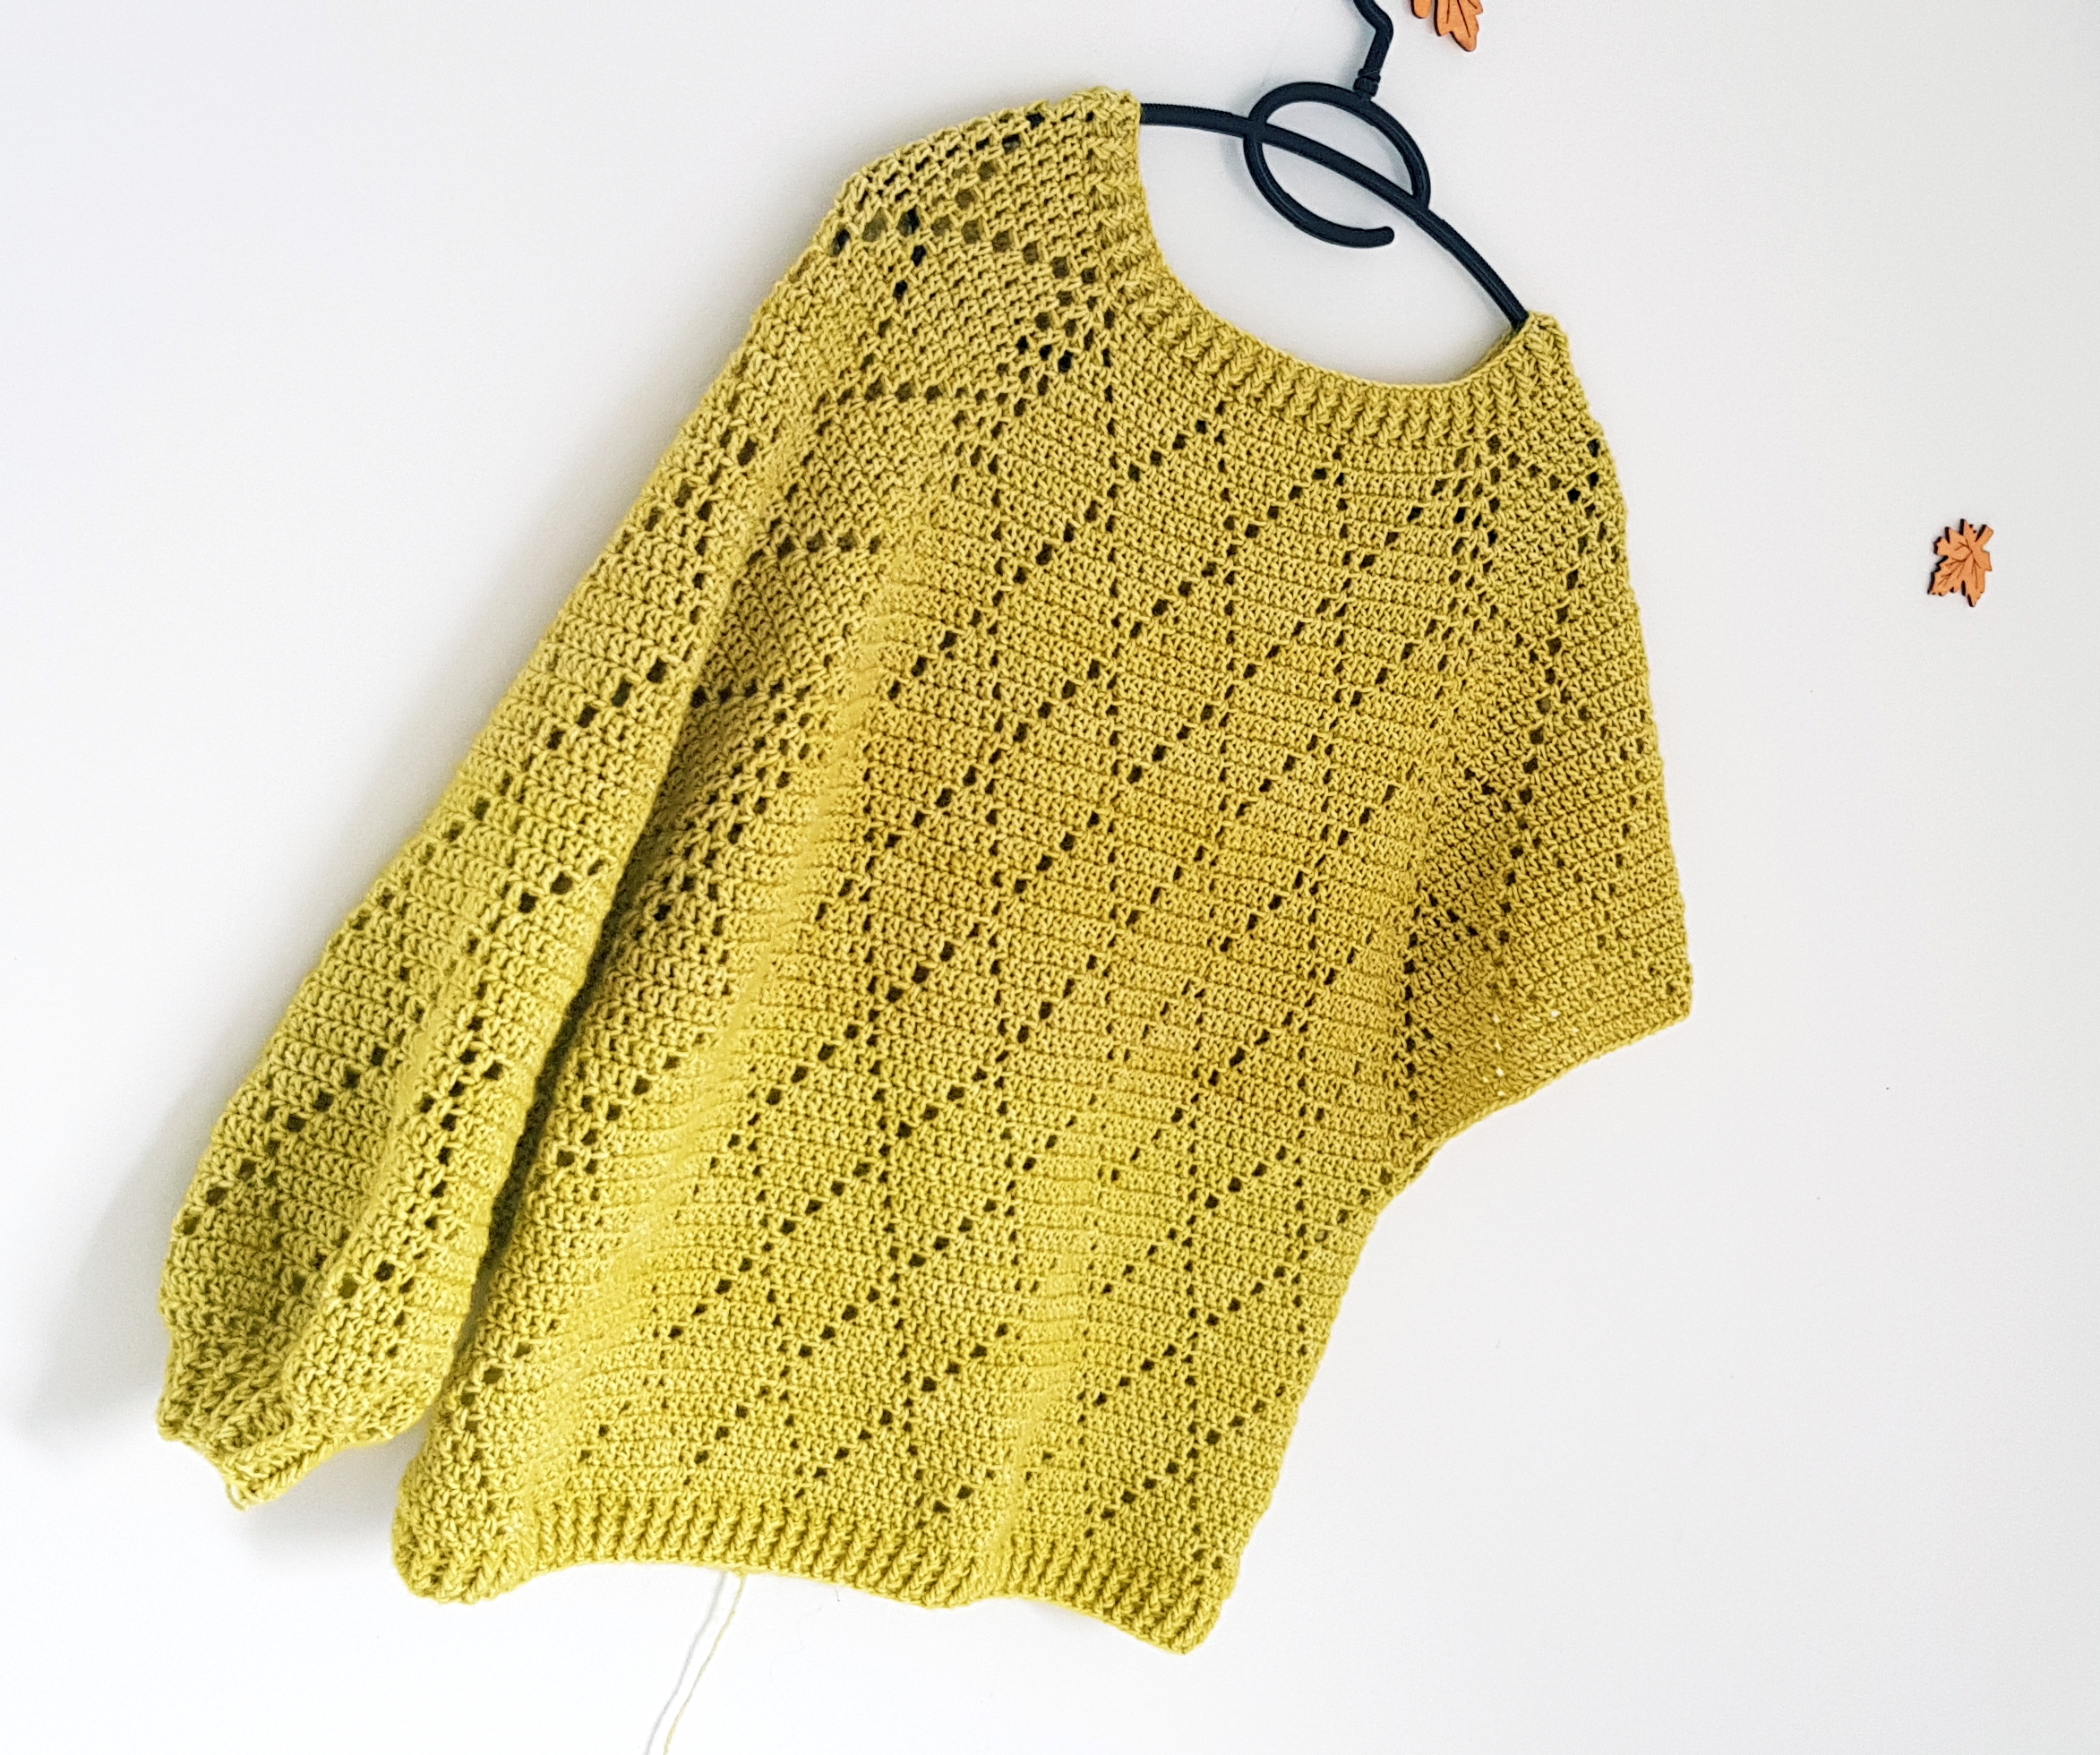
“My precious” sweater is a top-down sweater made with the Raglan technique. The yoke is worked longer than is usually worked on Raglan sweaters and this is because I wanted to make it oversized.
First, we are working the yoke, and then we will separate the sleeves from the body of the sweater and we will work the 3 parts individually.
The sweater has no seams. You will use the needle only to wave in the few ends that you will have after finishing the sweater.
Like I said My precious Sweater is an oversized sweater, with a positive ease of 15 cm (9″). If you want your sweater to be smaller you can choose to make a smaller size.
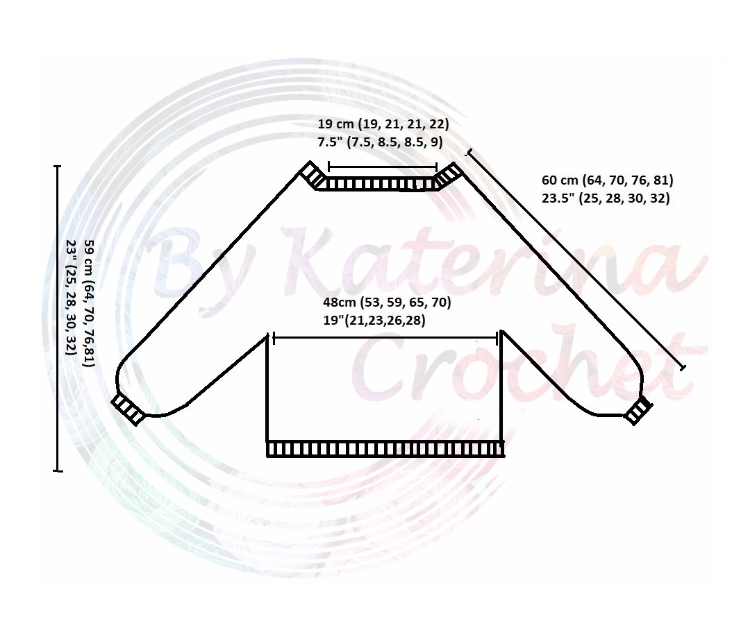
Below you will find the sketch with the final measurements.

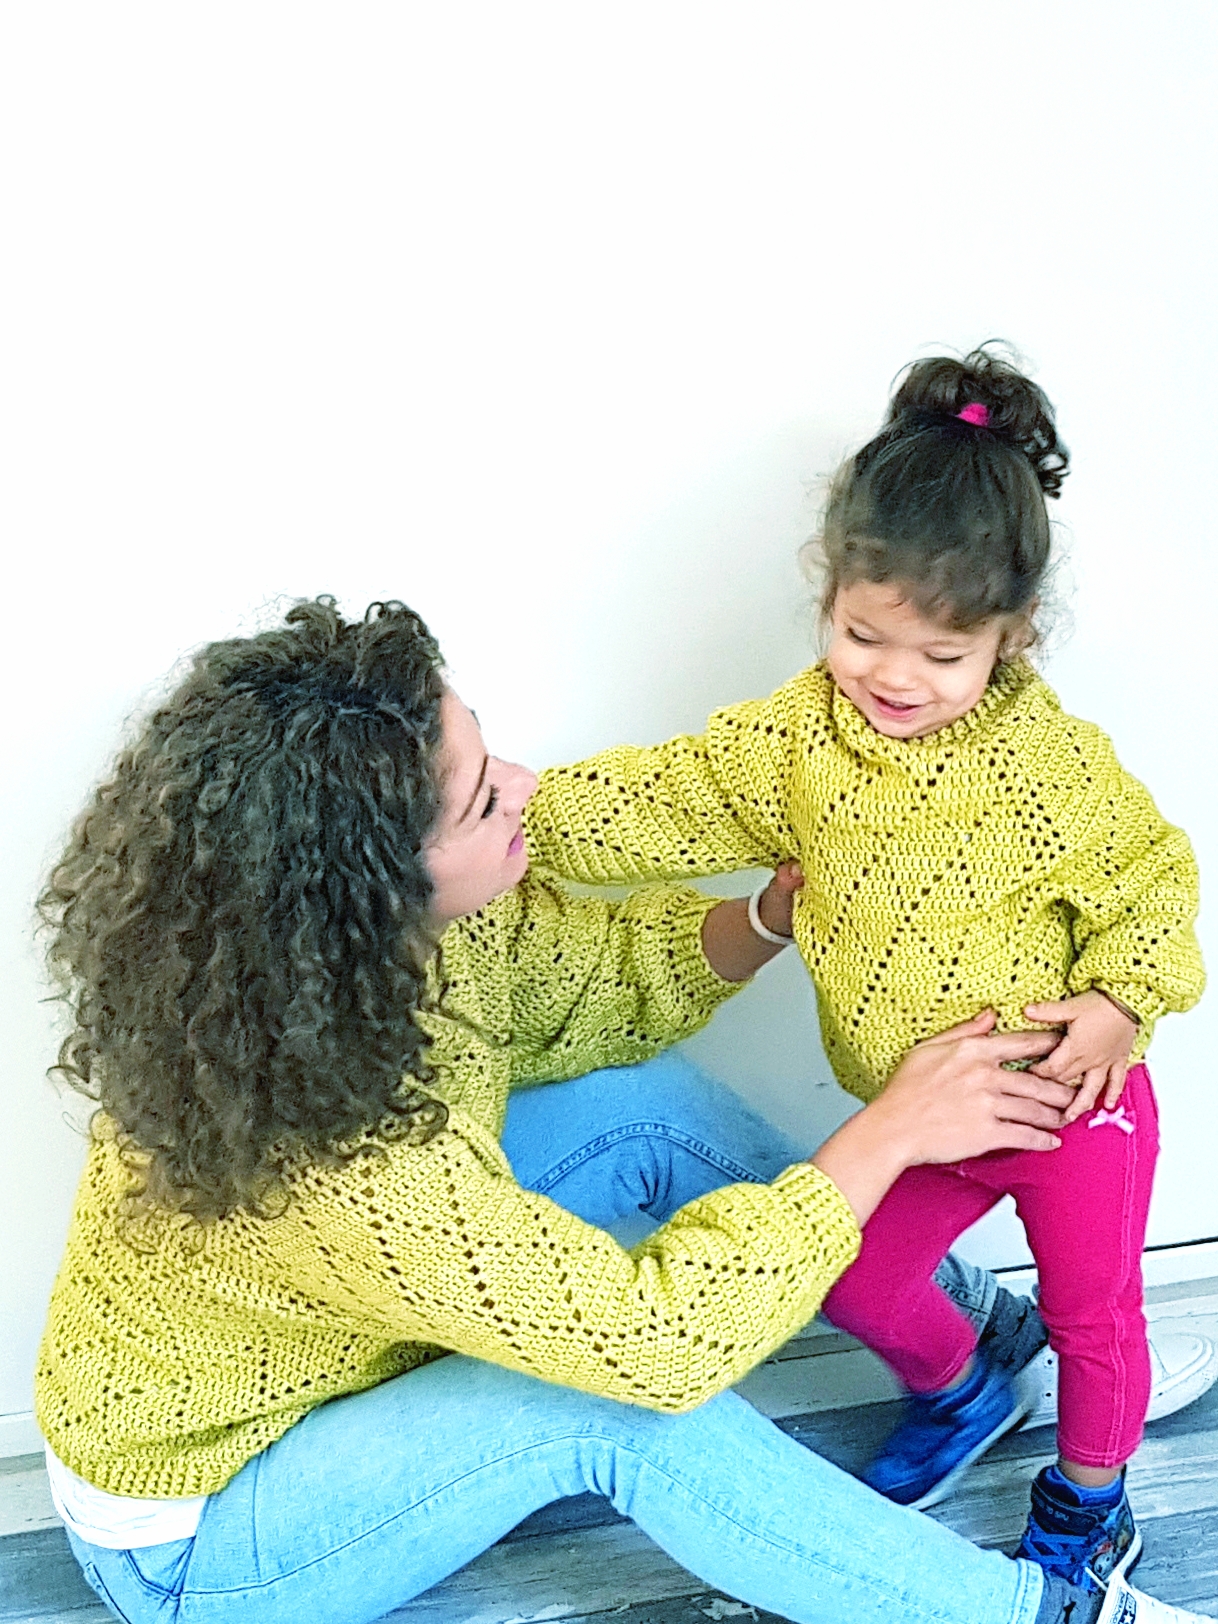
I just love this sweater so much and I hope you will too. I made one for my daughter also ??
 About materials, you will need
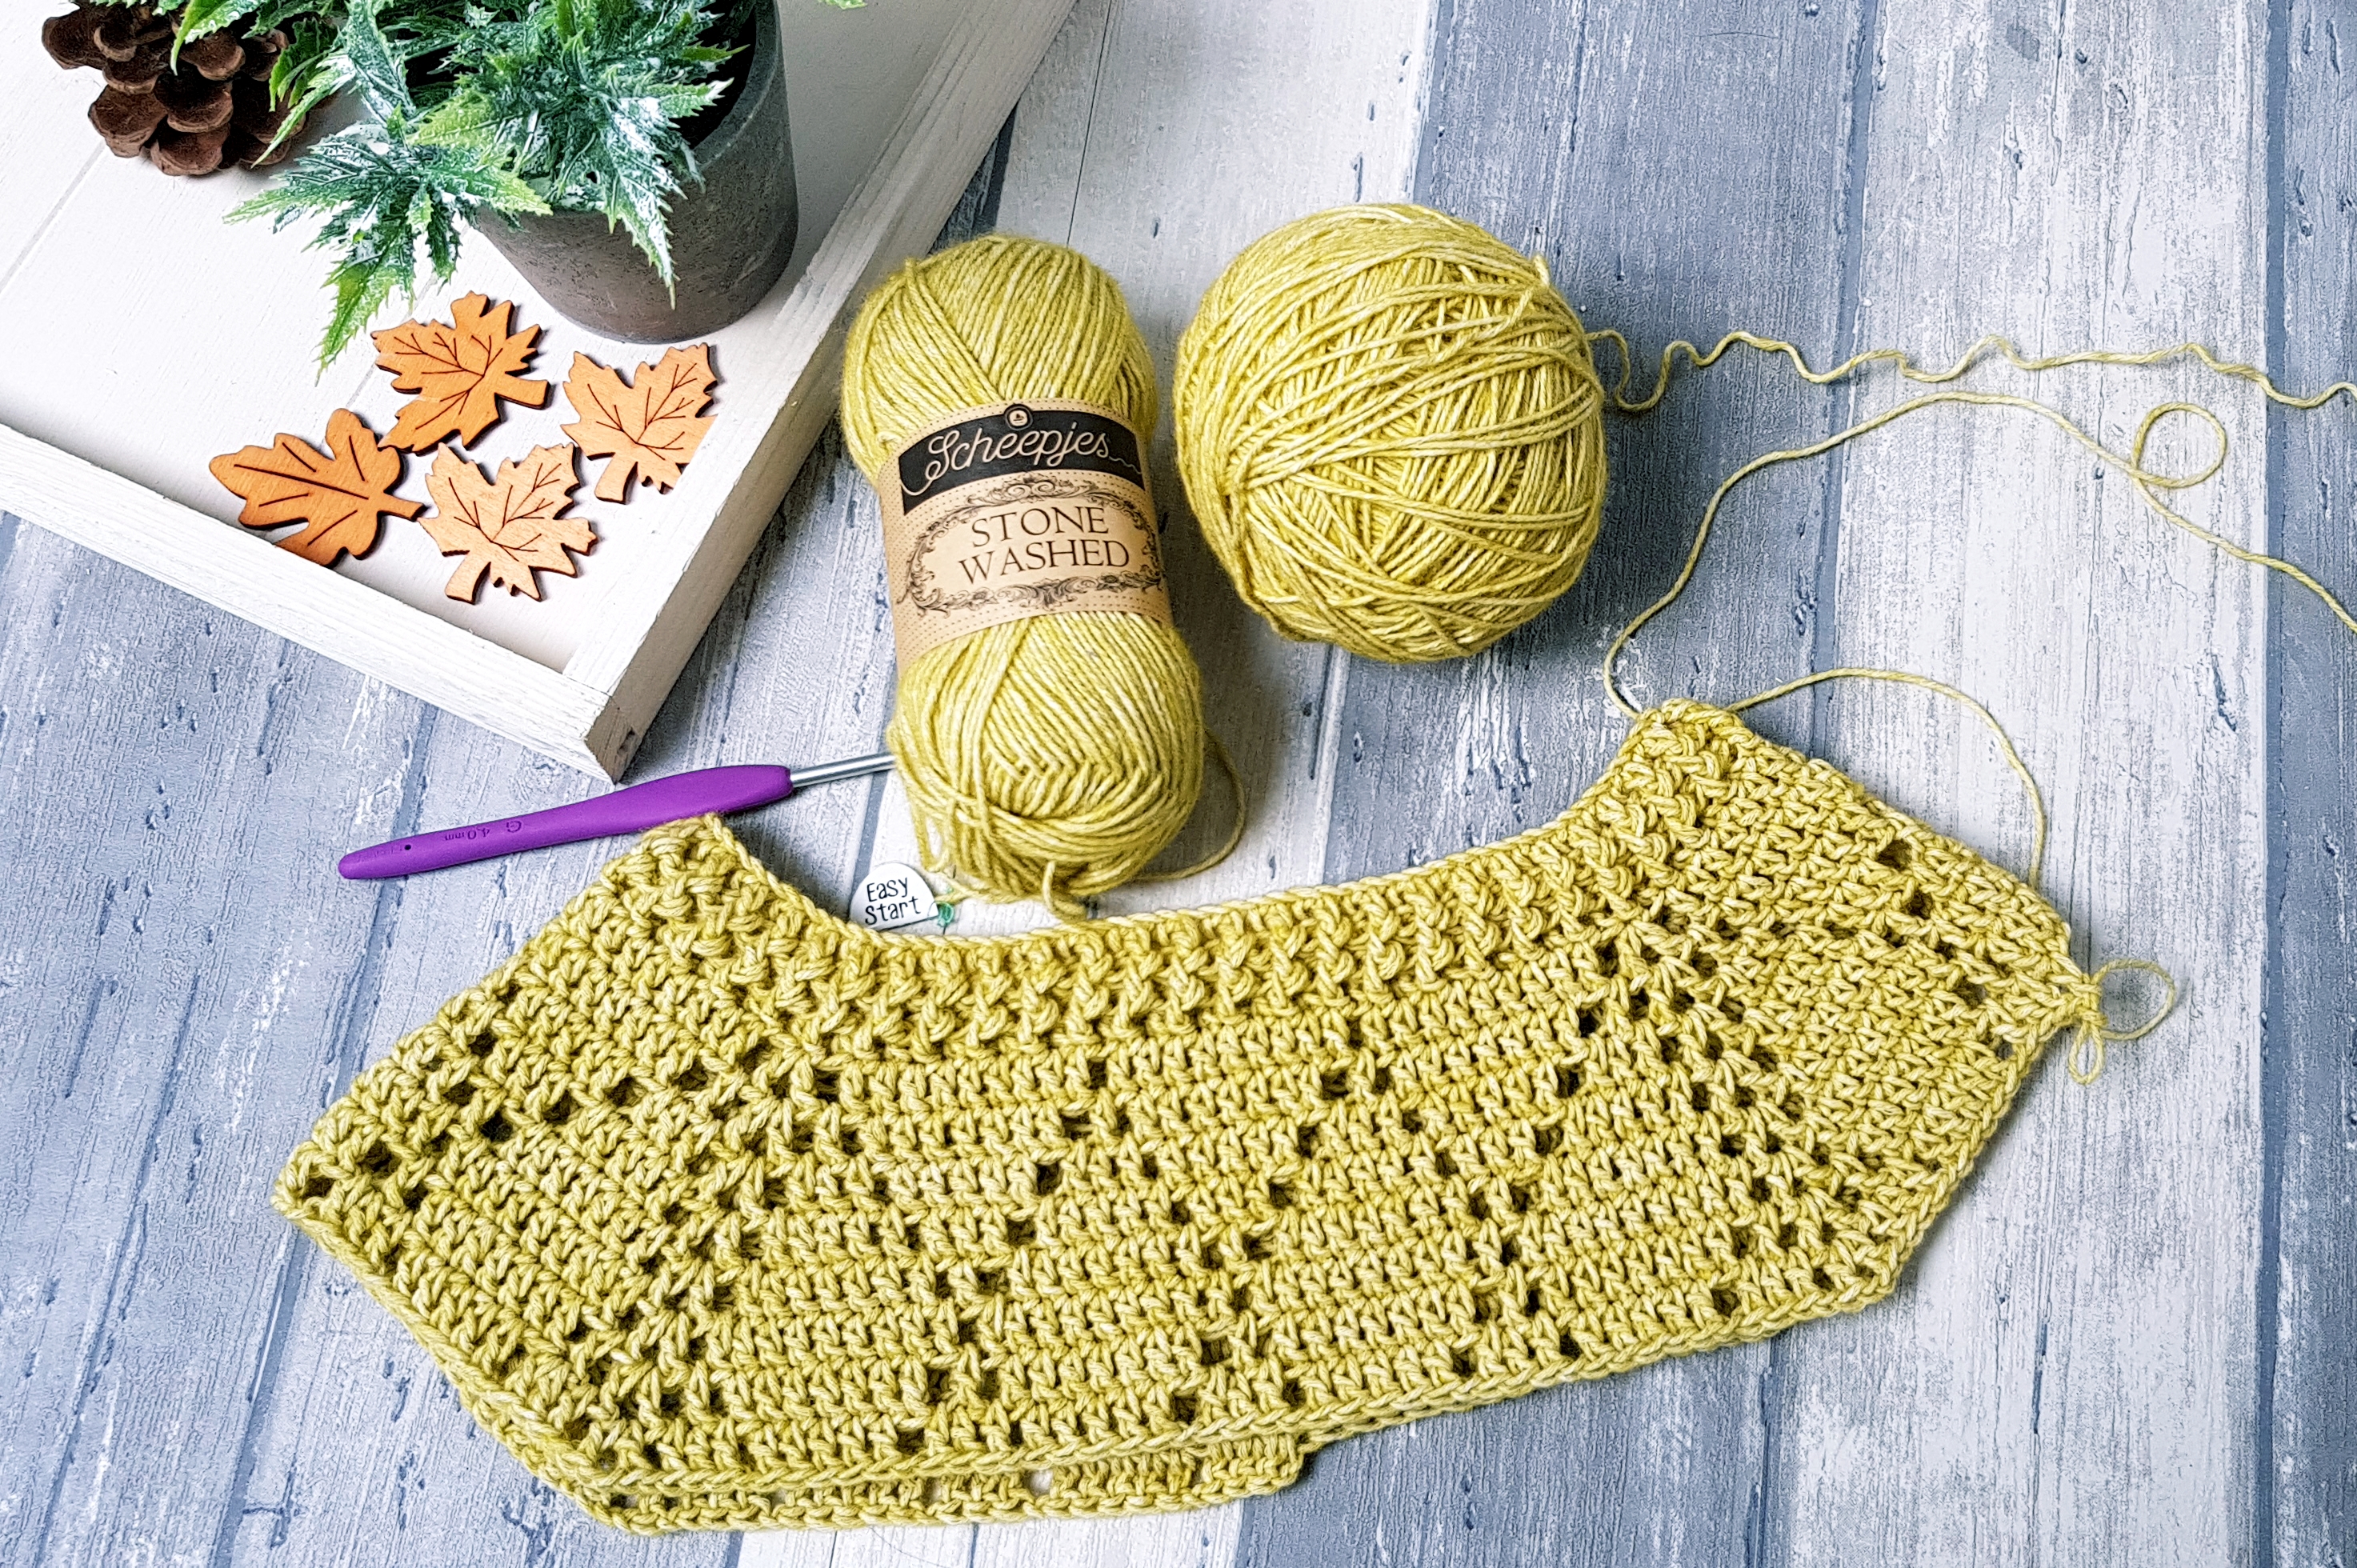
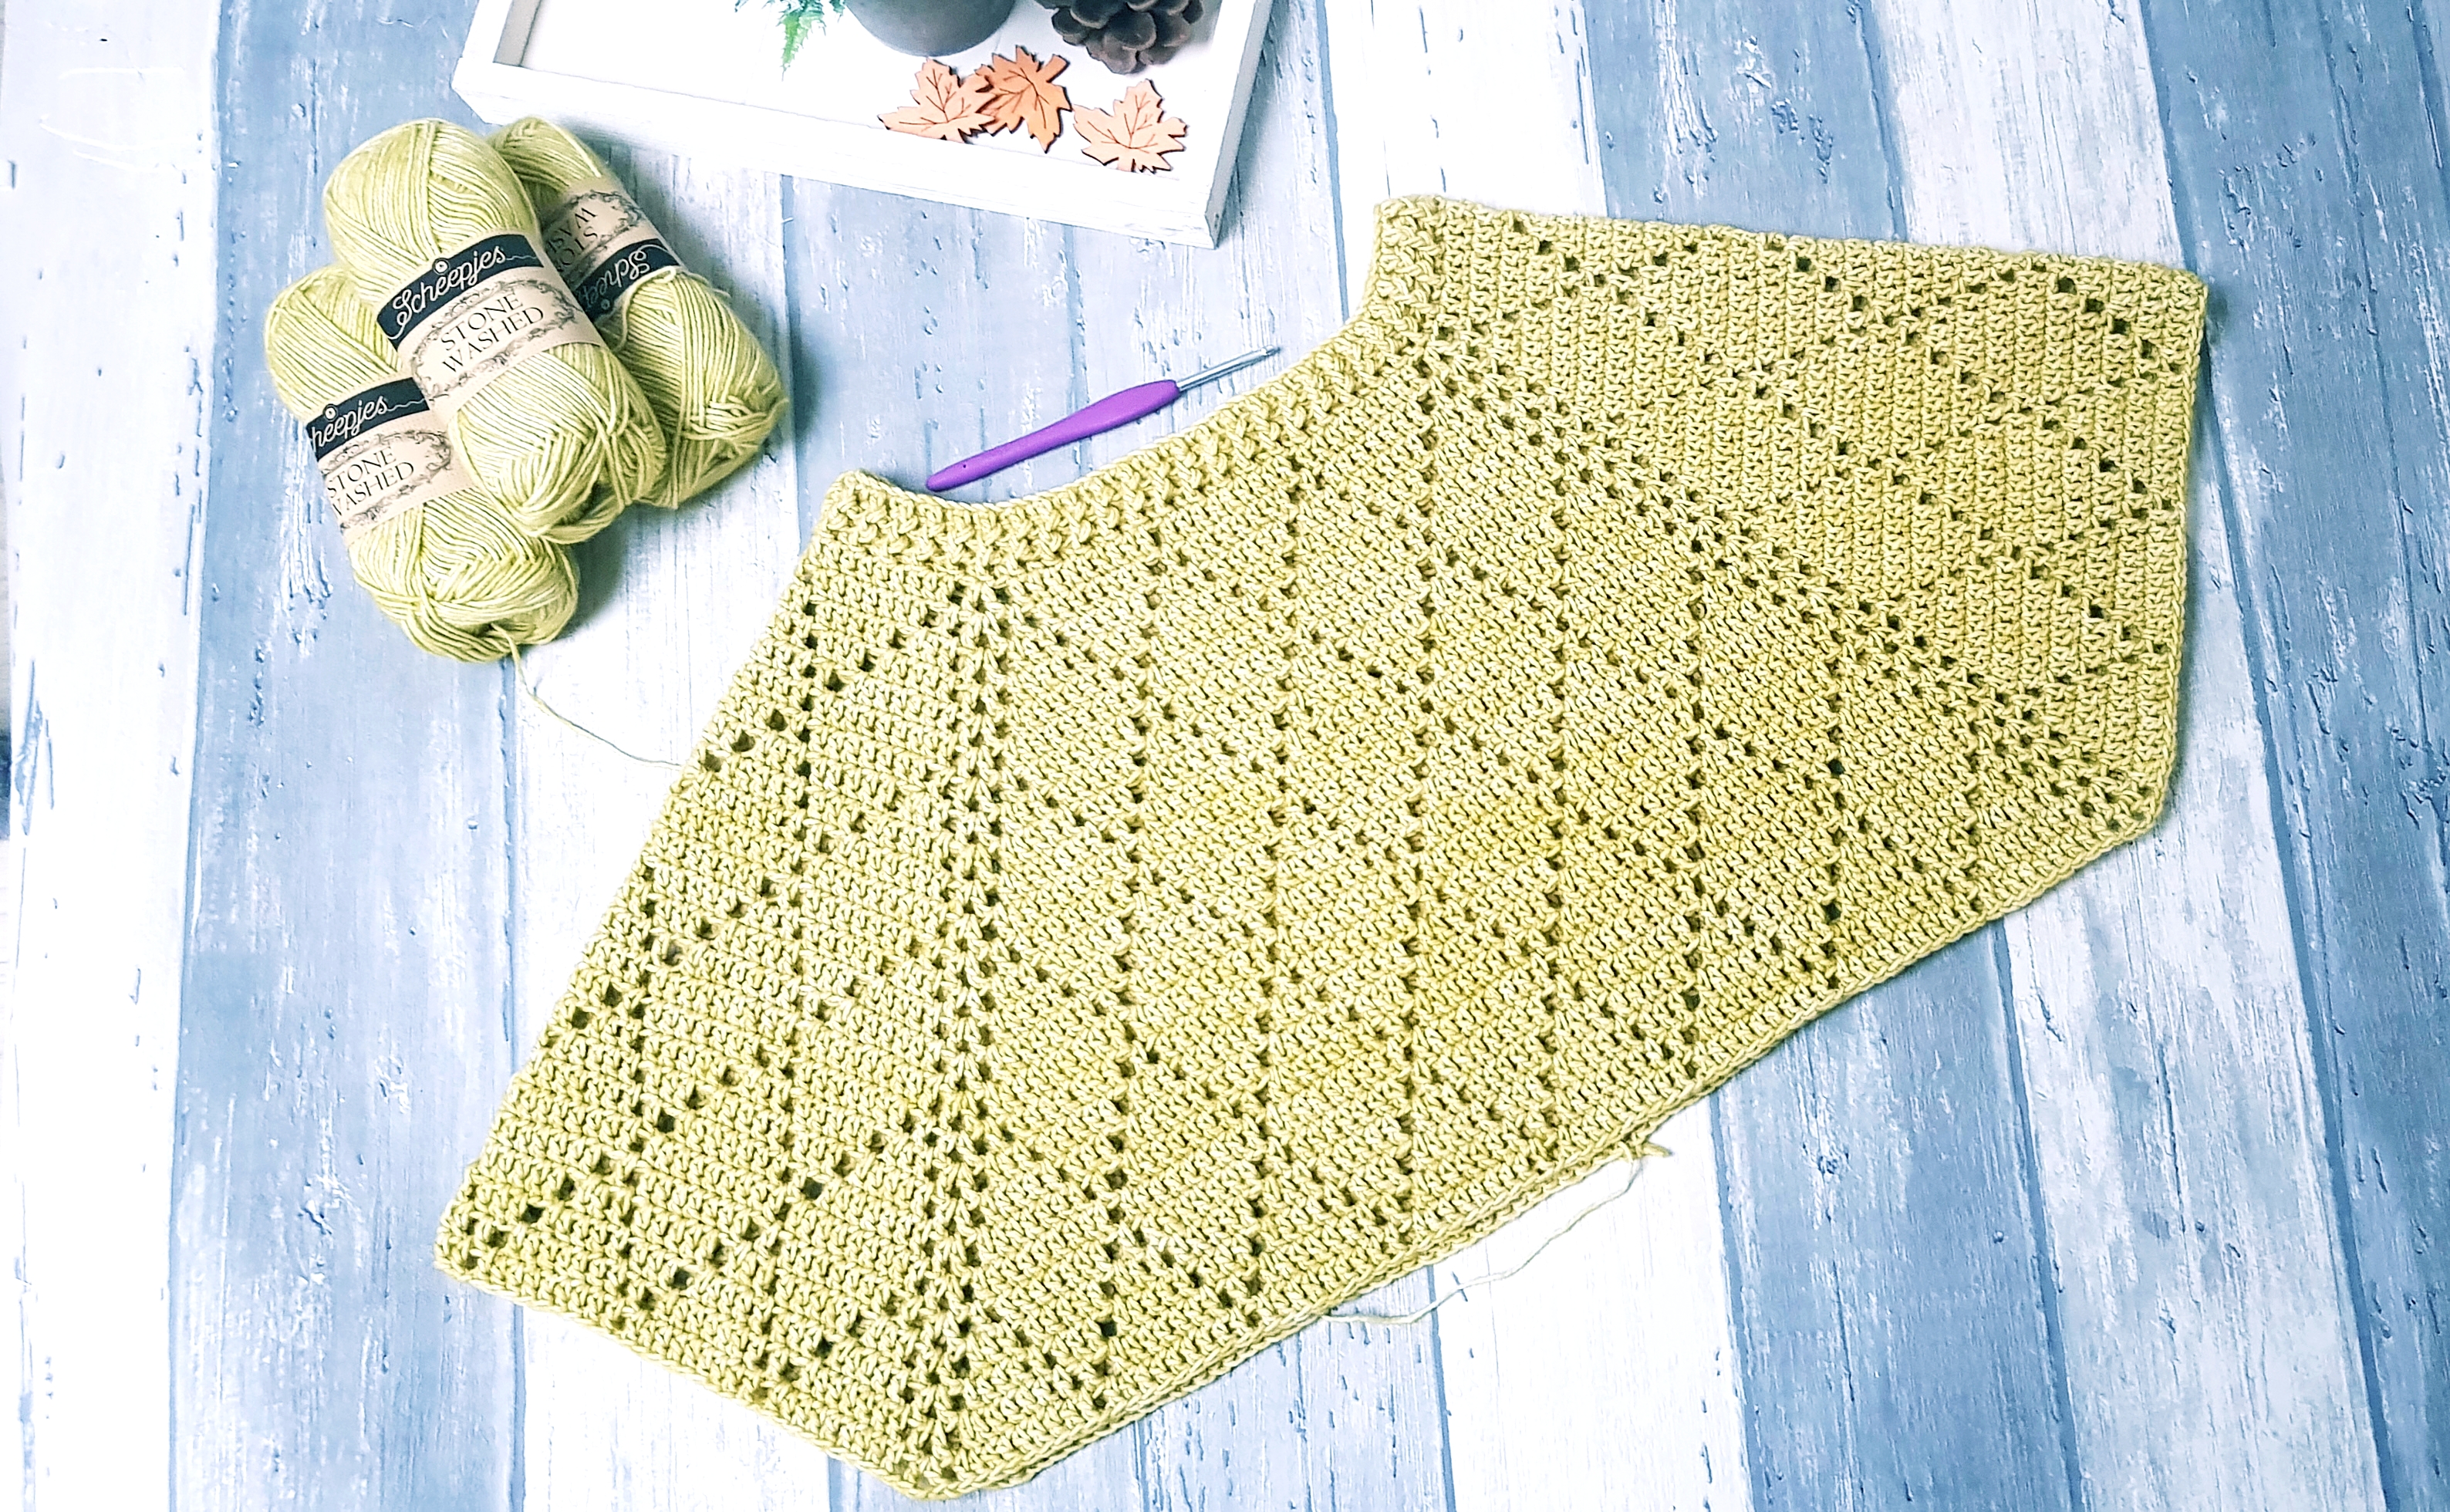
- I used for this sweater Scheepjes Stone Washed in color Lemon Quartz. Is a 5 ply, weight 2 ( fine) yarn. Is a combination of cotton and acrylic. One skein has 50 grams and 130 m (140 yds)
- 3.5 mm and 4 mm (G) crochet hook (3.5 mm for the ribbed band, 4 mm (G) for the rest)
- needle for weaving ends
- scissors
For each size you will approximate need:
S- 450 grams/1170 m/1275 yds
M – 490 grams/1260 m / 1370 yds
L – 520 grams/1350 m/1470 yds
X Large – 560 grams/1450m/1580 yds
2X Large – 590 grams/1520m/1650 yds
Abbreviations used in this pattern
Ch – chain
Sc – single crochet
Dc – double crochet
St(s) – stitch(es)
FPDc – front post dc
BPDc – back post dc
Sl st – slip stitch
Inc – increase ( 1 dc, ch 2, 1 dc)
Gauge
17 dc = 10 cm (4″)
9 rows = 10 cm (4″)
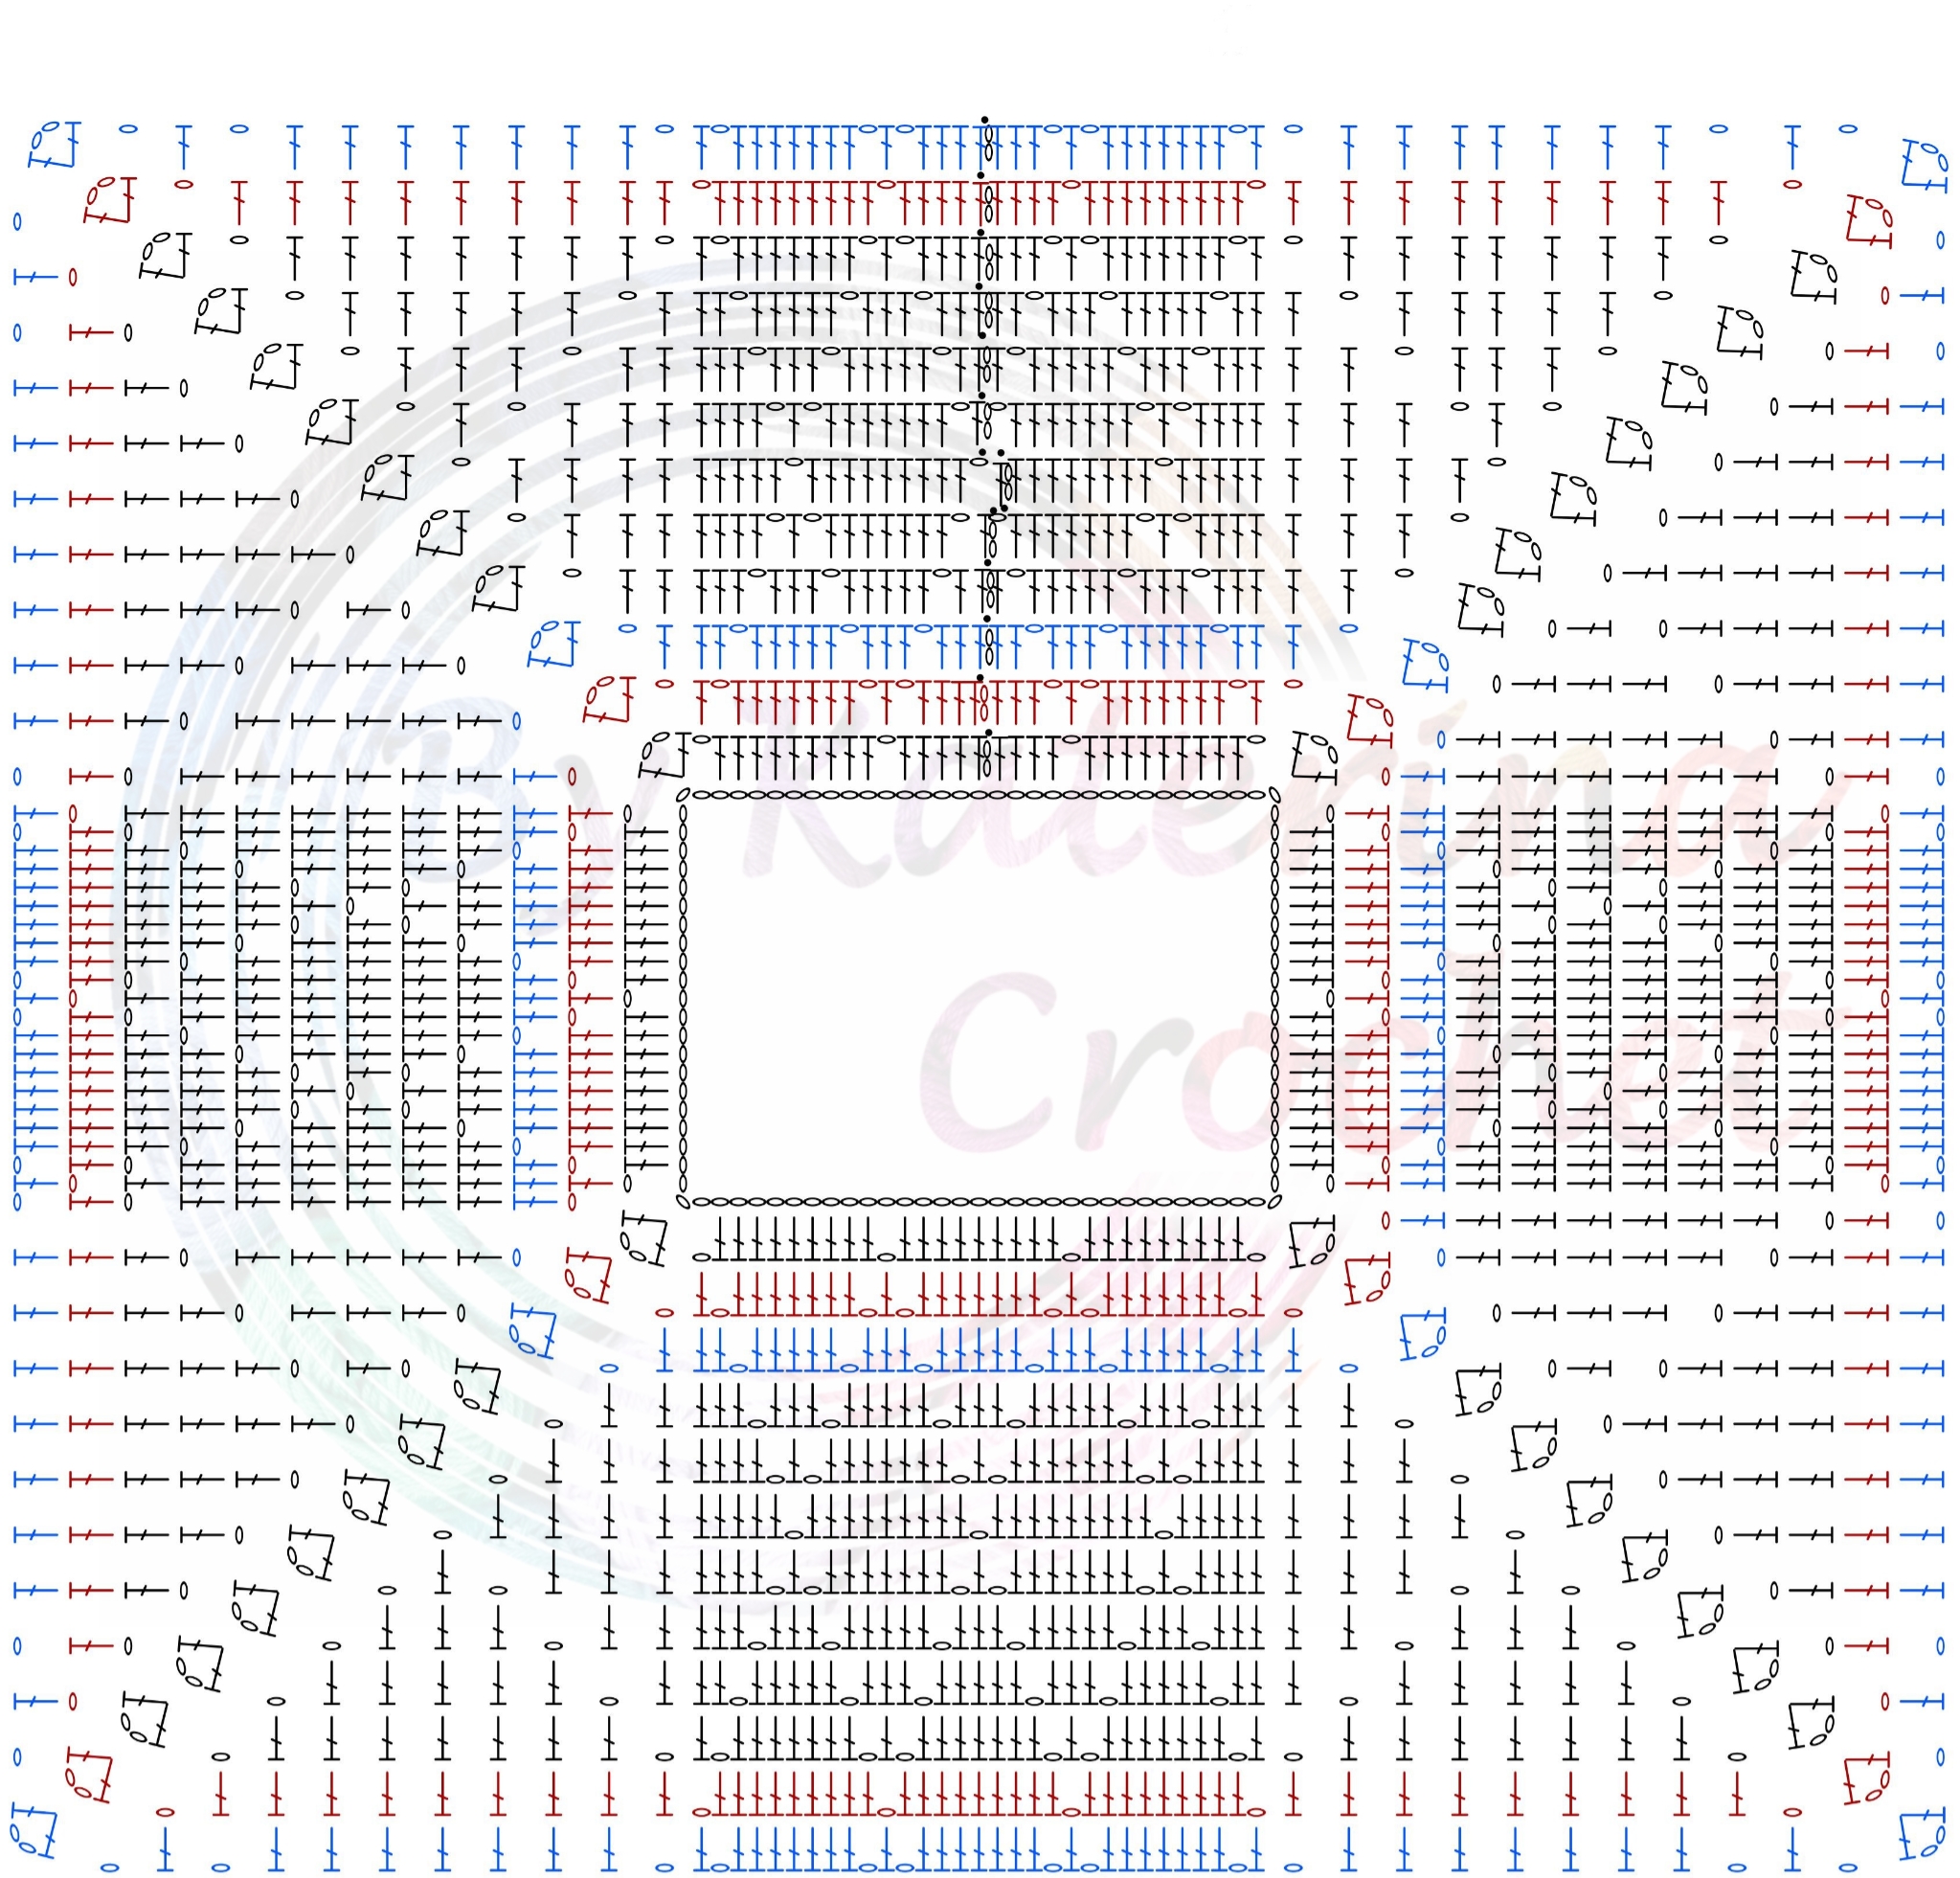
The stitch that I used for “My Precious” Sweater is the Diamonds Stitch. Maybe you saw this stitch in many other projects and maybe you made it before.
This time we will work this stitch in rounds.
Below you will see the stitch chart with the yoke start.
You can Purchase the easily printable PDF version of this pattern here:
With all these being said I think we are ready to start.
The pattern is for sizes from Small to 2X Large and is written in US terms.
We will start with the foundation chain.
S – 108 sts
M – 108 sts
L – 116 sts
X Large – 116 sts
2X Large – 124 sts.
Join the ends with aansl st
We will first make a ribbed band.
Band Round 1
for all sizes
Ch 3, 1 dc in each stitch around. Sl st with the 3rd st of the starting chain
Band Round 2
Ch 3, [1 FPDc, 1 BPDc in next]. Repeat to the end of the round. Sl st with the 3rd stitch of the starting ch.
Band Rounds 3 – 4
Repeat round 2
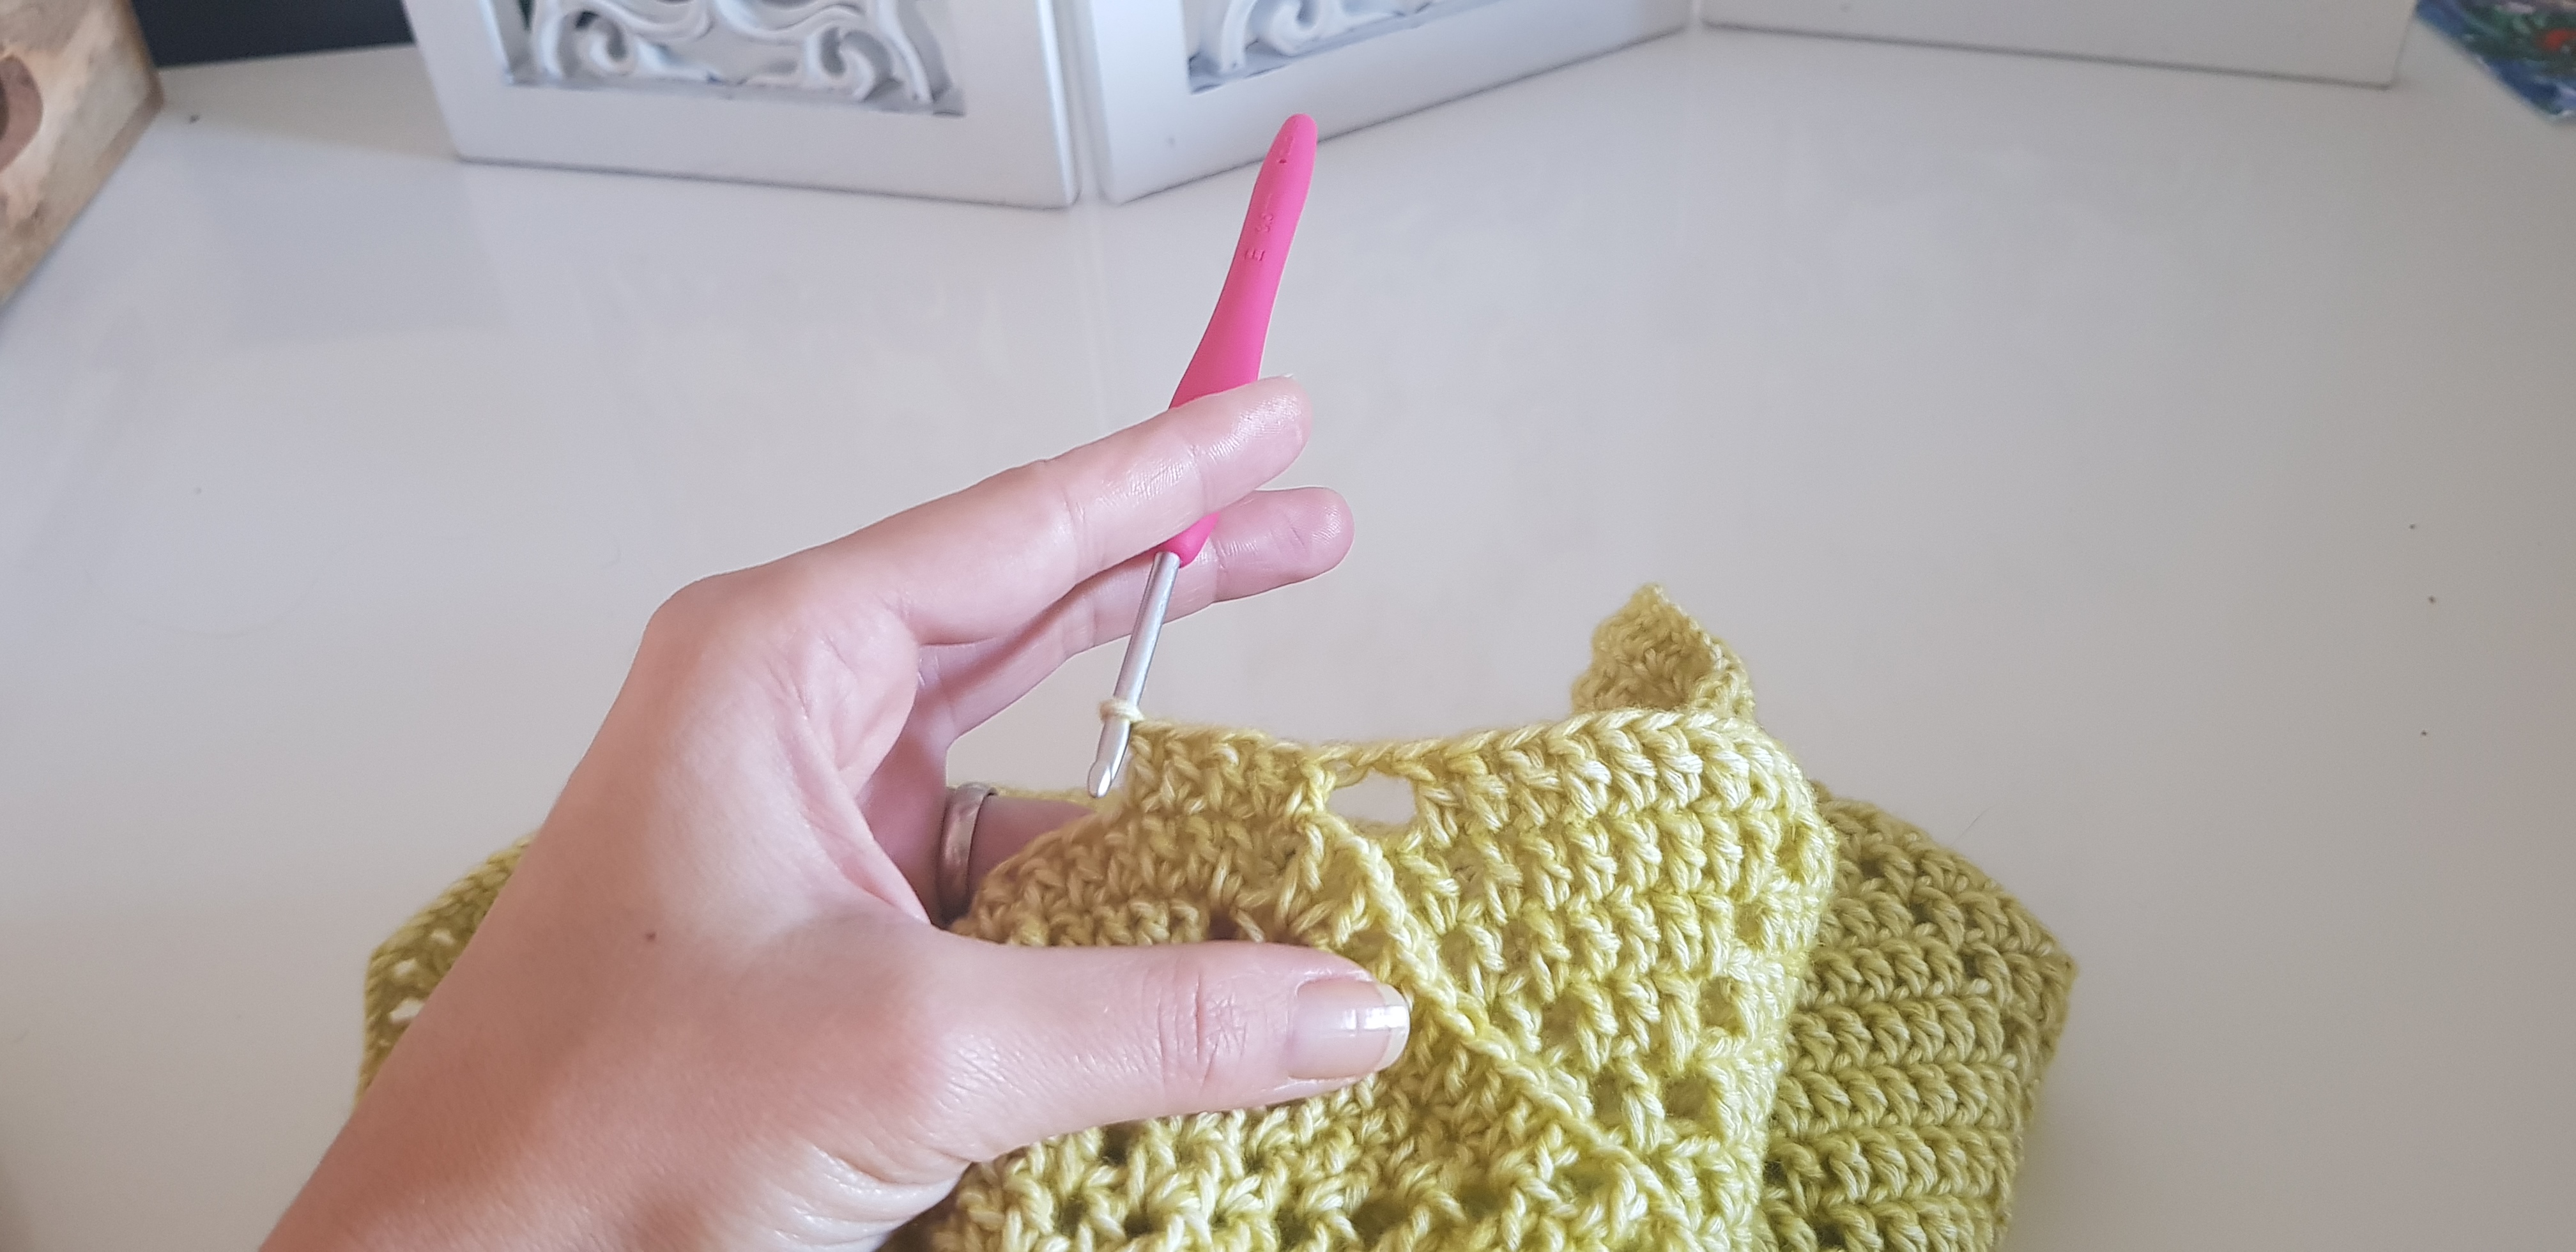
After finishing the ribbed band we will start with the diamond stitch pattern.
We will start to count from 1 again.
At every round, we won’t count the stitches in the corners and before and after the corner you will always have a window ( ch 1, skip 1)
I will write down the pattern for the rounds that are different and then you will have to repeat the pattern until you will get to the end of the yoke
Sizes S, M – start with round 1
Sizes L, X Large – start with round 2 (the red one in the chart)
Size 2X Large – start with round 3 (the blue one)
Round 1
Ch 2 (ch 2 at the beginning of each round doesn’t count as a stitch) 1 dc in the same st, 1 dc in the next 4 sts, ch 1, skip 1, 1 dc in the next 9 sts, ch 1, skip 1, inc. in next ( 1 dc, ch 2, 1 dc).
Continue with the 1st sleeve [ch 1, skip 1, 9 dc] 2 times, ch 1, skip 1 inc.,
Front: [ch 1, skip 1, 9 dc] 3 times, ch 1 skip 1, inc.,
2nd Sleeve: [ch 1, skip 1, 9 dc] 2 times, ch 1, skip 1, inc.,
Complete Back: ch 1, skip 1, 9 dc, ch 1, skip 1, 4 dc, sl st with the first dc.
At the end of the round, you will have 3 sets of 9 dc on the ack and front and 2 sets of 9 dc on sleeves.
Round 2
Ch 2, 1 dc in the same st, 1 dc in next 3 sts, ch 1, skip 1, 1 dc, ch 1,skip 1, 7 dc, ch 1, skip 1, 1 dc, ch 1, skip 1, inc.
Continue with the sleeve [ch 1, skip 1, 1 dc, ch 1,skip 1, 7 dc] 2 times, ch 1, skip 1, 1 dc, ch 1, skip 1, inc.,
Now the front side :ch 1, skip 1, 1 dc, ch 1,skip 1, 7 dc] 3 times, ch 1, skip 1, 1 dc, ch 1, skip 1, inc,
Repeat the pattern for the sleeve: [ch 1, skip 1, 1 dc, ch 1,skip 1, 7 dc] 2 times, ch 1, skip 1, 1 dc, ch 1, skip 1, inc,
Now finish the back side: ch 1, skip 1, 1 dc, ch 1, skip 1, 7dc, ch 1, skip 1, 1dc, ch 1, skip 1, 3 dc. Sl st with 1st dc.
At the end of rouns 2, you will have 3 sets of 7 dc on the ack and front and 2 sets of 7 dc on sleeves.
Round 3
Ch 2, 1 dc in the same st, 2 dc, ch 1, skip 1, 3 dc, ch 1 skip 1, 5 dc, ch 1, skip 1, 3 dc, ch 1, skip 1, inc.
Continue with the sleeve [ch 1, skip 1, 3 dc, ch 1, skip 1, 5 dc] 2 times, ch 1, skip 1, 3 dc, ch 1, skip 1, inc
Front side:[ch 1, skip 1, 3 dc, ch 1, skip 1, 5 dc] 3 times, ch 1, skip 1, 3 dc, ch 1, skip 1, inc
2nd sleeve: [ch 1, skip 1, 3 dc, ch 1, skip 1, 5 dc] 2 times, ch 1, skip 1, 3 dc, ch 1, skip 1, inc
Complete the back side: ch 1, skip 1, 3 dc, ch 1, skip 1, 5 dc, ch 1, skip 1, 3 dc, ch 1, skip 1, 2 dc. Sl st with 1st dc.
Round 4
Ch2, 1 dc in the same st, 1 dc, ch 1, skip 1, 5 dc, ch 1, skip 1, 3 dc, Ch 1, skip 1, 5 dc, Inc
1st sleeve: [ch 1, skip 1, 5 dc, ch 1, skip 1, 3 dc] 2 times, ch 1, skip 1, 5 dc, ch 1 skip 1, inc
Front:[ch 1, skip 1, 5 dc, ch 1, skip 1, 3 dc] 3 times, ch 1, skip 1, 5 dc, ch 1 skip 1, inc
2nd Sleeve:[ch 1, skip 1, 5 dc, ch 1, skip 1, 3 dc] 2 times, ch 1, skip 1, 5 dc, ch 1 skip 1, inc
Complete back: Ch 1, skip 1, 5 dc, ch 1, skip 1, 3 dc, ch 1, skip 1, 5 dc, ch 1, skip 1, 1dc. Sl st with first dc.
Round 5
Ch 2, 1 dc in the same st, ch 1, skip 1, 7 dc, ch 1, skip 1, 1 dc, ch 1, skip 1, 7 dc, ch 1 skip 1, inc
1st Sleeve: ch 1, skip 1 [7 dc, ch 1, skip 1, 1 dc, ch 1, skip 1] 2 times, 7 dc, ch 1, inc
Front:ch 1, skip 1,[7 dc, ch 1, skip 1, 1 dc, ch 1, skip 1] 3 times, 7 dc, ch 1, inc
2nd sleeve: ch 1, skip 1, [7 dc, ch 1, skip 1, 1 dc, ch 1, skip 1] 2 times, 7 dc, ch 1, inc
Complete back: ch 1, skip 1, 7 dc, ch 1, skip 1, 1 dc, ch 1, skip 1, 7 dc, ch 1, skip 1. Sl st with 1 st dc
Round 6
Go back with aansl st, in the last ch 1 space, and start the round from there.
Ch 2, 1 dc in the same st, [ch 1, skip 1, 9 dc] 2 times, ch 1, skip 1 inc
1st sleeve: [ch 1, skip 1, 9 dc] 3 times, ch 1, skip 1 inc
Front:[ch 1, skip 1, 9 dc] 3 times, ch 1, skip 1 inc
2nd sleeve: [ch 1, skip 1, 9 dc] 3 times, ch 1, skip 1 inc
Complete back: Ch 1, skip 1, 9 dc, ch 1, skip 1, 8 dc. Sl st. with the 1 st dc
You noticed that after 5 rounds the pattern started to repeat. Round 6 is very similar to round 1, only that per each side ( front, back sleeves) you have now with 1 more set of 9 dc.
Basically, at every 5 rounds, the pattern is similar only that we will increase with 1 repeat section ( of 9 dc, 7 dc, and so on)
Round 7
Sl st to the 1 st ch 1 space. Start the round from here
Ch 2, 1 dc in the same st, ch 1, skip 1, [7 dc, ch 1, skip 1, 1 dc, ch 1, skip 1] 2 times, inc
1 st sleeve: [ch 1, skip 1, 1 dc, ch 1,skip 1, 7 dc] 3 times, ch 1, skip 1, 1 dc, ch 1, skip 1, inc,
Front : [ch 1, skip 1, 1 dc, ch 1,skip 1, 7 dc] 4 times, ch 1, skip 1, 1 dc, ch 1, skip 1, inc,
2nd sleeve: [ch 1, skip 1, 1 dc, ch 1,skip 1, 7 dc] 3 times, ch 1, skip 1, 1 dc, ch 1, skip 1, inc,
Complete Back: [ch 1, skip 1, 1 dc, ch 1,skip 1, 7 dc] 2 times, Ch 1, skip 1, sl st with 1 st dc.
Round 8:
Back: ch2, 1 dc in same st, 1 dc in next, ch 1, skip 1, [1 dc in
next 5, ch 1, skip 1, 1 dc in next 3] x 2 times, ch 1, skip 1, Inc corner.
Sleeve: ch 1, skip 1, [1 dc in next 3, ch 1, skip 1, 1 dc in next 5, ch 1,
skip 1] x 3 times, 1 dc in next 3, ch 1, skip 1, inc corner
Front: ch 1, skip 1, [1 dc in next 3, ch 1, skip 1, 1 dc in next 5, ch 1,
skip 1] x 4 times, 1 dc in next 3, ch 1, skip 1, inc corner
2nd sleeve:ch 1, skip 1, [1 dc in next 3, ch 1, skip 1, 1 dc in next 5, ch
1, skip 1] x 3 times, 1 dc in next 3, ch 1, skip 1, inc corner
Finish back: ch 1, skip 1, [1 dc in next 3, ch 1, skip 1, 1 dc in next 5]
x 2 times, ch 1 skip 1, 1 dc in next and join.
Round 9
Back: ch 2, 1 dc in the same st, 1 dc in next 2, ch 1 skip 1, [1 dc in next
3, ch 1, skip 1, 1 dc in next 5, ch 1, skip 1] x 2 times, Inc
Sleeve: ch 1, skip 1,[ 1 dc in next 5, ch 1, skip 1, 1 dc in next 3, ch 1,
skip 1] x 3 times, 1 dc in next 5, ch 1, skip 1, Inc
Front: ch 1, skip 1,[ 1 dc in next 5, ch 1, skip 1, 1 dc in next 3, ch 1,
skip 1,] x 4 times, 1 dc in next 5, ch 1, skip 1, Inc
2nd Sleeve: ch 1, skip 1,[ 1 dc in next 5, ch 1, skip 1, 1 dc in next 3,
ch 1, skip 1] x 3 times, 1 dc in next 5, ch 1, skip 1, Inc
Finish Back: ch 1, skip 1,[ 1 dc in next 5, ch 1, skip 1, 1 dc in next 3,
ch 1, skip 1] x 2 times, 1 dc in next 2 and join
Round 10
Back: ch 2, 1 dc in same st, 1 dc in next 3, ch 1, skip 1, [1 dc in next,
ch 1, skip 1, 1 dc in next 7, ch 1, skip 1]x 2 times, Inc
Sleeve: ch 1, skip 1, [ 1 dc in next 7, ch 1, skip 1, 1 dc in next, ch 1,
skip 1] x 3, 1 dc in next 7, ch 1, skip 1, Inc
Front: ch 1, skip 1, [ 1 dc in next 7, ch 1, skip 1, 1 dc in next, ch 1,
skip 1] x 4, 1 dc in next 7, ch 1, skip 1, Inc
2nd Sleeve:ch 1, skip 1, [ 1 dc in next 7, ch 1, skip 1, 1 dc in next, ch
1, skip 1] x 3, 1 dc in next 7, ch 1, skip 1, Inc
Finish Back: ch 1, skip 1, [ 1 dc in next 7, ch 1, skip 1, 1 dc in next,
ch 1, skip 1] x 2, 1 dc in next 3 and join
From round 11 you will have to repeat from round 1, only that you will have one repeat in plus on each section of the yoke.
I noticed that is harder to explain this pattern than make it, so I hope that you will not get discouraged so many words and try it. ??
You will have in total for the yoke
S – 26 rounds
M – 30 rounds
L – 34
X Large – 39
2X Large – 43
After finishing the yoke is time for the separating round. We will separate the sleeves from the body.
Because with every size, the last round of the yoke might be a different one, the separating round won’t be the same. All you have to be careful at is to make the stitch pattern to continue.
For example on size small, the last round of the yoke is with sets of 9 dc and 1 window, so the next one has to be with sets of 7 and 2 windows.
What you will have to do, is to start the round as normal.
Before the corner, make the last set of 7 dc. Now is time to join with the front side and skip the sleeves sts.
The next sts that you will have to make is the 2 windows between 7 dc sets (ch 1, skip, 1, 1 dc, ch 1, skip 1)
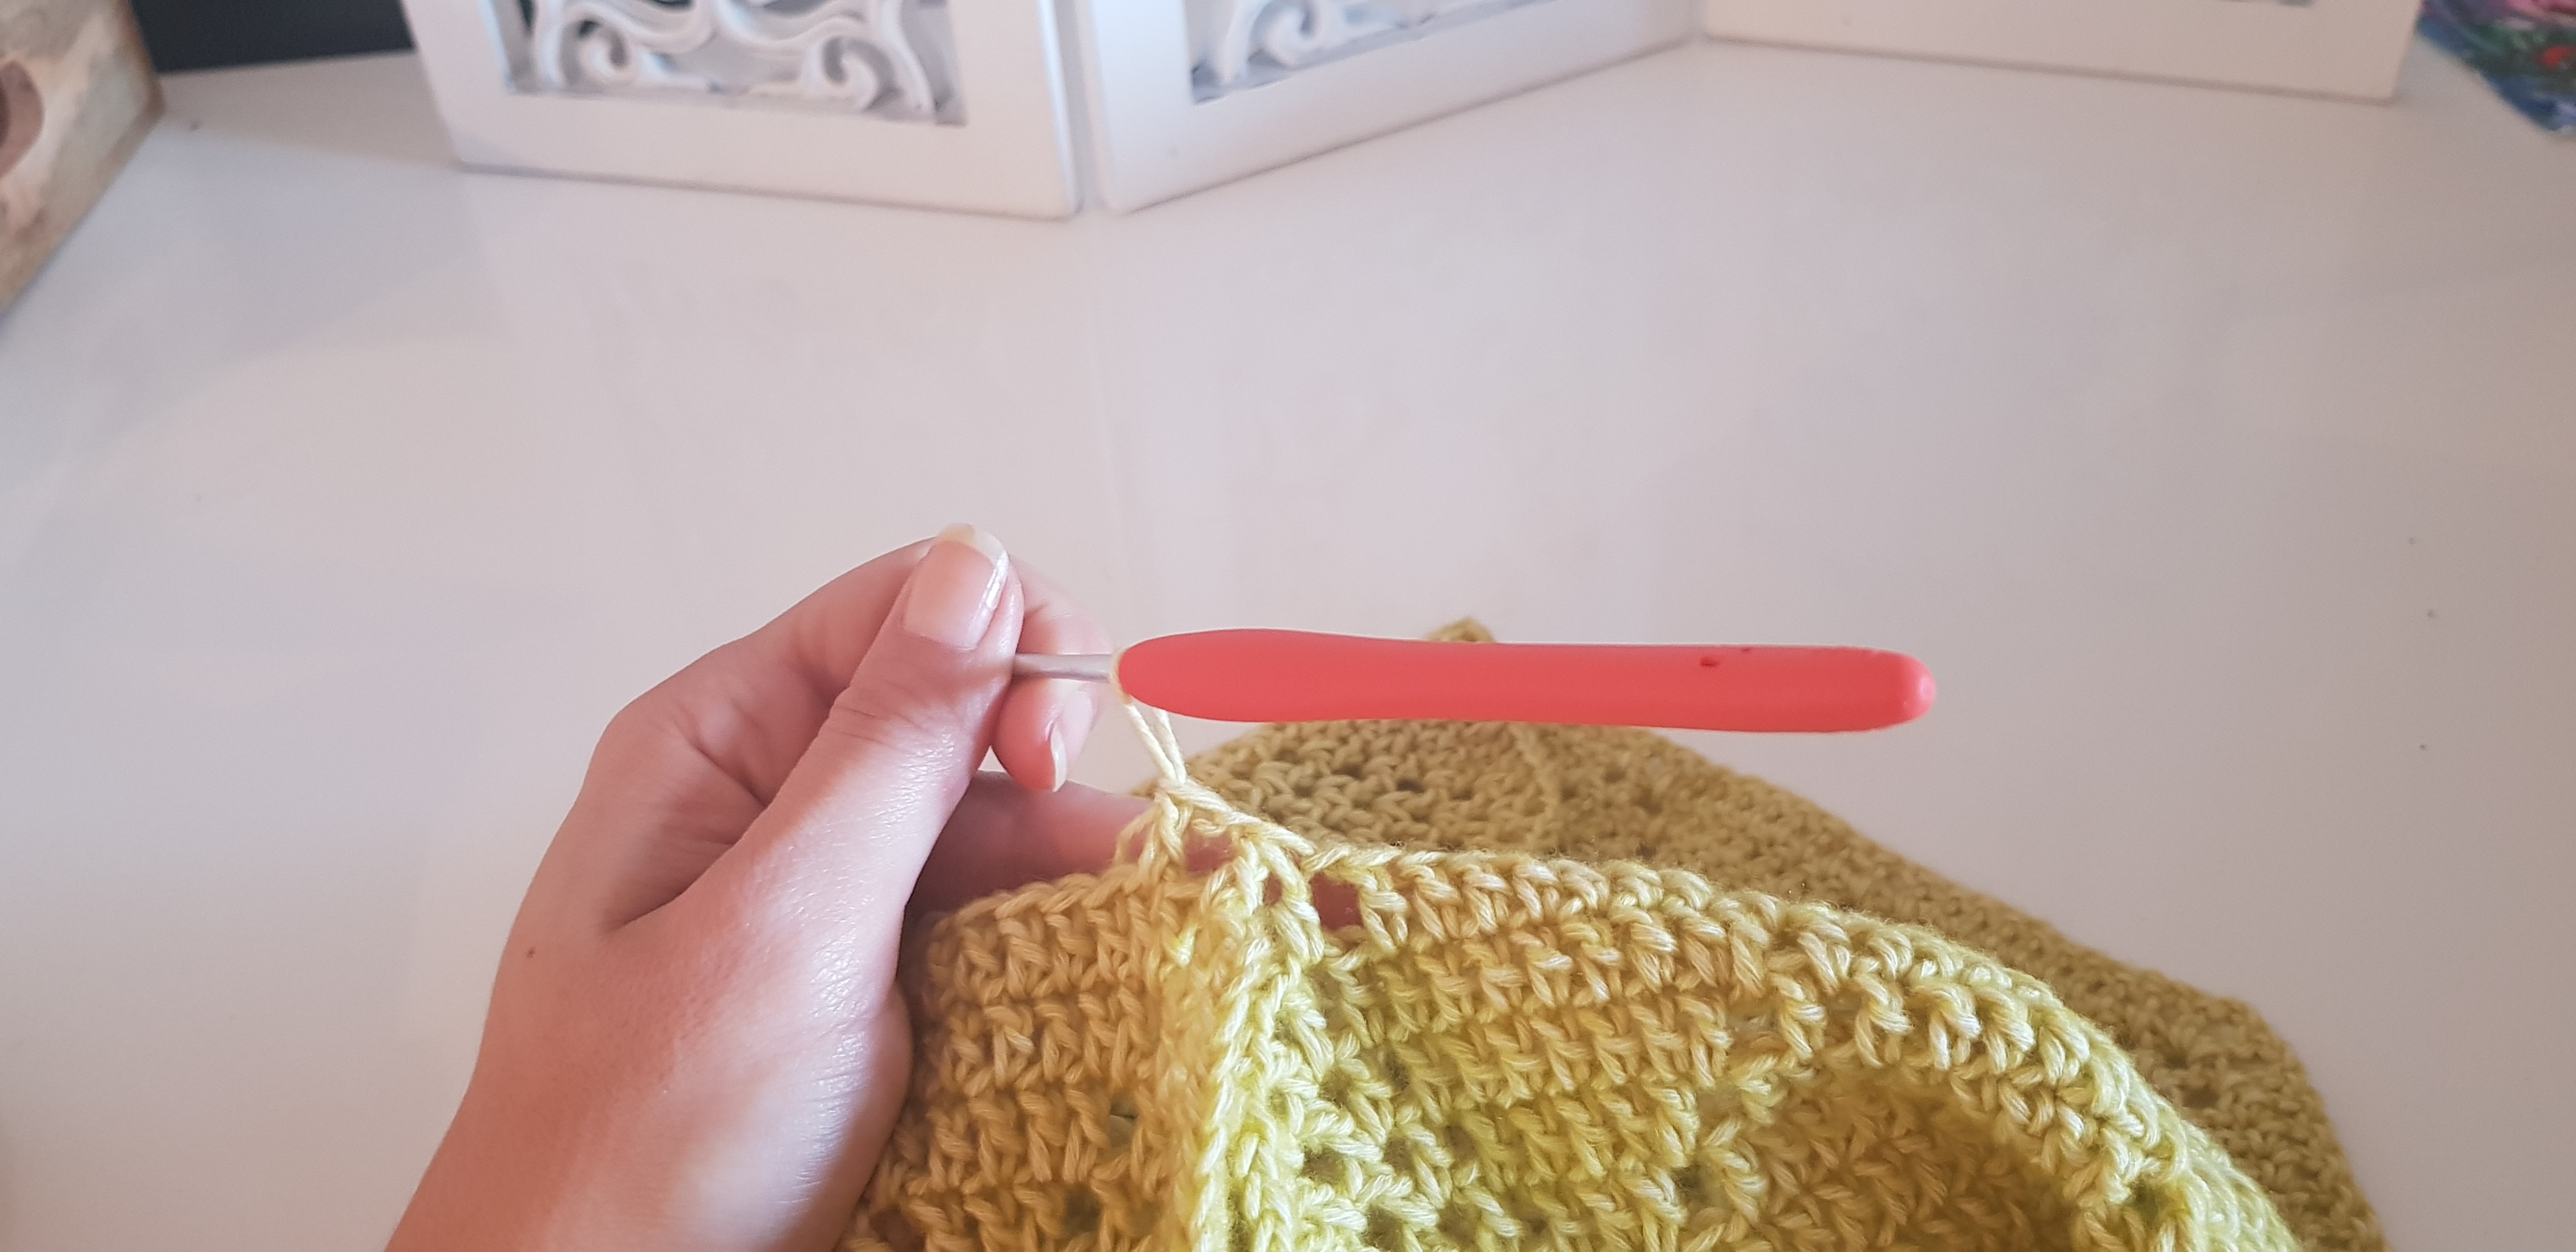
So, we chain 1, make 1 partial dc in the next ch 1 space, skip the sleeve sts and make 1 partial dc in the ch 1 space that is after the next corner. Yarn over, and pull it through the loops of the hook. Ch 1, skip 1, and continue with the pattern to the next corner where you will repeat the same.
The 2 dc worked together will count as 1 dc between the ch 1 spaces.
So, you have to make the pattern to continue when you make the join.
For size M, for example, the last yoke round is with sets of 7 dc and 2 windows and the next one has to be with sets of 9 and 1 window.
When you get to the corner you will need to ch1 skip 1 when making the join to complete the pattern. So, ch 1, skip the sleeve’s sts and make 1 dc in the ch 1 space after the corner.
After the separating round, continue with the stitch pattern:
S – 22 rounds
M – 22 rounds
L – 24 rounds
X Large – 24 Rounds
2X Large – 24 rounds
Or you can make as many rounds as you wish to get to the desired length.
After finishing the length of the sweater repeats the ribbed band made at the beginning.
Sleeves
Start to work the sleeves at the armpit The same as at the separating round, you will have to start with the sts that you need to complete the stitch pattern.
*a small hole will remain at the armpit, but you will sew it at the end.
Continue with the stitch pattern for as many rounds as you want until you will get to the desired length of the sleeve.
I made the same number of rounds as for the length of the sweater ( S – 22, M – 22, L – 24, XL – 24, 2XL – 25).
You can Purchase the easily printable PDF version of this pattern here:
Before making the cuff we will have to decrease.
I made 2 rounds decreasing, having small cuffs.
On the first round, I made 1 dc, skip 1, 1 dc
On the second I made 2 dc, skip 1.
You can find a pattern for the decrease to just make the cuffs of the sleeves large as you need. Maybe making just the first round, or repeat the second one 2 times.
After decreasing, make the ribbed band. You will make only the 3 rounds in FPDc and BPDc.
And finally “Your Precious” Sweater is done.
This post might belong because I tried to give you as many details as I consider that will help a newbie crocheter also.
The sweater is easier than appears and you have to try it.
Can’t wait to see pictures with yours.
Below, you will find the video tutorial
You can Purchase the easily printable PDF version of this pattern here:
https://ro.pinterest.com/katerina6795/free-crochet-patterns/


11 Comments
I love it! What suggestions do u have for short sleeves?
I think it will look ok with a shorter sleeve too. Work the length that you wish and then decrease to be as large as you need at the end. If you want to keep the length after finishing the yoke make a few rounds and decrease. Being oversized the sleeve is pretty large too.
Nice paters andere Good explination!
I would like to make this sweater with weight 4 yarn. I am a beginner in crocheting so it will most likely sound like a silly question. How do I adjust sizing in order to use thicker yarn?
The most simple way is to make your gauge. Then compare your gauge with mine. For example 8 have in 4″ square 17 dc and 9 rows. Let’s say that you will have 10 dc and 7 rows. That means that the no of sts in the pattern you should divided by 1.7 (17/10) and the no of rounds in the pattern you should divided by 1.3.
The only think is that at the beginning you should start with a multiple of 10 + 1 sts on each side(front, back, sleeves). So, have to see how many sts to you need to start with and try to adjust the number of sts to have multiple of 10+1.
If is easier and you don’t manage, let me know your gauge and which size you want to make and I will help you
Please is there also a pattern for the childsweather i love it
not yet, but i’m planning to publish it next week
Ok thanks i Can not want tot start shirt for a 4years old child ?
This is absolutely gorgeous! I’ve been looking for a sweater pattern for myself (have had yarn stashed for it for a couple years for a different pattern) and when I saw this, I knew this is the one I want to make. Now I just have to finish this year’s Christmas presents so I can start it. Thank you for sharing your wonderful talent!
I love this pattern! I made a sweater for myself and I would love one for my little girl. When will the childs size beposted?
The Mini Precious Sweater was posted last week. Here is the link
https://by-katerina.com/mini-precious-sweater/
So glad you live it.