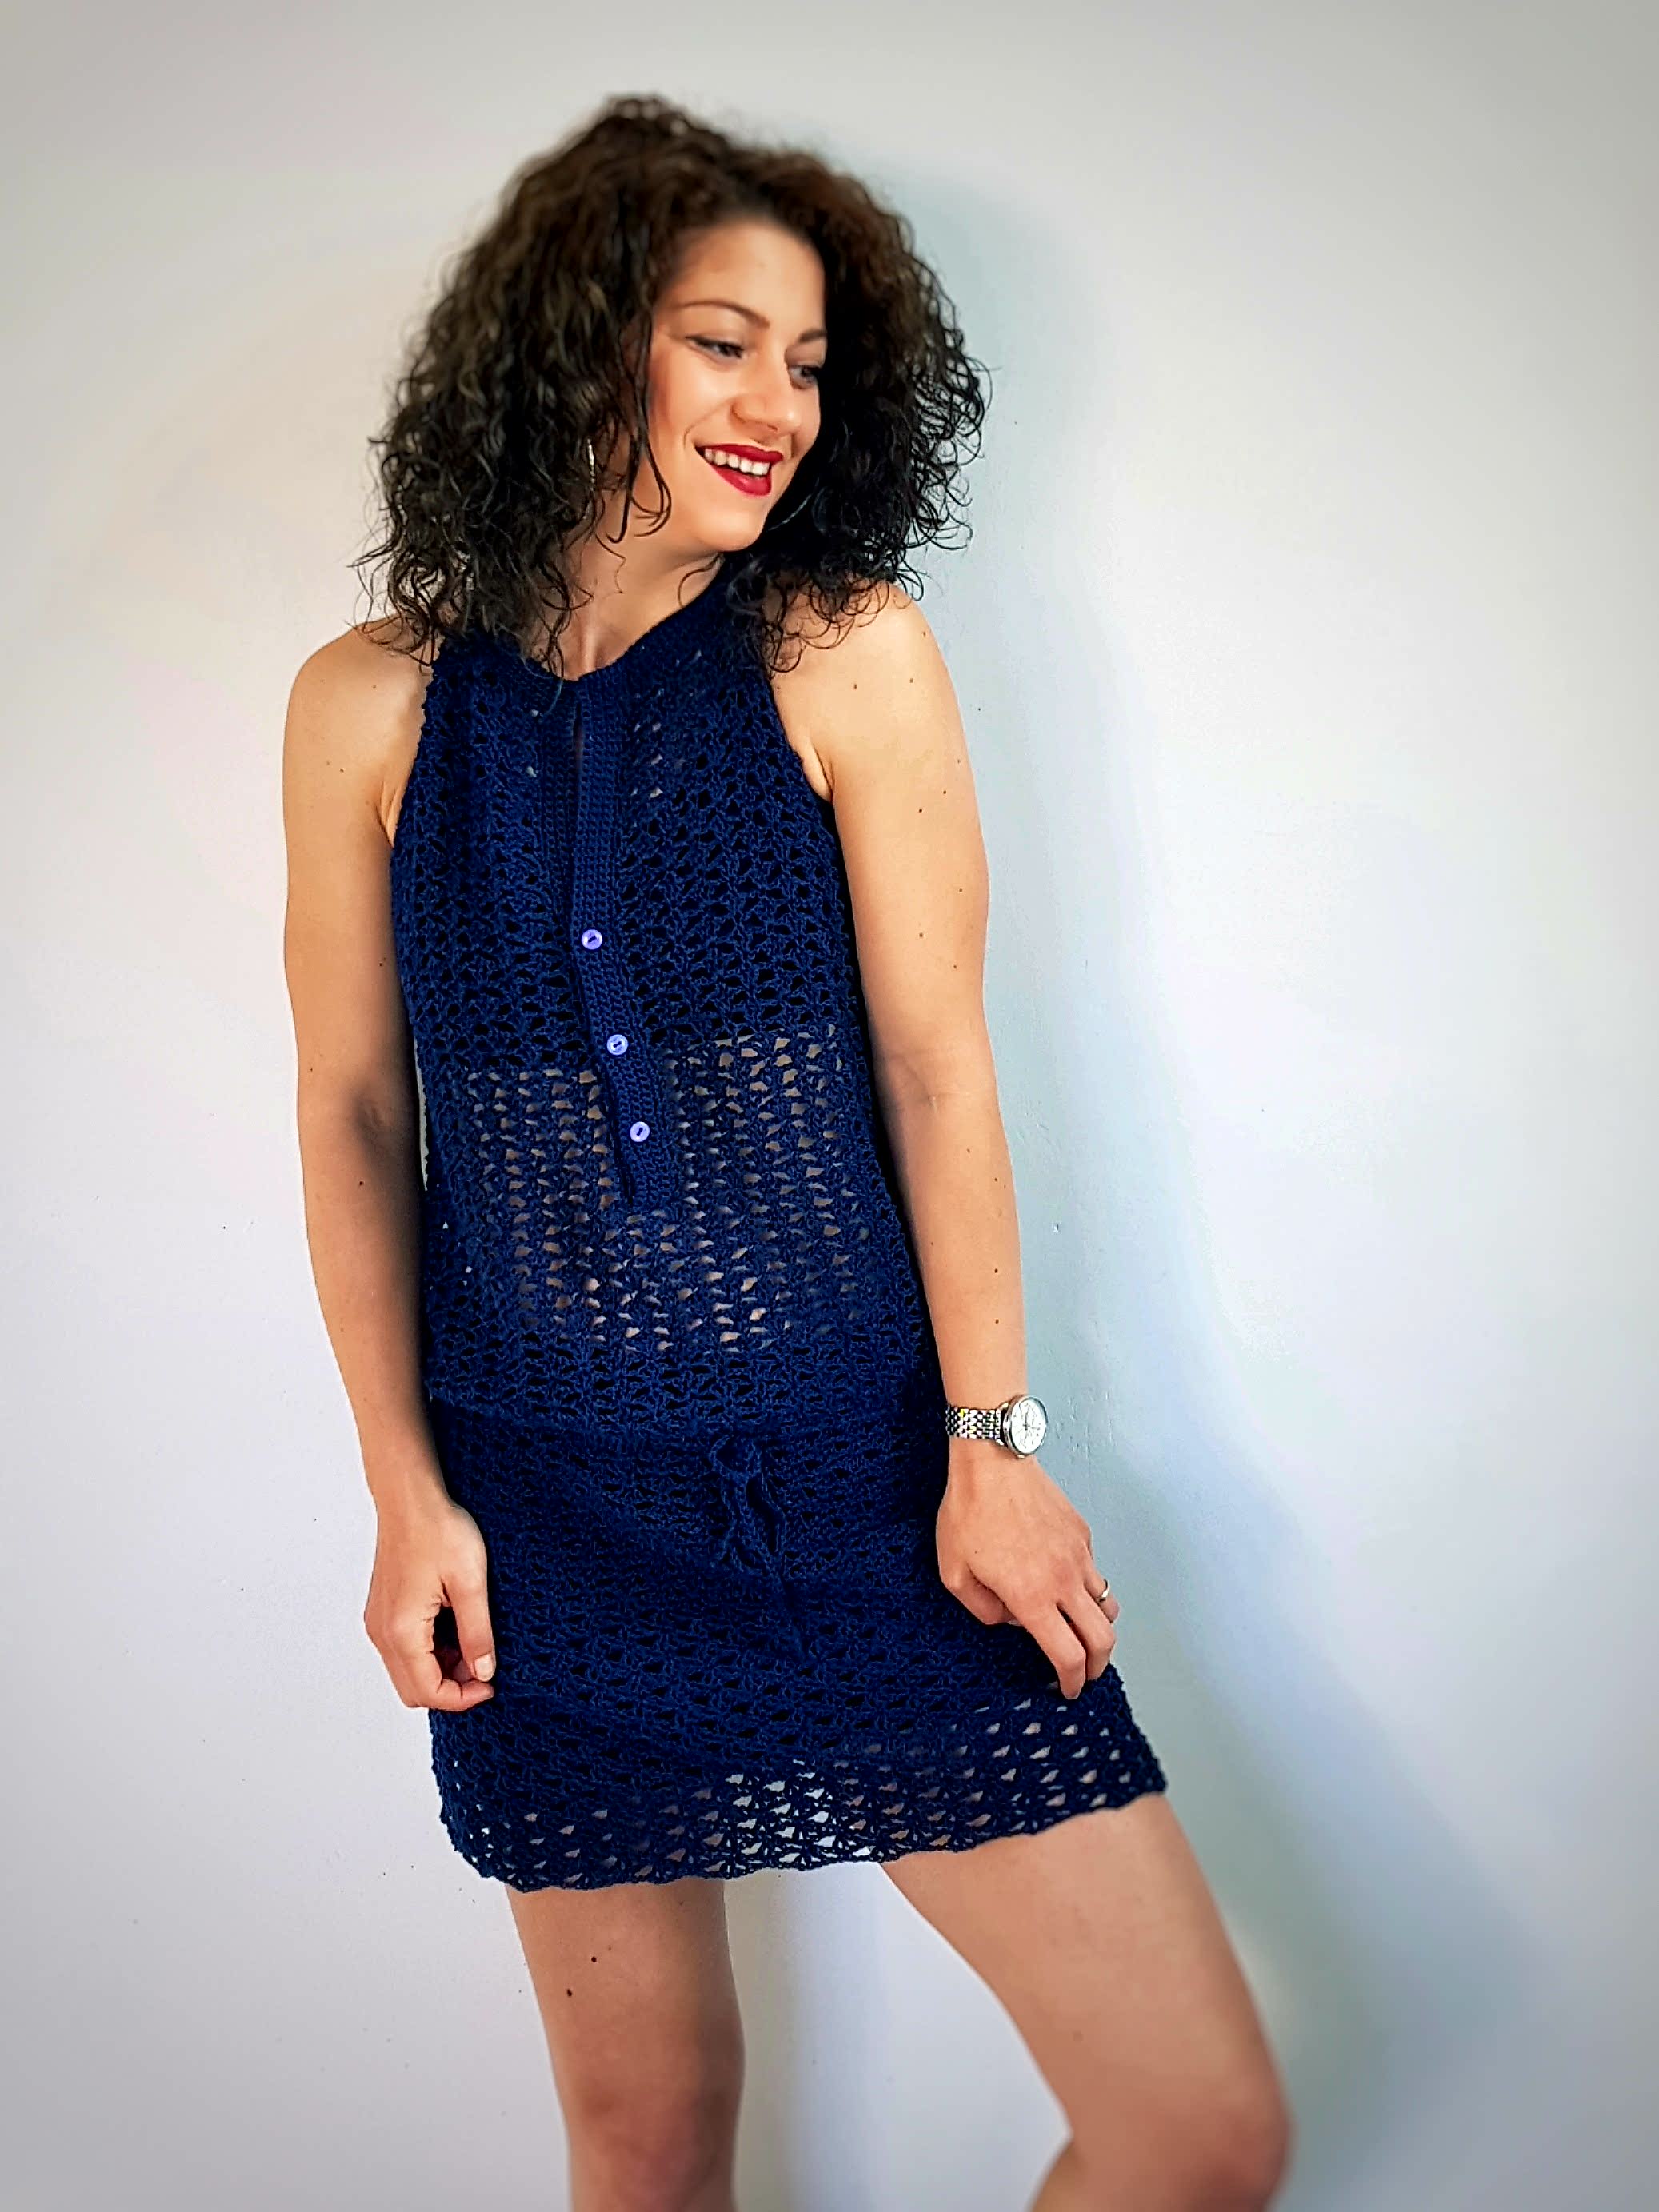
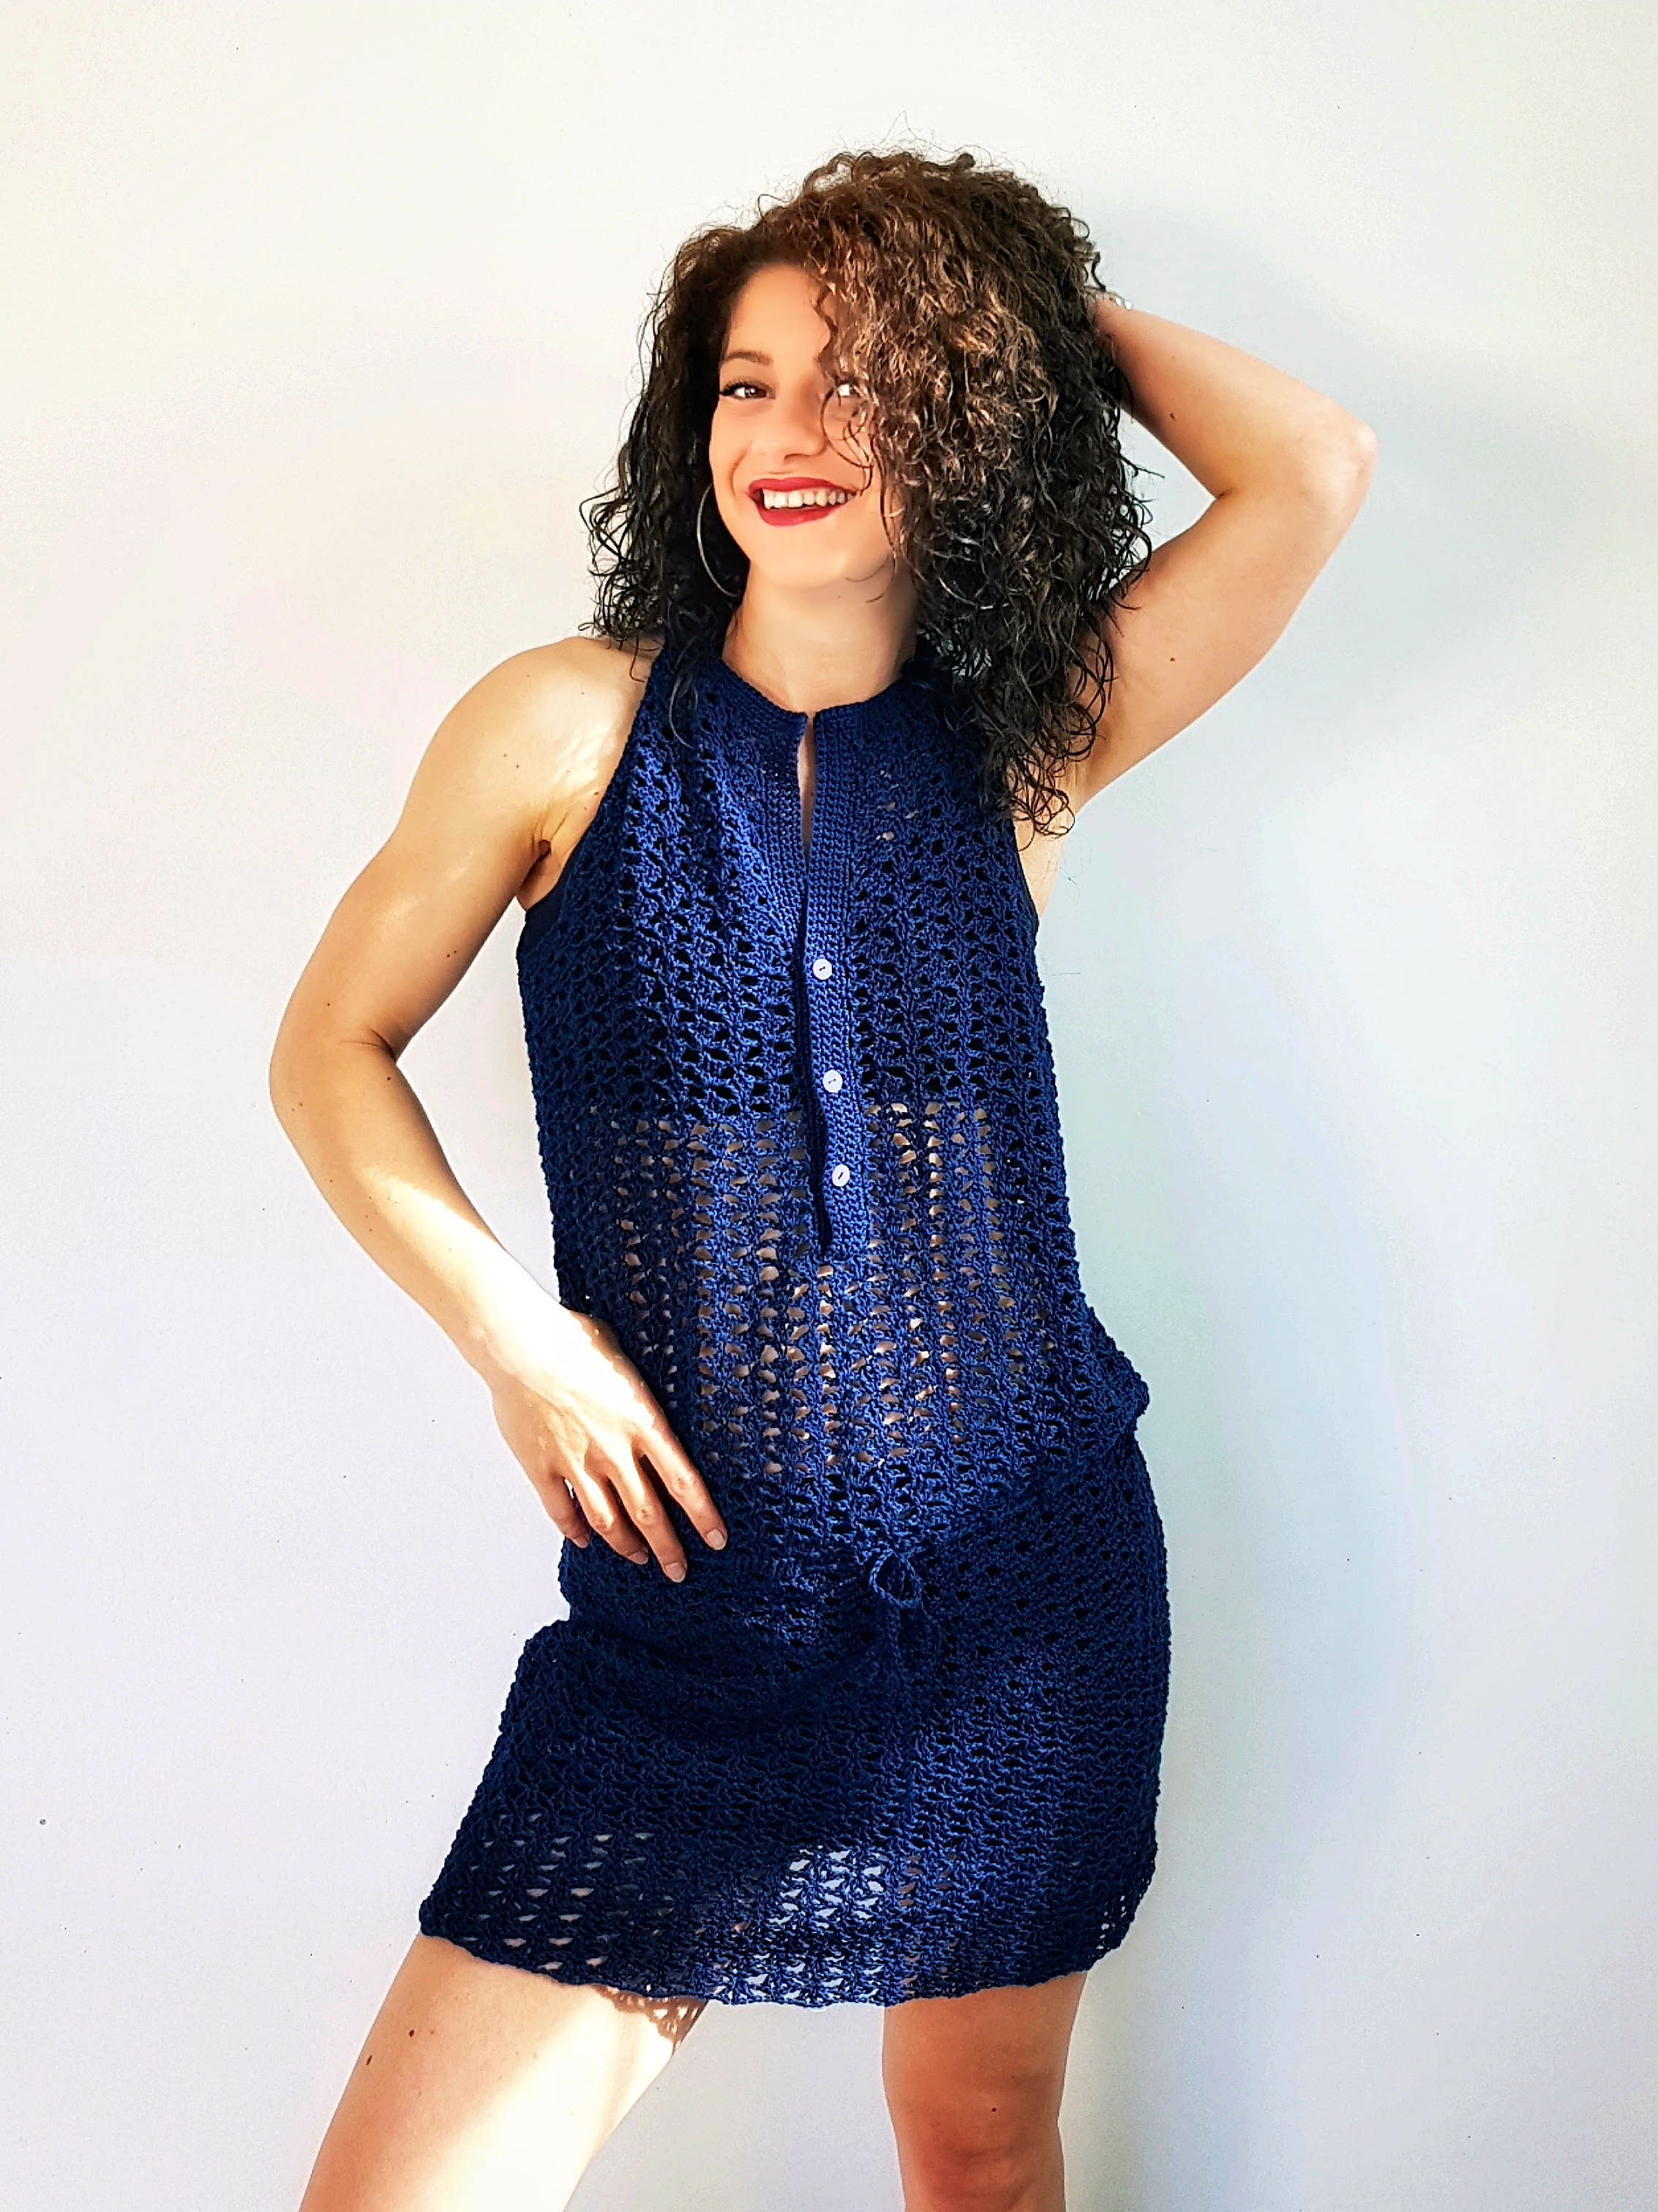
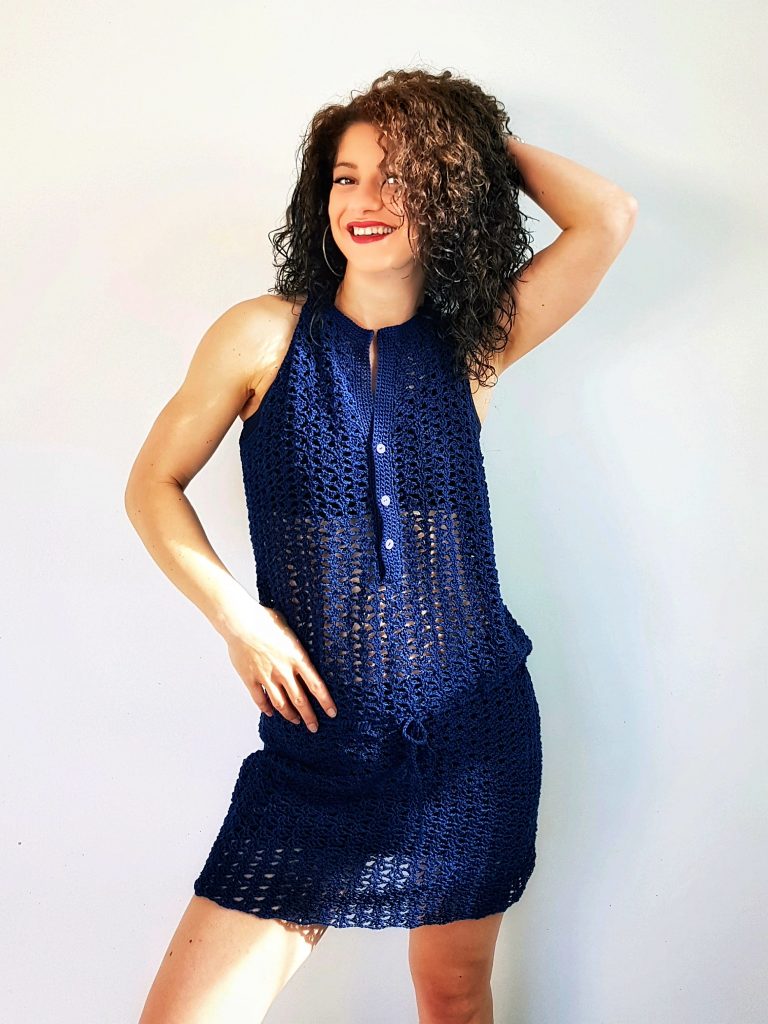
This Long Time Dress was planned to be made last year. Back then I was able to post only the top pattern and didn’t have time to continue the dress. Finally the dress is here and I really like it.
Pentru Postarea in limba romana, apasati aici.
You can purchase the add free, easy printable, instant download PDF version of this pattern here:
About Design
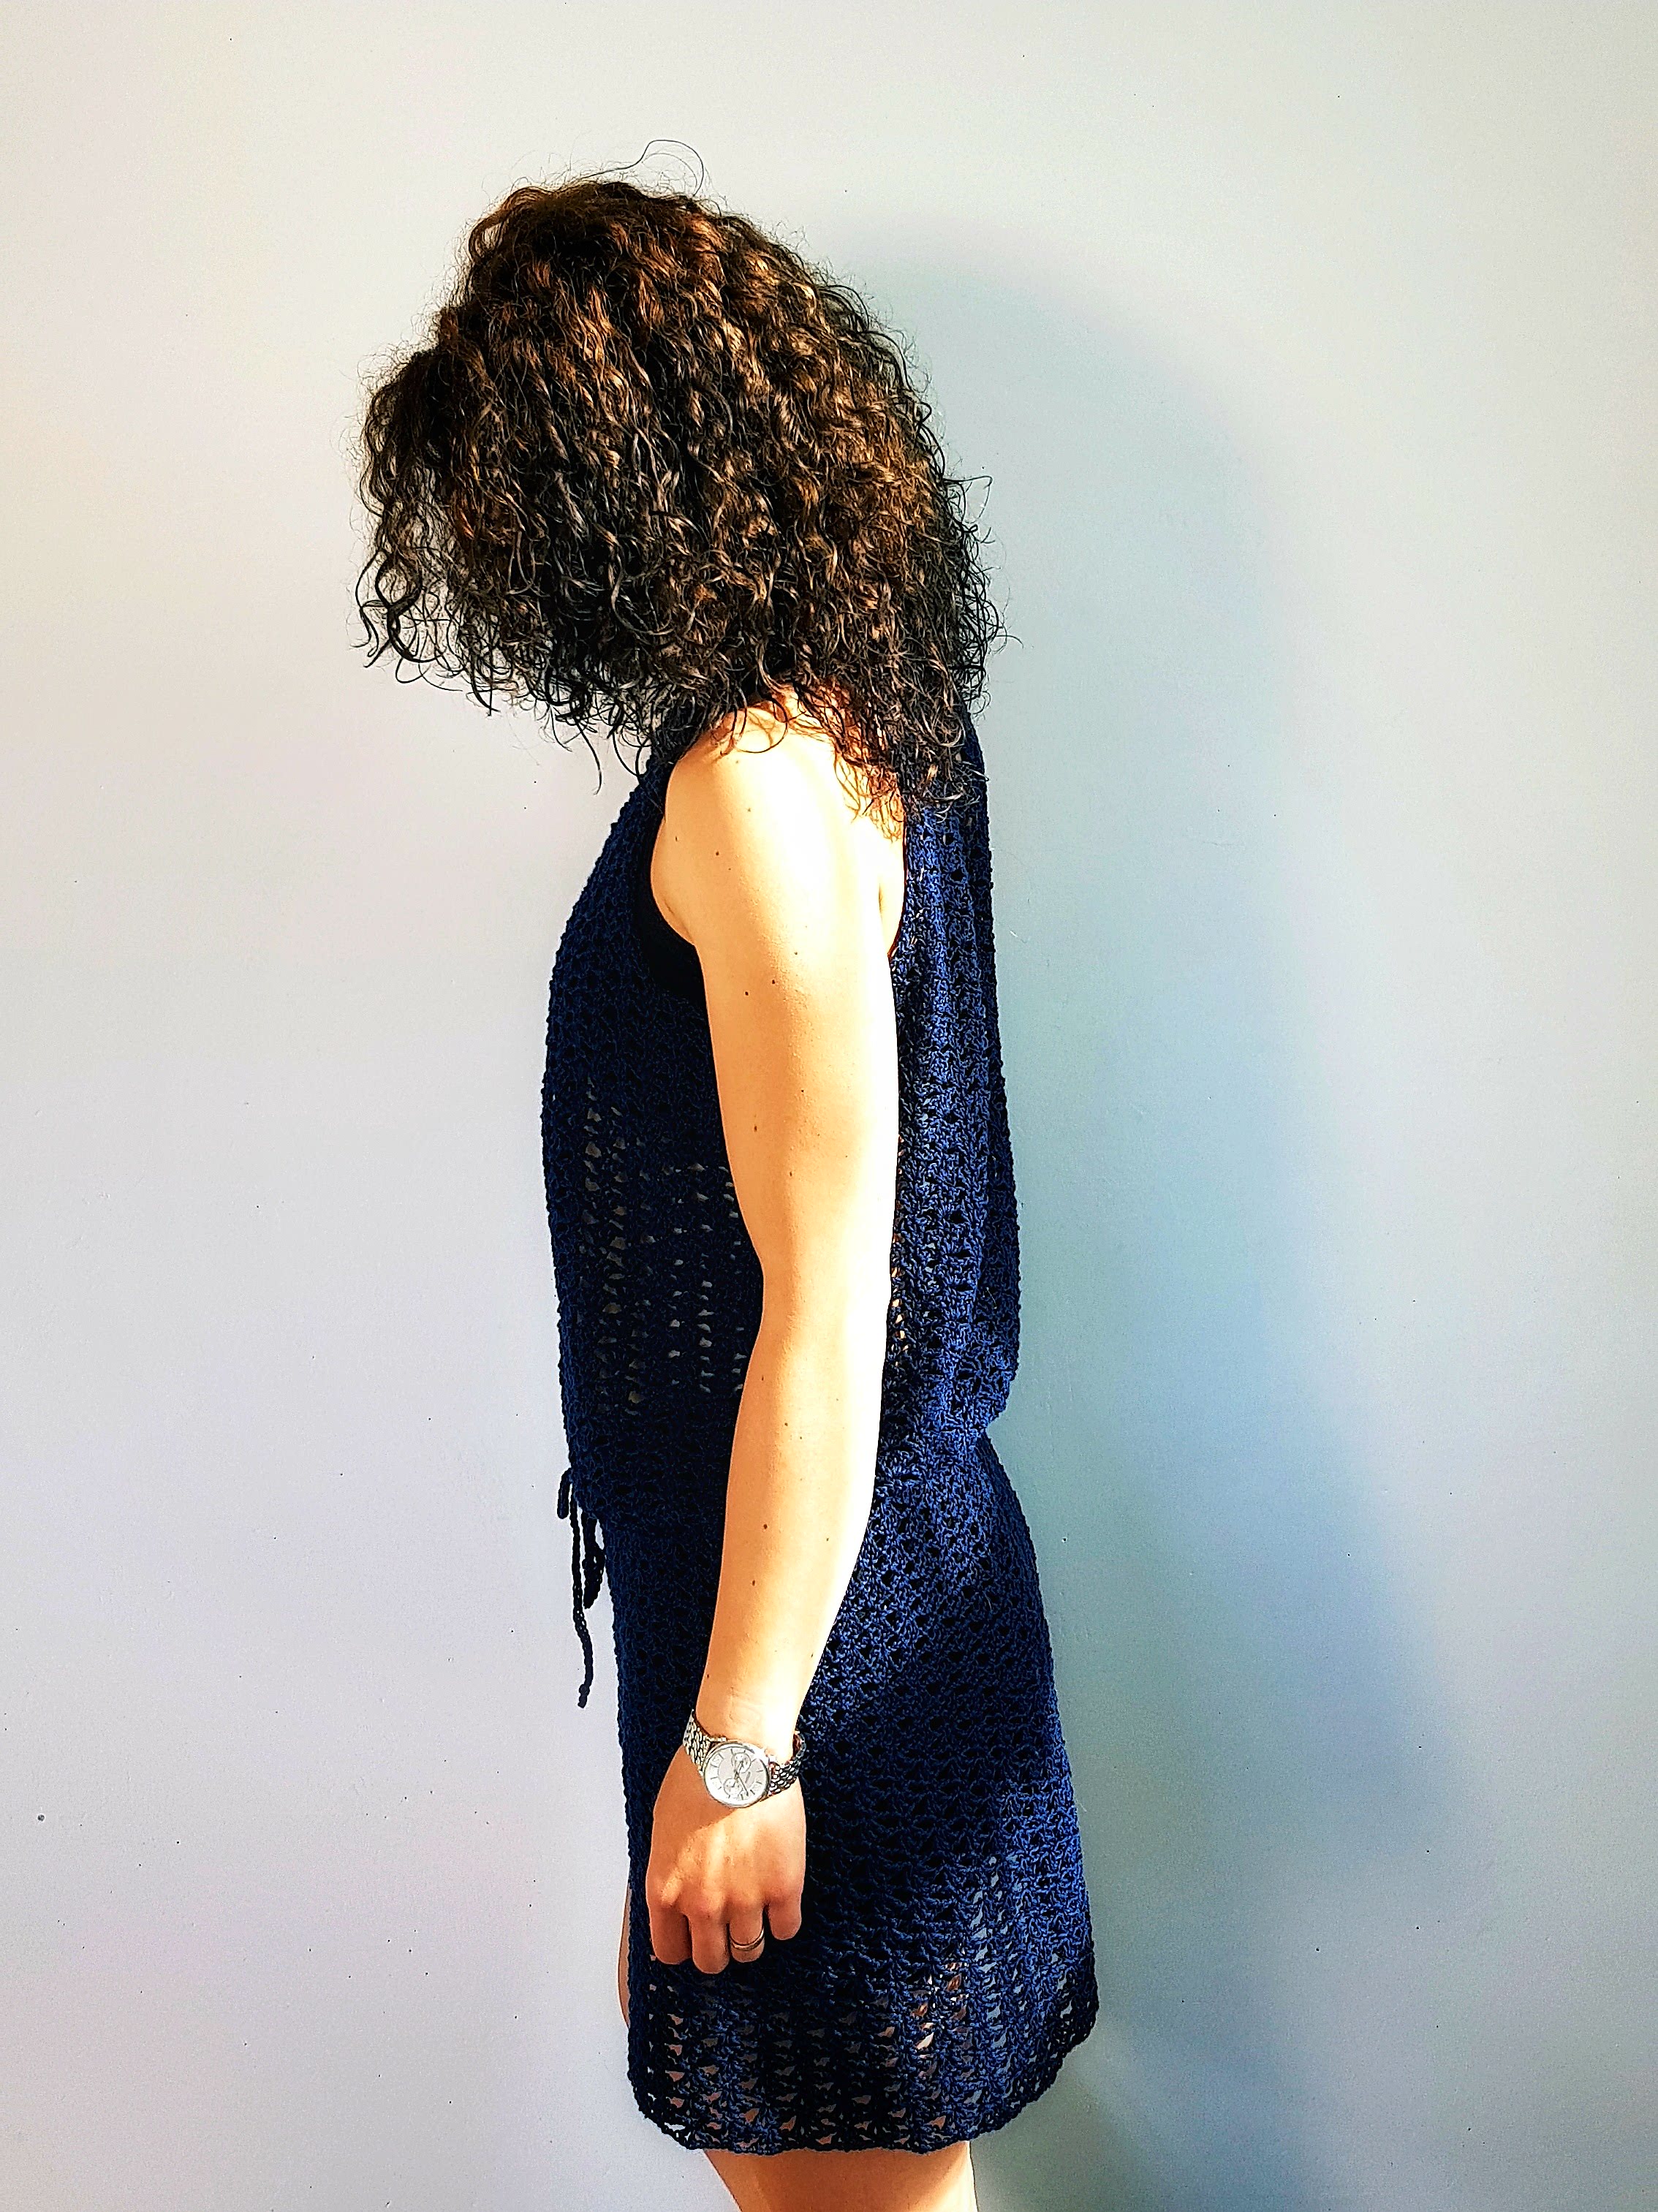
The design of this Long Time Dress is modern and the construction is simple. First we are working the top and then we will continue the dress with the skirt.
For the top we will work the back panel and front panel separately and then sew the panels on sides. We will join the panel on the shoulders with collar.
On the front panel we will let a space for the buttons line and then we will work it with the collar. Buttons line and collar are worked in one single piece.
After finishing the top we will work the skirt in circular rounds following the same stitch pattern as for the top. Before starting the skirt, you can make one more round in double crochet to make some increases if you want your skirt to be wider than the rest of the top.
Materials you will need
Yarn
I used SMC Catania Fine which is a 4 ply fingering Yarn.
Crochet Hook
3.5 mm (E size US)
3 small buttons
Tapestry needle for assembling the top panels
Scissors
Final Measurements
This pattern is available in 3 sizes, Small, Medium and Large and is written in US terms.
Below you will find the diagram with final measurements
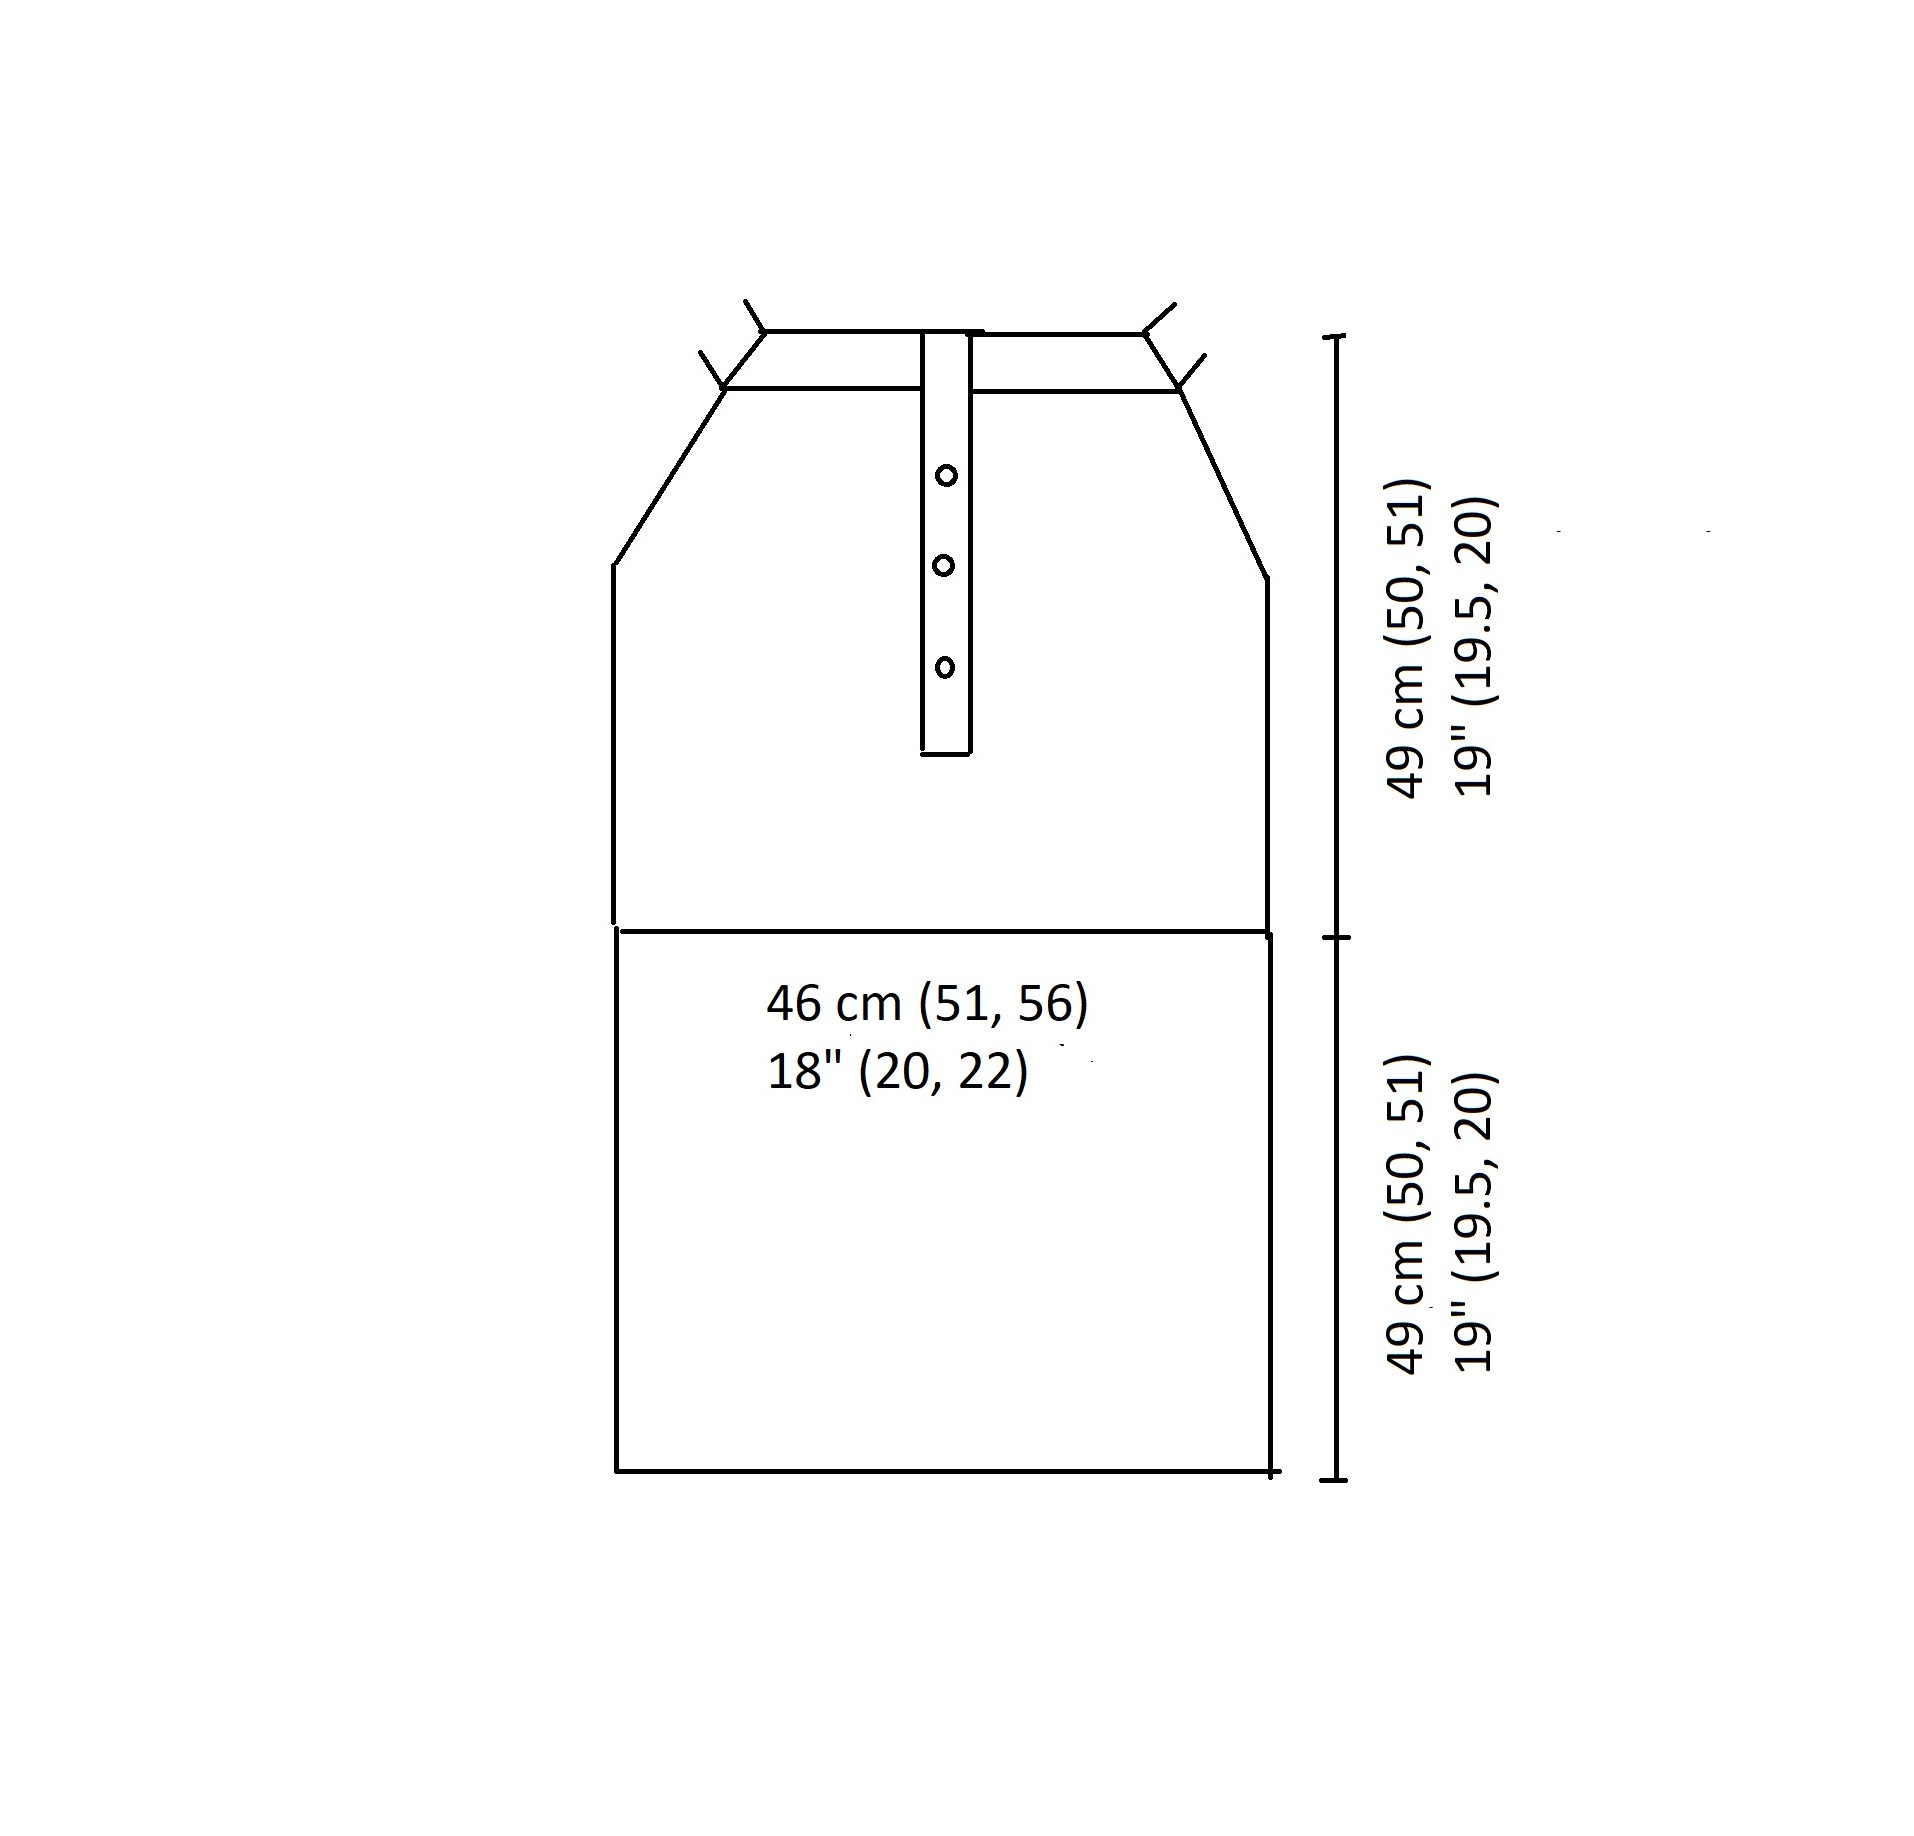
The length of the top and skirt can be adjusted by simply making fewer or more rows/rounds.
How much Yarn do I need?
- S – 300 grams, 990 m (6 skeins)
- M – 330 grams, 1090 m (7 skeins)
- L – 360 grams, 1190 m (8 skeins)
Abbreviations used in this pattern
- Ch – chain
- Dc – double crochet
- Sc – single crochet
- St(s) – stitch (es)
- Dec – decrease
Decrease
When needed we will decrease at the beginning of the row like this:
Ch 3, skip the first motif ( the first group of stitches, can be a sc or a group of 2 double crochet), move to the next motif ( can be a sc or a group of 3 dc) and begin the row as usual.
About the stitch pattern used in this pattern
I used for this pattern a version of shell stitch. Is a 3 double crochet open shell stitch. Open, because between double crochet we will make one chain stitch.
Below you will find the stitch chart:
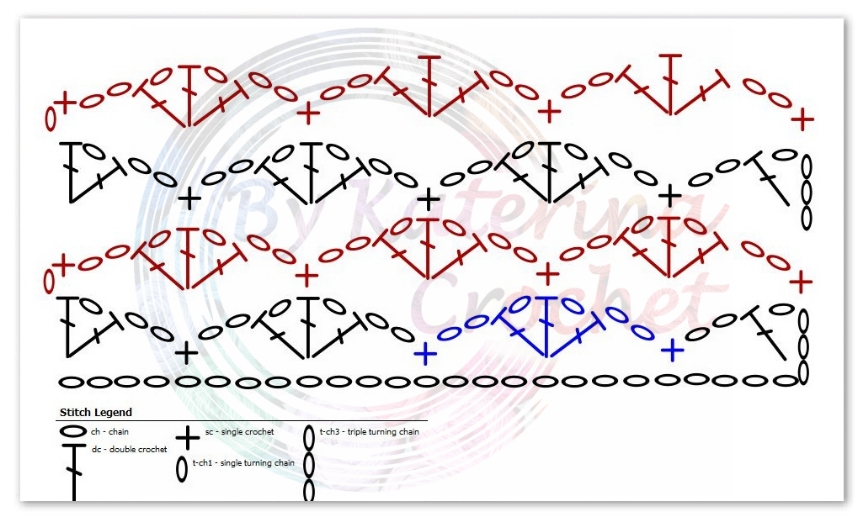
The stitch pattern requires a multiple of 8+1 and you will have to add 3 turning chain and one separation chain. So after you chained the 8+1 add 4 more chain sts.
Is a 2 rows repeat pattern
Row 1
Beginning with the 5th st, 1dc, [ch 2, skip 3 sts,1 sc, ch 2, skip 3, (1 dc, ch 1, 1 dc, ch 1, 1 dc) in the next st, ch 2, skip 3, 1 sc in the next] – repeat the section between [ ] to the end of the row, ending with ch 2, ( 1 dc, ch 1, 1 dc) in the last st. Ch 1 and turn
Row 2
1 sc in 1 st st, ch 2, [(1 dc, ch 1, 1 dc, ch 1, 1 dc) on the top of the next sc, [ch 2, 1 sc in the middle dc of the 3 from the previous row, ch 2, (1 dc, ch 1, 1 dc, ch 1, 1 dc) on the top of the next sc , ch 2]. Repeat the section between [ ] to the end of the row, ending with 1 sc in the 3rd st of the turning chain. Ch 4 and turn.
Row 3
1 dc in the first st, ch 2, 1 sc in the middle dc of the 3 from the previous row, [ ch 2, (1 dc, ch 1, 1 dc, ch 1, 1 dc) on the top of the next sc, ch 2, 1 sc in the middle dc of the 3 from the previous row, ch 2 ]. Repeat the section between [ ] to the end of the row ending with (1 dc, ch 1, 1 dc) on the top of the last sc. Ch 1 and turn.
Repeat rows 2 and 3
Gauge
20 dc = 10 cm (4”)
10 rows = 10 cm (4”)
You can purchase the add free, easy printable, instant download PDF version of this pattern here:
As I said in the Design description section we will first work the top
The top part of the Long Time Dress is worked in 2 pieces, back side and front side.
Back side
The stitch pattern requires to begin with 8+1 sts
- For S – chain 105 and make 1st row in dc or start with 105 foundation double crochet sts.
- For M – begin with 121 sts
- For L – begin with 129 sts
* this pattern is for a looser fit. If you want your top to be closer fit, begin with a less number of stitches.
After making the foundation, begin the next row with the Shell stitch as explained above to the armpit.
- Size S – 38 rows
- Size M – 40 rows
- Size L – 42 rows
* If you want the top part to be longer add more rows here.
For all sizes
Now that we get to the armpit, on the next row we will decrease at the beginning and at the end of the row with approximate 6 cm. Try to see the stitch pattern and skip with slip sts at the beginning of the row, the number of sts you have in 6 cm and the same number of sts skip them at the end of the row.
I skipped 14 sts
Row 40/42/44
Begin with a decrease ( * see the decrease pattern above ). Continue with the double V stitch to the end of the row.
Row 41/ 43/ 45
Repeat row 40/42/44
Row 42/ 44/ 46
Without decreasing make the Shell Stitch pattern
Repeat these 3 rows until you have in total:
- Size S – 51 rows in total ( not counting the first row in dc)
- Size M – 54 rows in total
- Size L – 58 rows in total
Back side of the top is done.

Front side
Begin with the same number of stitches as for the back side.
- For S – chain 105 and make 1st row in dc or start with 105 foundation double crochet sts.
- For M – begin with 121 sts
- For L – begin with 129 sts
Begin the next row with Shell stitch and repeat it until you have:
- For size S – 18 rows
- For size M – 19 rows
- For size L – 20 rows
We will follow the same pattern as for the back side only that we will let a space in the middle for the buttons line.
We will mark the buttons line in the middle of the front side. Mark approximate 2 cm for the buttons line. After you put the stitch markers we will begin to work left side and right side separately.
Right side
Rows 19 – 38 ( 20 – 40 / 21 – 42)
From where your yarn is right now continue with the shell stitch only to the stitch marker. And repeat this row to the armpit. You will have in total the same number of rows as for the back side.
Row 39 ( 41, 43)
After getting to the armpit, decrease the 6 cm (14 sts) at the beginning of the row with slip stitches.
Row 40 ( 42, 44)
Make the shell stitch pattern
Row 41 ( 43, 45)
Begin with a decrease* then continue with the shell stitch pattern
Rows 42 – 44 ( 44 – 46, 46 – 48)
Make the shell stitch pattern ( without decreasing)
Repeat the 4 rows (one with decreasing at the beginning, next 3 without decreasing) until you have in total the same number of rows as for the back side.
- Size S – 51 rows in total ( not counting the first row in dc)
- Size M – 54 rows in total
- Size L – 58 rows in total
Left side
Rows 19 – 38 ( 20 – 40 / 21 – 42)
Begin with the marked stitch and make the shell stitch pattern. Repeat this row until you get to the armpit.
Row 39 ( 41, 43)
After getting to the armpit, decrease with 6 cm (14 sts) at the end of the row.
Row 40 (42, 44)
Begin with a decrease then continue with the shell stitch pattern.
Rows 41 – 43 ( 43 – 45, 45 – 47)
Make the shell stitch pattern ( without decreasing)
Repeat the 4 rows (one with decreasing at the beginning, next 3 without decreasing) until you have in total the same number of rows as for the back side.
- Size S – 51 rows in total ( not counting the first row in dc)
- Size M – 54 rows in total
- Size L – 58 rows in total
Now the front side is done

Next, put the front side over the back side and sew the sides edges.
After that we will make the buttons line and the collar.
Buttons line and collar
This part is the same for all sizes.
Row 1
Insert the yarn and hook in the first stitch on the bottom of the buttons line, the one on the right side of the top (or the left side as you watching) and make 1 sc in each st.
When you get to the corner of the top of the front side, make 3 sc in the same st. Continue with the top edge of the front side and work sc2tog ( like a decrease in sc, 2 sc worked together).
At the end of the top edge of the front side chain 10, then join with the back side. On the top edge of the back side make sc2tog to the end, then chain 10 and join with the other front side (the left side). Continue making sc2tog until you get to the corner. In corner 3 sc in the same stitch and continue with left side of the buttons line making 1 sc in each st. Ch 1 and turn.
Rows 2 and 3
1 sc in each st across. Ch 1 and turn. (in the 2 corners make 3 sc in the middle st)
Row 4
We are on the left side of the buttons line, so on this row we will make the buttons holes.
[1 sc the first 10 sts, ch 2, skip 2] repeat 3 times. Continue with 1 sc in each stitch across.
Rows 5 – 6
1 sc in each st across.
And the buttons line and collar are done. Now sew the buttons line on the bottom ( the 2 sides, one over the other) then sew the buttons and the top part of the dress is done

For the top part of the dress you can find here the video tutorial.
Next we will continue with the skirt. If you want your skirt part to be wider you can make 1 round in double crochet and make some increases (2 dc in the same stitch) until you have the desired width. You can also use for the skirt a bigger crochet hook size.
The skirt part is worked in rounds and the round will start on the side, not to have a visible joining line.
Below you can find the stitch chart for the shell stitch worked in rounds
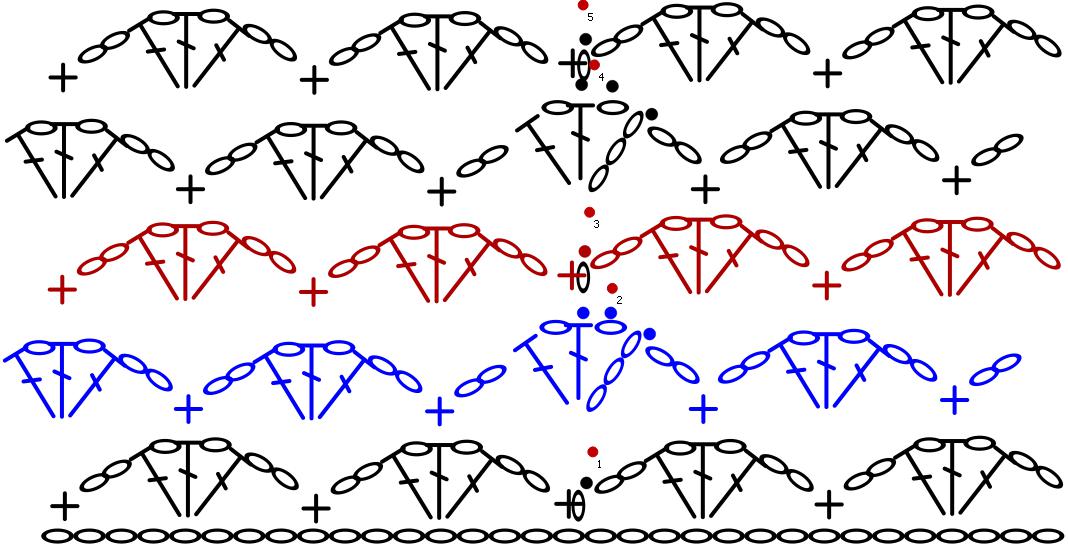
Round 1
Insert the yarn, make 1 ch and 1 sc in the same st, [ch 2, skip 3,( 1dc, ch 1, 1 dc, ch 1, 1 dc) in the same st, ch 2, skip 3, 1 sc in next]. Repeat the section to the end of the round. Finish the round with ch 2, skip the last 3 sts and join with a sl st with the first sc.
Round 2
Ch 4, ( 1 dc, ch 1, 1 dc) in the same first st, ch 2, [1 sc in the middle dc of the shell, ch 2 (1 dc, ch 1, 1 dc, ch 1, 1 dc) on the top of the sc from the previous round, ch 2]. Repeat the section to the end of the round. Finish the round with 1 sc on the top of the last middle shell dc, ch 2 and join with sl st with 3rd st of the starting chain.
Round 3
Start with sl st until you get to the first middle dc.
Ch1, 1 sc in the same st, ch 2 [(1 dc, ch 1, 1 dc, ch 1, 1 dc) on the top of the sc from the previous round, ch 2, 1 sc in the middle dc of the shell, ch 2]. Repeat the section to the end of the round. Finish the round with ch 2 and sl st with the 1st sc.
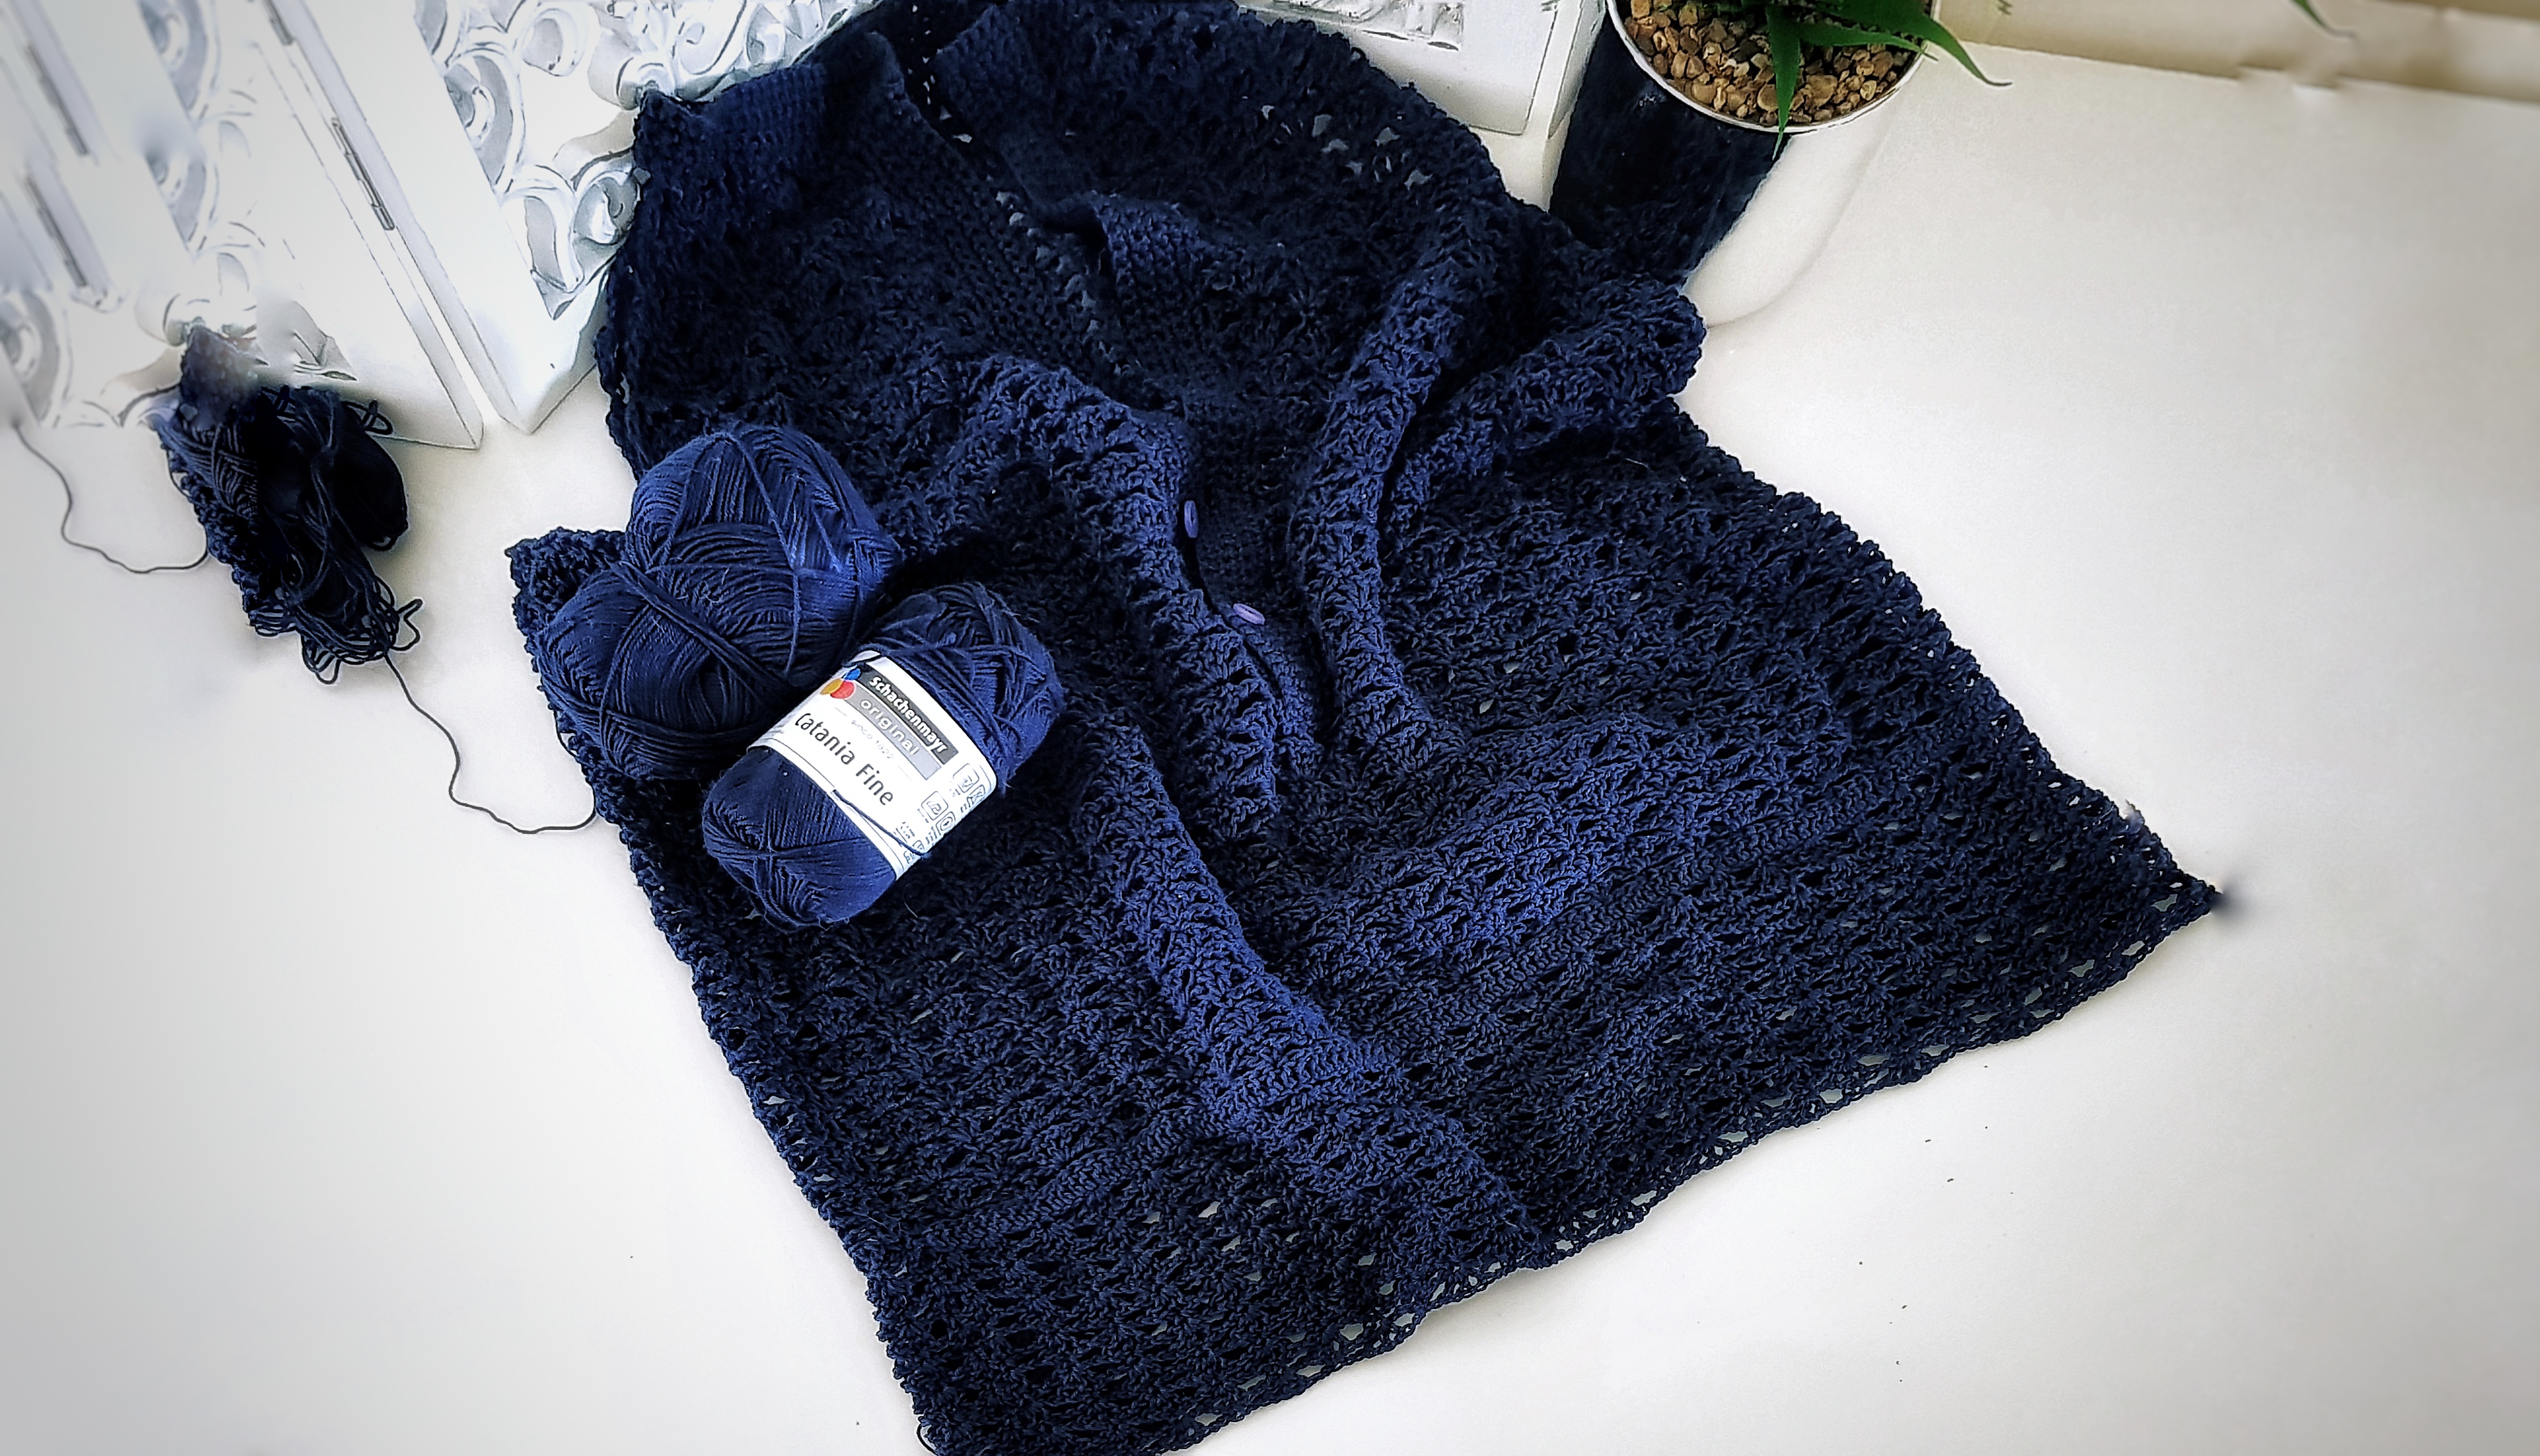
And all you have to do is just to keep repeating rounds 2 and 3 until you have the desired length of your dress. I did 40 rounds, but I think I will make a few more to have the dress a bit longer.
And Done! The Long Time Dress is ready to be worn. To finish it you will need to insert a cord at the waist or to use a belt, but it can also be worn as it is.
I really love this dress and I hope you too.
You can purchase the add free, easy printable, instant download PDF version of this pattern here:




Comments are closed.