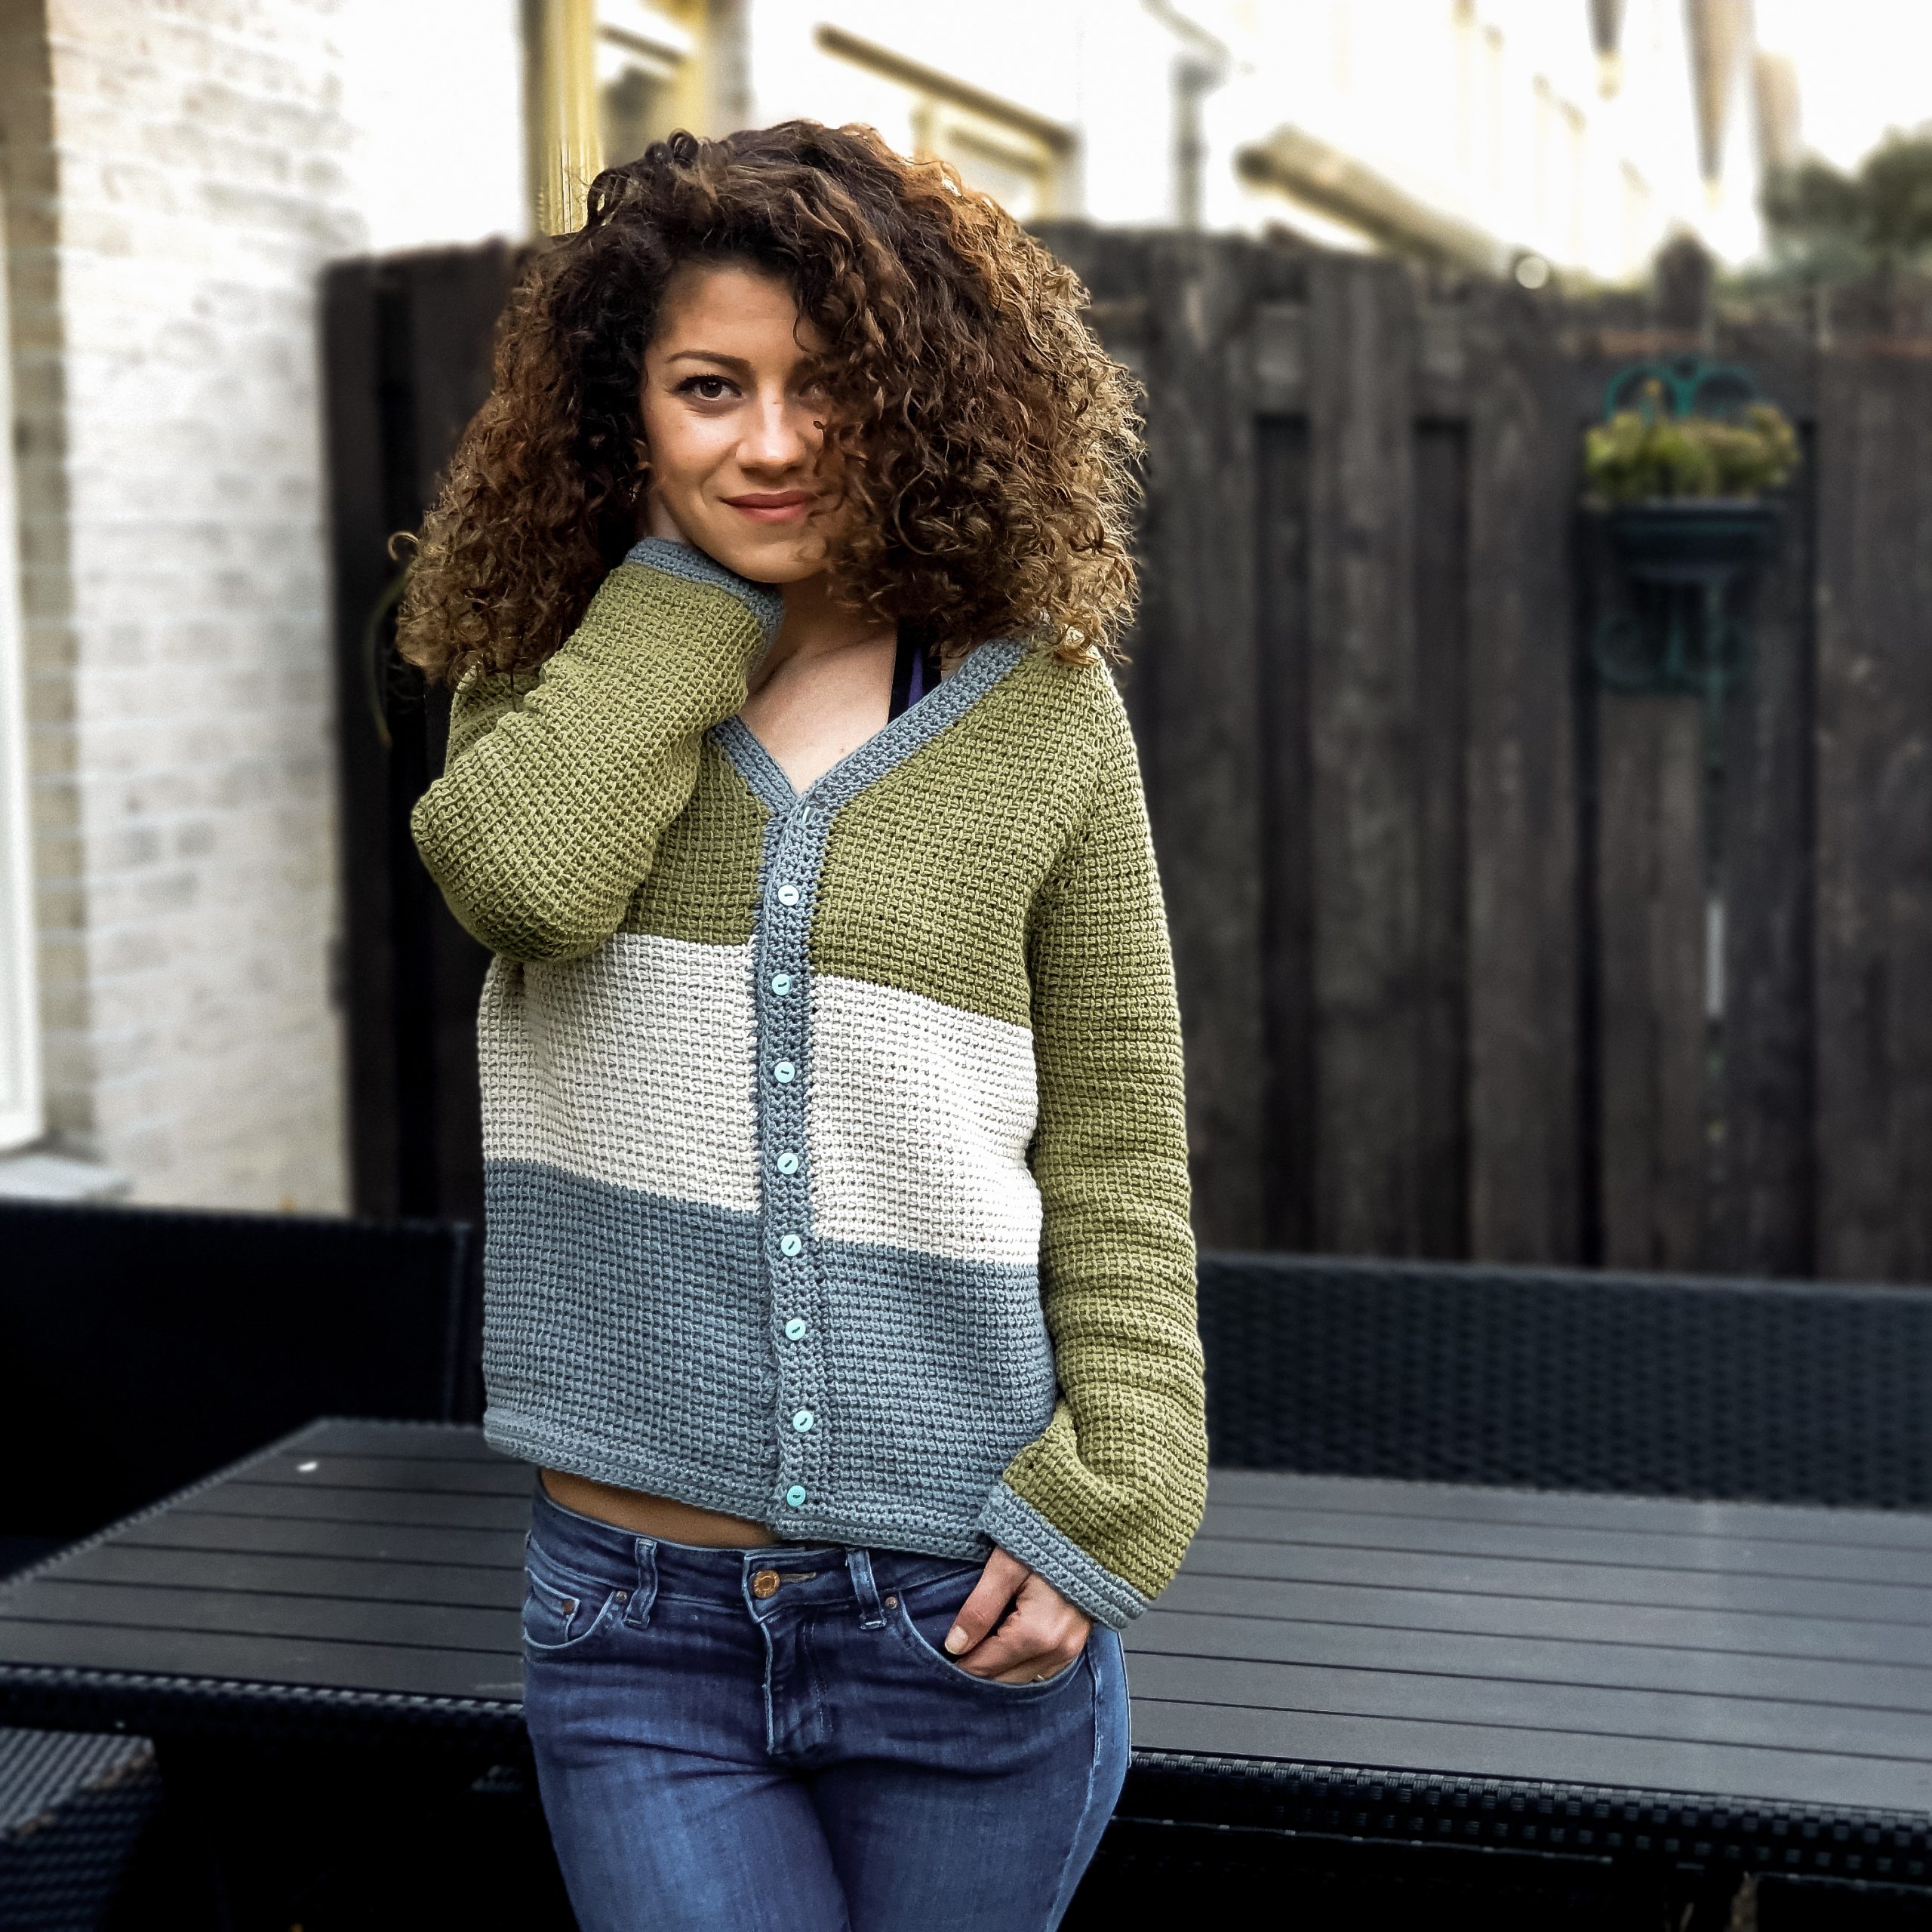
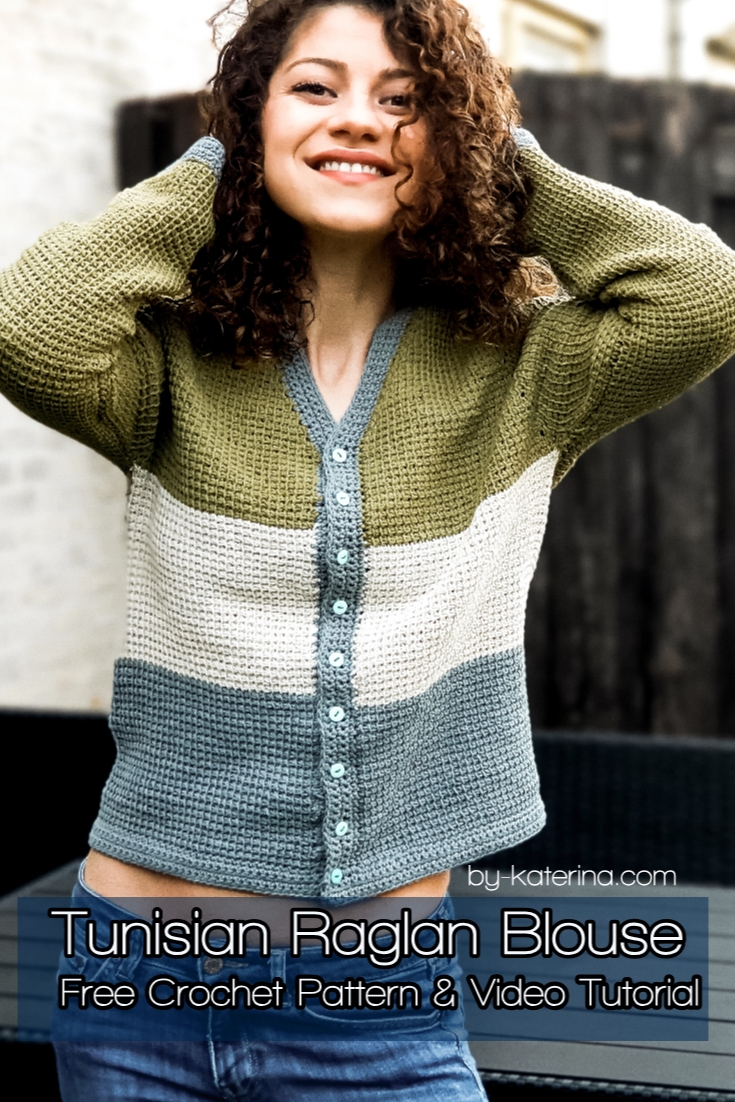
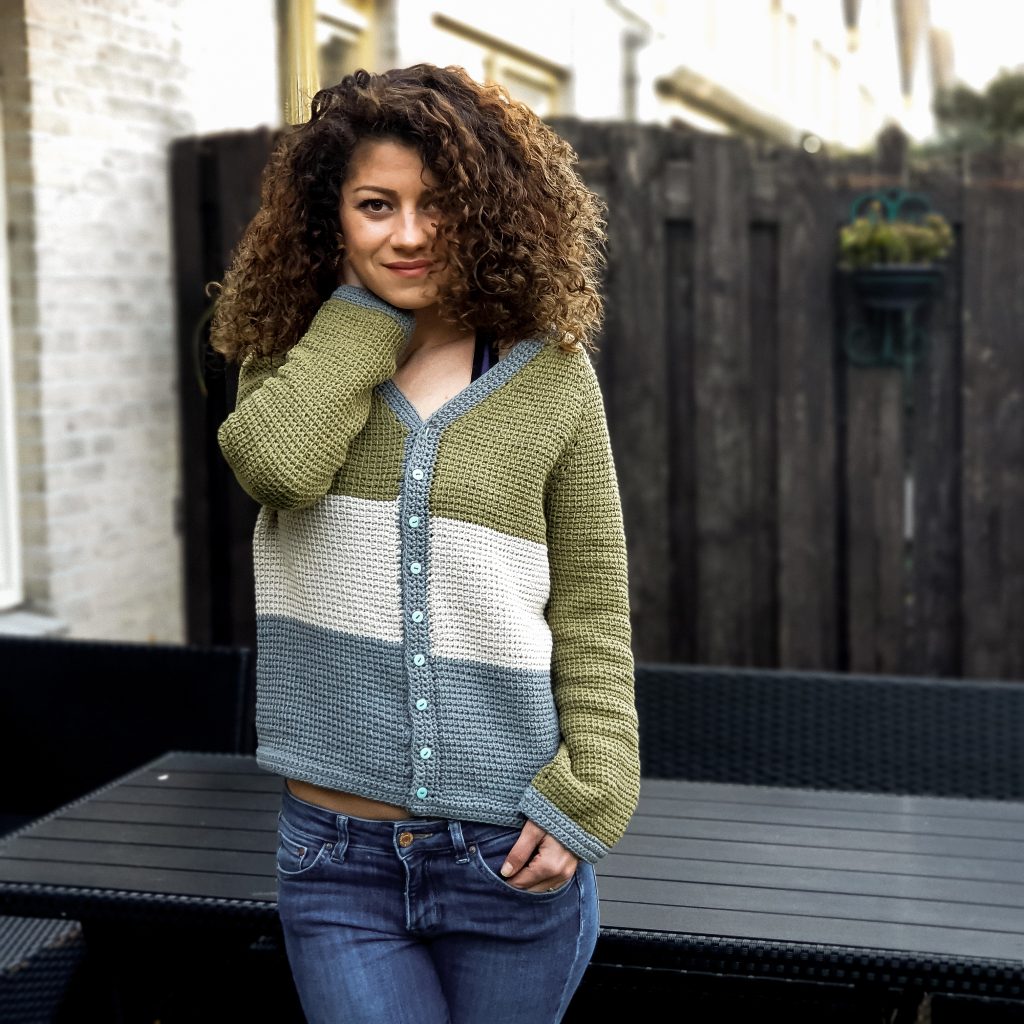
When I decided to design this Tunisian Raglan Blouse, I had in mind 2 things:
- It has to be a top down design, because I like this method for sweaters and tops and why not to try a Tunisian crochet one.
- There are a lot of Tunisian Crochet tutorials, but I didn’t find a top down blouse or how to work a yoke and I said that maybe are people there who will want to learn how to do it.

You can Purchase the easy printable PDF version of this pattern here:
I have to say that this blouse is my first Tunisian Crochet Project. I tried different small things before, but never a garment or something bigger.
As the other yarn crafts which I love, Tunisian Crochet it’s also addictive. I love so much the texture and I won’t stop here with Tunisian designs for sure.
I really hope you will love this pattern and you will try to make a Tunisian Raglan Blouse. I am amazed how many different textures you can get, only changing a crochet with knitting needles or with a Tunisian Crochet hook.
I wanted with this pattern to help you learn as many things as possible in Tunisian Crochet. So you will learn how to increase, how to change colors, working in rounds, bind off.
Almost everything you need to know about this technique is here, in this project.
Let’ s see what we will need and how to make this Tunisian Raglan Blouse.

Materials you will need
- Yarn
- Category 3 ( Light weight yarn; DK)
- Needles
- 5 mm Tunisian Crochet Hook with cable of 40 to 50 mm
- 4 mm Crochet Hook for edging
- You will need a yarn needle for wave in ends
- Scissors
- 4 stitch markers
- 8 buttons (0.5 cm in diameter)
Pattern notes
This Tunisian Raglan Blouse uses both Tunisian and traditional crochet. We will use traditional crochet only for edging, the rest of the sweater is worked just in Tunisian Simple Stitch.
This pattern requires techniques as Tunisian simple stitch, single crochet stitch, increase in Tunisian crochet and working in rounds in Tunisian crochet, loop method.
The blouse has a V neck made by starting with less stitches for the front panels and increase at the beginning and at the end of the row until we will have the same number of stitches as for the back panel.
The blouse is a top down design. We will start working the yoke first and then divide it into sleeves and body.
The Tunisian Raglan Blouse can be easily customized and be made as long or short as you wish, just by working more or fewer rows on the body. The same with sleeves.
The written instructions below are only for the forward row. The turning row will be always worked the same:
Turning row
Yarn over and pull the yarn through the first loop only. *yarn over and pull the yarn through 2 loops. *Repeat to the end of the row.
The pattern is available in 8 sizes, from Small to 5 X Large and is written in US terms
Final measurements
Final measurements of the sweater are listed below.
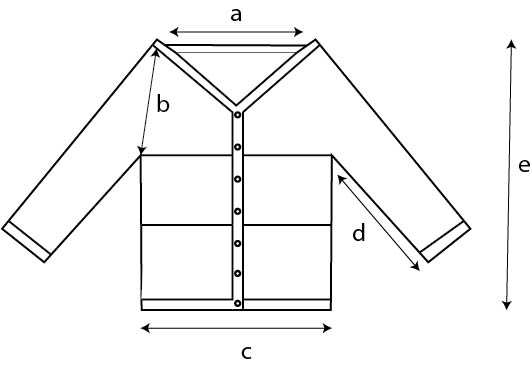
Neck Line a: 20 cm (22, 22, 24, 25, 25, 29, 30)
Yoke Depth b: 26 cm (28, 30, 33, 33, 35, 38, 39)
Bust Width c: 45 cm (50, 55, 60, 65, 70, 75, 80)
Underarm length d: 34 cm (34, 36, 36, 37, 37, 38, 38)
Length e: 51 cm (55, 58, 60, 63, 63, 67, 67)
This measurements will fit:
| To Fit cm | S | M | L | XL | 2XL | 3XL | 4XL | 5XL |
| Bust | 43 | 48 | 53 | 58 | 63 | 68 | 73 | 78 |
You can Purchase the easy printable PDF version of this pattern here:
How much yarn do you need?
For the Tunisian Raglan Blouse I used Cosy Fine by Durable Yarn. This yarn is a mix of cotton and acrylic and each skein has approximate 50 grams and 105 meters.
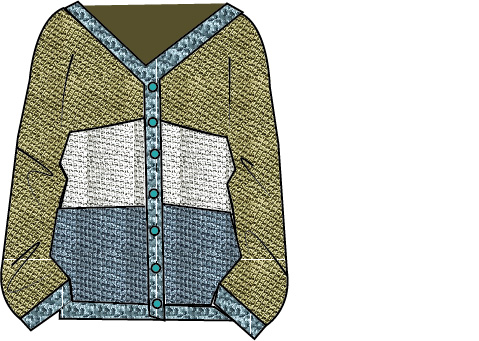
I used 3 colors: olive for yoke and sleeves, beige and grey.
For each size you will approximate need:

About the stitch pattern.
The Tunisian Raglan Blouse is worked in Tunisian Simple stitch. For the border we will use traditional single crochet.
Abbreviations used in this pattern
- Ch – chain
- Sc – single crochet
- Ss – slip stitch
- Tss – Tunisian simple stitch
- St(s) – stitch(es)
- Inc B – Increase at the beginning of the row: Insert the hook in the second space between Tss, yarn over and pull out a loop
- Inc E – Increase at the end of the row: Insert the hook in the last space between second to last and last TSS, yarn over and pull out a loop.
- Inc R – increase raglan line: Insert the hook in the space before the raglan line Tss, yarn over and pull out a loop, work the raglan line TSS, insert the hook in the space after the raglan line, yarn over and pull out a loop.
Gauge
- 15 sts = 10 cm
- 16 rows = 10 cm
*in Tunisian simple st
Pattern
Numbers for sizes M, L, XL, 2XL, 3XL, 4XL and 5 XL are written between.
After each inc R place a stitch marker into the raglan line st. Move the stitch marker with each Increase row.
Yoke
In Olive
Start| Ch 60 (66, 66, 68, 76, 76, 96, 97)
R1| 1 tss in each st to the end of the row.
R2| Increase row: 1 Inc B, 1 Tss in next 2 (2, 2, 2, 2, 2, 5, 5 ) sts, 1 Inc R, 1 tss in next 10 (11, 11, 11, 14, 14, 18, 18) sts, 1 Inc R, 1 tss in next 30 (34, 34, 36, 38, 38, 44, 45) sts, 1 Inc R, 1 Tss in next 10 (11, 11, 11, 14, 14, 18, 18) sts, 1 Inc R, 1 tss in next 2 (2, 2, 2, 2, 2, 5, 5 ) sts, 1 Inc E, 1 Tss in the last st.
R3| Repeat R1
R4| Increase Row: 1 IncB, *1 tss in every st to the next st marker, 1 IncR. *Repeat 4 times. 1 tss in every st to the last one, 1 Inc E, 1 tss in the last st.
Repeat R3 and R4 until you will have on front panels together the same number of sts as on the back panel.
- S – 25 rows
- M – 29 rows
- L – 29 rows
- XL – 31 rows
- 2XL – 33 rows
- 3XL – 33 rows
- 4XL – 33 rows
- 5XL – 34 rows
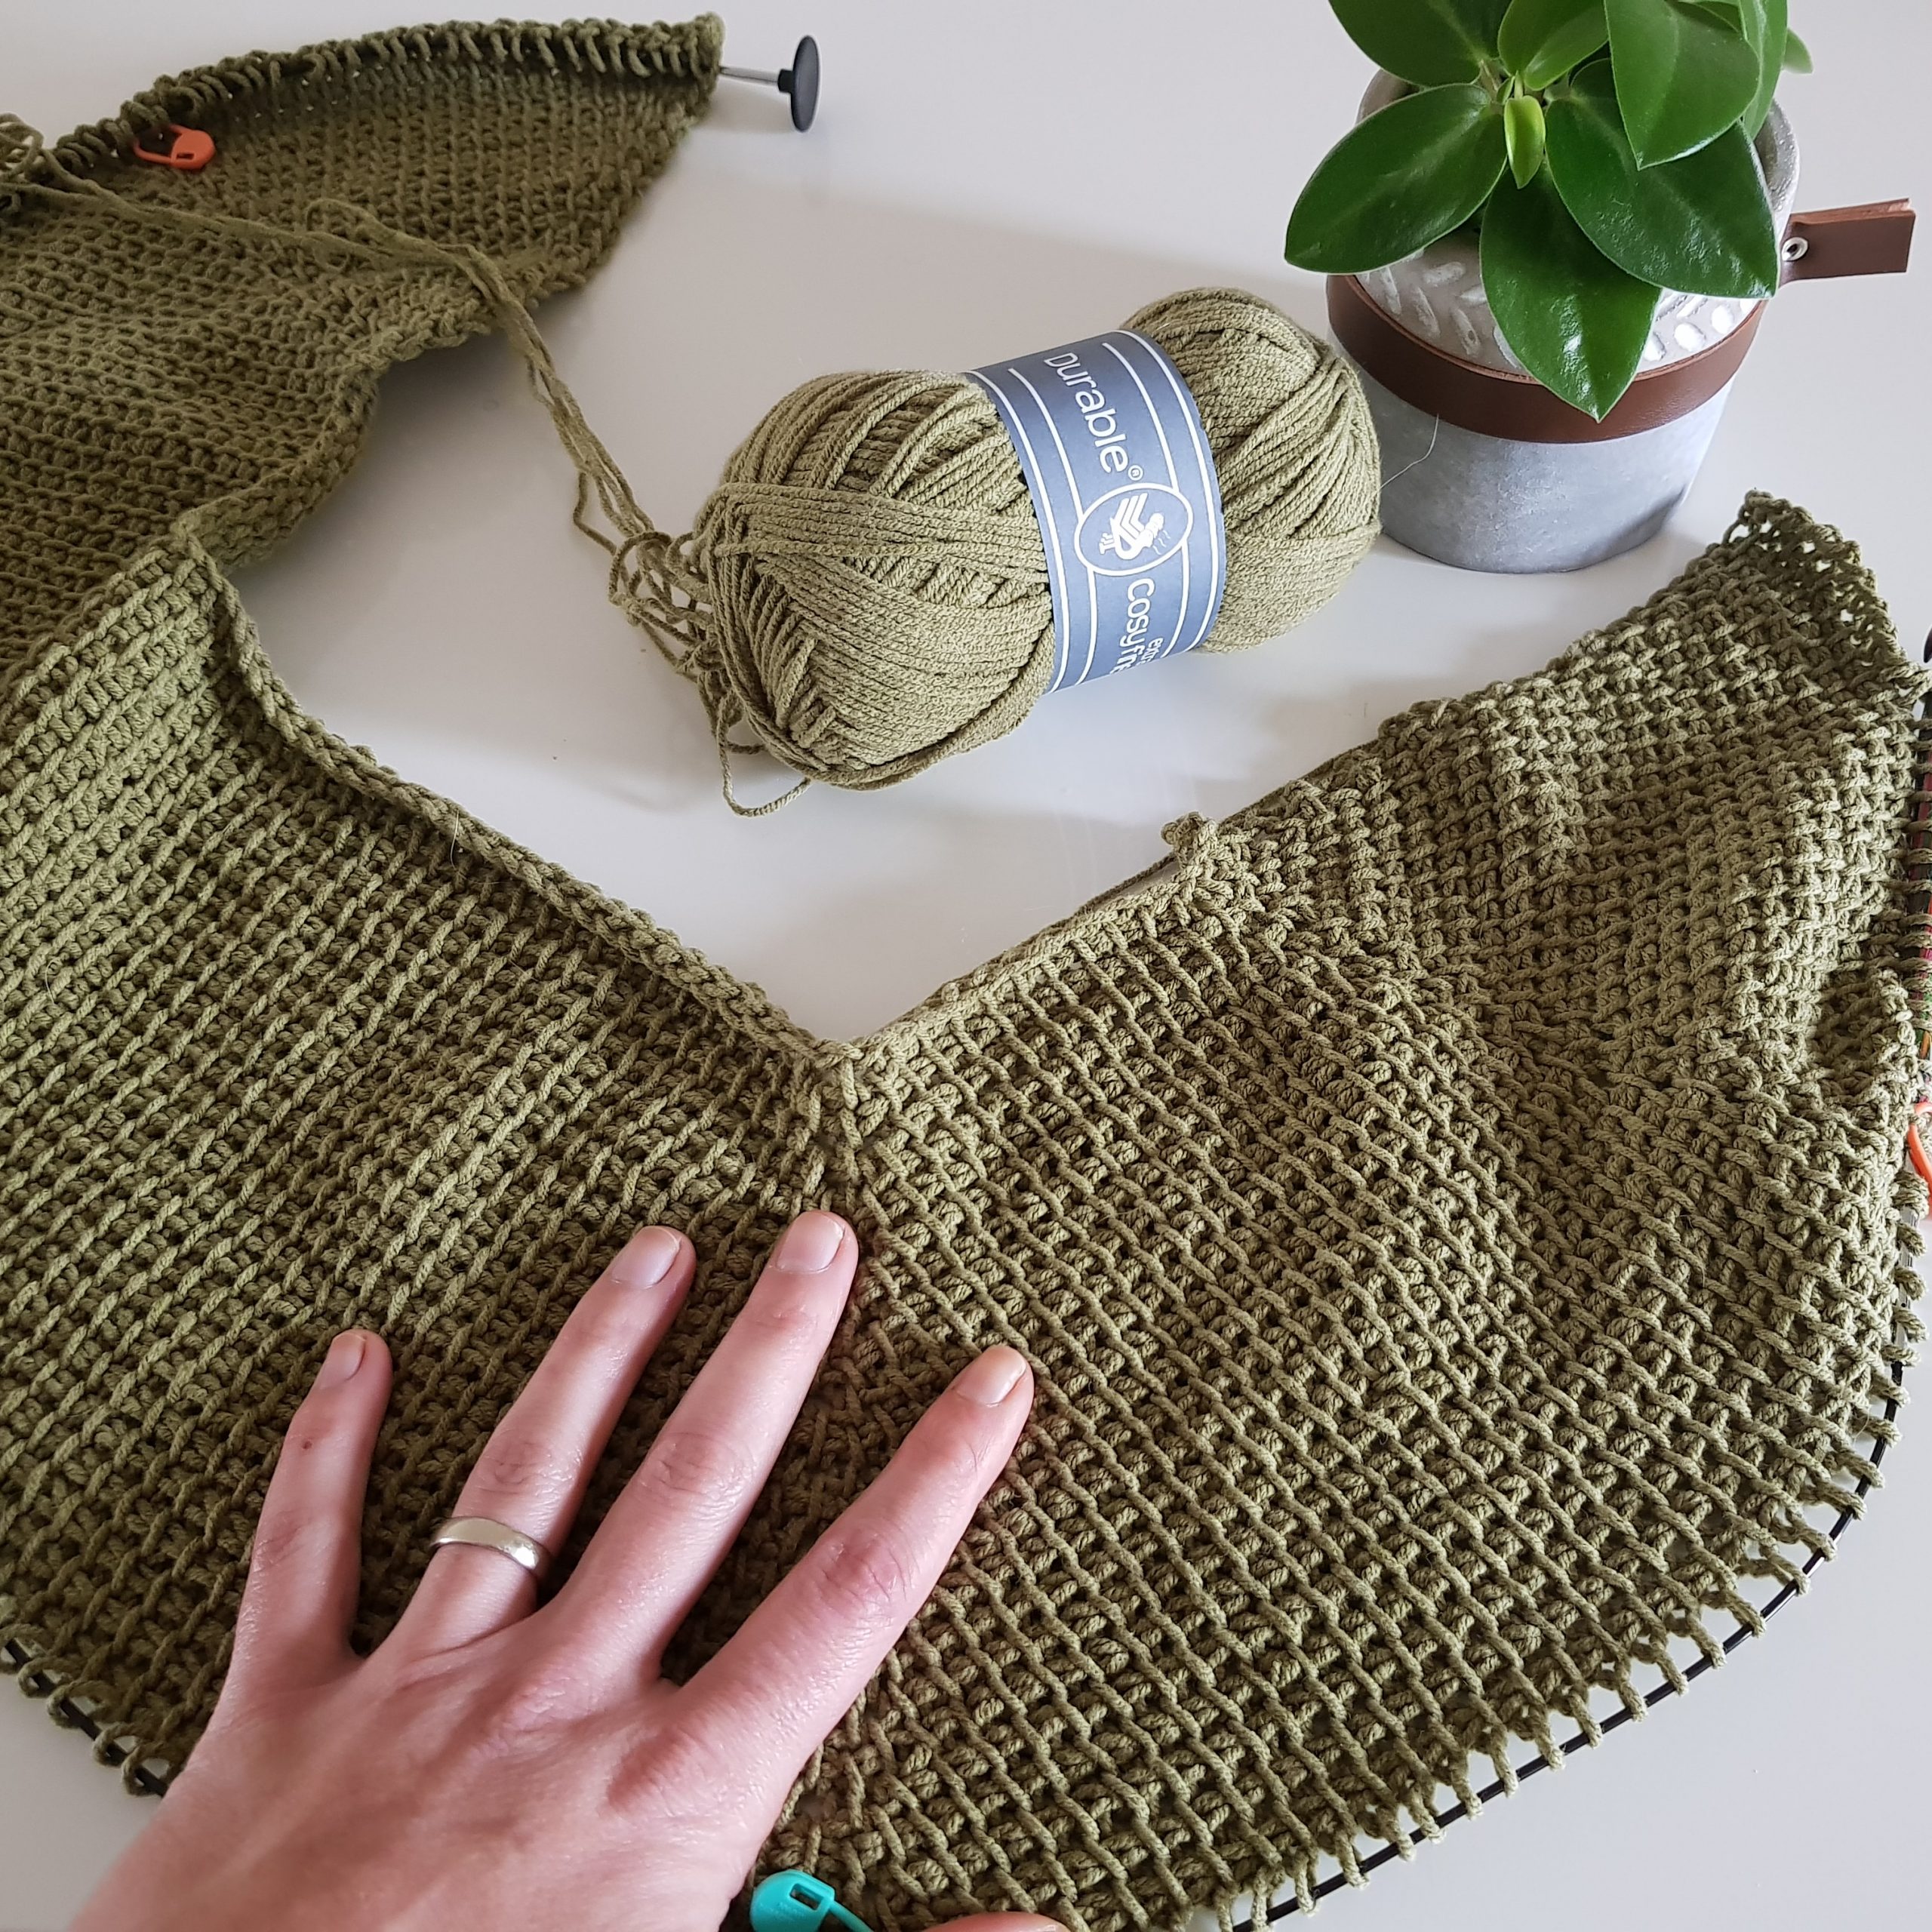
After finishing the V neck we will continue with the yoke, increasing only on the raglan lines. Stop increasing at the beginning and at the end of the row.
You can Purchase the easy printable PDF version of this pattern here:
Continue with the yoke until you have in total:
- S – 38 rows
- M – 42 rows
- L – 45 rows
- XL – 48 rows
- 2XL – 50 rows
- 3XL – 52 rows
- 4XL – 56 rows
- 5XL – 58 rows
At the end of last turning row, when you have 2 loops o your hook, change the color to beige. (Make a slip knot and pull the loop through the last 2 loops on your hook).
Body (in beige)
Sizes S and M
Separating row : 1 tss in each st, to the raglan line st, 1 tss in the raglan line st, skip the sts for the sleeve, 1 tss in the next raglan line tss, 1 tss in each of the next sts, until the next raglan line, 1 tss in the raglan line st, skip the sts for the sleeve, 1 tss in the next raglan line st, 1 tss in the next sts to the end of the row.
Sizes L, XL, XXL, 3XL, 4XL and 5XL
For bigger sizes you will need to add extra sts to the armpit to get to the needed number of sts for the Bust width.
- L – 5 extra sts
- XL – 7 extra sts
- XXL – 11 extra sts
- 3XL – 14 extra sts
- 4XL – 14 extra sts
- 5XL – 18 extra sts

How to add extra sts
Make 2 separate chains with the number of sts that you need. Now you have 2 small separate chain to be added to the armpit. This chain will be attached to your work piece and the ends will be anchored into your work with a help of a needle.
You can watch an useful video tutorial here
Separating row: 1 tss in each st to the raglan line st, 1 tss in the raglan line st, 1 tss in each st of the extra chain, skip the sts for the sleeve, 1 tss in next raglan line st, 1 tss in each st to the next raglan line, 1 tss into the raglan line st, 1 tss in each st of the extra chain, skip the sts for the sleeve, 1 tss in next raglan line st, 1 tss in all sts to the end of the row.
R1| 1 tss in each st to the end of the row.
R1-R22| Repeat R1
Finish the R22 turning row with color Grey.
R23 –R44| In color Grey: Repeat R1
Finish with a bind off row.
Bind off row:
Start as a normal row. Insert the hook s you would for a Tss. Yarn over and pull through a loop. As you are pulling through, also pull through the loop on the hook. Repeat to the end of the row.
Sleeves
The sleeves are worked in rounds using the loop method.
For all sizes
Start| join the yarn at the armpit and stat with 1 tss in the left raglan line st.
R1| 1 tss in each of the half number of sts (or as many sts as you can ) pull the hook and continue working the rest of the sts to the end of the row (after pulling the hook and start working the rest of the sts, the cable will take a loop shape.).
Before starting the turning row, pull out the cale a bit, then wrap the yarn over the cable (you jus did an extra loop), yarn over and pull it through the first loop, wrap the yarn ones more over the cable (you did a second extra loop on the cable), yarn over and pull the yarn through 2 loops. Tarn over and pull the yarn through 2 loop until you have 4 loops left at the end of the row. Yarn over and pull the yarn through all 4 loops.
*with the 2 extra loops made at the beginning of the turning row we are joining the beginning with the end of the row.
Repeat R1 until you have in total:
- S – 54 rows
- M – 54 rows
- L – 58 rows
- XL – 58 rows
- 2XL – 60 rows
- 3XL – 60 rows
- 4XL – 61 rows
- 5XL – 61 rows
Finish the sleeve with a bind off row.
Repeat the pattern for the other sleeve.
Neck line edging
Use grey color and a 4 mm traditional crochet hook.
Work the 1 sc in each tss side row on the front panels sides and in each tss on the back neck.
Working on the right side, join the yarn in to the first st of the right bottom corner
R1| 1 sc in each st, to the end of the row (left bottom corner). 1 ch st and turn.
R2| Repeat R1
R3| 1 sc in each st until you finish with the V neck left front panel sts, *1 ch st, skip 1 st, 1 sc in next 6 sts. * Repeat to the end of the row.
*on R3 we are making the buttons holes on the left front panel. Count the number of sts that you have from the end of the V neck to the bottom. Depending on how many buttons you will want to use, divide the number of sts to the number of buttons to see how many sts you will have between button holes.
*If you use bigger buttons,ch 2 and skip 2 sts.
R4 – R5| repeat R1
Don’t cut the yarn because from where your yarn is, you will start working the bottom edging.
Bottom edging
Start from where your yarn is after finishing with the neck line edging. 1 ch st
R1| 1 sc in each st to the end of the row. 1 ch st and turn.
R2-R5| Repeat R1
Fasten off.
Sleeves edging
Join the yarn in the joining stitch. 1 ch st
R1| 1 sc in each st to the end of the round. 1 ch st and turn.
R2 – R5| Repeat R1.
Fasten off.
To finish
Sew the buttons, wave in all ends and sew the armpit holes.
Block the blouse to measurements.
You can Purchase the easy printable PDF version of this pattern here:
You can watch a step by step video tutorial here



Comments are closed.