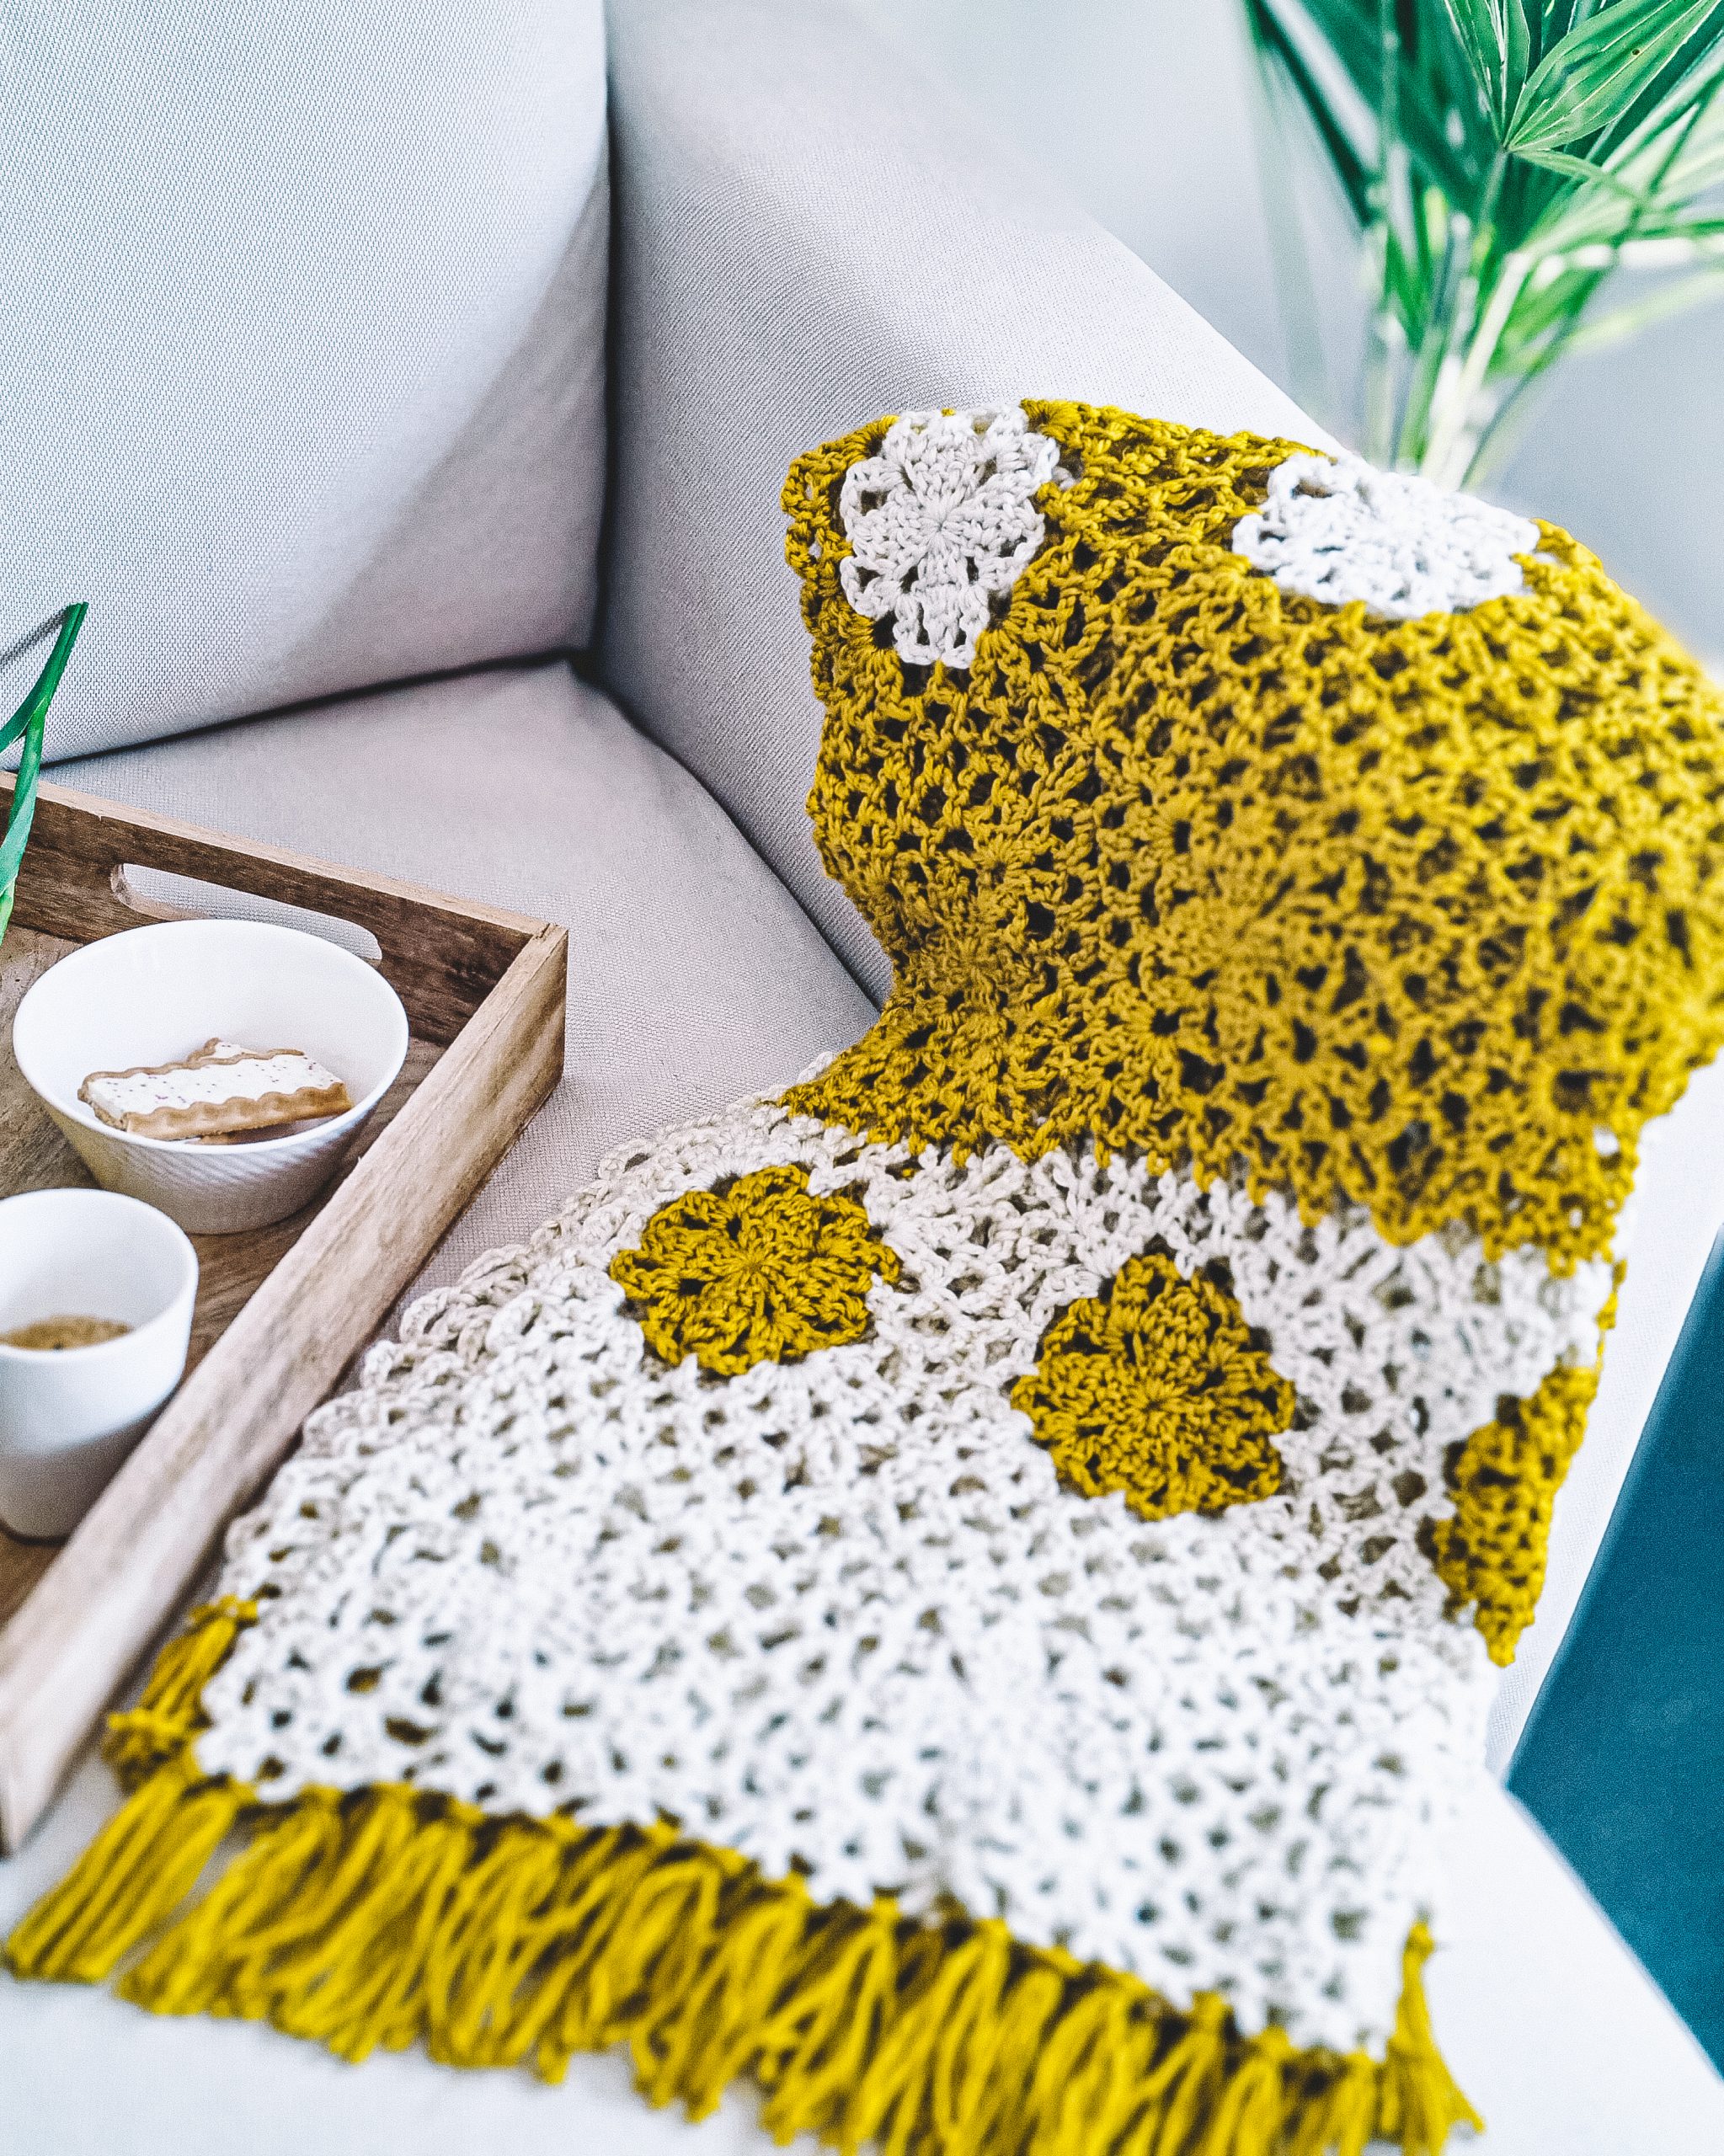
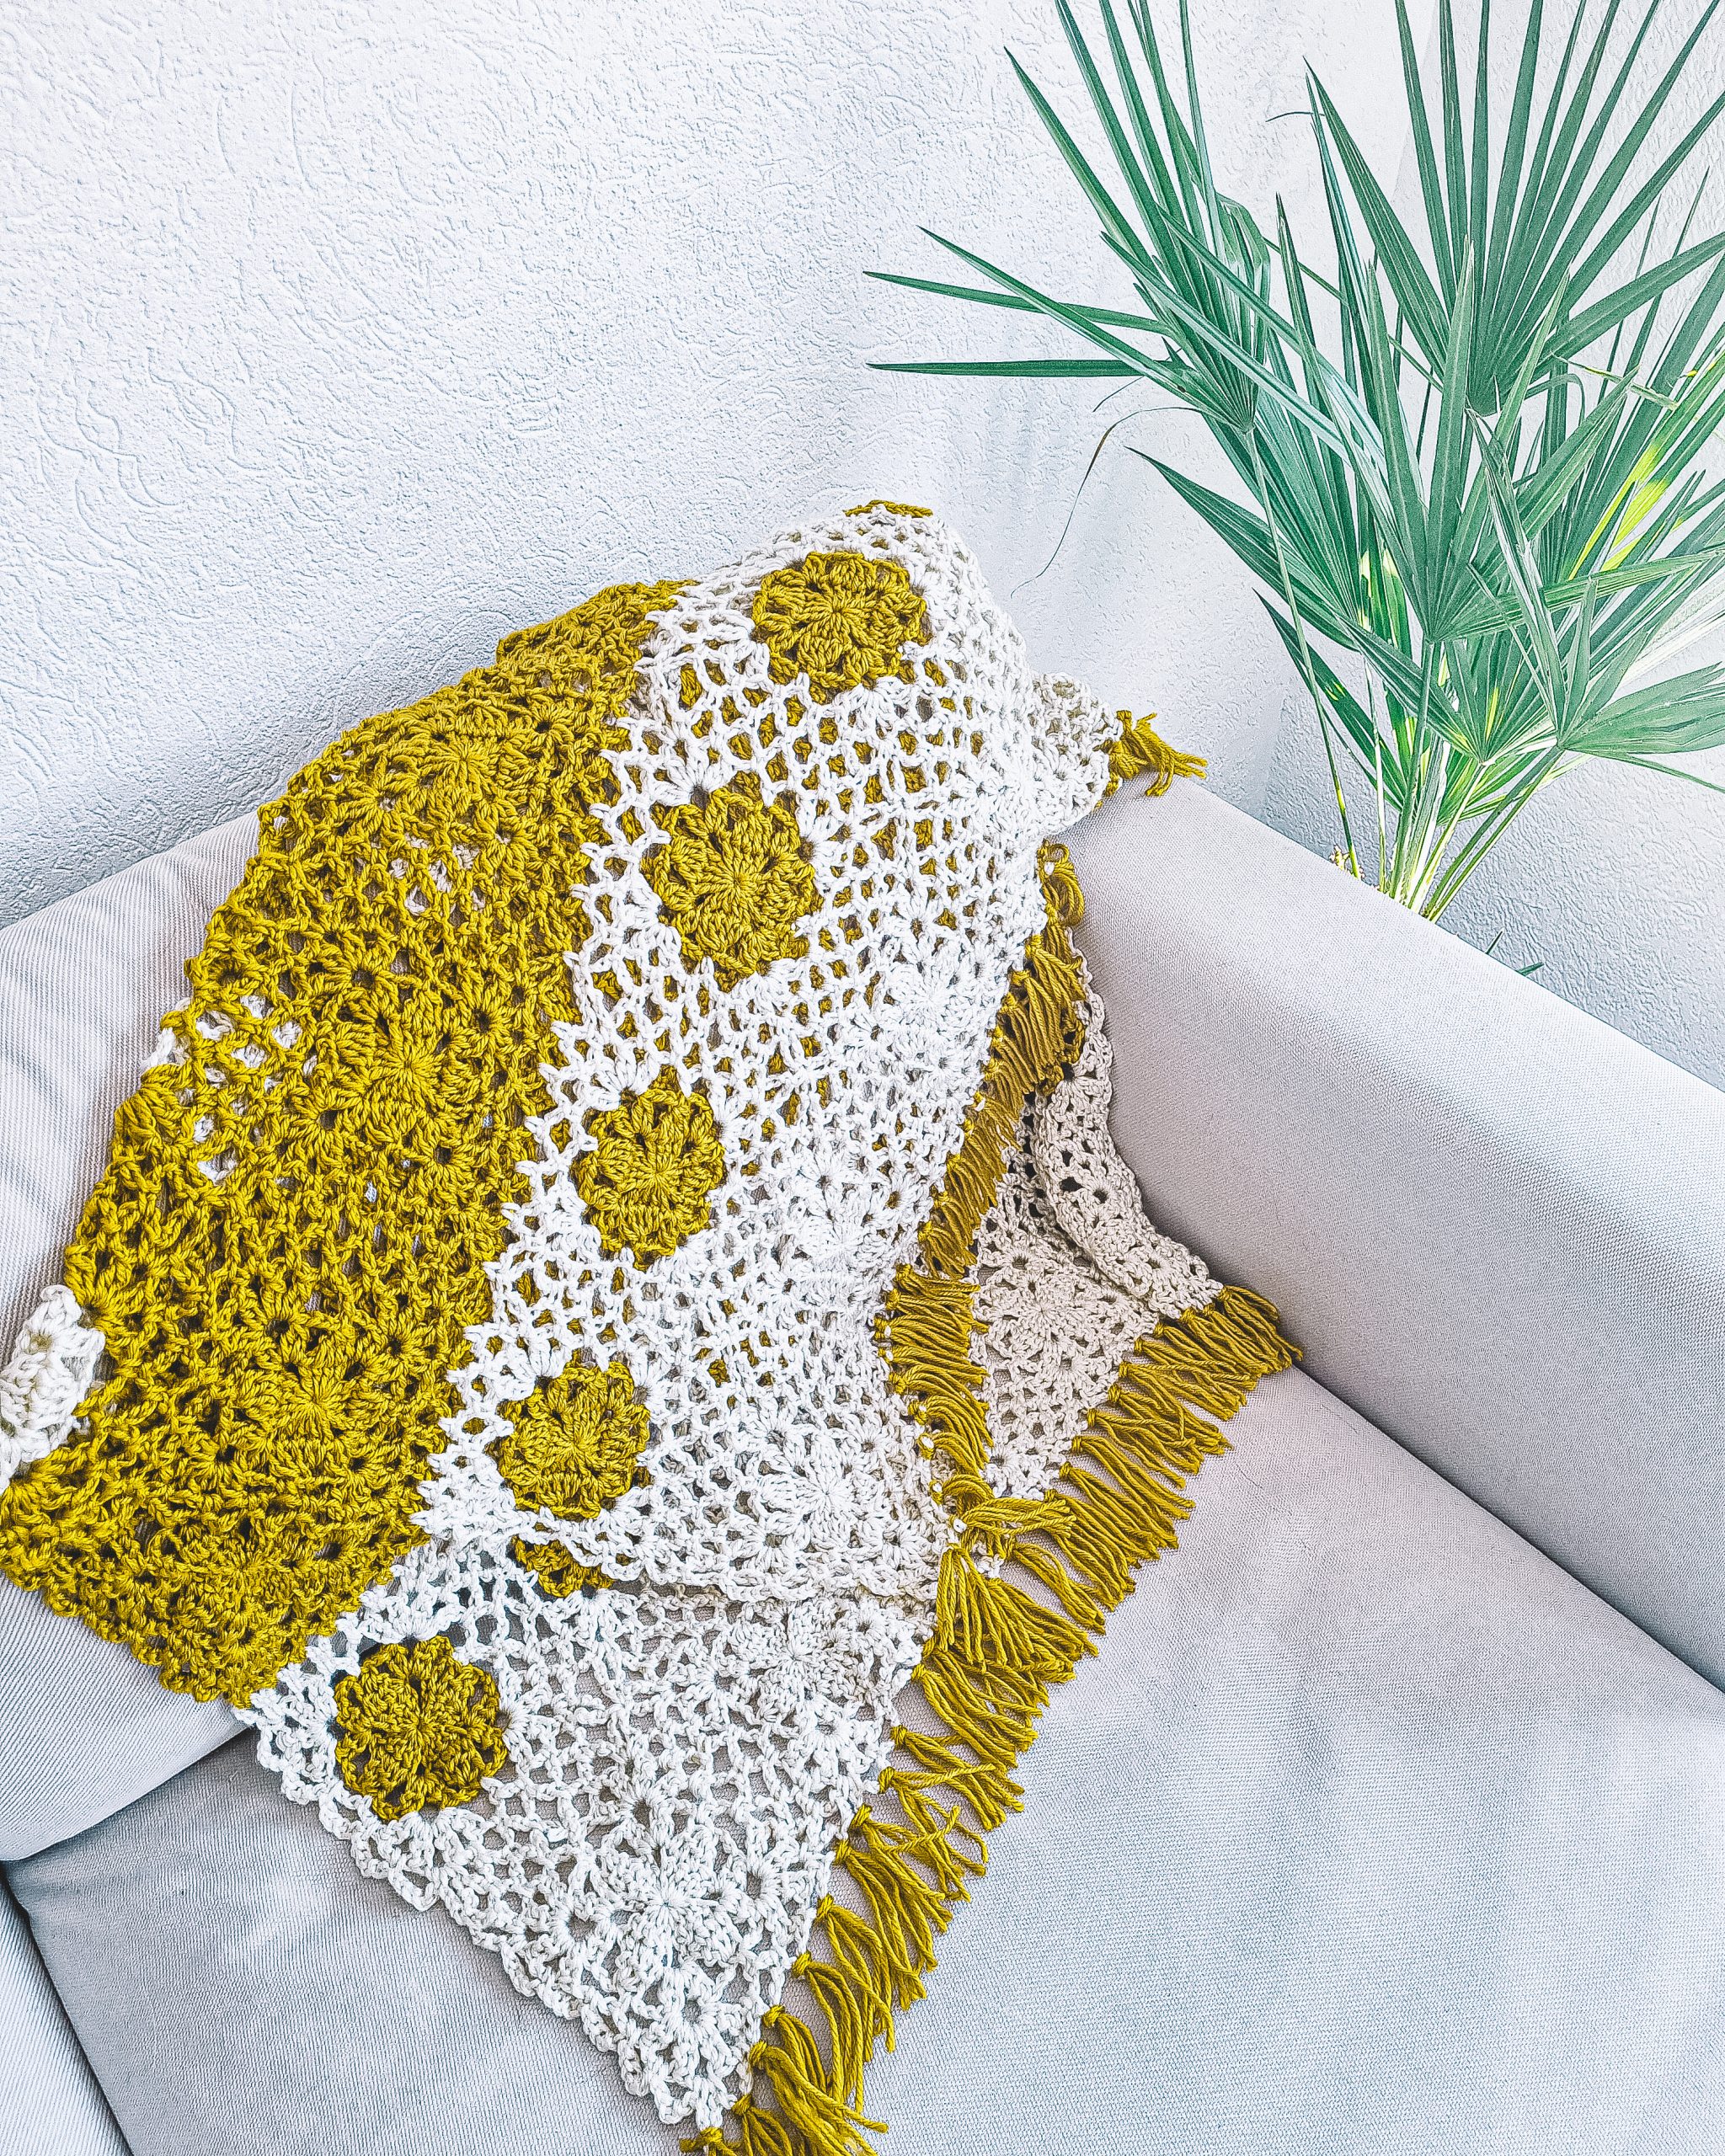
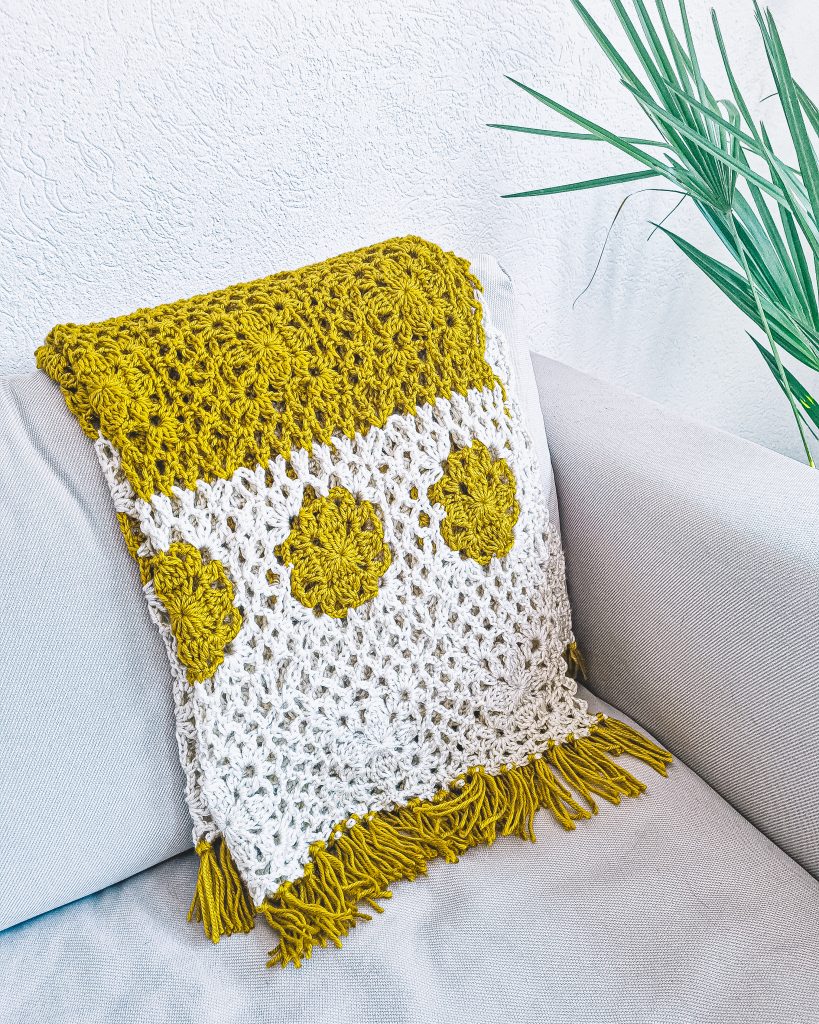
If you follow my posts for a while, you might have been noticed that I don’t make blankets too often! Actually, I don’t have any blanket pattern here on my website. But this Mornings Blanket is something that I needed around the house and I think it turned out really beautiful!
This project was sponsored by Furls Crochet as part of Furls Crochet Blog Hop 2021 and the post contains affiliate links.
I know it might be too hot to work on a blanket now, but this Mornings Blanket is lightweight, perfect for summer cooler mornings or even evenings. Plus, it is beautiful to lay down on the couch and make it an ideal home accessory.
Let’s see the materials you will need and how to make this beautiful blanket!
MATERIALS
- Yarn
-
- Medium Weight Yarn
- Crochet Hook
- 6 mm crochet hook ( Furls Streamline Swirl)
- You will need a yarn needle for weave in ends
- Scissors
NOTES ABOUT DESIGN
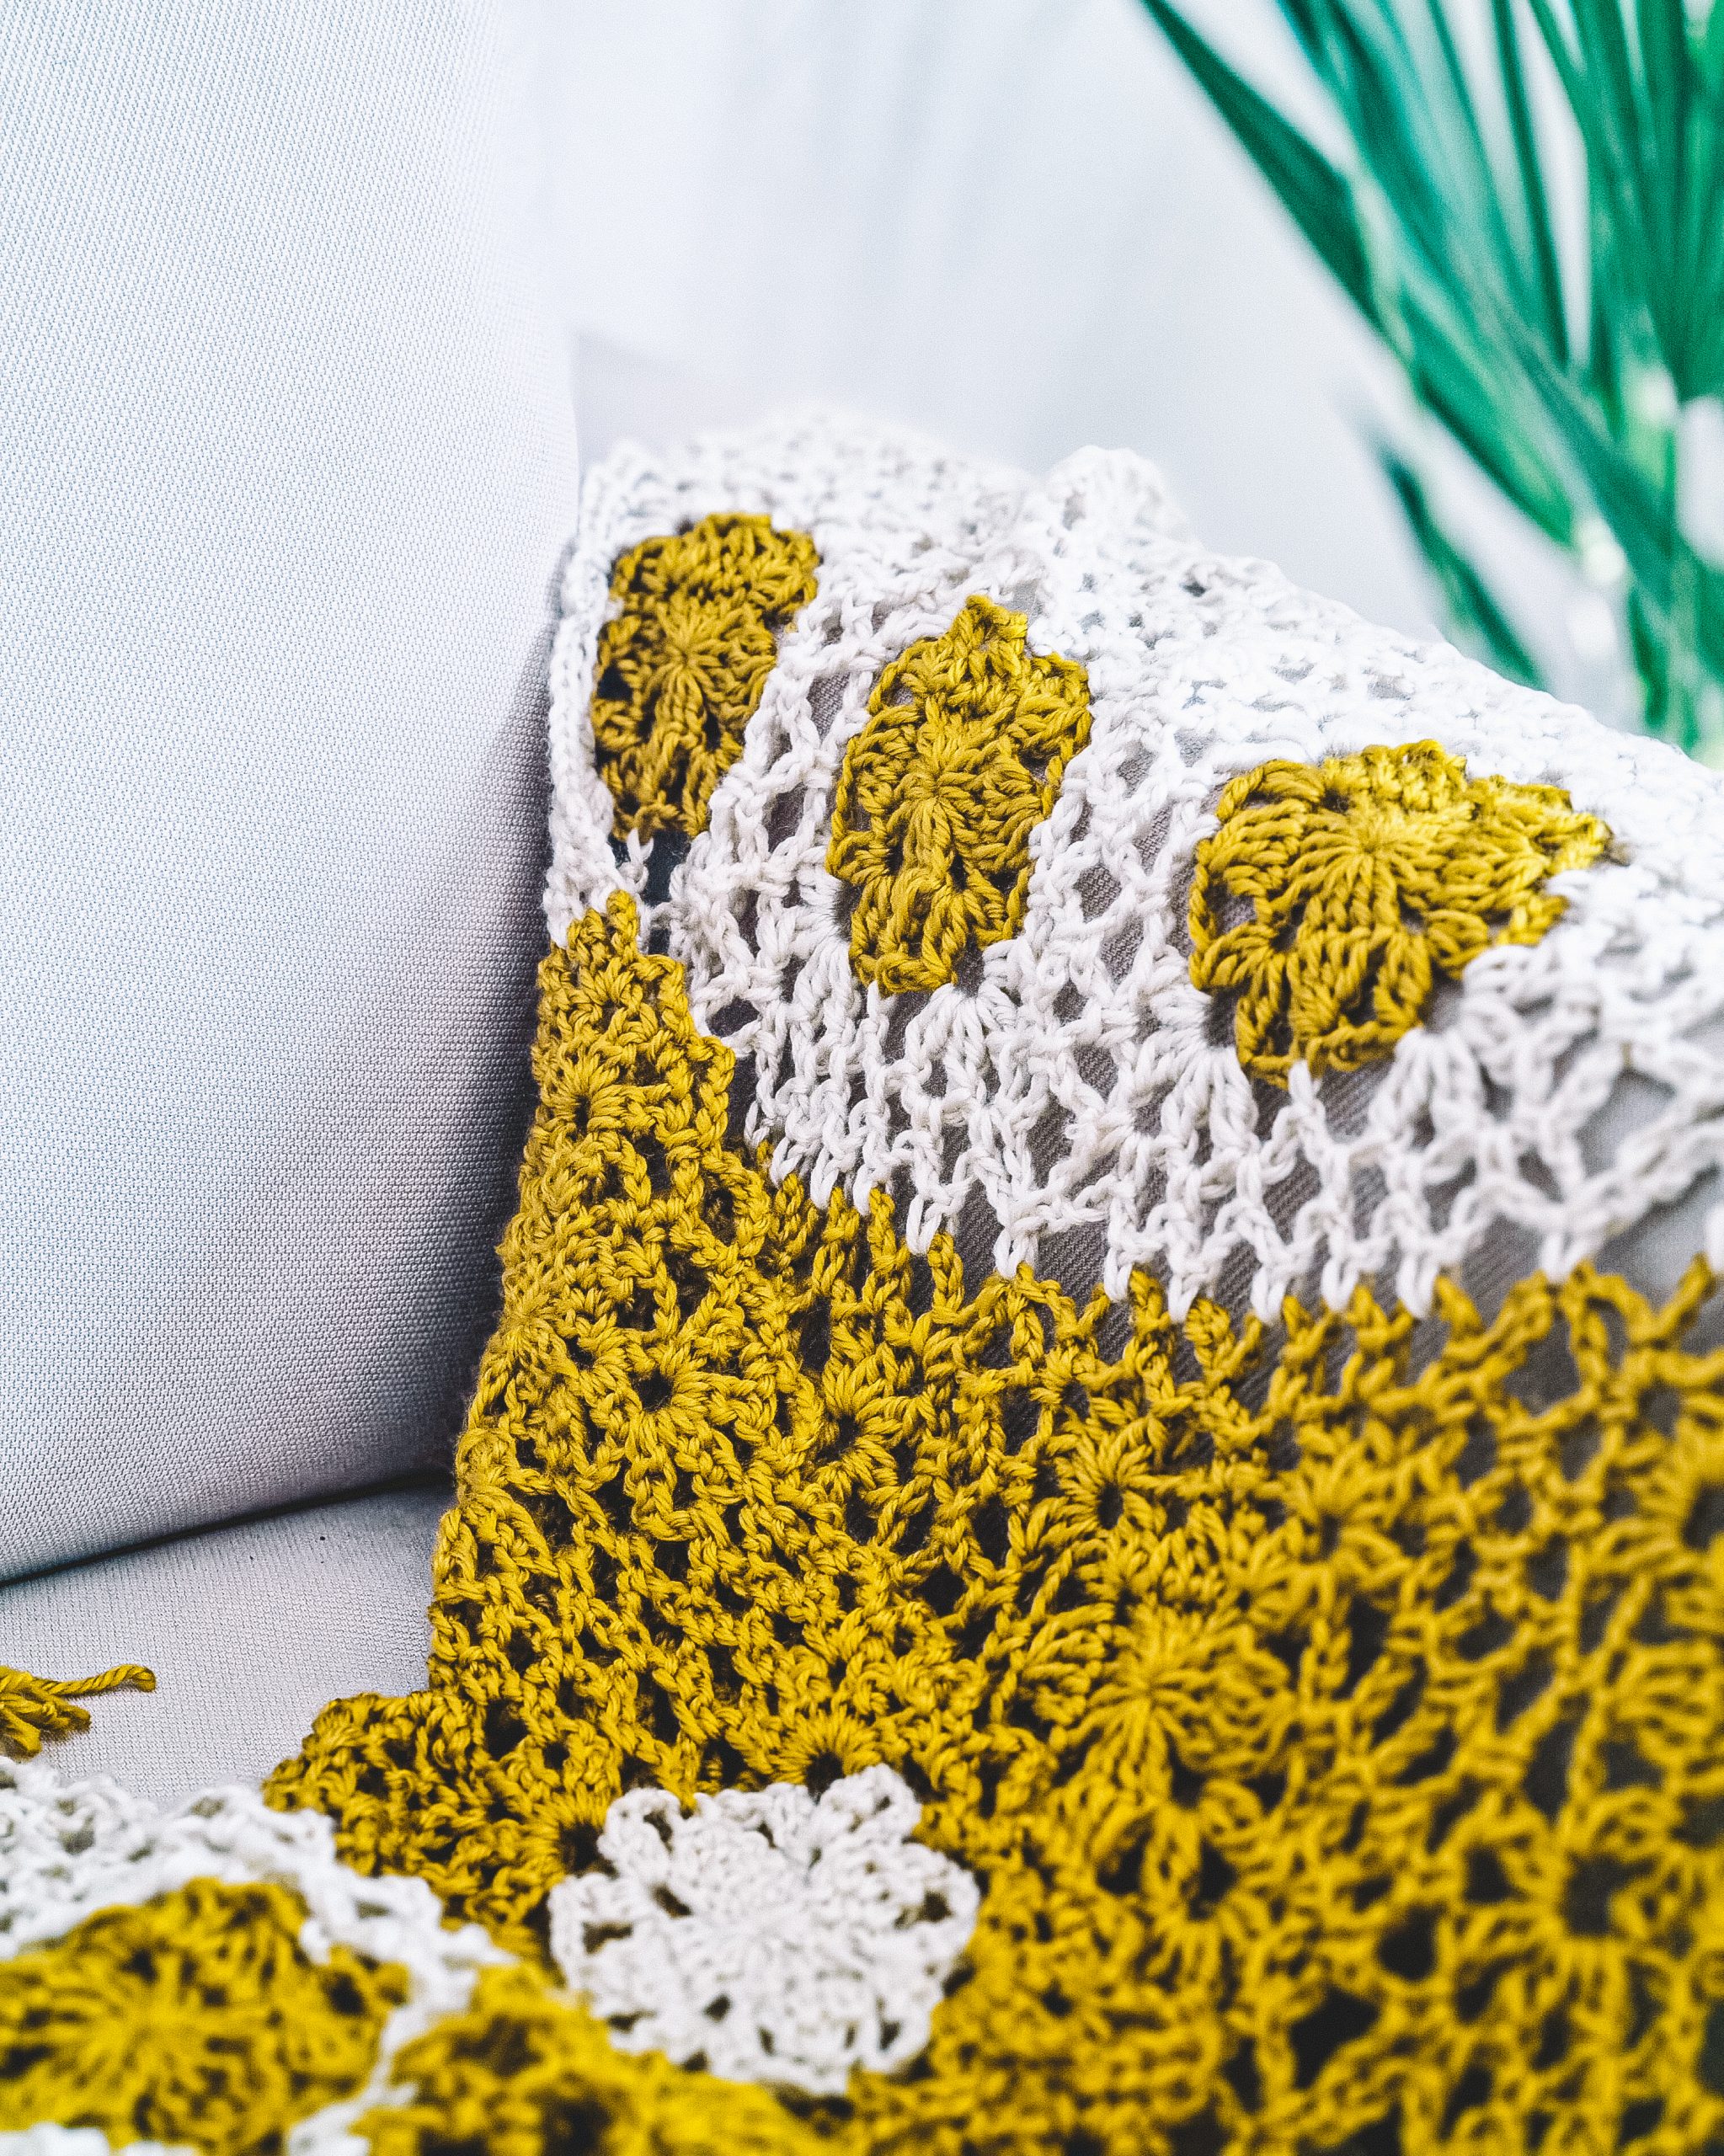
This blanket has a modular construction, out of squares, joined as you go.
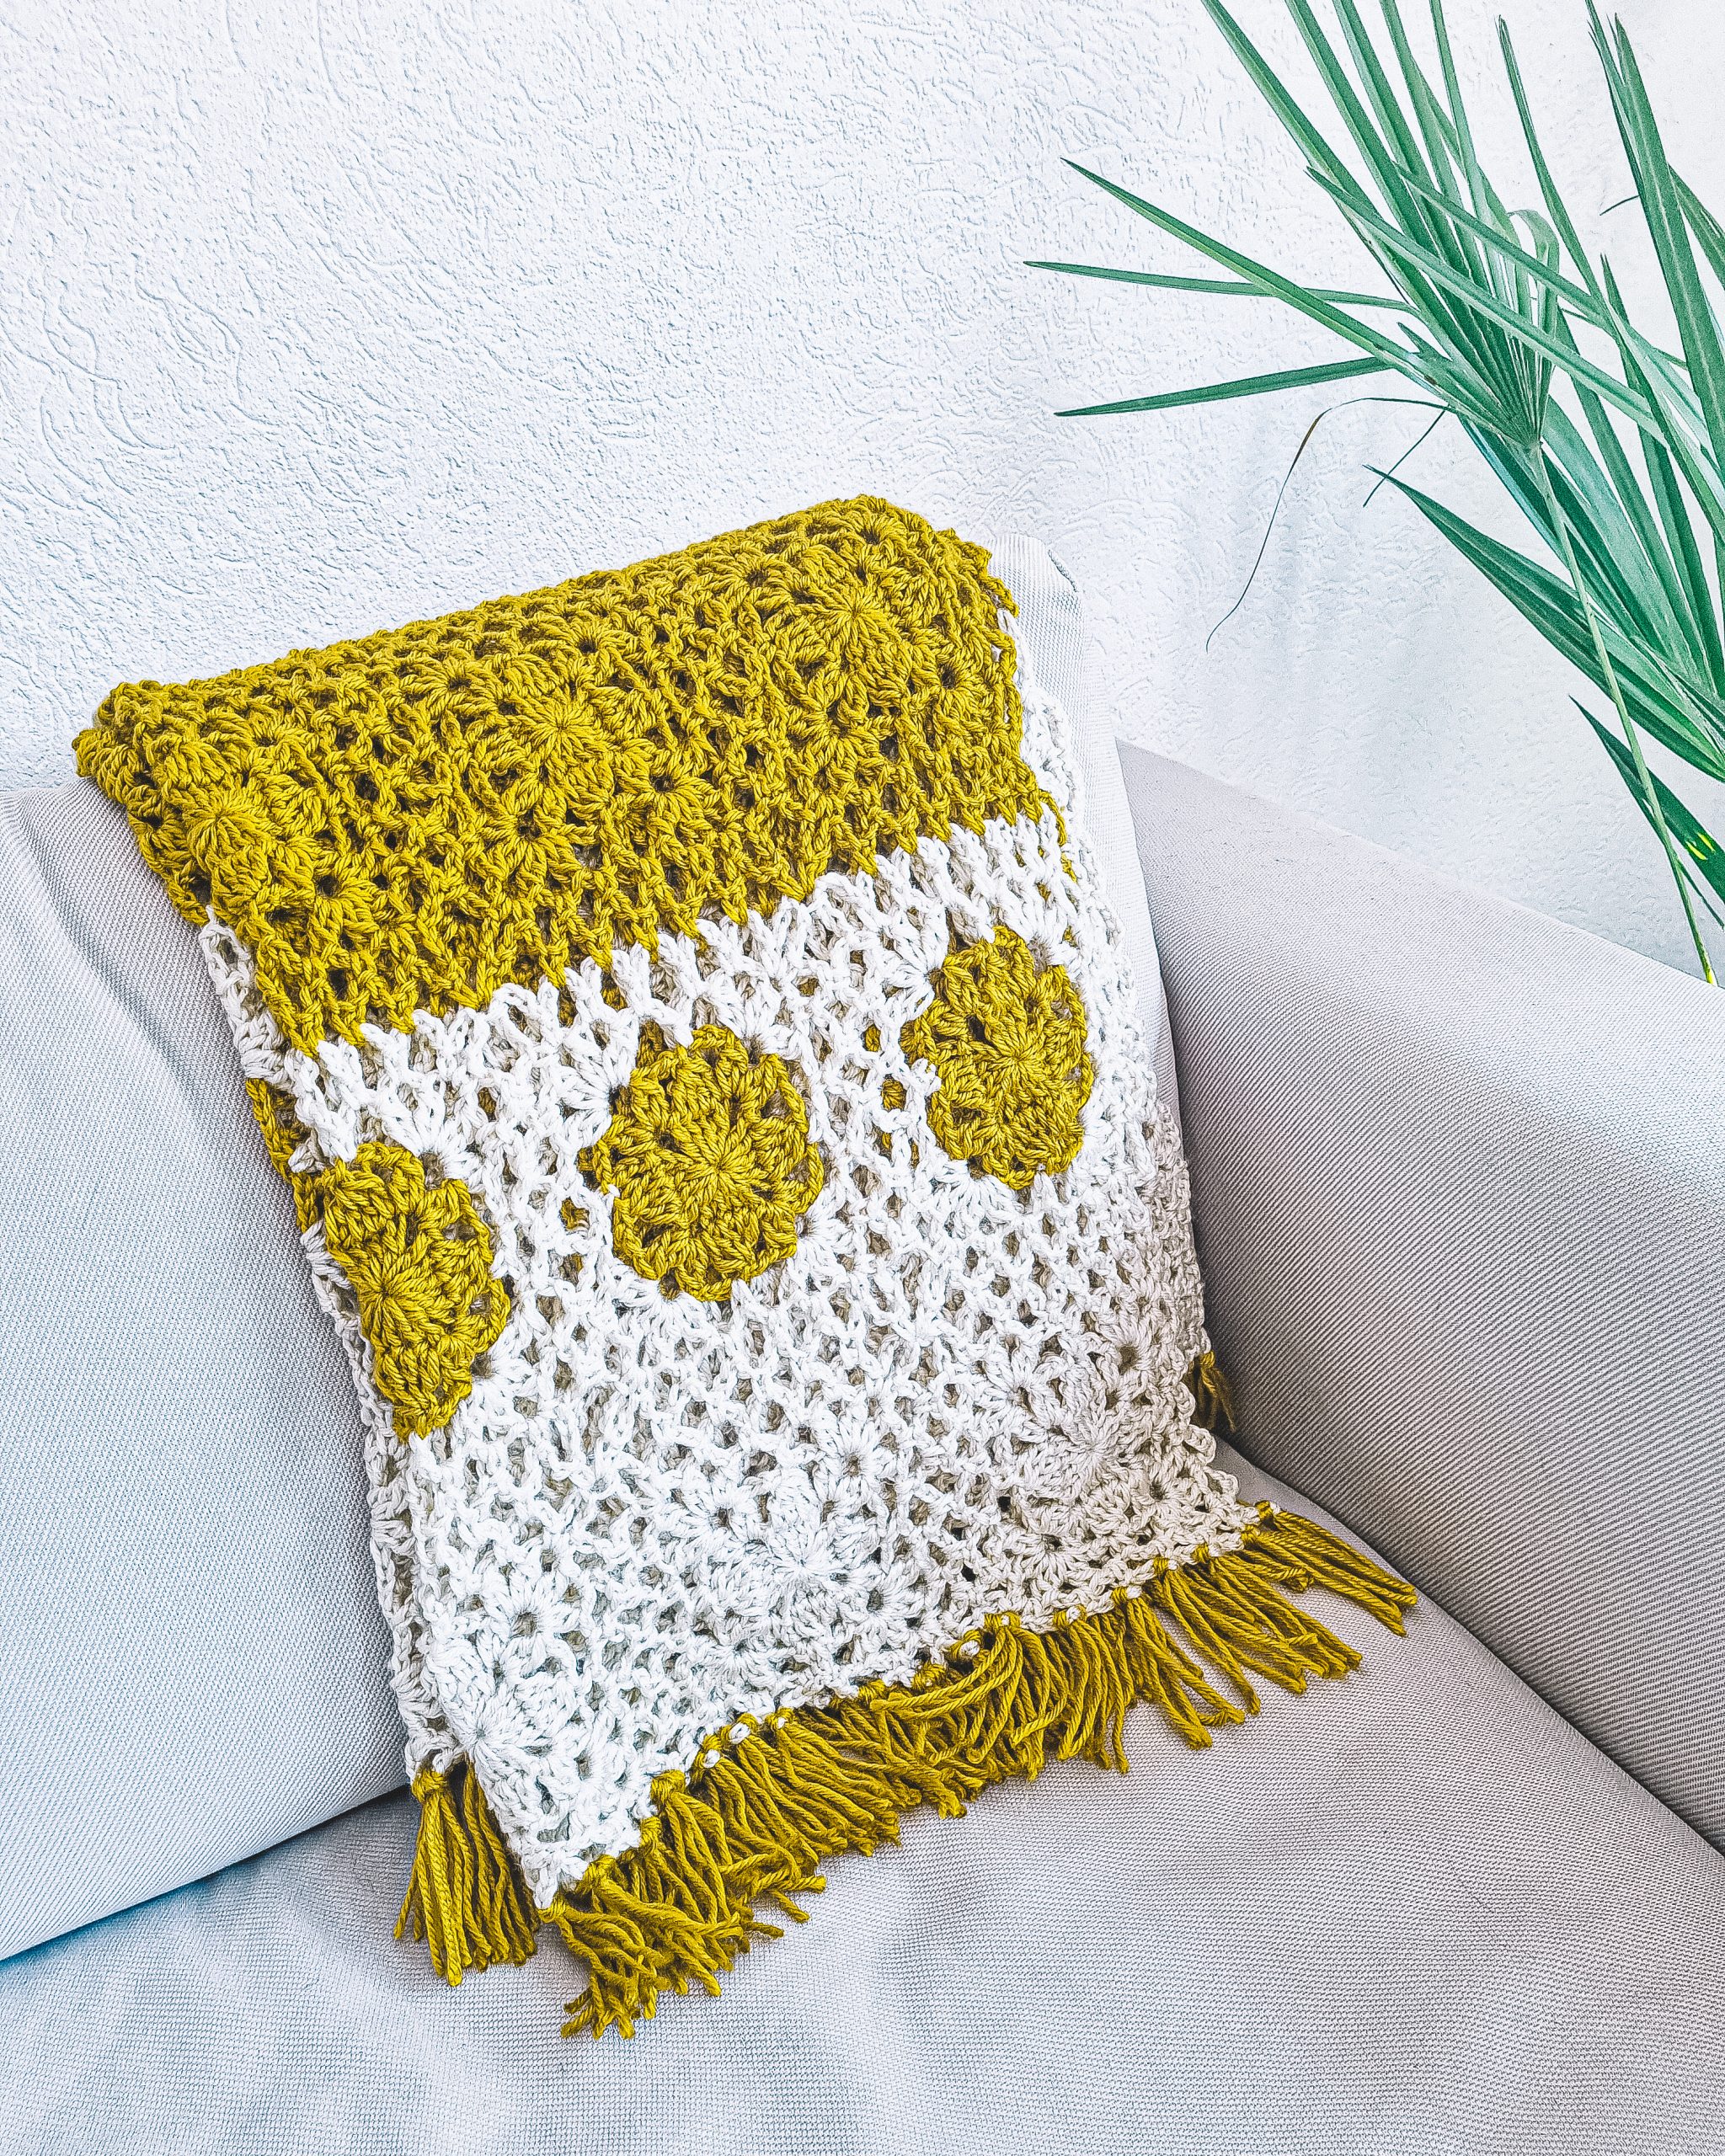
The pattern is worked in two different colors. Some of the squares are worked in one single color, and some of them using both colors.
This blanket is lightweight, perfect for summer cooler mornings or even evenings. Plus, it is beautiful to lay down on the couch and make it an ideal home accessory.
MEASUREMENTS AND SIZES
Final measurements of the Spring Colors T-shirt are listed below:

Blanket Width: 33” (84 cm)
Blanket Length: 47” (119 cm)
*make the blanket in any size, just by adding more squares in length or width
How much Yarn do you need?
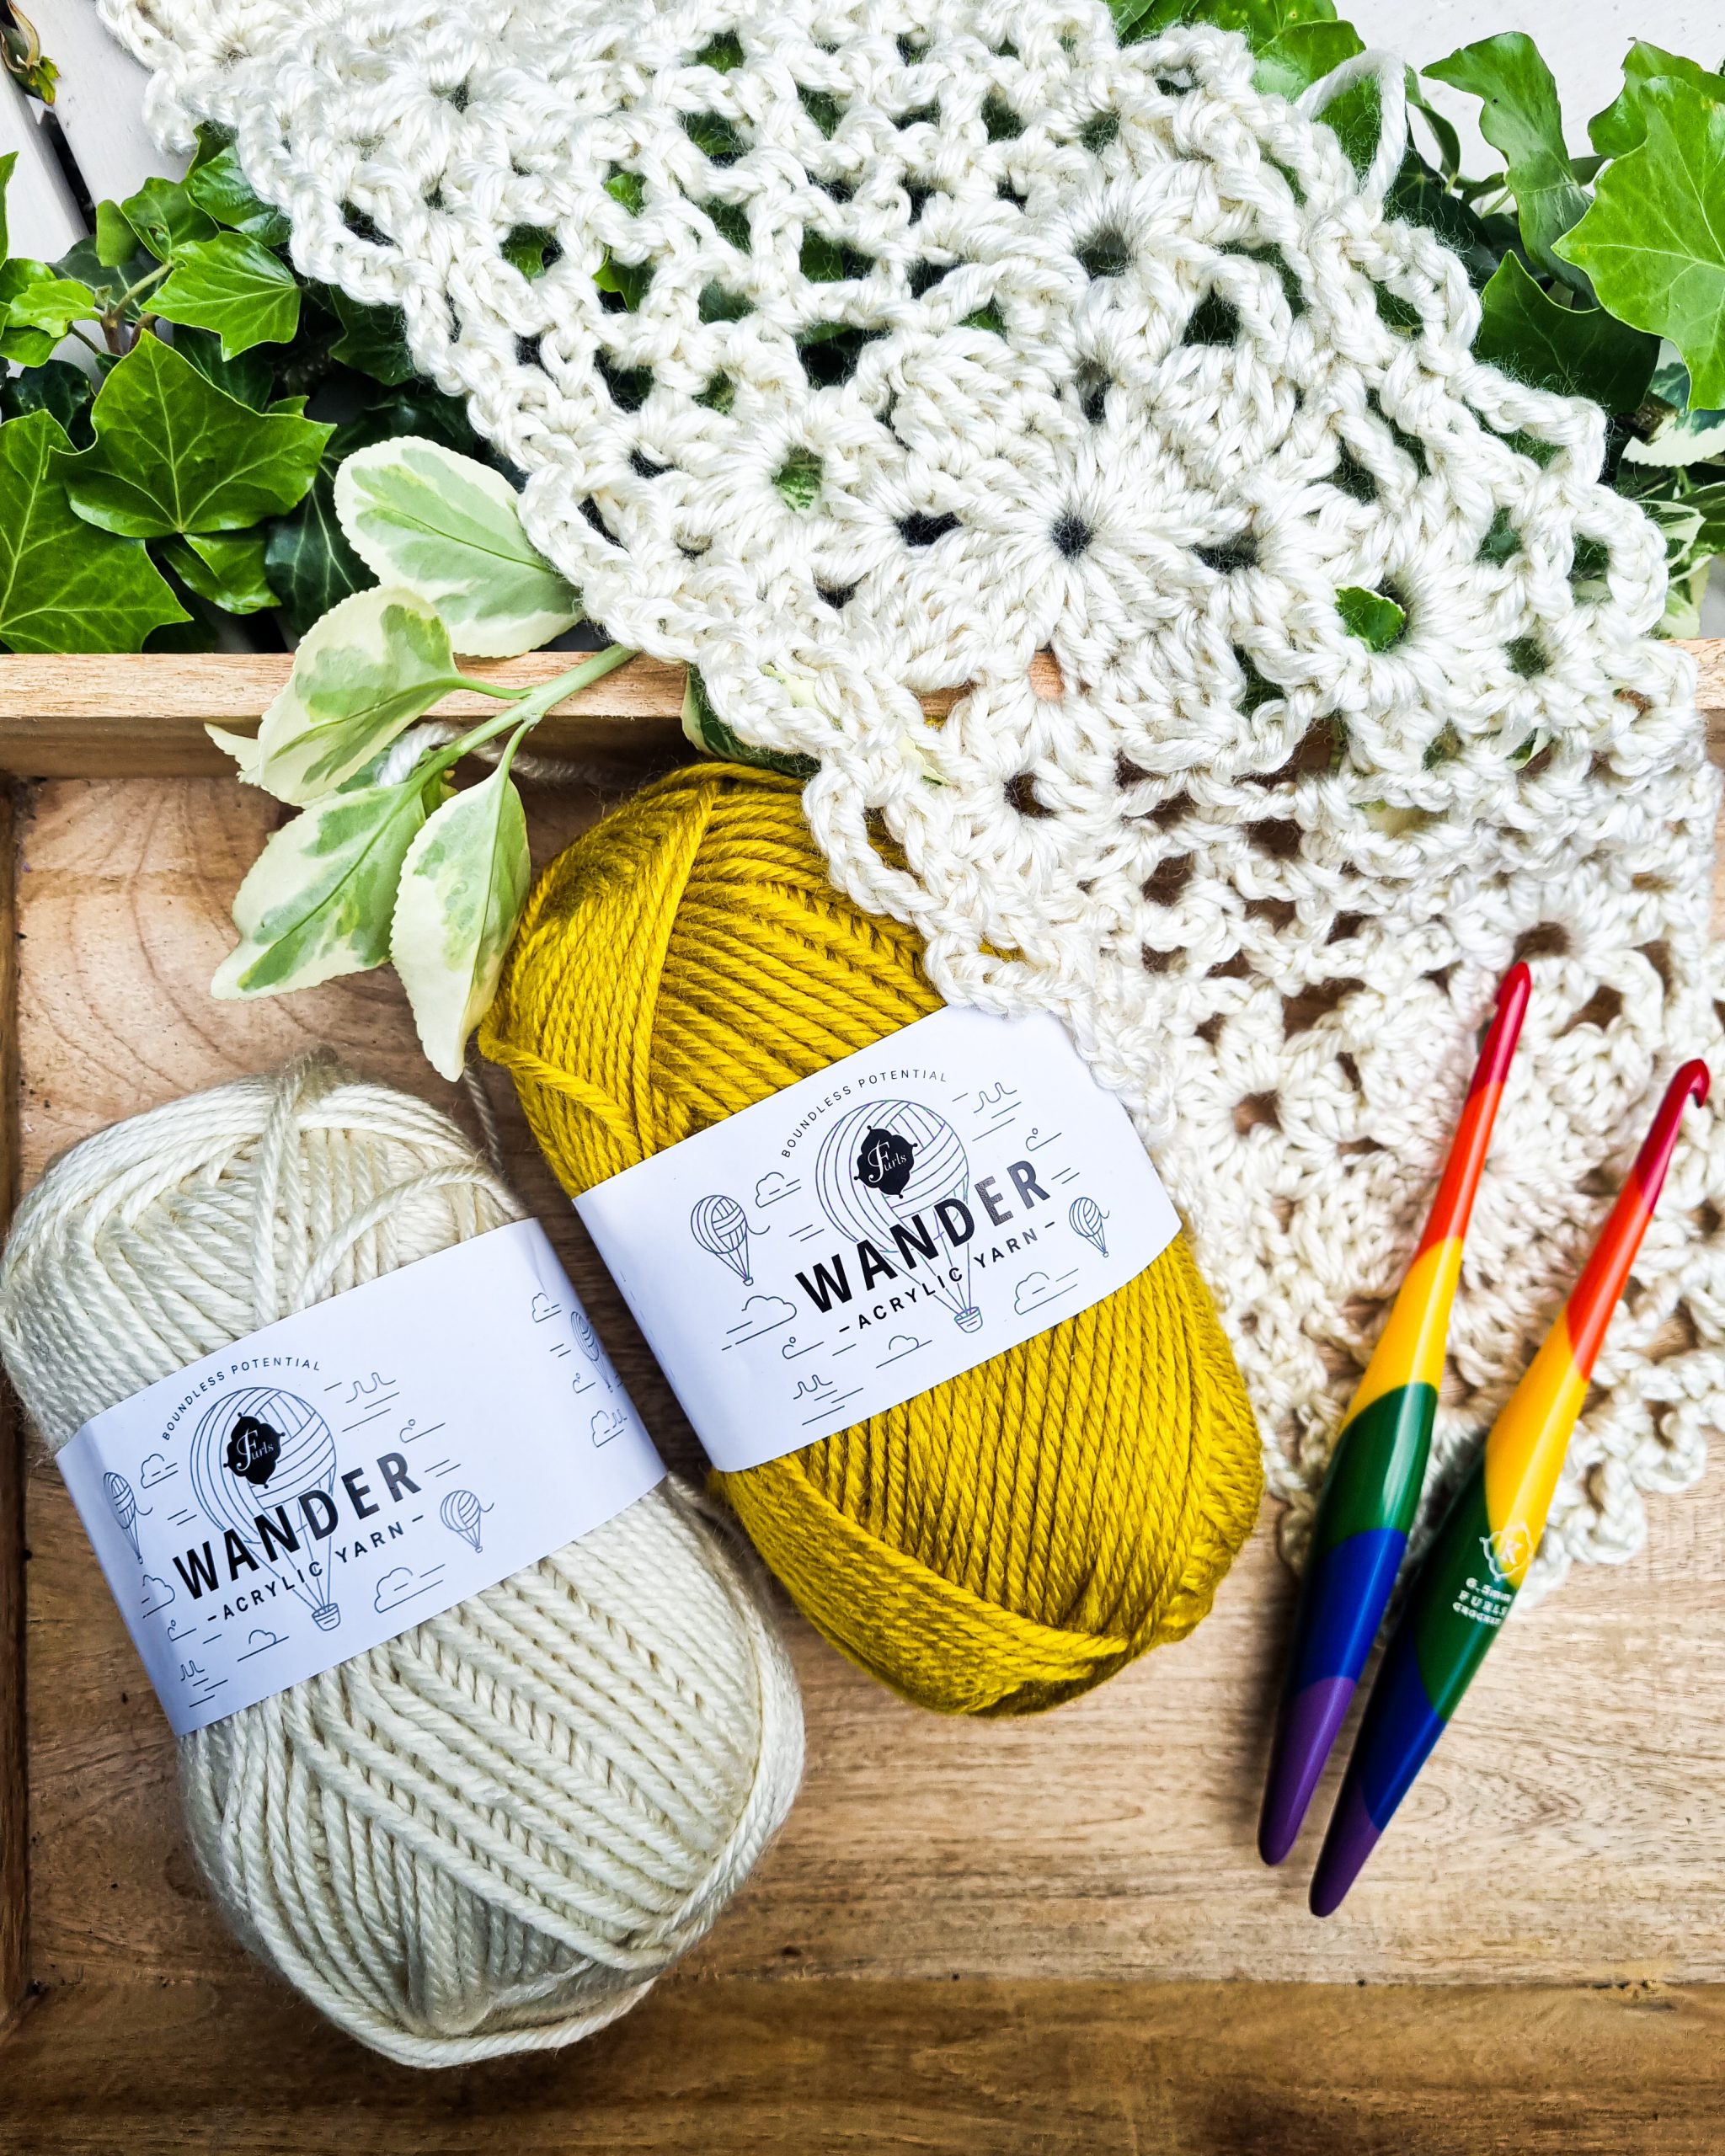
I used Wander Premium Acrylic Yarn by Furls, in colors Snow and Canary.
Each skein has 100 grams (3.5oz) and 120 yds (109m)
For one blanket in the sample size, you will need 3 skeins of each color.
ABBREVIATIONS
- Ch – chain
- dc –double crochet
- sc – single crochet
- 2dc-Group; 3dc – Group; 4dc-Group:* yarn over insert the hook into the next/same st (space), yarn over pull out a loop, yarn over and pass it through the first 2 loops on your hook. *rep. 2 (3, 4) times. Yarn over and pass it through all loops on your hook
- Slst – slip stitch
- Ch-sp – chain space
- St(s) – stitch(es)
- R – rows
- ** – repeated section.
TENSION (GAUGE)
Using a 6 mm StreamLine Swirl crochet hook, one square measure
- 7 / 7 “ (17 / 17 cm )
NOTES
The shawl construction is modular, out of squares.
Work the squares in rounds. Join each round with a slip stitch.
Each square has 4 rounds. Except for the first square, work the first 3 rounds and use round 4 for joining.
3ch at the beginning of a round counts as the first double crochet.
1ch at the beginning of a round does not count as the first single crochet.
To work a square in 2 colors, work the first 2 round in one color, then change into the second color and work the last 2 rounds
To change the color, work the slip stitch at the end of the round with the next color.
The shawl has 5 squares in width and 7 squares in length.
Start with the first 5 squares and then add 6 more rows of 5 squares.
Starting with round 2 of squares, join all the other squares from right to left.
INSTRUCTIONS
SQUARE PATTERN
You can follow the written pattern or the chart below:
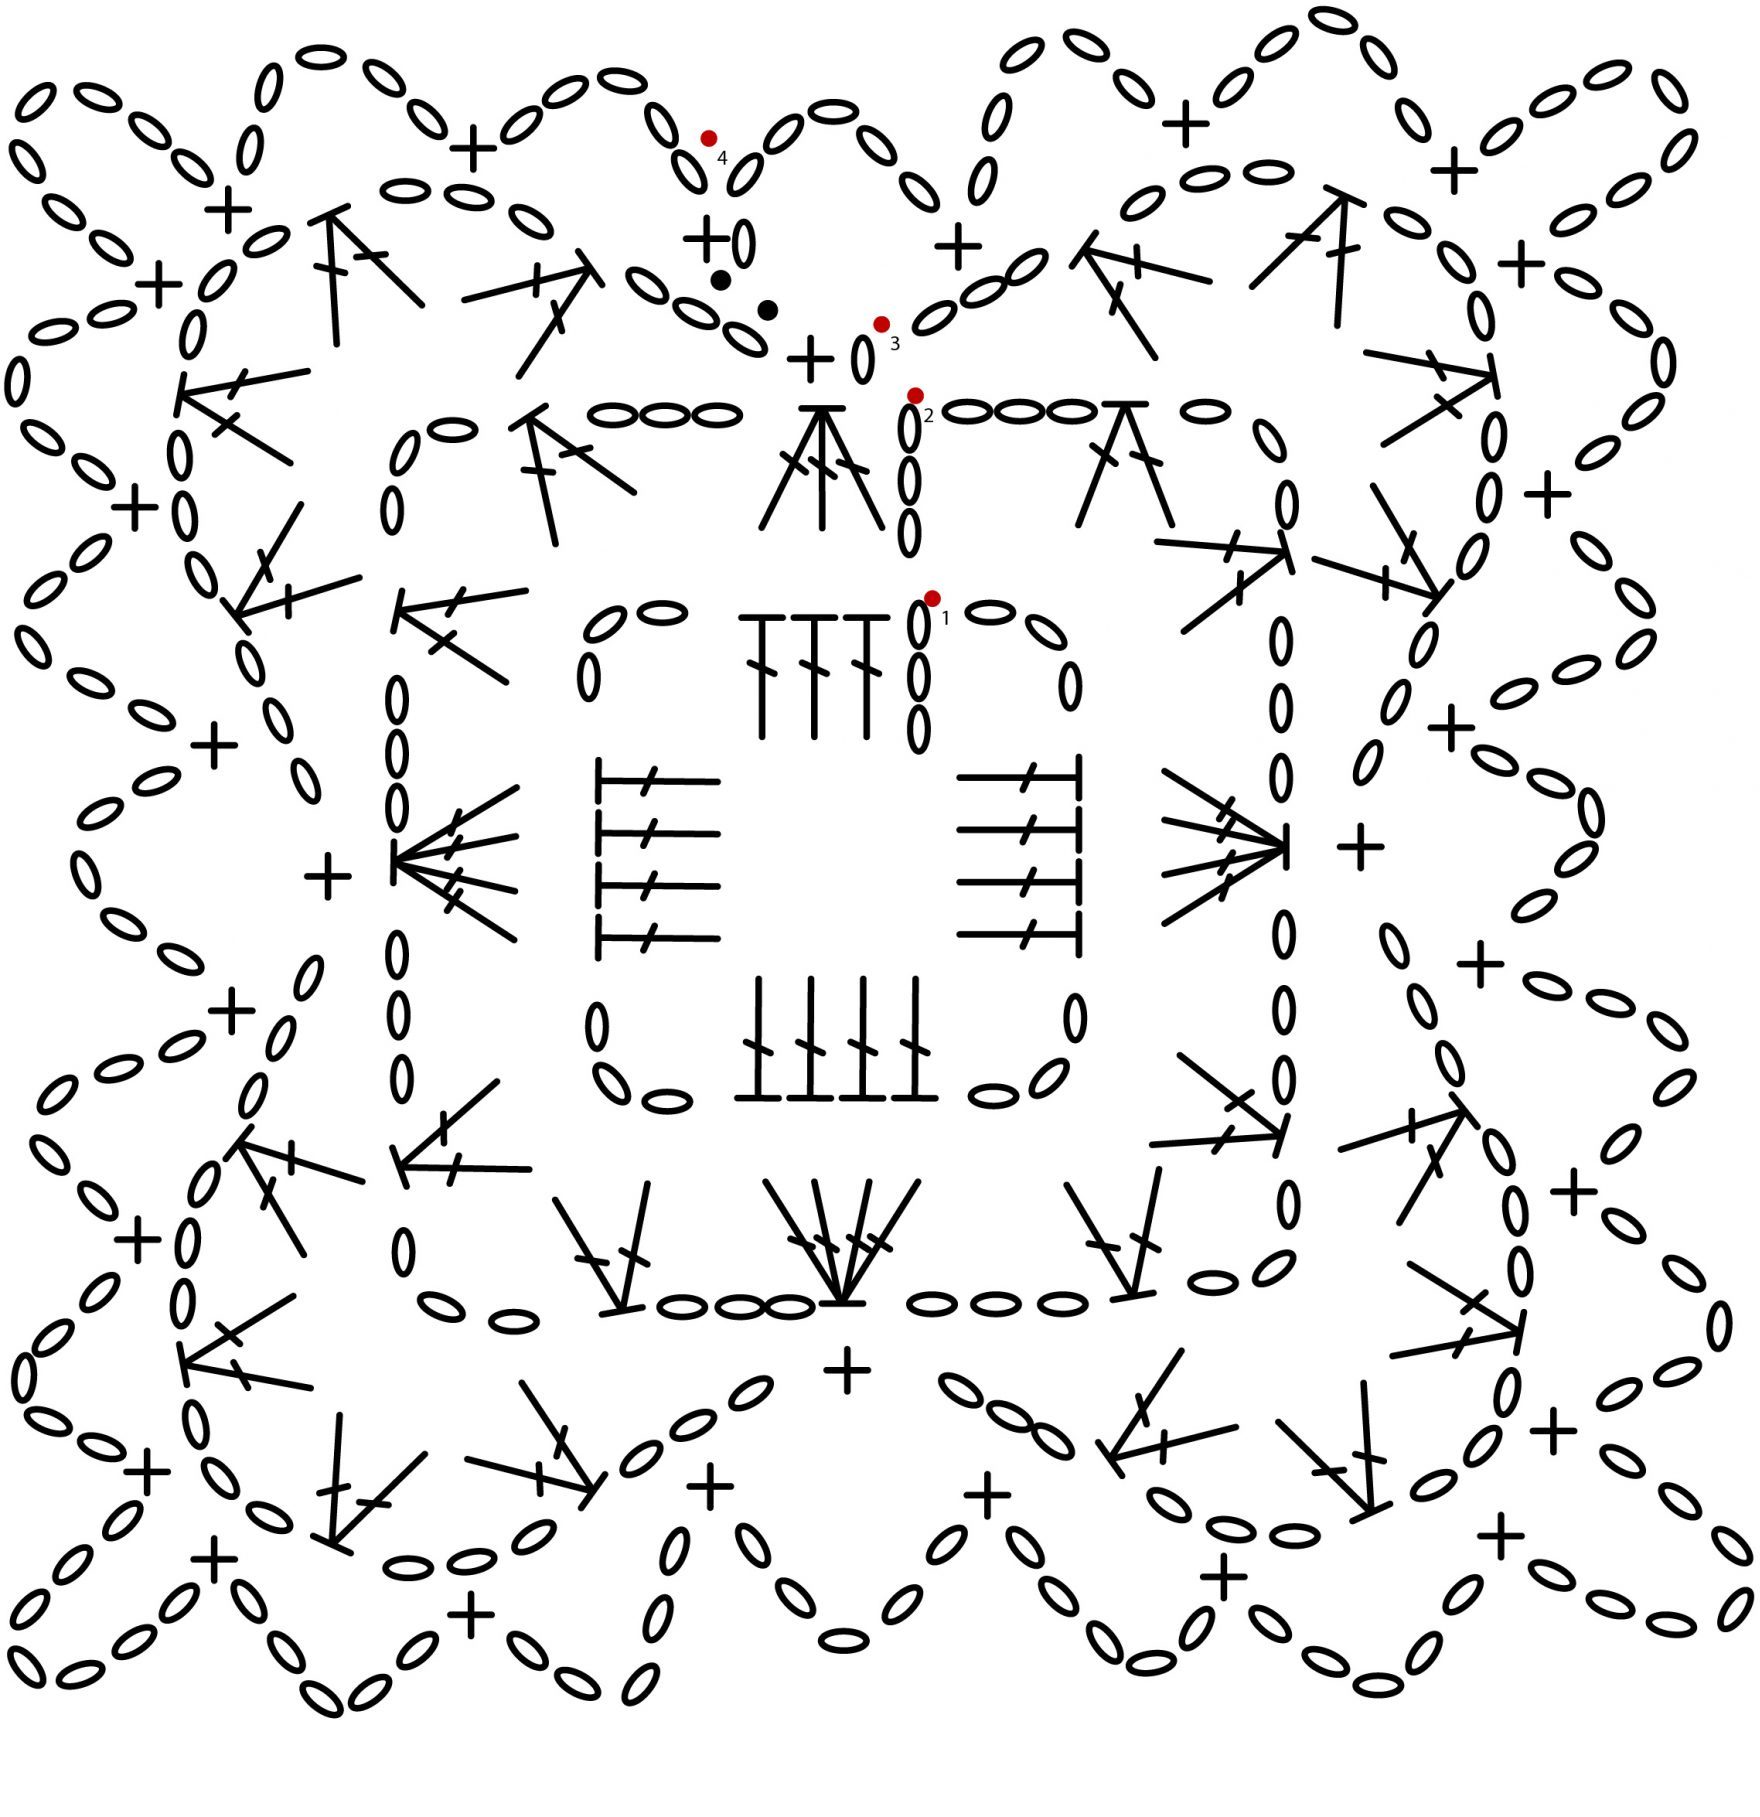
Start| Make a magic ring
R1| 3ch, 3dc, 3ch, *4dc, 3ch. *Repeat 3 times. Close the round with an sl st in the third chain.
R2| 3ch, 3dc-Group, 3ch, (2dc-Group, 3ch, 2dc- Group) in the 3ch-sp, 3ch, *4dc-Group, 3ch, (2dc- Group, 3ch, 2dc-Group) in the 3ch-sp, 3ch. *Repeat 3 times. Close the round with an sl st in the third chain
R3| 1ch, 1sc in the same st, 3ch, [2dc-Group, (3ch, 2dc-Group) 3 times] in the 3ch-sp from the corner, 3ch, *1sc in the 4dc-Group, 3ch, [2dc-Group, (3ch, 2dc-Group) 3 times] in the 3ch-sp from the corner, 3ch. *Repeat 3 times. Close the round with an sl st into the first sc.
R4| 2sl st (start the round into the 2nd ch st of the next 3ch – sp)
1ch, 1sc, 5ch, 1sc in the next 3ch – sp, 5ch, 1sc in the next 3ch – sp, 5ch, 1sc in the corner, (7ch, 1sc) in the 3ch-sp from the corner, *5ch sts, [1sc in the next 3ch sts – sp, 5ch] repeat 4 times to the corner; in the corner: (1sc, 7ch, 1sc).*Repeat on all sides of the square. Close the round with an sl st into the first sc.
Fasten off.
JOINING THE SQUARES
Joining one side (chart 2)
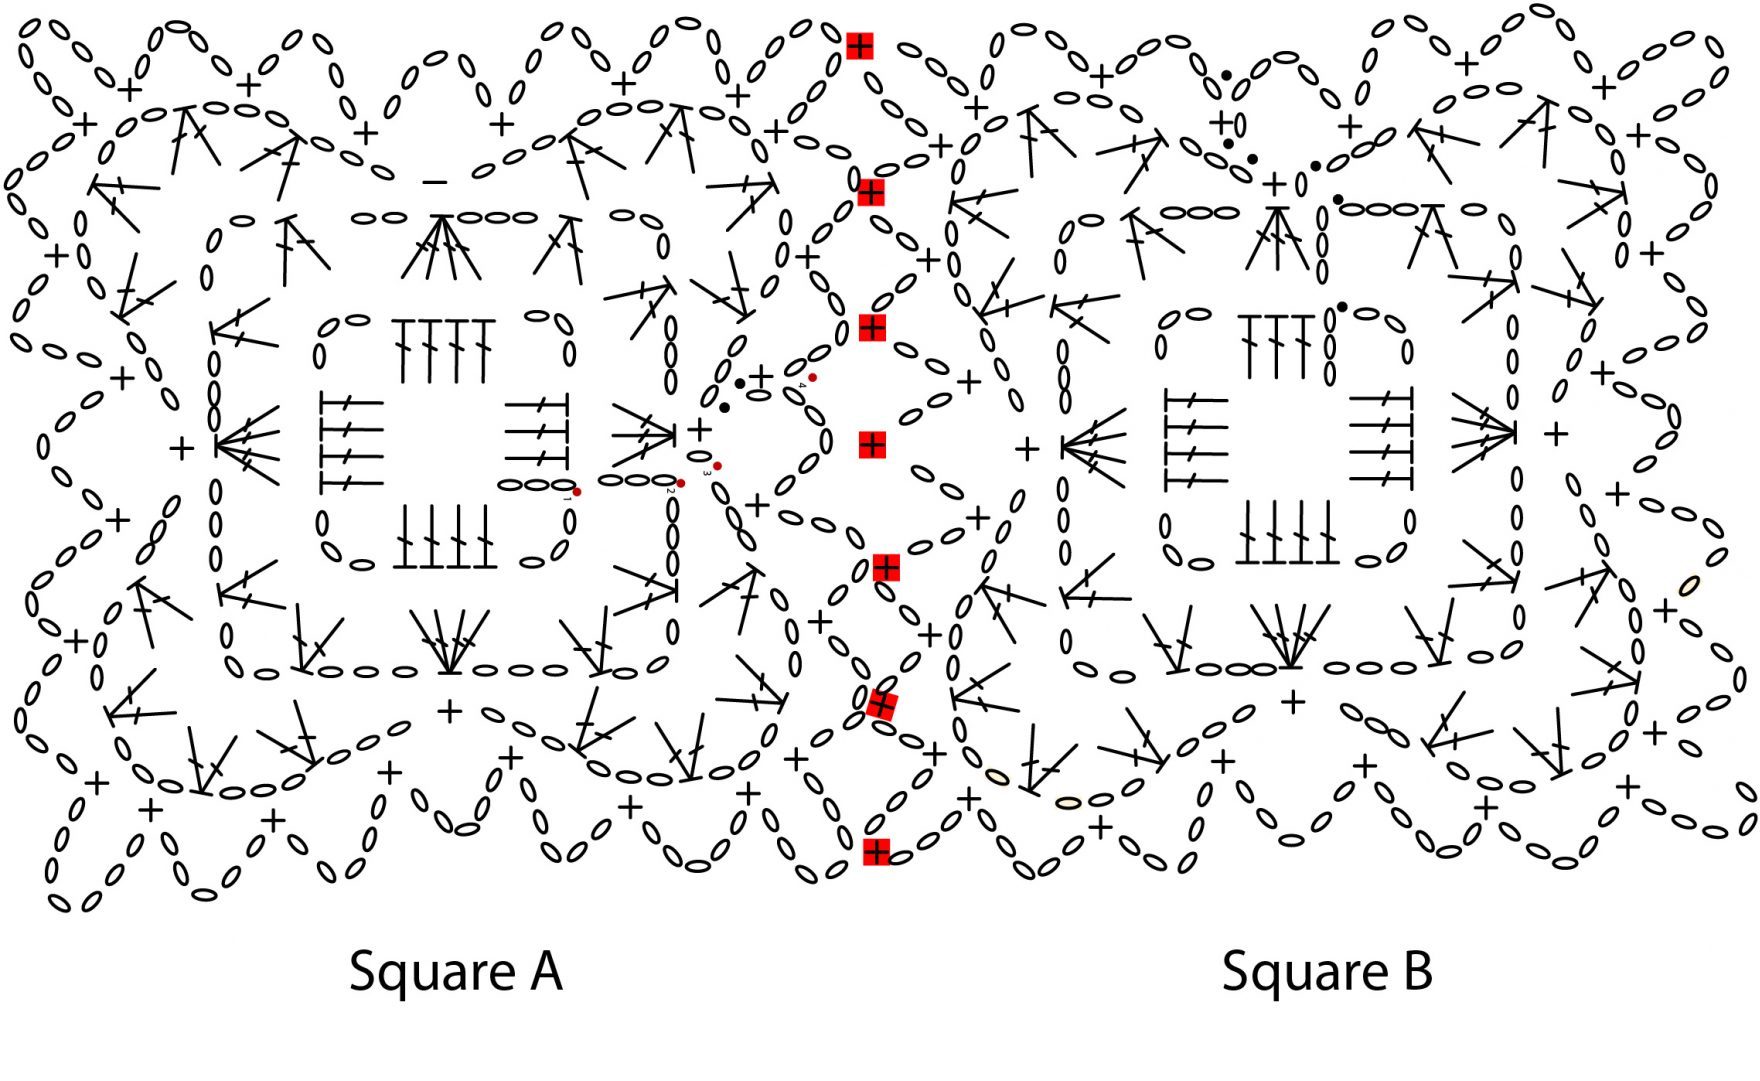
Square A = finished square
Square B = current square
Square A on the wrong side, Square B on the right side
Work first 3 rounds of square B.
Start round 4 and work until the 1st corner. In the 3 chain space from the corner chain 3 (instead of 7), 1sc into the 7ch – sp corner of square A, 3ch, 1sc into square B corner, *2ch, 1sc into the next 5ch – sp of the square A, 2ch, 1sc into the next 3ch-sp of the square B. *Rep until the next corner. Ch3, 1sc into the 7ch – sp corner of square A, 3ch, 1sc into square’s B corner.
After joining the second corner, continue working round 4 of square B.
Joining 2 sides (chart 3)
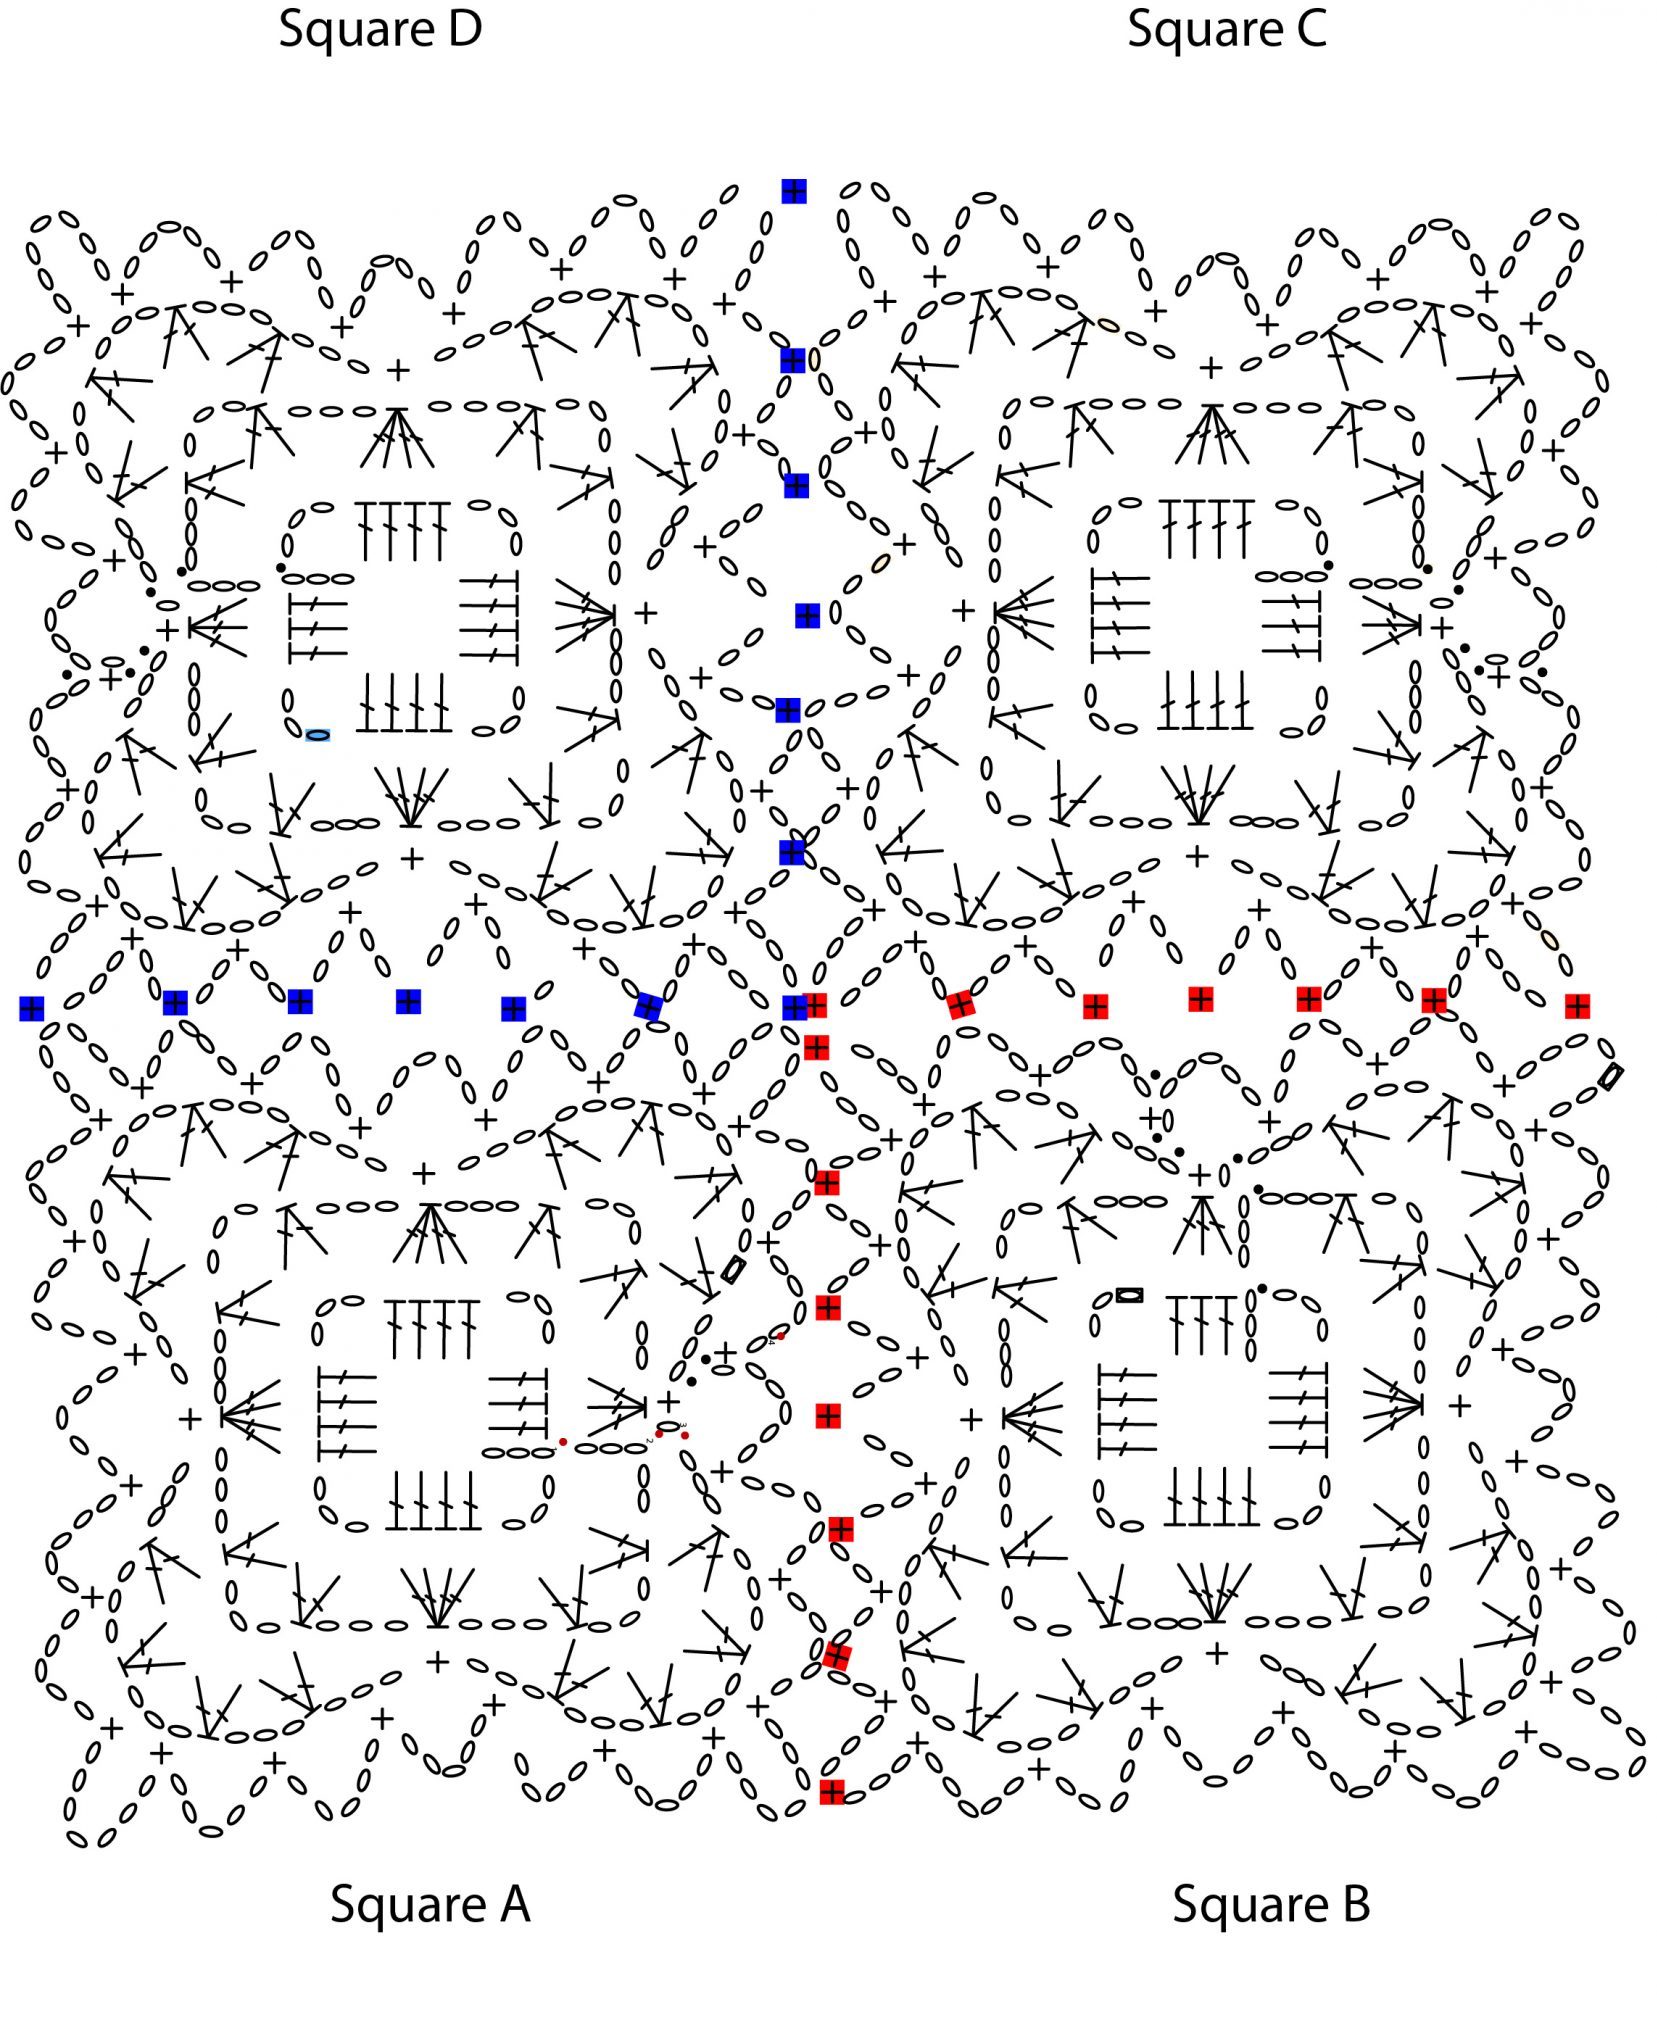
Except for the first square in a row, join all the other squares on 2 sides: One side with the correspondent square on the previous row and one side with the square earlier in the same row.
Square A = correspondent square on the previous row
Square B = earlier square
Square C = current square
Squares B and C are on the wrong side
Work first 3 rounds of square B.
Work the 4th round to the 1st corner, 1sc in the 7ch-sp (the corner in the right) of square A. Continue joining Square C with square A, including the second corner, following the steps from Joining one side section, and then join in the same way with square B.
Continue to add squares until you complete the length of the blanket.
TO FINISH
Weave in all looser ends and block to measurements.
Optional you can add fringe.
Fringe
Using color Canary.
Use cardboard of about 4” (10 cm) width.
Step 1: Wrap the yarn over the cardboard width three times.
Step 2: take off the yarn from the cardboard.
Step 3: Cut the loops from one end
Step 4: take the other end with loops, and insert it into the 5ch-sp of the blanket edge.
Step 5: take the other ends and pass them through the loop, and tie.

I hope you like this blanket as much as I do and can’t wait to see it in as many color combinations.




Comments are closed.