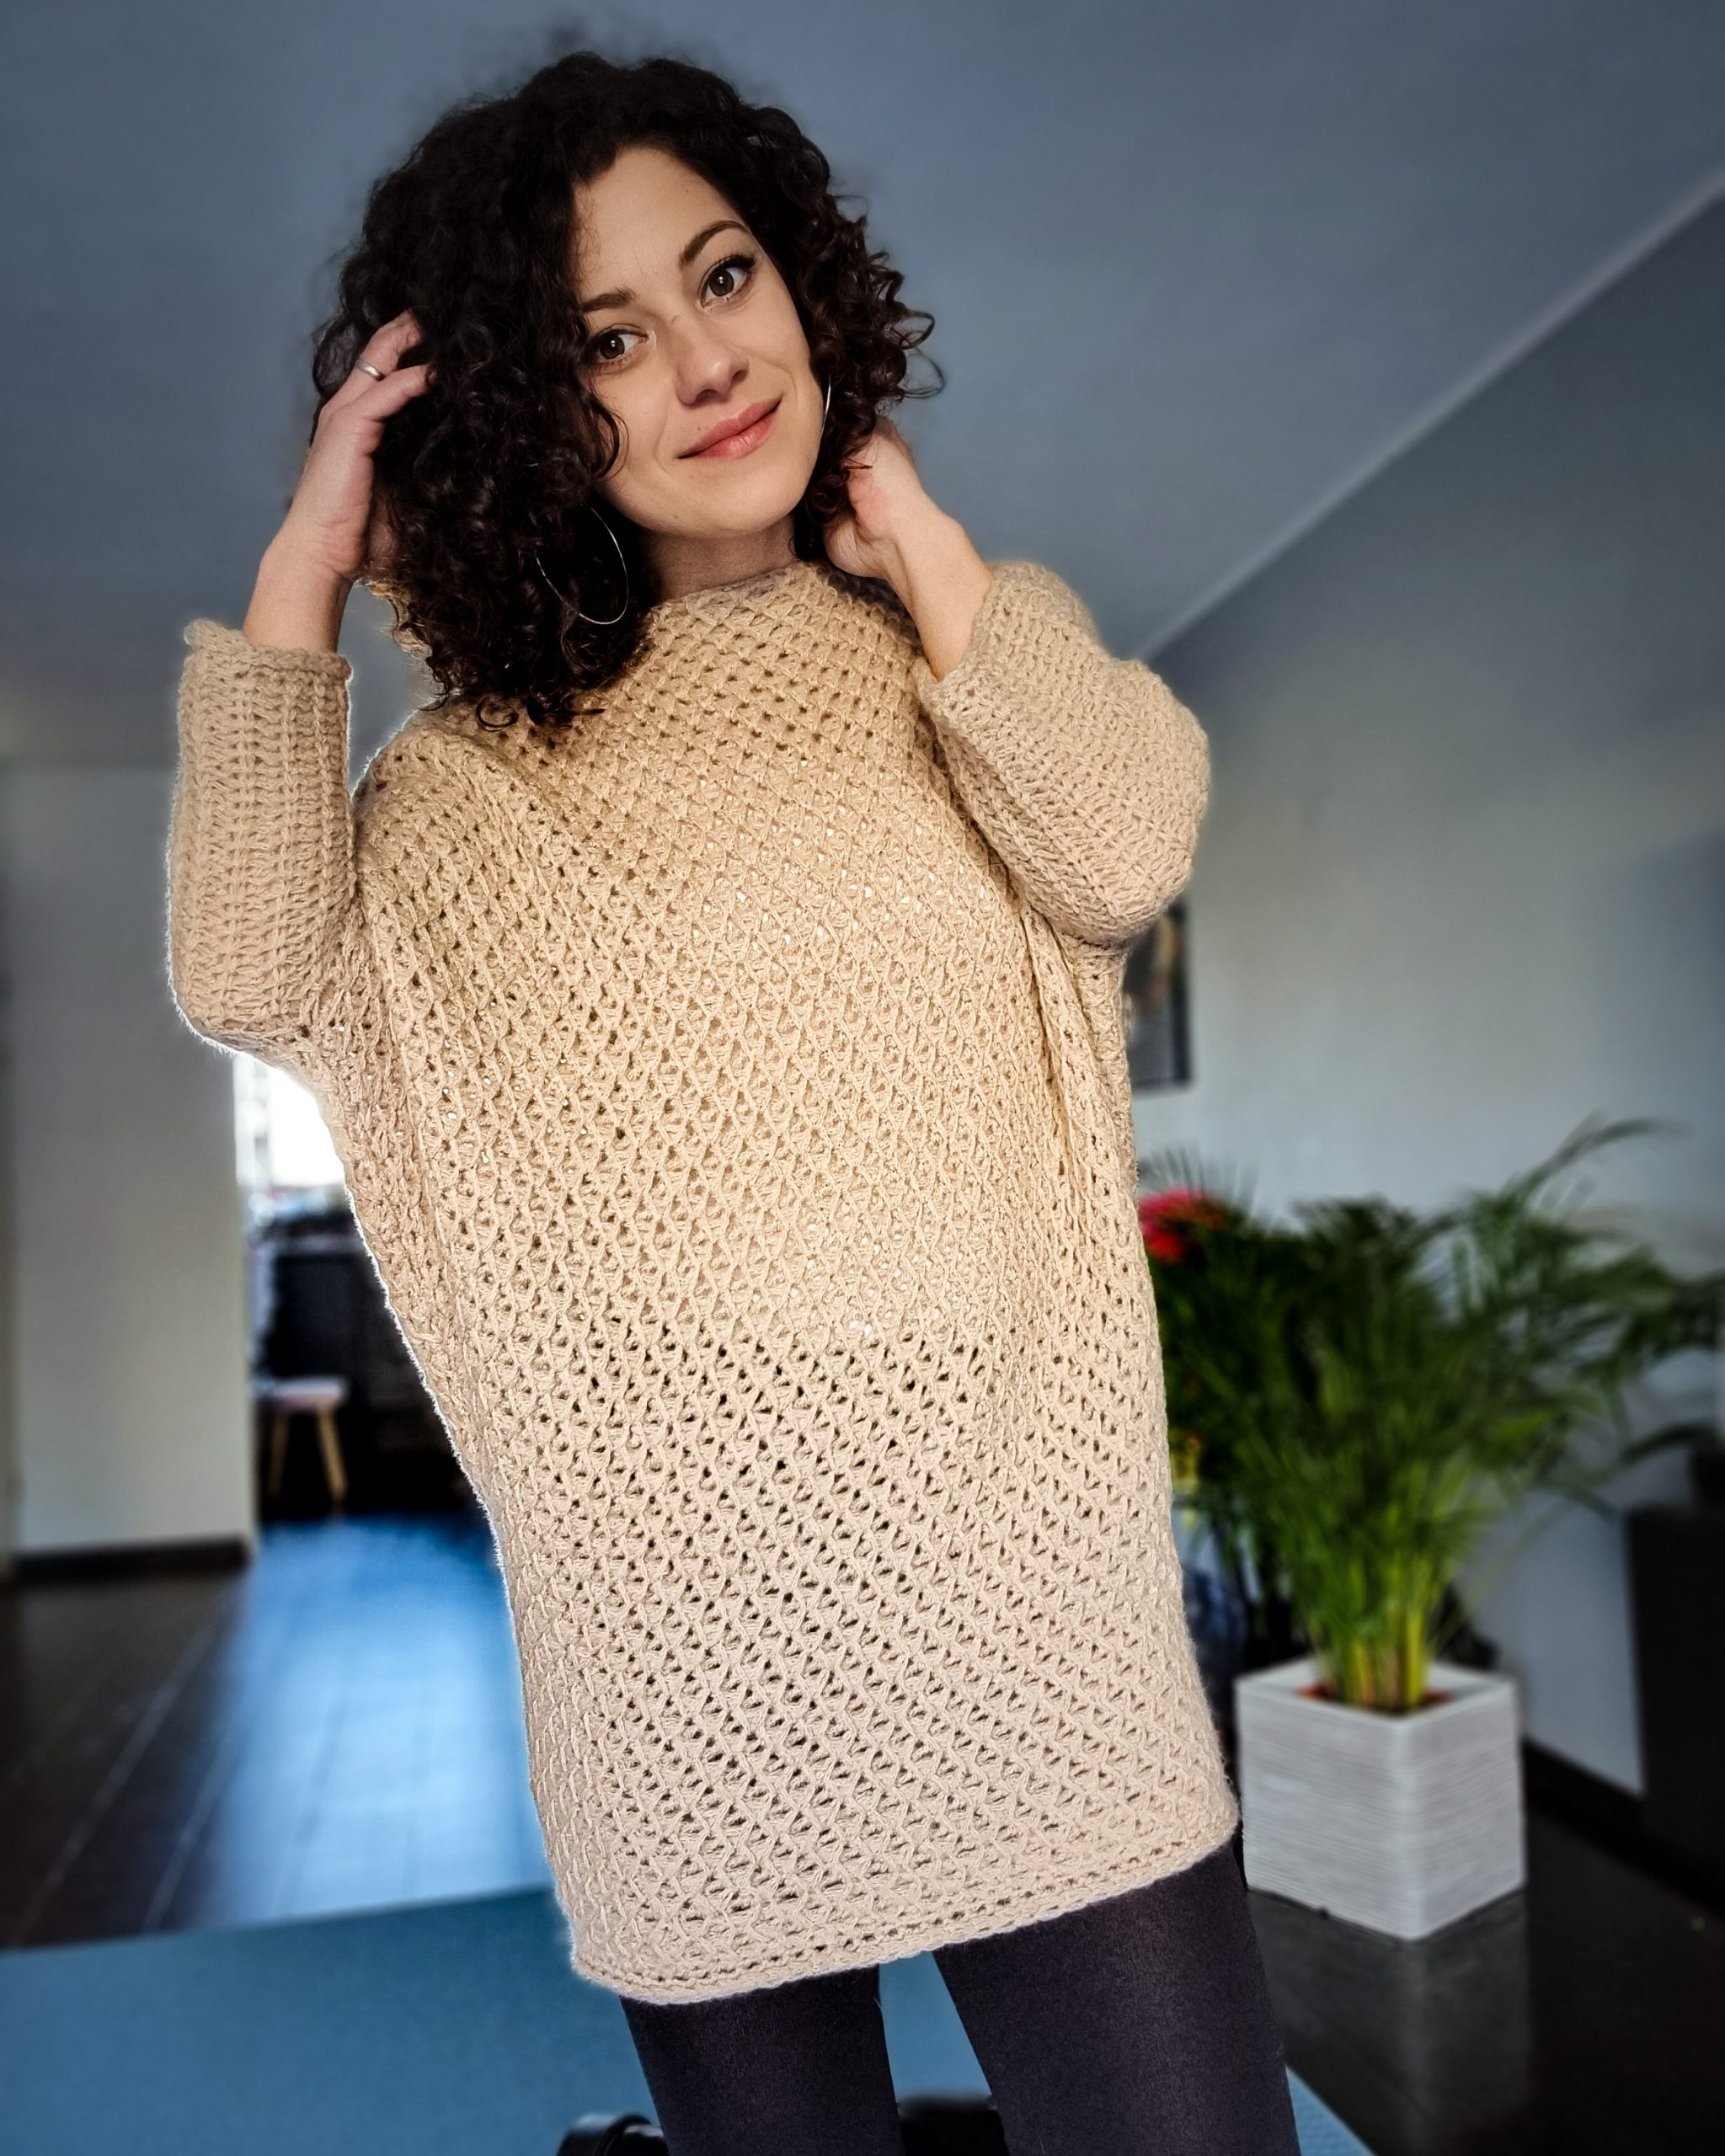
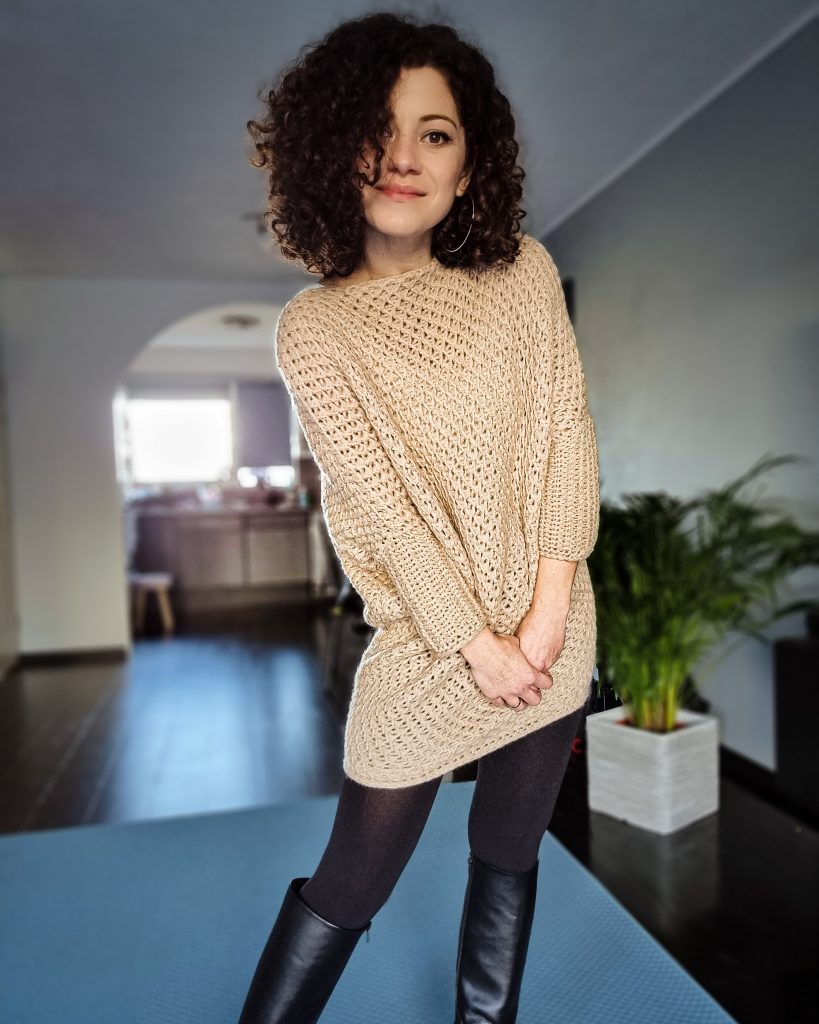
I had the sketch for this Diamonds Sweater – Dress for years and I am so happy that everything I needed for this design to come ou,t lined up so perfectly.
This design wasn’t something planned, and everything happened in a second.
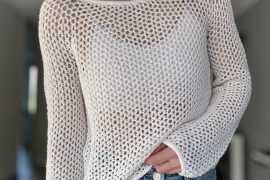
First, when I randomly looked on YouTube for some inspiration, I found this interesting stitch, which I don’t know the exact name, but because it looks similar to the honeycomb stitch in knitting and Tunisian crochet, I think we can call it the same.
Shortly after that, Amazing Wool asked me if I want some yarn that they sell to make something with it. At first, I chose another yarn, but it was out of stock, and then I chose this Soave by Lana Mondial. I was amazed about how airy and light is this yarn and about the yardage in 50 grams ball (almost 240 meters).
The third trigger to start working on this design was a poll that I made asking for your opinion on what you would like to see. And you guessed it: a sweater dress. After months, the pattern is finally here and I am really happy about it.
You can Purchase the easily printable PDF version of this pattern here:
This post contains affiliate links. By purchasing from this page I may receive some commissions. This won’t cost you anything, no additional costs for you as the commission is paid by the merchant.
In this way you support me and I will be extremely grateful.

I hope you will like this new design as much as I do!
So let’s see what you need and how to make this dress.
MATERIALS
• Yarn: DK weight yarn (size 3)
• Crochet Hook:
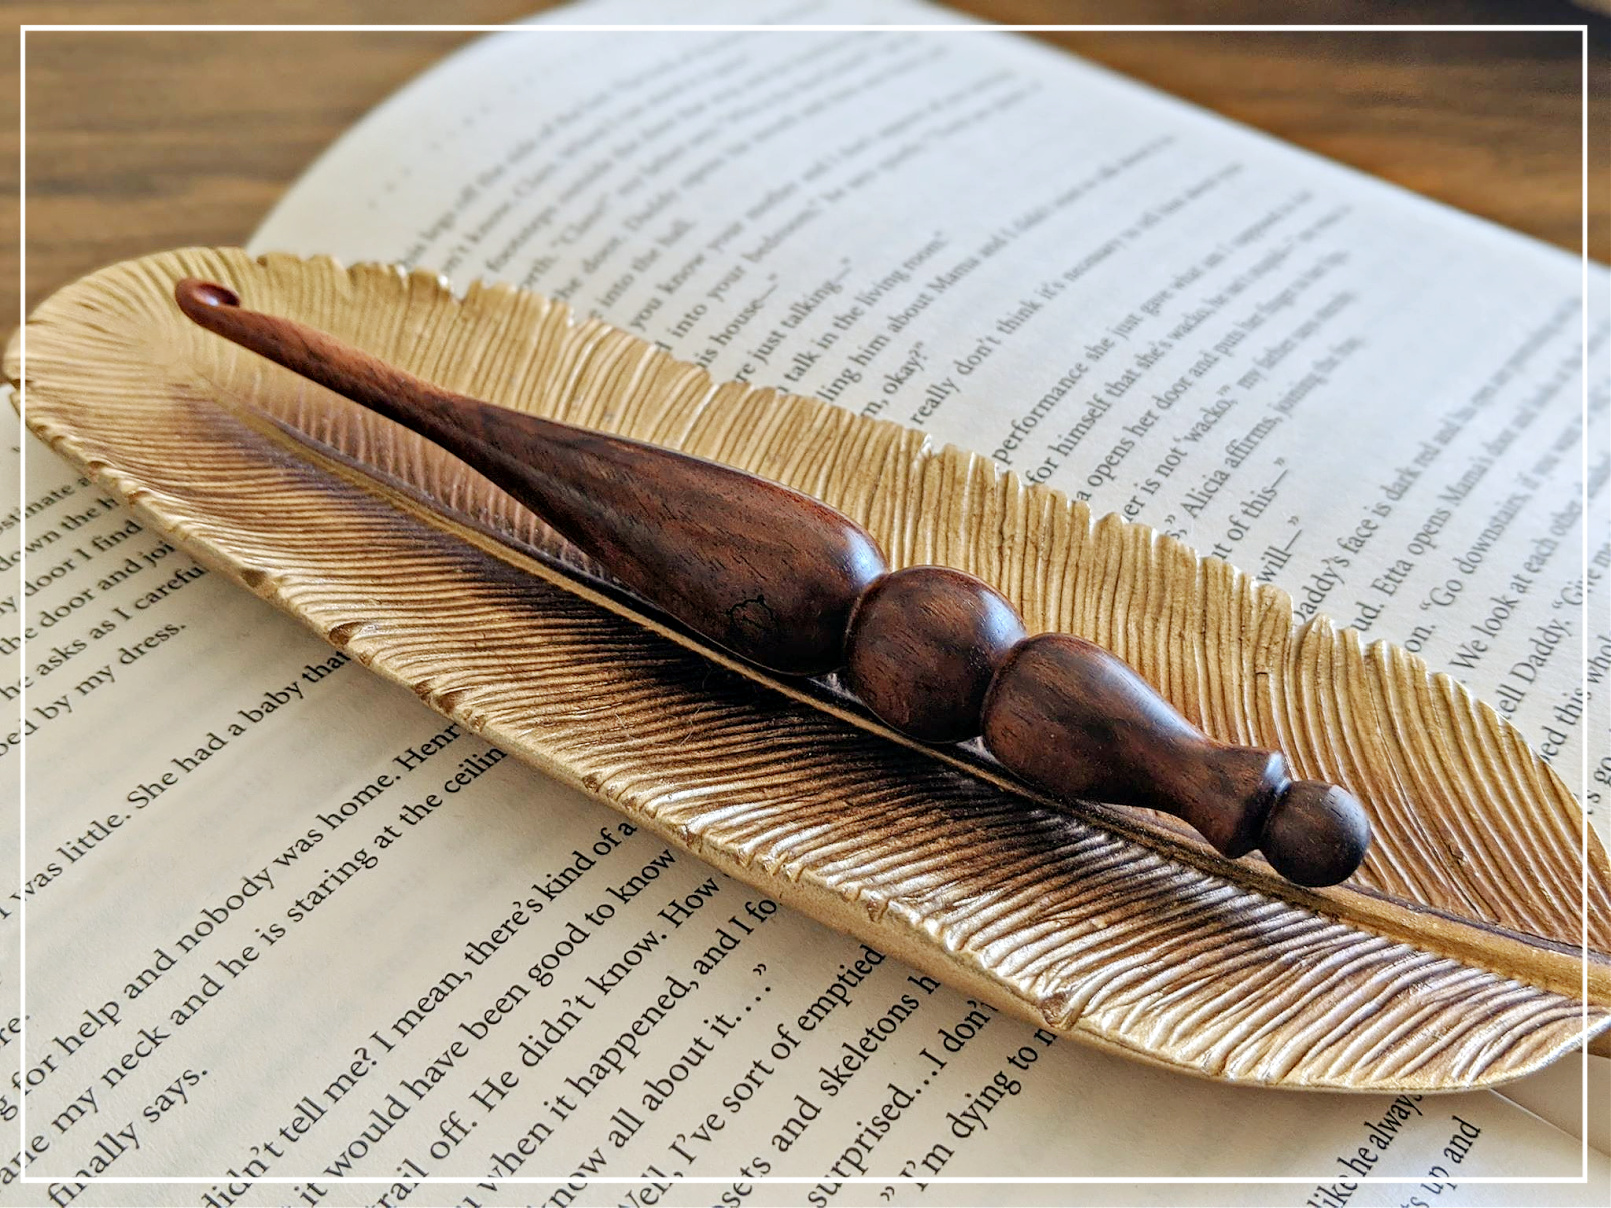
- 6.5 mm crochet hook (I used my favorite Streamline Resin Hook by Furls Crochet)
- yarn needle for weave in ends
- Stitch markers
- Scissors
NOTES ABOUT DESIGN
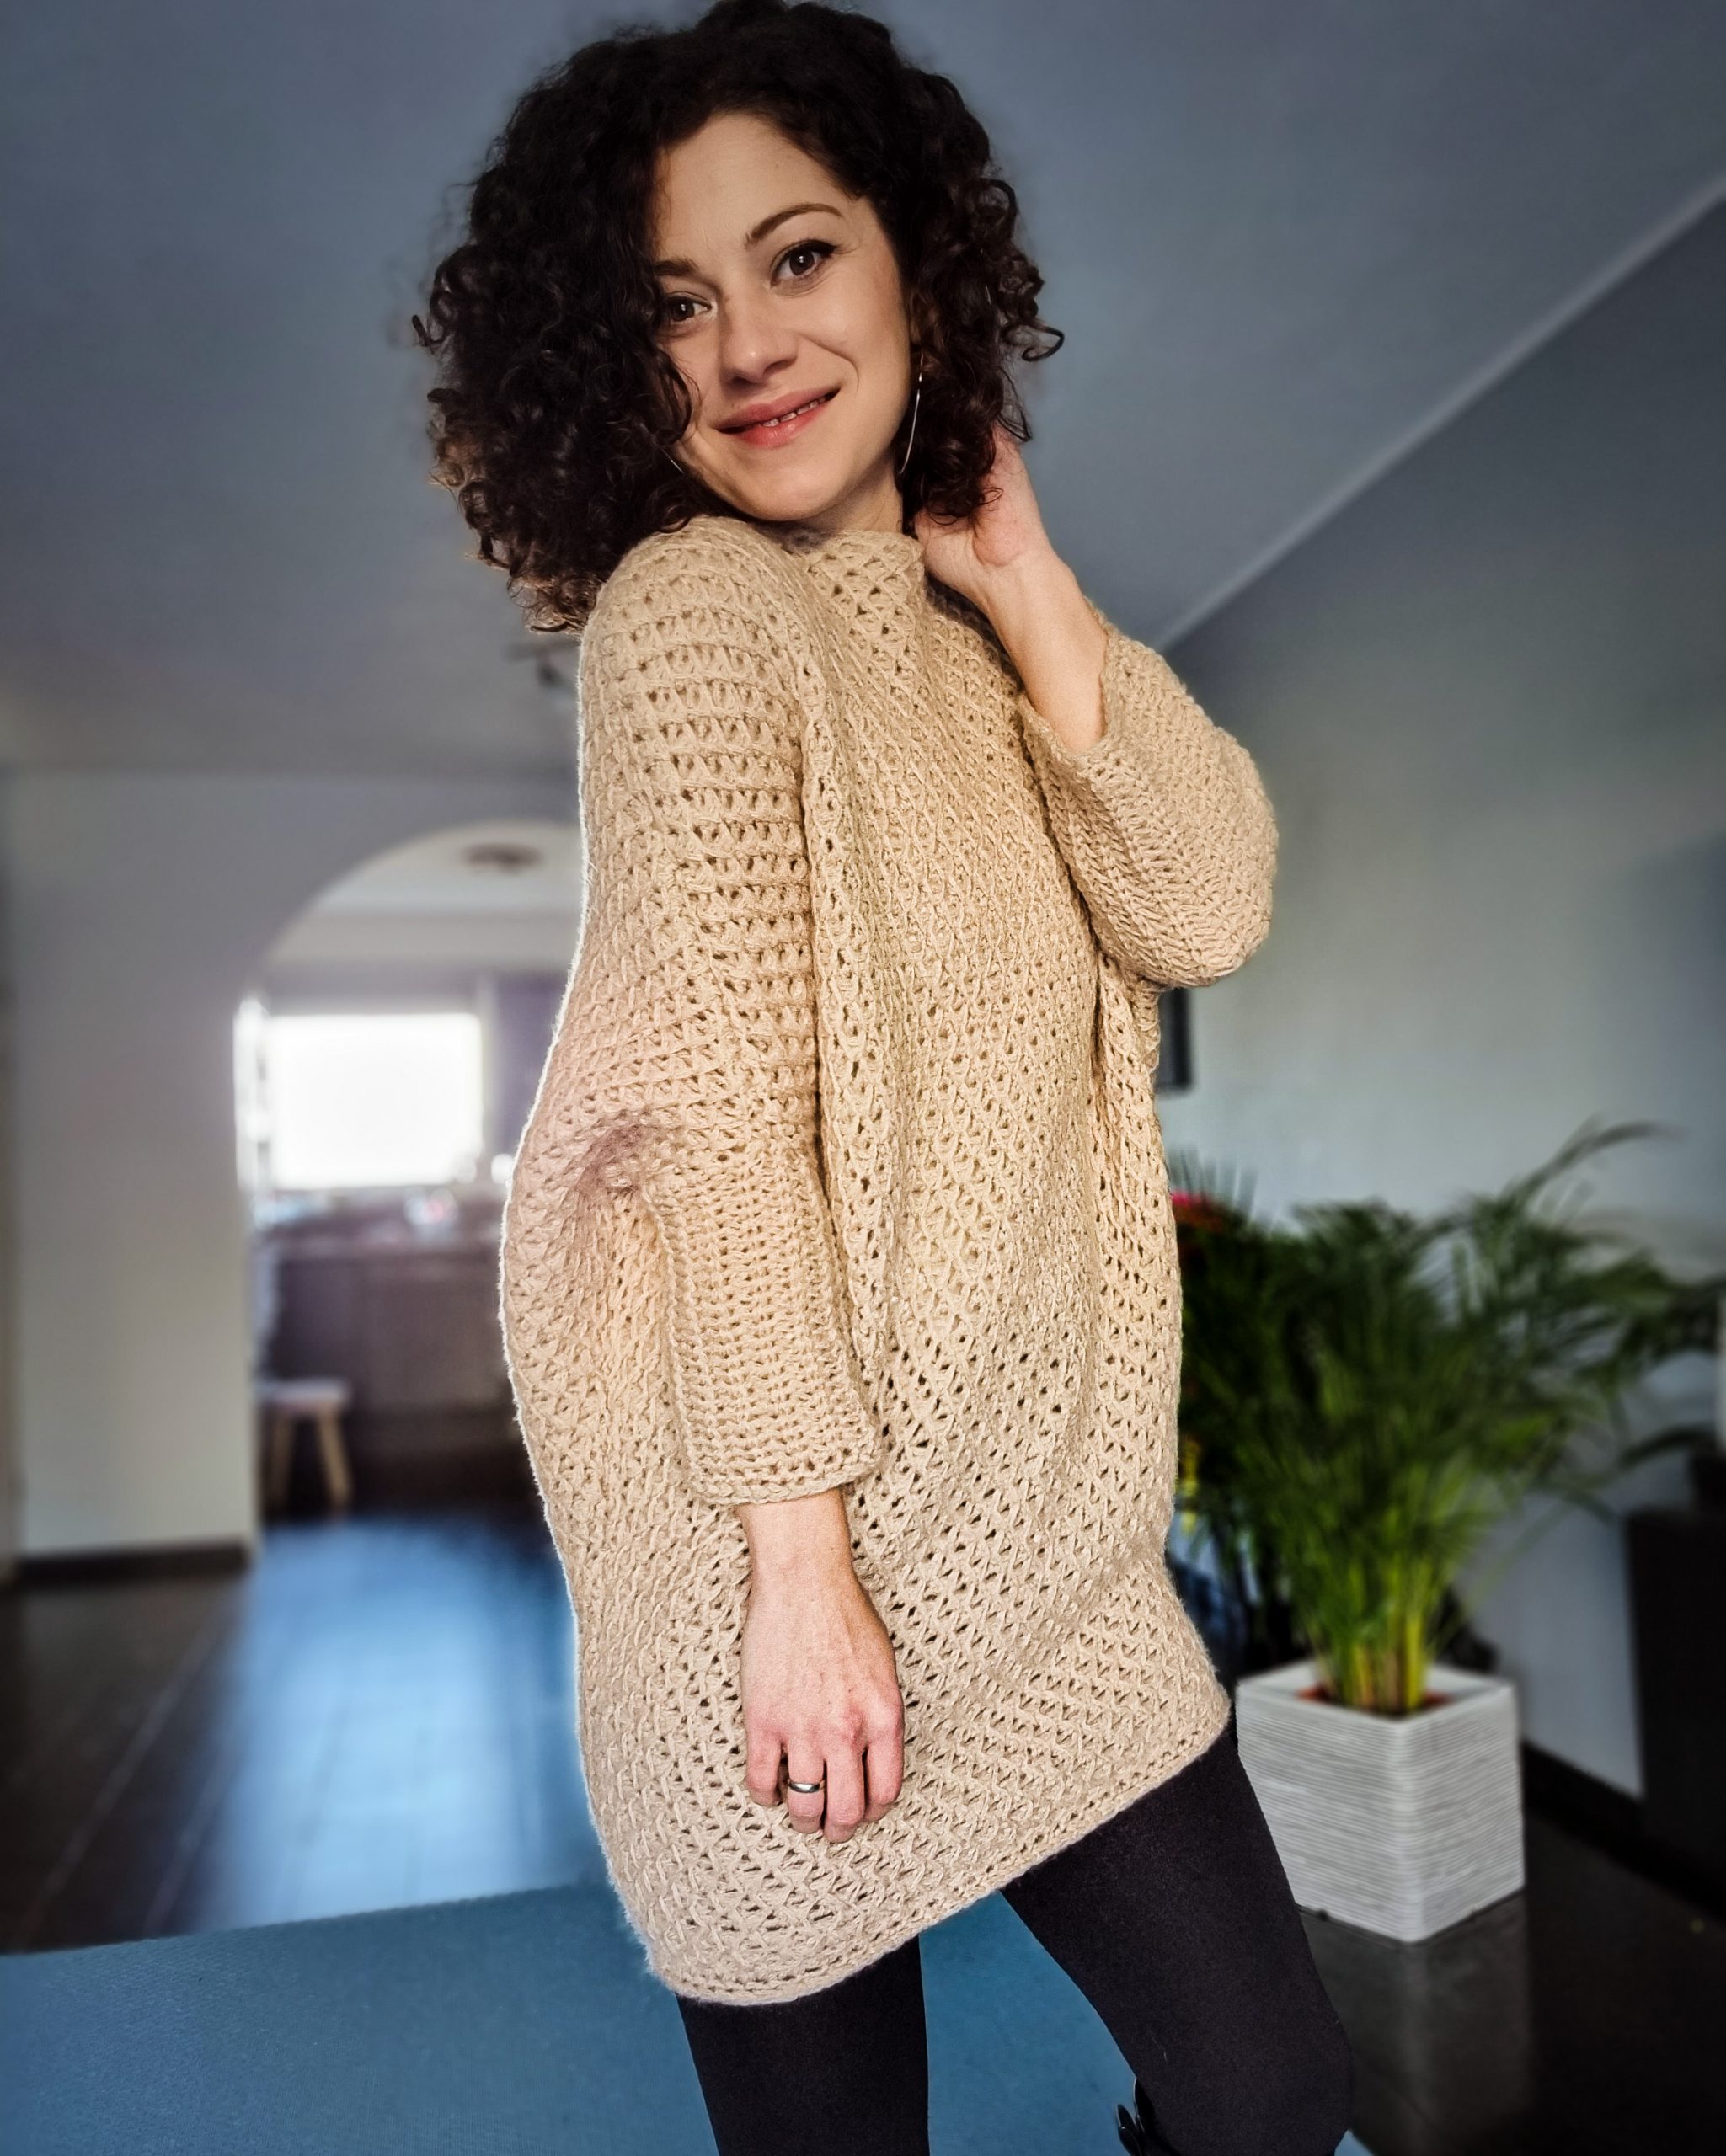
The Diamonds Sweater Dress has an interesting construction with batwings sleeves incorporated into the body!
There are only 2 identical panels for the back and front pieces that are then assembled! The sleeves are worked at the end in continuous rounds into the sleeves opening.
For an easier understanding of how I designed this dress, I divided one piece into 3 sections. They are not workes separately. Both panels are worked as a single piece.

Section 1: This section is the increase section and will also give you the length of the dress. This means, that if you want to adjust the length, this is the section in which you should do it.
If you want to adjust the length you need to take into consideration the total number of added stitches and divide them into the desired number of rows.
Section 2: This section is the “sleeve opening” section. Here you will stop increasing and work the stitch pattern into straight rows.
Section 3: This section is the armhole depth section. Here you will have to decrease so that the dress takes a nice shape around your shoulders and arms.
Section 4: This section is the sleeves section. This one is the last section that will be worked on after assembling the dress.
You can Purchase the easily printable PDF version of this pattern here:
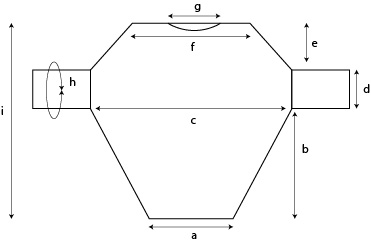
MEASUREMENTS AND SIZES
The Diamonds Sweater Dress Pattern is available in 8 sizes from Small up to 5XL. The model is 168 cm tall and wears size Small
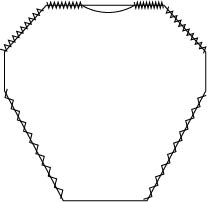
Bottom width a: 45 cm (50, 55, 60, 65, 70, 75, 80)
Length to the sleeve opening b: 50 cm (50, 50, 50, 50, 50, 50, 50)
Bust Width c: 87 cm (92, 98, 102, 109, 113, 117, 123)
Sleeve opening d: 12 cm (13, 14, 16, 19, 20, 22, 24)
Armhole Depth e: 24 cm (27, 27, 30, 30, 33, 33, 33)
Cross Back f: 44 cm (48, 50, 50, 52, 52, 53, 53)
Neckline g: 24 cm (26, 26, 28, 28, 29, 29, 29)
Sleeve circ h: 24 cm (26, 28, 32, 38, 40, 44, 48)
Length i: 85 cm (91, 92, 96, 99, 104, 106, 108)
You can Purchase the easily printable PDF version of this pattern here:
How much yarn do you need?
I used for this sample, Soave by Lana Mondial in color 846, given by Amazing Wool
This is a mix of Merino wool, Baby Alpaca, and microfiber.
Each ball has 50 grams and approximately 240 meters.
This particular yarn has more of a fingering weight yarn length. The thread is thicker, which gives a less wpi (wraps per inch) than a fingering weight yarn)
Here are some other yarn suggestions as I made a research to see which are better substitutes for this particular yarn in case this one is difficult to find:
Lang Yarns Novena
Lang Yarns Nova
Drops Sky
Katia yoga
Katia Lagom.
You can use any other DK weight yarn and the end result will be similar only that havier than my actual sample (considering that any other DK yarn can have between 120 – 150 meters in 50 grams)
You can also work with 1 strand of fingering weight yarn and 1 of Mohair. It can be an alternative that will work.
For each size you will need:
1800 m (2000, 2280, 2620, 2980, 3350, 3650, 4020)
Mondial Soave: 8 (9, 10, 11, 13, 14, 16, 17) balls
ABBREVIATIONS
ch – chain
sc – sc
FPsc – front post single crochet
csc – centered single crochet
scblo – single crochet in the back loop only
Inc – increase
Dec – decrease
ss – slip stitch
R – rows
** – repeated section.
*TENSION
Using 6.5 mm needles in the stitch pattern used
Before blocking
11 sts = 10 cm
18 rows = 10cm
After blocking
9.5 sts = 10 cm
16 rows = 10 cm
*when making the gauge swatch, wash it according to the recommendation on the yarn label, and block it. This will give a more accurate result on how the fabric will stretch in the end.
STITCH PATTERN AND TECHNIQUES
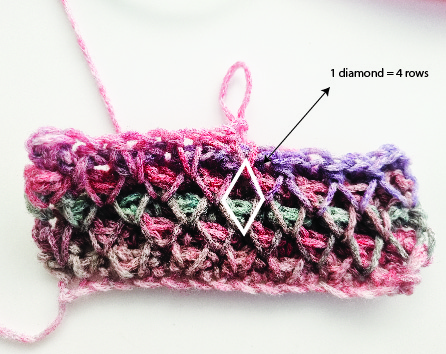
The Diamonds Sweater Dress is worked in Honeycomb Crochet Stitch pattern.
This crochet pattern is a combination of single crochet stitches and front post single crochet stitches.
In the PDF version of this pattern, you will find a couple of stitch charts representing the increase section and decrease section.
For the sleeves, I chose a ribbing stitch pattern, that is worked in the round by alternating 1 centered single crochet with 1 single crochet in the back loop only.
Centered single crochet: work as a regular sc, but insert the hook not under the 2 loops on top, but between the 2 bars that form the stitch, right in the middle of the st.
For edging, we will work 2 rounds: first in single crochet and the second in slip stitches.
You can Purchase the easily printable PDF version of this pattern here:
 Honeycomb Crochet Stitch Pattern
ch multiple of 2
R1: starting in the second st, 1sc in each st until the end of the row. 1ch and turn
R2: 1sc in first st, *1sc into the corespondent ch st, 1 row below, 1sc in next st. *rep, until the end of the row.
R3: 1 sc in next 2sts, *1fpsc around the left leg of the previous st, and right leg of the next st, 1sc in next st. *repeat until the end of the row, 1sc in last st.
R4: *1sc into the space under the corespondent st, 2 rows below. 1sc in the next st *rep until the end of the row; 1sc into the space under the corespondent st, 2 rows below
R5: *1sc, *1fpsc around the left leg of the previous st, and right leg of the next st, 1sc in next st. *repeat until the end of the row, 1sc in last st.
R6: *1sc, 1sc into the space under the corespondent st, 2 rows below. *rep until the end of the row, 1sc in the last st
Rep. R3 – R6 until you complete the desired length
You can Purchase the easily printable PDF version of this pattern here:
PATTERN NOTES
- work the pieces flat; turn after each row
- work 1ch at the end of each row; 1ch does not count as first sc
- when counting rows, 1 diamond = 4 rows
- use stitch markers at the beginning of each section (see construction diagram) to be easier to track the rows number
INSTRUCTIONS
Numbers for sizes M, L, XL, XXL, 3XL, 4XL, and 5XL are written between brackets; if not the pattern applies to all sizes.
BACK PANEL (repeat the same pattern for the front panel)
Section 1 (Increasing section)
Increase at every 4 rows (on row4, 8, 12…) with 1st at the beginning and 1 at the end)
Start: ch44 (48, 54, 58, 64, 68, 72, 78) sts
R1: starting in the second st, 1sc in each st until the end of the row. 1ch and turn
R2: 1sc in first st, *1sc into the corespondent ch st, 1 row below, 1sc in next st. *rep, until the end of the row.
R3: 1 sc in next 2sts, *1fpsc around the left leg of the previous st, and right leg of the next st, 1sc in next st. *repeat until the end of the row, 1sc in last st.
R4: (1sc, 1sc into the space under the corespondent st, 2 rows below) into the first st, *1sc in next st, 1sc into the space under the corespondent st, 2 rows below into the next st. *repeat until you have 1 st left, (1sc into the space under the corespondent st, 2 rows below, 1sc) into the last st.
R5:rep R3
R6: *1sc into the space under the corespondent st, 2 rows below, 1sc in next st.*rep. until you have 1 st left, into the space under the corespondent st, 2 rows below into the last st.
R7: *1sc in the next st, 1fpsc around the left leg of the previous st, and right leg of the next st. *rep. until you have 1 st left, 1sc into the last st.
R8:(1sc into the space under the corespondent st, 2 rows below and 1sc) into the first st, *1sc into the space under the corespondent st, 2 rows below, 1sc in next st. *rep. until you have 1 st left, (1sc and 1sc into the space under the corespondent st, 2 rows below) into the last st.
R9:rep. R7
R10: *1sc in next st, 1sc into the space under the corespondent st, 2 rows below. *rep. until you have 1 st left, 1sc in the last st.
R11:rep. R3
R12: Rep. R4.
Rep. from R5 to R12 until you have in total 80 rows (for all sizes). The last row is an increased row.
At the end of row 80, you will have in total 83 (87, 93, 97, 103, 107, 111, 117)
At every 4 rows, you added 2 sts.
SECTION 2 (SLEEVES OPENING)
Continue working without increasing 19 (21, 23, 26, 30, 33, 36, 38) more rows.
You will have in total: 99 (101, 103, 106, 110, 113, 116, 118) rows.
Place a stitch marker at the beginning of Section 2, to be easier to track the rows.
SECTION 3 (ARMHOLE DEPTH)
In this section, we will start decreasing
For some sizes, you will need to adjust the decreasing pattern as you will need to decrease less or more stitches than this pattern 1 by 1.
Also for some cases, the decrease stitch might be reversed as there are more types of decreases
Dec.1: sc2tog – second sc into the space under the corespondent st 2 rows below.
Dec.2: sc2tog – first sc into the space under the corespondent st 2 rows below.
Dec 3: sc2tog – both sts are regular sc
Dec 4: sc2tog – the second will be an FPsc around the left leg of the previous st, and the right leg of the next st.
Dec 5: sc2tog – first st will be an FPsc around the left leg of the previous st, and right leg of the next st.
R1: *1sc in the next st, 1fpsc around the left leg of the previous st, and right leg of the next st. *rep. until you have 1 st left, 1sc into the last st.
R2: Dec 1, *1sc in next st, 1sc into the space under the corespondent st 2 rows below. *rep until you have 3 sts left, 1sc, 1dec2.
Rep. R1 and R2 until you have in total:
38 (26, 38, 42, 46, 54, 52, 46) rows.
For size S and 3XL, section 3 is done
Sizes M, L, and XL only
For the rest of the section, for these sizes only we will change the decrease pattern into 2 by 1. This means that we will have 2 rows without decreasing and 1 decrease row.
Because the last row was a wrong side row, we will decrease now on the right side row.
R27 (39, 43) RS: rep. R1
R28 (40, 44) WS: *1sc in next st, 1sc into the space under the corespondent stitch 2 rows below. *rep until you have 1 st left, 1sc into the last st.
R29 (41, 45): sc2tog, *1fpsc around the left leg of the previous st, and right leg of
the next st, 1sc in next st. *repeat until you have 3 sts left, FPsc around the left leg of the previous st, and right leg of
the next st, sc2tog.
R30 (42, 46): rep R28 (40, 44)
R31 (43, 47): 1 sc in next 2sts, *1fpsc around the left leg of the previous st, and right leg of the next st, 1sc in next st. *repeat until the end of the row, 1sc in last st.
R32(44, 48): sc2tog, * 1sc into the space under the corespondent stitch 2 rows below, 1sc in the next st. *rep until you have 3 sts left, 1sc into the space under the corespondent stitch 2 rows below, sc2tog.
For sizes L and XL the section is done.
For size M, continue working in the same pattern 2 by 1 until you have in total 44 rows.
Sizes 2XL, 4XL and 5XL
For these sizes on the last rows, you will decrease on each row, 1 st at the beginning and 1 st at the end of the row.
R47 (53, 47): Dec. 4, *1sc in the next st, 1fpsc around the left leg of the previous st, and right leg of the next st. *rep. until you have 3 sts left, 1sc in next st, Dec. 5.
R48 (54, 48): Dec. 2, *1sc into the space under the corespondent st 2 rows below, 1sc in the next st. *rep until you have 3 sts left, sc into the space under the corespondent st 2 rows below, Dec.1.
For sizes 2XL and 4XL, Section 3 is done.
For size 5XL work in the same decrease pattern 6 more rows, until you have 54 rows.
At the end of section 3, the panel is done.
You should have in total: 137 (145, 147, 154, 158, 167, 170, 172) rows.
Stitches left after decreasing: 45 (49, 51, 51, 53, 53, 54, 54) sts
Next, use 2 stitch markers to mark the neck line: 23 (25, 25, 27, 27, 27, 28, 28) sts.
ASSEMBLING
Before stitching the panels together, block them according to the measurements.
Using the Mattress stitch technique, stitch both panels on the sides, leaving only the neckline and sleeves opened.
SLEEVES
Work the sleeves in continuous rounds. Use a stitch marker to mark the first st.
Rejoin yarn.
R1: 1ch, 1sc into each side row.
Total sts: 38 (42, 46, 52, 60, 66, 72, 76)
R2: *1csc, 1scblo. *rep. until the end of the round.
Rep. R2 until you have in total: 23 (24, 24, 24, 22, 22, 20, 18) rounds or until you get to the desired length.
EDGING
Work the edging around the neckline, sleeves, and bottom
R1: 1sc in each st around
R2: 1ss in each st around.
TO FINISH
Weave in all looser ends and block to measurements.
You can Purchase the easily printable PDF version of this pattern here:

And? How is it? Will you try to make one? Don’t forget to tag me in your post because I would love to see your versions.
Until next time, Happy Crochet! or Knitting 🙂



2 Comments
I LOVE this! So cute
Such a cute pattern and the sweater dress turned out beautiful. Love how you styled it!
xoxo
Lovely
http://www.mynameislovely.com