You know that when it’s about yarn, I am a “no waste” person. I don’t like to see in my stash single skeins of yarn or left over’s and I try to find a project for each single meter of yarn that I have.
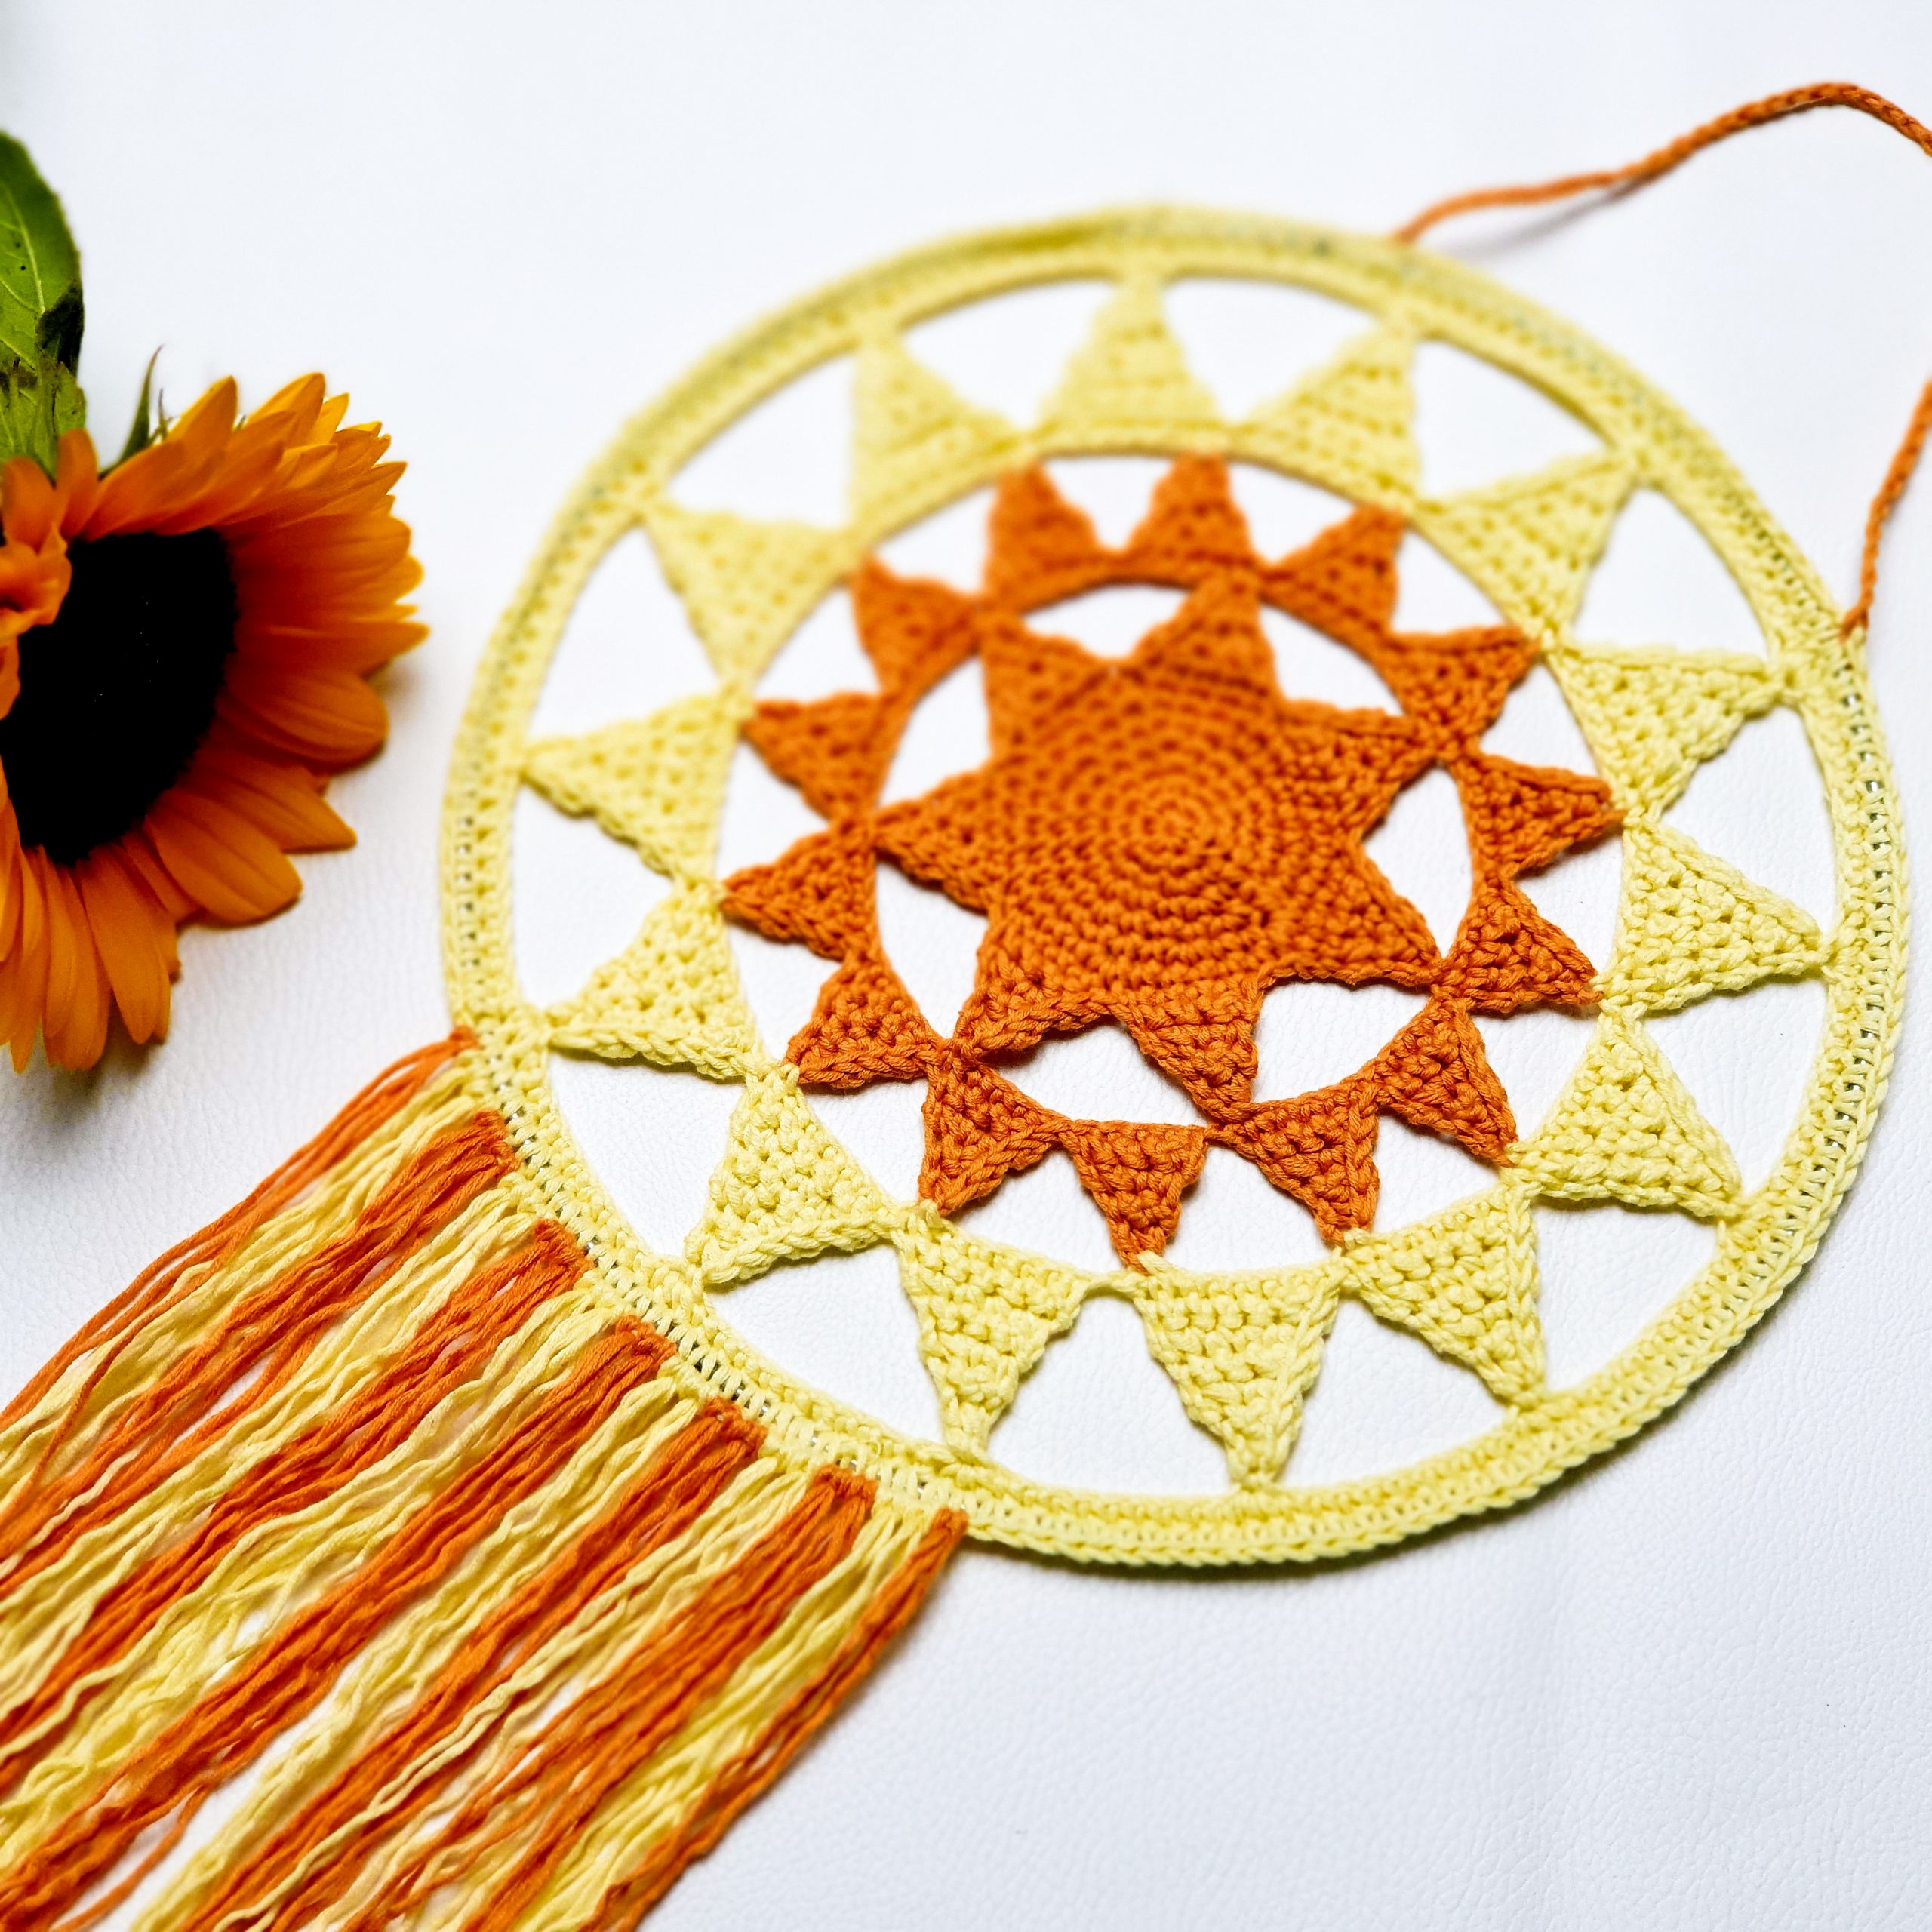
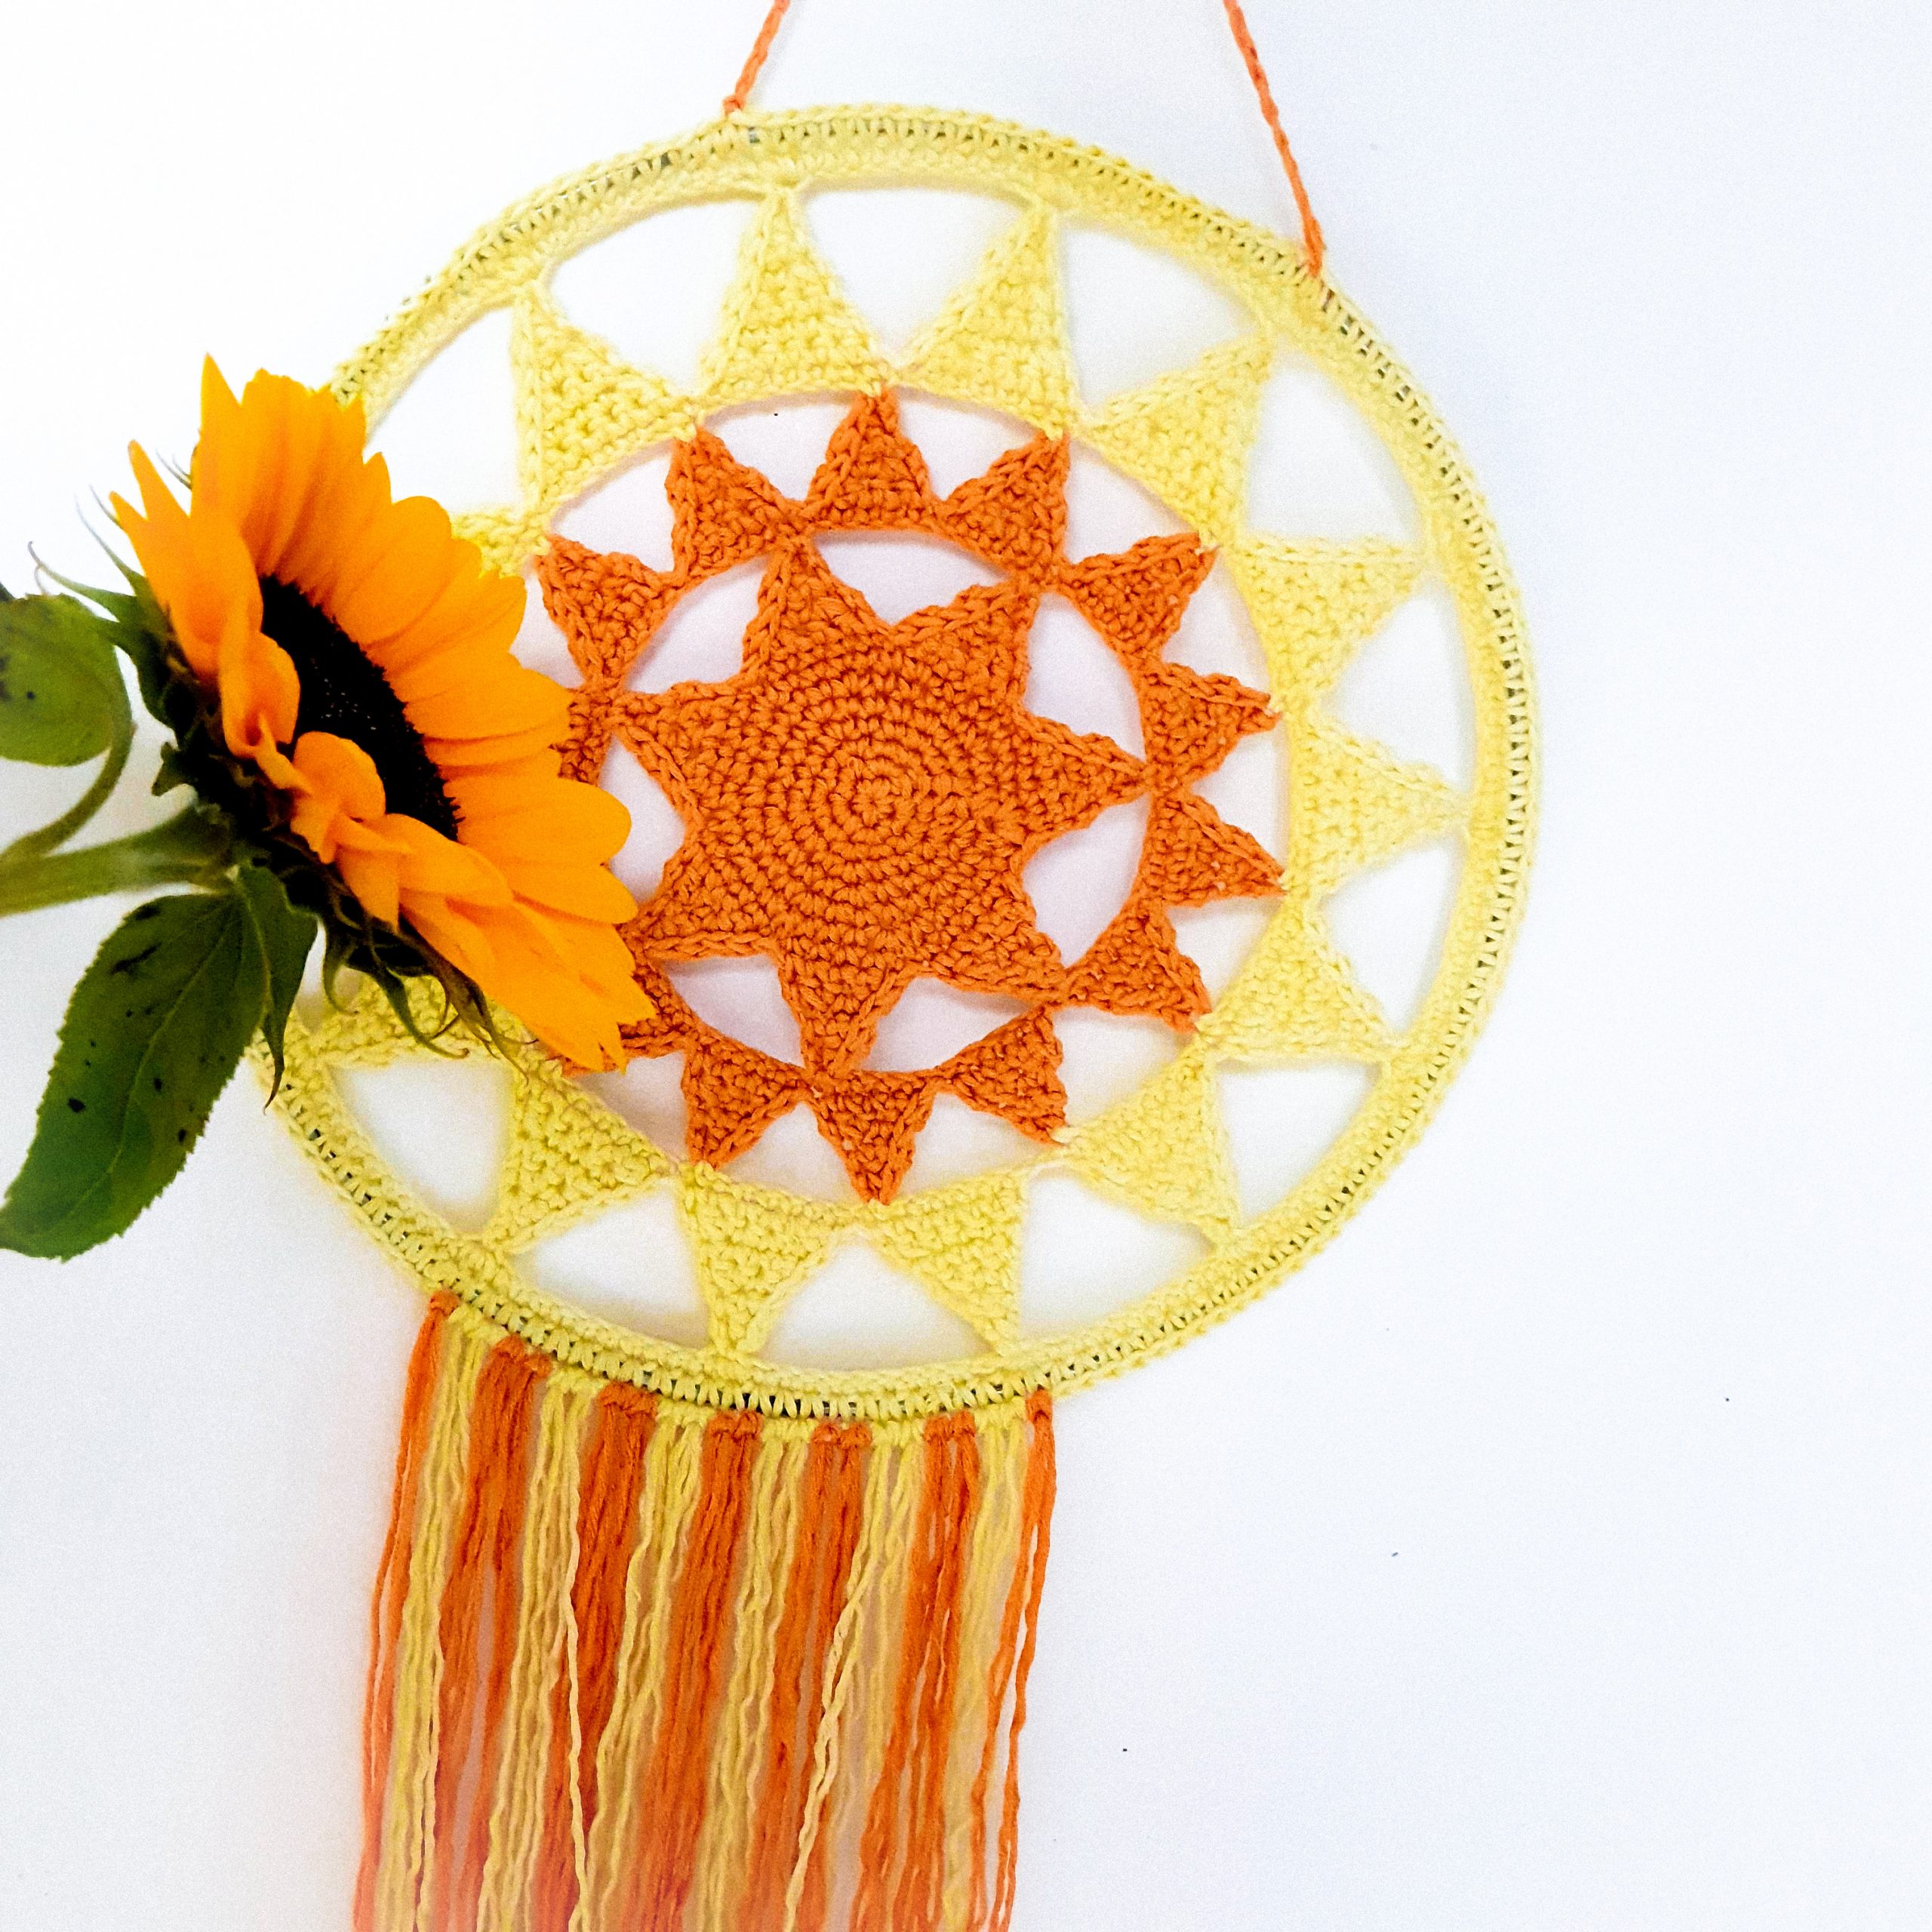
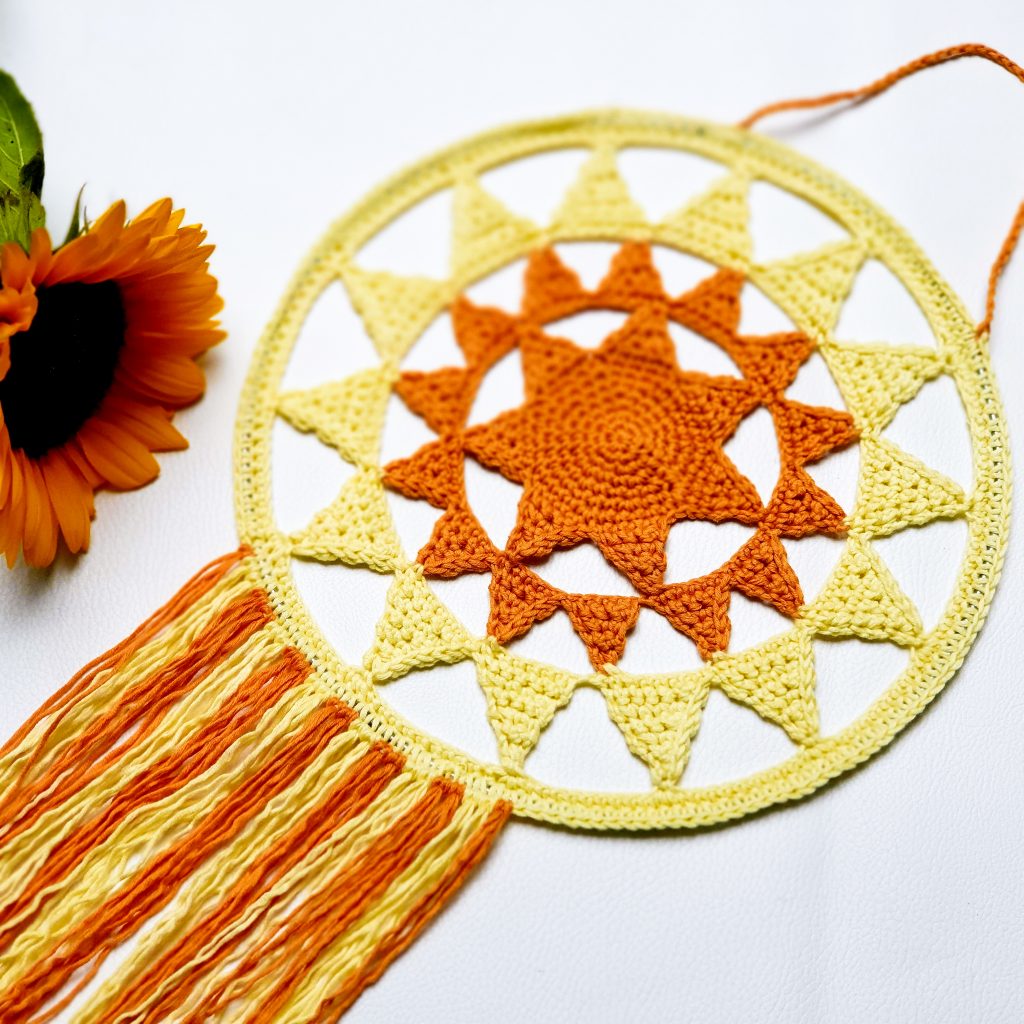
And this is how the Deity Wall Hanger came out! I had the metal ring for couple of years now and I finally put some yarn on it and I am so happy that I did.
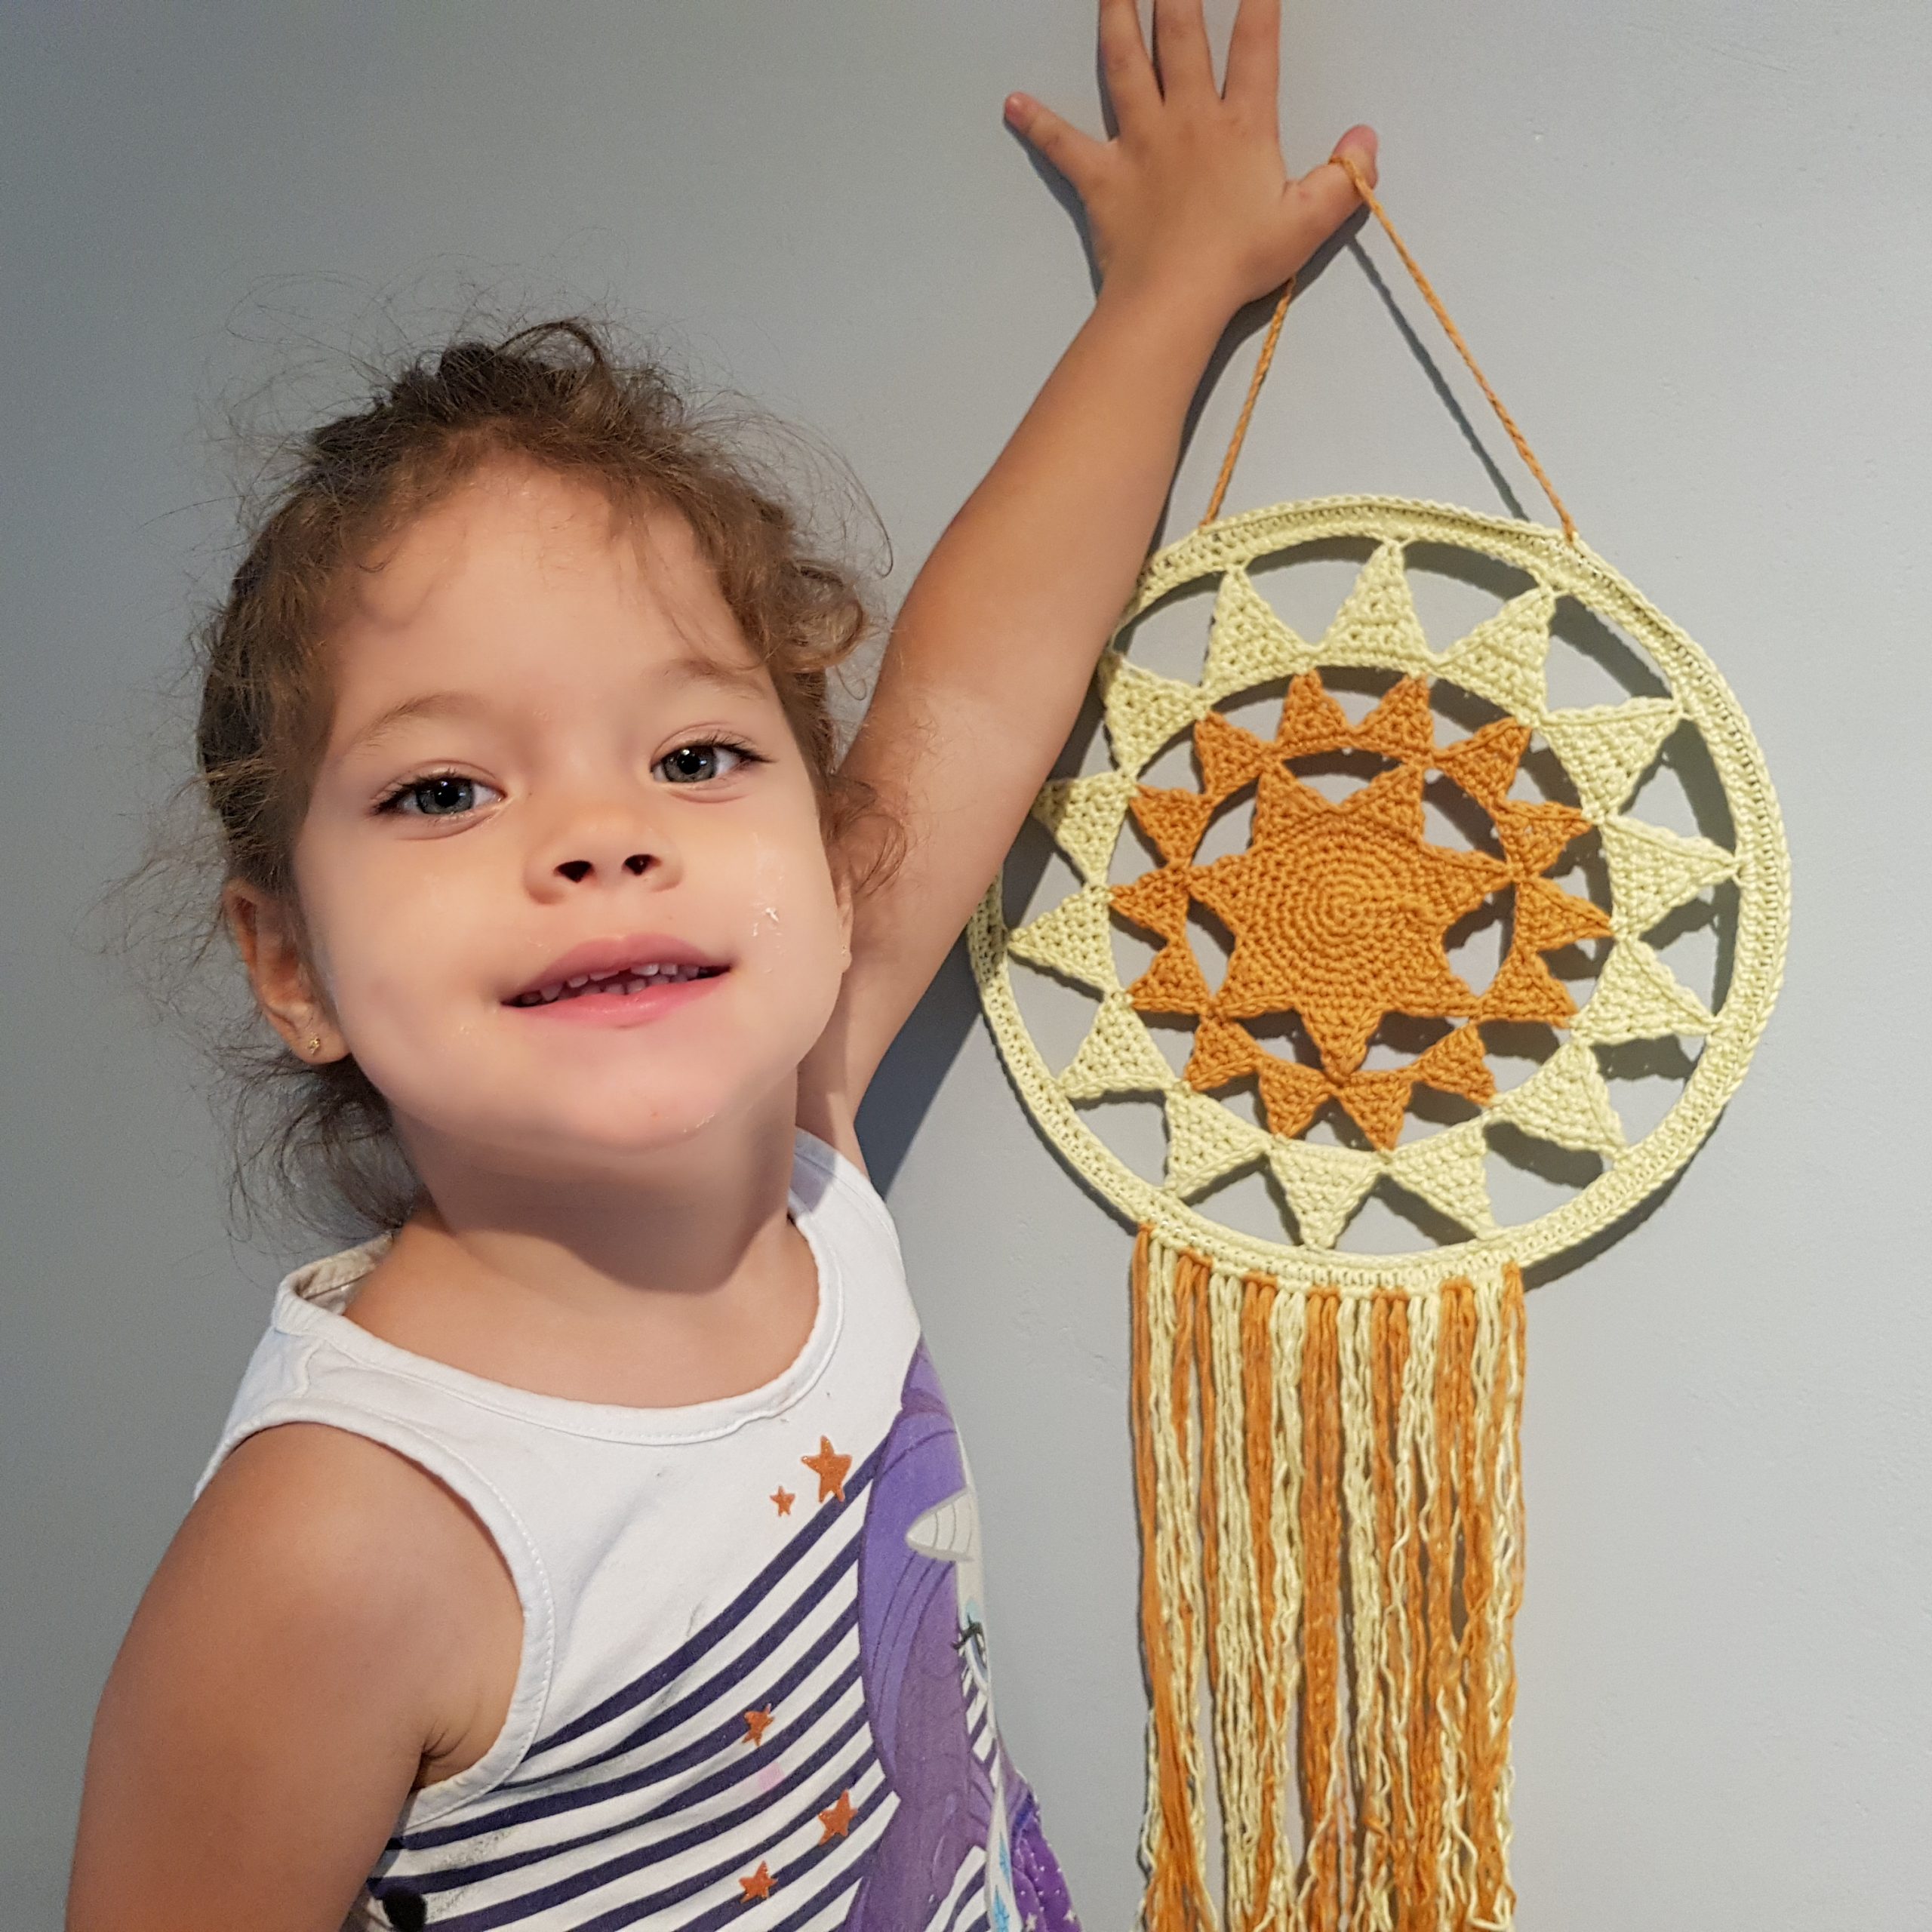
Plus, my daughter love her Sun and very proud she hung it on the wall in her room saying: “From now on, no more cloudy days!”
You can Purchase the easy printable PDF version of this pattern here:
You can now have the PDF version with 20% Discount or even for FREE if you want to support ByKaterina on Patreon
I am so happy that she loves it, even if at first I wanted this Wall Hanger for my creative corner so now I have a reason to hook up another one.
So, If you want to make one and to have a Sun in your home all day long with all it’s positive energy, here is what you will need and how to make a Deity Wall Hanger
Materials you will need
- Yarn
- Category 1 (fingering, Super Fine, 4 ply)
- Crochet Hook
- 5 mm (E US size)
- You will need a yarn needle for wave in ends
- Metal ring (25 cm diameter)
Pattern notes
This Deity Wall Hanger Patter features techniques like single crochet, single crochet increase, single crochet decrease and working in rounds.
First, is worked the main circle and then the triangle rounds by working each triangle individual.
The main circle is worked in rounds, joining each round with a slip stitch
After completing the entire piece, is attached to the metal ring using single crochet stitches.
At the end the fringe are added
Final measurements
Final measurements of the Deity Wall hanger are given by the metal ring dimensions. It will have 25 cm in diameter.
How much yarn do you need?
I used to make this Deity Wall Hanger Fair Cotton by Katia in colors Mustard and light yellow. You will need less than 1 ball of each color. From 1 ball of each color I made 2.
It’s a perfect project if you have some left over yarn from other projects.
You can Purchase the easy printable PDF version of this pattern here:
You can now have the PDF version with 20% Discount or even for FREE if you want to support ByKaterina on Patreon
About the stitch pattern.
To make this cute Deity Wall Hanger you will need to know only single crochet stitches being a perfect project for beginners.
Abbreviations used in this pattern
- Ch – chain
- Sc – single crochet
- Ss – slip stitch
- Sc2tog – 2 single crochet worked together: insert the hook into next st, yarn over pull out a loop, insert the hook into the next st, yarn over and pull out a loop, yarn over and pull the yarn through all 3 loops on your hook.
- R| – row/round
- ** – Repeated section
Gauge
After 7 rounds of single crochet the main circle measures 5 cm
After round 1 of triangles the motif measures 10 cm.
Pattern Notes
Ch 1 at the beginning of each round or row do not count as a stitch.
Instructions
Main Circle
Using Mustard
To make the main circle of the Deity Wall Hanger, you can follow the chart or the written pattern below.
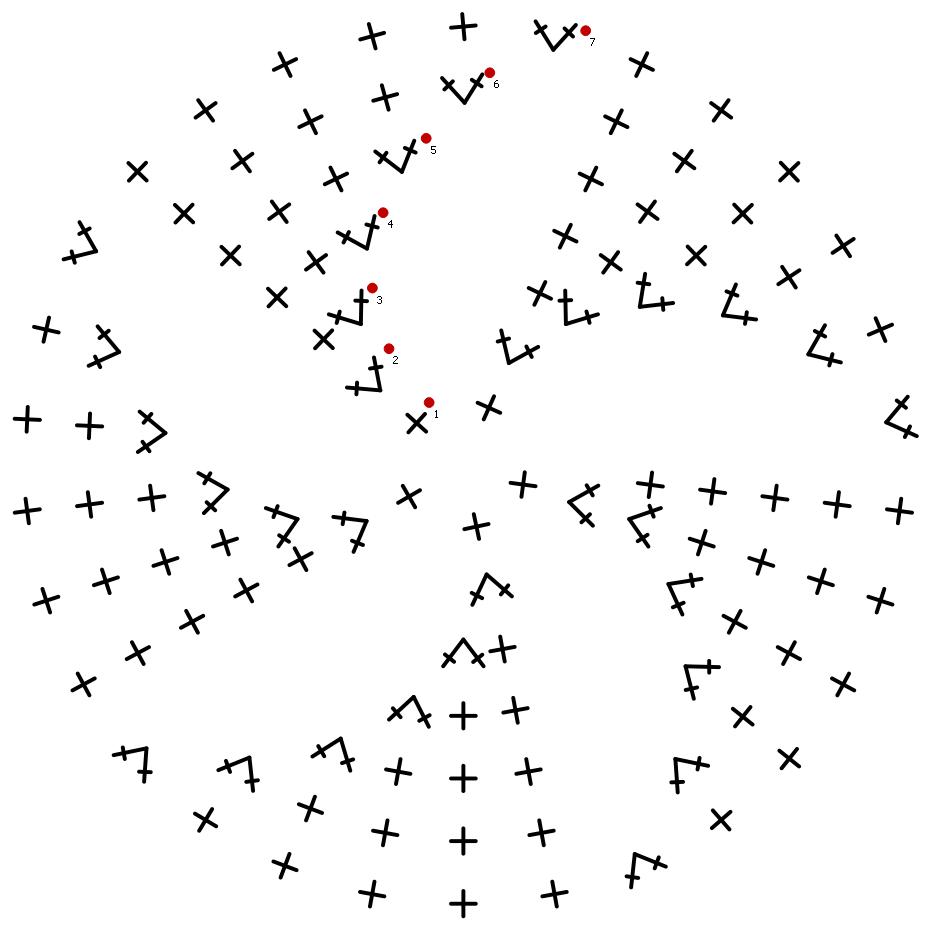
Start| make a magic ring
R1| ch 1, 5 sc inside the ring. Join with a ss with first sc.
R2| ch 1, 2 sc in each st around. Join with a ss with 1st sc. (10 sc)
R3| ch 1, *2 sc in next st, 1 sc in next. *Repeat 5 time to the end of the round. Join with a ss with 1st sc (15 sc)
R4| ch 1, *2 sc in next st, 1 sc in next 2 sts. *Repeat 5 times to the end of the round. Join with a ss with 1st sc. (20 sc)
R5| ch 1, *2 sc in next st, 1 sc in next 3 sts. *Repeat 5 times to the end of the round. Join with a ss with 1st sc. (25 sc)
R6| ch 1, *2 sc in next st, 1 sc in next 4 sts. *Repeat 5 times to the end of the round. Ss with 1st sc. (30 sc)
R7| ch 1, *2 sc in next st, 1 sc in next 5 sts. *Repeat 5 times to the end of the round. Ss with 1st sc.
Round 1 of triangles
Each triangle will have a base of 5 sc. Each triangle is worked individually. At the end of the round you will have 7 triangles.
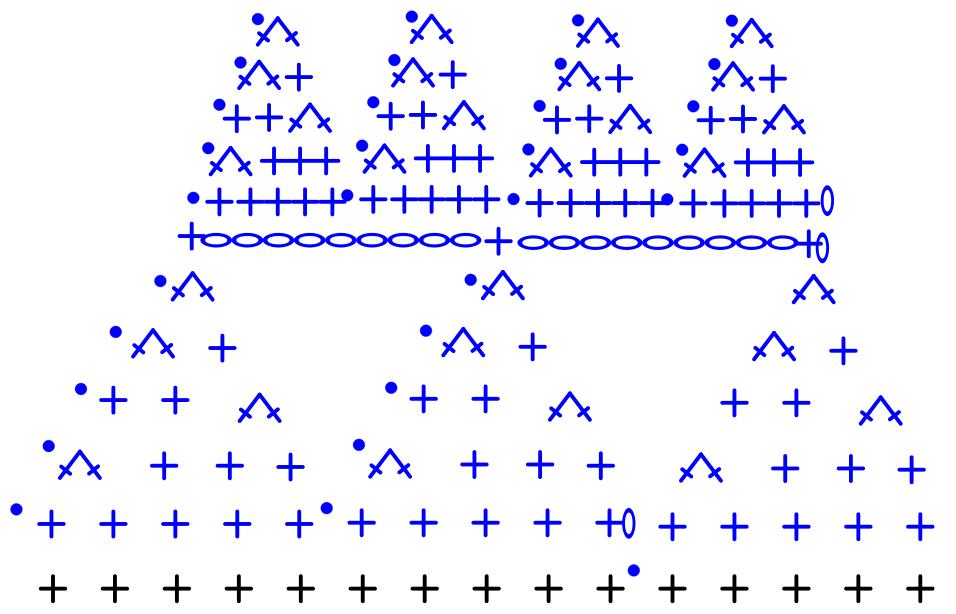
Triangle
R1| ch 1, 1 sc in next 5 sts, ch 1 and turn.
R2| sc2tog, 1 sc in next 3 sts, ch 1 and turn
R3| sc2tog, 1 sc in next 2 sts, ch 1 and turn
R4| sc2tog, 1 sc in next ts, ch 1 and turn
R5| sc2tog
Ss in each side row sc, on the side of triangle to get to the base round.
Repeat the pattern for the triangle all around. You will have 7 triangles in total. You will end the round of triangles in the top of last triangle. You don’t have to make the ss.
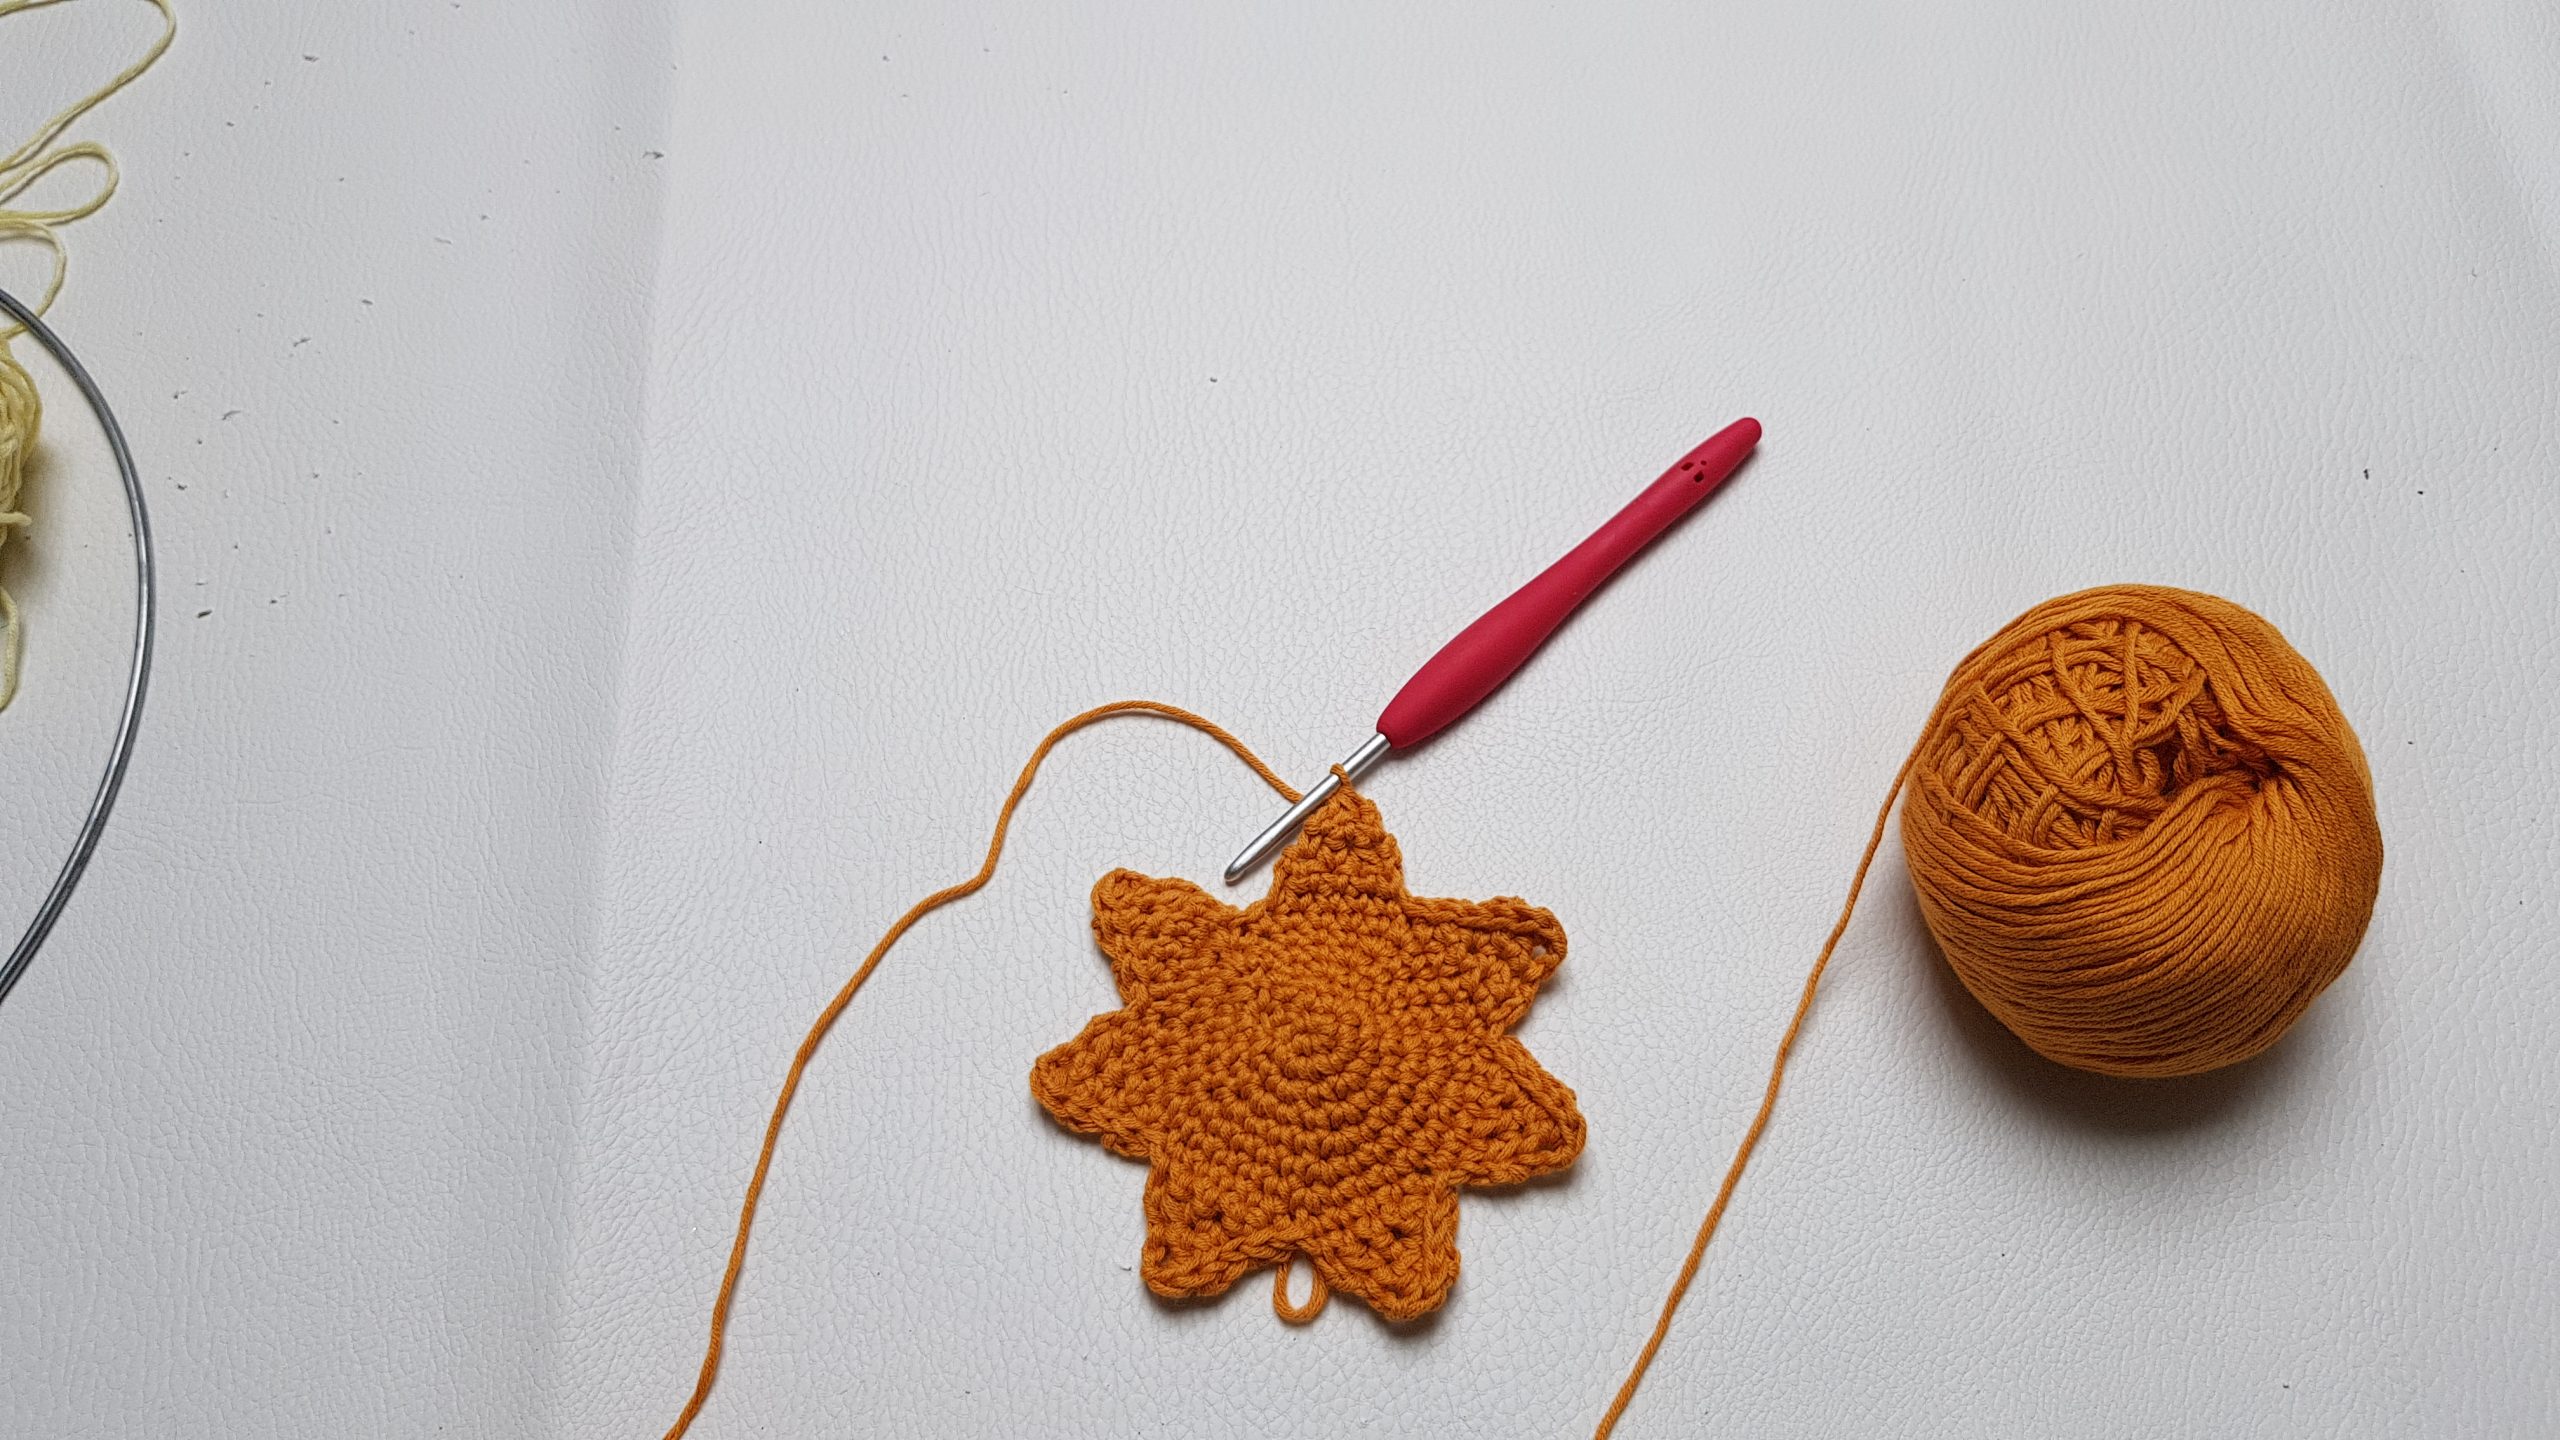
Round 2 of triangles.
Base Round
Ch 1, 1 sc in the same st, ch 9, *1 sc in the top st of next triangle, ch 9. *Repeat to the end of the round. Join with a ss with first sc.
Triangles round
Repeat the pattern for triangles for the first round. You will have at the end of this round 14 triangles, 2 triangles between each 2 triangles from the previous round.
At the end of this round of triangles we will change the color. Change the color by finishing the last st of the last triangle using light yellow or the second color you will want to use.
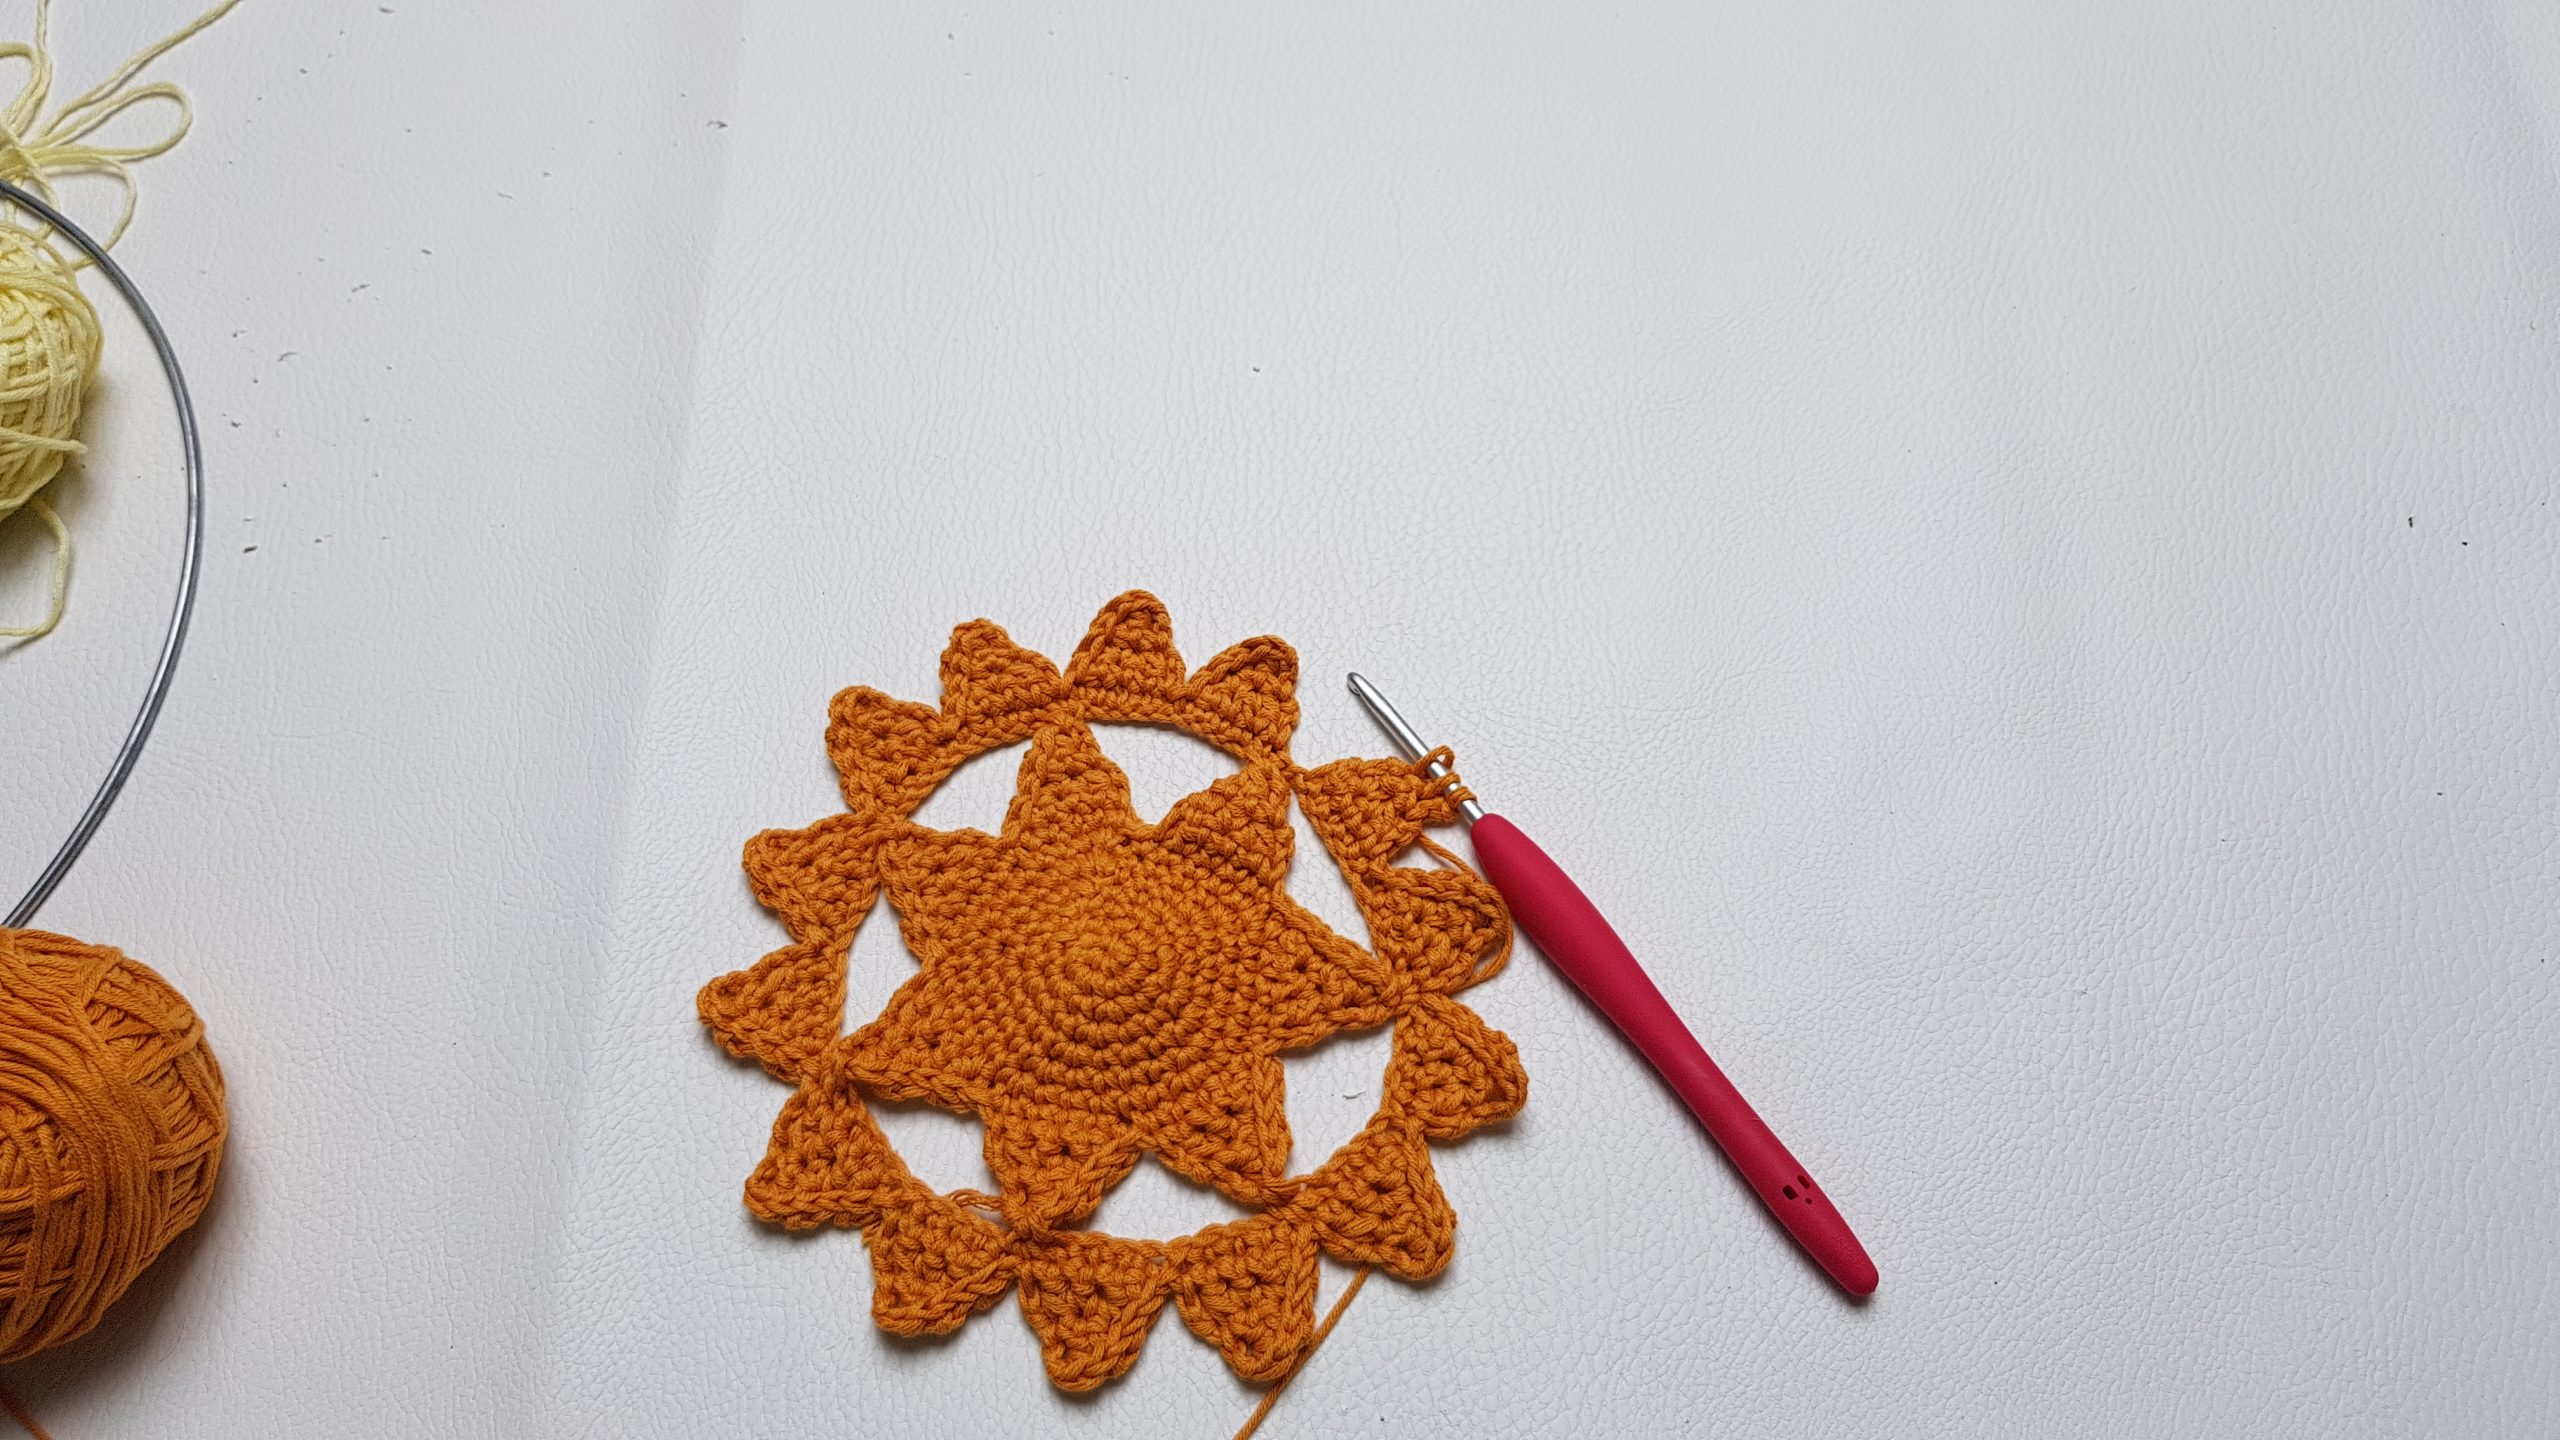
Round 3 of triangles
You can Purchase the easy printable PDF version of this pattern here:
You can now have the PDF version with 20% Discount or even for FREE if you want to support ByKaterina on Patreon
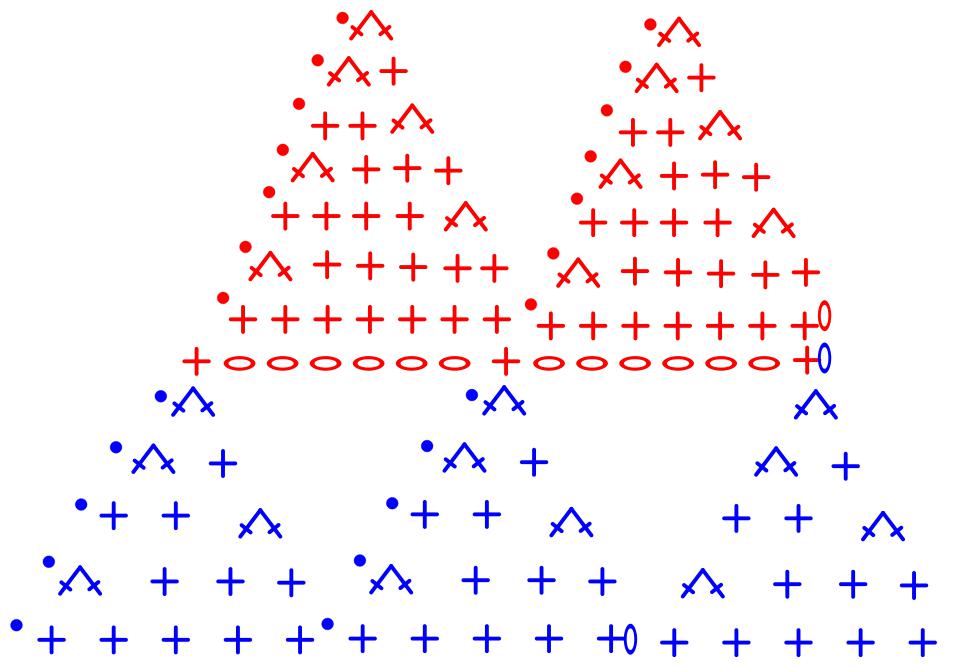
Base Round (light yellow)
Ch 1, 1 sc In the same st, ch 6, *1sc in the top st of the next triangle, ch 6. * Repeat to the end of the round. Ss in 1st sc.
Triangle
On this round of triangle, the base of one triangle will have 7 sts.
R1| ch 1, 1 sc in next 7 sts, ch 1 and turn
R2| sc2tog, 1 sc in next 5 sts, ch 1 and turn
R3| sc2tog, 1 sc in next 4 sts, ch 1 and turn
R4| sc2tog, 1 sc in next 3 sts, ch 1 and turn
R5| sc2tog, 1 sc in next 2 sts, ch 1 and turn
R6| sc2tog, 1 sc in next st, ch 1 and turn
R7| sc2tog
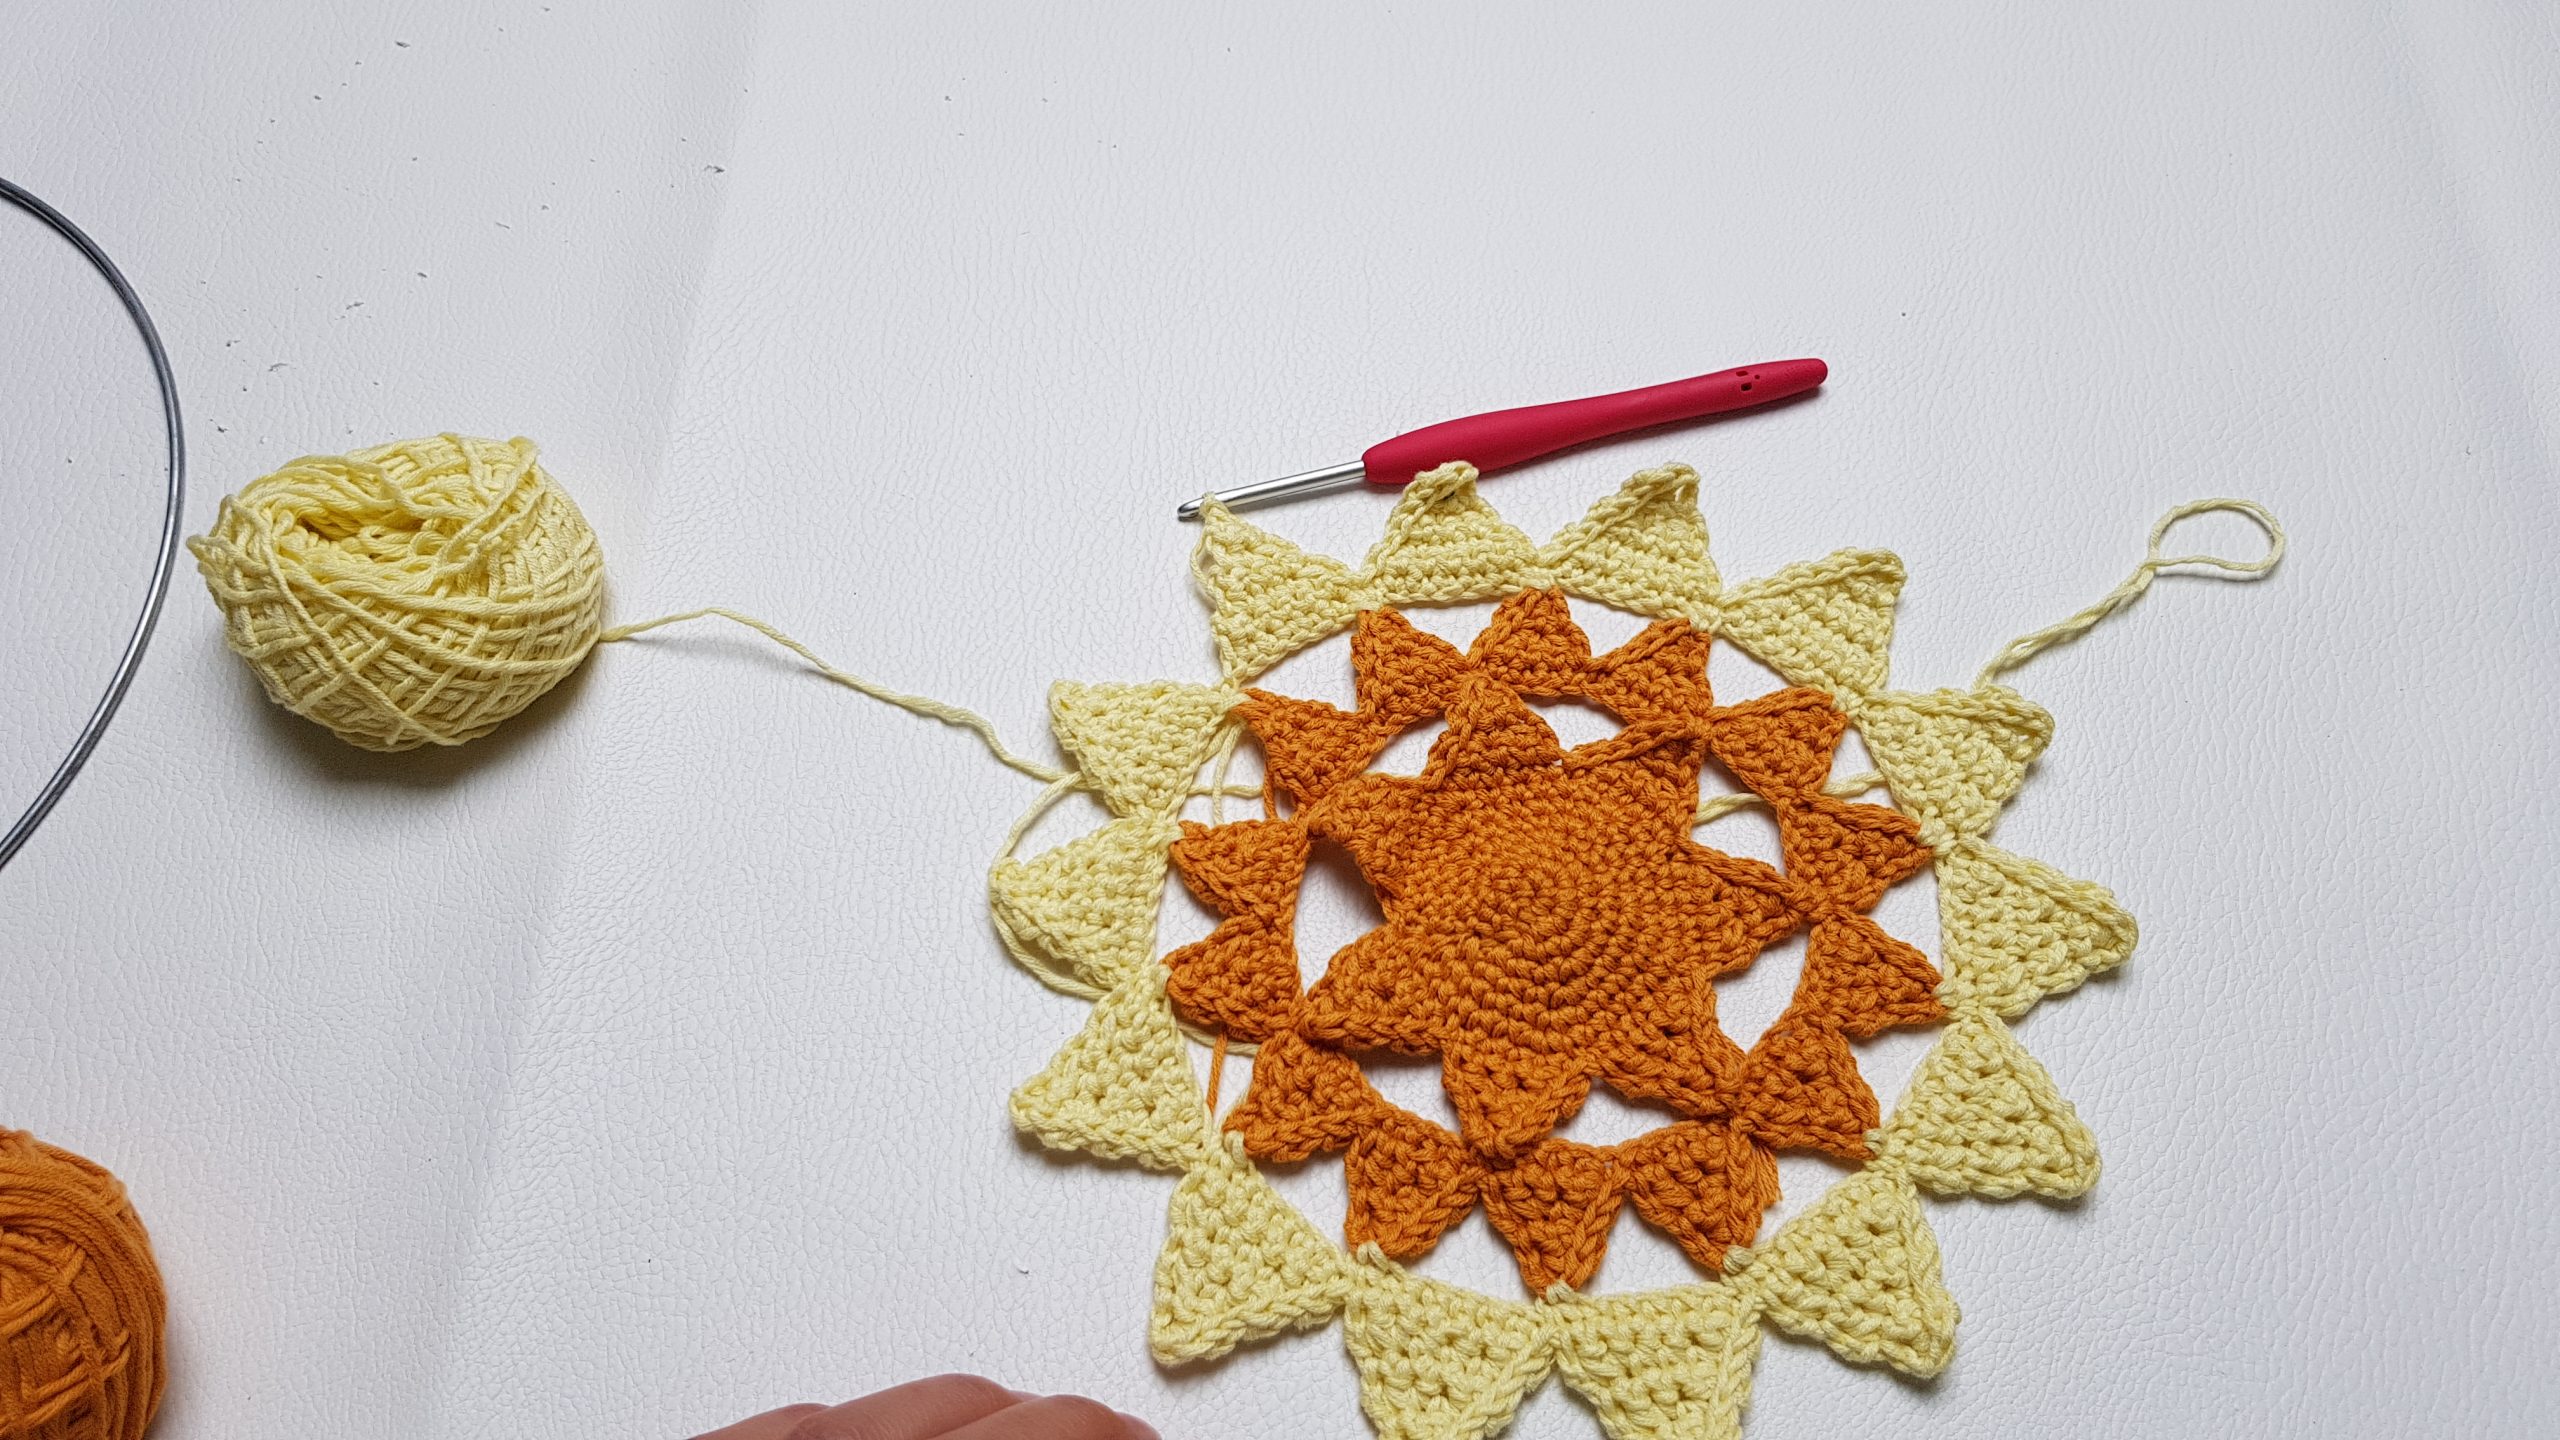
Ss on the side of the triangle, 1 ss in each sc side row.
Repeat the pattern for the triangle for the entire round. You will end up with 14 triangles. Finish the round of triangles with the top st of last triangle
Edging
R1| ch 1, 1 sc in the same st, ch 8, *1 sc in the top st of the next triangle, ch 8. Repeat to the end of the round. Ss into 1st sc.
R2| ch 1, *2sc in first sc, 1 sc in each of the next 8 ch sts. *Repeat to the end of the round.
Notes
At this stage you can cut the yarn and block the piece and attach it to the metal ring after blocking.
You can attach the piece to the ring without blocking, and in this case you don’t have to fasten off.
Assembling (attaching the crocheted piece to the metal ring)
Place the metal ring over the crocheted piece. Insert the hook into next available stitch, under the metal ring, yarn over, bring the loop in front, yarn over, with hook over the metal ring, and pull the yarn through the loops on your hook finishing the single crochet stitch. Repeat all around, working 1 sc in each st, over the metal ring.
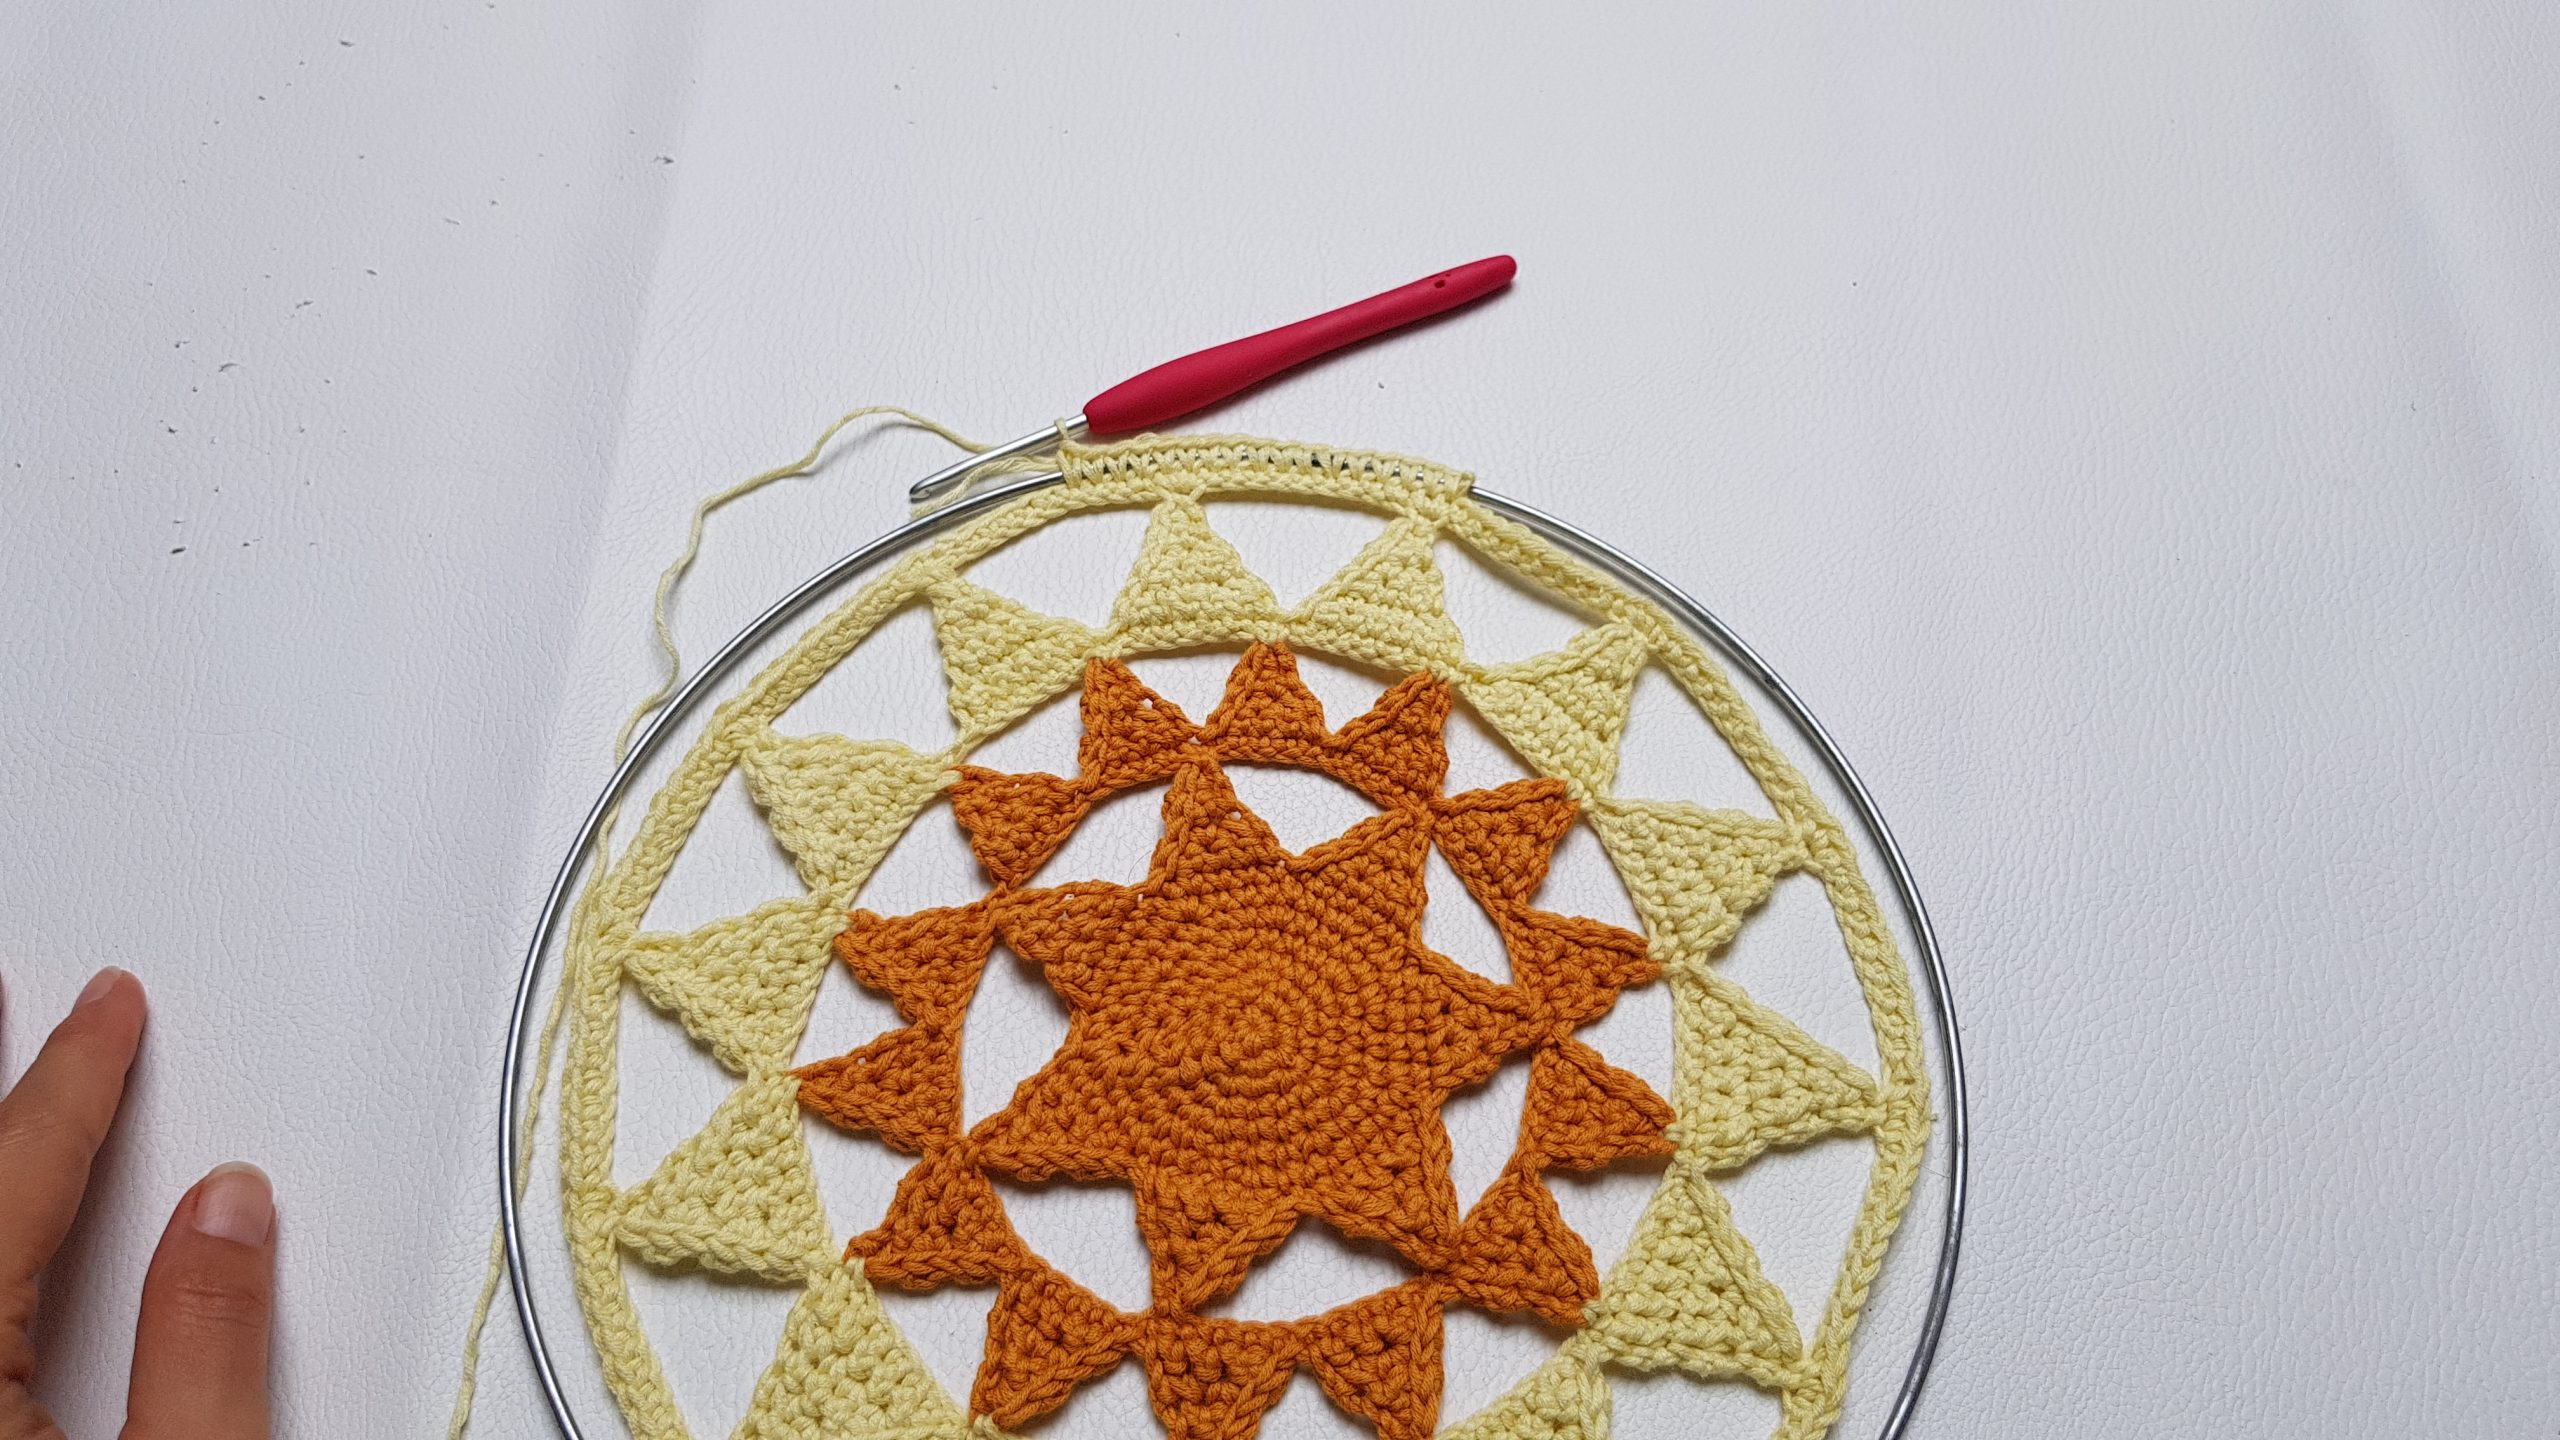
At the end of the round, join with a ss with 1st sc.
Fringe
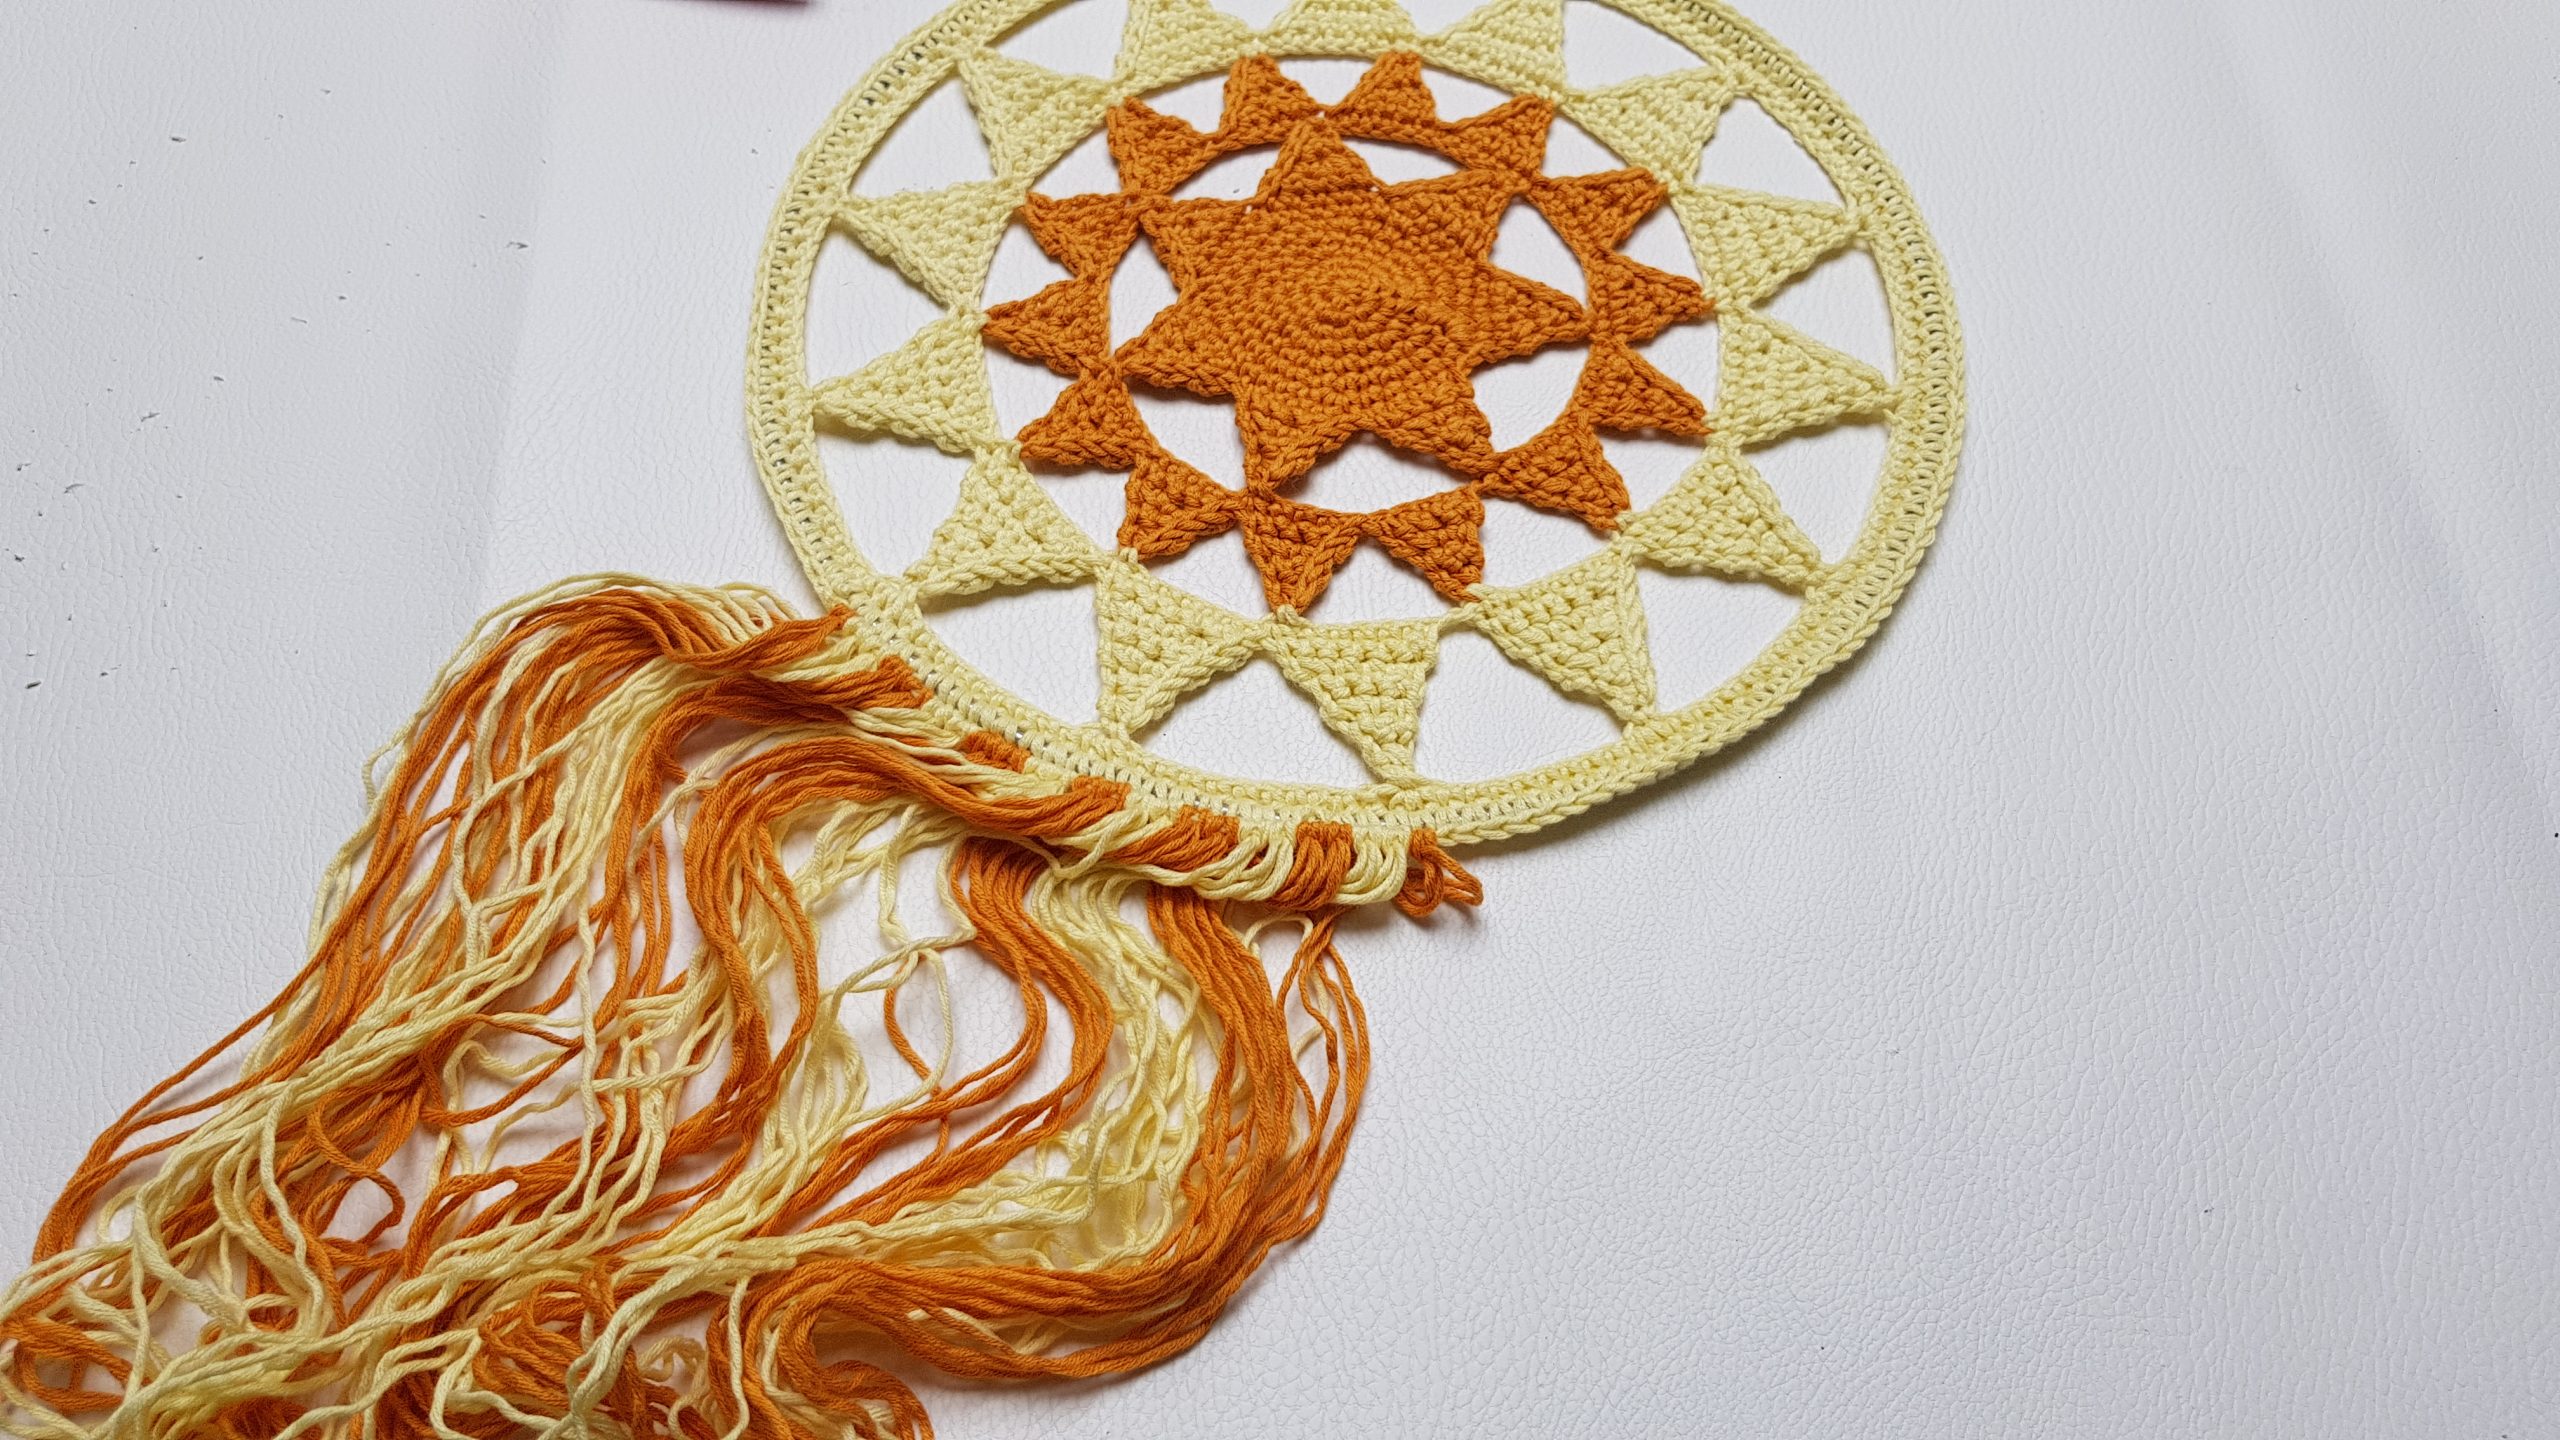
The fringe are attached into each st between 3 triangles. Alternate 2 fringe with one color and 2 with the other color.
Cut 2 strands of yarn of around 60 – 70 cm. Fold them in half. With a crochet hook, insert the loop into the wall hanger stitch, grab the ends and pull them through the fringe loop and tie. Repeat until you complete the entire section.
To finish, trim the fringe at the desired length.
Hanger chain
The chain used to hang the wall hanger can be made after you finished the round in single crochet made to attach the crocheted piece on the metal ring, or at the end.
Make sure that you make this chain into the correspondent sts on the top of the wall hanger.
Rejoin yarn, or start from where your yarn is, ch 55 to 60 sts or as many sts as you want, and join with a sc stitch with the correspondent st, after 2 triangles (the hanger cord has to be anchored at the same distance as the width of the fringe section). Fasten off
To finish
Wave in all ends. In case you want your fringe to be nice and straight you can steam them or iron.
And done! A cute Wall Hanger or Dream Catcher to brighten your home!
You can Purchase the easy printable PDF version of this pattern here:
You can now have the PDF version with 20% Discount or even for FREE if you want to support ByKaterina on Patreon
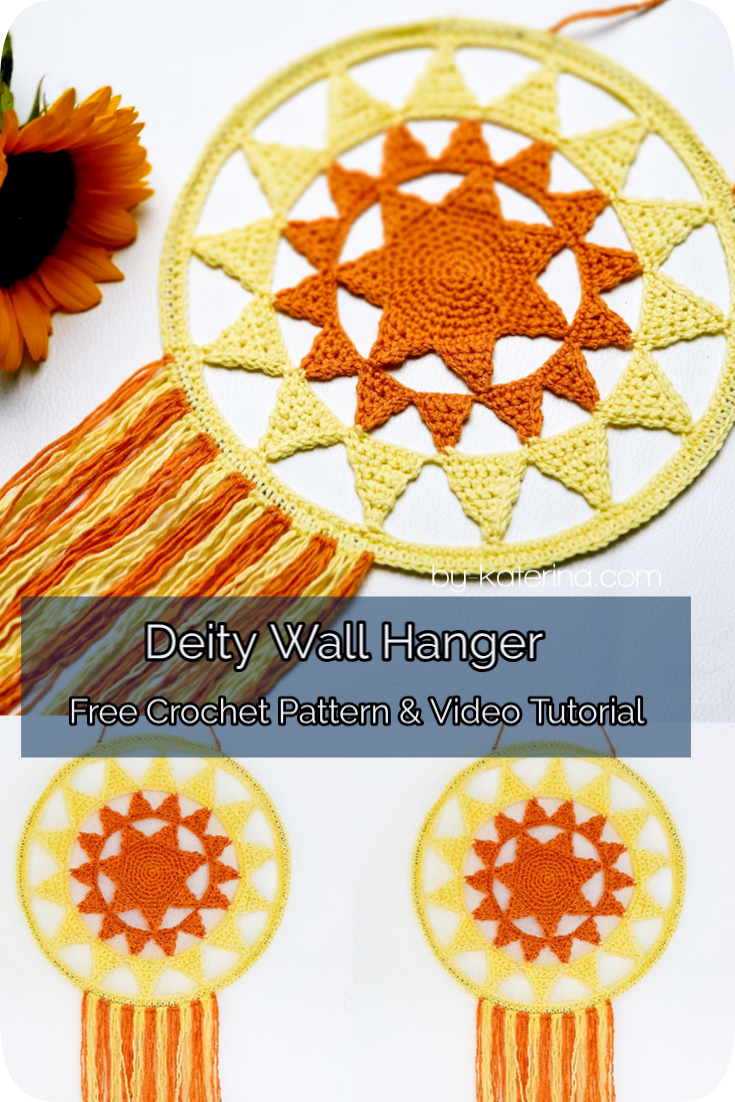
You can also find a step by step video tutorial here:




Comments are closed.