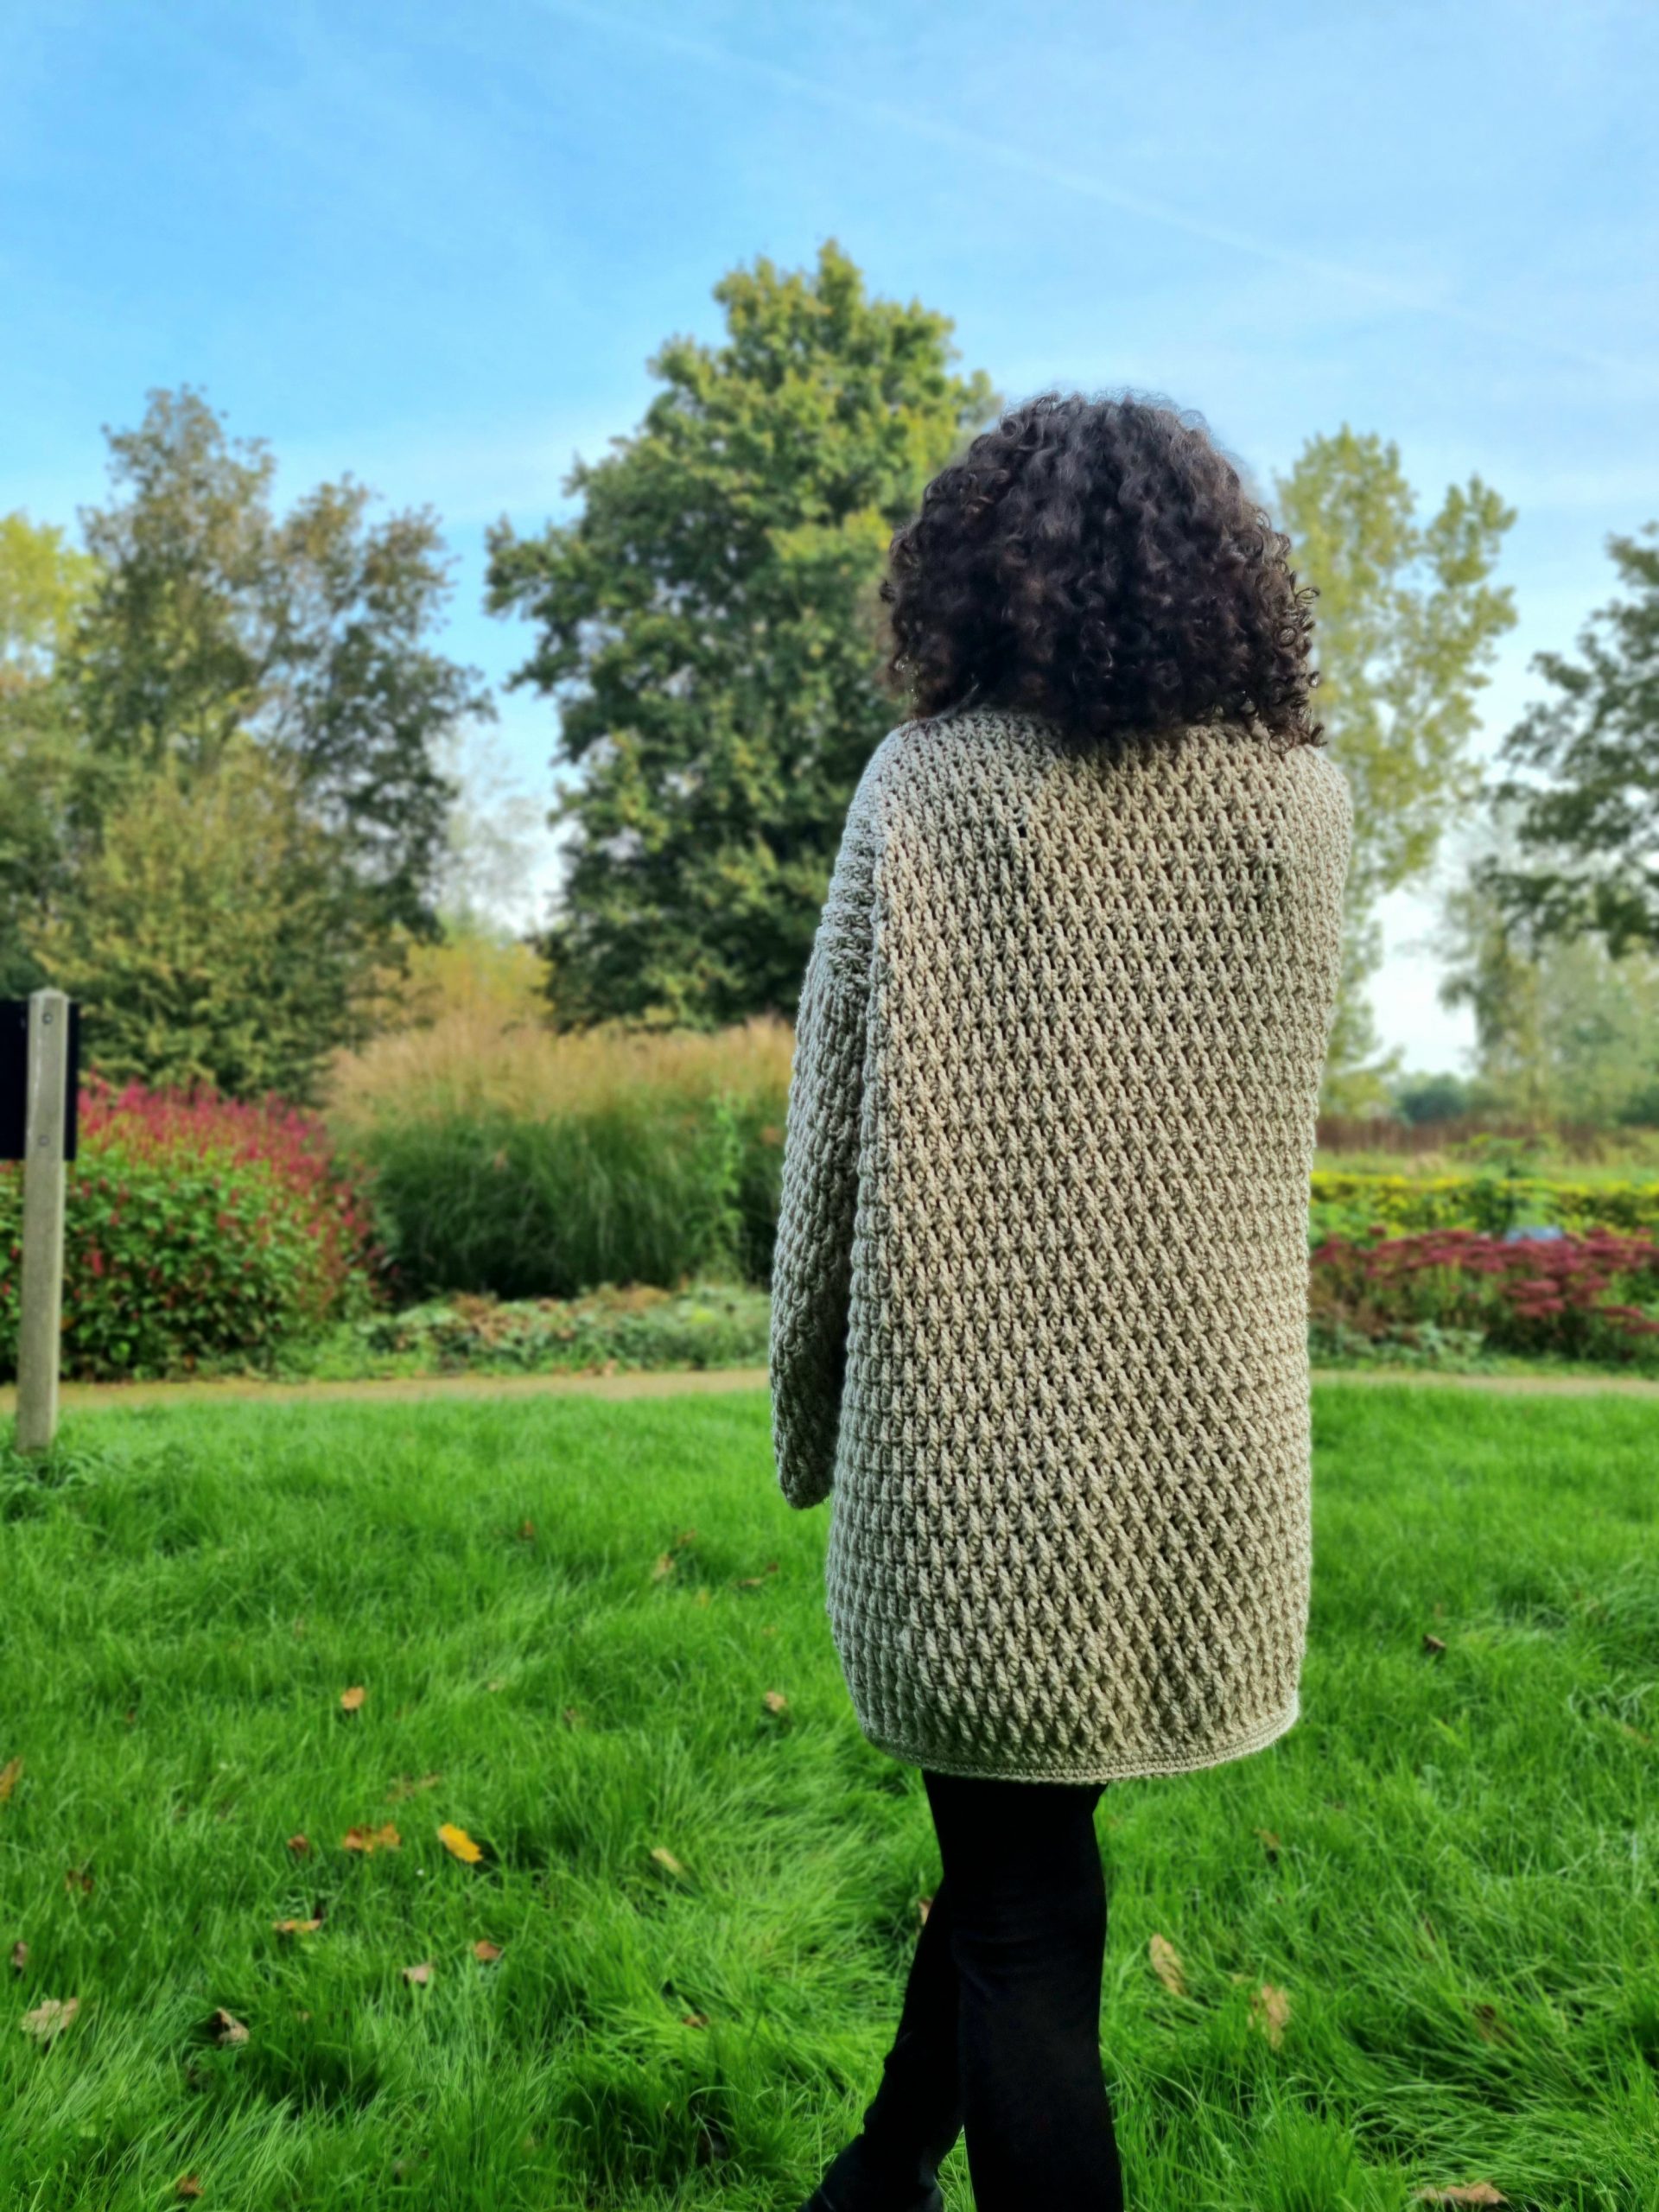
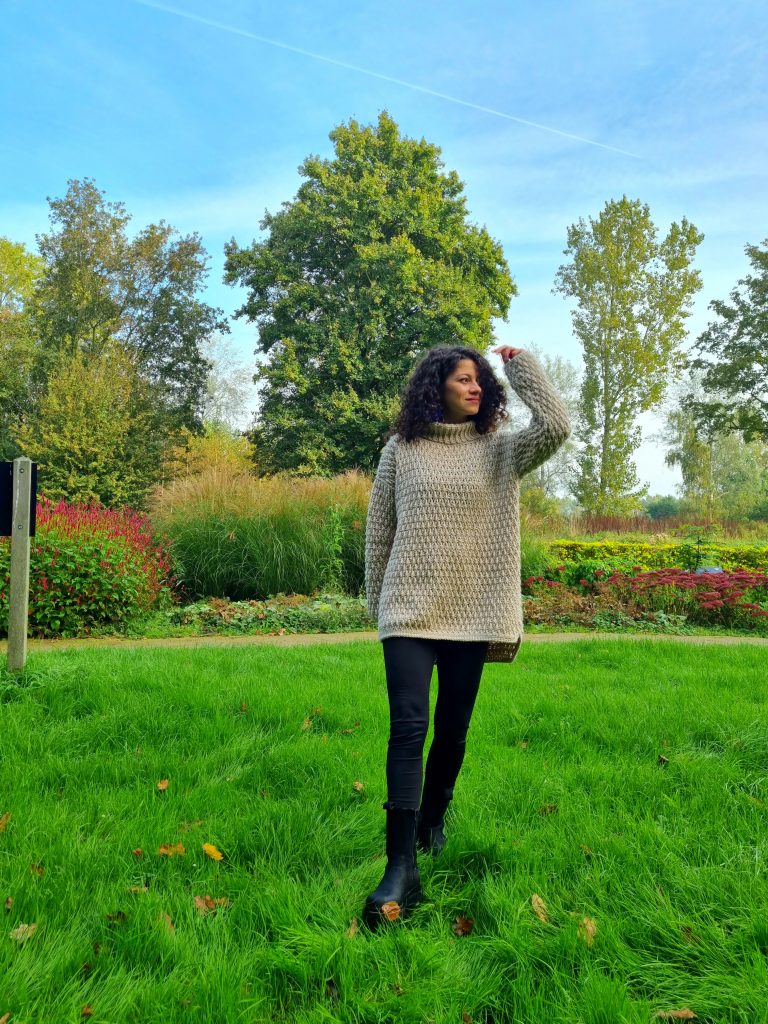
The Coaty Sweater holds a special place in my heart as it was one of my earliest designs back in 2018, marking the beginning of my journey in the world of crochet. Despite my limited experience at the time, I’ve always had a soft spot for this design, and I believe it still holds up beautifully.
This year, I found myself yearning for a Coaty Sweater of my own once again. In addition to satisfying my own crochet cravings, I saw it as the perfect opportunity to breathe new life into both the written pattern and the accompanying video tutorial.
The Coaty Sweater is the ultimate winter wardrobe essential. Its extraordinary texture and adaptable length make it a versatile choice for keeping both warm and stylish when the temperature takes a dip. Whether you opt to flaunt it on its own during milder days or layer it beneath your jacket for that extra toasty feeling on chilly winter mornings, the Coaty Sweater is destined to become your trusty, go-to piece.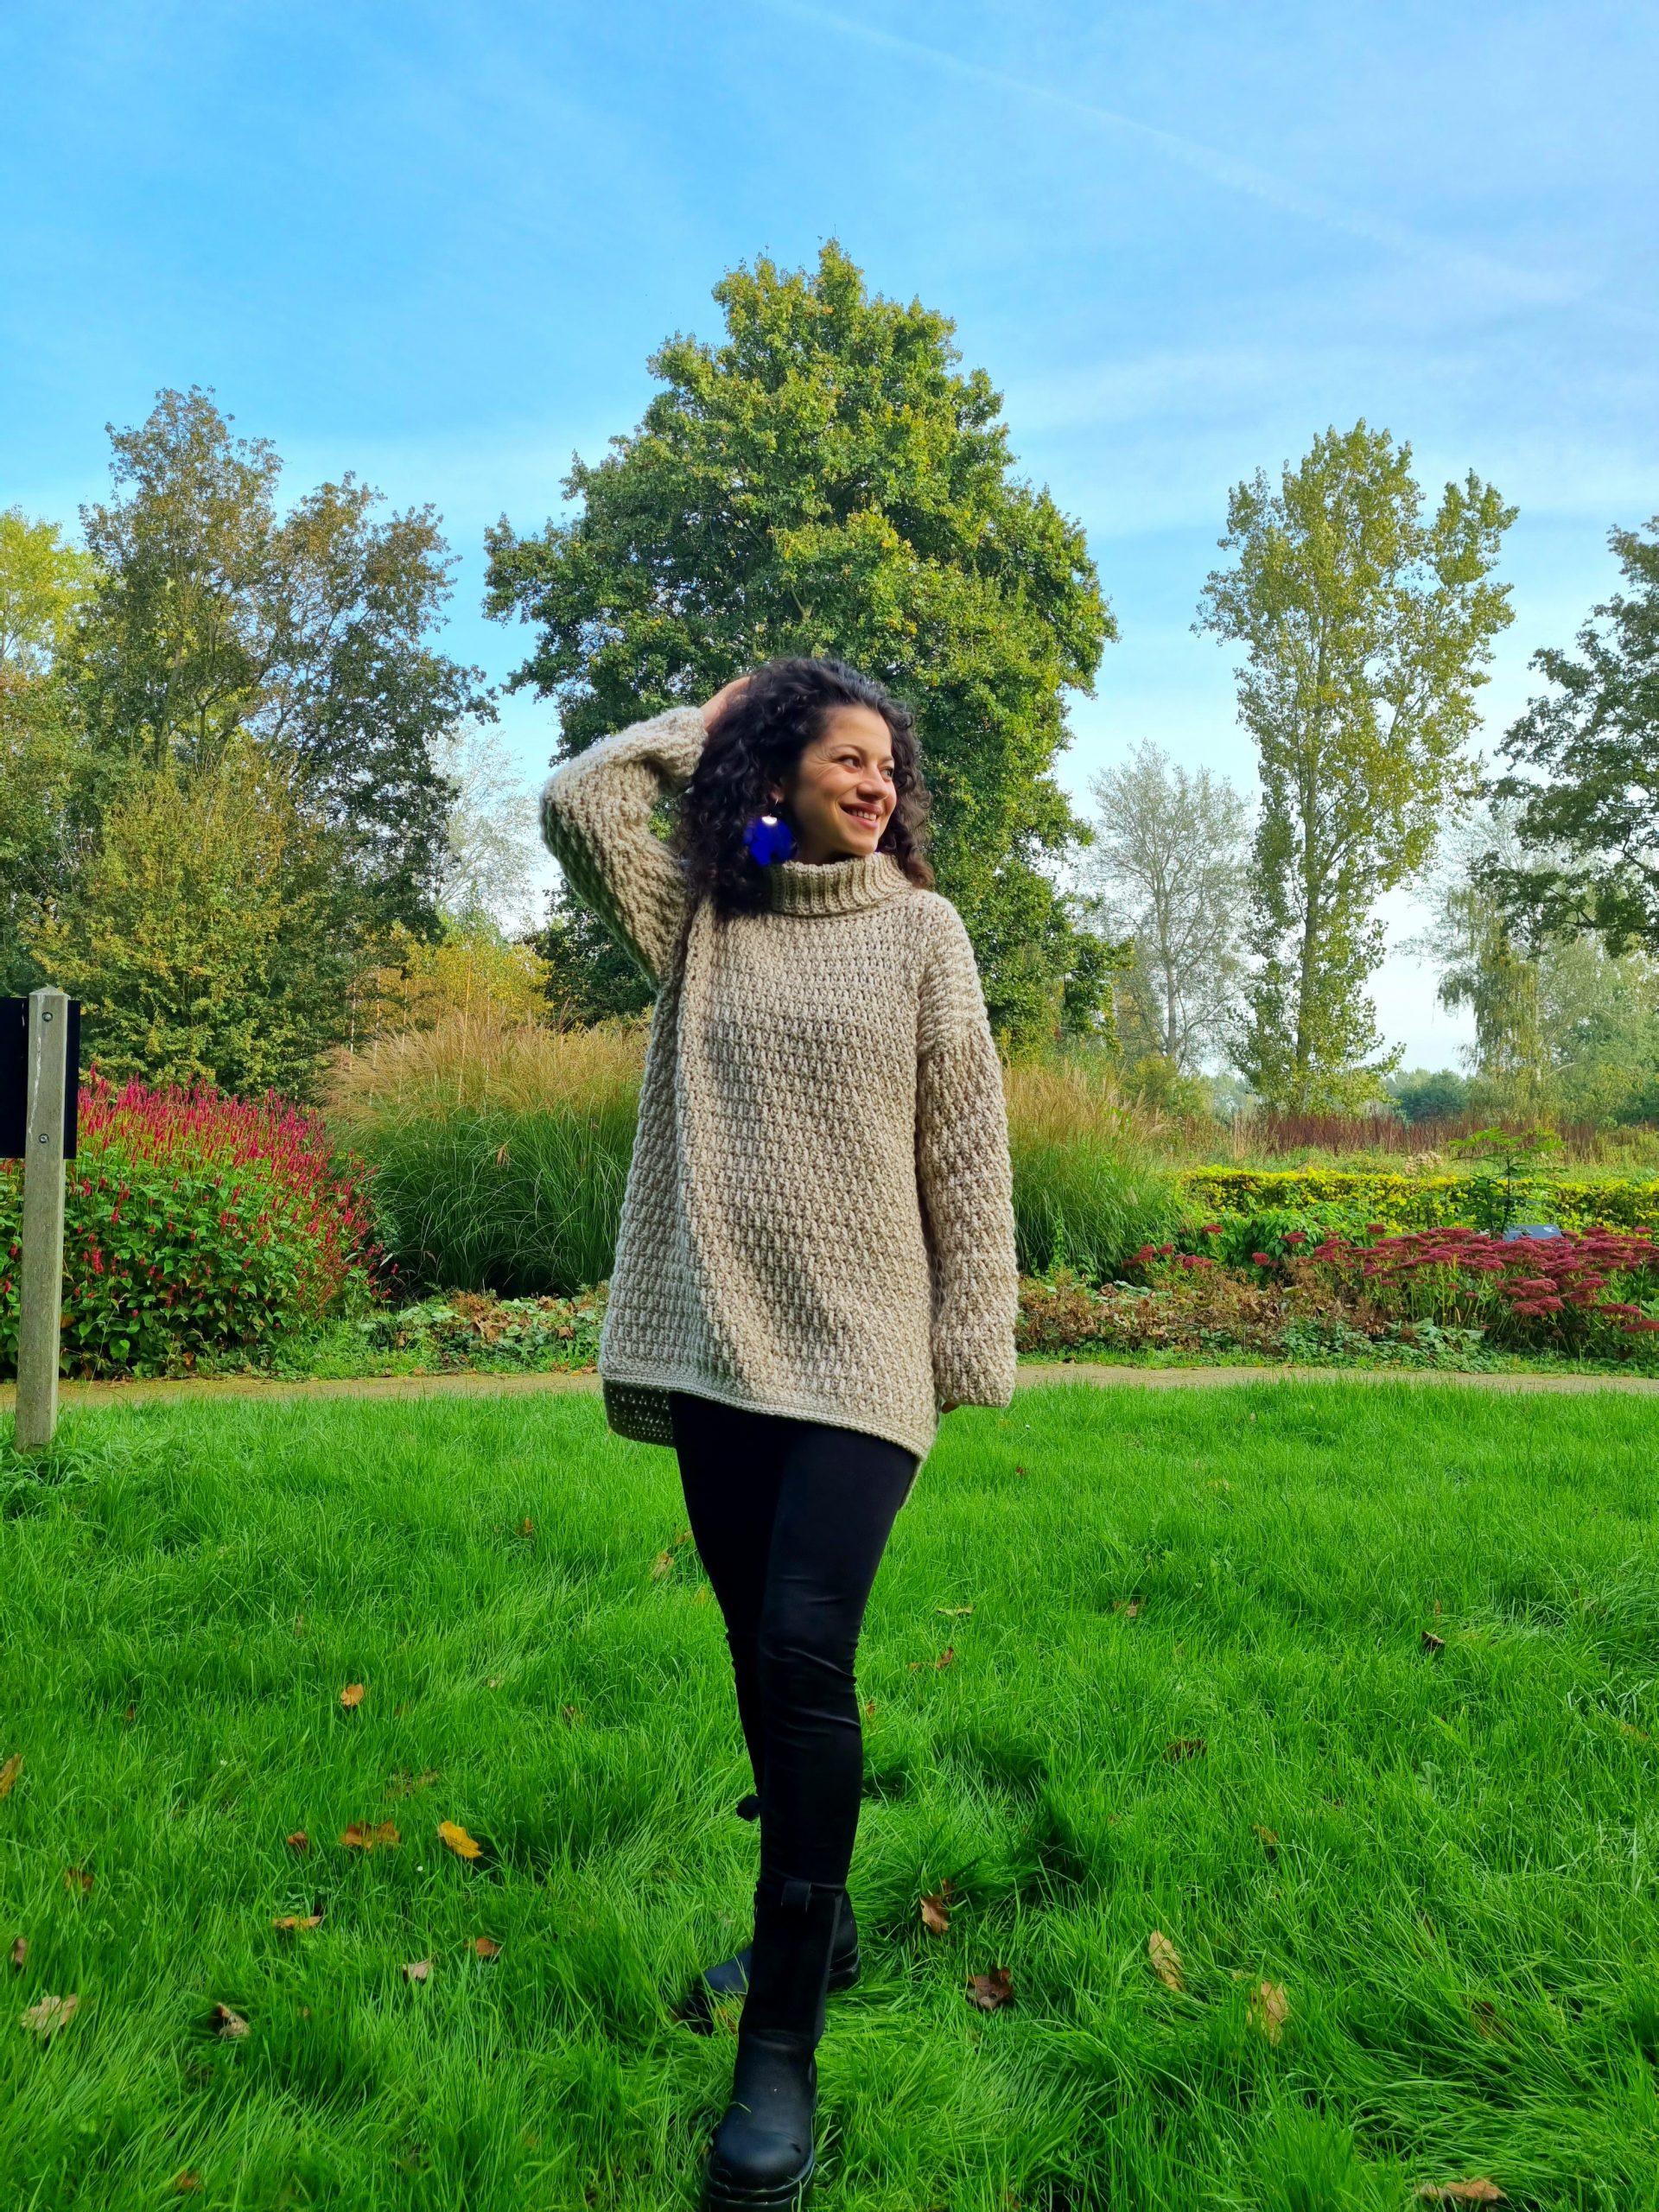
You can purchase the easily printable PDF pattern here at the links below. The PDF contains stitch charts also.
I hope you will love this pattern as much as I do!
Let’s see what we will need and how to make this beautiful Coaty Sweater.
MATERIALS
• Yarn: Worsted Weight yarn (Size 4, Medium)
• Crochet Hook:
o 6 mm crochet hook
o 5.5 mm crochet hook for collar
• yarn needle for weaving in ends
• Stitch markers
• Scissors
NOTES ABOUT DESIGN
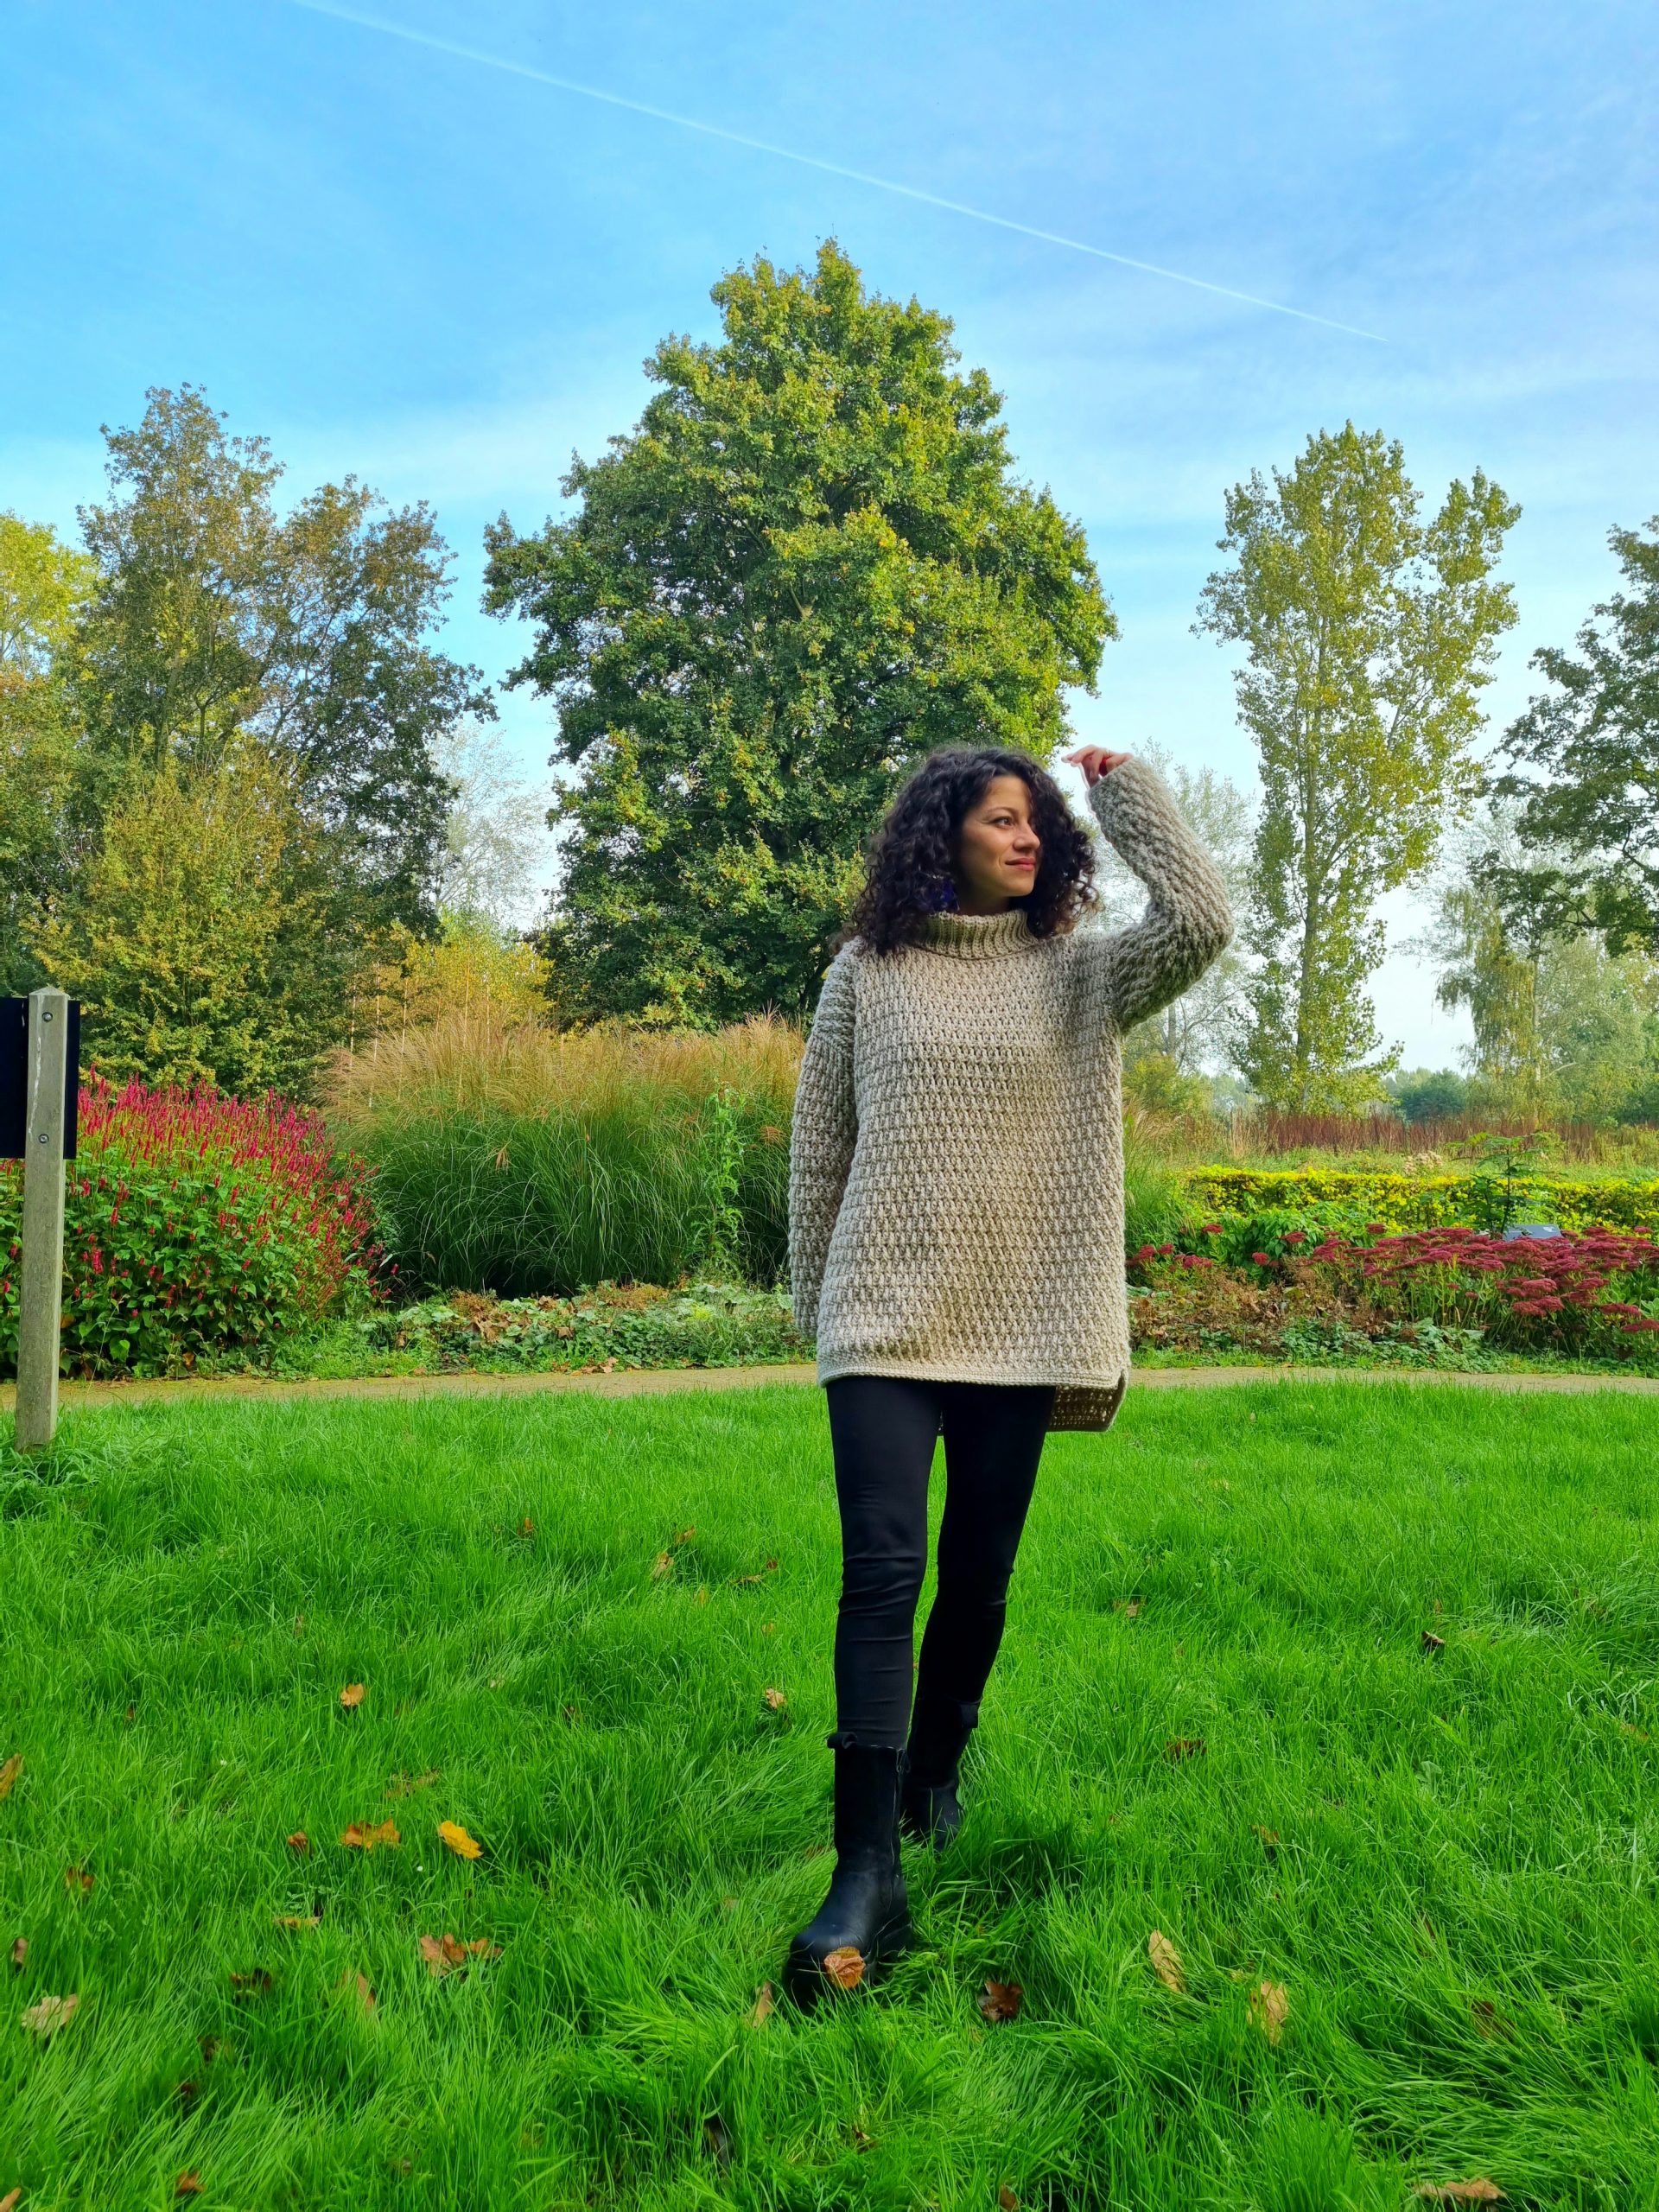
This sweater boasts a unique panel construction, which not only enhances its structure but also complements the intricate stitch pattern. We’ve added thoughtful design elements, such as a longer back and subtle side slits, to elevate its look. The snug turtle neck collar adds to the overall comfort and charm of this design.
With an oversized fit and approximately 30 cm of positive ease around the bust, the Coaty Sweater offers both style and roominess, making it the perfect choice for any winter occasion. Whether you’re out and about or enjoying a relaxing day at home, this sweater will keep you feeling cozy and looking fabulous.
MEASUREMENTS AND SIZES
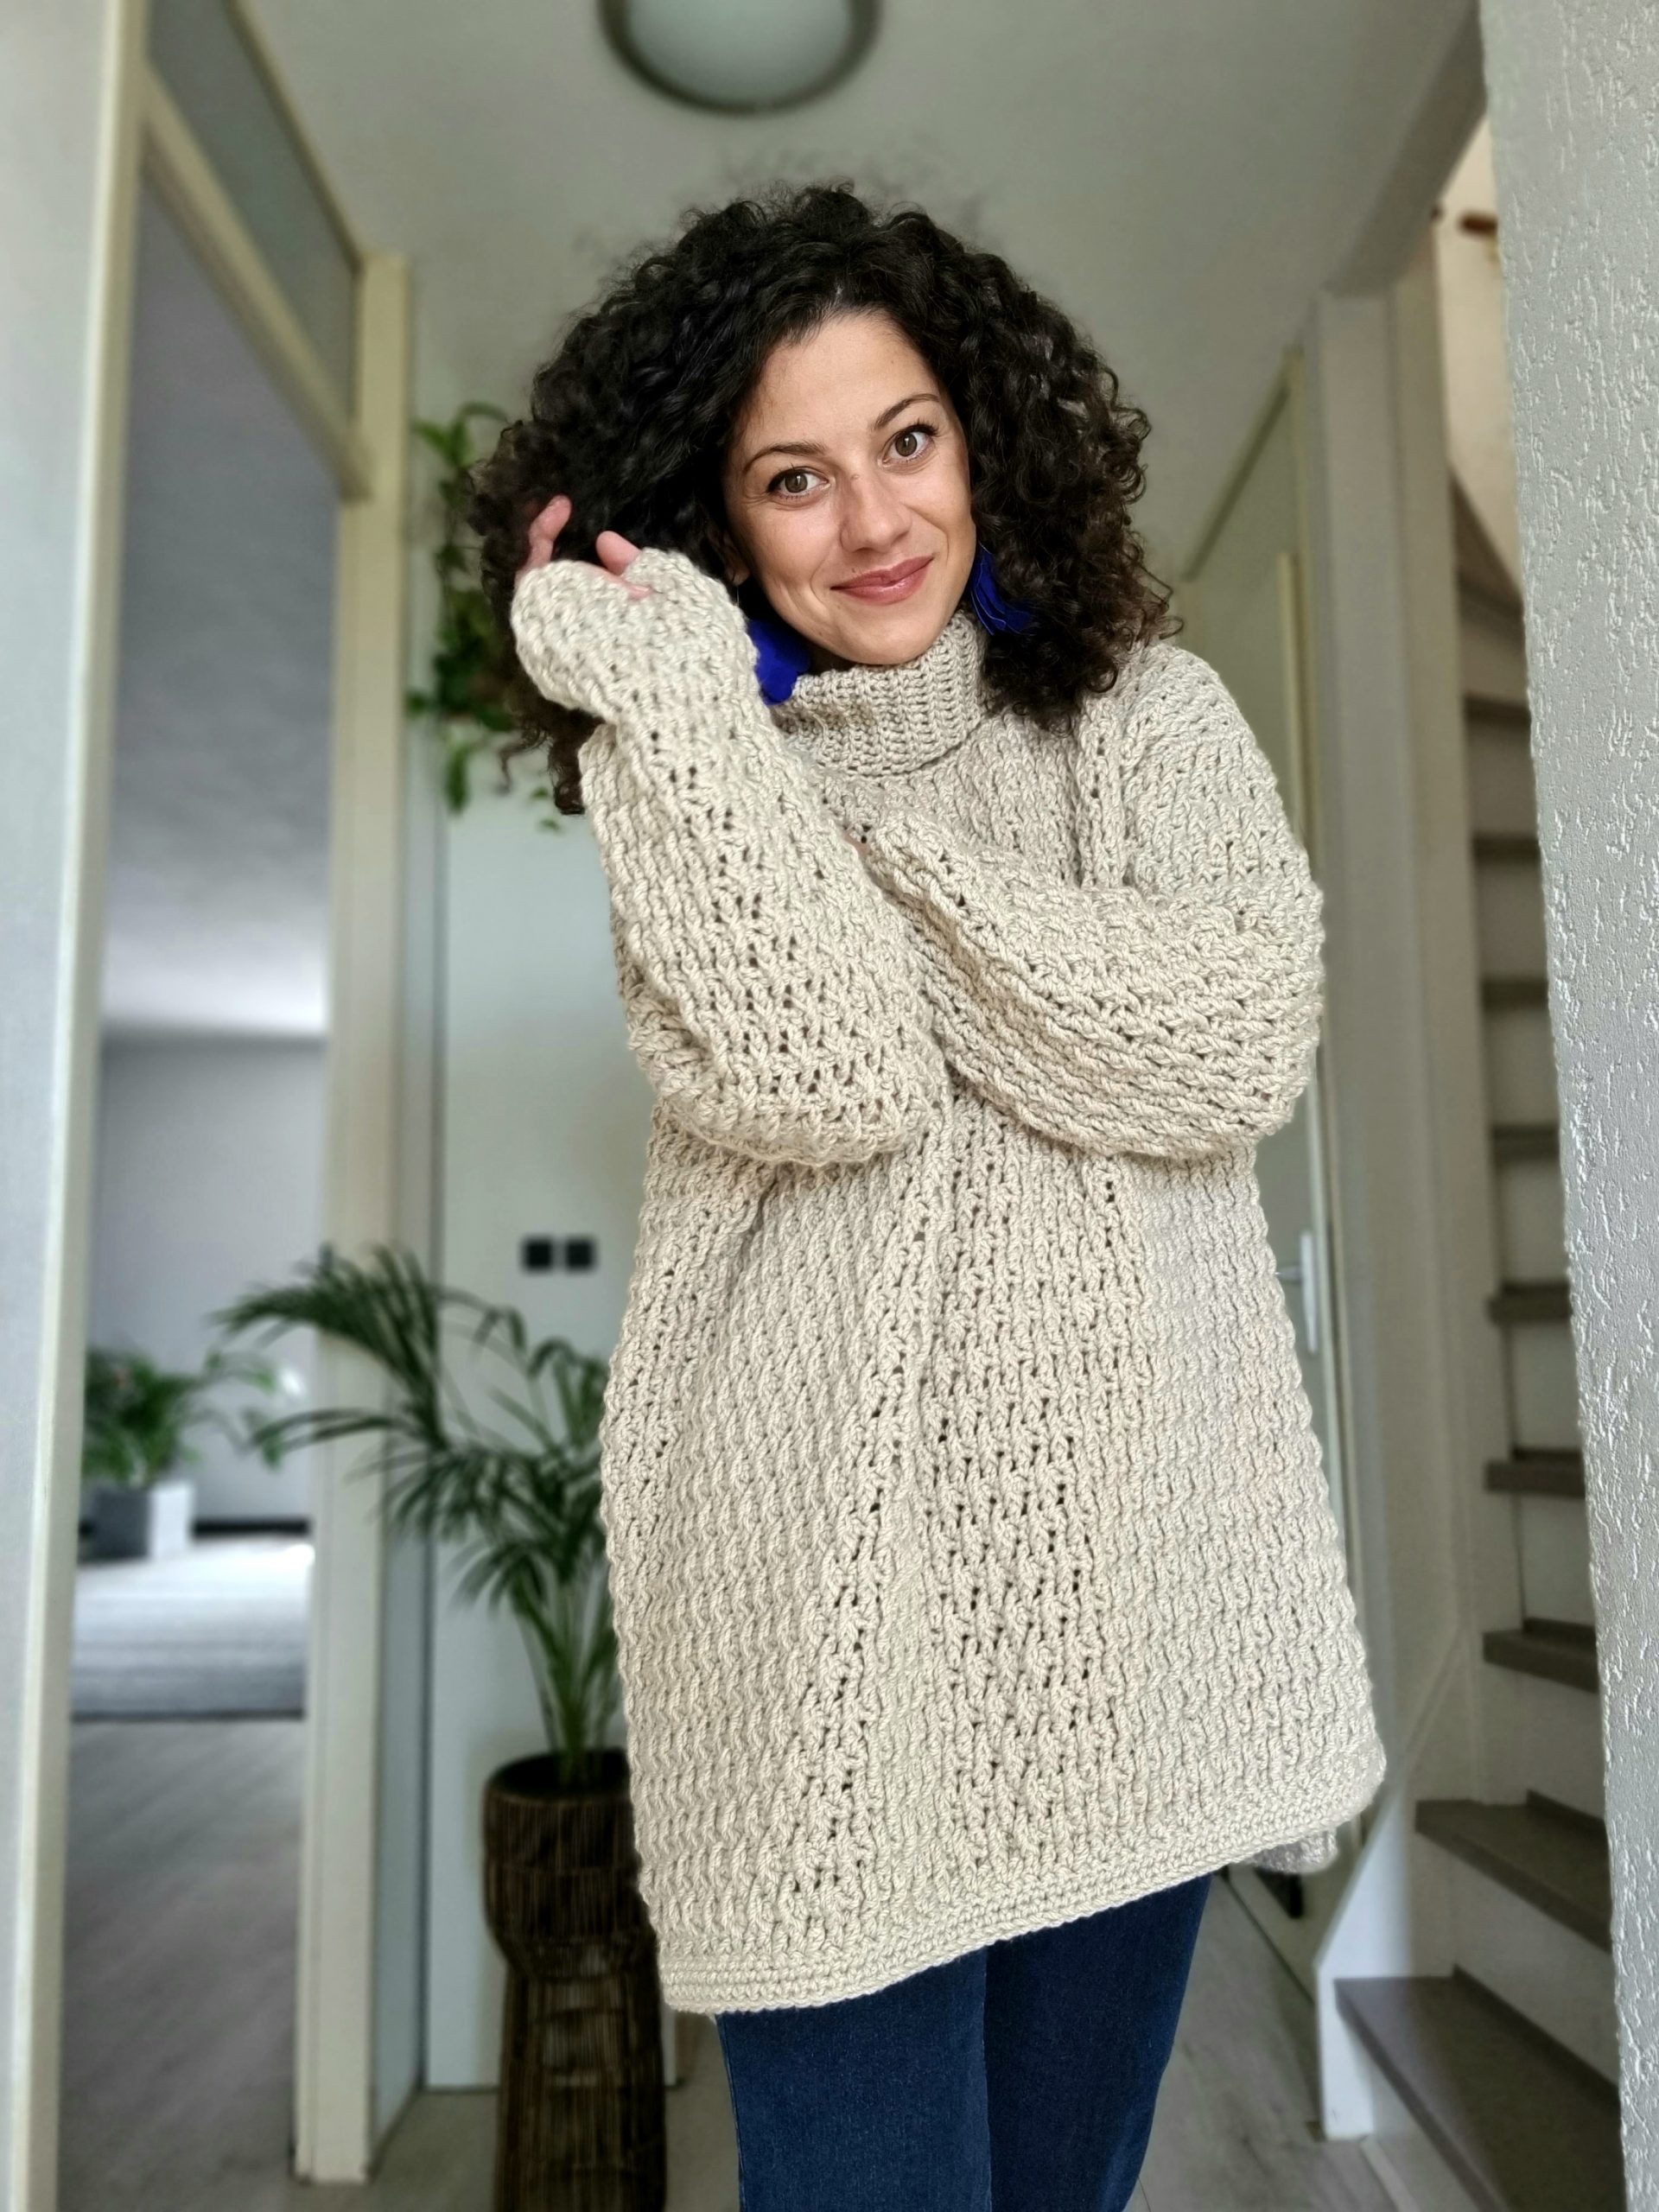
The Coaty Sweater Pattern is thoughtfully designed to cater to a wide range of sizes, with options available from Extra Small all the way up to 5 Extra Large. To provide a helpful point of reference, our model stands at 5.5 feet tall and is wearing a size Small
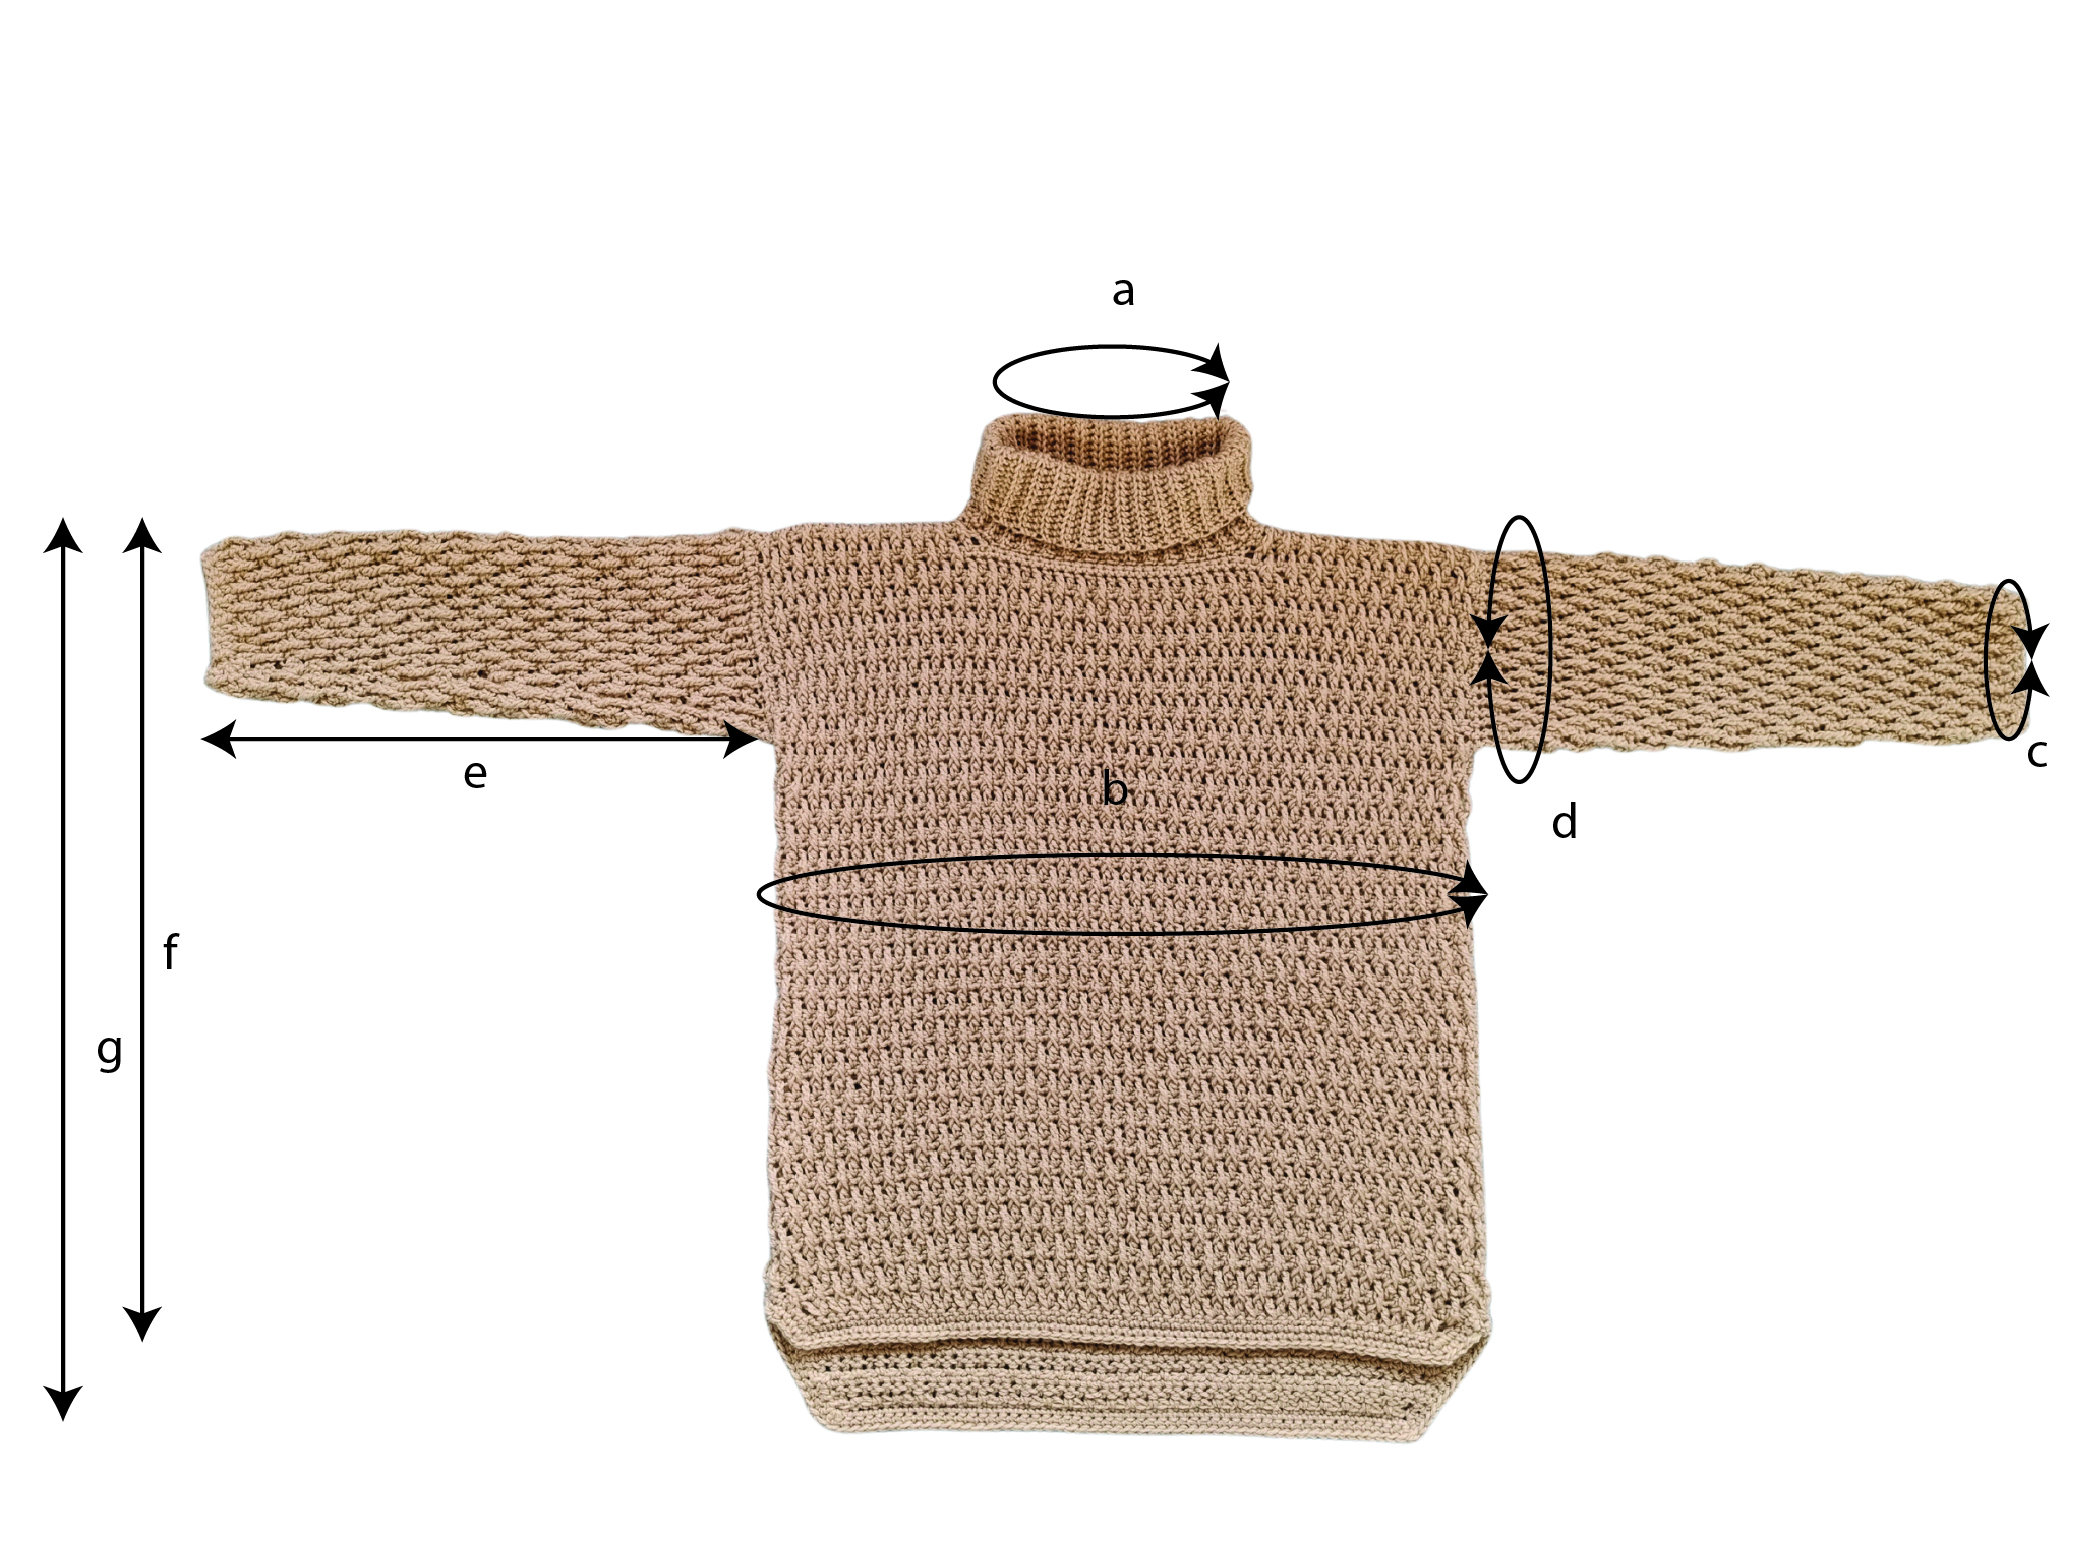
Neckline a: 49cm (50, 51, 53, 54, 55, 57, 59, 61)
Bust b: 112cm (118, 123, 130, 137, 147, 157, 167, 177)
Wrist c: 27cm (28, 30, 32, 34, 36, 38, 39.5, 41.5)
Armhole d: 35cm (37, 38, 41, 43, 44, 46, 48, 51)
Sleeve length e: 47cm (47, 47, 49, 49, 49, 51, 51, 51)
Length front f: 64cm (66, 66, 68, 68, 71, 71, 73, 73)
YARN
I used Bingo XL, by Hobbii in color 03, Cup of Tea. Yarn Composition 100% Acrylic. Each skein has 100 grams and 200 meters
How much yarn do you need?
For each size you will need: 7 (8, 8, 9, 10, 10, 11, 12, 13) skeins
1400 (1500, 1560, 1720, 1810, 1950, 2110, 2270, 2410) meters
ABBREVIATIONS
Ch – chain
Sc – single crochet
dc – double crochet
fptr – front post triple crochet
Dssblo – double slip stitch or half double crochet slip stitch in the back loop only (for the collar)
St(s) – stitch(es)
R – rounds
** – repeated section.
TENSION
Using 6 mm crochet hook in the Alpine Stitch
11 sts = 10 cm
9.5 rows = 10 cm
You can purchase the easily printable PDF pattern here at the links below. The PDF contains stitch charts also.
STITCH PATTERN
The primary stitch pattern featured in the Coaty Sweater is the Alpine Stitch. Additionally, for the collar, we utilize the double slip stitch technique (although you have the option to substitute it with any other ribbing pattern of your choice). To finish off the bottom edge, we employ the single crochet stitch, worked seamlessly in the round.
The Alpine Stitch pattern consists of a simple 2-row repeat. Interestingly, the wrong side of your work, which is the one displaying the intricate texture, is the right side of your sweater.
This is because on the wrong side, we work front post triple crochet stitches, and they are alternated with the front post triple crochet stitches from the preceding wrong side row. As a result, each alternating wrong side row commences and concludes differently, creating a unique texture pattern for your sweater.
Below you will find the stitch pattern and the stitch chart.
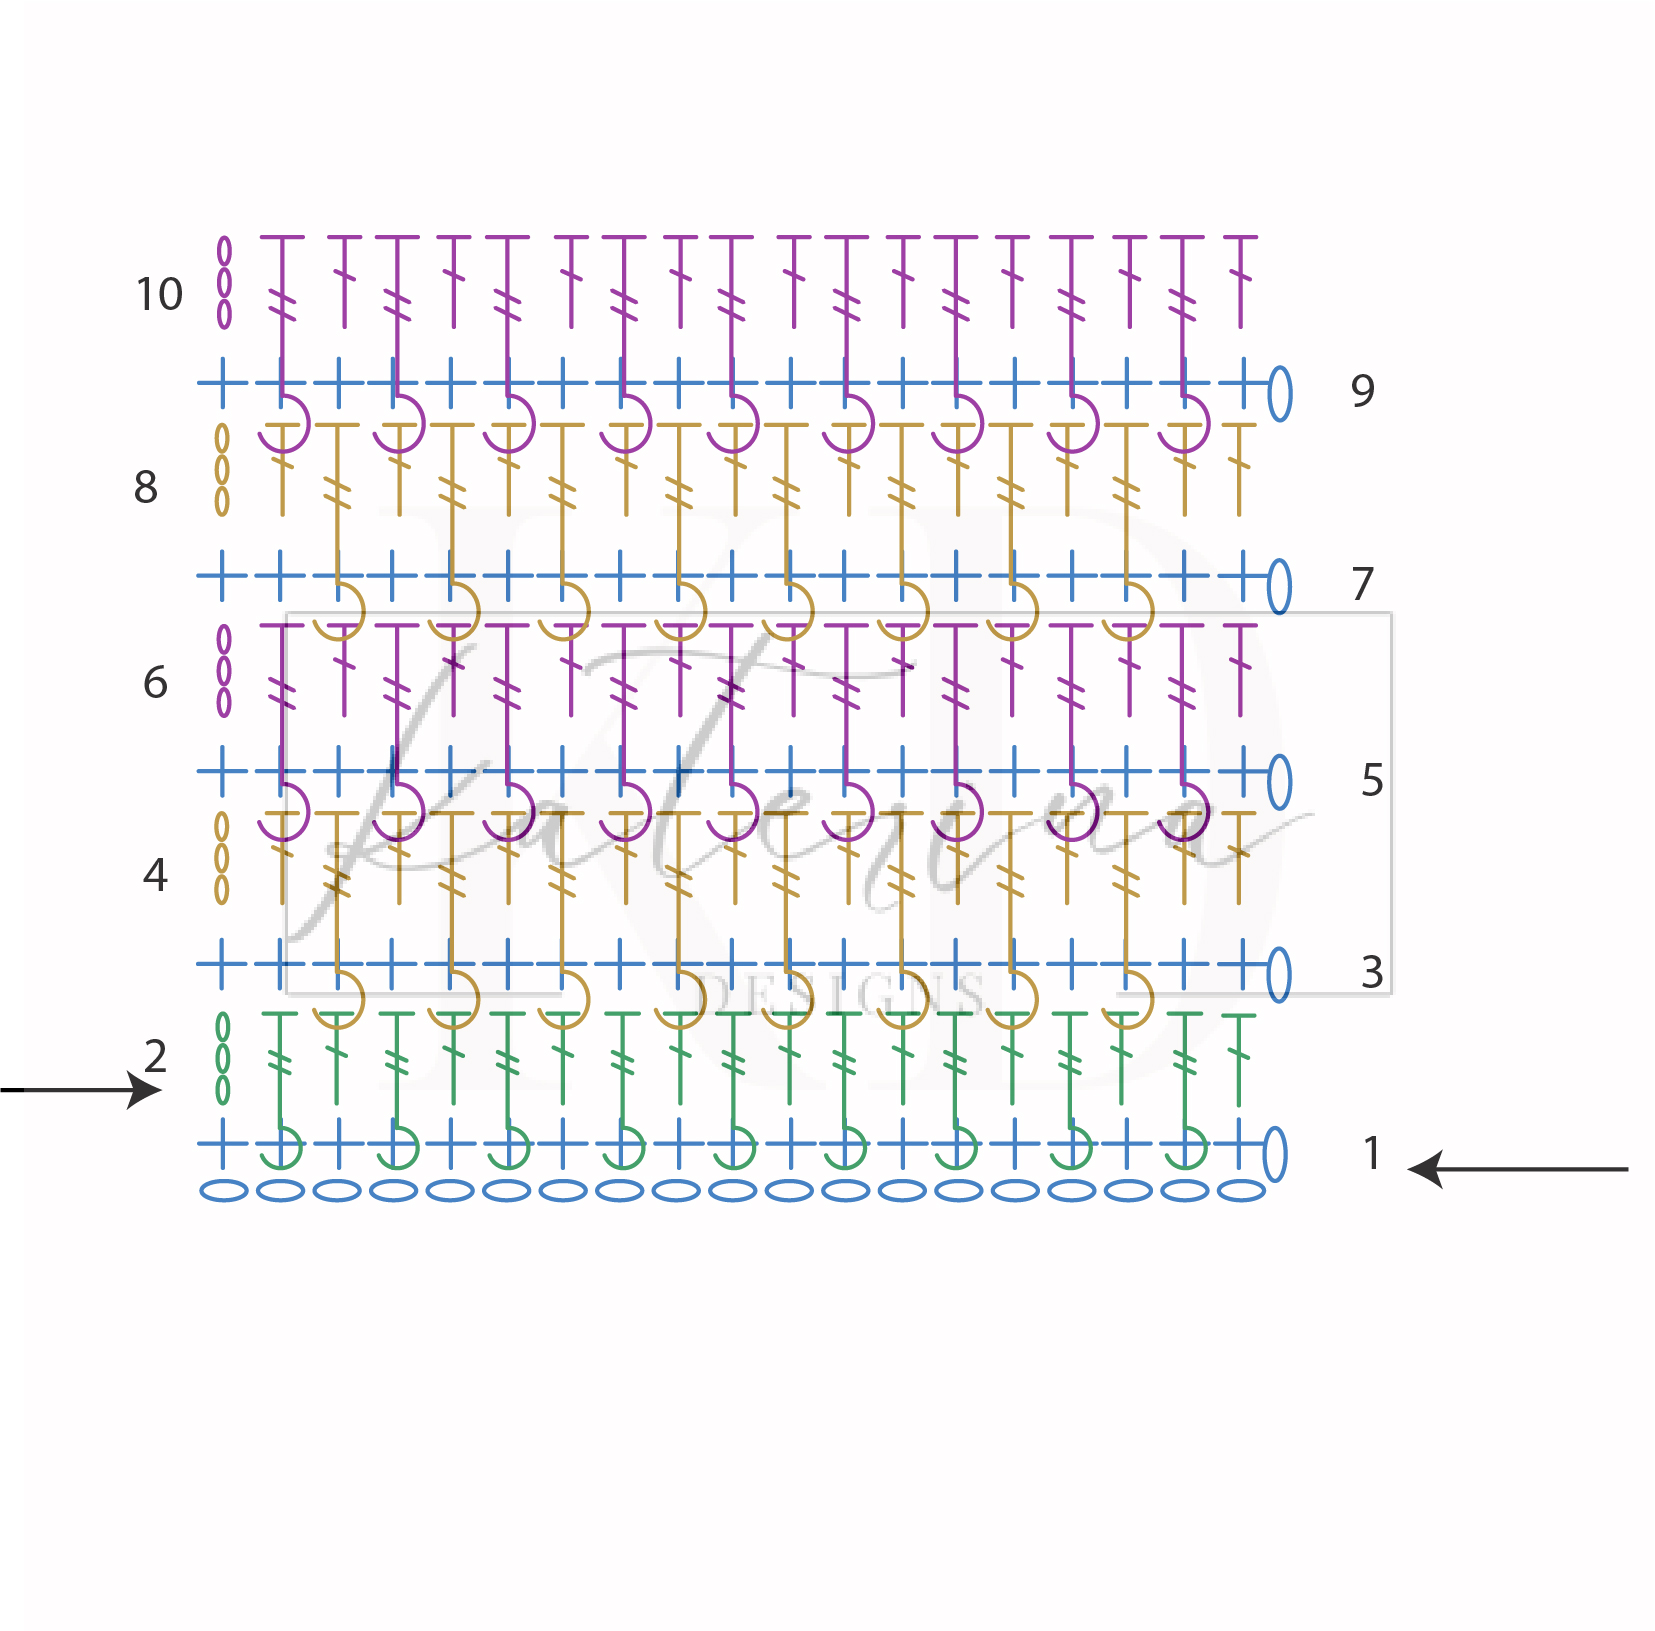
Chain a multiple of 2 sts
R1: start with the second st and work 1sc in each st to the end of the row; 3ch and turn;
R2: 1frtr around the second sc, 1dc in next st, *1fptr around next sc, 1dc in next st; *rep. to the end of the row; 1ch and turn;
R3: 1sc in each st to the end of the row; 3ch and turn;
R4: 1dc in second sc, 1fptr around next dc, 2 rows below, *1dc in next st, 1fptr around next dc 2 rows below; *rep until you have 2sts left, 1dc in the last 2sts.
R5: rep. R3
R6: *1fptr around the next dc 2 rows below, 1dc in next st; * rep. to the end of the row; 1ch and turn;
R7: rep. R3
Rep. R4 to R7 until desired length
You can purchase the easily printable PDF pattern here at the links below. The PDF contains stitch charts also.
INSTRUCTION
FRONT PANEL
- Pattern Notes:
The front panel is worked flat; turn after each row; - 1ch at the beginning of a row does not count as a first sc;
- 3ch at the beginning of a row will count as a first dc.
- if you don’t want the bottom of the front panel to be narrower, start with the number of sts mentioned after R3 below +1 (turning ch)
Start: ch60 (64, 66, 70, 74, 80, 86, 90, 96) sts
R1: start into the second st, 1sc in each st to the end of the row; 3ch and turn
R2: 1frtr around the second sc, 1dc in next st, *1fptr around next sc, 1dc in next st; *rep. to the end of the row; 1ch and turn;
R3: 2sc in the first st, 1sc in each of the next sts, except the last one, 2sc in the last st; 3ch and turn;
Total sts: 61 (65, 67, 71, 75, 81, 87, 91, 97)
R4: 1fptr around the ch3, 2 rows below, 1dc in next sc, *1fptr around the next dc, 2 rows below, 1dc in next st; * rep. to the end of the row; 1ch and turn;
R5: 1sc in each st to the end of the row; 3ch and turn;
R6: *1dc in next st, 1fptr around the next dc, 2 rows below; *rep. to the end of the row until you have 2sts left, 1dc in the last 2sts; 1ch and turn;
R7: rep. R5
R8: *1fptr around the next dc 2 rows below, 1dc in next st; * rep. to the end of the row; 1ch and turn;
R9: rep. R3
Rep. R6 to R9 until you have 57 (59, 59, 61, 61, 63, 63, 65, 65) rows.
Shaping the neckline;
Note: You have the flexibility to customize the neckline to your preferred width. For the last 4 rows of the front panel, exclusively work into the shoulder stitches, leaving the neckline lower. To facilitate this, use stitch markers to identify the stitches for each shoulder: 18 (20, 21, 22, 24, 26, 29, 30, 33).
Start from where your yarn is and work into the established pattern only on the left
shoulder sts, the next 4 rows; your last row will be a sc row; fasten off.
Rejoin yarn into the first marked st of the right shoulder and work into the established pattern, only into the shoulder sts for the next 4 rows; Fasten off.
BACK PANEL
Follow the same pattern notes as for the FRONT PANEL except the last one;
if you want to have a straight bottom for the front panel, you should start with the number of sts mentioned after R9.
Start: ch 54( 58, 60, 64, 68, 74, 80, 84, 90) sts
R1: start into the second st, 1sc in each st to the end of the row; 3ch and turn
R2: 1frtr around the second sc, 1dc in next st, *1fptr around next sc, 1dc in next st; *rep. to the end of the row; 1ch and turn;
R3: 2sc in the first st, 1sc in each of the next sts, except the last one, 2sc in the last st; 3ch and turn;
Total sts: 55 (59, 61, 65, 69, 75, 81, 85, 91)
R4: 1fptr around the ch3, 2 rows below, 1dc in next sc, *1fptr around the next dc, 2 rows below, 1dc in next st; * rep. to the end of the row; 1ch and turn;
R5: rep. R3
Total sts: 57 (61, 63, 67, 71, 77, 83, 87, 93)
R6: Rep. R4
R7: Rep. R3
Total sts: 59 (63, 65, 69, 73, 79, 85, 89, 95)
R8: Rep. R4
R9: rep. R3
Total sts: 61 (65, 67, 71, 75, 81, 87, 91, 97)
R10: Rep. R4
R11: 1sc in each st to the end of the row; 3ch and turn
R12: *1dc in next st, 1fptr around the next dc, 2 rows below; *rep. to the end of the row until you have 2sts left, 1dc in the last 2sts; 1ch and turn;
R13: rep. R3
Rep. R10 to R13 until you have in total 67 (69, 69, 71, 71, 73, 73, 75, 75) rows; Fasten off.
SLEEVES (make 2)
Notes:
if you want to adjust the pattern for the sleeves, use the instructions in the section HOW TO ADJUST THE COATY SWEATER ACCORDING WITH YOUR DESIRED FIT AND MEASUREMENTS
1ch at the beginning of the row does not count as first sc;
3ch at the beginning of the row, counts as first dc
For the sleeves, starting with Row 7, we will follow this repeating pattern: 1 Increasing Row followed by 7 rows without any further increases. The pattern below is provided for more than 8 rows to accommodate variations that might occur on the wrong side, based on the position of the front post triple crochet:
Start: ch 30 (32, 34, 36, 38, 40, 42, 44, 46) sts
R1: start with the second st and work 1sc in each st to the end of the row; 3ch and turn;
R2: 1frtr around the second sc, 1dc in next st, *1fptr around next sc, 1dc in next st; *rep. to the end of the row; 1ch and turn;
R3: 1sc in each st to the end of the row; 3ch and turn;
R4: 1dc in second sc, 1fptr around next dc, 2 rows below, *1dc in next st, 1fptr around next dc 2 rows below; *rep until you have 2sts left, 1dc in the last 2sts.
R5: rep. R3
R6: *1fptr around the next dc 2 rows below, 1dc in next st; * rep. to the end of the row; 1ch and turn;
R7: 2sc in the first st, 1sc in each of the next sts, except the last one, 2sc in the last st; 3ch and turn;
Total sts: 31 (33, 35, 37, 39, 41, 43, 45, 47)
R8: 1fptr around the ch3, 2 rows below, 1dc in next sc, *1fptr around the next dc, 2 rows below, 1dc in next st; * rep. to the end of the row; 1ch and turn;
R9: 1sc in each st to the end of the row; 3ch and turn;
R10: *1dc in next st, 1fptr around the next dc, 2 rows below; *rep. to the end of the row until you have 2sts left, 1dc in the last 2sts; 1ch and turn;
R11: rep. R9
R12: rep R6
R13: Rep. R9
R14: Rep. R10
R15: Rep. R7
R16: Rep. R10
R17: Rep. R9
R18: Rep. R6
R19: Rep. R9
R20: Rep. R10
R21: Rep. R9
R22: Rep R6.
We will continue to rep. R7 – R22 until you have in total: 45 (45, 45, 47, 47, 47, 49, 49, 49) rows
ASSEMBLING AND FINISHING
Before assembling, we’ll start by working the bottom edging on both the front and back panels. It’s essential to complete this edging before joining the side panels, as it will be necessary for joining the side edges as well.
Use stitch markers to clearly identify the first single crochet row without any increases at both ends. It’s important to note that we’ll be working on the side rows as well. To assist you visually, you can refer to the video tutorial available [here]
When working into the side rows, keep in mind that we will place 2 single crochets into each double crochet side row and 1 single crochet into each single crochet side row. Depending on your tension, you may need to adjust the number of single crochets in a side row accordingly.
The first stitch of the bottom edge will align with the first right-side single crochet side row that doesn’t have an increase, while the last stitch in the row will correspond to the first single crochet side row without an increase on the left. This ensures a neat and balanced edge.
When you reach the corner stitches, which are the first and last stitches of the foundation chain, work 3 single crochets to make the turn along the side of the chain.
To maintain a straight edge in line with the side of the panels, you’ll begin and end the row by working a decrease, specifically by crocheting 2 single crochets together. This technique ensures a neat and uniform edge.
You can purchase the easily printable PDF pattern here at the links below. The PDF contains stitch charts also.
R1: Rejoin yarn into the indicated st, as explained above
1ch, sc2tog (dec), 1sc in each st (as explained above) until the next first st of the foundation chain, 3sc into that st, 1sc in each st of the foundation except the last one, 3sc in that last st, 1sc in each of the side rows sts, except the last 2, sc2tog; 1ch and turn;
R2: sc2tog, 1sc in each st until 2sts left, sc2tog, 1ch and turn.
On the second row we didn’t work the increases into the corner, but you will need to mark the second st, for the increase on the next row
R3: slst2tog (see the video tutorial here), 1slst, until the marked st in the corner, 2slst, in the same st, 1slst in each of the next sts until the second corner, 2slst in next st, 1slst in each of the next sts, until you have 2sts left, slst2tog.
ASSEMBLING
Step 1: Utilize the yarn needle to sew the shoulders together. For a comprehensive, step-by-step guide on the assembly process and techniques, please refer to the video tutorial available [here]
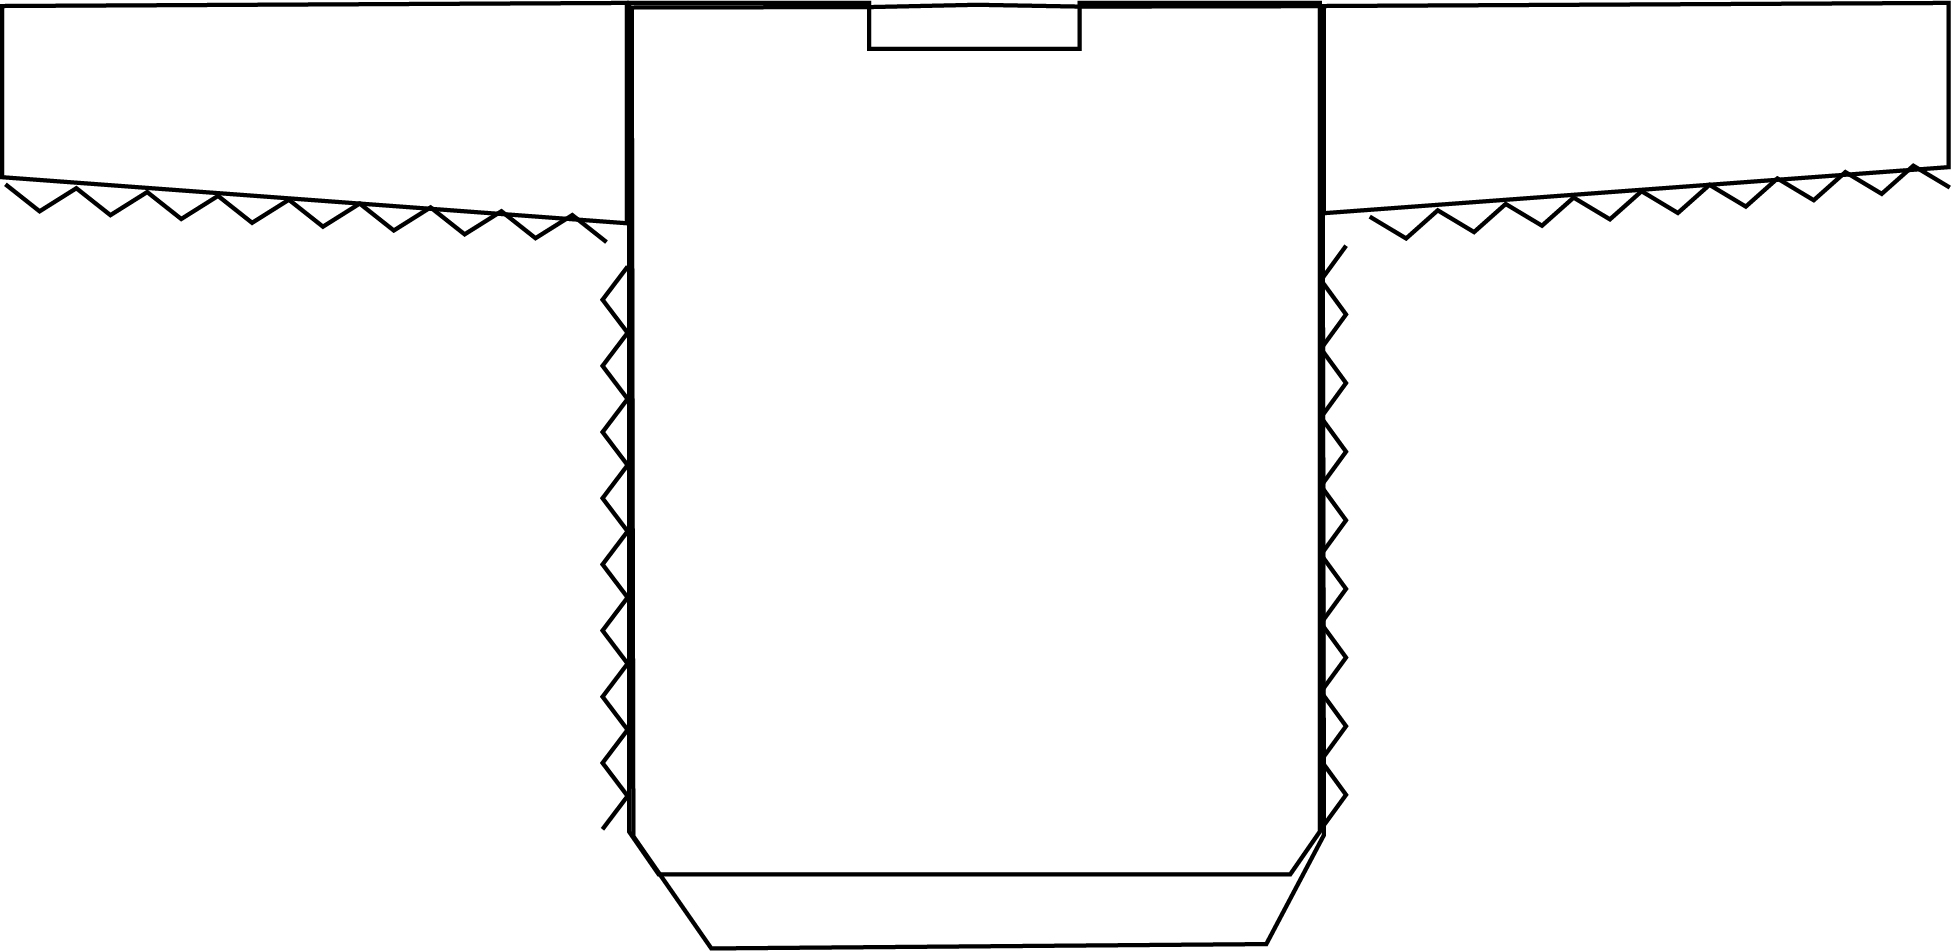
Step 2: When joining the sleeves into the armhole, employ stitch markers to align the center stitch of the sleeve with the shoulder seam for proper placement.
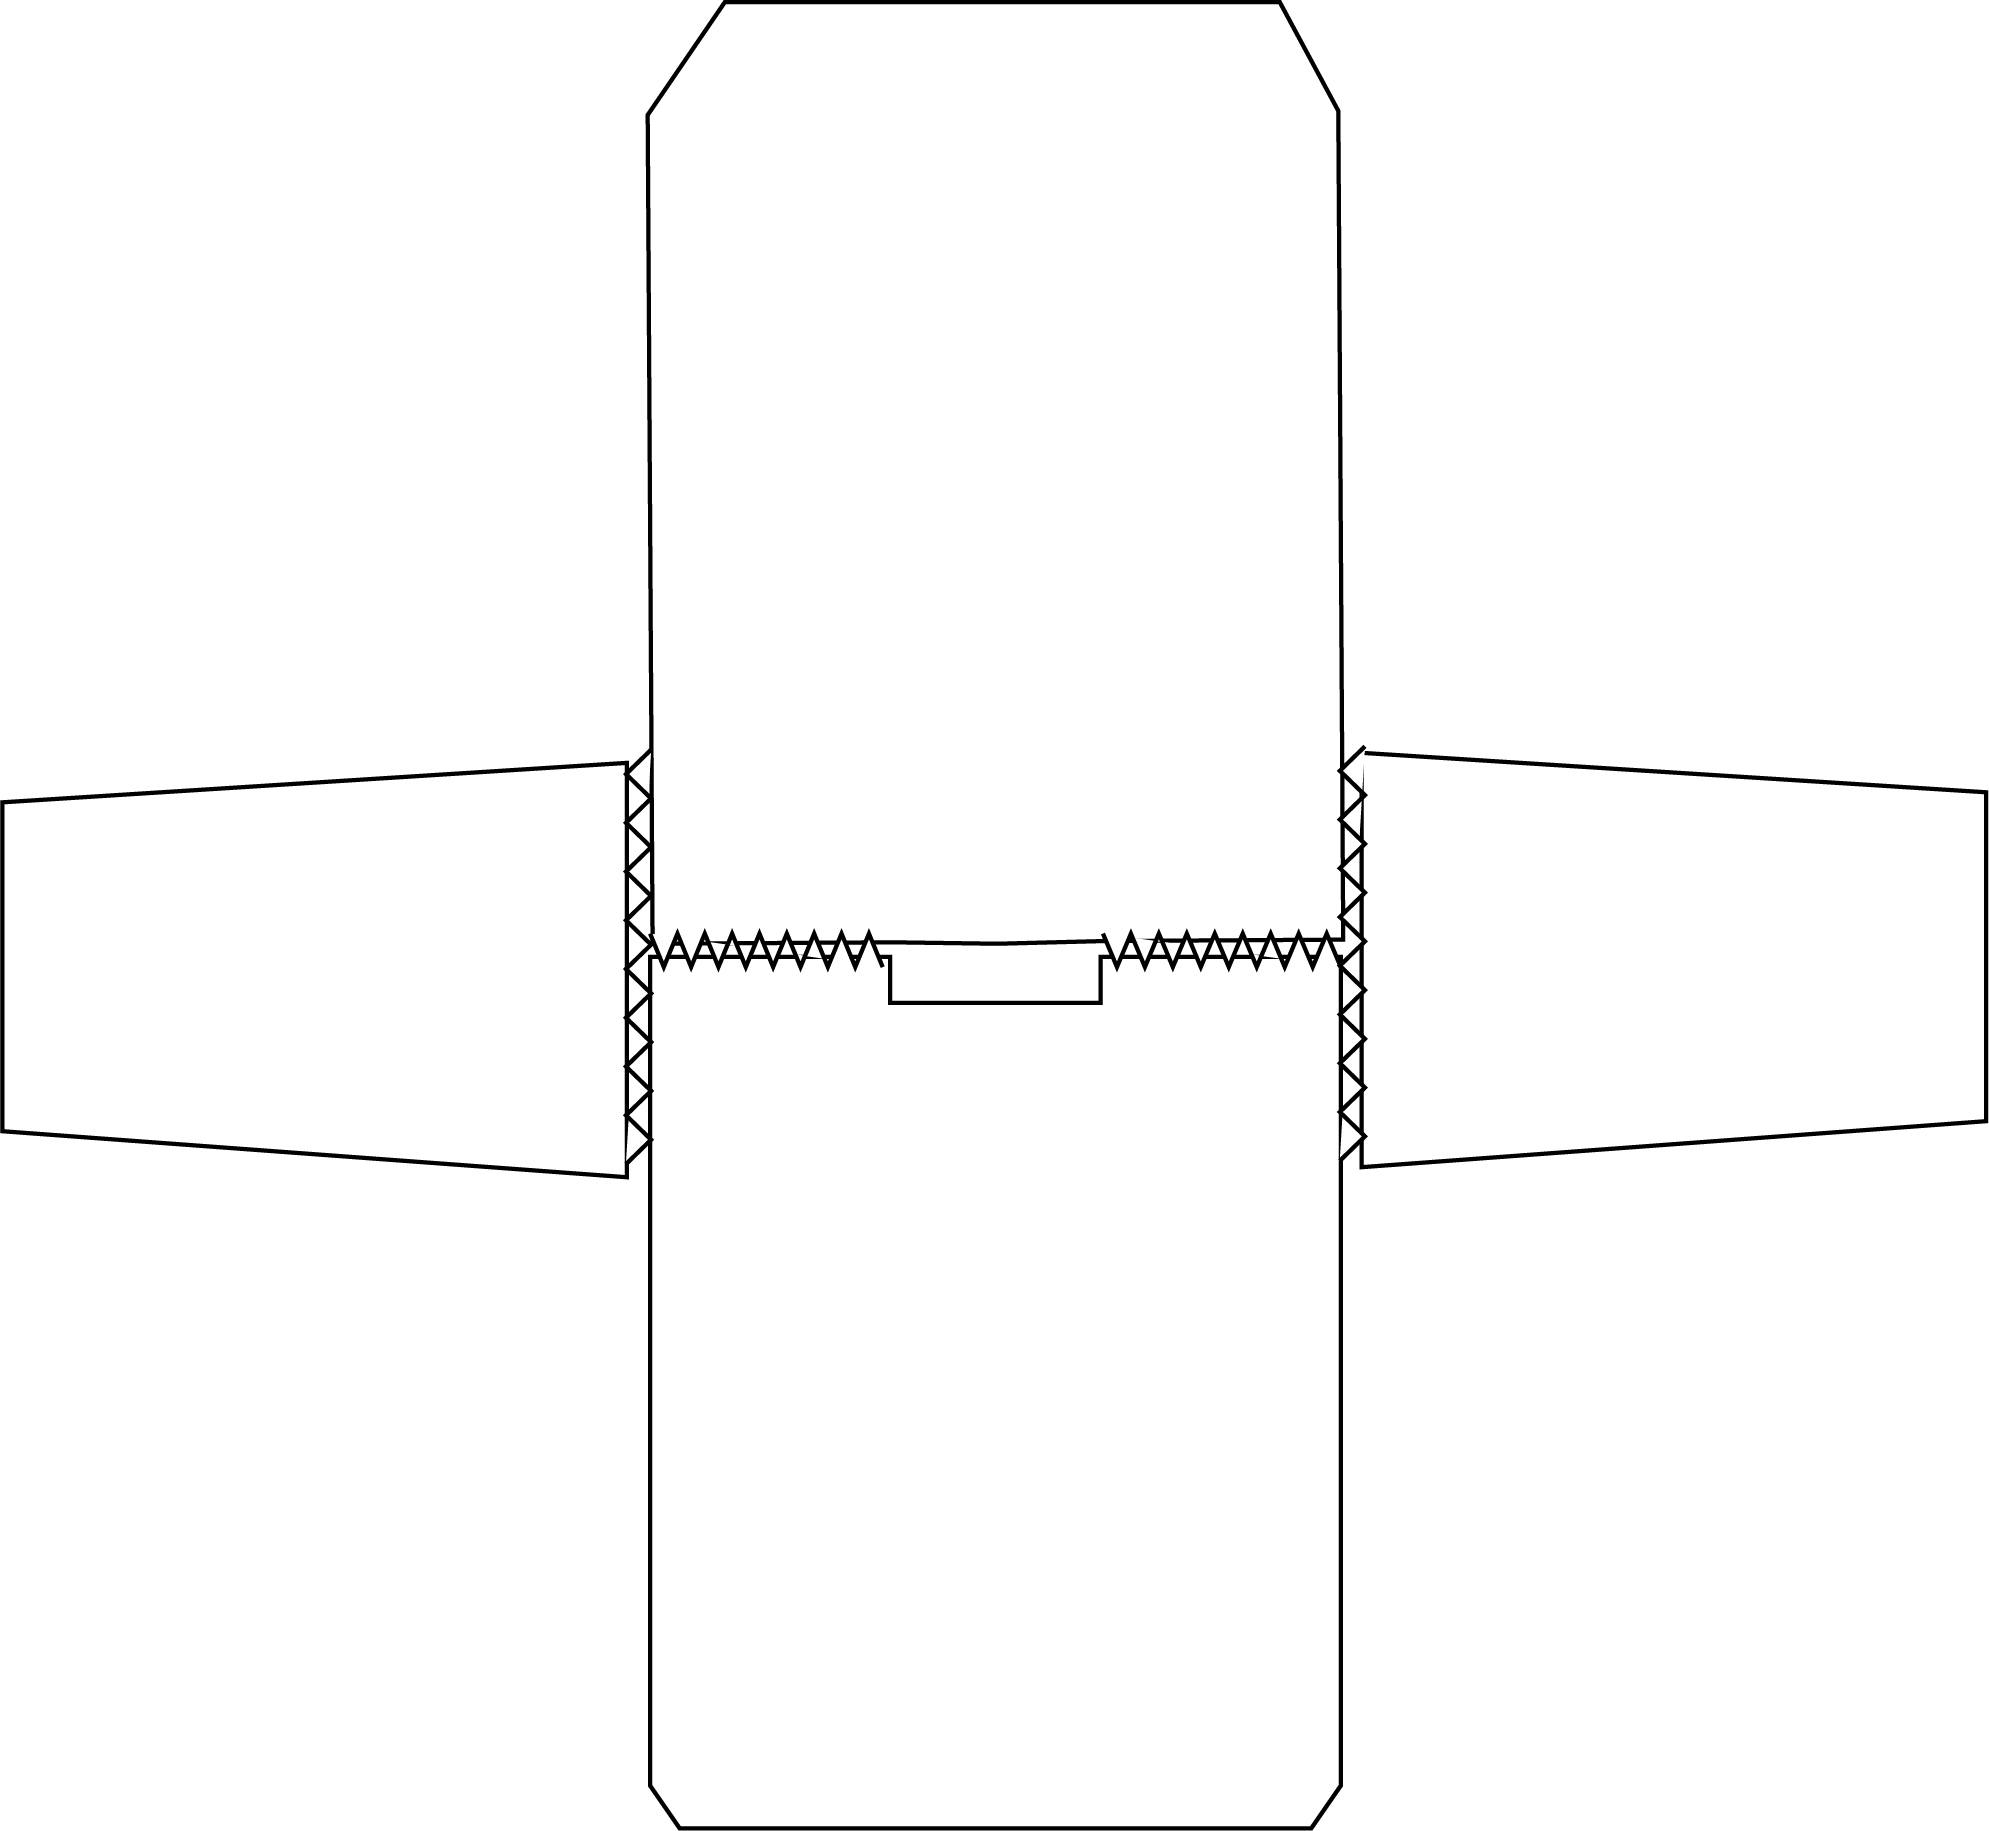
Step 3: fold the piece in half and sew the side edges
COLLAR
For the collar, I used as a stitch pattern the double slip stitch (dslst blo) or half double crochet slip stitch into the back loop only: Yarn Over, insert the hook into the back loop only of the indicated st, yarn over and pull out a loop and pass the loop through all the loops on the hook.
Before starting work on the actual collar, rejoin yarn into the side of the neckline and work one round in sc
Collar Ribbing
Use a 5.5 mm crochet hook and ch26 turn;
R1: 1dslst in each st until the edge of the neckline. 1slst into the next 2sts of the neckline edge; turn
R2: 1dslst blo in each st to the end of the row; 1ch and turn;
R3: 1dslst blo in each st, until the neckline edge, 1slst in the next 2sts of the neckline edge.
Rep. R2 and R3 until you finish the entire neckline circumference. Join the ends using slip stitches on the right side (when folding the collar, not to make the seam visible)
That was it! I hope you like it.
For a comprehensive, step-by-step guide on the entire sweater-making process and techniques, please refer to the video tutorial available [click on the photo below]
You can purchase the easily printable PDF pattern here at the links below. The PDF contains stitch charts also.




Comments are closed.