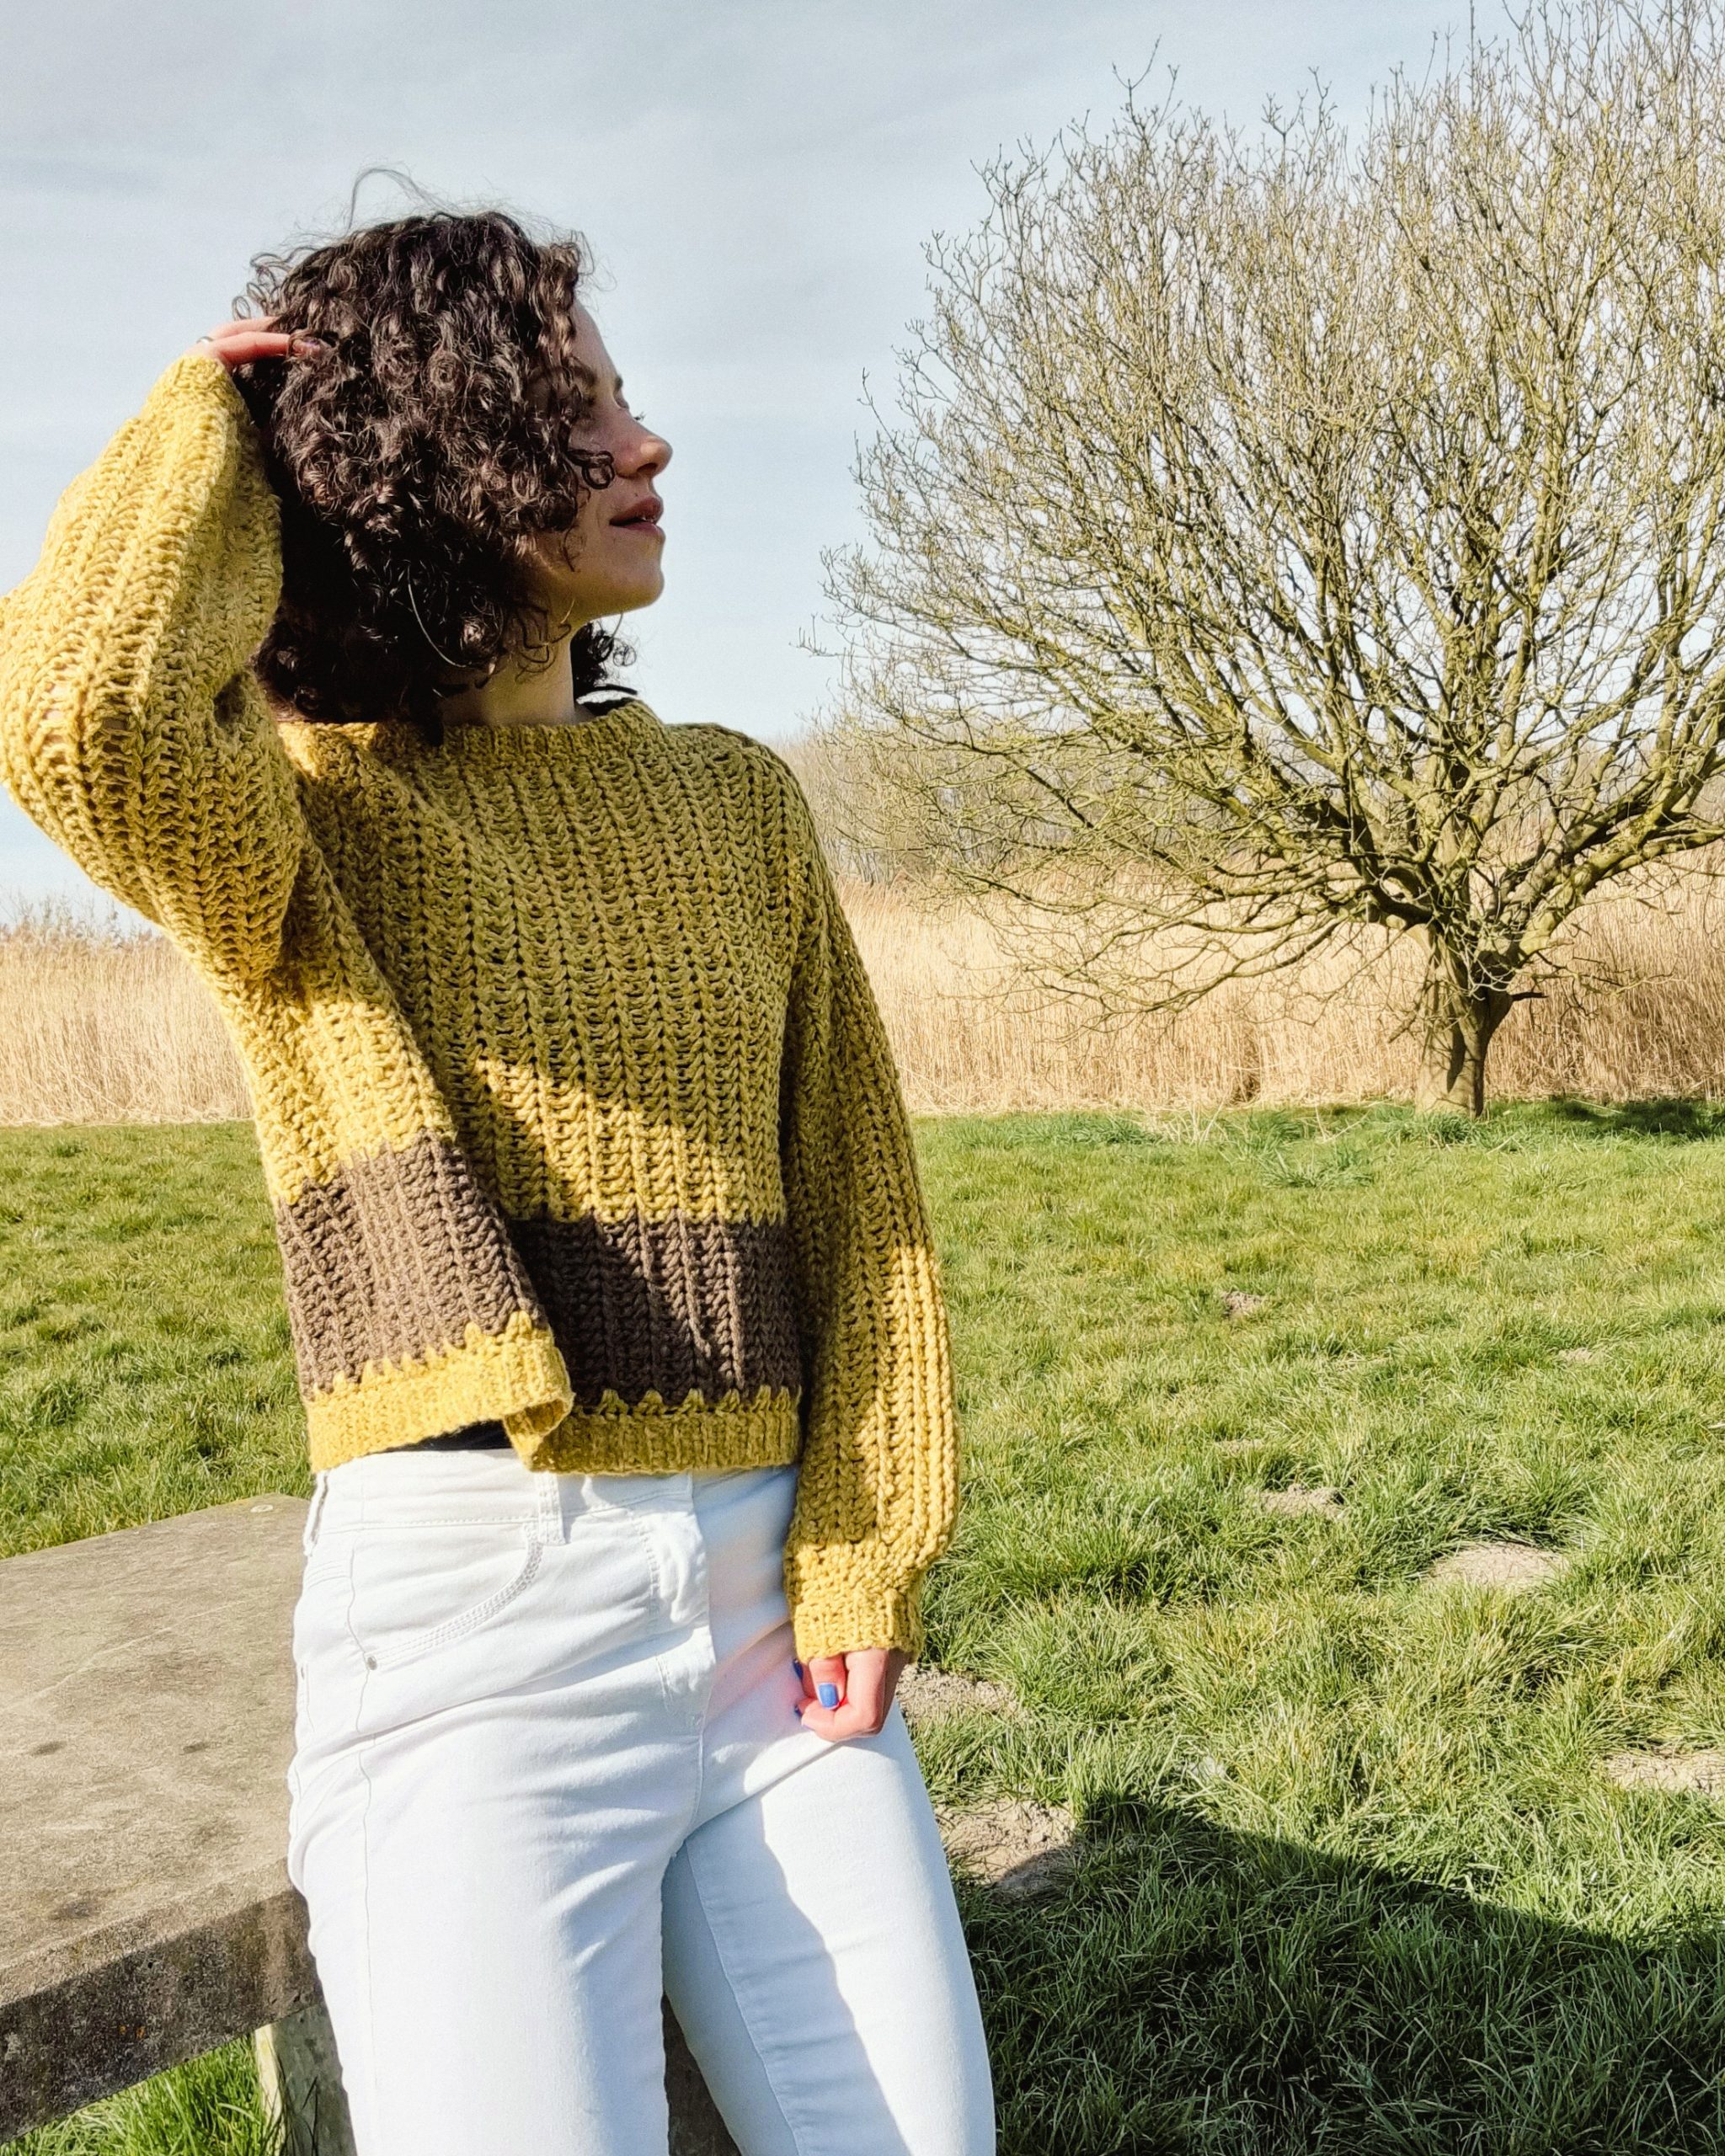
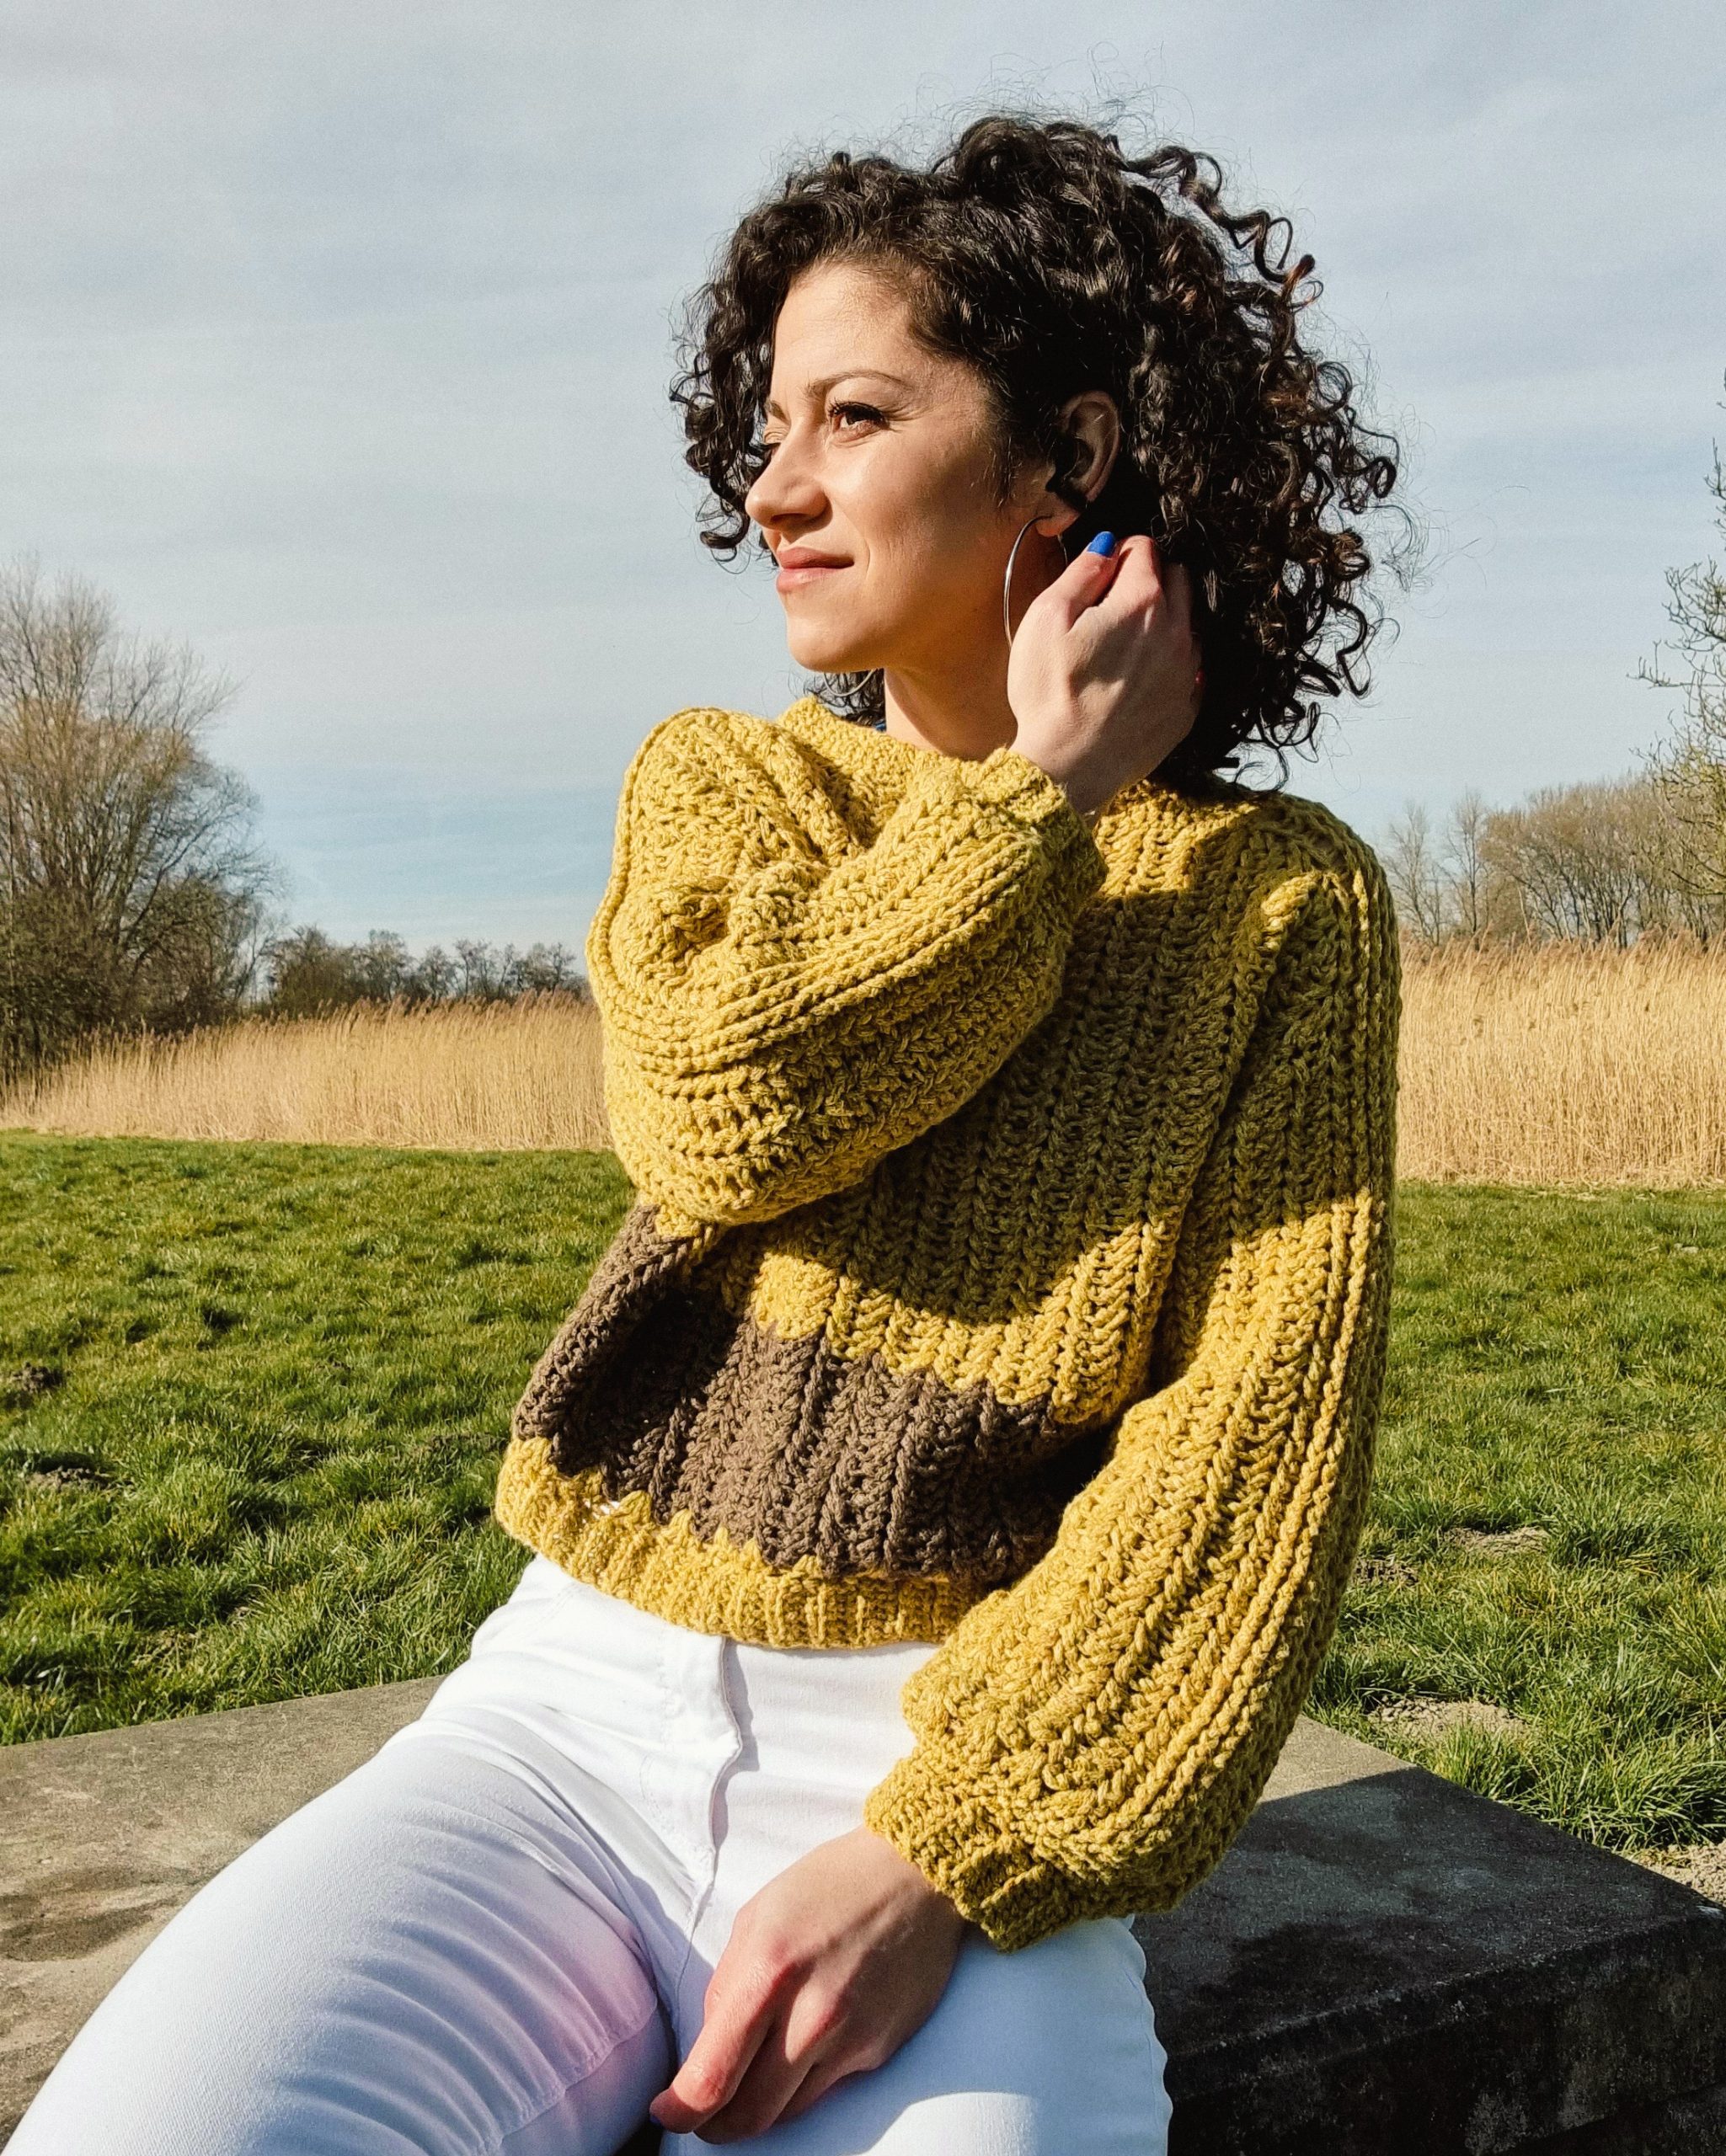
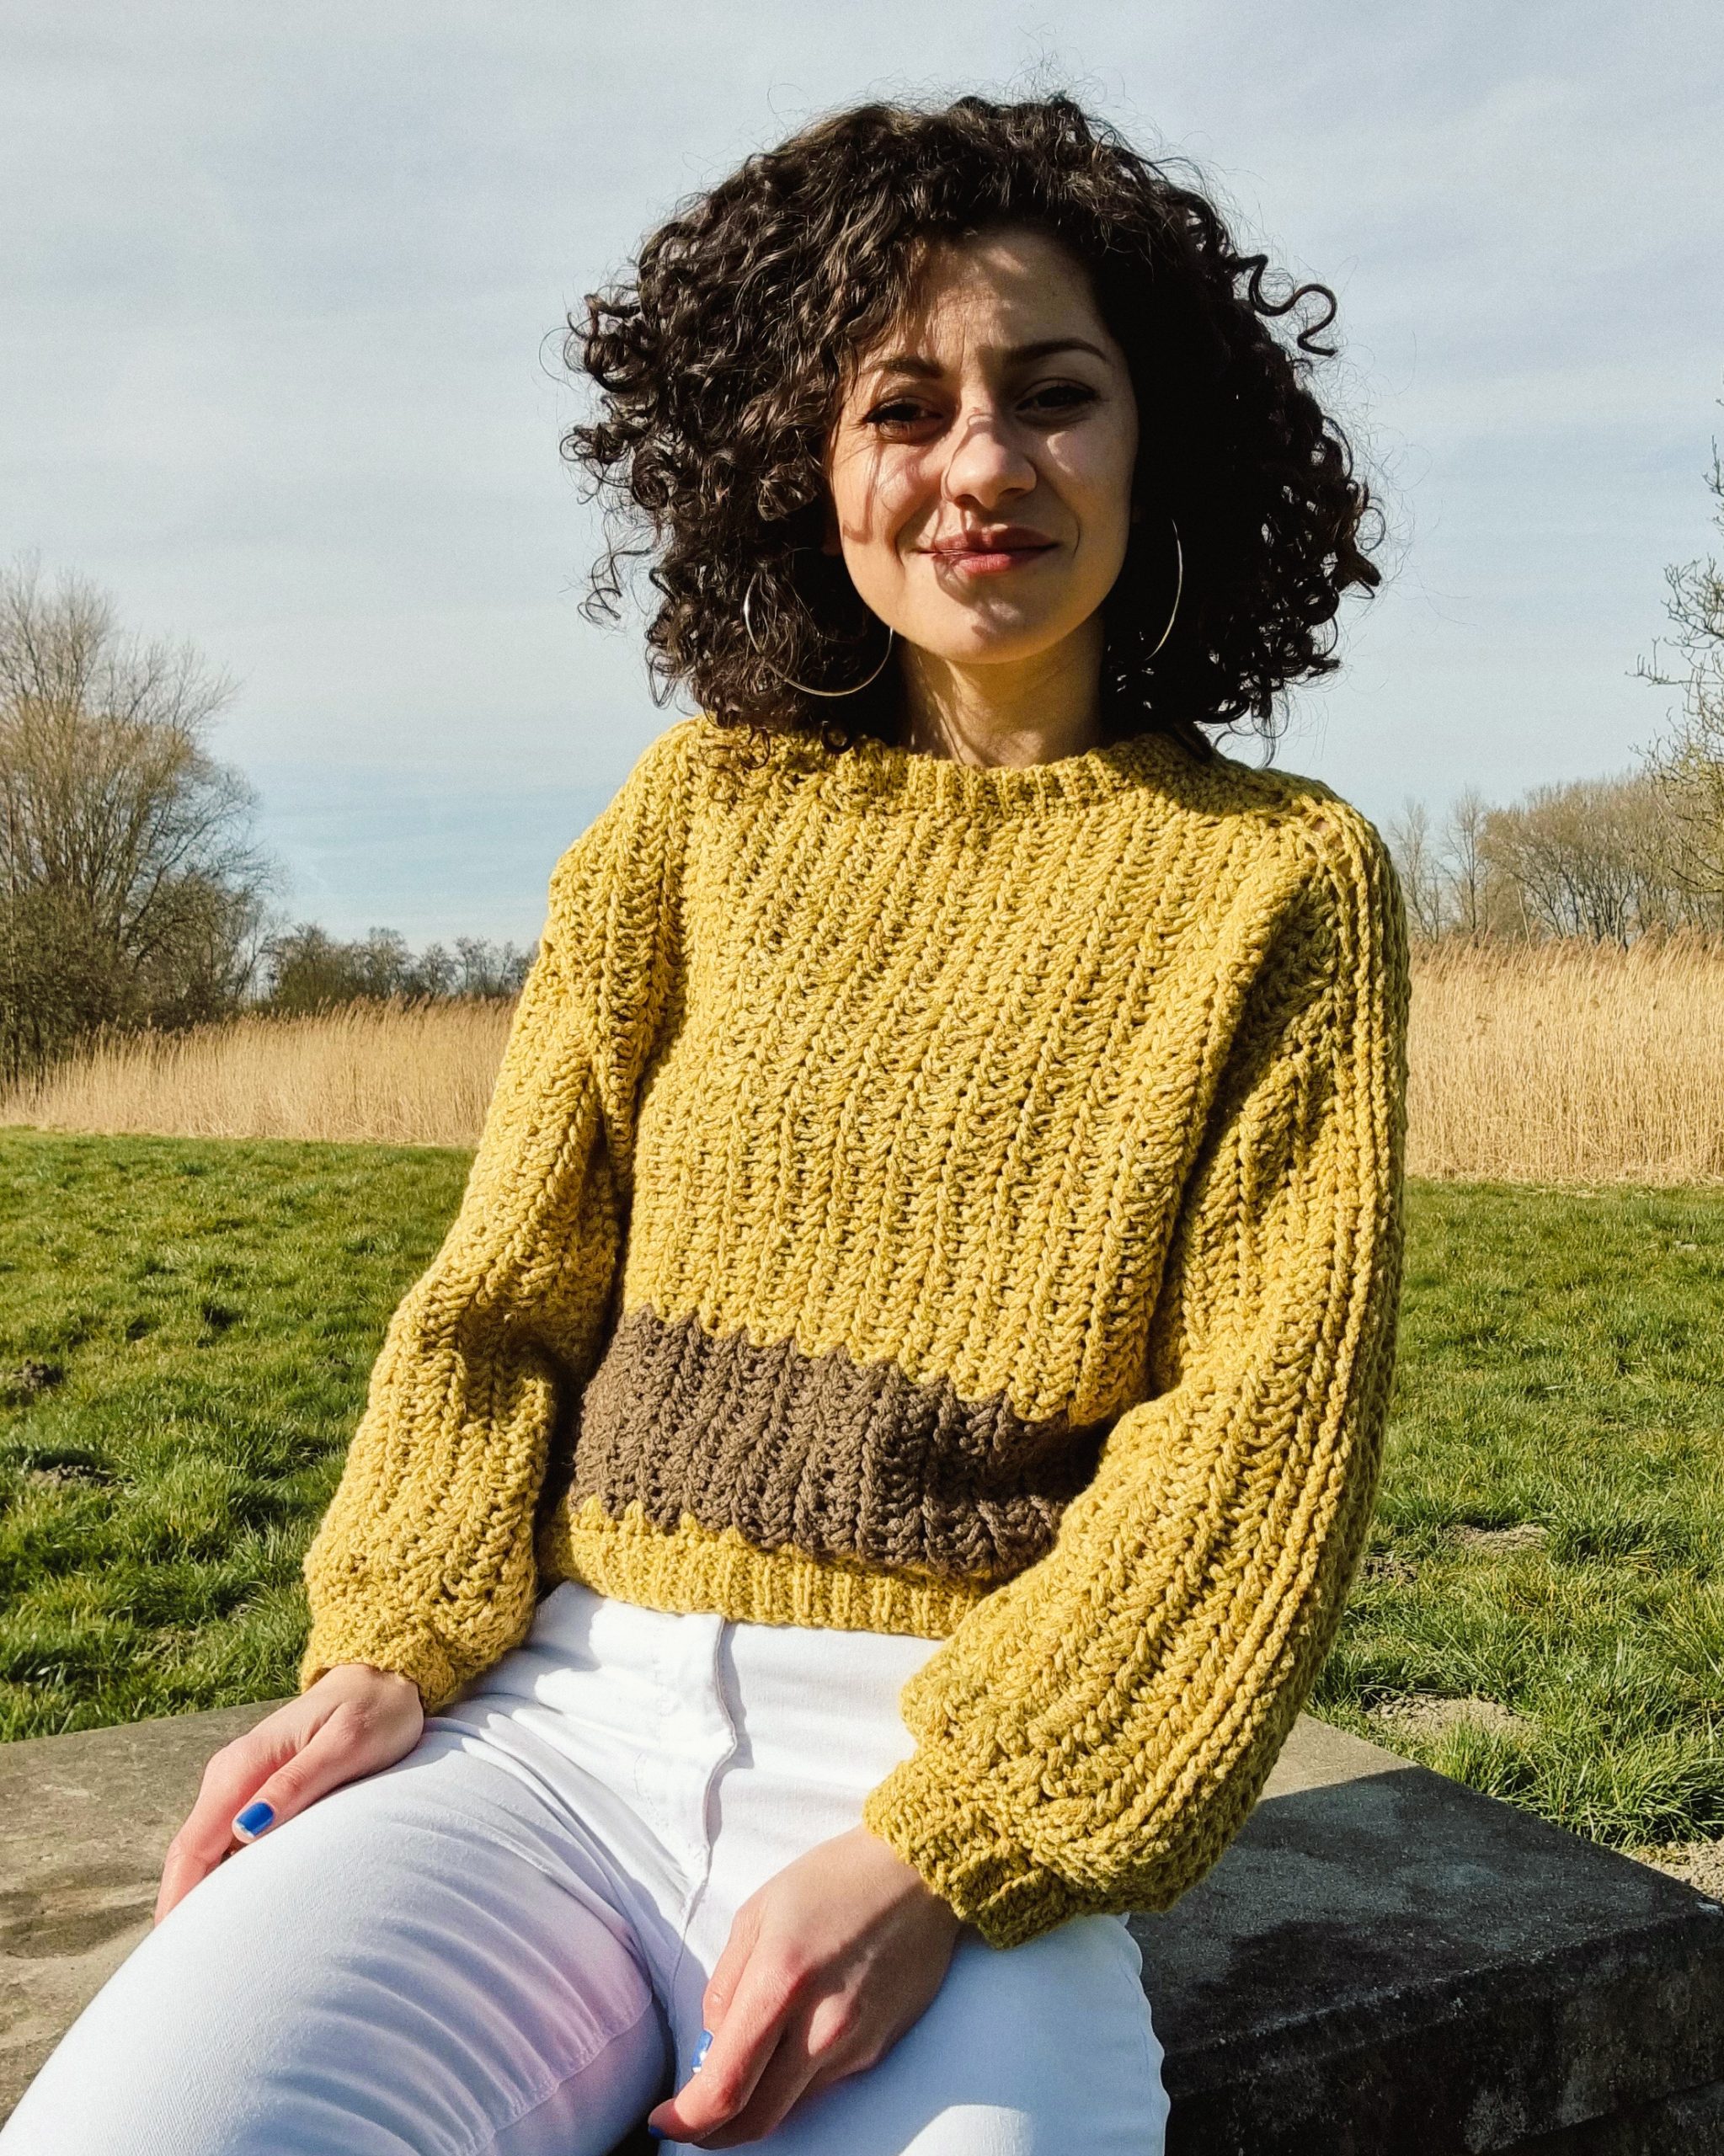
I am so excited to share with you the Caryopsis Sweater Pattern. I worked a lot on this new design and learned many things!
So I hope you will give this pattern a try, and I will be more than happy to hear from you: your thoughts about the design or the pattern.
But let’s talk a bit about the name, and then I promise we will jump right into the pattern.
The stitch pattern I used, a variation of a V-stitch (you will find more details in the pattern), gave the idea of wheat, but “wheat” wasn’t a great name. So, I started to research a bit about wheat! Sometimes, being a crochet designer means learning some other stuff. 🙂
What did I find out? Well, I found out that botanically the wheat fruit, those tiny seeds that are transformed in flour and then into everything wheat-related, are “caryopsis fruits.” Ta, da! “Caryopsis” sounds like an excellent name for my new sweater. And here I am sharing with you the CARYOPSIS Sweater Pattern.
And as I said, we would jump right into the pattern because it is a long one 🙂
The PDF version of this pattern includes stitch charts, photos, and more information about how you can adjust this pattern to your measurements. You can Purchase the easily printable PDF pattern here:
MATERIALS
• Yarn: Size 2, Sport Weight yarn or size 3, DK weight yarn
• Crochet Hook:
o 4.5 mm crochet hook (for the bottom, neckline and sleeves edging)
o 5.5 mm crochet hook
• yarn needle for weave in ends
• Stitch markers
• Scissors
NOTES ABOUT DESIGN
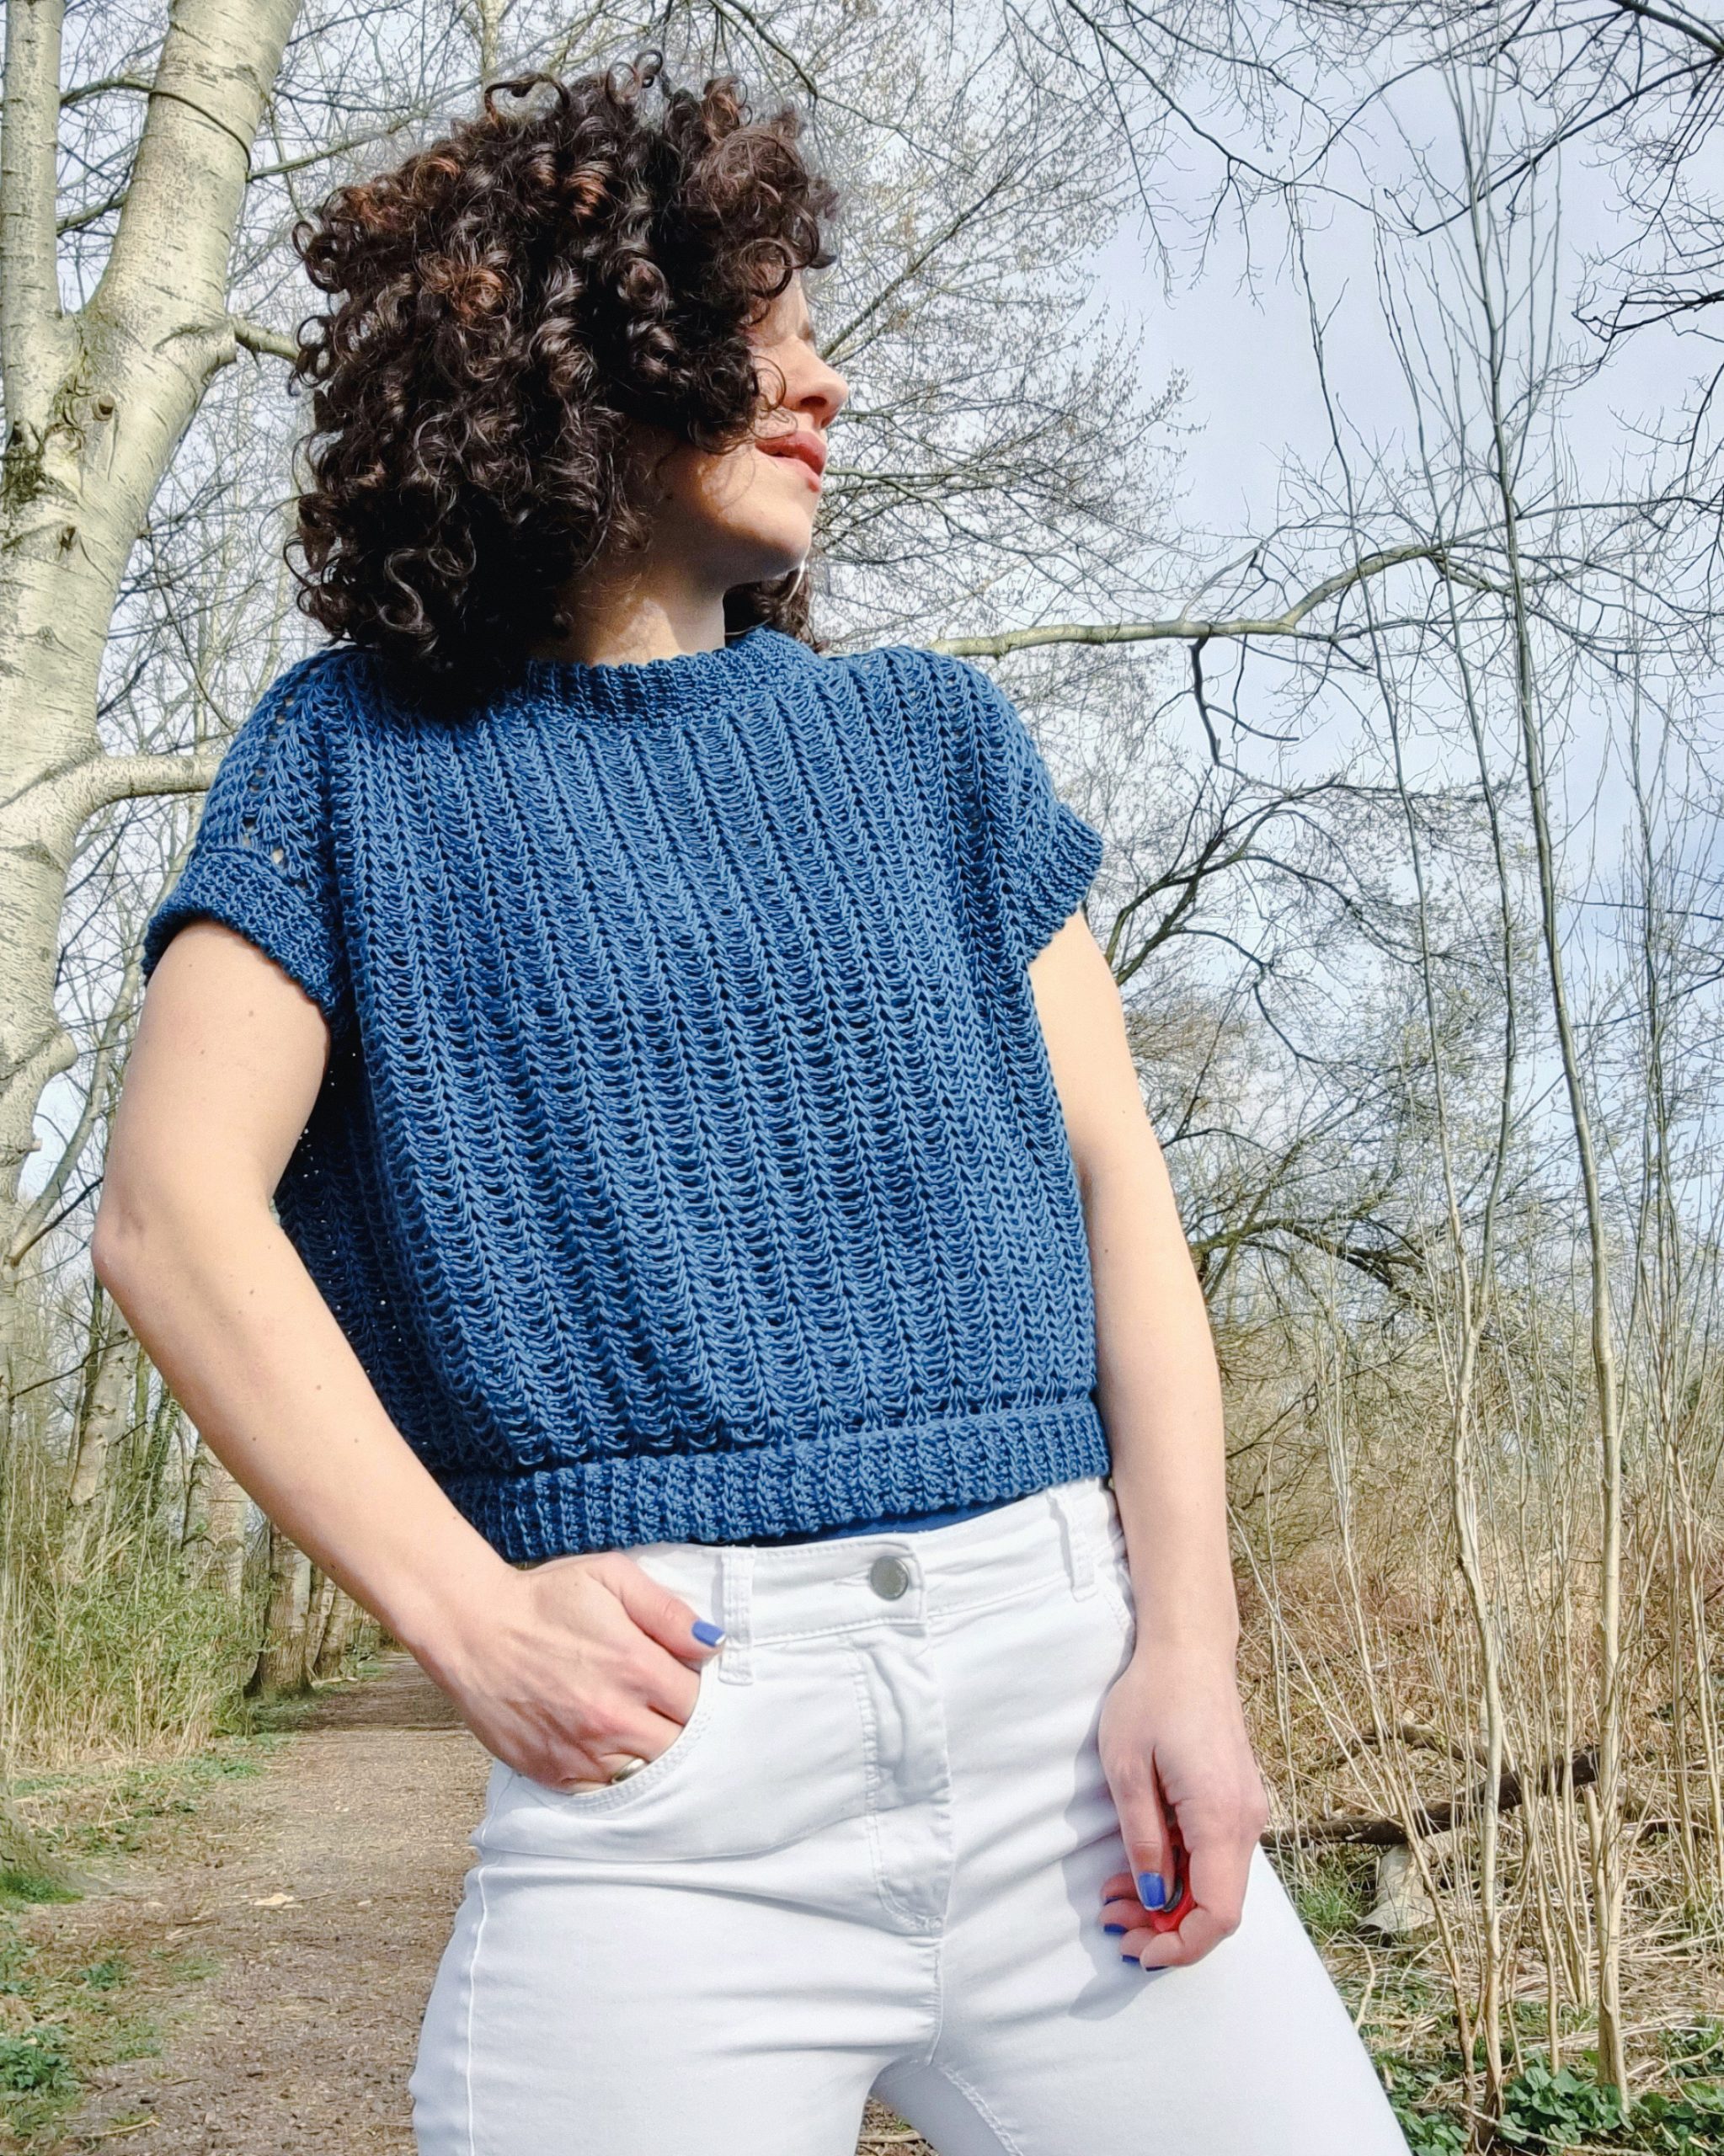
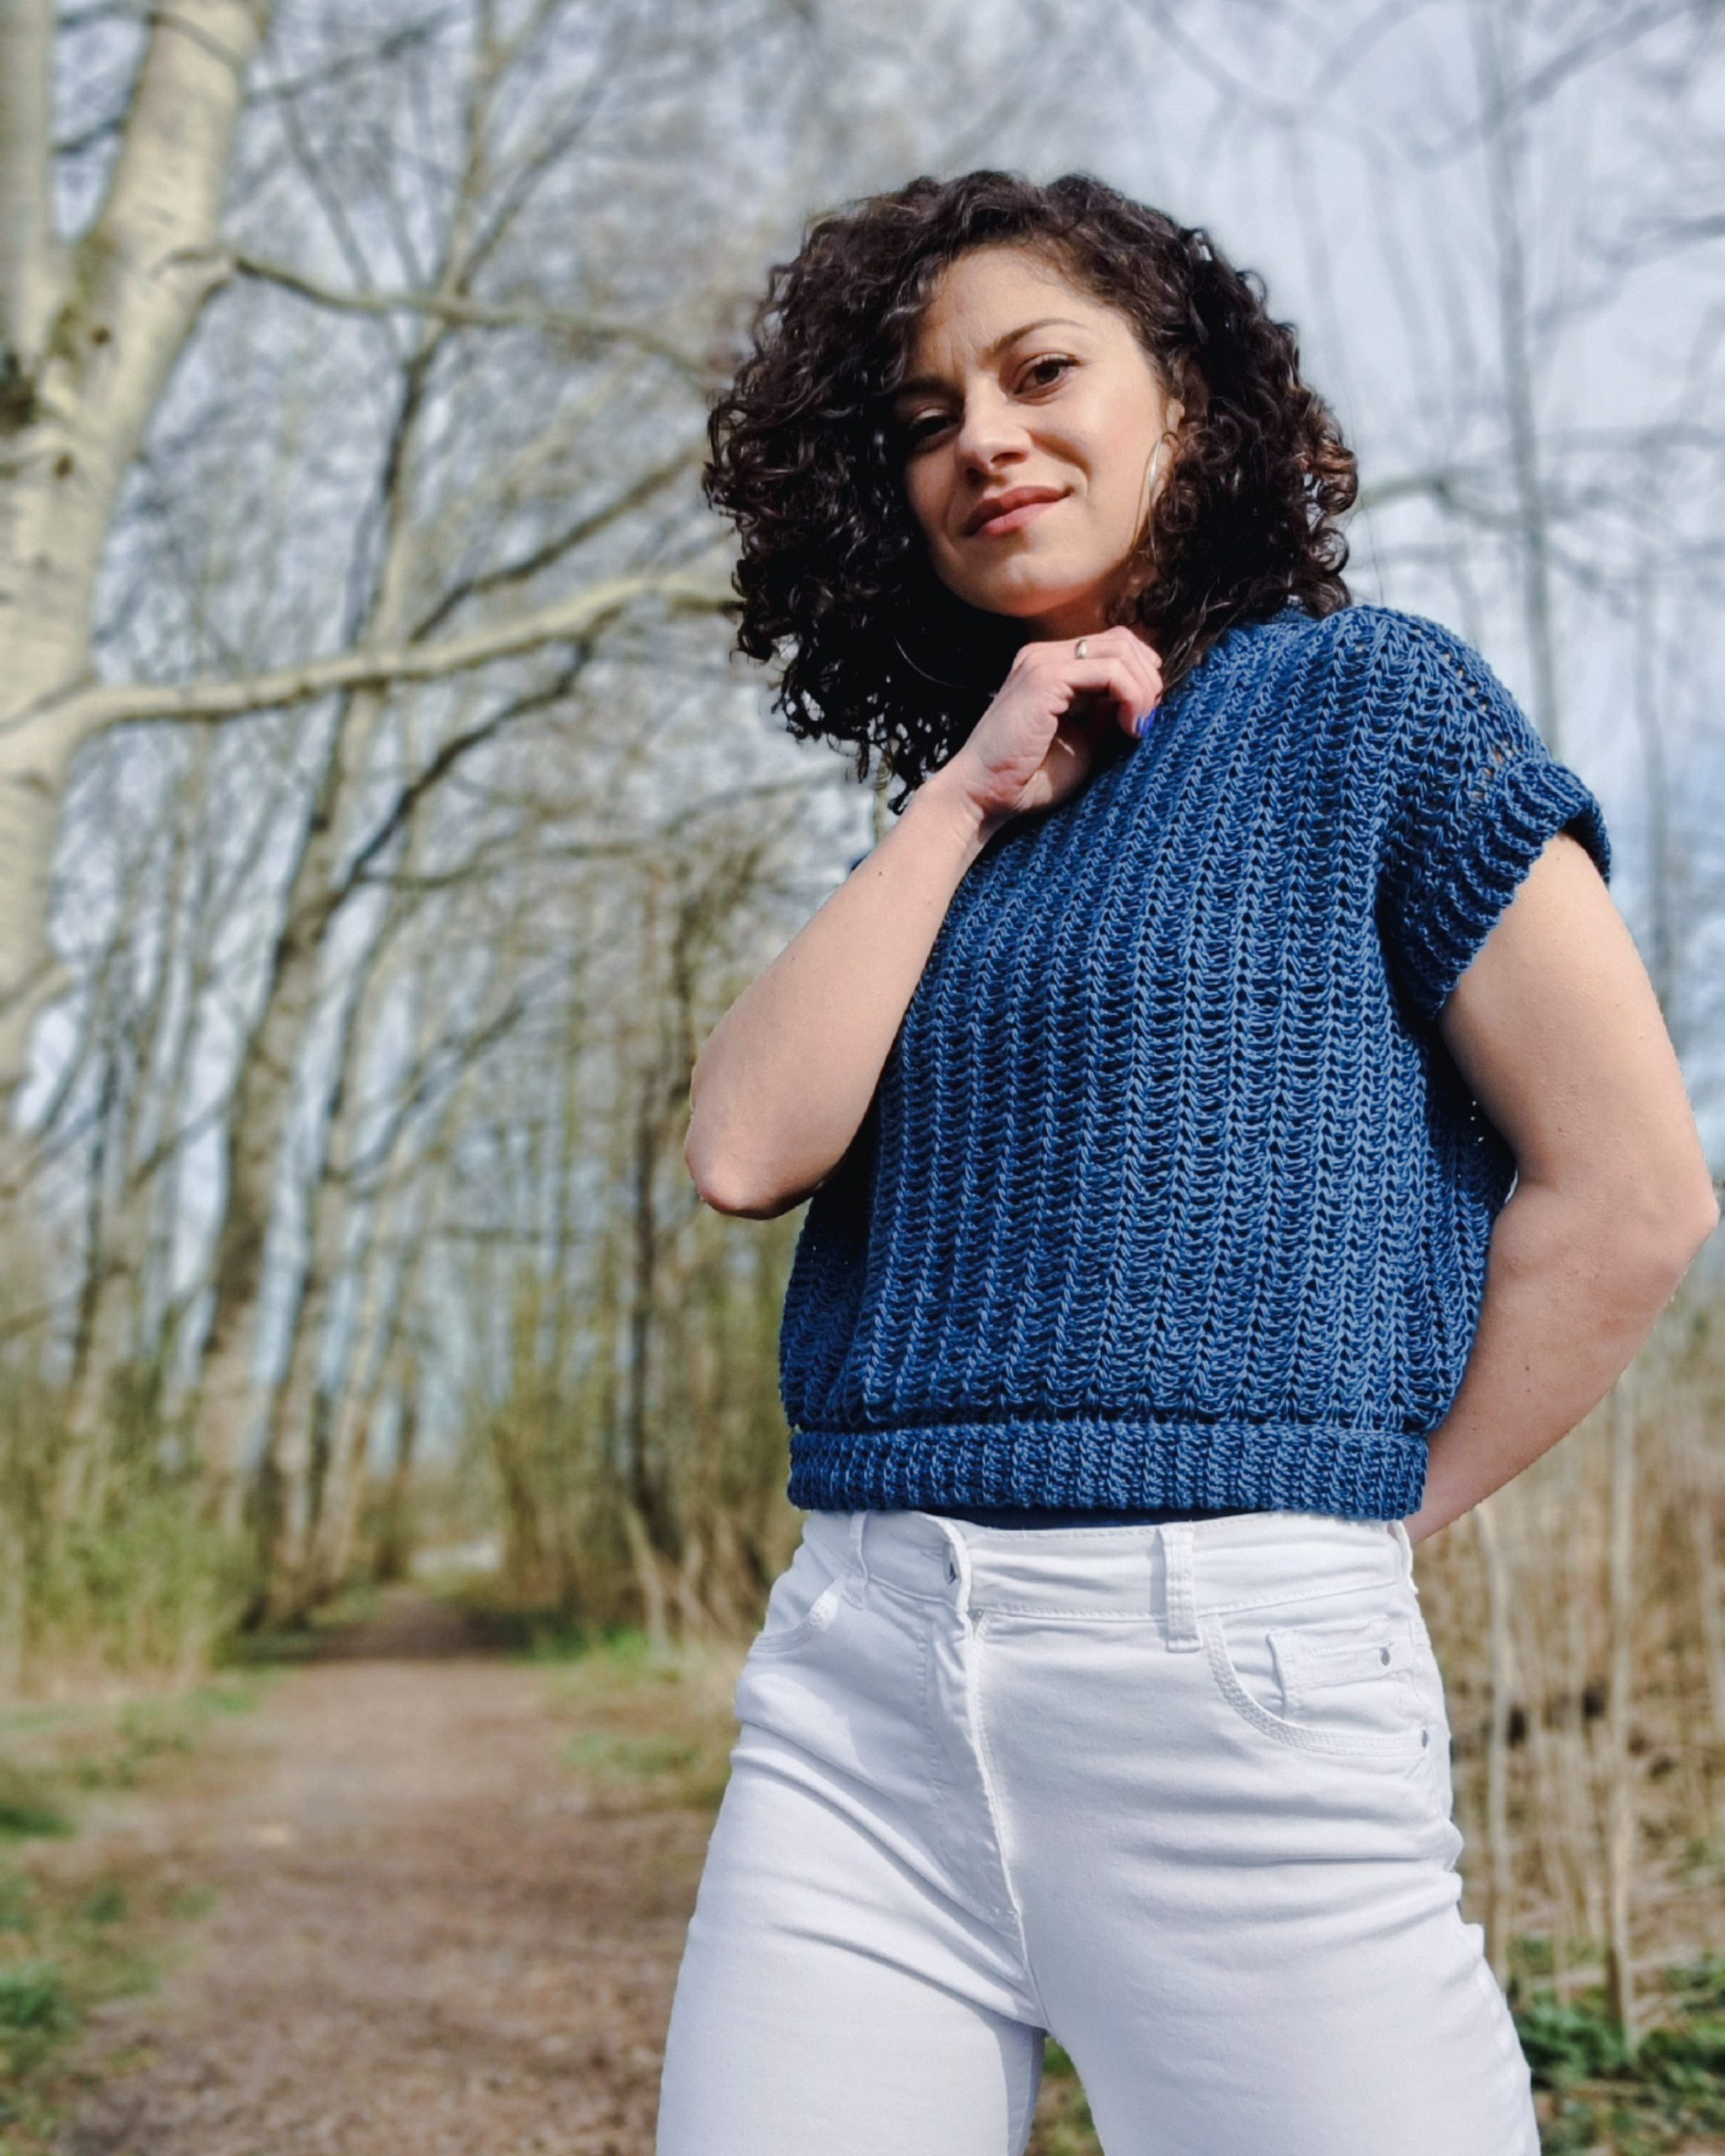
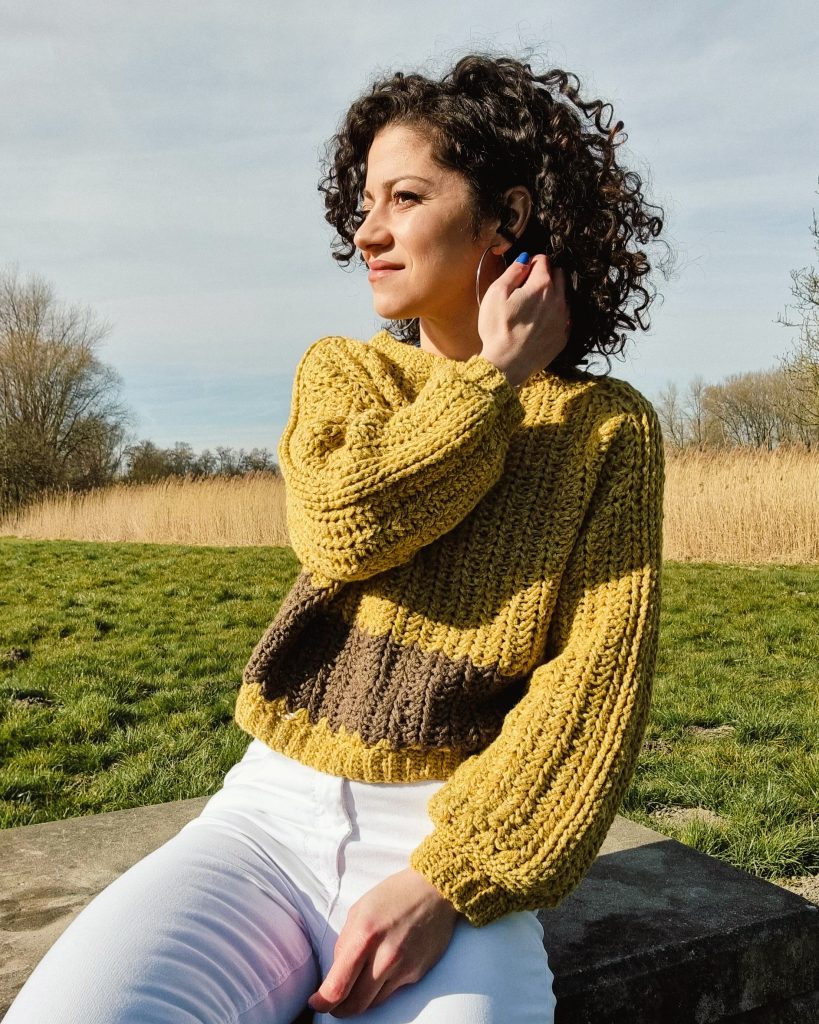
The Caryopsis Sweater is a top-down sweater using a technique more used in knitting. I designed this sweater using 2 different yarn weights, with long and short sleeves.
First, you will work the neckline ribbing (Section 1) and then a few short rows to better fit (Section 2). Then you work the raglan, increasing until getting to the desired bust width. (Section 3)
This section of the raglan doesn’t include the sleeves’. The armhole depth is worked into the next section (Section 4) in two separated parts, the back and front panel.
On the next step, we join back and front panels at the armpit and continue working in the round for the trunk section of the sweater.
The sleeves are worked into the armhole.
Below you can find a diagram with the top part, from the neckline up to the armpit.

MEASUREMENTS AND SIZES
The Caryopsis Sweater Pattern is available in 8 sizes, from small to 5X Large. The model is 168 cm tall and wears a size Small.

Yellow Sweater (DK Weight)
Neckline width a: 25 cm (25, 25, 28, 28, 30, 30, 30)
Bust width b: 53 cm (58, 63, 68, 73, 78, 83, 88)
*Armhole depth c: 12 cm (14, 15, 18, 18, 20, 20, 20)
Sleeve circ. d: 38 cm (43, 48, 58, 58, 65, 65, 65)
Sleeve length e: 40 cm (40, 42, 42, 43, 43, 44, 44)
Length f: 47 cm (50, 53, 58, 60, 62, 64, 66)
*does not includde the shoulder sts (raglan lines)
Blue Sweater (Sport weight)
Neckline width a: 25 cm (25, 25, 28, 28, 30, 30, 30)
Bust width b: 53 cm (58, 62, 69, 73, 76, 80, 84)
*Armhole depth c: 10 cm (12, 13, 16, 16, 18, 18, 18)
Sleeve circ. d: 34 cm (39, 43, 52, 52, 59, 59, 59)
Length e: 44 cm (47, 50, 54, 55, 58, 59, 61)
*Does not include the shoulder sts (raglan lines)
How much yarn do you need?
For the Caryopsis Sweater, I used:
Yellow Sweater DK Weight): *Concept Lagom, by Katia Yarns; Yarn composition: 47% Merino, 40% Cotton, 13% Nylon. Each ball has 50 grams and approximately 200 meters. *You will find this yarn listed as Worsted, but I fund it closer to a DK thickness.
Blue Sweater (Sport Weight): Hobbii Twister Solid; Yarn composition 55% cotton and 45% acrylic. 1 cake has 100 grams and is approximately 400 meters.
For each size, you will need:
Yellow Sweater: 7 (8, 9, 11, 11, 13, 13, 14) balls or 1300 (1490, 1720, 2040, 2180, 2420, 2580, 2730) meters
Blue Sweater: 3 (3, 4, 4, 5, 5, 5, 6) cakes or 960 (1130, 1280, 1540, 1660, 1820, 1950, 2110 ) meters
ABBREVIATIONS
Ch – chain
sc – single crochet
scblo – single crochet in back loop only
hdc – half double crochet
dc – double crochet
fpdc – front post double crochet
ss – slip stitch
V-st – 1dc, 2ch, 1dc in the same st
St(s) – stitch(es)
R – rows
** – repeated section.
TENSION
Using a 5.5 mm crochet hook in the main stitch pattern (V-st variation)
Sport weight yarn
4,5 V-st = 10 cm
14 rows = 10 cm
DK Weight yarn
4 V-st = 10 cm
12 rows = 10 cm
The PDF version of this pattern includes stitch charts, photos, and more information about how you can adjust this pattern to your measurements. You can Purchase the easily printable PDF pattern here:
STITCH PATTERN AND TECHNIQUES
Short rows
We will work 5 short rows to raise the back and lower the front for a better fit of the sweater. These short rows will be worked in single crochet stitches, right after the ribbing.
The idea is to work more rows on the back and gradually work stitches from the front panel. More to be explained in the pattern.
V stitch (V-st)
For this particular design: V-st = (1dc, 2ch, 1dc) in the same st. Work the next round’s V-sts into the sts one row/round below.
PATTERN NOTES
- This design has 4 main parts: Yoke, Armholes, trunk, and sleeves.
We will divide the yoke part into different sections to better understand the construction; Section 1 – Neckline Ribbing, Section 2 – Short Rows, Section 3 Raglan.
Section 1 – Ribbing, - work the ribbing using the smaller crochet hook size 4.5 mm.
- Work the piece flat; turn after each row
- work 1ch at the end of each row.
- Work through both loops, the first and the last stitch in a row.
- After completing the length, join the ends using slip stitches.
- For this particular design, the ribbing is then folded and worked one round through the stitches of both edges.
Section 2 – Short rows - Work this section using the 5.5 mm crochet hook
- Work the piece flat, turn after each short row.
- before start working on this section, you will need to mark the raglan lines and then increase before and after the raglan lines (more details in the pattern)
- at the end of the row, work 3 more stitches from the front panel
- working the first extra stitch: insert the hook into the side edge of the previous stitch, yarn over and pull out a loop, then insert the hook into the next st (first extra st), yarn over and pull out a loop, yarn over and pass it through all loops on your hook.
- On the last row, work all the stitches and join with the first sc with a slip st; on the last row, don’t work the raglan lines increases.
Section 3 – The raglan - work this section using the V-st
- This section is worked in the round, only on the right side
- Rejoin yarn into the first st, after the raglan line, and start the work from there.
- Start each round into the first 2ch sp of the first V-st
- Start each round into the first 2ch sp of the first V-st
- First V-st in a round will be: 4ch and 1dc into the same st/2ch-sp
- Close each round with a slip stitch into the second chain.
The PDF version of this pattern includes stitch charts, photos, and more information about how you can adjust this pattern to your measurements. You can Purchase the easily printable PDF pattern here:
INSTRUCTIONS
The pattern is written for sizes from Small up to 5XL. Numbers are written between brackets for sizes M, L, XL, XXL, 3XL, 4XL, and 5XL. If not, the pattern applies to all sizes.
The pattern is written for sport weight and DK weight yarn, and you will find the numbers written separately. If not, it means that the patter applies for both yarn weights.
PART 1: YOKE (UP TO THE ARMPIT)
Section 1: NECKLINE RIBBING
Using the 4.5mm crochet hook ch15
R1: start in the second st from the hook
1sc in each st until the end of the row. 1ch and turn.
R2: 1sc, 1scblo in next 13 sts, 1sc in last st, 1ch and turn
Rep. R2 until you will have in total:
DK Weight: 62 (62, 62, 68, 68, 74, 74, 74) rows
Sport weight: 68 (68, 68, 74, 74, 80, 80, 80) rows.
Join the ends of the ribbing using slip stitches.
Fold the ribbing and make sure the edges of the rows are perfectly aligned.
Start from where your yarn is. Work 1ch and then 1sc into each side row, through both side edges, until you complete the round.
At the end of this round you should have
DK Weight: 62 (62, 62, 70, 70, 74, 74, 74) sts
Sport weight: 68 (68, 68, 74, 74, 80, 80, 80) sts.
Next, we will use stitch markers to mark the raglan lines; from where your yarn is, place 1st marker into the same st as the working loop; then count:
DK Weight:4sts, place st marker in next st, 25 (25, 25, 29, 29, 31, 31, 31) sts, place a stitch marker in next st, 4sts, place a stitch marker in next st 25 (25, 25, 29, 29, 31, 31, 31) sts.
Sport Weight:4sts, place st marker in next st, 28 (28, 28, 31, 31, 34, 34, 34) sts, place a stitch marker in next st, 4sts, place a stitch marker in next st 28 (28, 28, 31, 31, 34, 34, 34) sts.
Section 2: SHORT ROWS
Work with the 5.5 mm crochet hook
Turn your work and start working into the first marked stitch.
Follow either the stitch chart or the written pattern.
DK weight
R1 (WS): 2sc (place the st marker into the second st), 1sc in next 4sts, 2sc in next st (place st marker in first st), 1sc in next 25 (25, 25, 28, 28, 31, 31, 31) sts, 2sc in next st (place st marker in the second st), 1sc in next 4sts, 2sc in next st (place st marker in the first st), 1sc in next 3sts. 1ch and turn.
R2 (RS): 1sc in next 4sts, 2sc in next st (place the st marker into the second st), 1fpdc in next 4sts, 2sc in next st (place the st marker into the first st), 1sc in next 27 (27, 27, 30, 30, 33, 33, 33) sts, 2sc in next st (place the st marker into the second st) 1fpdc in next 4sts, 2sc in next st (place st marker into the first st) 1sc in next *4sts (the last 3sts are from the foundation round; see the PATTERN NOTES for working the extra sts), 1ch and turn.
R3 (WS): 1sc in next 5sts, 2sc in next st (place st marker in the second sc), 1sc into the next 4sts, 2sc in next st (place st marker into the first st), 1sc in next 29 (29, 29, 32, 32, 35, 35, 35) sts, 2sc in next st (place st marker into the second st), 1sc in next 4sts, 2sc in next st (place st marker in the first st) 1sc in the next 8sts. 1ch and turn.
R4 (RS): 1sc in next 9sts, 2sc in next st (place the st marker into the second st) 1fpdc in next 4sts, 2sc in next st (place the st marker into the first st), 1sc in next 31 (31, 31, 34, 34, 37, 37, 37) sts, 2sc in next st (place the st marker into the second st) 1fpdc in next 4sts, 2sc in next st (place st marker into the first st) 1sc in next 9sts. 1ch and turn.
R5 (WS): 1sc in next 10sts, 2sc in next st (place st marker in the second sc), 1sc into the next 4sts, 2sc in next st (place st marker into the first st), 1sc in next 33 (33, 33, 36, 36, 39, 39, 39) sts, 2sc in next st (place st marker into the second st), 1sc in next 4sts, 2sc in next st (place st marker in the first st) 1sc in the next 13sts. 1ch and turn.
R6: 1sc in next 15sts, 1fpdc in next 4 sts, 1sc in next 37 (37, 37, 40, 40, 43, 43, 43)sts, 1fpdc in next 4sts, 1sc in next 37 (37, 37, 40, 40, 43, 43, 43)sts . Close the round with slip stitch in first sc.
Sport weight
R1 (WS): 2sc (place the st marker into the second st), 1sc in next 4sts, 2sc in next st (place st marker in first st), 1sc in next 28 (28, 28, 31, 31, 34, 34, 34) sts, 2sc in next st (place st marker in the second st), 1sc in next 4sts, 2sc in next st (place st marker in the first st), 1sc in next 3sts. 1ch and turn.
R2 (RS): 1sc in next 4sts, 2sc in next st (place the st marker into the second st) 1fpdc in next 4sts, 2sc in next st (place the st marker into the first st), 1sc in next 30 (30, 30, 33, 33, 36, 36, 36) sts, 2sc in next st (place the st marker into the second st) 1fpdc in next 4sts, 2sc in next st (place st marker into the first st) 1sc in next *4sts (the last 3sts are from the foundation round; see the PATTERN NOTES for working the extra sts), 1ch and turn.
R3 (WS): 1sc in next 5sts, 2sc in next st (place st marker in the second sc), 1sc into the next 4sts, 2sc in next st (place st marker into the first st), 1sc in next 32 (32, 32, 35, 35, 38, 38, 38) sts, 2sc in next st (place st marker into the second st), 1sc in next 4sts, 2sc in next st (place st marker in the first st) 1sc in the next 8sts. 1ch and turn.
R4 (RS): 1sc in next 9sts, 2sc in next st (place the st marker into the second st) 1fpdc in next 4sts, 2sc in next st (place the st marker into the first st), 1sc in next 34 (34, 34, 37, 37, 40, 40, 40) sts, 2sc in next st (place the st marker into the second st) 1fpdc in next 4sts, 2sc in next st (place st marker into the first st) 1sc in next 9sts. 1ch and turn.
R5 (WS): 1sc in next 10sts, 2sc in next st (place st marker in the second sc), 1sc into the next 4sts, 2sc in next st (place st marker into the first st), 1sc in next 36 (36, 36, 39, 39, 42, 42, 42) sts, 2sc in next st (place st marker into the second st), 1sc in next 4sts, 2sc in next st (place st marker in the first st) 1sc in the next 13sts. 1ch and turn.
R6: 1sc in next 15sts, 1fpdc in next 4 sts, 1sc in next 40 (40, 40, 43, 43, 46, 46, 46)sts, 1fpdc in next 4sts, 1sc in next 40 (40, 40, 43, 43, 46, 46, 46)sts . Close the round with slip stitch in first sc

- The PDF version of this pattern includes stitch charts, photos, and more information about how you can adjust this pattern to your measurements. You can Purchase the easily printable PDF pattern here:
- Section 3: Raglan
After finishing the SHORT ROWS section, you need to cut the yarn and rejoin the yarn into the first st of the back panel. - you can work the first round using half double crochet stitches instead of double crochet stitches for the V-st;
work the sts at round 2, into the sts one row below (same single crochet sts as the one in which you worked the sts at round 1. - Starting with round 3 and further, work the V-st under the 2ch of the V-sts one round below.
Increase: (1dc, 2ch, 1dc, 2ch, 1dc) in the same stitch or 2ch-sp, 1 rows below - Increase at every other row (the uneven number)
- On the round after an increase round, work 2V-sts into each 2ch-sp of the increase.
DK weight
R1:(4ch, 1dc, 2ch, 1dc) in the same st, skip 2sts, *(1dc, 2ch, 1dc) in the next st, skip 2sts. *rep. 10 (10, 10, 11, 11, 12, 12, 12) times, (1dc, 2ch, 1dc, 2ch, 1dc) in next st, 1fpdc in next 4sts, (1dc, 2ch, 1dc, 2ch, 1dc) in next st, skip 2sts, *(1dc, 2ch, 1dc) in the next st, skip 2sts. *rep. 10 (10, 10, 11, 11, 12, 12, 12) times, (1dc, 2ch, 1dc, 2ch, 1dc) in next st, 1fpdc in next 4sts, ss into the second ch. Slip stitch into the first 2ch-sp.
Sport weight
R1:(4ch, 1dc, 2ch, 1dc) in the same st, skip 2sts, *(1dc, 2ch, 1dc) in the next st, skip 2sts. *rep. 11 (11 11, 12, 12, 13, 13, 13) times, (1dc, 2ch, 1dc, 2ch, 1dc) in next st, 1fpdc in next 4sts, (1dc, 2ch, 1dc, 2ch, 1dc) in next st, skip 2sts, *(1dc, 2ch, 1dc) in the next st, skip 2sts. *rep. 11 (11 11, 12, 12, 13, 13, 13) times, (1dc, 2ch, 1dc, 2ch, 1dc) in next st, 1fpdc in next 4sts, ss into the second ch. Slip stitch into the first 2ch-sp.
Note: Starting with round 2, you can follow the same pattern for both yarn weights. Remember that you need to have 2 more V-st on the back and front panels (4V-sts in total) at every 2 rounds.
R2: (4ch, 1dc) into the first 2ch-sp, *1V-st into each 2ch-sp until the next raglan line, 1fpdc into the next 4sts. *rep until the end of the round, ss into the second ch. Slip stitch into the first 2ch-sp.
R3: (4ch, 1dc, 2ch, 1dc) into the first 2ch-sp, *1V-st into each 2ch-sp, until the last one before the raglan line, (1dc, 2ch, 1dc, 2ch, 1dc) into the next 2ch-sp, 1fpdc into the next 4sts*, (1dc, 2ch, 1dc, 2ch, 1dc) into the next 2ch-sp. Rep from * to * one more time, ss into the second ch. Slip stitch into the first 2ch-sp.
R4: Rep. R2
Rep R3 and R4 until you have in total:
DK weight: 10 (12, 14, 16, 18, 18, 20, 22) rows
Sport weight: 12 (14, 16, 18, 20, 20, 22, 24) rows
- Section 4: ARMHOLES
Notes: - Work the armholes separately for the back and front panel;
- Both pieces are worked flat; turn after each row.
- work 2ch at the end of each row; finish the row with 1dc into the second st
- the first row will start into the first V-st after the raglan line and will end into the last V-st before the raglan line (considering one single side, back or front)
- From where your yarn is, start working with the back panel.
- This section has the same number of rows for both yarn weights. If needed, you can adjust that; see the HOW TO ADJUST THE PATTERN section.
Back Panel
R1: 2ch, 1V-st into each 2ch-sp except the last one, 1dc into the last V-st. 2ch and turn.
Rep. R1 until you have in total 14 (16, 18, 22, 22, 24, 24, 24) rows
Front Panel
Rejoin yarn into the first 2ch-sp after the second raglan line and start the row.
Rep. the same pattern as for the back panel
PART 2: BODY
- Notes
- Work the body part in the round;
- In the first round, join the front and back panels at the armpit
- first armpit joint: yarn over and insert the hook into the last st of the front pane and then into the first st of the back panel, yarn over and pass it through first 2sts; then finish the dc as usual; then finish the V-st: 2ch and 1dc into the same st
- the last armpit joint: yarn over, insert the hook into the last st of the back panel and then into the base of the 2ch at the beginning of the round; yarn over and pass it through the first 2sts, then finish the dc stitch as usual. Close the round with 2ch and an ss into the second ch.
R1 joining round
2ch, 1V-st into each 2ch-sp, until the last st of the front panel, join (see the explanations above), and 1V-st into each2ch-sp until the end of the back panel’s last st, ss into the second chain. Slip stitch into the first 2ch-sp.
R2: (4ch, 1dc) into the first 2ch-sp, 1V-st into each 2ch-sp, until the end of the round. Close the round with ss into the second chain.
Rep. R2 until you have in total:
DK weight: 25 rounds or until you get to the desired length.
Sport weight: 30 rounds or until you get to the desired end.
Last round before ribbing:
(2ch, 2dc) into the first 2ch-sp, 3dc in each 2ch-sp, until the end of the round. Ss into the second ch.
After finishing the body, move to the RIBBING section.
PART 3: SLEEVES
Notes:
- Skip this part if you want to make a short sleeves version; follow the pattern for the folded version ribbing.
- Work the sleeves into the armhole
- work in the round; close each round with an ss into the second chain and then ss into the first 2ch-sp to start the next round.
- Rejoin yarn at the armpit
when working into the side rows edge, work 1V-st into one side row and skip the next one - work the raglan line sts the same as for the raglan section (fpdc sts) for the entire length (more details in the pattern)
- into the space before and after the raglan line work a V-st
- Work second round, into the same sts/spaces as the first round
R1: (4ch, 1dc) into the same st/space, skip 1side-row, *1Vs-st in next side-row, skip next side row.*rep. until the raglan line, 1fpdc into next 4sts, *1Vs-st in next side-row, skip next side row. *rep. until the end of the round. Close the round with an ss into the second ch; ss to the first 2ch sp.
R2: (4ch, 1dc) in the same 2ch-sp, 1V-st into each 2ch-sp, until the end of the round. Close the round with an ss into the second chain. Slip stitch to the first 2ch-sp.
Rep. R2 until you have in total:
DK weight: 40 (40, 43, 43, 44, 44, 45, 45) rounds
Sport weight: 48 (48, 50, 50, 52, 52, 53, 53) round
Next round: (2ch, 2dc) into the first 2ch-sp, 3dc in each 2ch-sp, until the end of the round. Ss into the second ch.
Last 3 rounds before cuff ribbing (optional):
1sc in next 4 sts, sc2tog in next 2. Rep until the end of the round
1sc in next 3 sts, sc2tog in next 2. Rep until the end of the round
1sc in next 2 sts, sc2tog in next 2. Rep until the end of the round
RIBBING
Use the 4.5 mm crochet hook
Version 1: single ribbing (not folded)
Start: 8ch
R1: start into the second st, 1sc into the next 7sts, 1ss into the next 2sts of the edge, turn
R2: 1scblo in next 6sts, 1sc into the last st, 1ch and turn
R3: 1sc in the first st, 1sc blo into the next 6sts, 1ss into the next 2sts of the edge. Turn.
Rep. R2 and R3 until you complete the circumference of the body/sleeve.
Join the ends of the ribbing using slip stitches.
Version 2: folded ribbing
*for the sleeves, work one round in sc before starting the ribbing; work 2sc into each 2ch side-row edge and 3sc in each dc side-row edge.
Start: 15ch
Rep. the same pattern as for single ribbing (with the number of sts we have now)
Next: folding the ribbing.
Step 1: with your work on the right side, fold the ribbing inside
Step 2: with the working yarn under your work, insert the hook into the st at the last round of the body/sleeve, before ribbing, and then into the corespondent side-row edge, yarn over, and pull out a loop (through both sides);
Step 3: Insert the hook into the next st and repeat Step 2, then pass the first loop through the second loop (like a slip stitch)
Rep. Step 2 and 3 until you complete the entire circumference of the body/sleeves
TO FINISH
Weave in all looser ends and block to measurements.
And, Done! Phew! I wrote quite a lot 🙂
I hope you like it and you will try it because it’s easier than it looks 🙂
The PDF version of this pattern includes stitch charts, photos, and more information about how you can adjust this pattern to your measurements. You can Purchase the easily printable PDF pattern here:



3 Comments
On the diagrams of the sweaters where you’ve labelled measurements a through f, I believe you have an error on the blue sweater. The total length is marked as “e” but should be “f”. Thanks!
Hi! Thank you for your message. I will have that changed.
Beautiful knits! Thanks for sharing!
xoxo
Lovely
http://www.mynameislovely.com