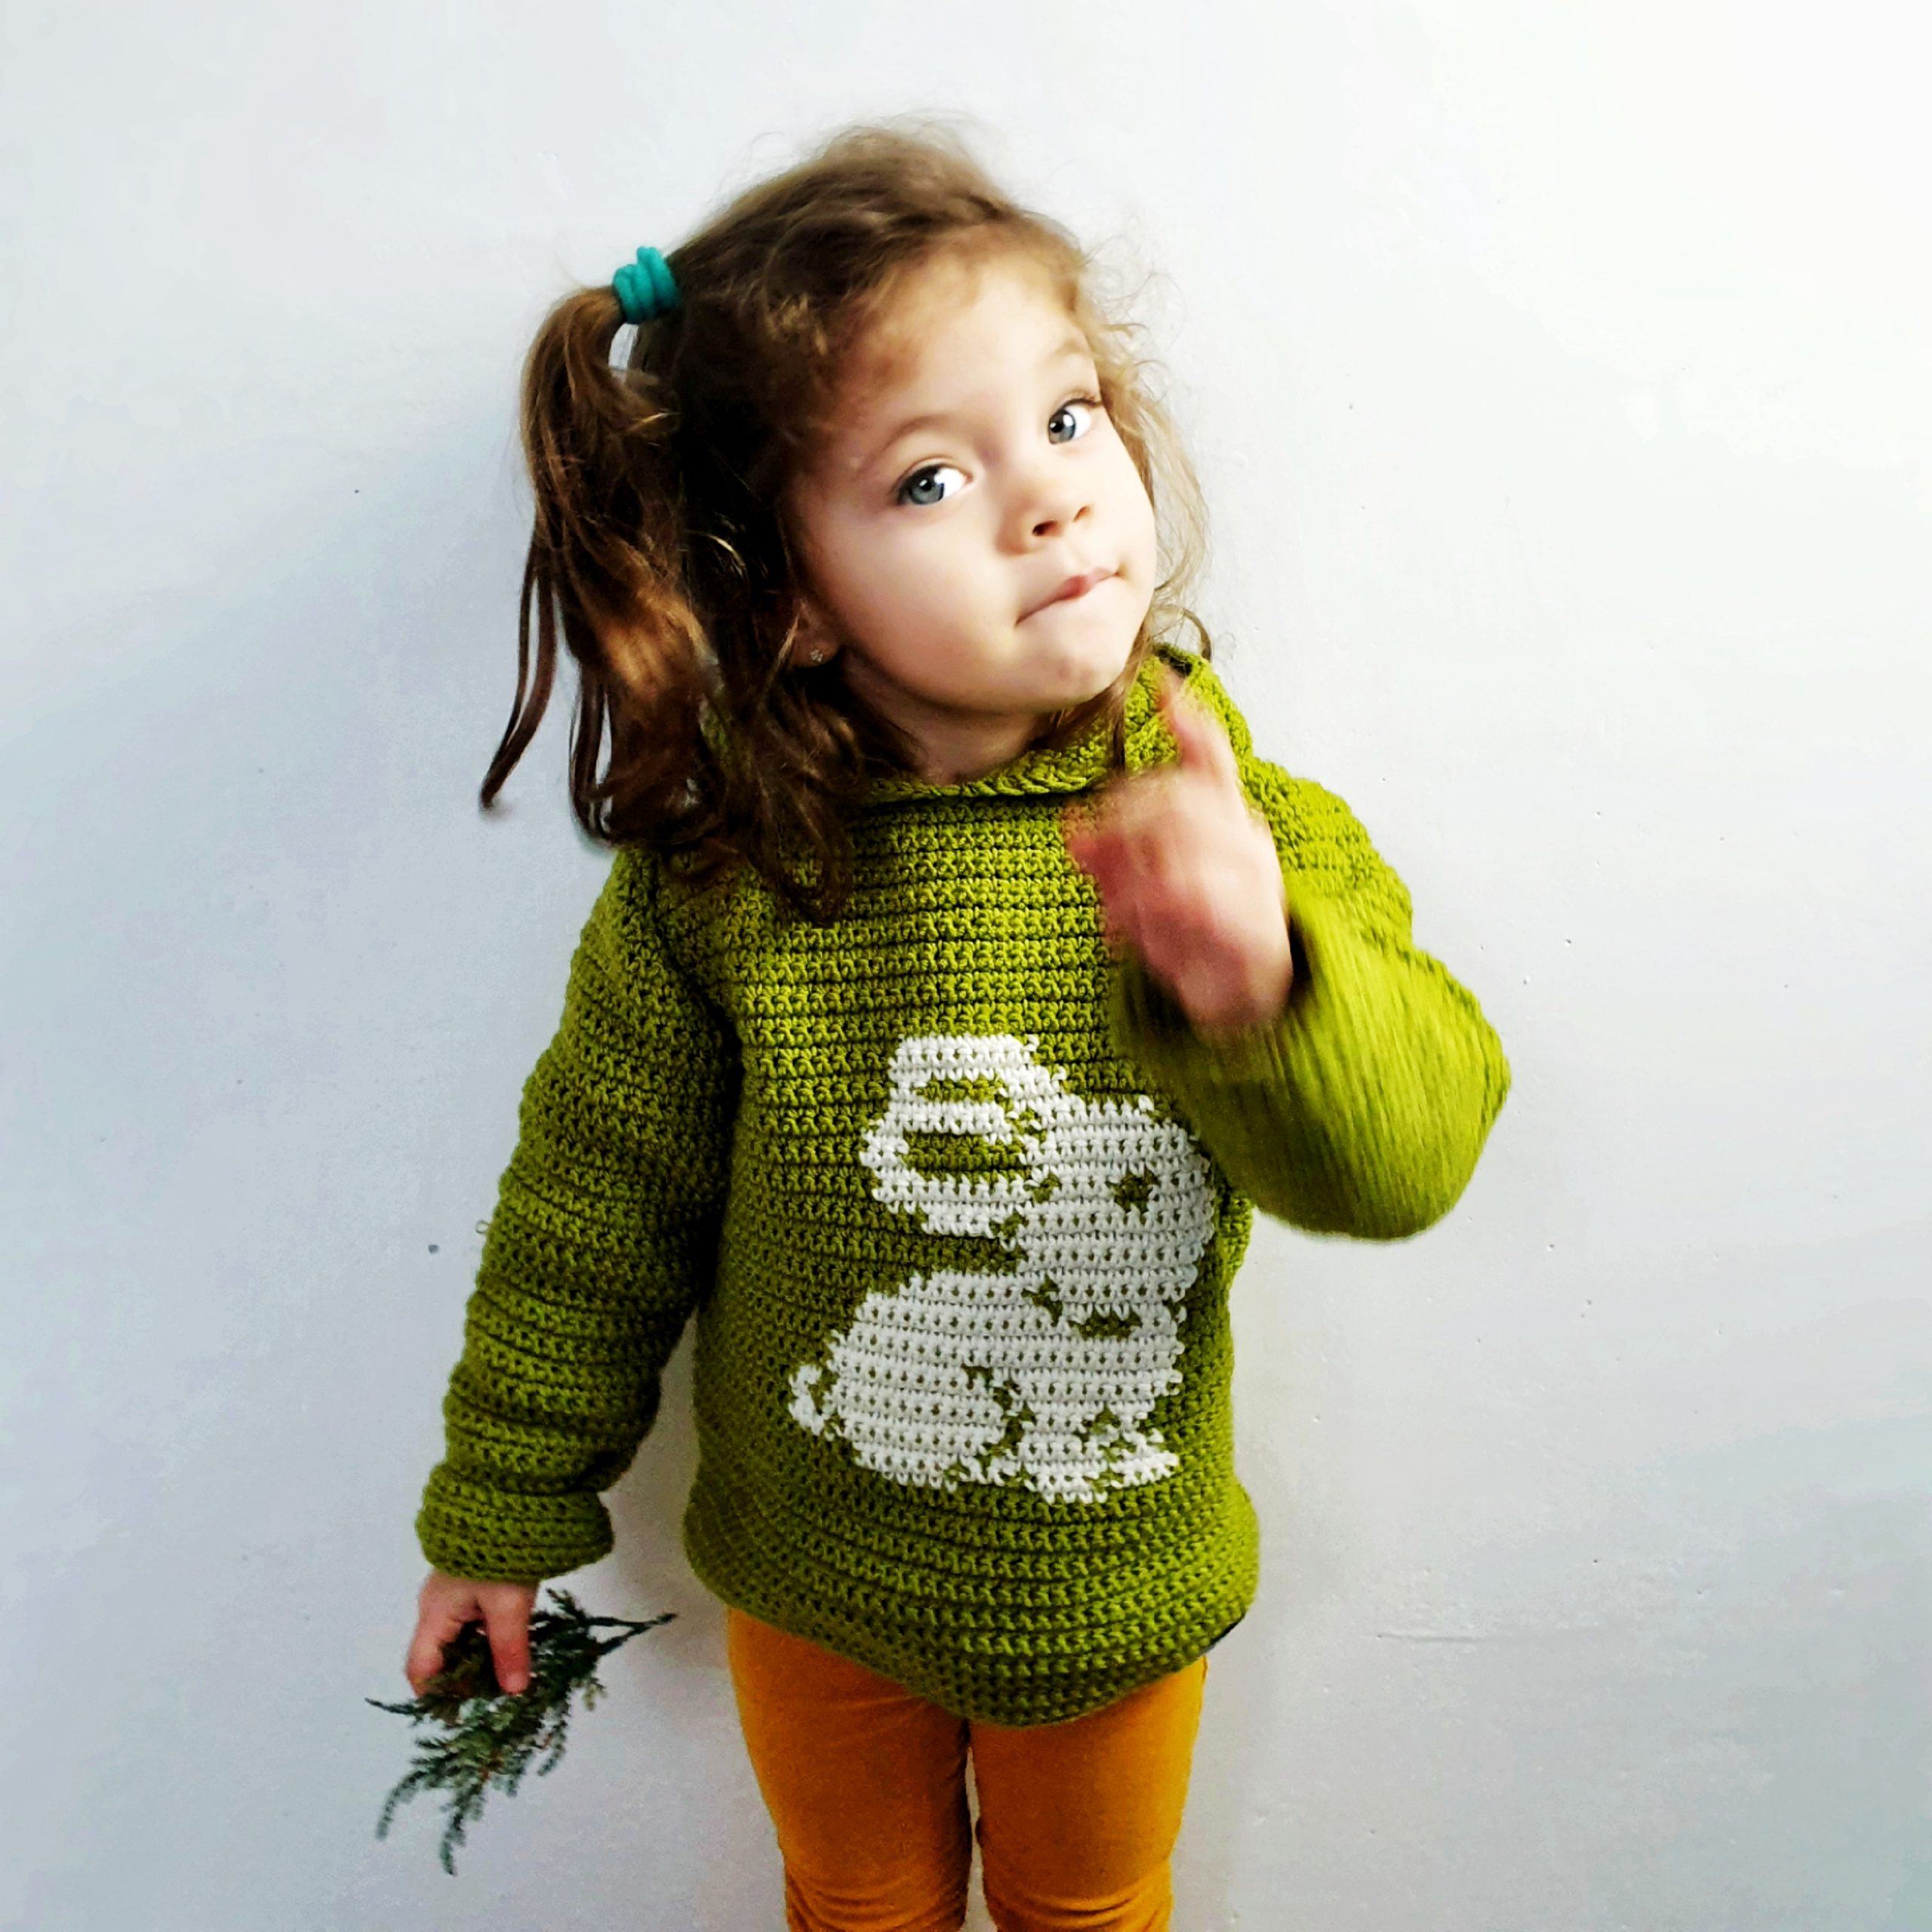
Lately I started to remake some of my oldest patterns and I am so happy with this because some of them are really beautiful. Today I will share with you the Bunny Sweater which I love it so much.
This time I decided to make another sweater for this remake, because the first I made was for size 2Y and my daughter grew in the mean time and I gave it away because it was too small for her.

You can Purchase the easy printable PDF version of this pattern here:
This Sweater was the first garment piece I made as a designer and basically was the one that convinced me that I am pretty good at this 🙂
If you already purchased the older version of this pattern, please send me an e-mail at contact@by-katerina.com and I will send you the updated version
This time the pattern is available in 5 sizes, from 2 years old up to 10 years old and has also a video tutorial.
Materials you will need
- Yarn
- Category 3, DK weigh Yarn
- Needle
4 mm crochet hook (US G size)
- You will need a yarn needle for assembling and to hide the ends
- Scissors
Pattern notes
This Bunny Sweater has a classic construction. We will work 4 panels: Back, front and sleeves. After assembling we will add a hood.
Back and front panels have almost the same pattern, considering the number of stitches and rows, but on the front panel we will work a bunny in a contrasting color using tapestry crochet technique.
The pattern is available in 5 sizes, from 2 Y up to 10 Y old.
For reference my daughter has 3 years and 9 months and she is wearing size 4 Y.
Final measurements
The Bunny sweater has a positive ease of 5 to 6 cm. If your child is between sizes you can use the table below to choose the proper size to make.

Final measurements for each panel are:

Cross Back a: 24 cm (25, 26, 27, 29)
Bust Width b: 33 cm (35, 38, 40, 42)
Length to Armpit c: 22 cm (23, 26, 29, 31)
Armhole depth d: 12 cm (14, 15, 16, 18)
Neck Line e: 12 cm (13, 14, 15, 16)
Upper arm f: 27 cm (28, 31, 32, 32)
Sleeve Length to Armpit g: 22 cm (27, 30, 32, 35)
How much yarn do you need?
For this pattern I used Stylecraft Belissima, which is a 100% Premium Acrylic Yarn. Each Skein has 100 grams and approximate 286 meters. For the bunny I used some left over yarn in color white of the same weight. You will need for the bunny less of half a skein.
For each size you will approximate need:

About the stitch pattern.
All panels of this Bunny Sweater are worked in single crochet
Abbreviations used in this pattern
- Ch – chain
- sc – Double Crochet
- St(s) – stitch(es)
- Dec – Decrease (sc2tog – insert the hook in the next st and pull out a loop, insert the hook in the second st and pull out a loop, yarn over and pull the yarn through all loops on your hook)
- Inc – increase (2 sc in the same st)
Gauge
- 15 sc – 10 cm (4”)
- 18 rows sc – 10 cm (4”)

You can Purchase the easy printable PDF version of this pattern here:
Pattern
Pattern Notes
Ch 1 at the beginning of each row doesn’t count as first sc
Change the color with 2 loops on your hook from the last stitch.
When working at the bunny carry on the second yarn, but only for the bunny sts.
Always keep the yarn strands on the wrong side of your work.
Back Panel
Start with the foundation ch.
- 2Y – 50 sts
- 4Y – 52 sts
- 6Y – 58 sts
- 8Y – 60 sts
- 10Y – 64 sts
Row 1
Ch 1 more, and starting with the second st, 1 sc in each to the end of the row. Ch 1 and turn.
Repeat row 1 until you have in total:
- 2Y – 43 rows
- 4Y – 42 rows
- 6Y – 47 rows
- 8Y – 54 rows
- 10 Y – 58 rows
If you want the sweater to me longer you can make more rows on this section.
Next, we will start shaping the armholes. To do this we will decrease with 1 sc at the beginning and at the end of the row.
*the numbers for sizes, 4Y, 6Y, 8Y and 10Y are written between brackets.
Row 44 (43, 48, 55, 59)
1 dec (sc 2 tog), 1 sc in each st until you have 2 sts left, 1 dec. Ch 1 and turn
Repeat previous row for:
- 2Y – 7 rows ( 50 rows after finish dec)
- 4Y – 7 rows ( 49 rows)
- 6Y – 8 rows ( 55 rows)
- 8Y – 8 rows ( 62 rows)
- 10Y – 8 rows ( 66 rows)
Next, we will continue to work 1 sc in each st, without dec for:
- 2Y – 15 more rows
- 4Y – 19 more rows
- 6Y – 18 more rows
- 8Y – 19 more rows
- 10Y – 22 more rows
In the end you will have in total
- 2Y – 65 rows
- 4Y – 68 rows
- 6Y – 73 rows
- 8Y – 81 rows
- 10Y – 88 rows
Fasten off.

Front panel
For the front panel we will follow the same pattern as for the back panel. This time we will have to use the Bunny chart to insert the bunny.
You have to read the chart from right to left when working on the right side and from left to right when working on the wrong side.
Each square from the chart represent 1 stitch and 1 row.
The chart has 30 sts/30 rows
To center the bunny, count the total numbers of rows that you have for the back panel, decrease 30 sts for the bunny. Divide the result by 2 to know how many rows you will have to make before and after the bunny:
- 2Y – 18 rows before bunny, 17 rows after
- 4Y – 19 rows before, 19 rows after
- 6Y – 22 rows before, 21 after
- 8Y – 26 rows before, 25 after
- 10Y – 29 rows before, 29 after
Now that you know how many rows to make before the bunny you have to start the front panel with the same number of sts as the back panel and do these rows.
Next, we will have to calculate how many sts we have before and after the bunny.
Count the number of sts, decrease 30 and divide the result by 2. This is the number of sts that you should have before and after the bunny.
- 2Y – 10 sts before and after
- 4Y – 11 sts before and after
- 6Y – 14 sts before and after
- 8Y – 15 sts before and after
- 10Y – 17 sts before and after

Use some st markers to mark the 30 sts for the bunny to know where you will start following the chart.
Next you will have to follow the chart to make the color work.
You can follow the link below for the video of the sweater to help you out.
Also, follow the pattern for the back, for the armhole shaping.
The last 2 rows of the front panel will be worked only in the sts for the shoulder letting the neck line apart.
- 2Y – 7 sts on right and left
- 4Y – 7 sts
- 6Y – 7 sts
- 8Y – 6 sts
- 10Y – 7 sts
Fasten off
Sleeves
Make 2
Foundation
- 2Y – 26 sts
- 4Y – 28 sts
- 6Y – 30 sts
- 8Y – 32 sts
- 10Y – 32 sts
To get to the upper arm width we will have to increase. On the row with increase, you will increase with 1 sc at the beginning of the row and 1 at the end.
Sleeve length to armpit
*numbers for sizes 4Y, 6Y, 8Y and 10 Y are written between brackets
Rows 1 – 4 (1-5, 1-5, 1-6, 1-6)
1 sc in each st. Ch 1 and turn
Row 5 (6, 6, 7, 7)
1 inc (2 sc in the same st), 1 sc in each st to the last one, 1 inc in the last st. ch 1 and turn
Repeat rows 1 to 5 (1 to 6, 1 to 6, 1 to 7, 1 50 7) :
- 2Y – 7 times (35 rows)
- 4Y – 7 times (42 rows)
- 6Y – 8 times (48 rows)
- 8Y – 8 times (56 rows)
- 10Y – 8 times (56 rows)
Next, to get to the sleeve length to the armpit we will continue with a few more rows without increasing.
- 2Y – 4 more rows
- 4Y – 6 more rows
- 6Y – 6 more rows
- 8Y – 1 more row
- 10Y – 7 more rows
Next, we will start decreasing with 1 st at the beginning and 1 at the end of the row:
- 2Y – 14 rows
- 4Y – 16 rows
- 6Y – 17 rows
- 8Y – 18 rows
- 10Y – 20 rows
At the end of the sleeve you will have in total:
- 2Y – 53 rows and 12 sts left
- 4Y – 64 rows and 10 sts left
- 6Y – 71 rows and 12 sts left
- 8Y – 75 rows and 12 sts left
- 10Y – 83 rows and 8 sts left
Fasten off.
Repeat the pattern for the second sleeve.
Assembling
First we will assemble back and front panel. Using a tapestry needle sew the shoulders and then the sides.
Next sew the sleeves.
Hood
Point the 2 sts in the middle of the neck line.
The one in the left will be the first st of the hood and the one in the right the last st.
Row 1
1 sc in each st, ch 1 and turn
Repeat row 1 until you have in total:
- 2Y – 33 rows
- 4Y – 34 rows
- 6Y – 37 rows
- 8Y – 41 rows
- 10Y – 44 rows
Fasten off.
Next, count the total number of sts and mark 8 sts in the middle.
Join the yarn in the first st of the 8. Make 1 sc in each of the 8 th sts, in the next 2 sts make 2 slip stitches and turn.
Skip the 2 sl sts and make 1 sc in each of the next 8 sc, 2 sl st in the next 2.
Continue like this until you don’t have any sts left on the right and left.

You can Purchase the easy printable PDF version of this pattern here:
Fasten off
To finish
Add 1 more row in single crochet to the hood edge and wave in all ends.
And done!
You can also find a video tutorial for this cute Bunny Sweater here (click the photo below)


2 Comments
Love, love your pattern!
Thanks!! So happy you love it!