Tag

crochet

Browsing

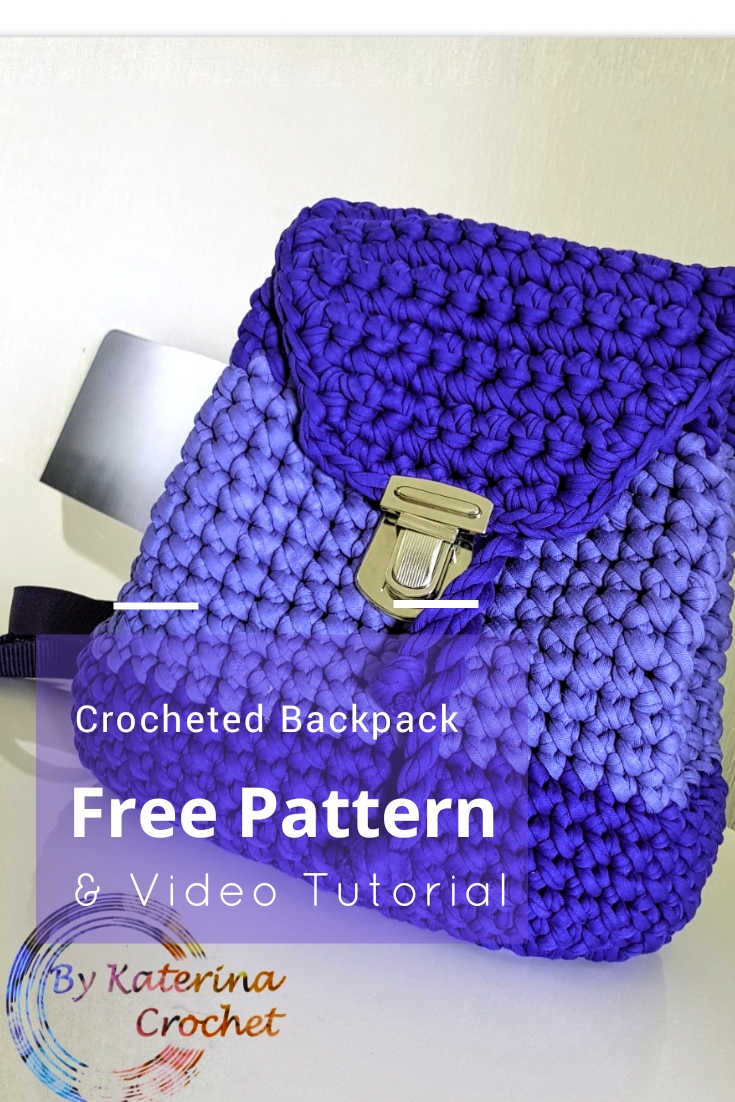
I haven’t made bags or backpacks for so long, but my friend ask me to make her one crocheted backpack and I couldn’t say no. So, here I am with the tutorial and the pattern.

Is easy and fast and also in fashion, so maybe you will want to give it a try.

Pentru postarea in limba romana, click aici
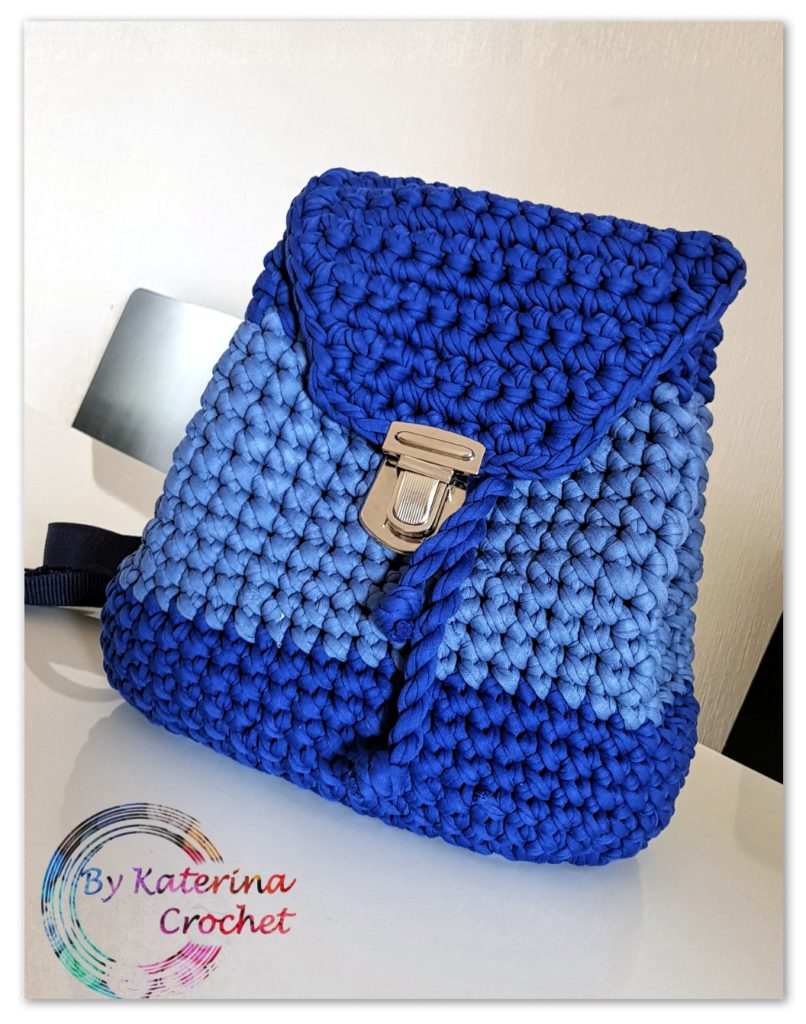
crocheted backpack

You can purchase the easy printable pdf version of this pattern here.

Materials you will need

  • I used t-shirt yarn from Hoooked (Hoooked Zpagetti) but you will find some yarn substitute here.

You can try using more strands of yarn just to get to the thickness.

  • 8 mm crochet hook ( L – 11)
  • 3 D rings (2.5 cm)
  • 1 backpack closure
  • bag band (optional if you don’t want to crochet the straps)

If you use a band like I did you will need some press buttons so you don’t have to sew the straps on edges.

Abbreviations used in this pattern

  • Ch – chain
  • Sc – single crochet
  • St(s) – stitch(es)
  • Sl st – slip stitch
  • Inc – increase (2 sc in the same st)

We will begin with an oval base. So we will work in rounds making an oval.

Begin with a chain of 10 stitches.

Round 1

Beginning with second st, 1 sc in the next 8 sts ( until you have 1 st left), 3 sc in the last st ( mark the first and the last st), turn on the other side of the ch, 1 sc in the next 8 sts, 3 sc in the next (and the last st of the row), Sl st with the 1st sc.

Round 2

Ch 1, [1 sc in the next 8 sts, 1 inc in the next 3 sts] repeat this section on the other side of the chain. Sl st.

Round 3

Ch 1, [1 sc in the next 8 sts, (1 inc, 1 sc in next st) 3 times] repeat the section on the other side of the chain. Sl st

Round 4

Ch 1, [1 sc in the next 8 sts, (1 inc, 1 sc in next st) 4 times] repeat the section on the other side of the chain. Sl st

Round 5

Ch 1, [1 sc in the next 8 sts, (1 inc, 1 sc in next st) 5 times] repeat the section on the other side of the chain. Sl st

The base of the backpack is done.

Rounds 6 – 23 (or until you get to the desired high of your backpack )

Ch 1, 1 sc in each st around, sl st.

Fasten off.

Backpack flap

Fold the top of the backpack with the sides edges in the interior. On the back side mark the second stitch and the stitch before the last one. This will be the length of your back pack flap.

Row 1

Insert the hook and begin to make 1 sc in each st. Ch 1 and turn.

If you want a flap with straight edges repeat 1st row until you get to the desired length of the flap.

If you want a flap with round edges you will have to decrease and to follow the rest of the pattern.

Rows 2 – 5

Repeat row 1

Row 6 – until you get to the desired length of the flap

Decrease with 1 st at the beginning of the row (skip the first st) then continue with 1 sc in each st to the end of the row.

Make an edge in sc

After finishing the flap the crocheted backpack is done. Attach the backpack closure, the D rings and the straps and done. If you want you can put a linen but is not mandatory.

crocheted backpack

You can purchase the easy printable pdf version of this pattern here.


I found it very easy to make this crocheted backpack, even for a beginner, so I hope you will try it.

Bellow you will find the video tutorial too.

The crocheted backpack was this week pattern. If you liked it save it for later.
 

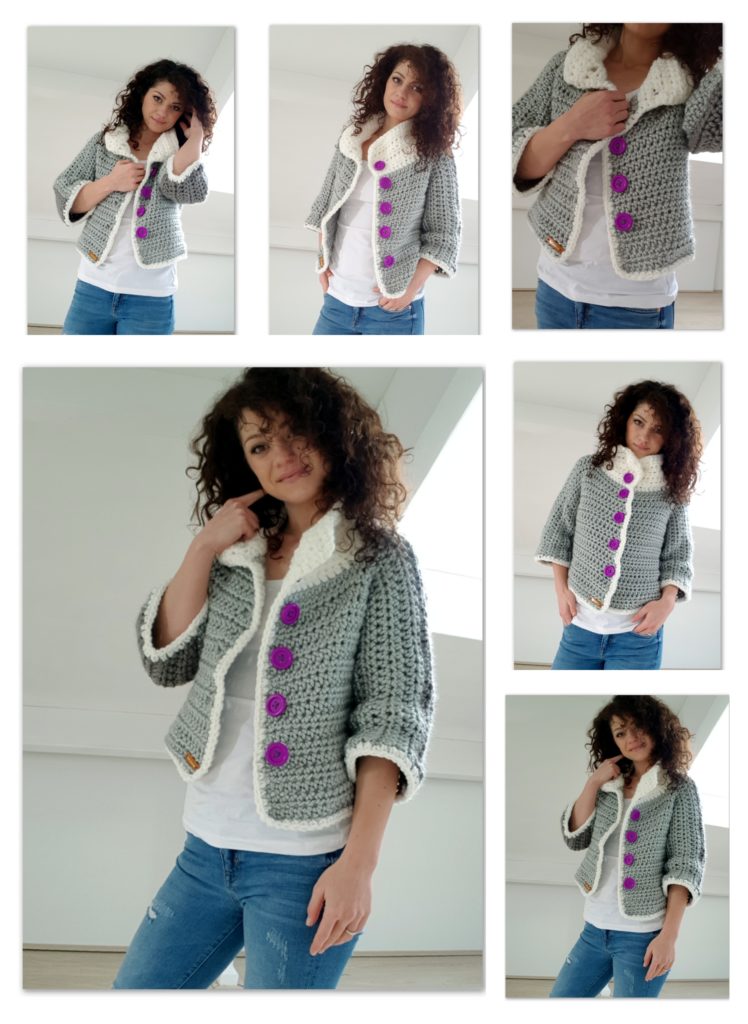
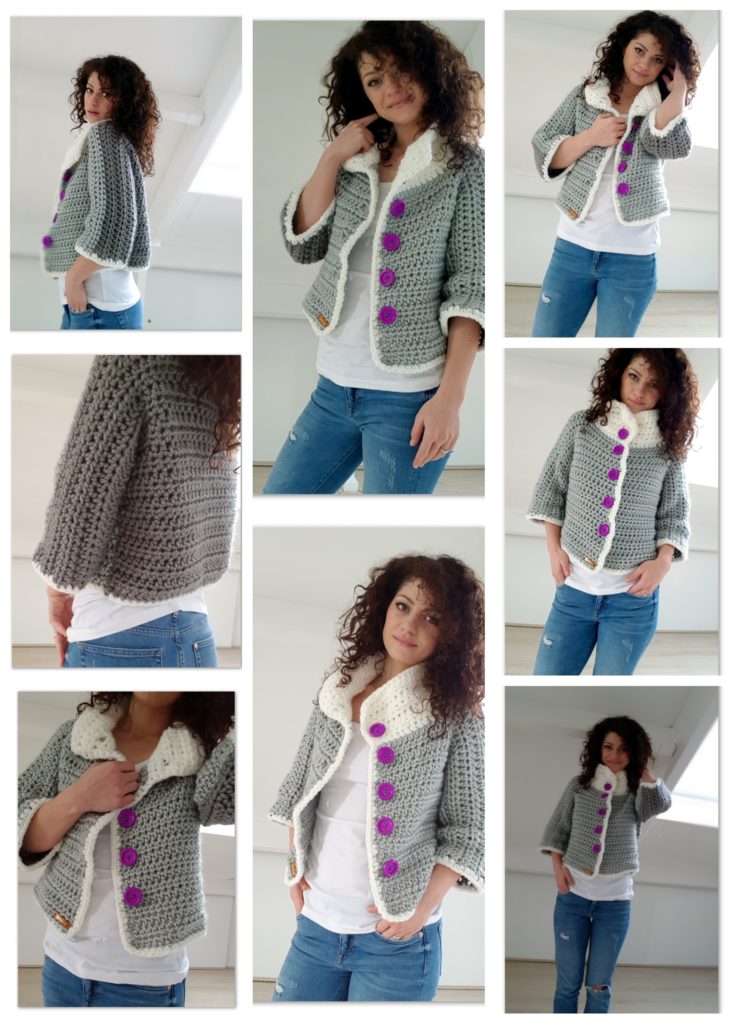
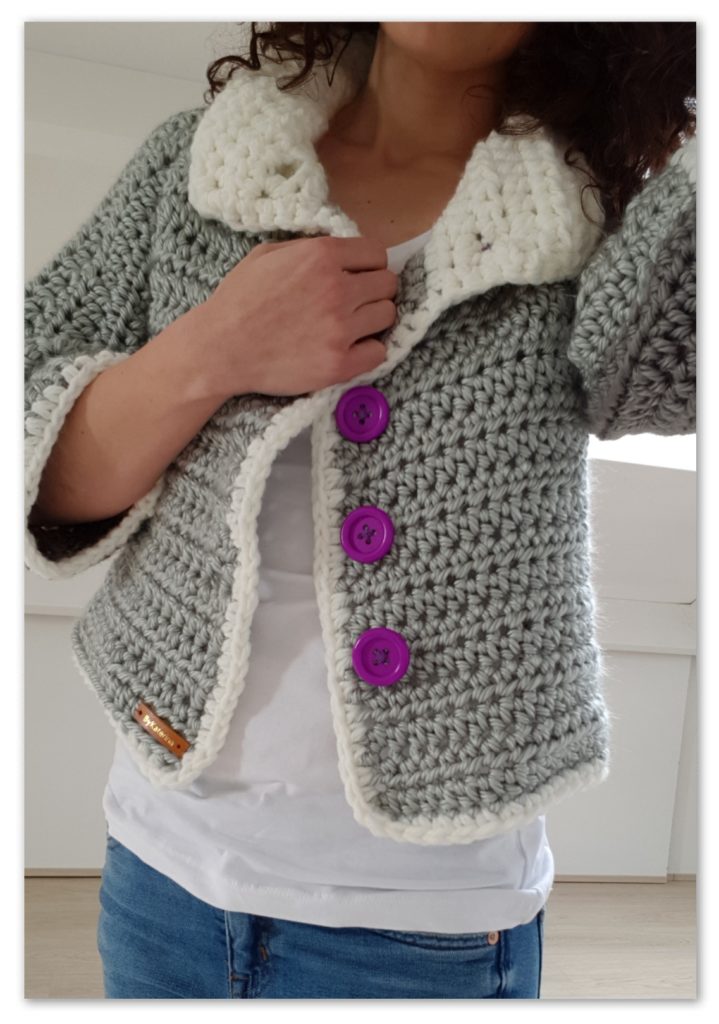
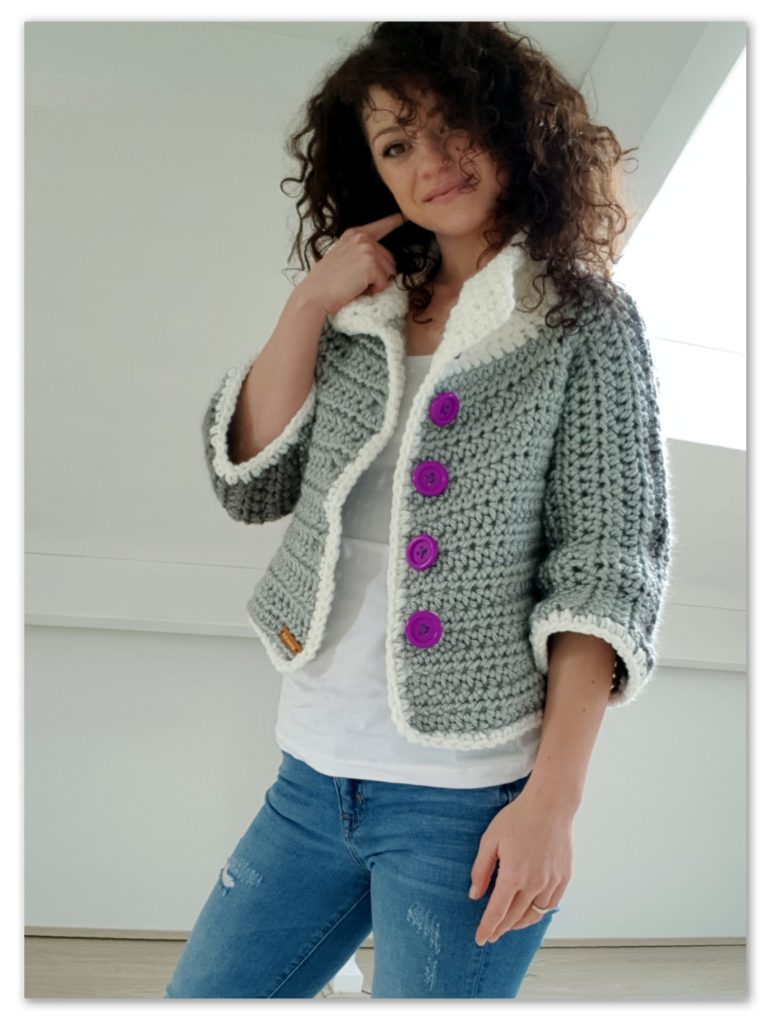
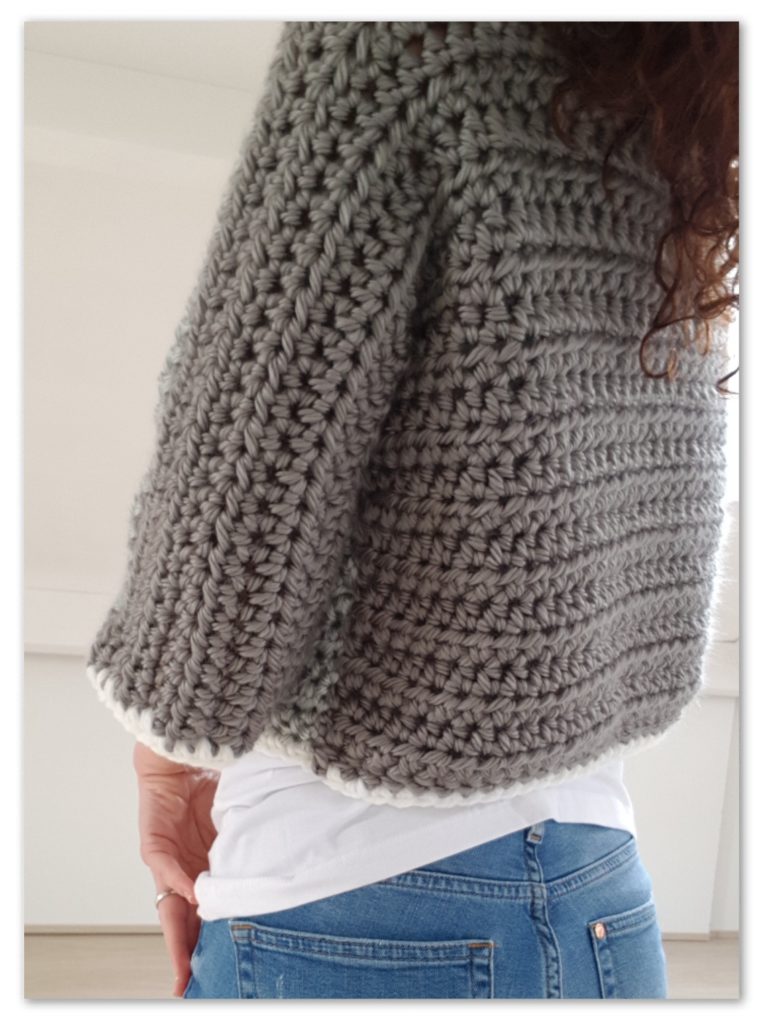
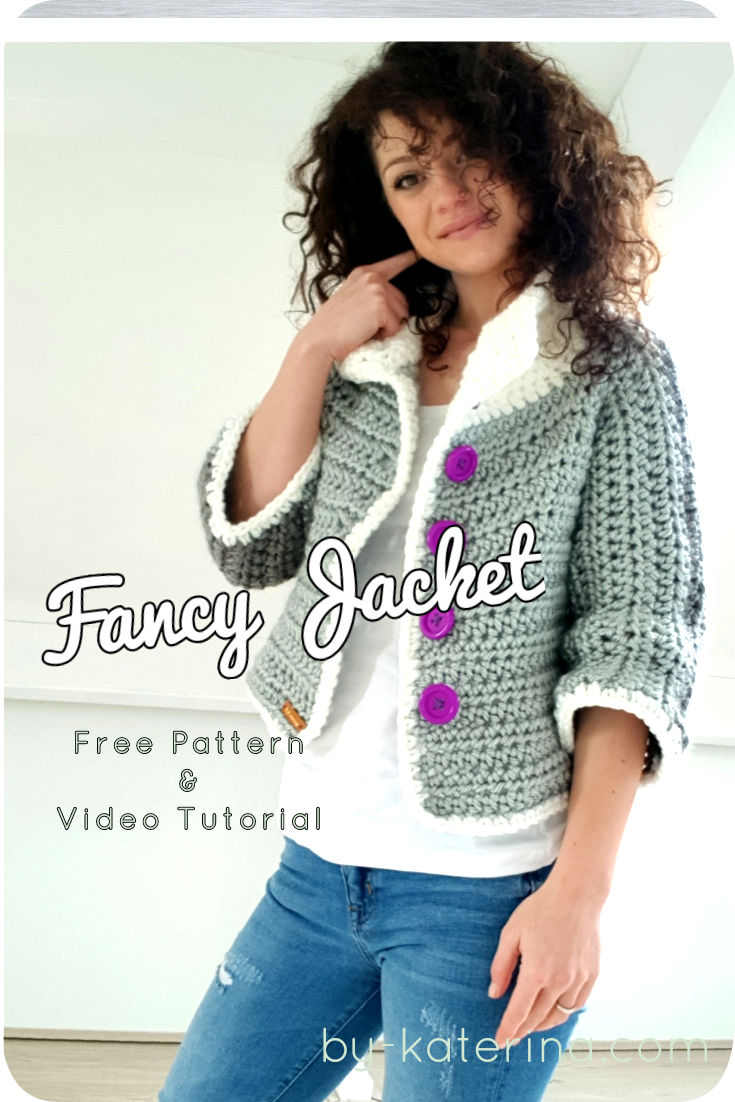
Today I am about to show you how you can make this pretty cool Fancy Jacket. You will see how easy and fast you can make a jacket that you will love it.

Pentru postarea in limba romana, click aici

Fancy Jacket

You can purchase the easy printable pdf version of this pattern here.

This Fancy Jacket wasn’t in my plan. I always keep some backup projects on hand just in case I am stuck with a current project. This Jacket was one of my backups.

I realise that it might be a great pattern almost when I finished the back side and here where I was thinking to put the camera on and make a video. Then the name Fancy Jacket came in my head because is almost the same technique as for the Fancy Sweater.

Ok, now let’s see how you can make this Jacket.

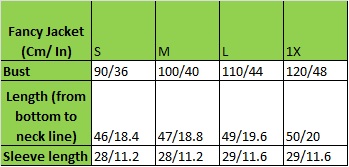
First, this pattern is for sizes from S to XL. The final dimensions for it are:

final dimensions fancy jacket

For this Fancy Jacket I used Super Bulky weight yarn ( Katia Artico) and a 10 mm crochet hook (N/P – 15 US hook size).

If you want you can use 2 strands of chunky yarn as well but you will have to verify your gauge.

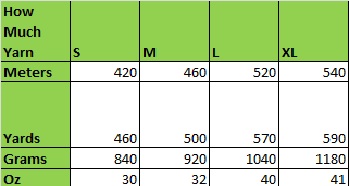
Here is how much yarn you will need for each size.

yarn needed fancy jacket

You will also need:

  • 5 buttons ( 2.5 Cm diameter)
  • yarn sewing needle
  • scissors

Gauge

7 Half double crochet = 10 cm (4″)

5 Rows = 10 cm (4″)

Fancy Jacket

You can purchase the easy printable pdf version of this pattern here.

Abbreviations used in this pattern:

  • Ch – chain
  • Hdc – Half double crochet
  • St(s) – stitch(es)
  • FHDC – foundation half double crochet

I used 2 different colors of grey and white for collar, but this was not the idea at first. I just didn’t have enough yarn in the same color and for a backup project I said that will do just fine working the back and front with different colors. ?

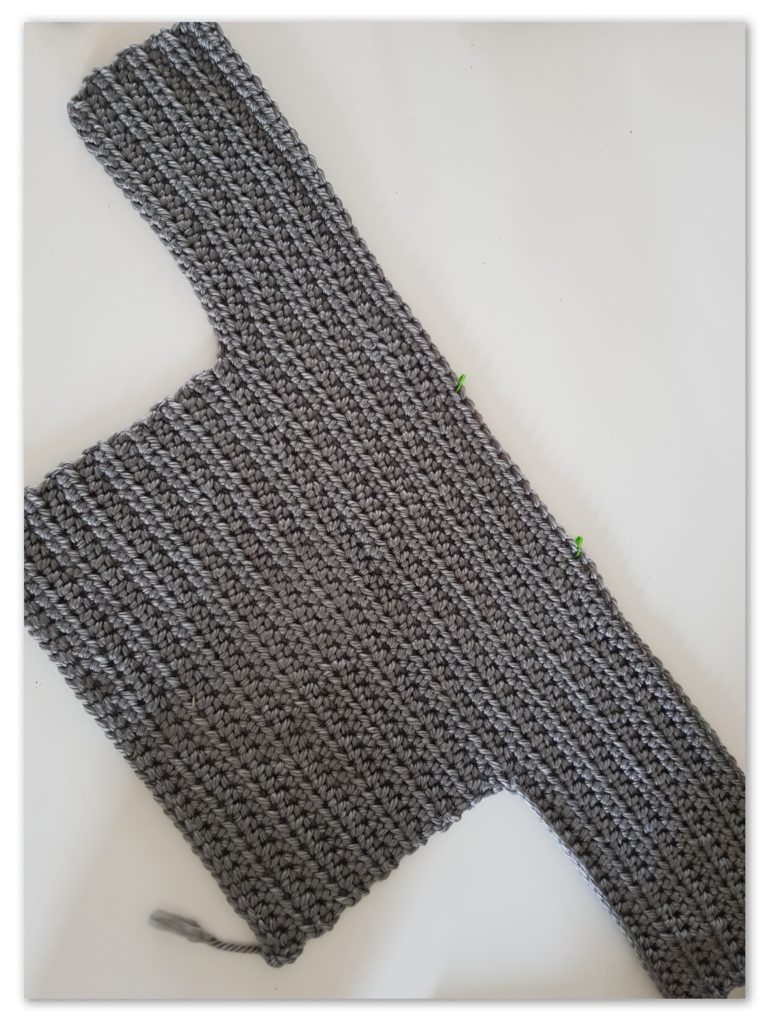
We will work this Fancy Jacket from back panel bottom, then we will continue with the sleeves. After we will finish the back panel we will continue with front panels.

To begin, start making your foundation. I made the foundation half double crochet but you can also make a regular chain, then 1 row in half double crochet.

  • S – 32 FHDC ( or 32 ch st(s))
  • M – 35 FHDC
  • L – 39 FHDC
  • XL – 42 FHDC

for all sizes

Rows 1 – 14

1 hdc in each st across

At the end of row 14 we will chain extra st(es) for sleeve:

  • S – ch 20
  • M – Ch 20
  • L – Ch 21
  • XL – Ch 21

Row 15

1 hdc in each st, also in the extra chain st(s) made for the sleeve. At the end of row 15, chain the extra stitches for the other sleeve. From row 16 we will work 1 hdc in each stitch untill we finish the back panel.

  • S – rows 16 – 24 (9 more rows)
  • M – rows 16 – 25 (10 more rows)
  • L – rows 16 – 26 ( 11 more rows)
  • XL – rows 16 – 26 ( 11 more rows)

We just finished the back panel.

fancy jacket back panel

Now is time to mark the stitches for the neck line.

Count the stitches beginning with the sleeve end.

  • S – 29 st(s) on each side. Put a stitch marker in stitch 29.
  • M – 30 st(s)
  • L – 33 st(s)
  • XL – 34 st(s)

Now we will continue to work the front right panel.

We are with the yarn at the end of the sleeve and we will begin the front side panel from here.

For all sizes

Rows 1 – 3

1 hdc in each stitch, until the marked stitch (until the neck line)

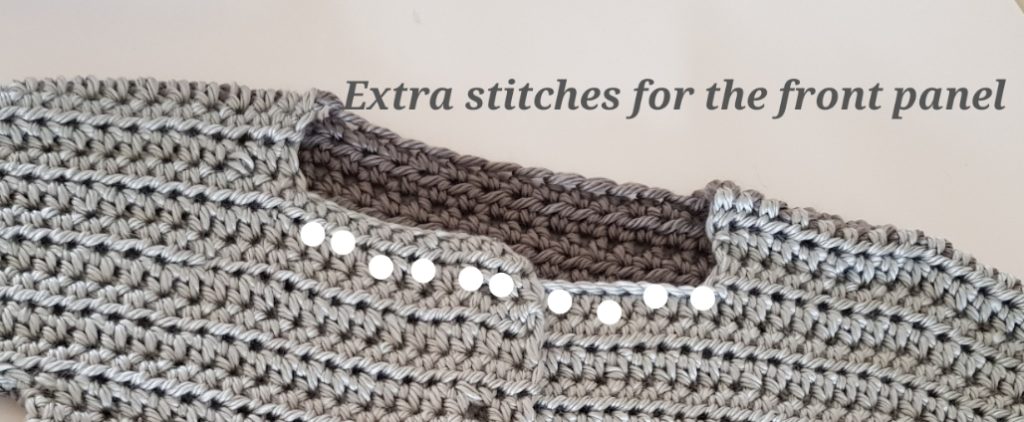
At the end of row 3 we will chain some extra stitches to get to the middle of the back side with the edge of the front panel.

fancy jacket

S, M, L- 11 extra st(s)

XL – 12 extra st(s)

Turn and continue working 1 hdc in each stitch until you finish the front side panel sleeve. We will make the same number of rows as we made for the sleeve on the back side panel.

  • S – Rows 4 – 10
  • M – Rows 4 – 11
  • L- Rows 4 – 12
  • XL – Rows 4 – 12

We are working on the right front panel, so beginning with the end of row 5 we will make the button holes, 1 at every 3 rows. When you have 3 st(s) left, ch 1, skip 1 st, 2 hdc in the last 2 st(s).

After finishing the sleeve we will have to skip the stitches for sleeve and continue working the front side panel only from armpit to bottom without the sleeve.

 Row 11 (S) (12 (M), 13 (L), 13 (XL)

Slip st 21 sts ( 21, 22, 22) ch 1, 1 hdc in the same stitch, 1 hdc in each stitch to the end of the row.

Row 13 (S) (13(M), 14 (L), 14 (XL)

1 hdc in each stitch across

 Rows 14 – 25 ( 14 – 25, 15 – 25, 15 – 26)

Repeat row 13.

Remember that at every 3 rows you will have to make the button holes. I made 4 in total.

We just finished the right side front panel.

For the left side.

For all sizes

Begin with the marked stitch at the neck line. Make one row until the end of the sleeve.

From here you will follow the same pattern as for the other side without the button holes.

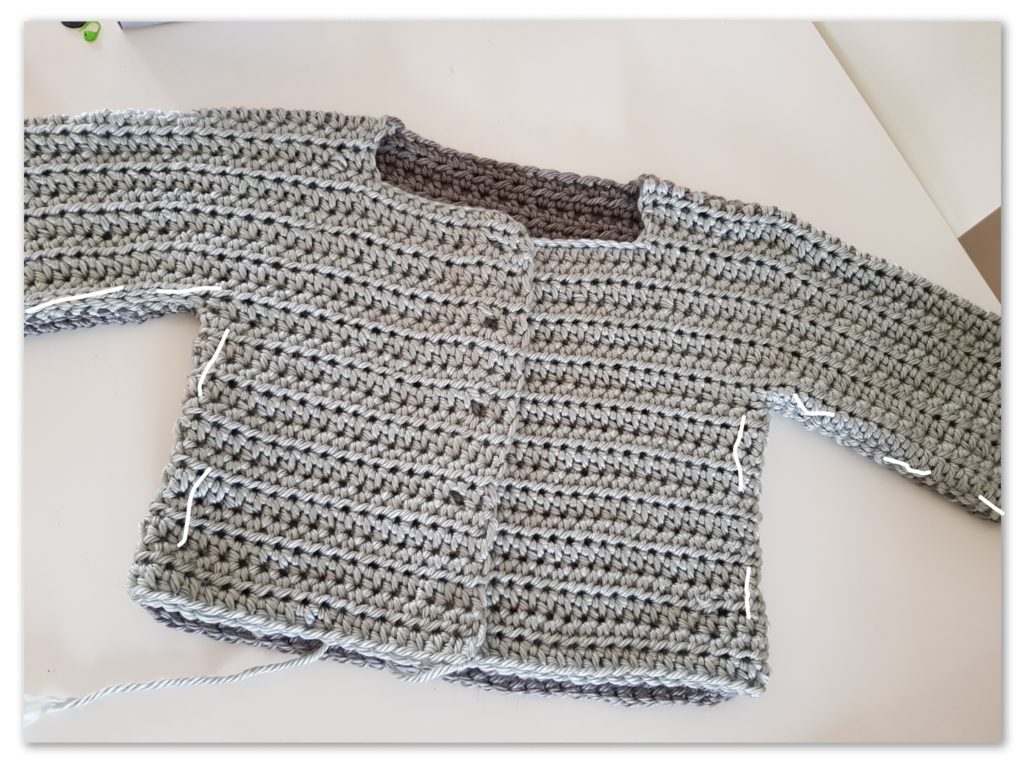
fancy jacket front sides panels

Sew the edges and the Fancy Jacket is almost done.

We only have the collar.

Collar

Insert yarn and hook in the first stitch of the right side front panel and make 1 hdc in each stitch across the neck line.

Repeat this row 6 more times to have 7 rows in total or until you get to the desired high of the collar. At the end of row 2 make 1 more button hole.

Then if you want you can add an edge in single crochet.

And this is the Fancy Jacket.

Fancy Jacket

You can purchase the easy printable pdf version of this pattern here.

fancy jacket

Hope you liked it.

Bellow you will find the video tutorial.

Follow me on Pinterest where I will add 1 new pattern every week.

https://ro.pinterest.com/katerina6795/free-crochet-patterns/

Enjoy crochet and save this pattern for later.

You can purchase the easy printable pdf version of this pattern here

Fancy Jacket. Free Crochet Pattern & Video Tutorial


In this post I’m gone show you 4 simple methods on how to change colors in crochet.

I’m sure that each of you already have your own method and maybe is one of these 4, but if you looking for a new method or want to find out how you can do this in other way, this is for you.

Pentru postarea in limba romana, click aici

how to change colors in crochet

All 4 methods have something in common, you change the color at the end of the row when you want to work with different colors for the entire row. When you want to change the color in the middle of the row is a different discussion and we will talk about this in this post too.

Method 1 

You finished the row and made your last stitch (in this tutorial I made double crochet but it work with any stitch). You don’t have to finish the stitch, let 2 loops on your hook. Then grab your yarn in the other color and pull a loop trough the 2 loops on your hook, finishing the last stitch with the new color you want to continue. Then just continue with the turning chain and working your stitches as usual.

how to change colors method 1

Method 2

This is pretty similar with the first one, only that before you pull a loop with the new color, first we make a slip knot.

how to change colors method 2

Pull out the loop trough without the slip knot.

how to change colors method 2

Method 3

This time you will finish the last stitch and pull the loop on your hook to make it a little bigger. Then take the other color yarn, insert it trough the loop and make a knot.

How to change colors method 3

Then insert the hook trough the loop, pull the yarn and make it smaller and with the new color yarn pull trough the loop. Then continue working as usual.

how to change colors method 3

Method 4

Well, this time finish the last stitch and fasten off.

how to change colors method 4

Now, insert the hook in the last stitch, grab your new color yarn, pull out the yarn trough the stitch and make a knot.

how to change colors method 4

Insert the hook in the stitch again and with the new color yarn pull out a loop, then continue working as usual.

how to change colors method 4

These are the 4 method to change colors in crochet that I had for you today. Which one works for you?

Now let’s see how we change colors in the middle of the row.

When you want to change the color in the middle of the row, let the last stitch made with the first color unfinished (keep 2 loops on your hook).

how to change colors in the middle of the row

Then grab your new yarn and pull it trough the 2 loops on your hook, finishing the stitch with the new color yarn.

how to change colors in the middle of the row

And continue working as usual.

You can carry on the other yarn color, kipping it on the top of the stitches and work the stitches over it. In this way you have the other color on your hand when you need to switch again.

Hope this post will help, even if you are a beginner or not. Bellow you will find a short video tutorial in which I am showing you the 4 methods on how you change colors in crochet.

Follow me on Pinterest to find out more tips & tricks every week.

https://ro.pinterest.com/katerina6795/crochet-tipstricks/

Enjoy crochet and save this post for later.

how to change colors in crochet