Tag

Crochetaddict

Browsing

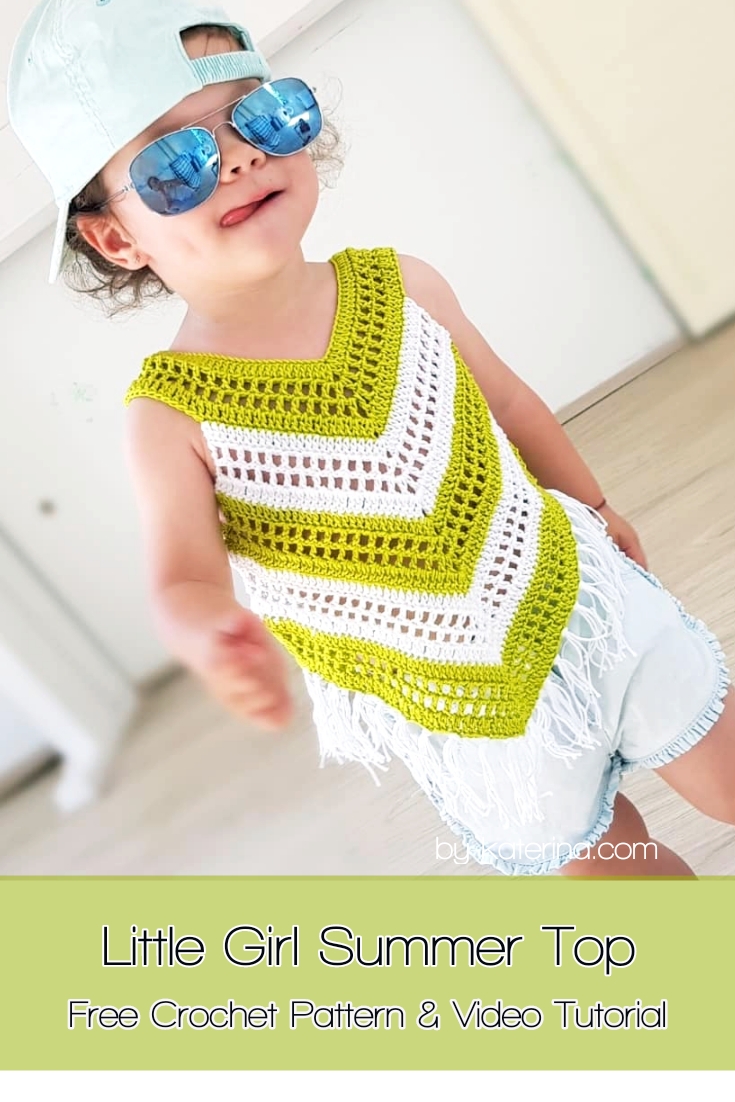
Well I couldn’t’ keep making things just for me so it was time to make this so easy, fast and fun Little Girl Summer Top for my daughter.

Pentru postarea in limba romana, click aici
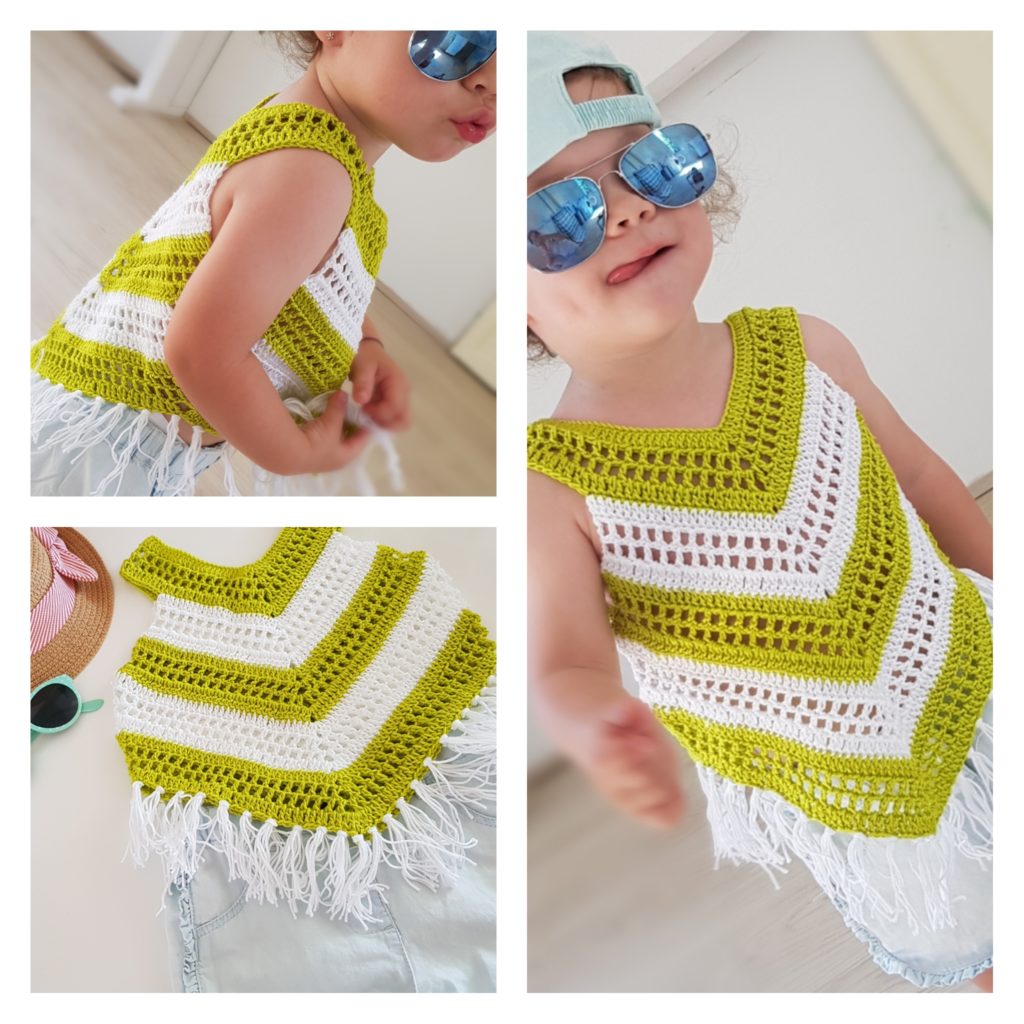
little girl summer top

You can purchase the easy printable pdf version of this pattern here.

or

Ravelry

The idea with the cap and sun glasses was her’s, so she is beginning to be a real model ???.

This project was actually a backup. You know that when I work on something, try to have other project in case I get bored or something doesn’t work as I wish. As usual the back up projects are the ones I love the most.

This little girl summer top is so easy to make and what I love the most is that is a no sewing project. So when you’re done, you’re done.

The pattern is for 2, 4 and 6 years old, but in the end I will give you some tips to make this top in any sizes even adult sizes if you want.
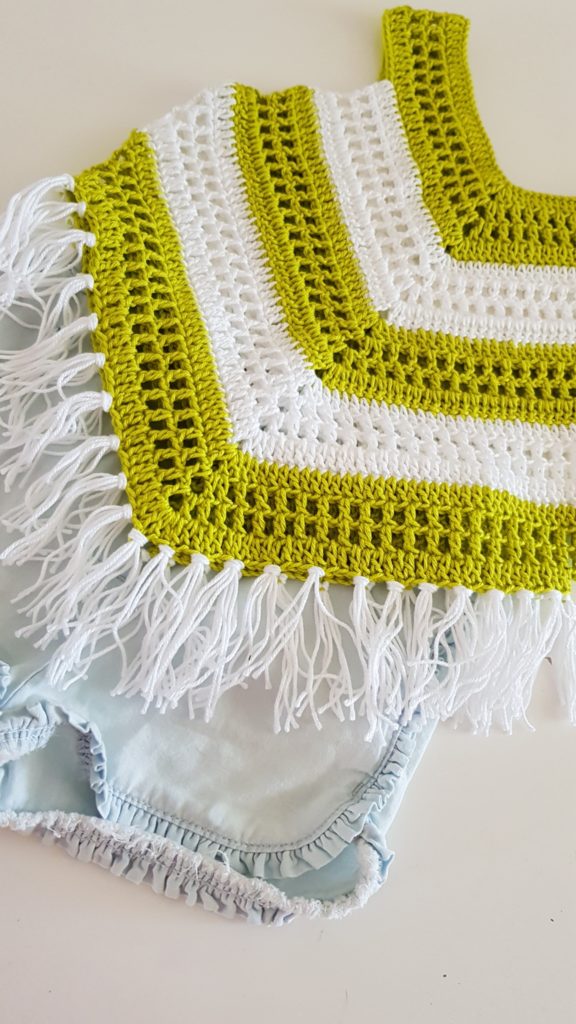
little girl summer top

Now, about the yarn that I used.

  • Schachenmayr Catania Originals
  • Yarn weight 2 (fine)
  • The needle I used is 2.5 mm ( 2-B US)

For 2 years old size I used 50 grams (125 m/137 yds) meaning 1 skein of white and the same amount of mustard.

For bigger sizes (4 amd 6 years) you will have to buy 2 skeins of each color.

Gauge

23 dc = 10 cm (4″)

10 rows = 10 cm (4″)

Abbreviations used in this pattern:

  • Ch – chain
  • Dc – double crochet
  • Sl st – slip stitch
  • St(s) – stitch(es)
  • Inc – increase ( 2 dc, ch 3, 2 dc in the same st on the solid row, 1 dc, ch 3, 1 dc on the filet st row)
  • Dec – decrease ( 1 dc, skip 3 sts, 1 dc)

We will work this Little girl summer top from the neck to the bottom.

First foundation chain:

  • 2 years – 100 ch sts
  • 4 years – 108 ch sts
  • 6 years – 120 ch sts

Mark the middle stitch and sl st to join the end of the chain with the beginning.
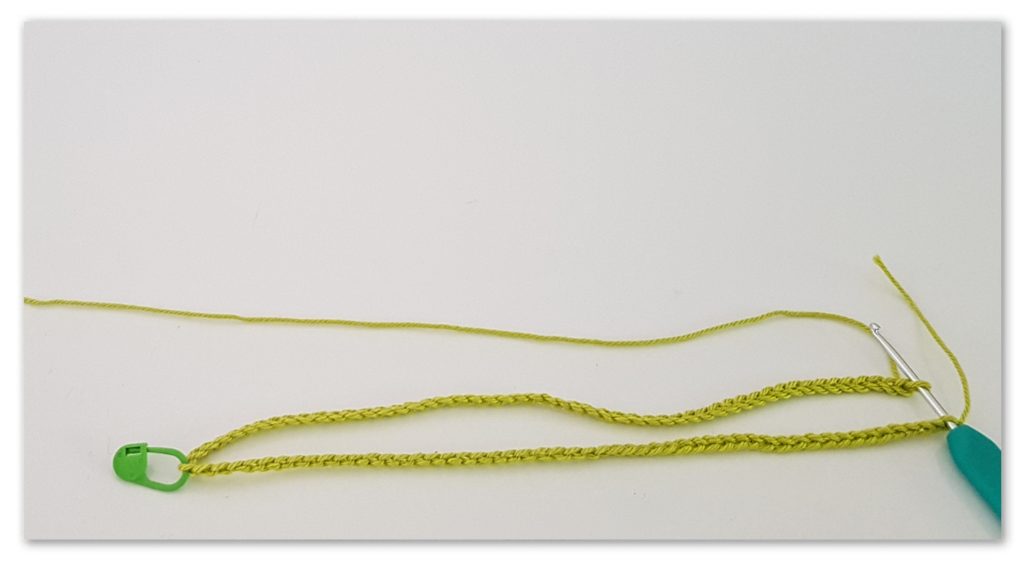
little girl summer top foundation chain

Row 1

Ch 2, 1 dc in the same stitch, 1 dc in each st to the center (the marked stitch). In the marked st 1 inc* (as I explained it above in the abbreviations section), 1 dc in each st until the last one. In the last st make 2 dc, ch 3, 1 dc and then sl st with the first dc.
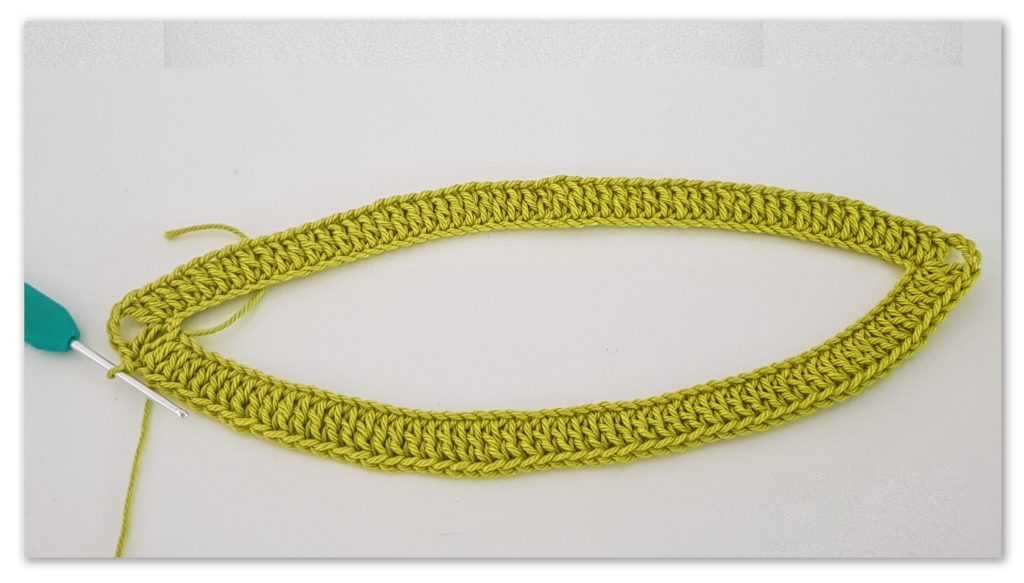
little girl summer top first top

Row 2

Ch 4, [skip the next st, 1 dc, ch 1] – repeat to the center. In the 3 ch space from the center make one inc* but for the filet row as I explained above.

Continue with ch 1, 1 dc in the next st, ch 1, skip 1 st, 1 dc in the next. Repeat until the ch 3 space at the end of the row. Here in the chain 3 space, make 1 dc, ch 3, 1 dc, ch 1 and sl st with the 3rd st of the starting chain.

Row 3

Repeat row 2

Row 4 

Repeat row 1

After first 4 rows we will work the back and front separately to form the arm hole.

Counting from the center point:

  • 2 years  – count 22 sts on the left and 22 on the right, also on the back and front side. Mark the st number 22.
  • 4 years – 24 sts
  • 6 years 26 sts

little girl summer top

You can purchase the easy printable pdf version of this pattern here.

or

Ravelry

Change the color ( we will change the color at every 4 rows).

For all sizes

Row 5 front side

Working on the right side, begin with the marked stitch and start your row in double crochet stitch.

Make 1 dc in each st to the center. Inc in the ch 3 space, 1 dc in each st to the second marked stitch. Ch 4 and turn.

Row 6 front side

Skip the next st, 1 dc in the next, ch 1, skip 1, 1 dc in the next. Repeat to the center point. 1 inc in the center. Then continue with the stitch pattern to the end of the row.

Row 7 front side

Repeat row 6

Row 8 front side

Repeat row 5

Repeat the 4 rows until you have:

  • 2 years – 12 rows in total
  • 4 years – 14 rows
  • 6 years – 16 rows

Repeat the same with the back side.
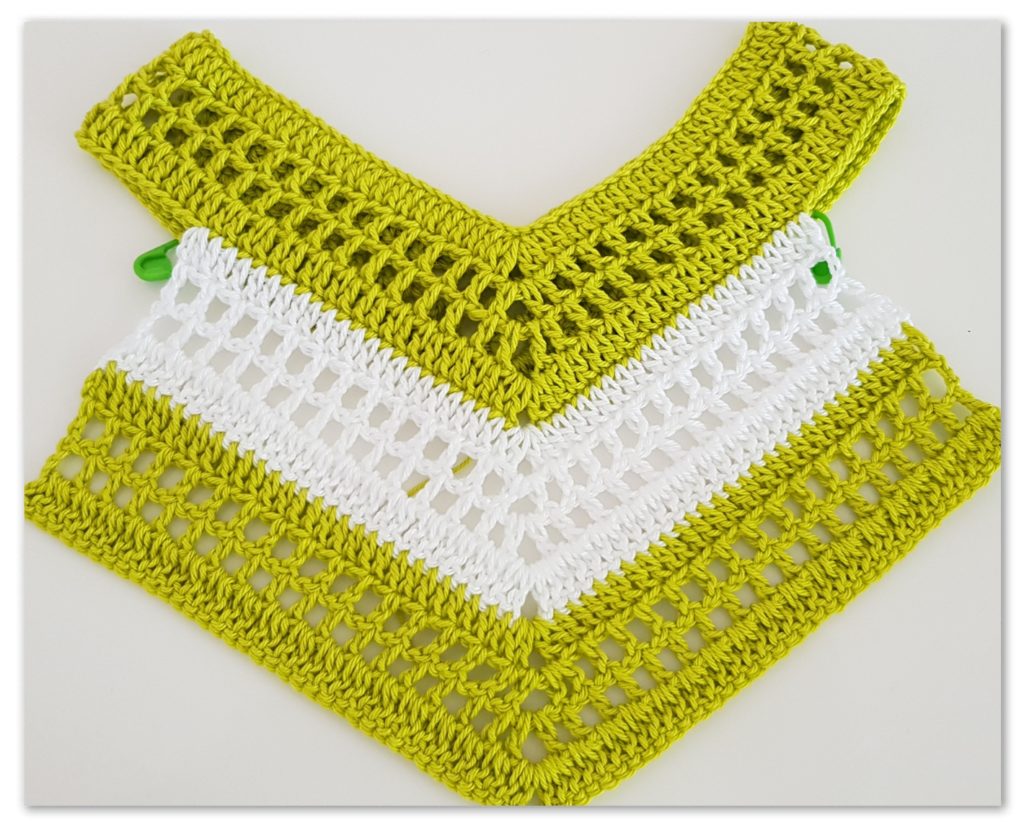
little girl summer top

Row 13/15/17

At this row we will join the back and front on the side edges and we will continue to work in rounds.

Begin your work in one side and make sure you are on the right side. Work the row as normal until you get to the other side edge. Here join with the back. Continue the row to the end and here join with the front side.

Row 14/16/18

Slip st 2 sts, then start the row as normal. When you get to the side edge make a decrease ( skip 3 sts from the middle) continue with the stitch pattern to the end of the row. At the end of the row decrease again, skip 3 sts then sl st.

Continue working like this until you get to the desired length.

We decrease on the side edges to have them straight considering the increase that we make in the center point of the back and front side.

And this is it. A cute little girl summer top.
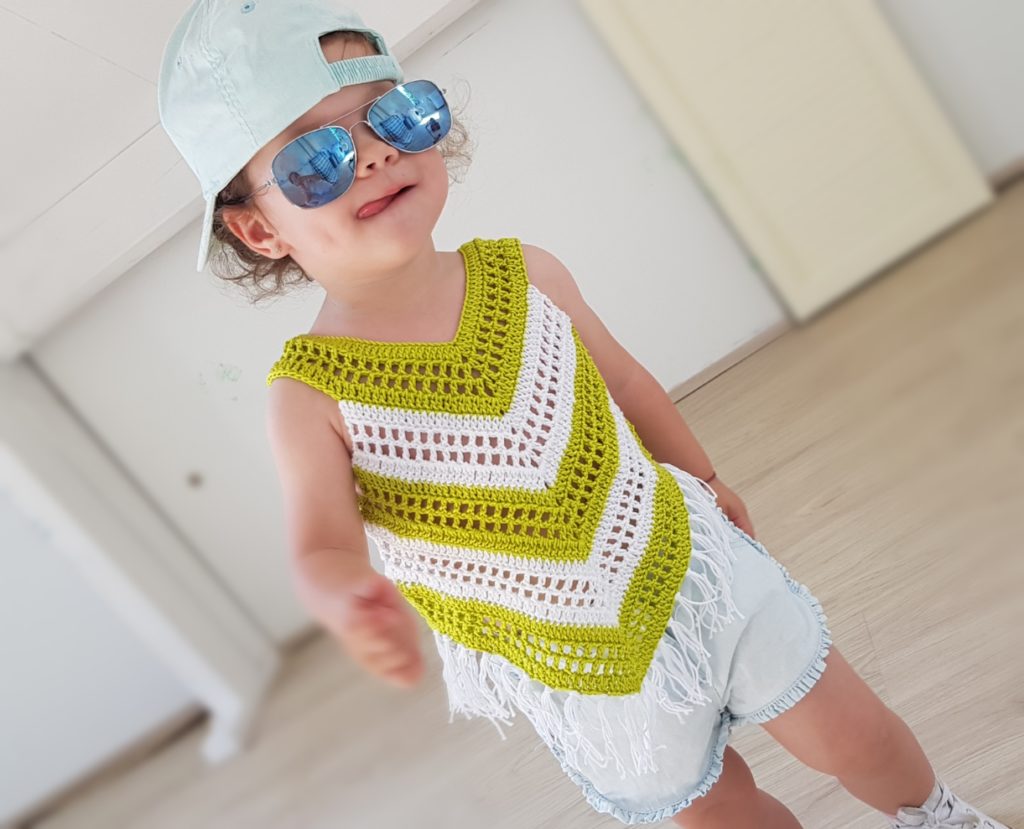
little girl summer top

You can purchase the easy printable pdf version of this pattern here.

or

Ravelry

On the bottom I just added some fringe but make it as you wish.

Now as I said in the beginning, some tips on how and what to measure to make this top in any size.

Step 1

Grab a t-shirt in size you wish.

Step 2

Measure the length from the shoulder to the center of the chest. Point the center higher or lower depending on how you wish the neck line to be.
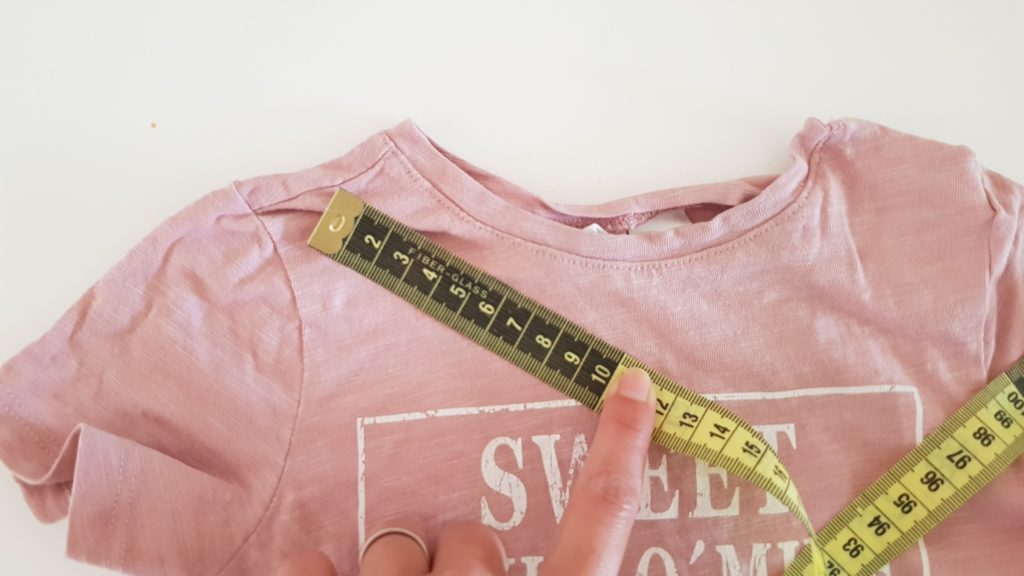
 

tips top de vara pentru fetite

Step 3

Multiply this length with 4 and this will be the length of your foundation chain.

Now make the first 4 rows.

Step 4

Is time to mark the sts for the arm hole. Count from the center point 2/3 of the number of sts that you have from the center to the shoulder. Mark that st.

Step 5

To know how many rows to make for the arm hole depth, put your work over the t-shirt, and measure the length from the marked stitch to the armpit of the t-shirt. This will be the arm hole depth and you will have to make as many rows as you need to get to that length.
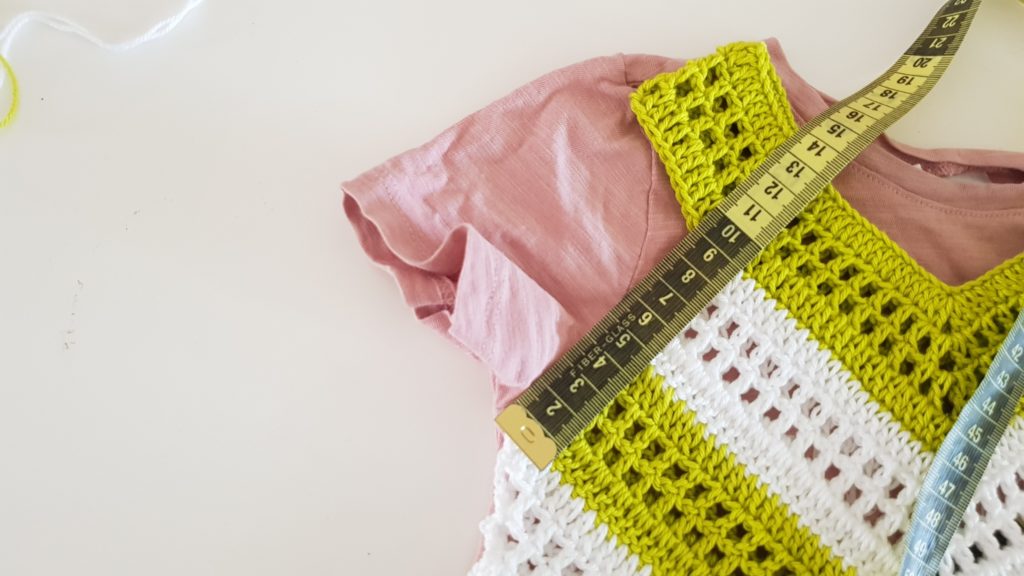
 

tips little girl summer top

After that just continue working as written in the pattern.

Hope these tips will be helpful and you will have all you’ll need to try this super easy and nice top.

Bellow, you find the video tutorial as well.

Hope you will like this pattern too.

Enjoy crochet!!! I know I will,  and l’ll come back here to share my work with you.
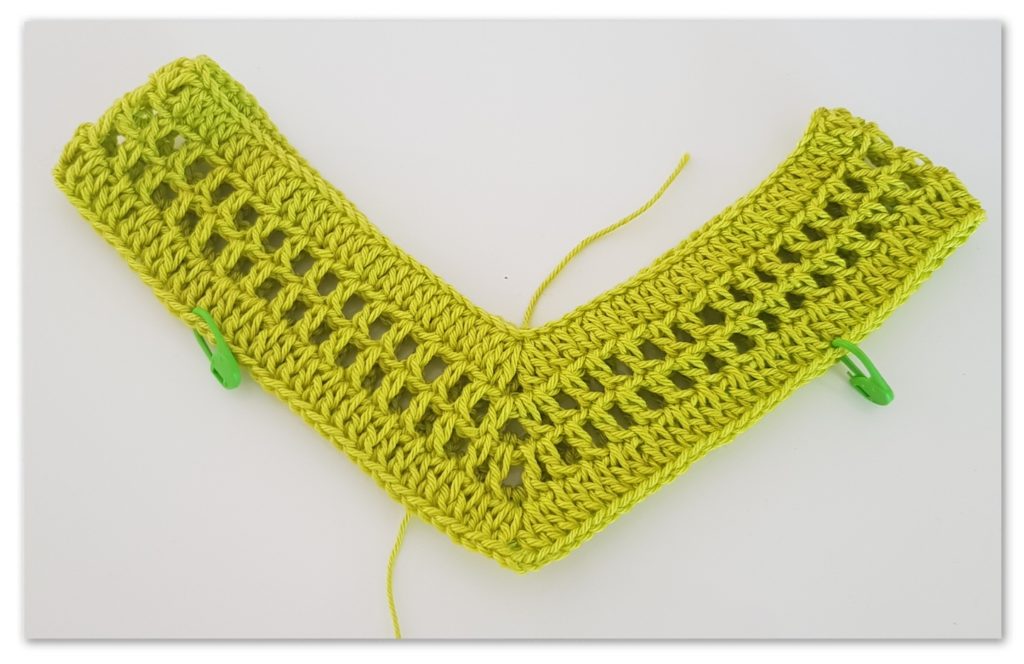
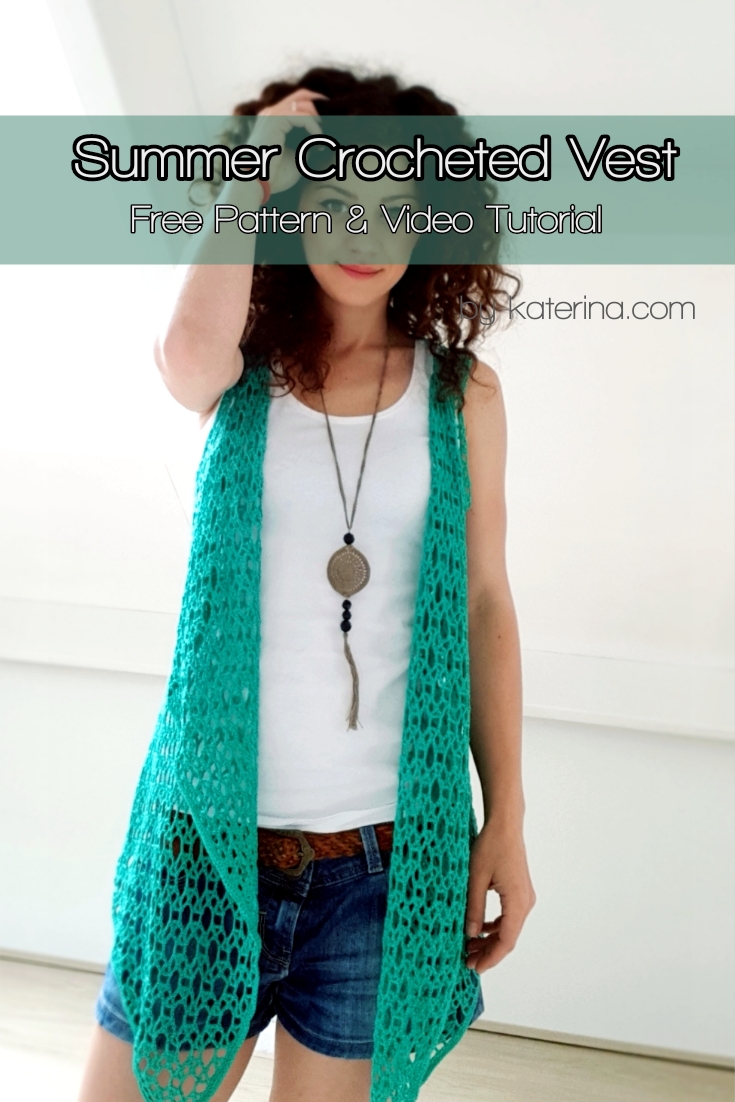
Couldn’t wait to finish this Summer crocheted vest and share it with you. Is easy to make and is so beautiful.

Pentru postarea in limba romana, click aici summer crocheted vest You can purchase the easy printable pdf version of this pattern here.

or

Ravelry


If you like the idea to just put something on to complete your look, this is for you. I love it and is also easy to make. I used for this vest the stitch with circles and a mercerized cotton 

or any cotton 8/4 for which the recommended hook is 2.5 mm

This pattern is for sizes from S to 1X, but I will give you the instructions you will need to make this summer crocheted vest even if you want to use another type of yarn.

So, we will make 3 panels:  1 Back side and 2 front sides.

All 3 panels are identical, so once you have one done, all you have to do is to repeat the same with the next 2. Then assemble the 3 pieces and done. What is important is that the length of the chain is the length of your vest.

So chain as many stitches as you need to get to the desired length. Then start to make the stitch with circle and make as many rows as you need to get to the desired width.

The width of one panel is the width from shoulder to shoulder.summer crocheted vest You can purchase the easy printable pdf version of this pattern here.

or

Ravelry


Knowing that is easy now to make this vest with any type of yarn. Materials that I used

  • Mercerized cotton
  • 2.5 mm crochet hook (try with B or C US size)
  • Tapestry needle

You will need approximate

  • For size S – 700 m (765 Yd) or 175 grams of yarn
  • For size M – 800 m (875 Yd) or 200 grams
  • For sizes L and XL – 900 m (985 Yd) or between 225 – 250 grams of yarn

* This yardage are approximated for a cotton thread size 5. Gauge 23 Double crochet = 10 cm ( 4 “) 10 rows in double crochet = 10 cm (4”)

Abbreviations used in this pattern:

  • Ch – chain
  • St(s) – stitch(es)
  • Dc – double crochet

For all sizes I let the same length, 57 cm without stretching and 62 after washing and steam the vest.

So begin with 176 sts. If you want your vest to be longer or shorter, add or cut sts, but remember that you will need a multiple of 8.

Row 1

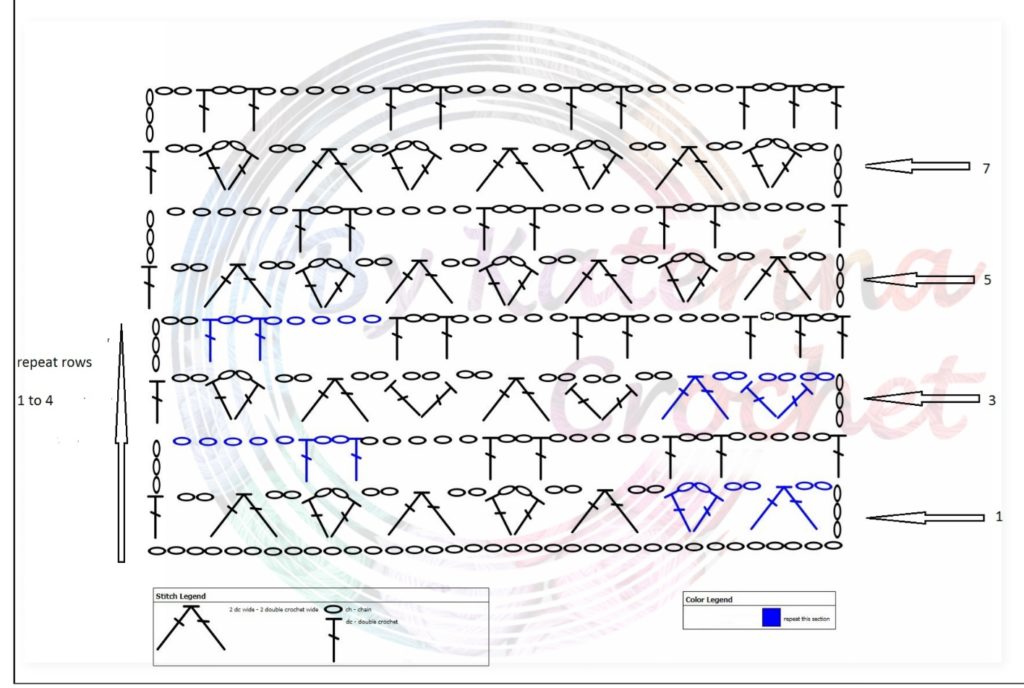
Start with the 7th st from the hook. [2 dc wide (2 dc worked together with 2 ch between them), ch 2, skip 2, 1 V st in the next st, ch 2] repeat this section to the end of the row, ending with 2 dc wide, ch 2, skip 2, 1 dc in the last stitch. Turn

Row 2

3 turning ch, [ch 5, skip  (ch 2, 2 dc wide, ch 2), 1 dc in first dc of the V st, ch 2, 1 dc in the second dc of the V st, ch 5, ] – repeat the section to the end of the row, ending with ch 5 and 1 dc in the 3rd st of the turning chain. Turn

Row 3

3 turning ch, [ch 2, 1 V st in the 3rd st of the ch 5 from the previous row, ch 2, 2 dc wide (first dc in the next dc, second in the next one)] – repeat this section to the end of the row, ending with ch 2, 1 V st in the 3rd ch of the ch 5, ch 2n 1 dc in the 3rd st of the turning chain. Turn

Row 4

Ch 5, [ 1 dc in first dc of the V st, ch 2, 1 dc in the second dc of the V st, skip (ch 2, 2 dc wide, ch 2), ch 5] repeat the section to the end of the row, ending with 1 dc in first dc of the last V st, ch 2, 1 dc in the second dc of the V st, ch 2, skip 2, 1 dc in the 3rd st of the turning ch. Turn. stitch with circles chart   Now repeat these 4 rows until you have in total:

  • For size S – 35 rows
  • For size M – 39 rows
  • For sizes L, XL – 41 rows

Now one panel is done. Repeat the same with the next 2. After finishing the 3 panels is time for assembling. Sew the sides edges to the armpit. Let for the arm hole:

  • For sizes S, M – 20 cm (64 sts)
  • For sizes L,XL – 23 cm (74 sts)

Now sew the shoulder. Between 5 and 10 cm on each shoulder as you like it. Make a border all over the vest edges in single crochet for 2 rows, or you cam make another stitch if you want. And this is it. An easy and beautiful summer crocheted vest. summer crocheted vest You can purchase the easy printable pdf version of this pattern here.

or

Ravelrysummer crocheted vest I love it. Bellow you will find the video tutorial.
 

Hope you liked this pattern and you will give it a try. Enjoy crochet!

https://ro.pinterest.com/katerina6795/free-crochet-patterns/


Summer Crocheted Vest. Free Pattern with chart & video tutorial

In today’ s post I want to show you how to join yarn. I found 3 simple methods, so easy and not to much time consuming and I wanted to share them with you.

Pentru postarea in limba romana, click aici

how to join yarn

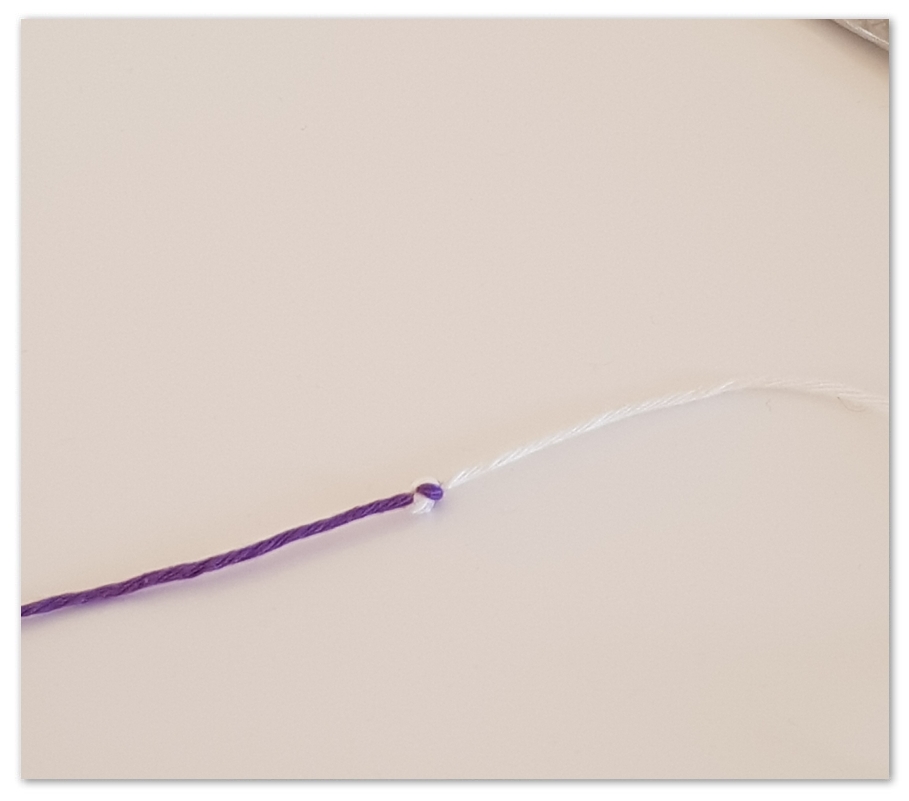
You can use one of this 3 methods, when you want to join 2 strands of yarn and you need a strong and tiny knot.

You can use this methods when you finish one skein of yarn and have to join a new one. You may also try this methods on changing colors and you can say goodbye to wave in ends.

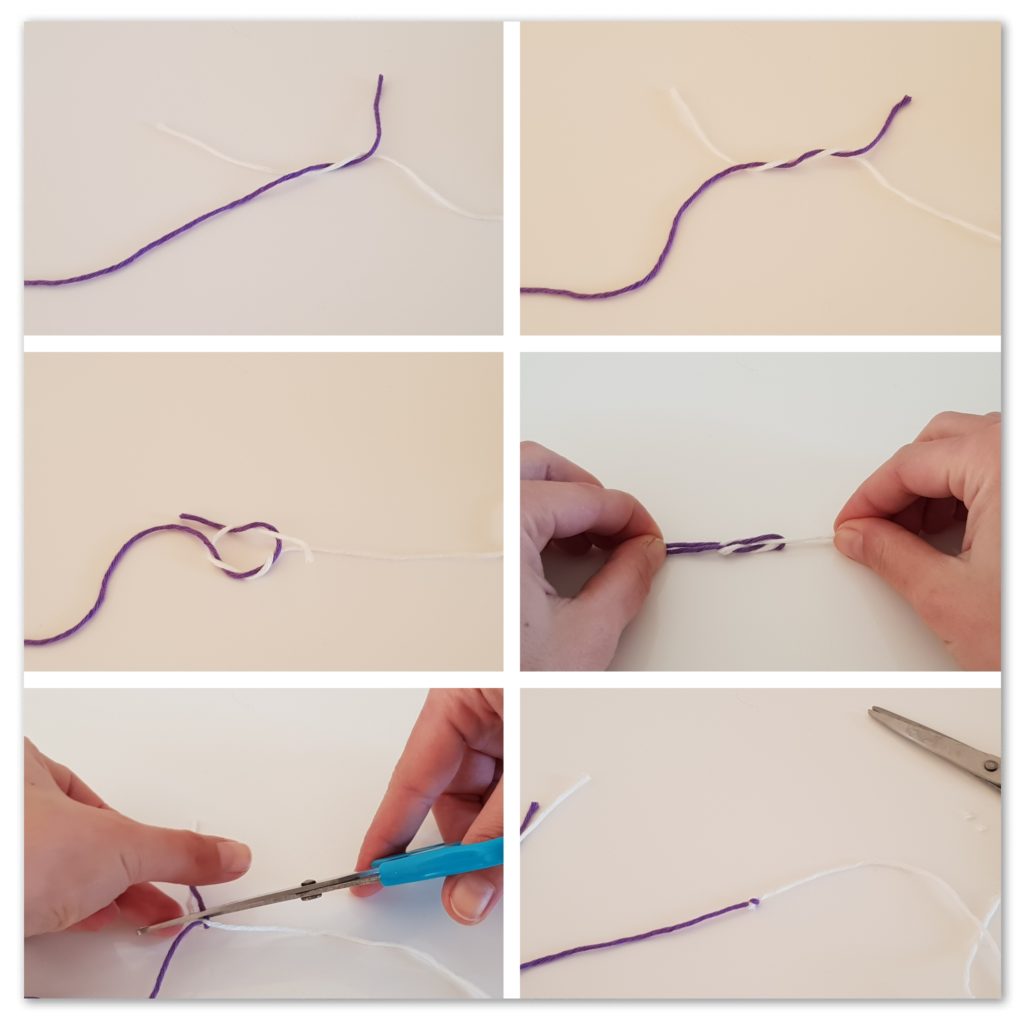
Method 1

Square knot

Step 1

Lay the 2 ends of yarn in X, one over the other, then wrap one end  underneath the other.

Step 2

Wrap the other end the same as the first one.

Step 3

Now tie the 2 strands together with one simple knot.

Step 4

Grab the both ends and pull to tie the knot.

Step 5

Cut the ends as close the knot as you can.

how to join yarn square knot

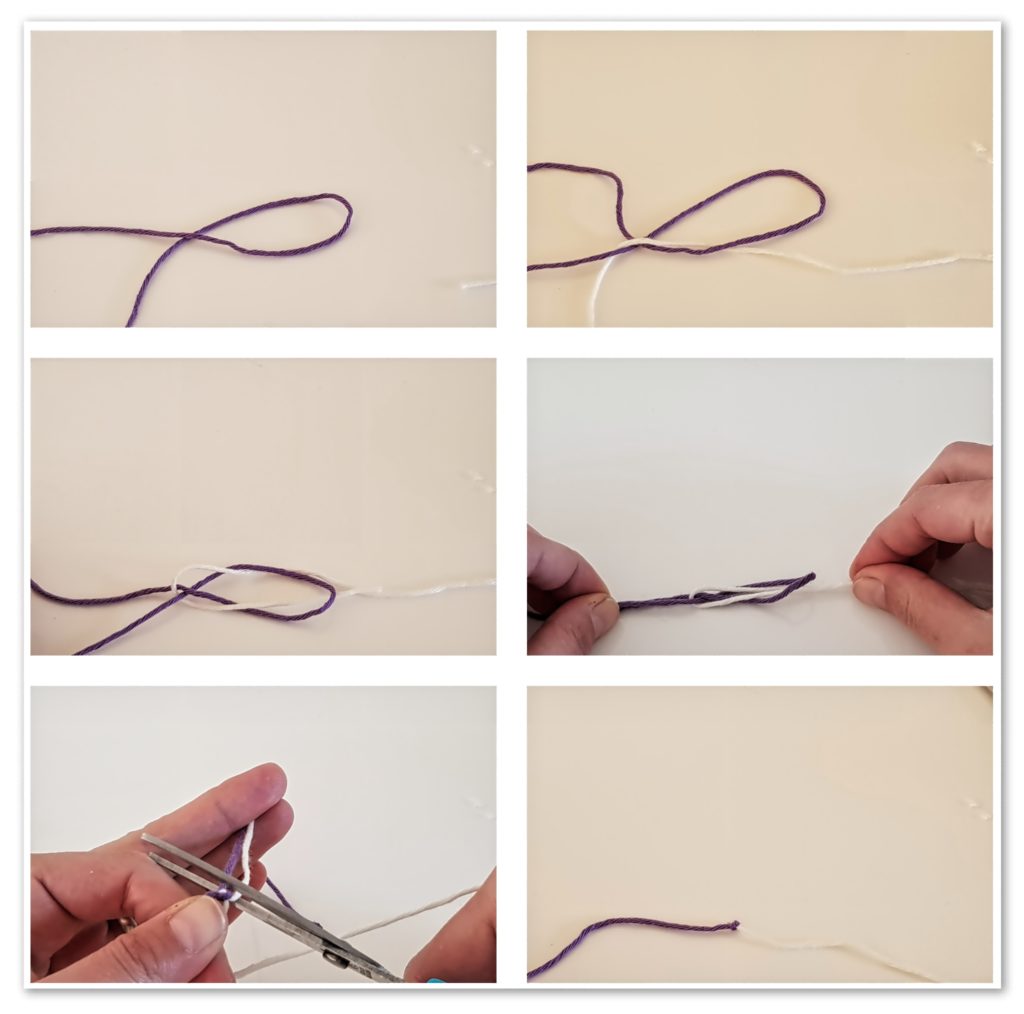
Method 2

Weaver’s knot

Step 1

With one end of yarn make a loop.

Step 2

Insert the second end of yarn trough the loop and then underneath the end of the first yarn.

Step 3

Insert the end of the second yarn trough the loop again.

Step 4

Grab the both ends and pull to tie the knot.

Step 5

Cut the ends.

how to join yarn waver knot

Method 3

Magic knot

This will be perfect if you have a slippery yarn.

Step 1 

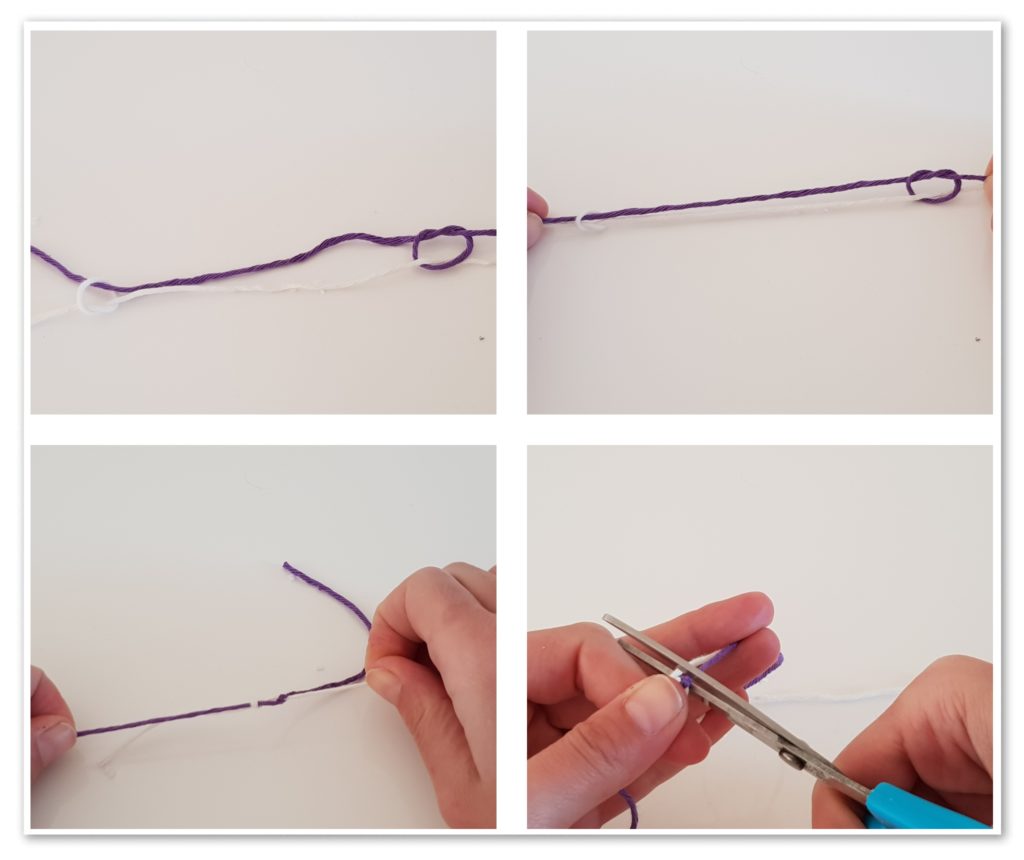
Lay both strands of yarn one on top of other,  with the ends in opposite direction. Then make a simple knot with each end.

Step 2

Grab the ends end pull to tie the knots. Then let the ends apart and pull only the strand of yarn. The knots will come closer.

Step 3

Cut the ends.


how to join yarn magic knot

I hope you will find this 3 methods on how to join yarn useful and will help you in your crochet projects.

Bellow you will also find the video tutorial.

Hope you liked this post too and don’t forget to Enjoy Crochet!

How to join yarn. Step by step instructions with pictures & video tutorial