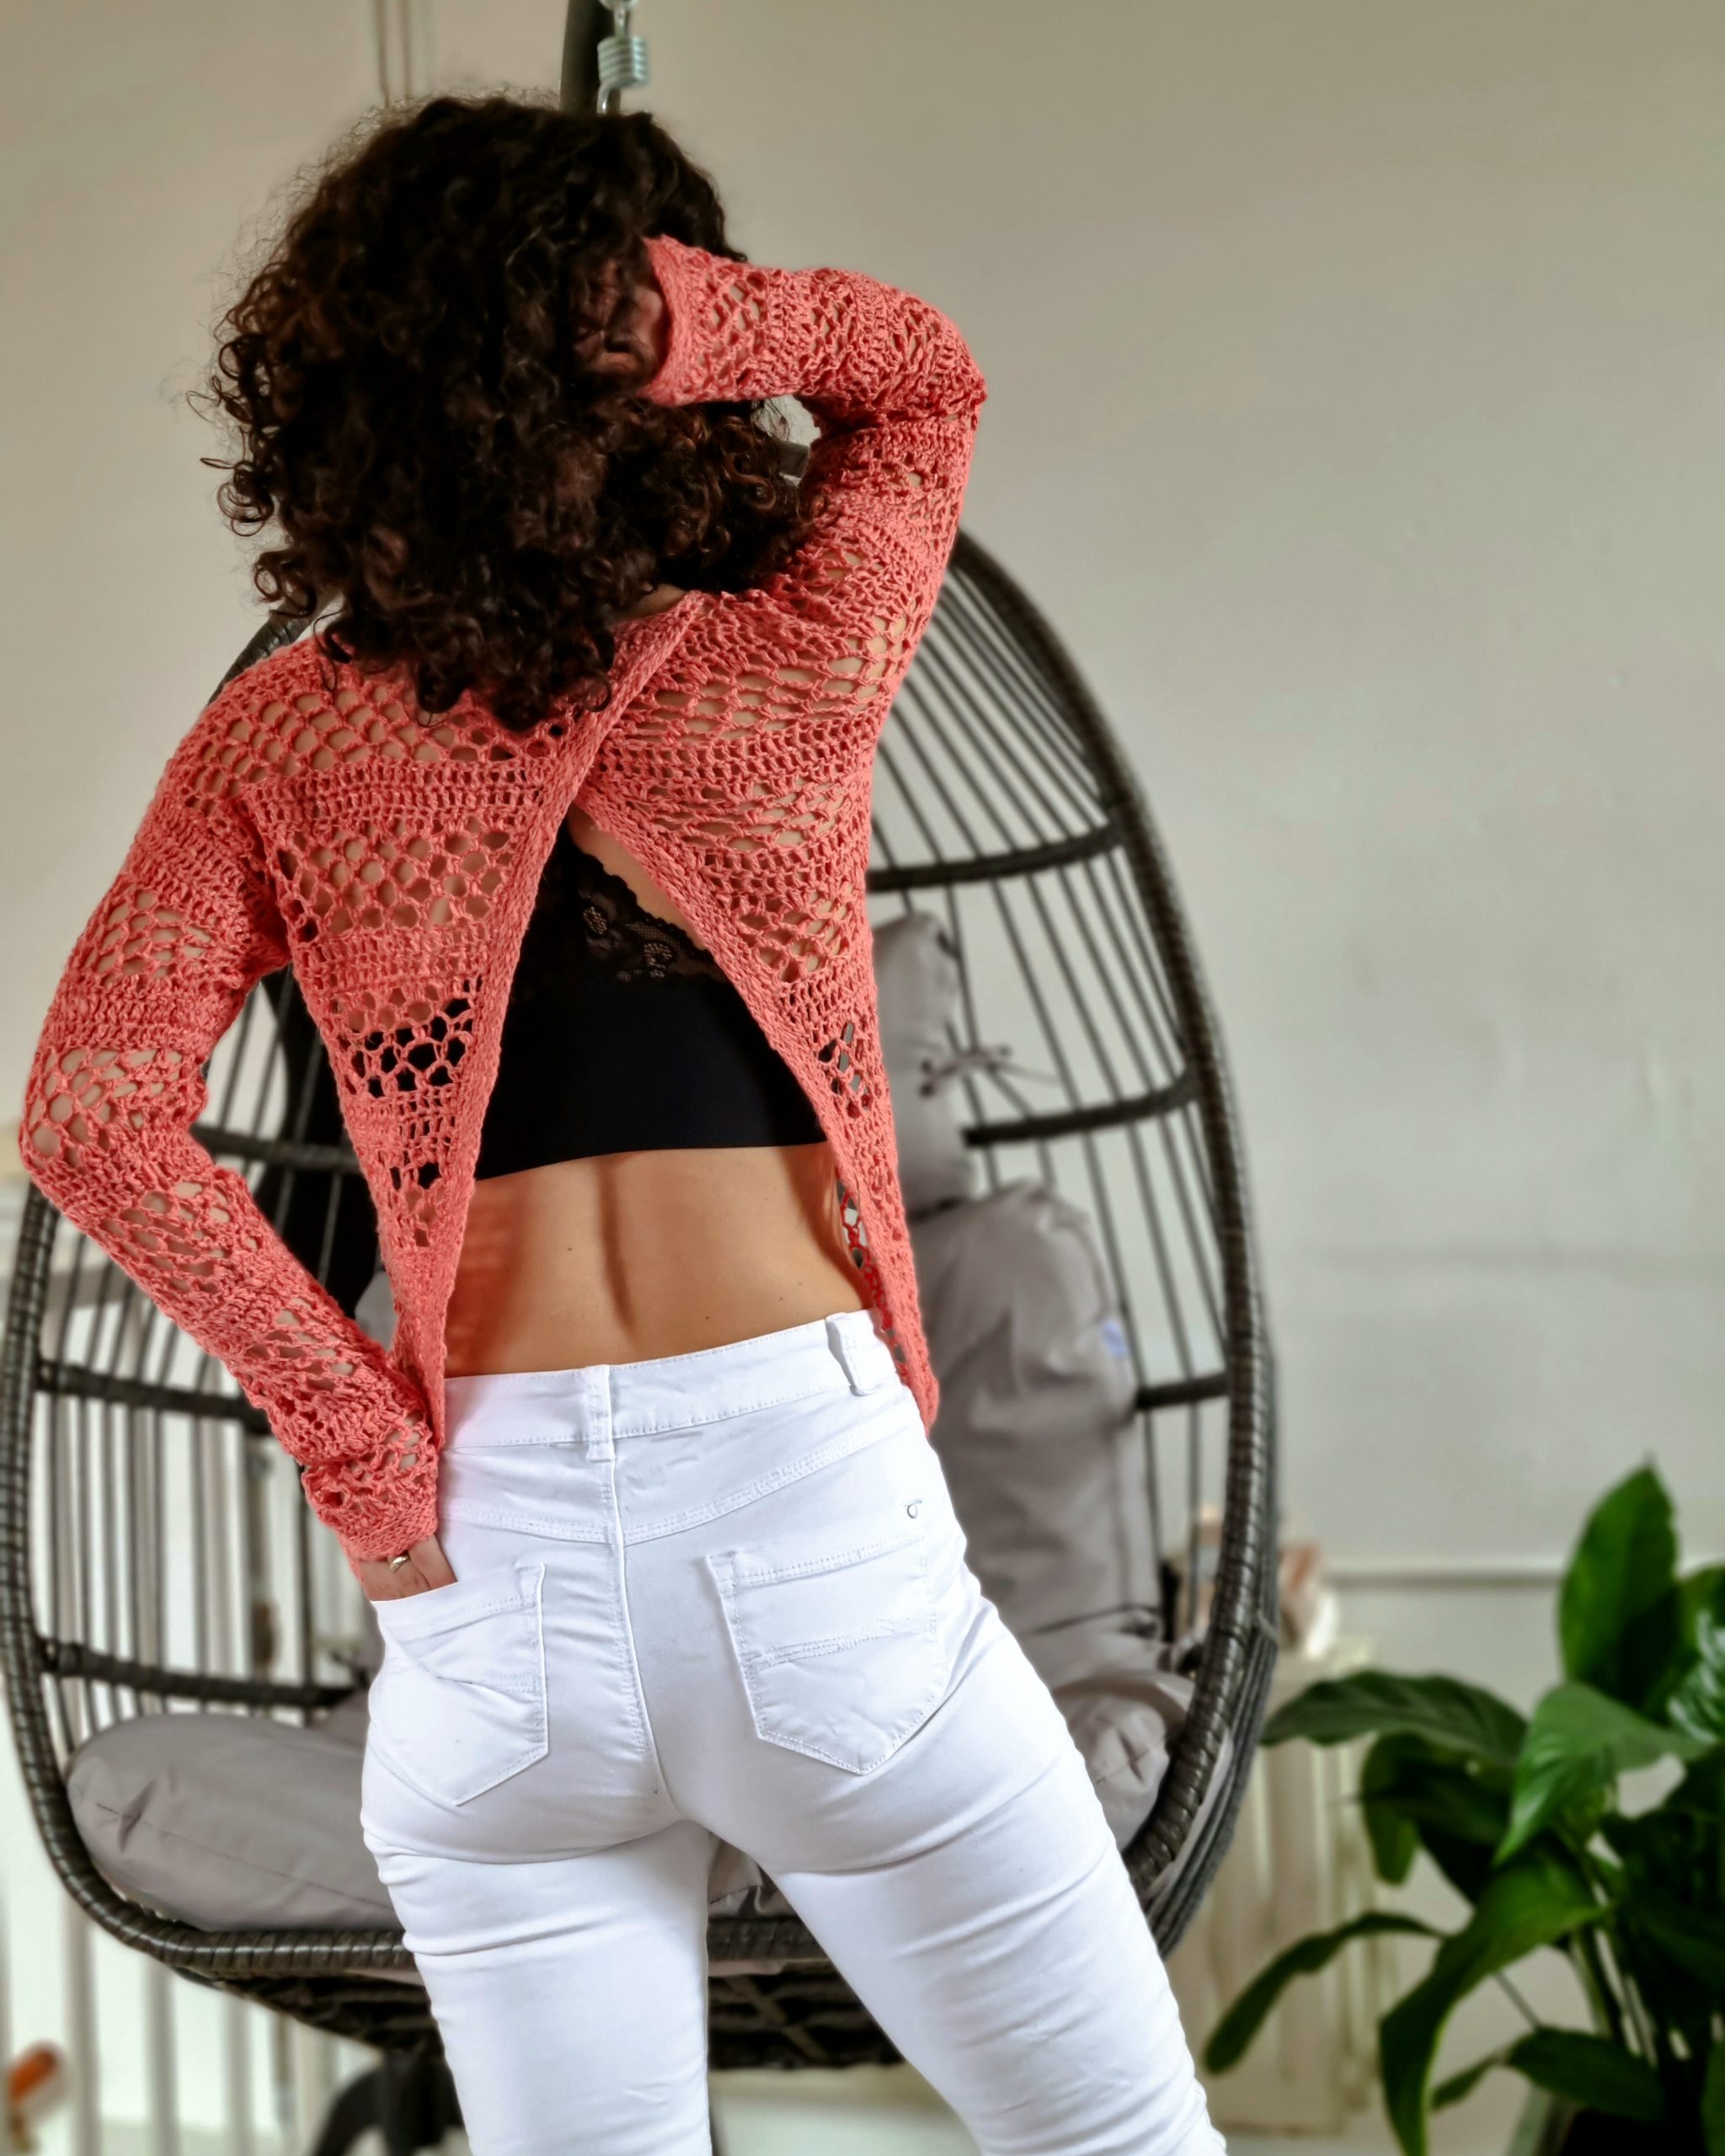
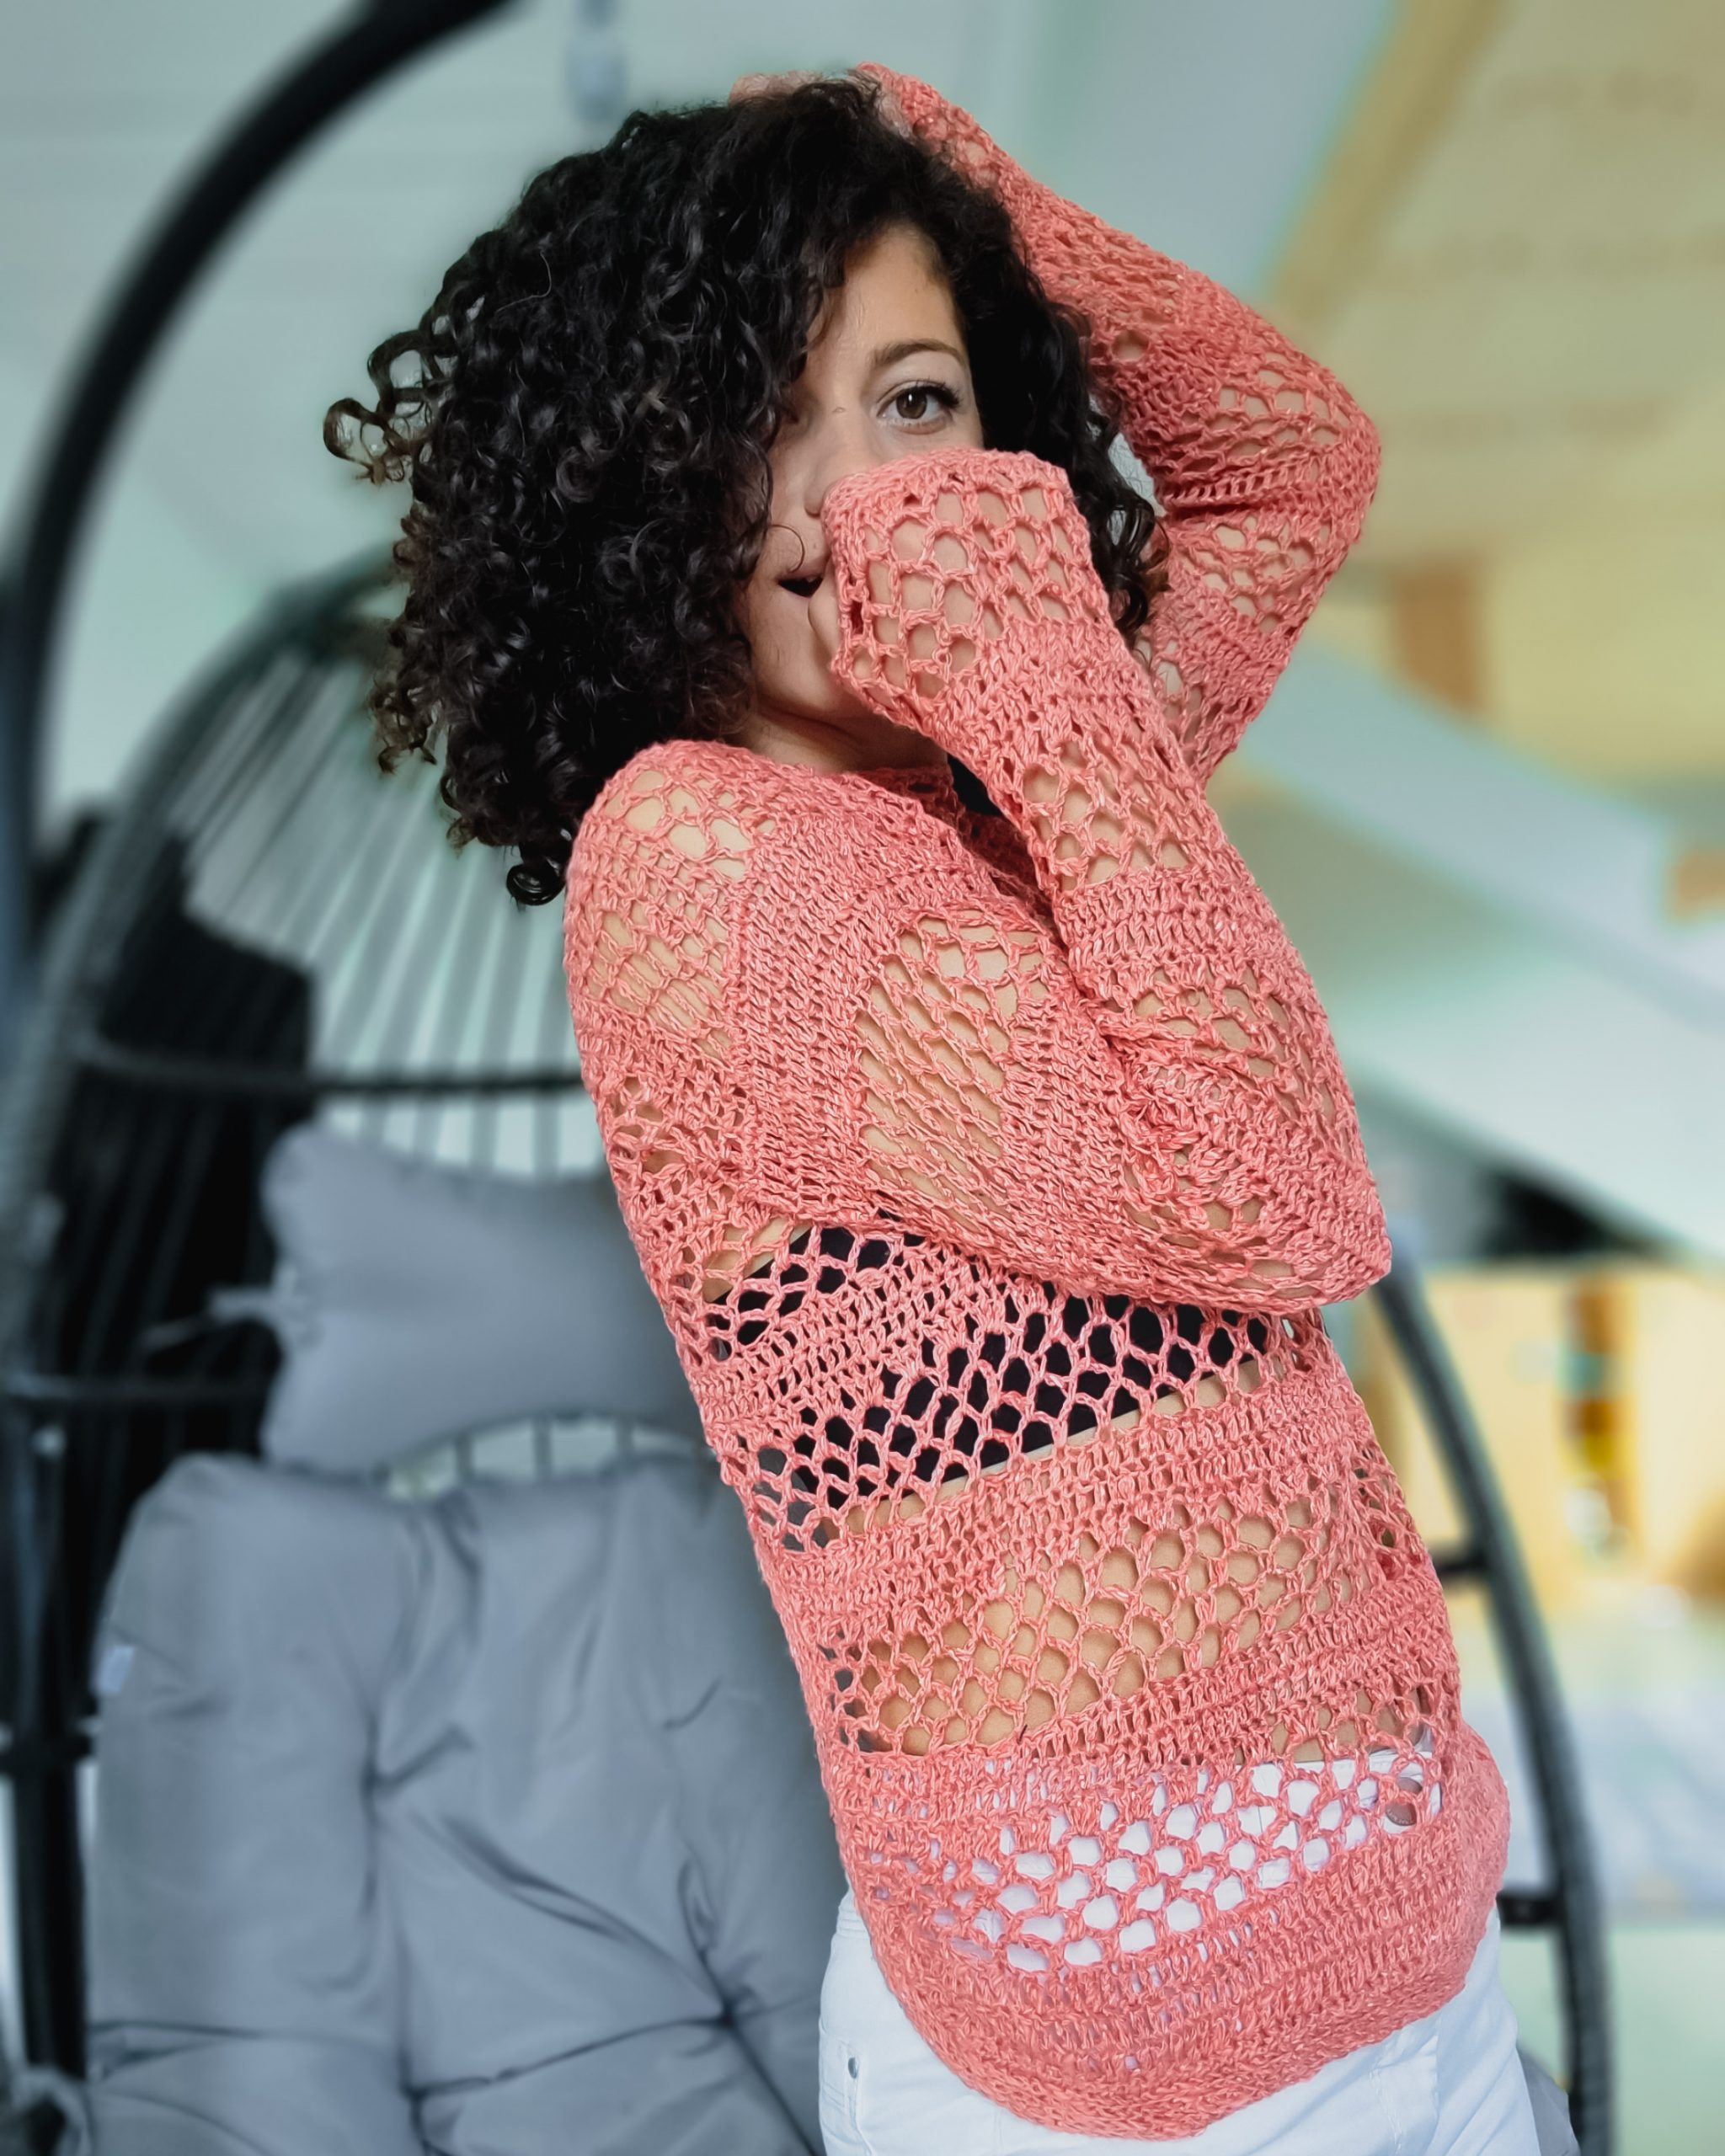
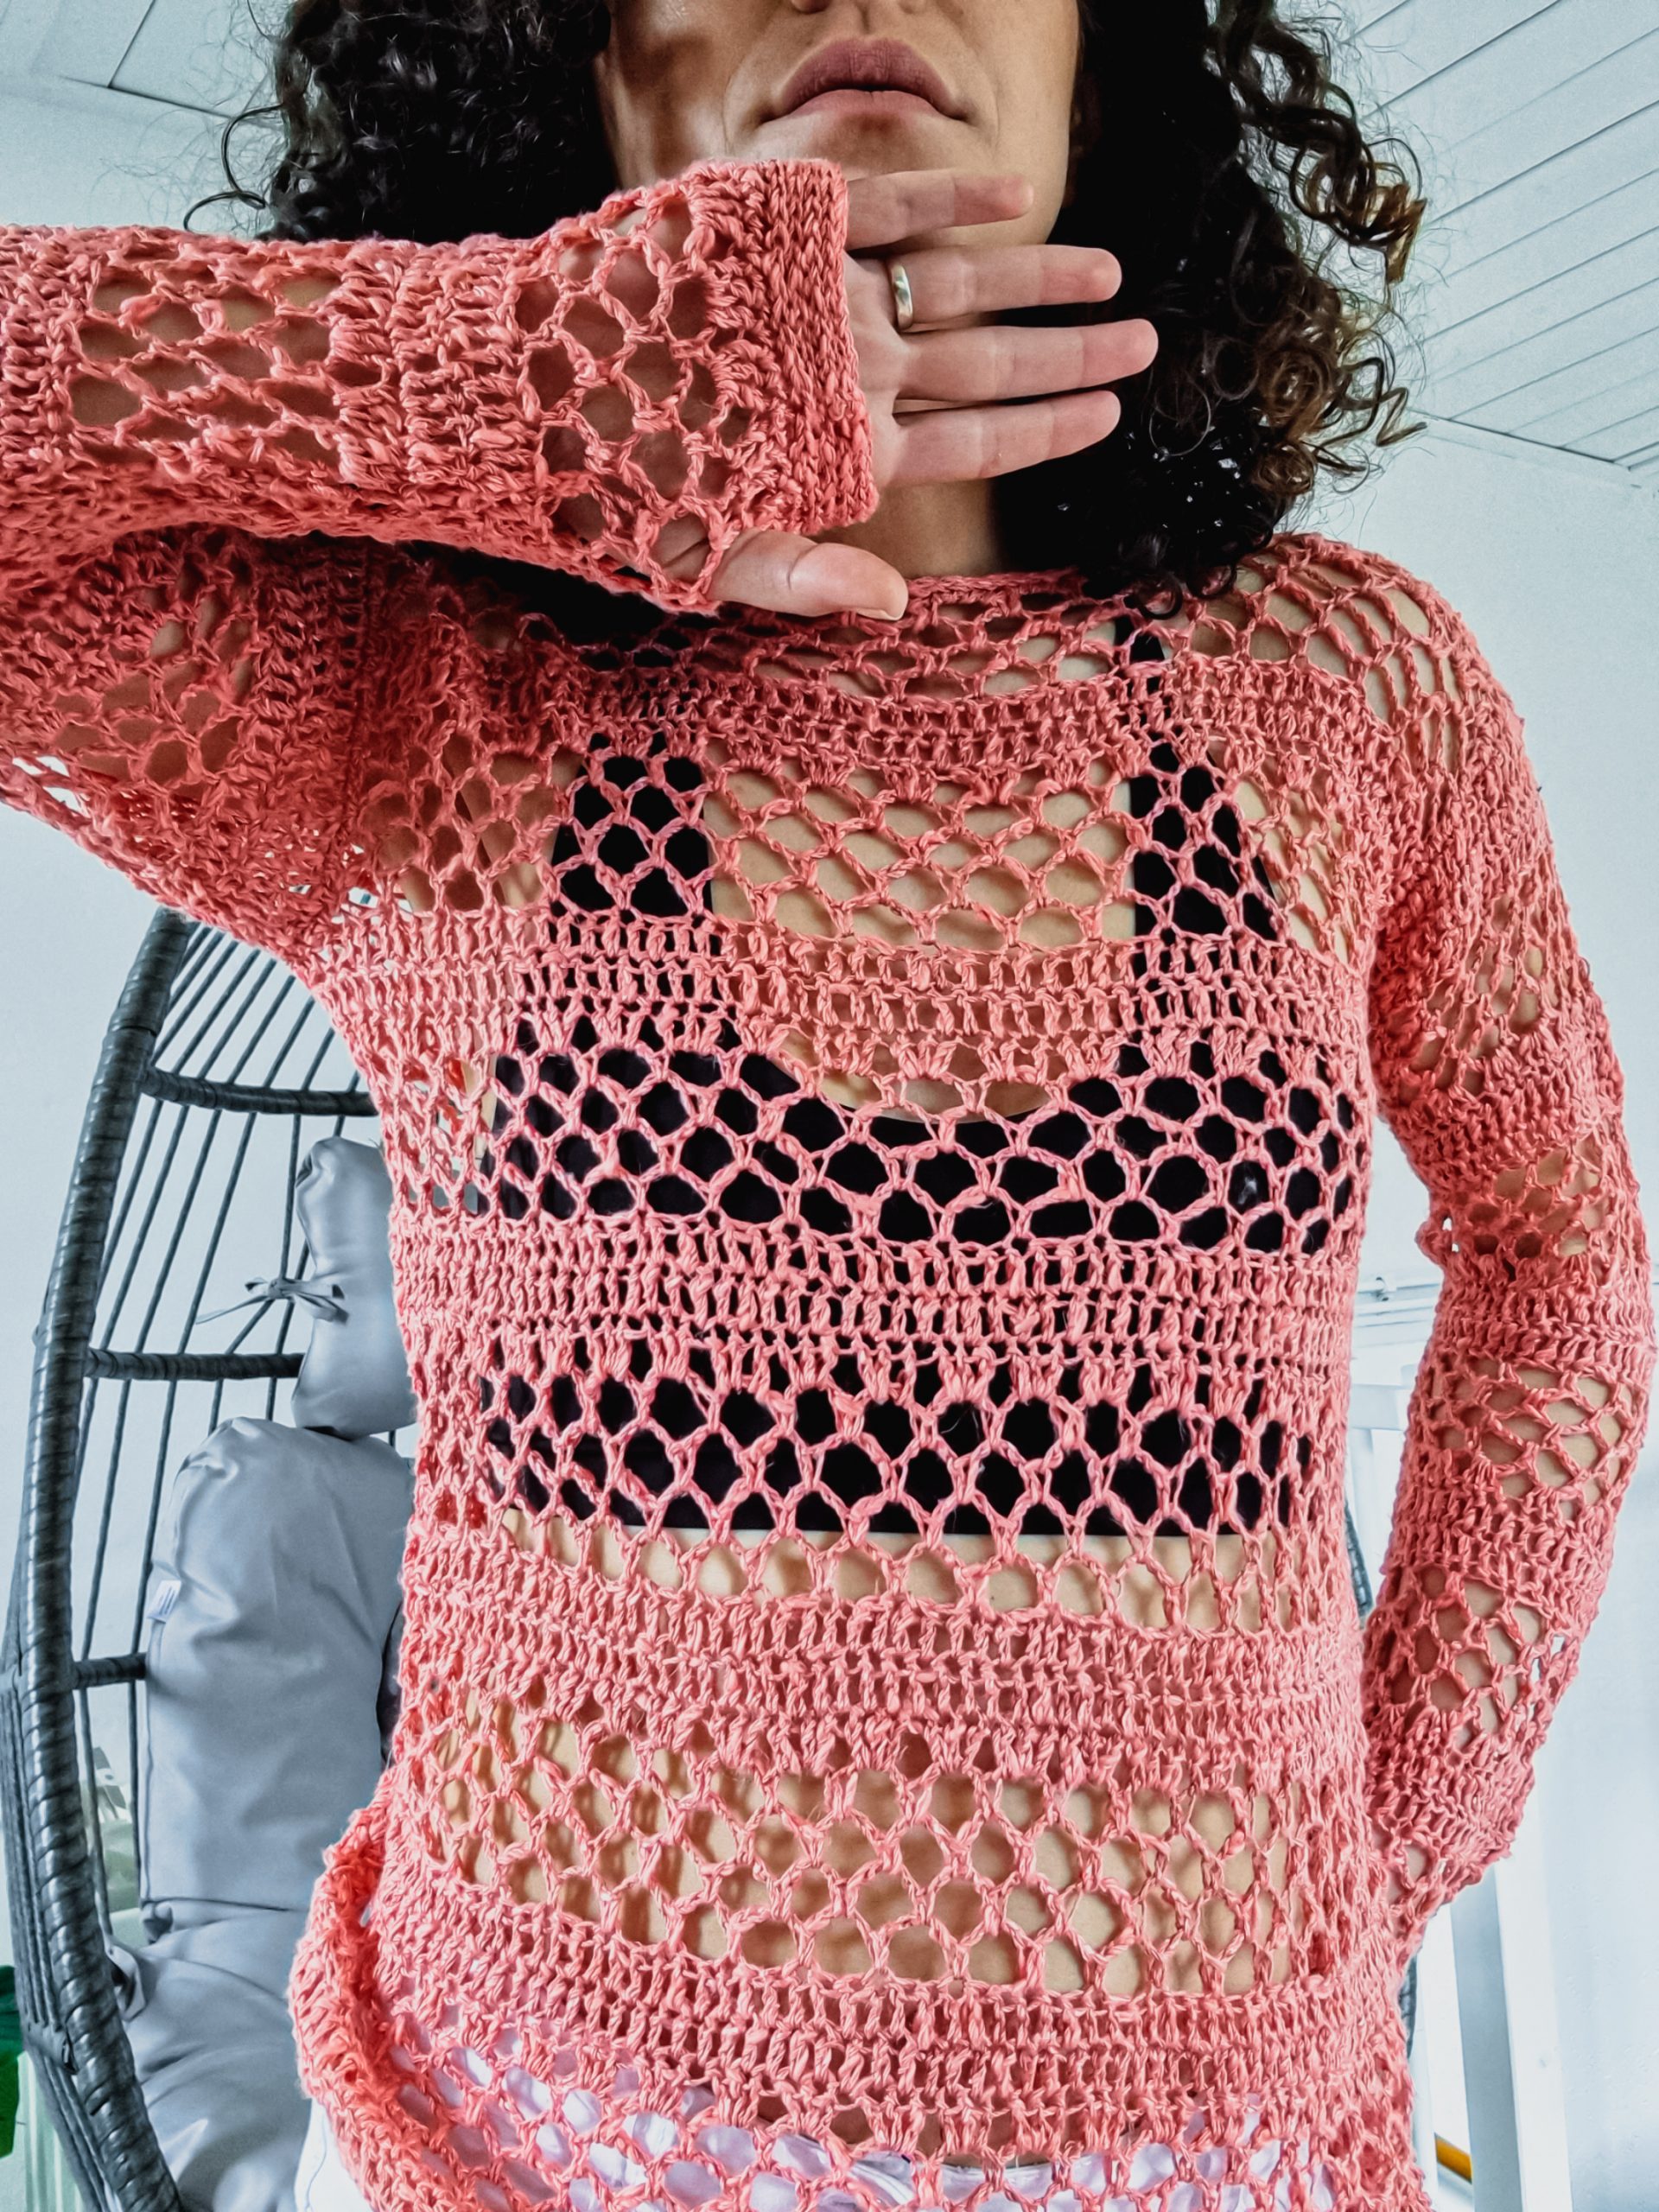
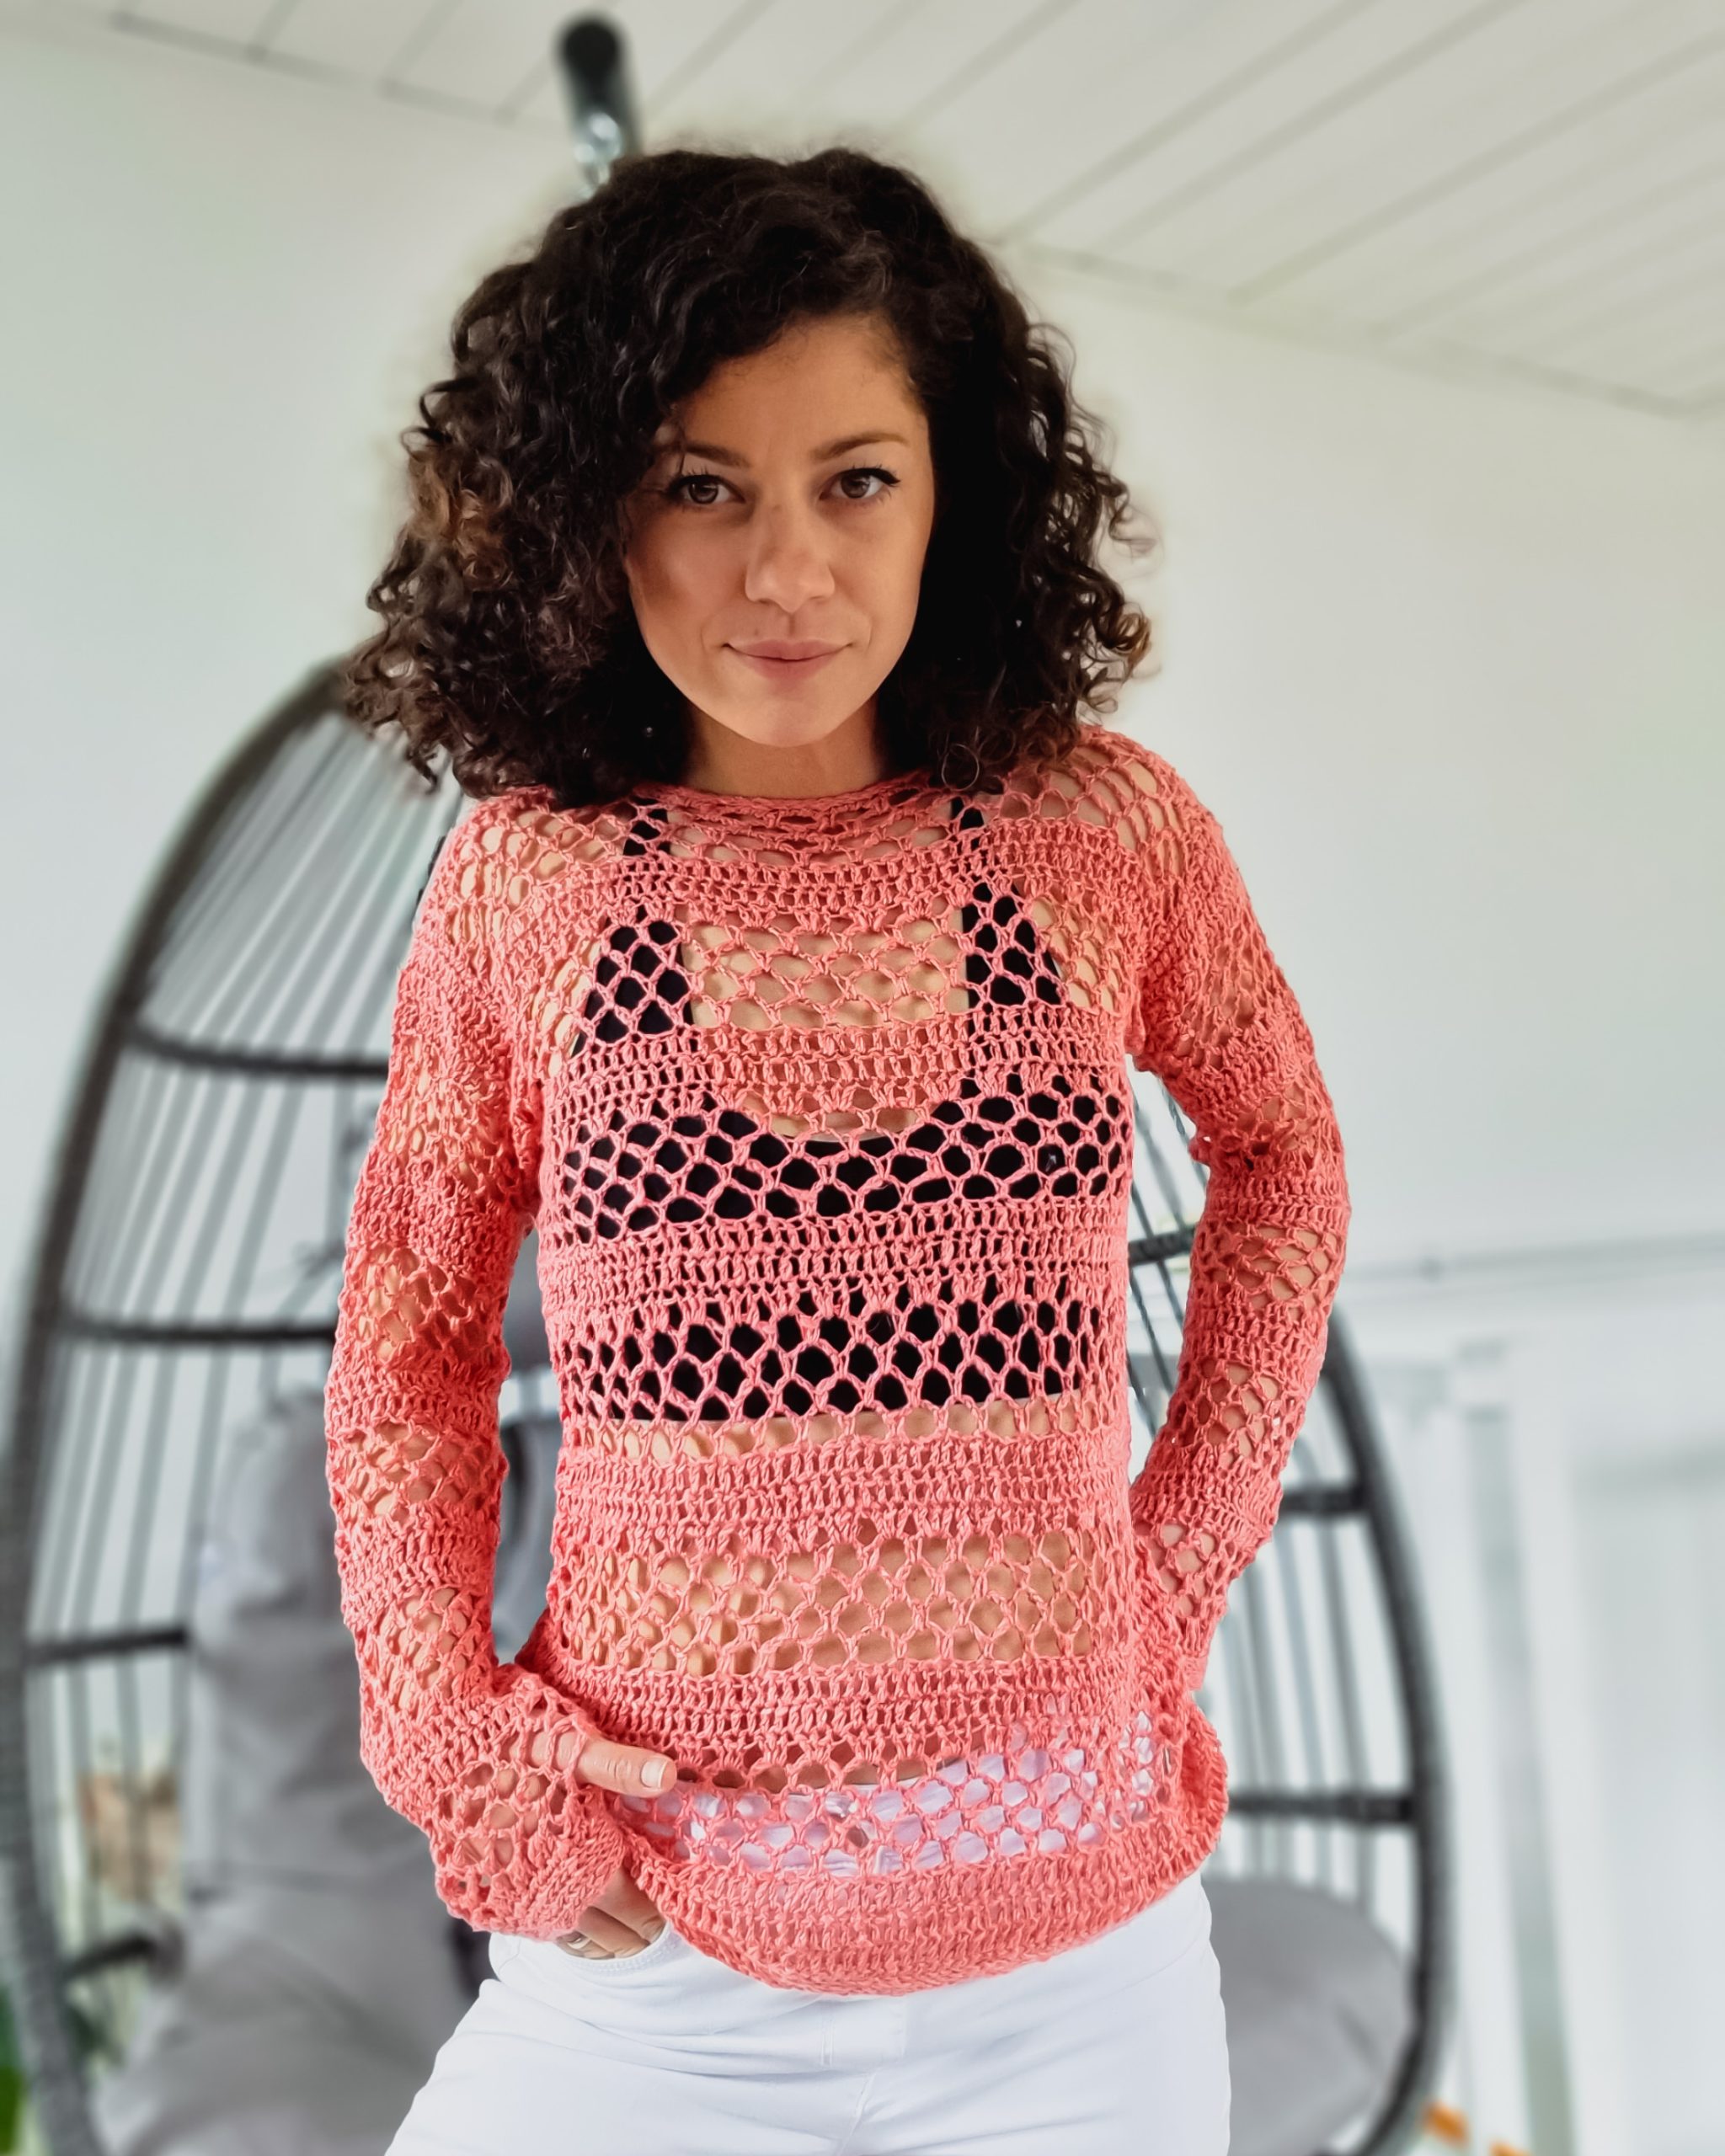
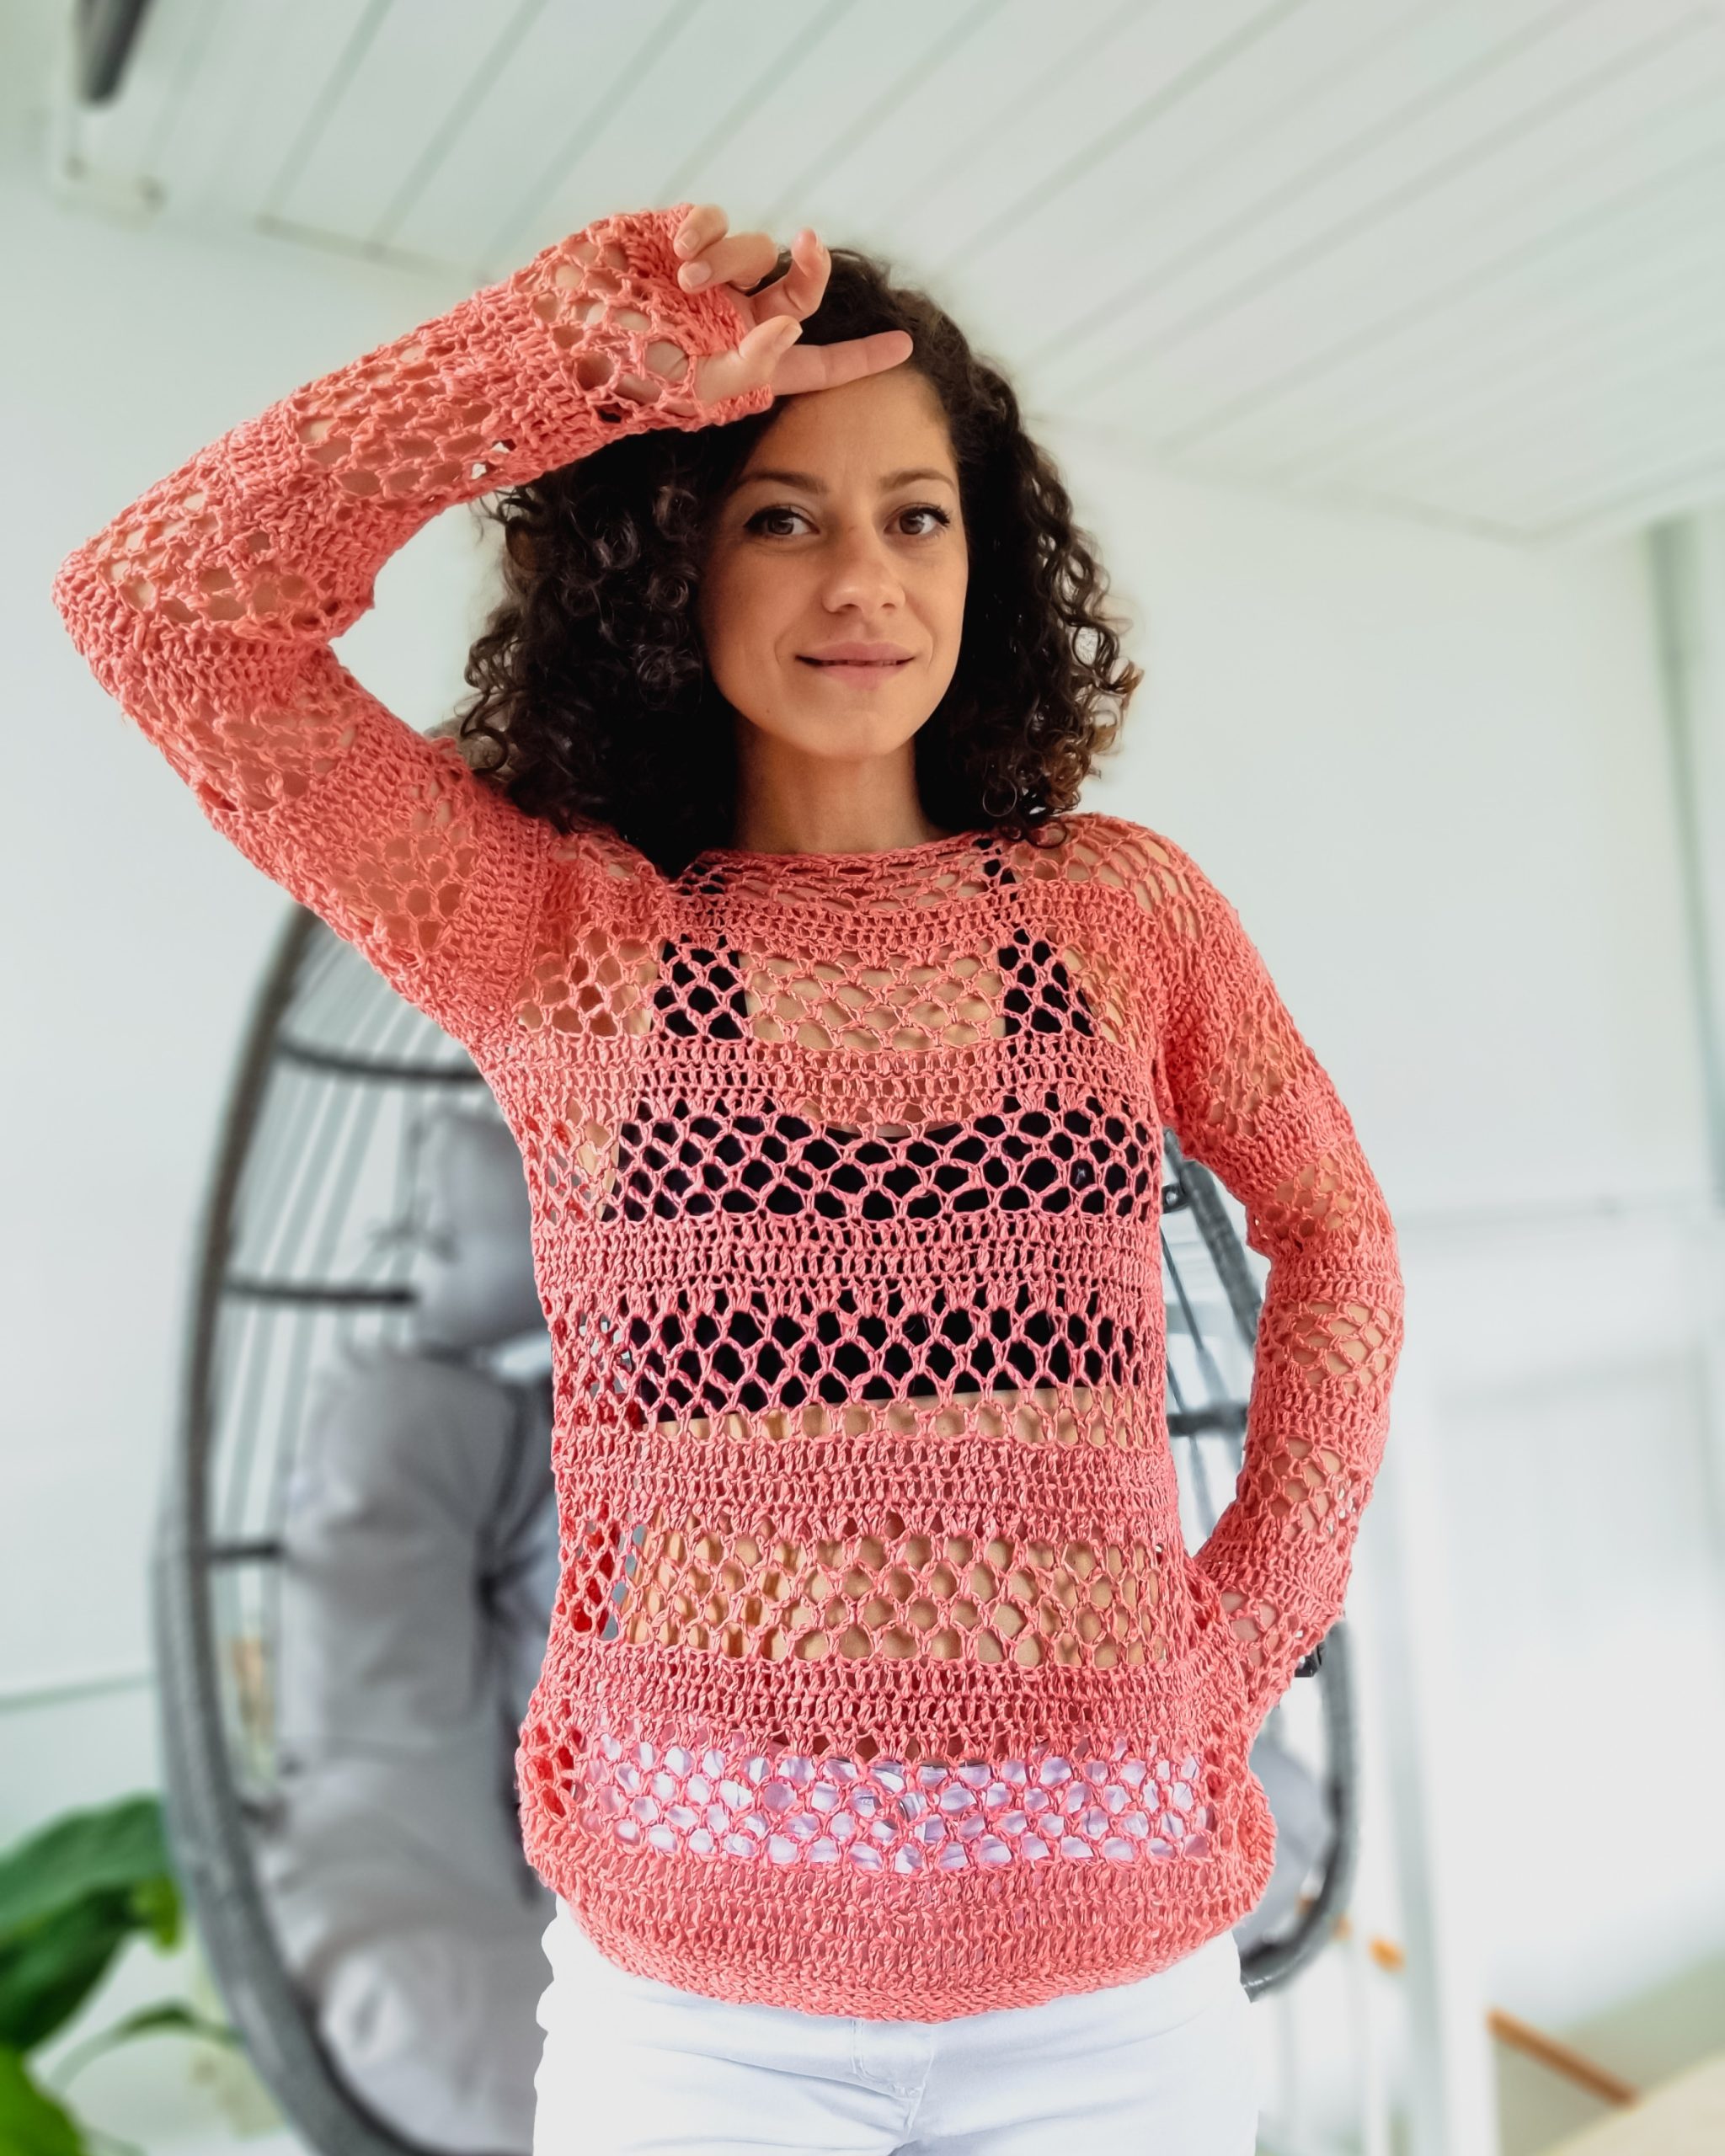
This Pride Blouse Design was in my head for years! I don’t know why I didn’t make it until now, but I am happy I finally did. I think that maybe it wasn’t the time for it. Who knows?
I wasn’t that inspired when choosing the name, and I used the yarn’s name. The yarn I used for this project is Wool Addicts Pride by Lang Yarns, and I thought it would be an excellent name for this project.
I don’t have too many words about this project, and I am afraid I will say what I always say about any new design: I love it, and I hope you will love it too.
The PDF version of this pattern includes stitch charts. You can Purchase the easily printable PDF pattern here:
Now, let’s see what it is all about, what you will need, and how to make this blouse.
MATERIALS
• Yarn: Size 3, DK, Light Weight yarn
• Crochet Hook:
o 4 mm crochet hook
o 4.5 mm crochet hook (for the bottom and back panels edges)
• yarn needle for weaving in ends
• Stitch markers
• Scissors
NOTES ABOUT DESIGN
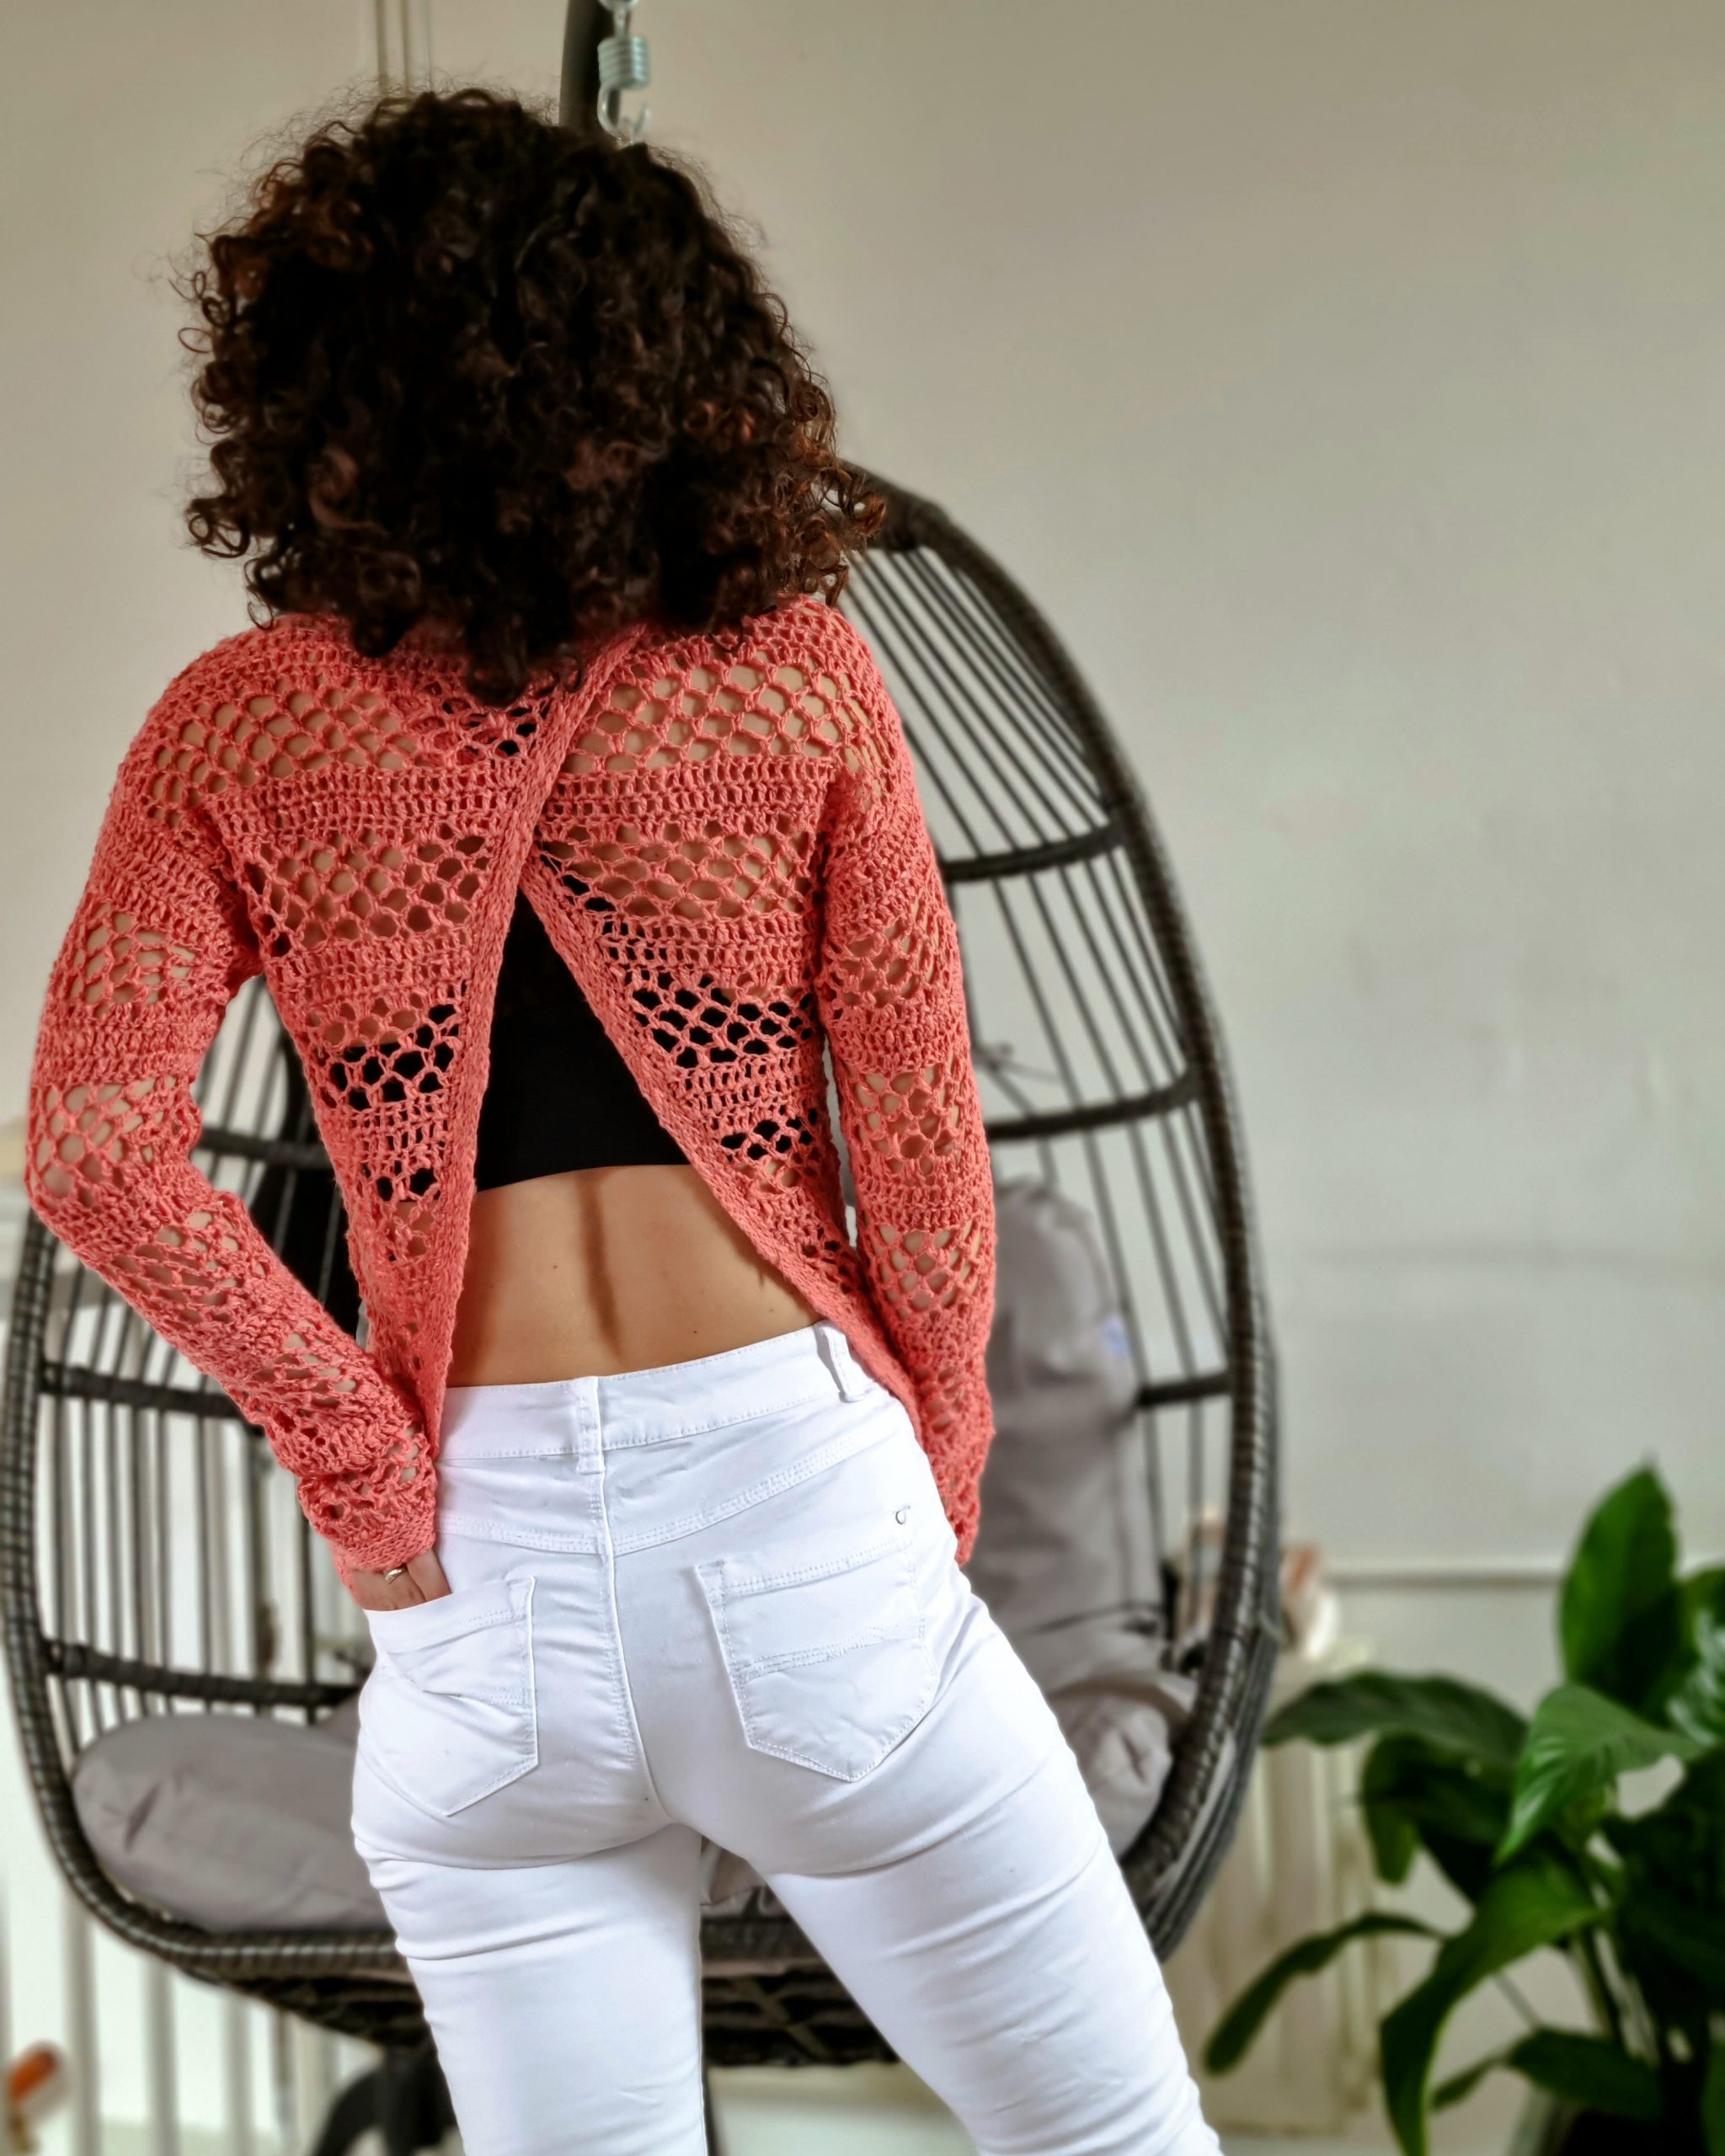
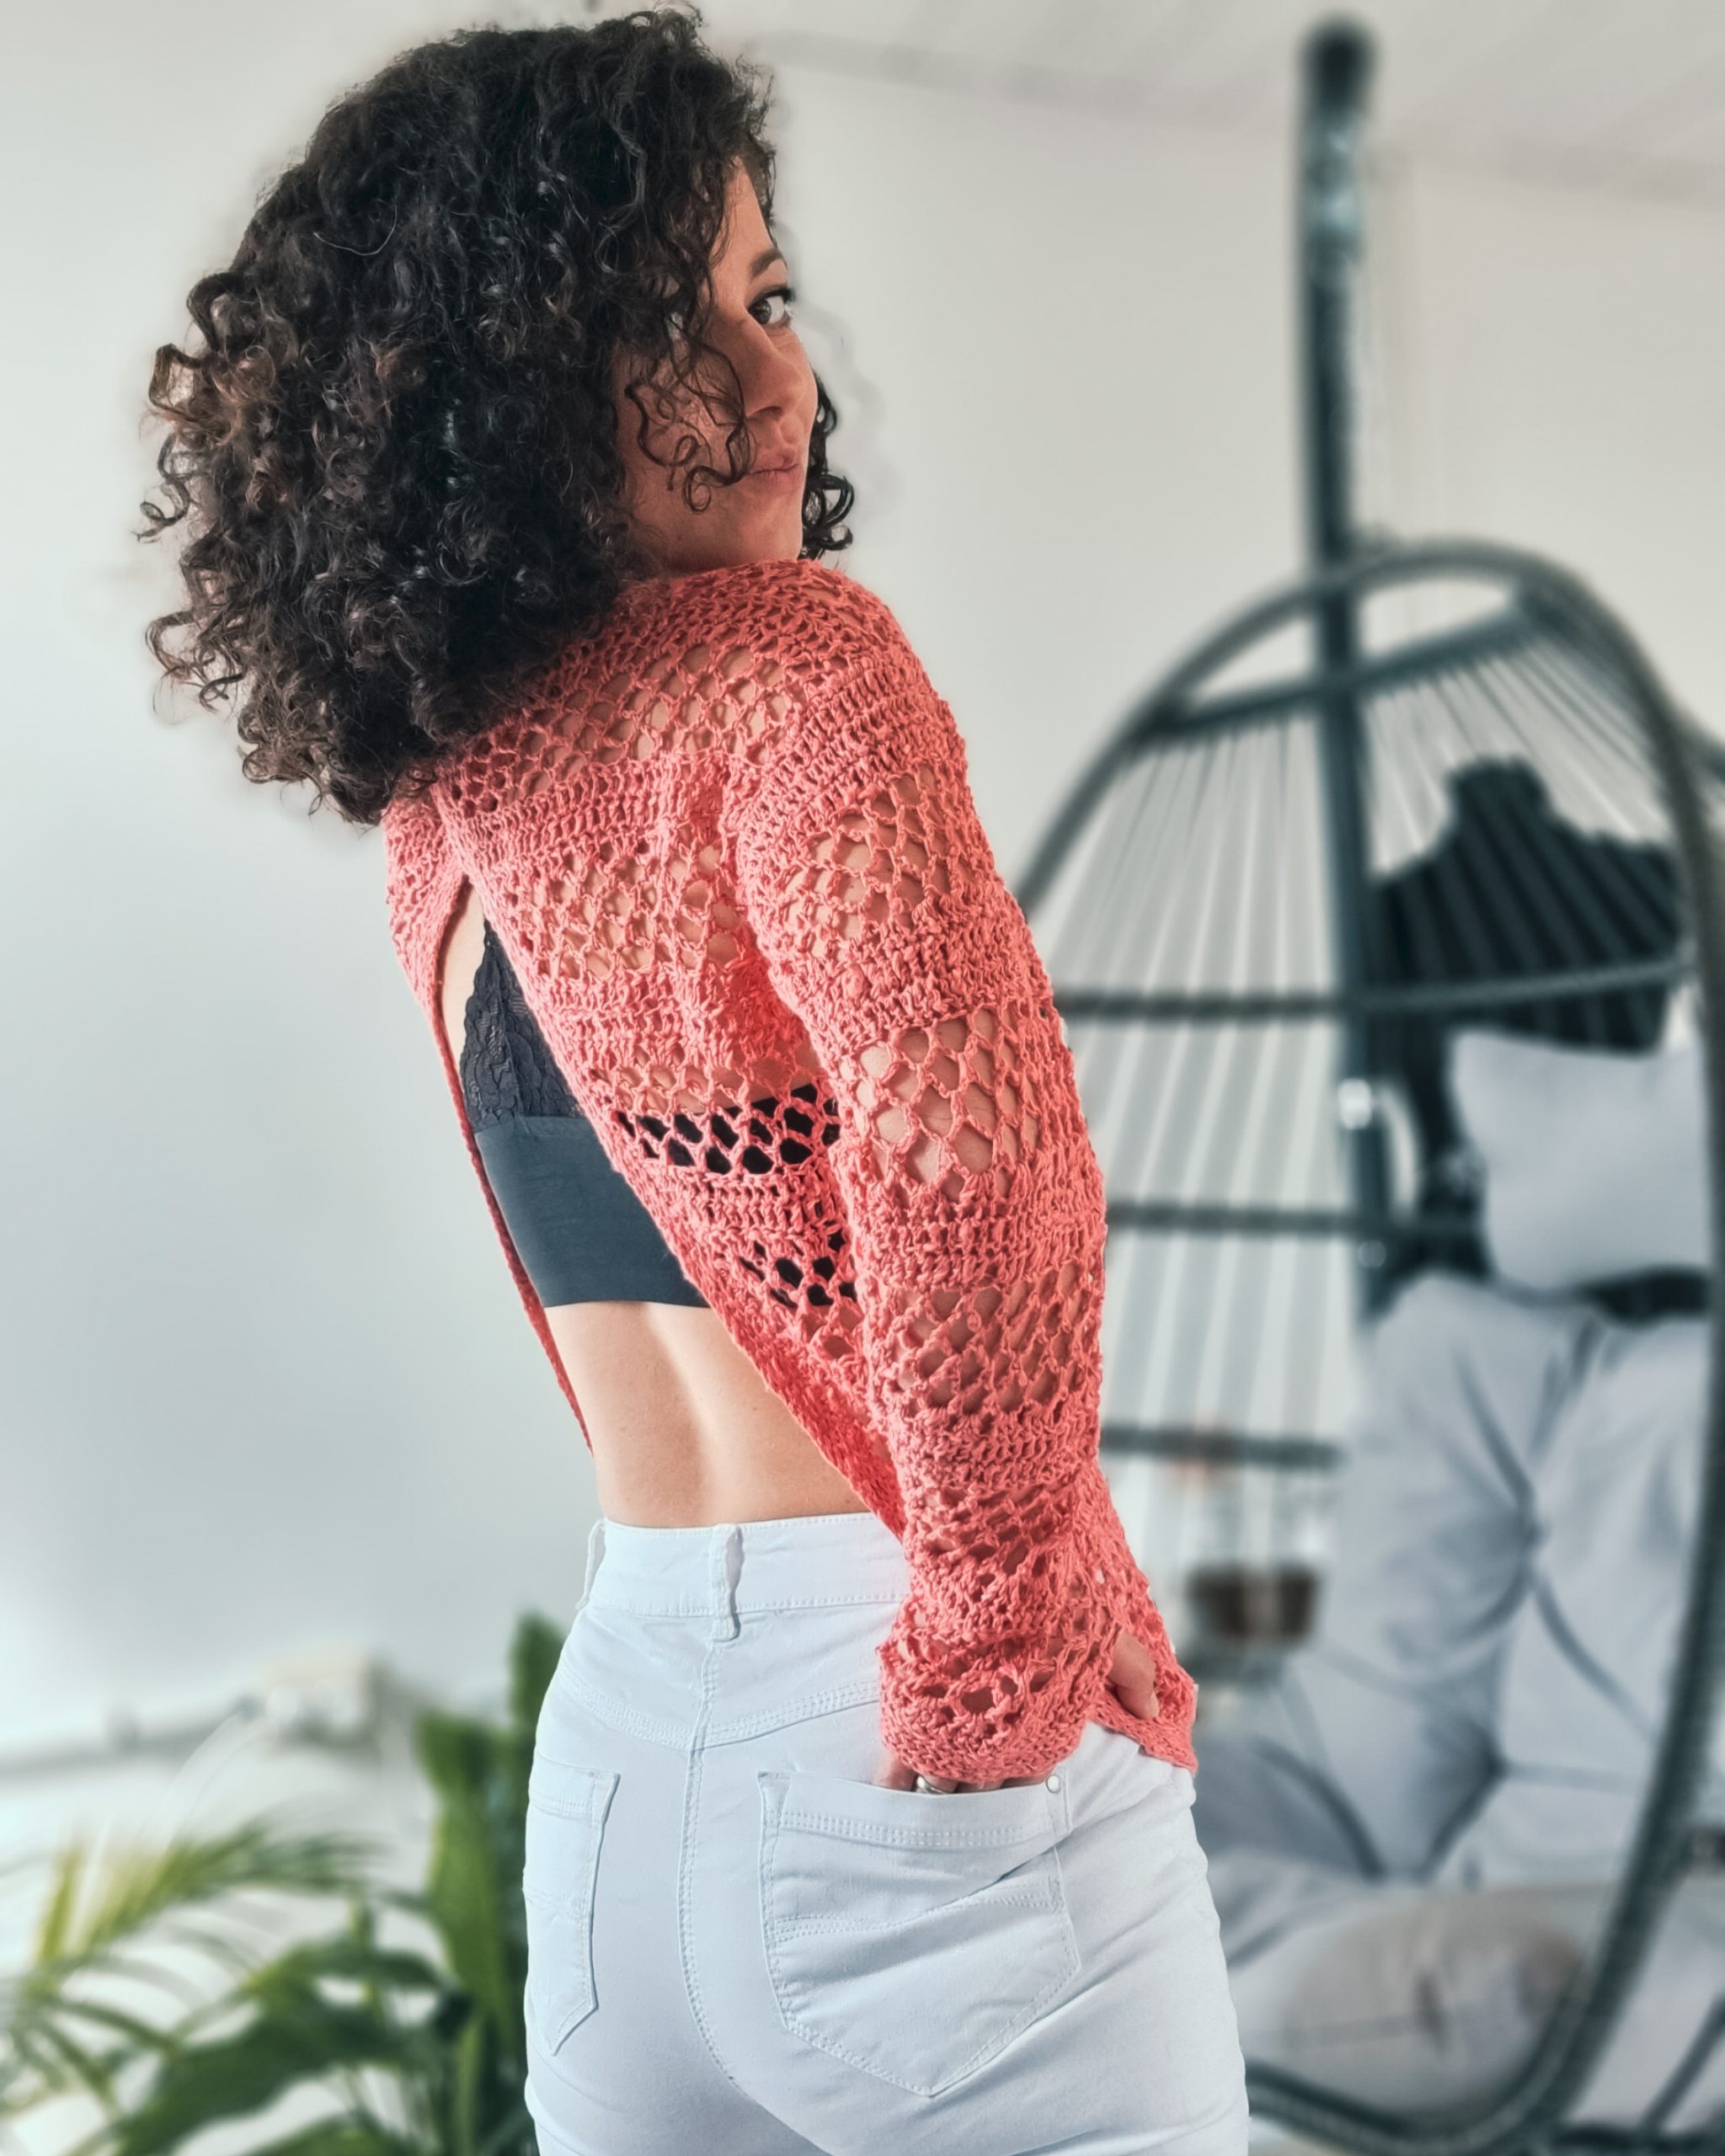
The Pride Blouse has an open back. The trunk is worked in a single piece up to the armpit and then split into front and back panels which are then worked individually to create the armholes.
The sleeves are worked into the armholes after assembling.
The shape of the trunk is a trapezium. We start with a smaller base and increase on the sides until the end of the piece.
MEASUREMENTS AND SIZES
The Pride Blouse Pattern is available in 9 sizes, from XS to 5X Large. The model is 168 cm tall, has an 86 cm Bust circumference, and wears a size Small.
The numbers are written below as follows: XS (S, M), (L, XL), (2XL, 3XL, 4XL, 5XL); the US sizes 0/2 (4/6, 8/10), (12/14, 14/16W), (18/20W, 22/24W, 26/28W, 30/32W)
All the measurements use as reference Standard Body Measurements by ASTM International.
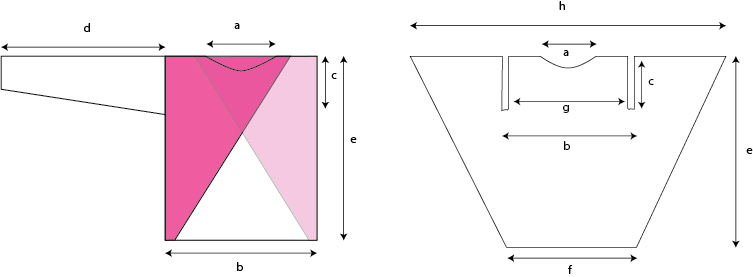
Final Measurements of the Pride Blouse
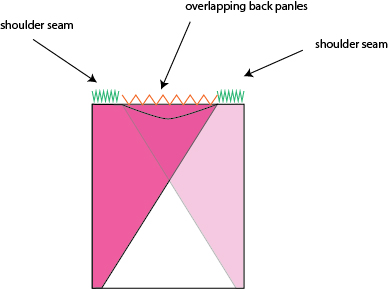
The diagram above shows the final piece after assembling on the left, and on the right is the trunk piece before assembling
- *Neckline width a: 20.5cm (21, 21.5), (22.5, 23), (23.5, 24.5, 25.5, 26)
- Bust width b: 44cm (47, 49.5), (53, 56.5), (61.5, 66.5, 71.5, 76.5)
- Armhole depth c: 18cm (19, 19.5), (21, 22), (22.5, 23.5, 24.5, 26)
- Sleeve length. d: 47cm (46, 46), (46, 45), (45, 46, 46, 47)
- Length e: 60cm (60, 60), (60, 61), (61, 62, 62, 62)
- Starting base f: 51cm (54, 56.5), (60, 63.5), (68.5, 73.5, 78.5, 83.5)
- Cross width front g: 40cm (41, 41), (44, 44), (52, 54, 54, 56)
- Entire trunk width h: 98cm (101, 107), (121, 126), (145, 147, 151, 155)
* if you need a bigger neckline, let more sts for it when shaping the front panel
How much yarn do you need?
For the Pride Blouse, I used:
Wool Addicts Pride; Yarn composition: 40% linen, 32% Cotton, 28% Viscose. Each ball has 100 grams and is approximately 280 meters.
For each size, you will need:
3 (3, 3), (3, 3), (4, 4L, 4, 4) balls or 660 (680, 710), (780, 830) ,(910, 960, 1000,1050) meters
ABBREVIATIONS
Ch – chain
sc – single crochet
dc – double crochet
dc2tog – 2dc together
ss – slip stitch
ssblo – slip stitch in back loop only
St(s) – stitch(es)
R – rows
** – repeated section.
TENSION
Using a 4.00 mm crochet hook in the main stitch pattern
14sts (dc) = 10 cm
7 rows = 9 cm (one pattern repeat)
The PDF version of this pattern includes stitch charts. You can Purchase the easily printable PDF pattern here:
STITCH PATTERN AND TECHNIQUES
dc2tog (decrease): yarn over insert the hook into the indicated st, yarn over pull out a loop, yarn over and pass it through the first 2loops on your hook; yarn over insert the hook into the next st, yarn over pull out a loop, yarn over and pass it through the first 2loops on your hook, yarn over and pass it through all the loops on the hook;
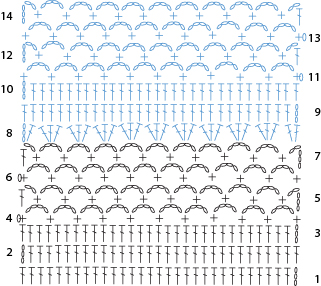
The stitch pattern requires a multiple of 3+1 sts. The repeated pattern is 3 rows in dc and 4 rows in mesh stitch pattern
Mesh stitch:
R1: 1ch, 1sc, *4ch, skip 2sts, 1sc in next st. *rep. until the end of the row. 5ch and turn
R2: 1sc in the first 4ch-sp, *4ch, 1sc in the next 4ch-sp. *rep. until the end of the row. Finish the row with 2ch and 1dc into the third ch. 1ch and turn.
R3: 1sc in the first st, *4ch, 1sc in next 4ch-sp. * rep until the end of the row. Finish the row with 1sc into the third ch.
PATTERN NOTES
- work the trunk panel flat; turn after each row.
- ch3 at the end of a dc row and turn;ch3 counts as first dc
- for the mesh stitch pattern: ch1, if the row starts with an sc, or ch5 if the row starts with a half 4ch-sp;
- 1ch before an sc starting row does not count as first sc; the first ch3 from the turning 5ch counts as first dc.
- work the sleeves after assembling them into the armhole;
- work the sleeves in the round, but turn after each round.
- The pattern is written in US terms.
- The pattern is written for 3 groups of sizes having a different increase pattern for the trunk panel; the pattern is written separately for each group of sizes.
- stitch charts for the length up to the armpit and back panels across the armhole are at the end of this document
INSTRUCTIONS
TRUNK PANEL
SECTION 1 – length up to the armpit
SIZES XS, S, and M
Start: ch 71 (77, 83) and turn
R1: start in the second st
1sc in each st until the end of the row. 3ch and turn. (70, 76, 82 sc)
R2: 1dc in the first st (same as 3ch), 1dc in each of the following sts, except the last one, 2dc in the last st. 3ch and turn (72, 78, 84 dc)
R3: rep. R2 (74, 80, 86 sts).
R4: rep R2 (76, 82, 88 sts). 5ch and turn.
R5: 1sc in the first st (same as 5ch), *4ch, skip 2sts, 1sc in next st. *rep. until the end of the row. Finish the row with 2ch and 1dc in the last st (same as the last sc). 1ch and turn. (25 4ch-sp, 27 4ch-sp, 29 4ch-sp)
R6: 1sc in the first st, *4ch, 1sc in next 4ch-sp).
*rep. until the end of the row; finish the row with 1sc into the third ch. 5ch and turn. (26 4ch-sp, 28 4ch-sp, 30 4ch-sp)
R7: 1sc in next 4ch-sp, *4ch, 1sc in next 4ch sp). *rep. until the end of the row. Finish the row with 2ch and 1dc in the last sc. 1ch and turn. (25 4ch-sp, 27 4ch-sp, 29 4ch-sp)
R8: rep. R6. 3ch and turn. (26 4ch-sp, 28 4ch-sp, 30 4ch-sp)
R9: 1dc in the first st, 3dc in each of the following 4ch-sp except the last one, 2dc into the last 4ch-sp, 2dc in last sc.
(81, 87,93 sts)
Next, rep. R3 – R9 until you have 32 (32, 32) rows.
At the end of this section, you will have
112 (118, 124 sts)
Next, move to SECTION 2 – Back and front panels across the armholes.
TRUNK PANEL
SECTION 1 – length up to the armpit
SIZES L and XL
Start: ch 86 (92) and turn
R1: start in the second st
1sc in each st until the end of the row. 3ch and turn. (85, 91 sc)
R2: 1dc in the first st (same as 3ch), 1dc in each of the following sts, except the last one, 2dc in the last st. 3ch and turn (87, 93 dc)
R3: rep. R2 (89, 95 sts).
R4: rep R2 (91, 97 sts). 5ch and turn.
R5: 1sc in the first st (same as 5ch), *4ch, skip 2sts, 1sc in next st. *rep. until the end of the row. Finish the row with 2ch and 1dc in the last st (same as the last sc). 1ch and turn. (30 4ch-sp, 32 4ch-sp)
R6: 1sc in the first st, *4ch, 1sc in next 4ch-sp). *rep. until the end of the row; finish the row with 1sc into the third ch. 5ch and turn. (31 4ch-sp, 33 4ch-sp)
R7:1sc in next 4ch-sp, *4ch, 1sc in next 4ch sp). *rep. until the end of the row. Finish the row with 2ch and 1dc in the last sc. 5ch and turn. (30 4ch-sp, 32 4ch-sp)
R8: 1sc in the first st, *4ch, 1sc in the next 4ch-sp. *rep until the end of the row. Finish the row with 2ch and 1dc into the third ch. 3ch and turn. (31 4ch-sp, 33 4ch-sp)
R9: 1dc in the first st, 1dc in the next 2ch-sp, 3dc in each of the following 4ch-sp, 1dc in te last 2ch-sp, 2dc into the third ch.
(99, 105 sts)
Next, rep. R3 – R9 until you have in total 30 (30) rows.
At the end of this section, you will have
139 (145) sts
Next, move to SECTION 2 – Back and front panels across the armholes.
TRUNK PANEL
SECTION 1 – length up to the armpit
SIZES 2XL, 3XL, 4XL, and 5XL
Start: ch 98 (101, 110, 116) and turn
R1: start in the second st
1sc in each st until the end of the row. 3ch and turn. (97, 100, 109, 115 sc)
R2: 2dc in the first st (same as 3ch), 1dc in each of the following sts, except the last one, 3dc in the last st. 3ch and turn (101, 104, 113, 119sts)
R3: rep. R2 (105, 108, 117, 123 sts).
R4: rep R2 (109, 115, 121, 127). 5ch and turn.
R5: 1sc in the first st (same as 5ch), *4ch, skip 2sts, 1sc in next st. *rep. until the end of the row. Finish the row with 2ch and 1dc in the last st (same as the last sc). 1ch and turn. (36 4ch-sp, 38 4ch-sp, 40 4ch-sp, 42 4ch-sp)
R6: 1sc in the first st, *4ch, 1sc in next 4ch-sp). *rep. until the end of the row; finish the row with 1sc into the third ch. 5ch and turn. (37 4ch-sp, 39 4ch-sp, 41 4ch-sp, 43 4ch-sp)
R7: 1sc in next 4ch-sp, *4ch, 1sc in next 4ch sp). *rep. until the end of the row. Finish the row with 2ch and 1dc in the last sc. 1ch and turn. (36 4ch-sp, 38 4ch-sp, 40 4ch-sp, 42 4ch-sp)
R8: rep. R6. 3ch and turn. (37 4ch-sp, 39 4ch-sp, 41 4ch-sp, 43 4ch-sp)
R9: 2dc in the first st, 3dc in each of the following 4ch-sp except the last one, 2dc into the last 4ch-sp, 3dc in last sc.
(116, 122, 128, 134 sts)
Next, rep. R3 – R9 until you have 30 (30, 30, 30) rows.
At the end of this section, you will have
161 (164, 170, 1750 sts
Next, move to SECTION 2 – Back and front panels across the armholes.
The PDF version of this pattern includes stitch charts. You can Purchase the easily printable PDF pattern here:
SECTION 2 – Back and front panels across the armholes
Use stitch markers and mark the back panels’ stitches and the front panel sts

Sizes XS, S, and M
Right Back Panel
Start from where your yarn is.
R1: 5ch, 1sc in the first st, *4ch, skip next 2sts, 1sc in next st, *rep. until you have 3sts left until the st marker, 4ch, skip next 2sts, 1sc into the last st. 5ch and turn
R2: 1sc in next 4ch-sp, *4ch, 1sc in next 4ch-sp. *rep. until the end of the row. Finish the row with 4ch and 1sc into the third ch. 5ch and turn
R3: rep. R2
R4: rep. R2. 3ch and turn
R5: 2dc into the first st, 3dc in each of the following 4ch-sp, 1dc into the last 2ch-sp, 1dc into the third ch. 3ch and turn.
R6: 1dc in each dc, 2dc into the third ch, 3ch, and turn.
R7: 1dc into the first st (same as 3ch), 1dc in each dc until the end of the row. 1ch and turn,
R8:1sc into the first st, *4ch, skip next 2sts, 1sc in next st. *rep until the end of the row. Finish the row with 2ch and 1dc into the last st. 1ch and turn
R9: 1sc into the first st, *4ch, 1sc into the next 4ch-sp. *rep. until the end of the row. Finish the row with 2ch and 1dc into the last st.
R10: rep. R9
R11: Rep. R9. 3ch and turn
R12:1dc into the 2ch-sp, 3dc into each 4ch-sp, 3dc in last sc. 3ch and turn
R13: 1dc into the first st, 1dc in each dc to the end of the row. 3ch and turn.
R13 was the last row for size XS. Cut the yarn and move to the FRONT
PANEL.
R14: 1dc in each dc, 2dc into the third ch. 5ch and turn
R14 was the last row for size S. Cut the yarn and move to the FRONT
PANEL.
R15: rep R1
Front Panel
Rejoin yarn into the marked st, ch1
R1: 1sc into the first st, *4ch, skip the next 2sts, 1sc in next st. *rep until the end of the row. 5ch and turn
R2: 1sc into the next 4ch-sp, *4ch, 1sc into the next 4ch-sp. *rep until the end of the row, 2ch and 1dc into the last st. 1ch and turn
R3: 1sc into the first st, *4ch, 1sc into the next 4ch-sp. *rep. until the end of the row, 4ch, 1sc into the third ch. 5ch and turn
R4: rep. R2. 3ch and turn
R5: 1dc into the 2ch-sp, 3dc in each 4ch-sp, 1dc into the last 2ch-sp, 1dc into the third ch. 3ch and turn
R6: 1dc into each dc to the end of the row. 3ch and turn
R7: rep. R6.
R8 – R11: Rep. R1 – R4
The following 2 (3, 4) rows work only the shoulder sts: 17 (18, 17) sts.
*for size M the last row for the shoulders will be a Mesh pattern which requires a multiple of 3 plus 1 sts, but you have a multiple of 3+2 (17sts). Finish the row by skipping 3 sts instead of 2
Left Back Panel
Rejoin yarn into the marked st and ch1
R1: 1sc into the first st, *4ch, skip next 2sts, 1sc in next st. *rep, until the end of the row, 2ch, 1dc into the same last st. 1ch and turn
R2: 1sc into the first st, *4ch, 1sc in next 4ch-sp. *rep until the end of the row, 2ch, 1dc into the last st. 1ch and turn.
R3: rep. R2
R4: Rep R2. 3ch and turn
R5: 1dc into the 2ch-sp, 3dc in each 4ch-sp, 3dc into the last st. 3ch and turn
R6: 1dc into the first st (same as 3ch), 1dc in each dc. 3ch and turn.
R7: 1dc in each dc, 2dc into the third ch. 5ch and turn.
R8: 1sc in the first st, *4ch, skip next 2sts, 1sc in next st, *rep. until you have 3sts left, 4ch, skip next 2sts, 1sc into the last st. 5ch and turn
R9: 1sc in next 4ch-sp, *4ch, 1sc in next 4ch-sp. *rep. until the end of the row. Finish the row with 4ch and 1sc into the third ch. 5ch and turn
R10: rep. R9
R11: rep. R9. 3ch and turn
R12: 2dc into the first st, 3dc in each of the following 4ch-sp, 1dc into the last 2ch-sp, 1dc into the third ch. 3ch and turn.
R13: 1dc in each dc, 2dc into the third ch, 3ch, and turn. (last row size XS)
R14: into the first st (same as 3ch), 1dc in each dc until the end of the row. 1ch and turn. (last Row size S)
R15: Rep. R1 (last row size M)
Sizes L and XL
Right Back Panel
Start from where your yarn is.
R1:1dc into the first st (same as 3ch), 1dc in each dc. 3ch and turn.
R2: 1dc in each dc, 2dc into the third ch. 5ch and turn.
R3: 1sc in the first st, *4ch, skip next 2sts, 1sc in next st, *rep. until you have 3sts left, 4ch, skip next 2sts, 1sc into the last st. 5ch and turn
R4: 1sc in next 4ch-sp, *4ch, 1sc in next 4ch-sp. *rep. until the end of the row. Finish the row with 4ch and 1sc into the third ch. 5ch and turn
R5: rep. R4
R6: 1sc in next 4ch-sp, *4ch, 1sc in next 4ch-sp. *rep. until the end of the row. Finish the row with 4ch, 1sc into the third ch, 2ch and 1dc into the third ch.
R7: 1dc into the first st, 1dc into the 2ch-sp, 3dc in each 4ch-sp, 1dc in the last 2ch-sp, 1dc into the third ch. 3ch and turn
R8: 1dc in each dc, 2dc into the third ch. 5ch and turn.
R9: 1dc into the first st (same as 3ch), 1dc in each dc. 1ch and turn.
R10: 1sc into the first st, *4ch, skip next 2sts, 1sc in next st. *rep until you have 3sts left, 4ch, skip next 2sts, 1sc into the third ch, 2ch, 1dc into the third ch. 1ch and turn
R11: 1sc, into the first st, *4ch, 1sc into the next 4ch-sp. *rep. until the end of the row. Finish the row with 2ch, 1dc into the last st.
R12: rep. R11, 5ch, and turn
R13: 1sc into the first st, *4ch, 1sc into the next 4ch-sp. *rep. until the end of the row. Finish the row with 2ch and 1dc into the last st. 3ch and turn.
R14: 1dc into the 2ch-sp, 3dc in each 4ch-sp, 1dc into the last 2ch-sp, 2dc into the third ch.
R15: rep. R1
R16:rep R2 (Last Row for Size L)
R17: Rep R3.( Last Row for Size XL)
Front Panel
Rejoin yarn into the marked st, ch3
R1:1dc into each dc to the end of the row. 3ch and turn
R2: rep. R1, 1ch, and turn
R3: 1sc into the first st, *4ch, skip the next 2sts, 1sc in next st. *rep until the end of the row. 5ch and turn
R4: 1sc into the next 4ch-sp, *4ch, 1sc into the next 4ch-sp. *rep until the end of the row, 2ch and 1dc into the last st. 1ch and turn
R5: 1sc into the first st, *4ch, 1sc into the next 4ch-sp. *rep. until the end of the row, 4ch, 1sc into the third ch. 5ch and turn
R6: Rep. R4
R7: 1dc into the 2ch-sp, 3dc in each 4ch-sp, 1dc into the last 2ch-sp, 1dc into the third ch. 3ch and turn
R8: rep R1
R9: Rep R1
R10 – R13: Rep. R3 – R6
The following 3 (4) rows work only the shoulder sts: 18 (18) sts.
*for size, XLthe last row for the shoulders will be a Mesh pattern which requires a multiple of 3 plus 1 sts, but you have a multiple of 3 (18sts). Finish the row by skipping 1 st instead of 2.
Left Back Panel
Rejoin yarn into the marked st and ch3
R1: 1dc in each dc, 2dc into the third ch.
R2: 1dc into the first st (same as 3ch), 1dc in each dc. 1ch and turn.
R3: 1sc into the first st, *4ch, skip next 2sts, 1sc in next st. *rep until you have 3sts left, 4ch, skip next 2sts, 1sc into the third ch, 2ch, 1dc into the third ch. 1ch and turn
R4: 1sc, into the first st, *4ch, 1sc into the next 4ch-sp. *rep. until the end of the row. Finish the row with 2ch, 1dc into the last st.
R5: rep. R4, 5ch, and turn
R6: 1sc into the first st, *4ch, 1sc into the next 4ch-sp. *rep. until the end of the row. Finish the row with 2ch and 1dc into the last st. 3ch and turn.
R7: 1dc into the 2ch-sp, 3dc in each 4ch-sp, 1dc into the last 2ch-sp, 2dc into the third ch.
R8:Rep R2
R9: Rep. R1
R10: 1sc in the first st, *4ch, skip next 2sts, 1sc in next st, *rep. until you have 3sts left, 4ch, skip next 2sts, 1sc into the last st. 5ch and turn
R11: 1sc in next 4ch-sp, *4ch, 1sc in next 4ch-sp. *rep. until the end of the row. Finish the row with 4ch and 1sc into the third ch. 5ch and turn
R12: rep R11
R13:1sc in next 4ch-sp, *4ch, 1sc in next 4ch-sp. *rep. until the end of the row. Finish the row with 4ch, 1sc into the third ch, 2ch and 1dc into the third ch.
R14: 1dc into the first st, 1dc into the 2ch-sp, 3dc in each 4ch-sp, 1dc in the last 2ch-sp, 1dc into the third ch. 3ch and turn
R15:Rep R1
R16:rep R2 (Last Row for Size L)
R17: Rep R3.( Last Row for Size XL)
Sizes 2XL, 3XL, 4XL and 5XL
Right Back Panel
Start from where your yarn is.
R1:2dc into the first st (same as 3ch), 1dc in each dc. 3ch and turn.
R2: 1dc in each dc, 3dc into the third ch. 5ch and turn.
R3: 1sc in the first st, *4ch, skip next 2sts, 1sc in next st, *rep. until you have 3sts left, 4ch, skip next 2sts, 1sc into the last st. 5ch and turn
R4: 1sc in next 4ch-sp, *4ch, 1sc in next 4ch-sp. *rep. until the end of the row. Finish the row with 4ch and 1sc into the third ch. 5ch and turn
R5: rep. R4
R6: rep. R4
R7: 2dc into the first st, 3dc in each 4ch-sp, 1dc in the last 2ch-sp, 1dc into the third ch. 3ch and turn
R8: 1dc in each dc, 3dc into the third ch. 5ch and turn.
R9: 2dc into the first st (same as 3ch), 1dc in each dc. 1ch and turn.
R10: 1sc into the first st, *4ch, skip next 2sts, 1sc in next st. *rep until you have 2sts left, 4ch, skip 1st, 1sc into the third ch. 5ch and turn
R11: 1sc, into the first st, *4ch, 1sc into the next 4ch-sp. *rep. until the end of the row. Finish the row with 2ch, 1dc into the last st. 1ch and turn
R12: 1sc into the first st, *4ch, 1sc into the next 4ch-sp. *rep. until the end of the row, 4ch, 1sc into the third ch. 5ch and turn
R13: rep R11. 3ch and turn
R14: 1dc into the 2ch-sp, 3dc in each 4ch-sp, 1dc into the last 2ch-sp, 3dc into the third ch.
R15: rep. R1
R16: rep. R2
R17: rep. R3 (Last Row 2XL)
R18: rep. R4 (Last Row 3XL)
R19: Rep R4 (Last Row 4XL)
R20: Rep R4 (Last Row 5XL)
Front Panel
Rejoin yarn into the marked st, ch3
R1:1dc into each dc to the end of the row. 3ch and turn
R2: rep. R1, 1ch, and turn
R3: 1sc into the first st, *4ch, skip the next 2sts, 1sc in next st. *rep until the end of the row. 5ch and turn
R4: 1sc into the next 4ch-sp, *4ch, 1sc into the next 4ch-sp. *rep until the end of the row, 2ch and 1dc into the last st. 1ch and turn
R5: 1sc into the first st, *4ch, 1sc into the next 4ch-sp. *rep. until the end of the row, 4ch, 1sc into the third ch. 5ch and turn
R6: Rep. R4
R7: 1dc into the 2ch-sp, 3dc in each 4ch-sp, 1dc into the last 2ch-sp, 1dc into the third ch. 3ch and turn
R8: rep R1
R9: Rep R1
Rep. R3 – R9 until you have 4 rows left (counting the same number of rows as the right-back panel)
The following 4 rows work only the shoulder sts: 23 (24, 24, 25) sts.
Left Back Panel
Rejoin yarn into the marked st and ch3
R1: 1dc in each dc, 3dc into the third ch.
R2: 2dc into the first st (same as 3ch), 1dc in each dc. 1ch and turn.
R3: 1sc into the first st, *4ch, skip next 2sts, 1sc in next st. *rep until you have 3sts left, 4ch, skip next 2sts, 1sc into the third ch, 2ch, 1dc into the third ch. 1ch and turn.
R4:1sc, into the first st, *4ch, 1sc into the next 4ch-sp. *rep. until the end of the row. Finish the row with 2ch, 1dc into the last st.
R5: rep R4
R6: Rep. R4
R7: 1dc into the 2ch-sp, 3dc in each 4ch-sp, 1dc into the last 2ch-sp, 3dc into the third ch.
R8: Rep. R2
R9: Rep R1, 1vh and turn
R10: 1sc into the first st, 4ch, skip 1st, 1sc in next, *4ch, skip 2sts, 1sc in next st. *rep until you have 3sts left, 4ch skip 2sts, 1sc into the third ch, 5ch and turn
R11: 1sc, into the first st, *4ch, 1sc into the next 4ch-sp. *rep. until the end of the row. Finish the row with 2ch, 1dc into the last st. 1ch and turn
R12: 1sc into the first st, *4ch, 1sc into the next 4ch-sp. *rep. until the end of the row, 4ch, 1sc into the third ch. 5ch and turn
R13: rep R11. 3ch and turn
R14: 2sc into the first st, 1dc into the 2ch-sp, 3dc in each 4ch-sp, 1dc into the last 2ch-sp, 3dc into the third ch
R15: Rep. R1
R16: Rep R2
R17: rep. R3 (Last Row 2XL)
R18: rep. R4 (Last Row 3XL)
R19: Rep R4 (Last Row 4XL)
R20: Rep R4 (Last Row 5XL)
Now the entire trunk piece is done for all sizes.
To summarize the last section across the armholes, on the back panels, you should have 39 (40, 44), (52, 56) (63, 63, 66, 66) sts.
You should have the same number of sts as you start for the front panel.
BACK PANELS AND BOTTOM EDGE
Next, we will work on the back panels and bottom edge. Work this section in one single piece in rows.
When working across the side rows, work 1st if it is an sc side row, or 3 sts if it is a ch3 or dc side row.
Starting with the second row, use a 4.5 mm crochet hook
R1: 1sc in each st, 1ch, and turn
R2: 1ssblo in each st, 1ch and turn
R3 – *R12: Rep. R2
*work as many rows as you want, depending on how thick you want the edge.
ASSEMBLING
You can use a darn needle for assembling and stitching the shoulder sts and the overlapping back panels. In this design, I used the crochet hook with a lace joining method for the shoulders and slip stitches for the overlapping back panels.
The last row of the shoulders can be either a double crochet row or a Mesh stitch row. Depending on your size, you will find both situations below.
Joining shoulders double crochet rows
Step 1:Rejoin yarn into the first stitch of the right side.
Step 2: 3ch, 1sc into the first st of the left side;
Step 3: 2ch, skip 1st from the right side, 1sc into the next st;
Step 4: 2ch, skip 1st from the left side, 1sc into the next st.
Rep. Step 3 and Step 4 until you finish the shoulder sts.
Joining shoulders mesh stitch rows rows
Step 1:Rejoin yarn into the first stitch of the right side.
Step 2: 3ch, 1sc into the first st of the left side;
Step 3: 2ch, skip 1sc into the first 4ch-sp of the right side
Step 4: 2ch, 1sc into the first 4ch-sp of the left side
Step 5: 3ch, 1sc into the next 4ch-sp of the right side
Step 6: 2ch, 1sc into the next 4ch-sp of the left side.
Rep. Step 5 and Step 6 until you finish the shoulder sts.
The PDF version of this pattern includes stitch charts. You can Purchase the easily printable PDF pattern here:
After finishing the first shoulder, you continue joining the overlapping front panels using slip stitches or single crochet sts. After that, you can continue with the second shoulder.
If the back panels overlap with the shoulders, insert the hook through the back panels when joining the shoulders section.
SLEEVES
Work the sleeves into the armhole. Start by joining the yarn at the armpit.
Work the sleeves in the round and turn after each round.
The first row is a setup row; work the first row in single crochet sts on the right side. The pattern should be:
3sc into a dc or 3ch side row
1sc if the side row is an sc stitch.
Use this pattern as guidance, but considering your tension,
Adjust the pattern so at the end of the row to have a multiple of 3sts.
*R1: 1ch, 1sc in each st around, ss into the first sc and turn
*consider the indications above
R2: 3ch, dc2tog, 1dc in each st until you have 2sts left, dc2tog, ss into the third ch and turn.
R3: rep. R2.
R4: rep R2
R5: 1ch, *1sc, 4ch, skip 2sts. *rep. until the end of the row. ss into the first sc and turn
R6: 5ch, 1sc into the next 4ch-sp, *4ch, 1sc into the next 4ch-sp. Close the round with 2ch and ss into the third ch. turn
R7: 1ch, 1sc into the first st, 4ch, *1sc into the next 4ch-sp, 4ch. * rep. until the end of the row. Ss into the first sc. turn
R8: rep. R5
R9: 3ch, skip 2ch-sp, 3dc into each of the following 4ch-sp, skip the last 2ch-sp, ss into the third ch.
Rep. R2 – R9 until you have 37 (36, 36) (36, 35) (35, 36, 36, 37) rows or until you have the desired length
Sleeves edge
R1: 1sc in each st. 1ch and turn
R2: 1ch, 1ssblo in each st, ss into the first 1ch. Turn
R3 – R12: rep. R2
Neckline edge
Rejoin yarn in one of the sts across the neckline.
Work into the side row 3dc if it’s a dc or ch3 row
Work 1st if it’s an sc side row
Work 3sts into each 4ch-sp.
R1: 1sc in each st around; ss into the first sc and turn
R2 (optional): 1ch, 1ssblo in each st around; ss into the first ch.
TO FINISH
Weave in all looser ends and block to measurements.
The PDF version of this pattern includes stitch charts. You can Purchase the easily printable PDF pattern here:
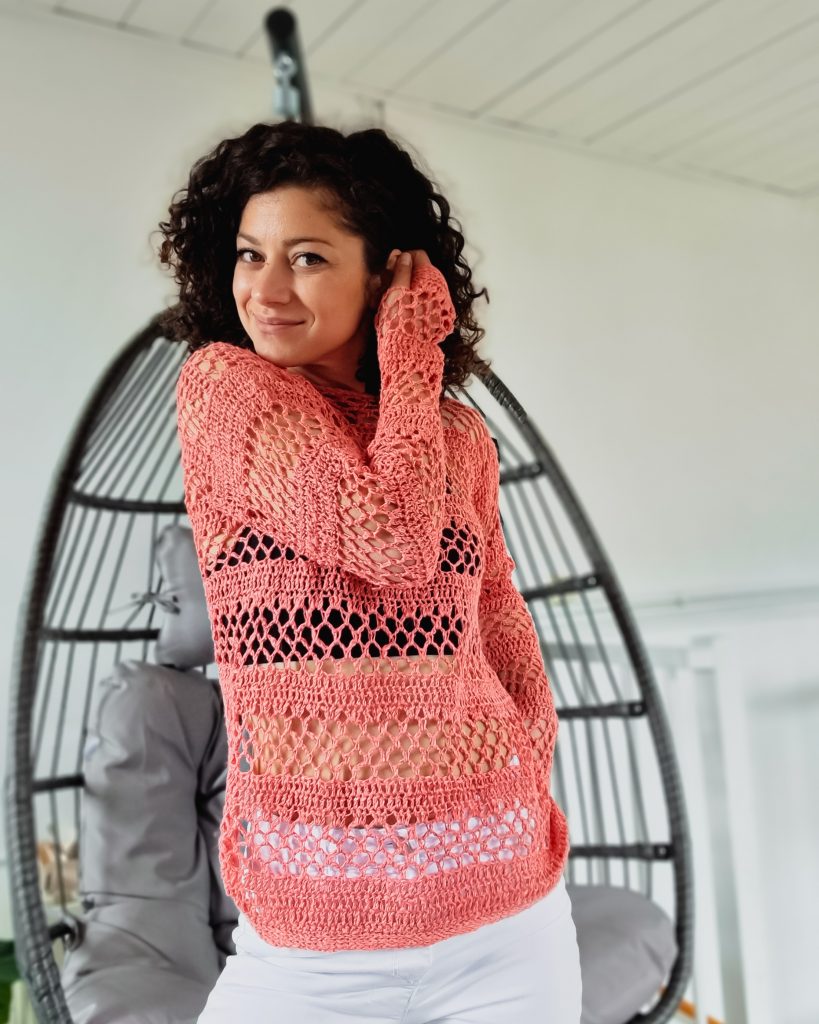
And you are done! I hope you like this pattern! The Pride Blouse is perfect for those beach walks at sunset, or at least this is how I picture myself wearing it.




2 Comments
Beautiful as usual. The back of this blouse is so pretty!
xoxo
Lovely
http://www.mynameislovely.com
Pingback: 20 Easy Crochet Summer Sweater and Cardigan Patterns