
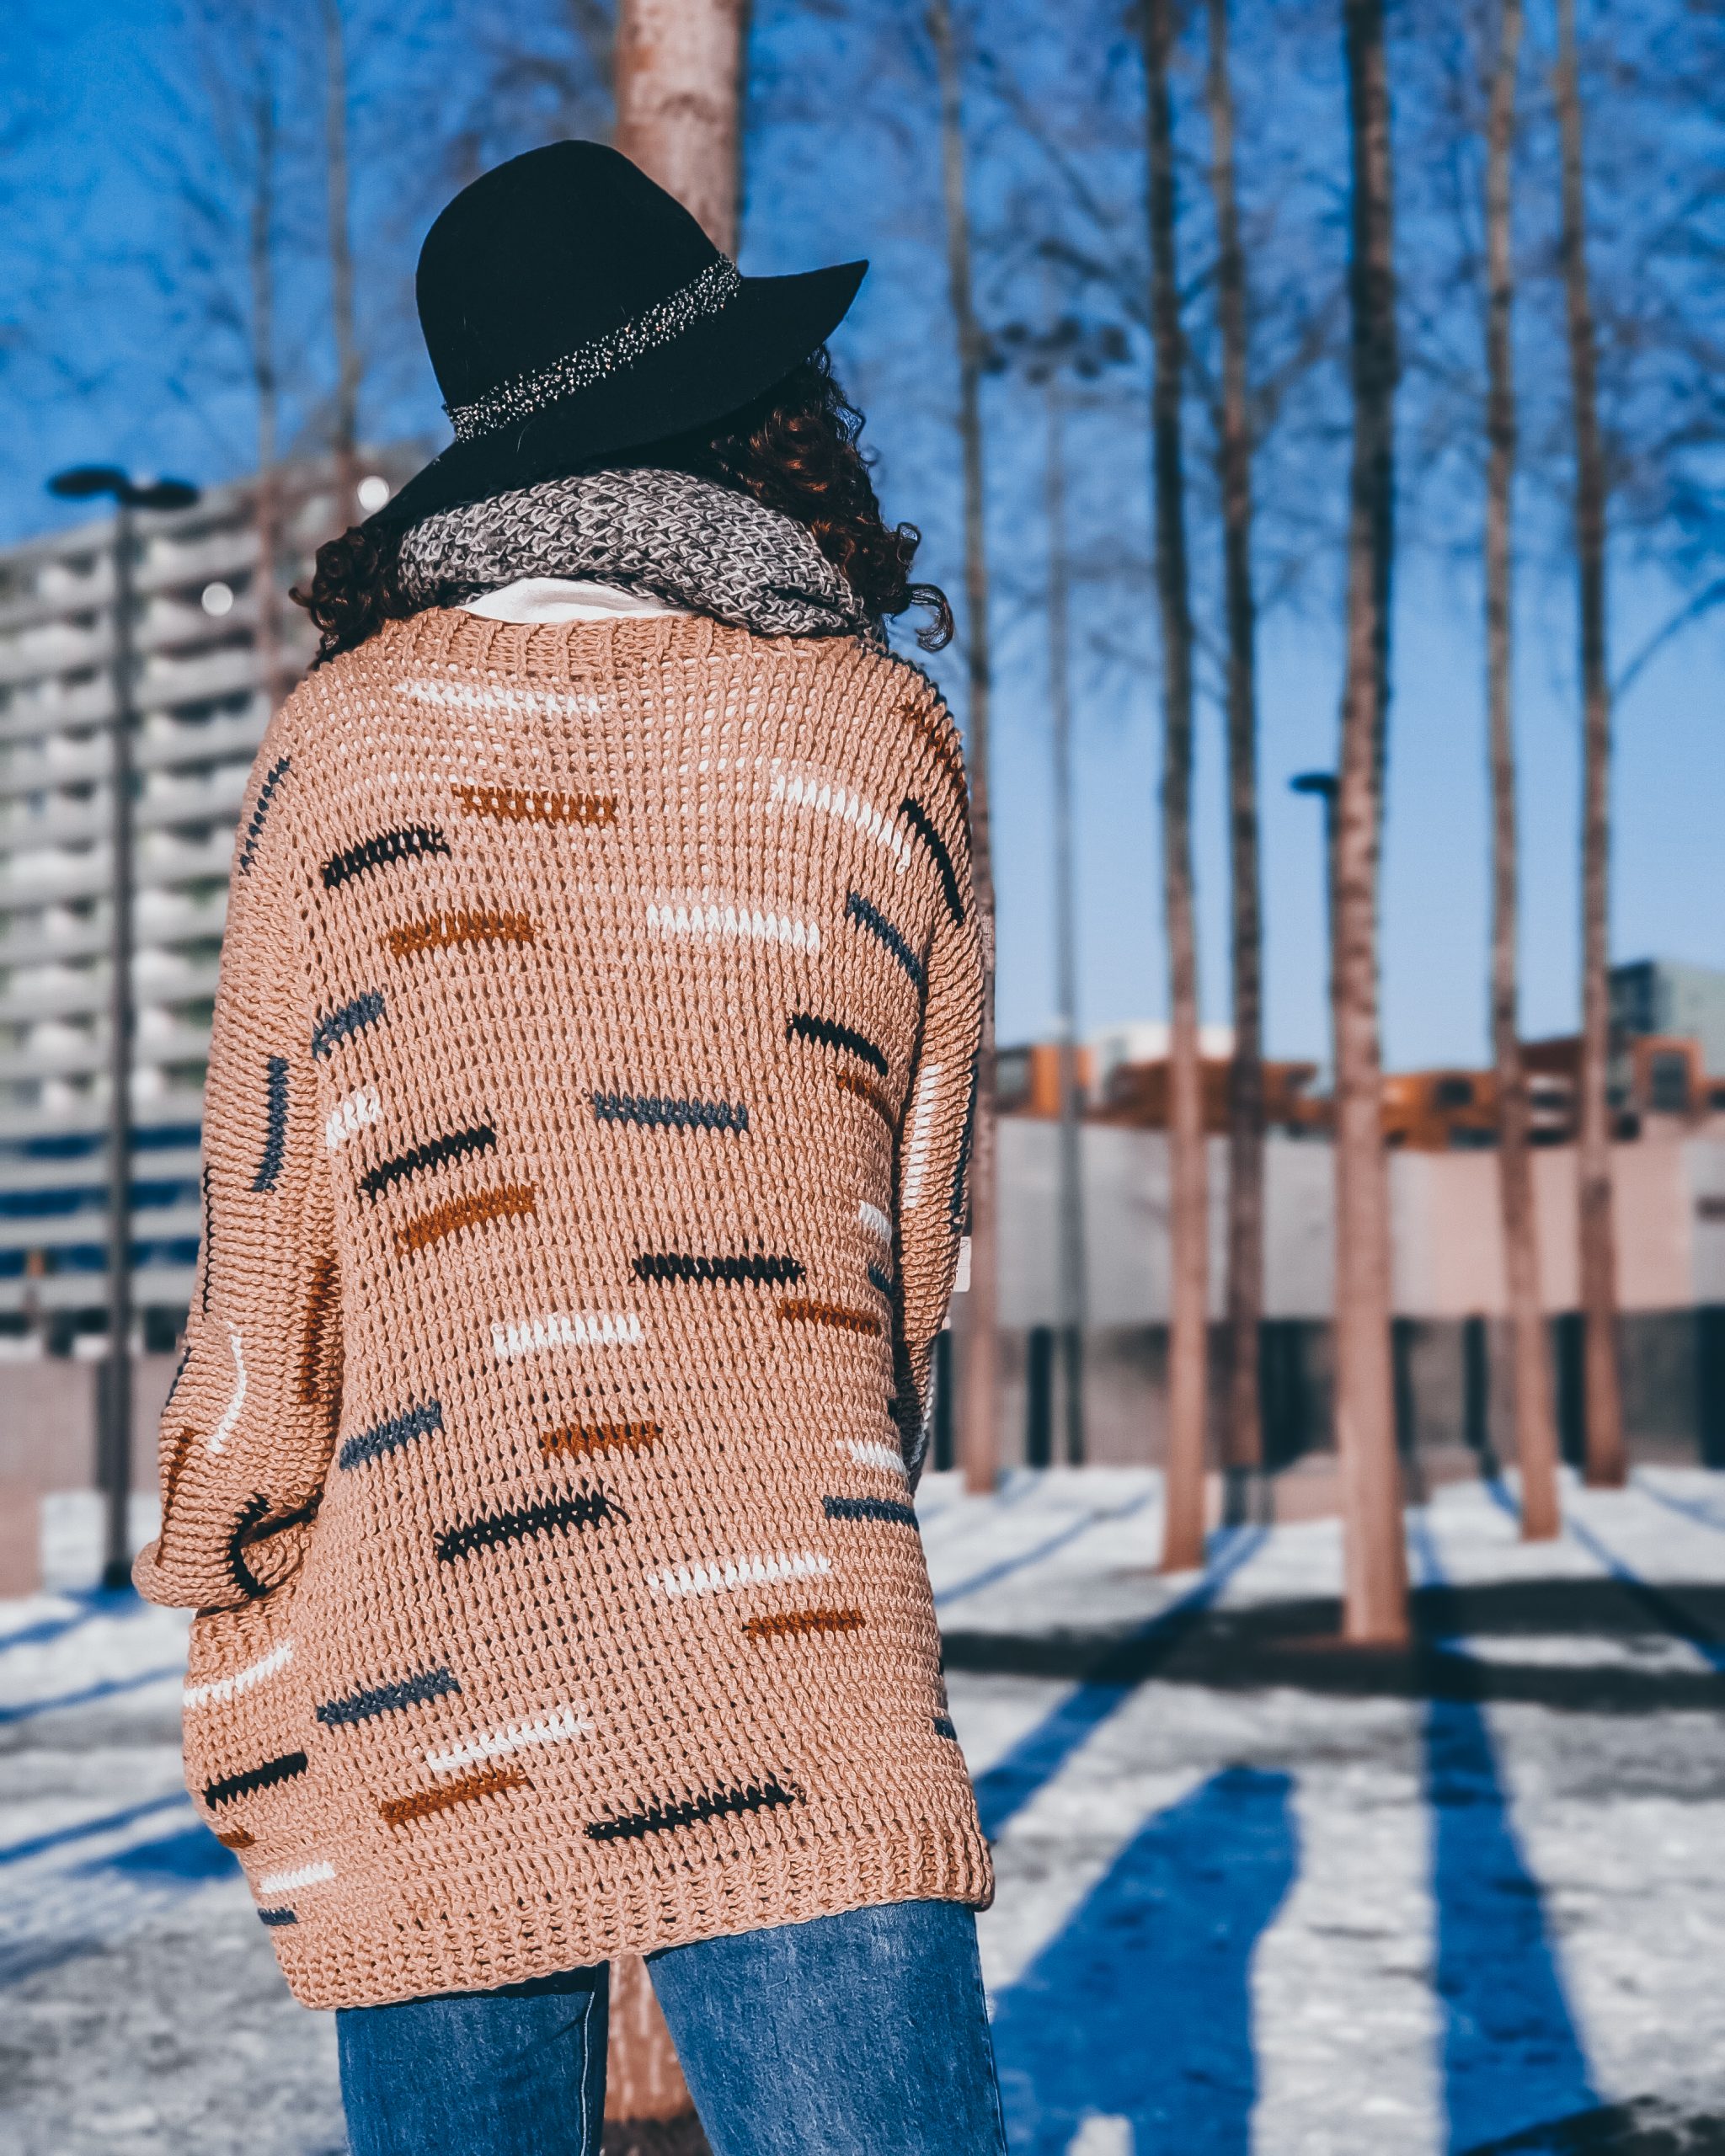
Lately, I didn’t design too many cardigans, even if I love them, and I like how easy to wear they are and perfect for layering, especially when you live in a country where the weather is constantly changing.
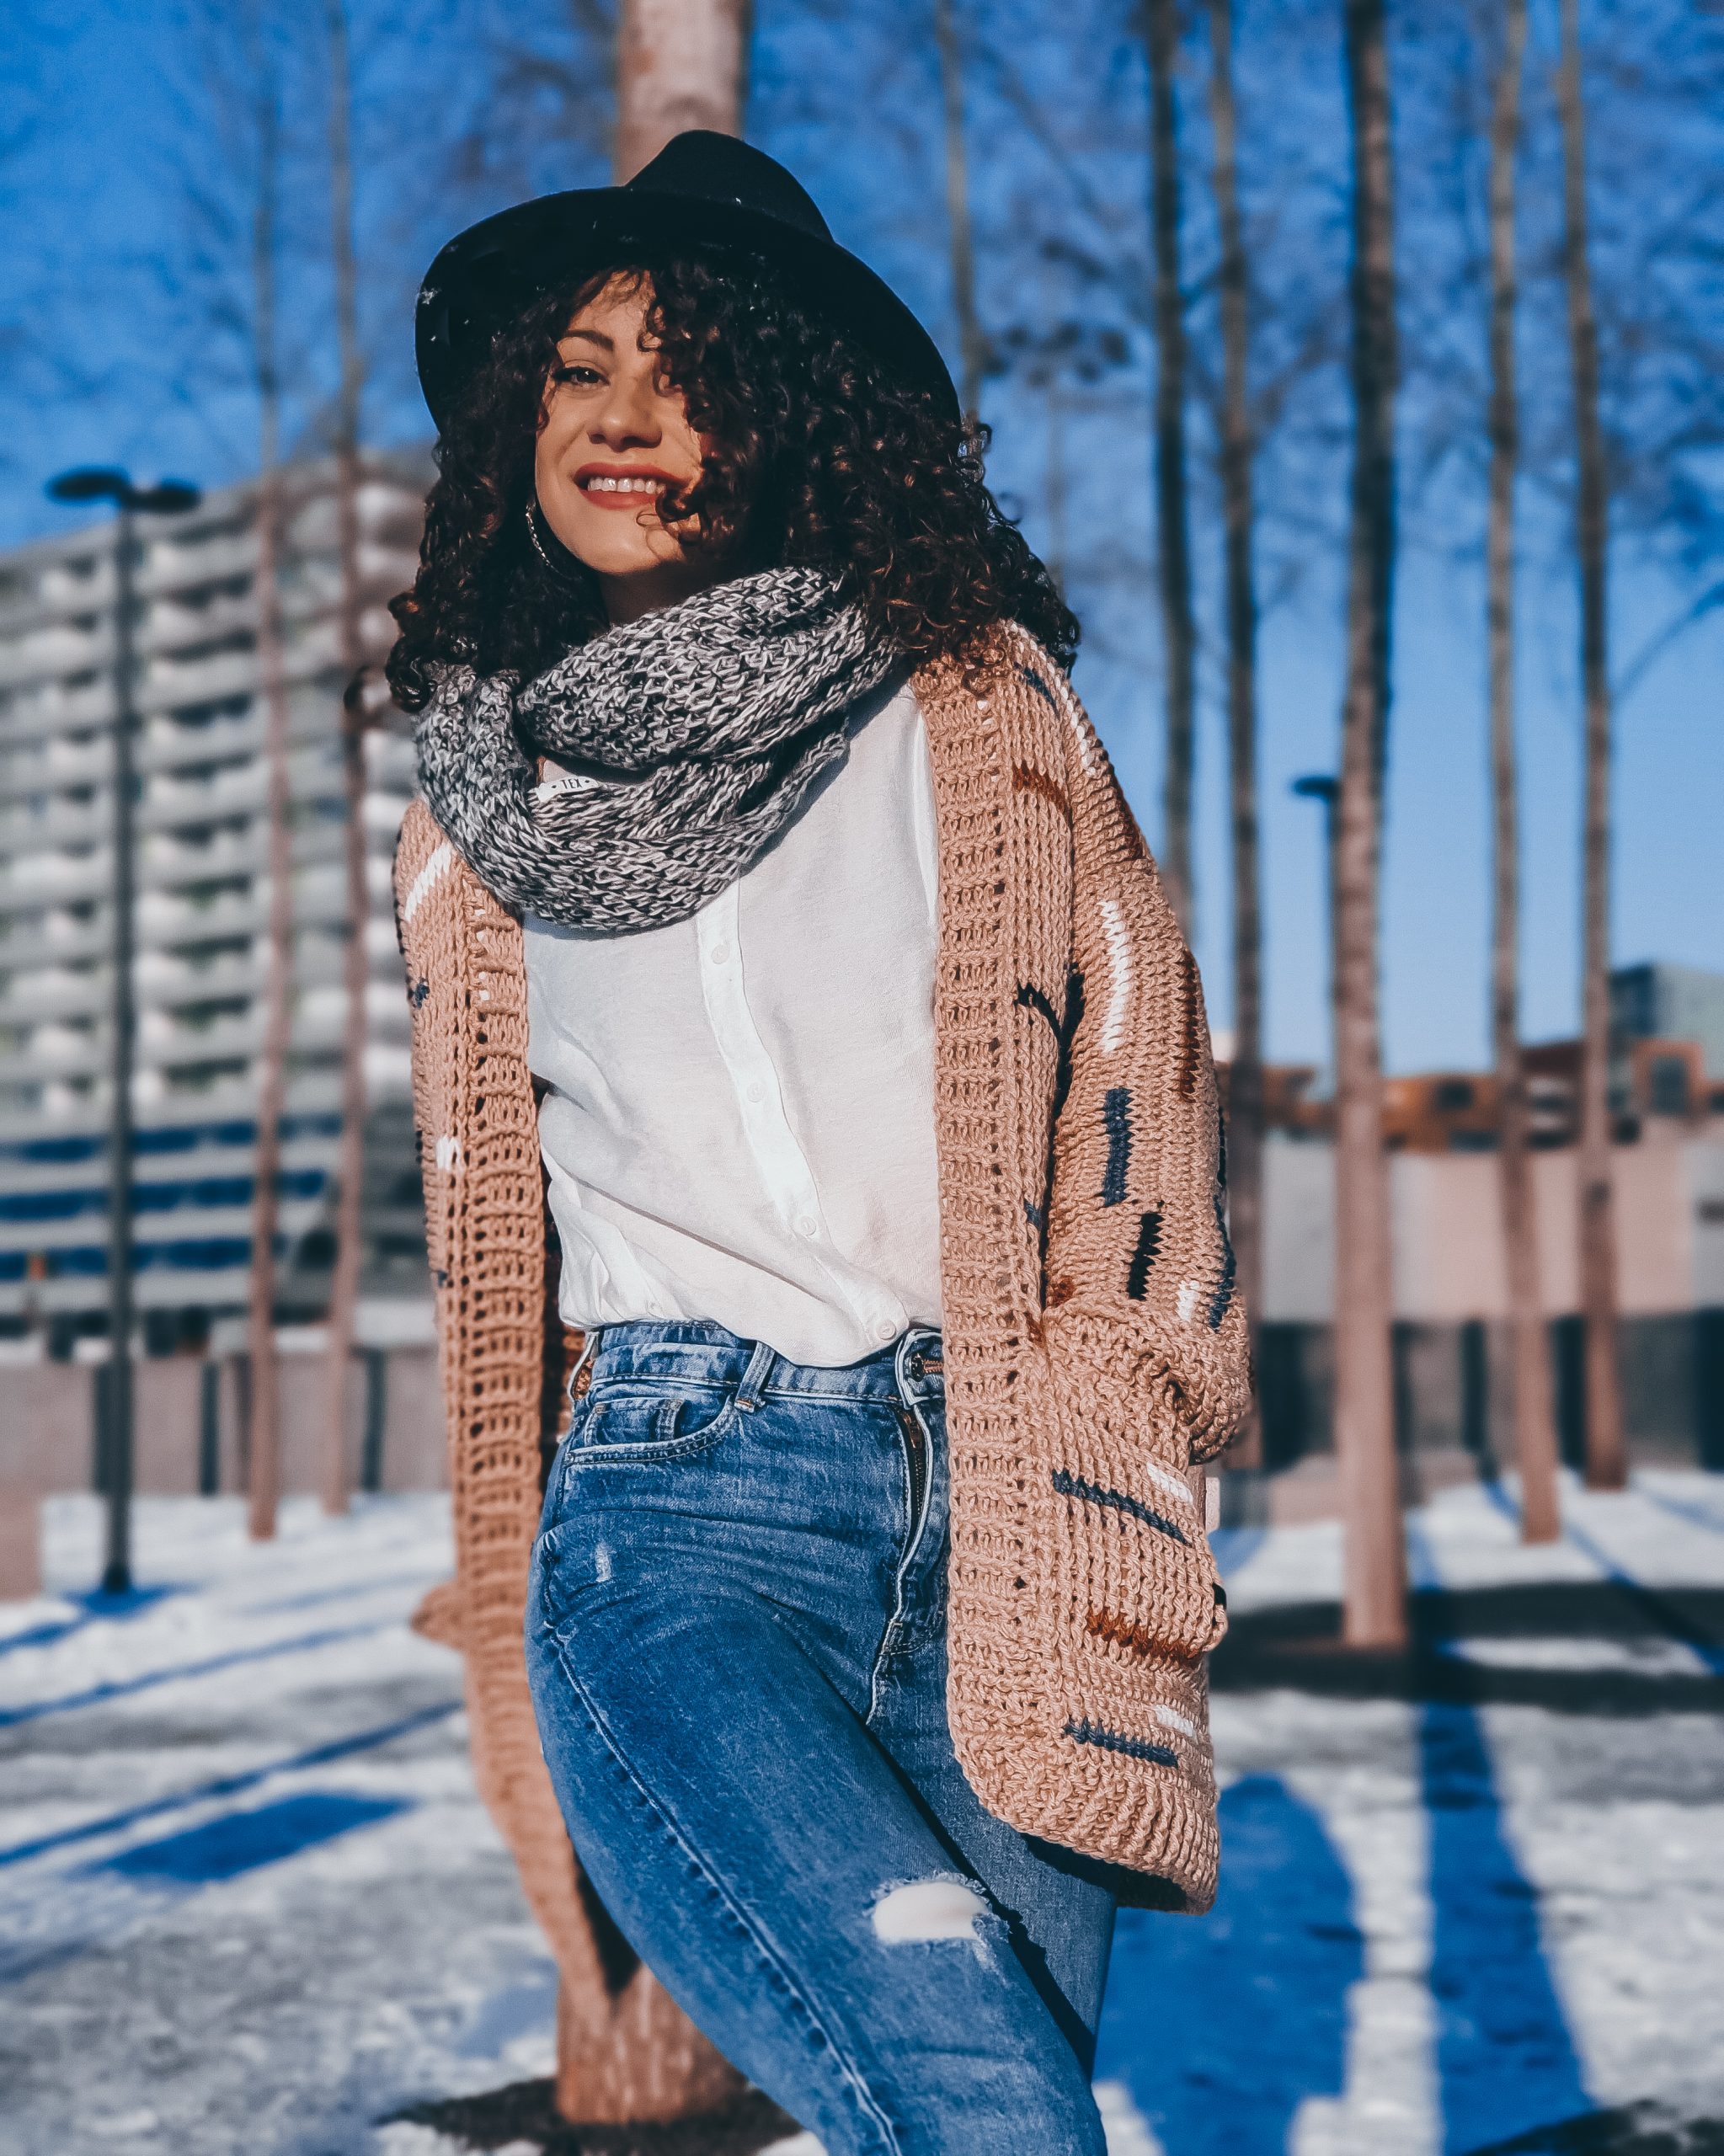
I am so happy that I made this Cookie Cardigan because it will be perfect to have when switching to a spring wardrobe.

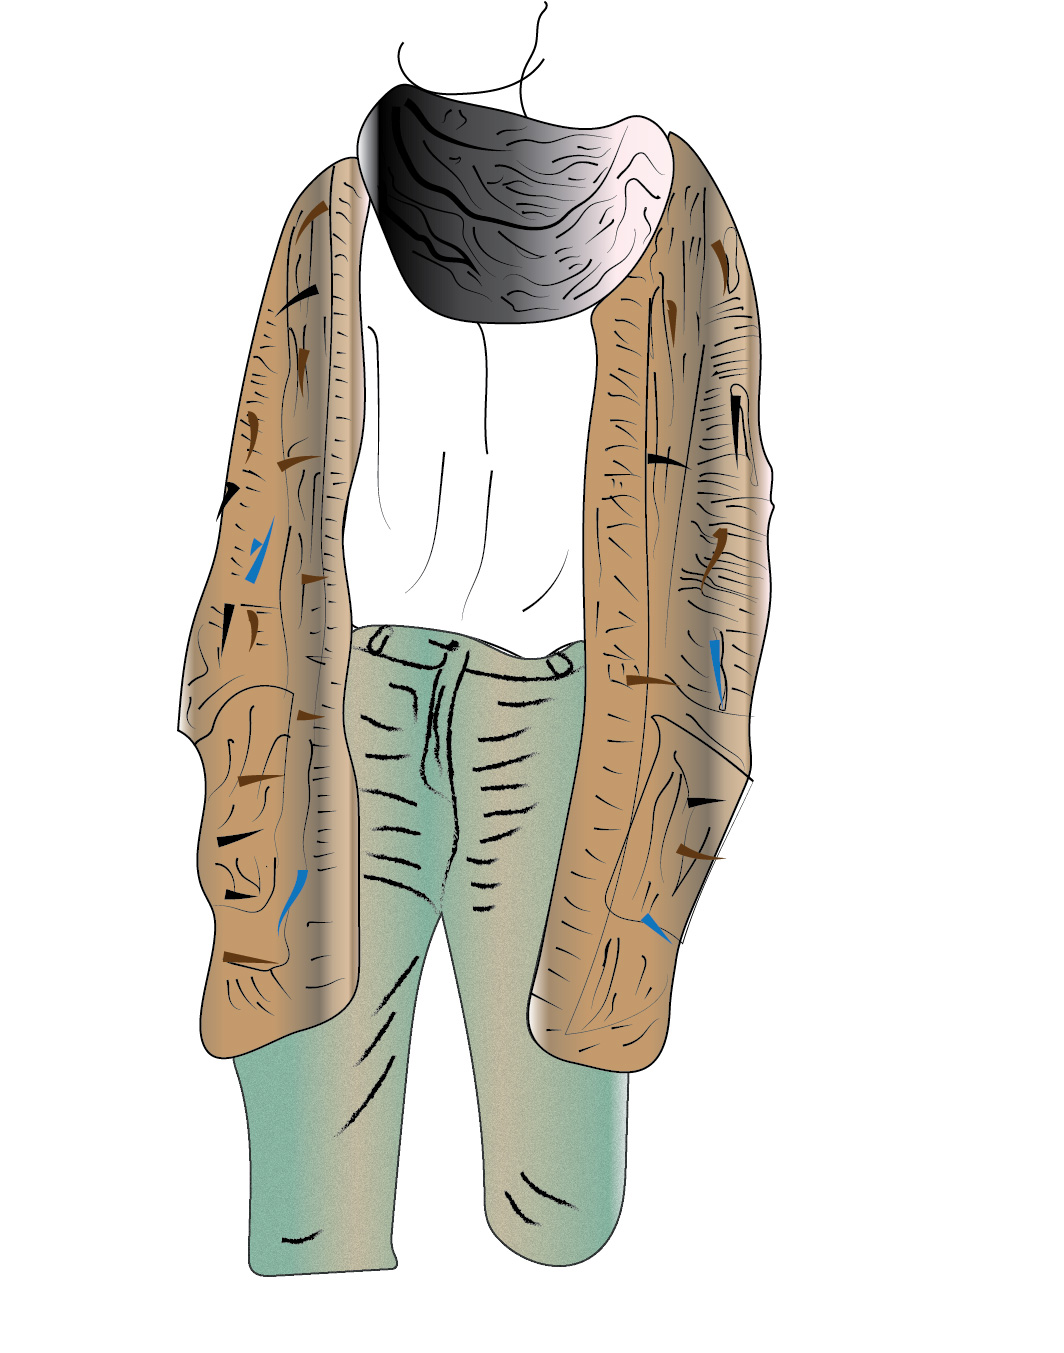
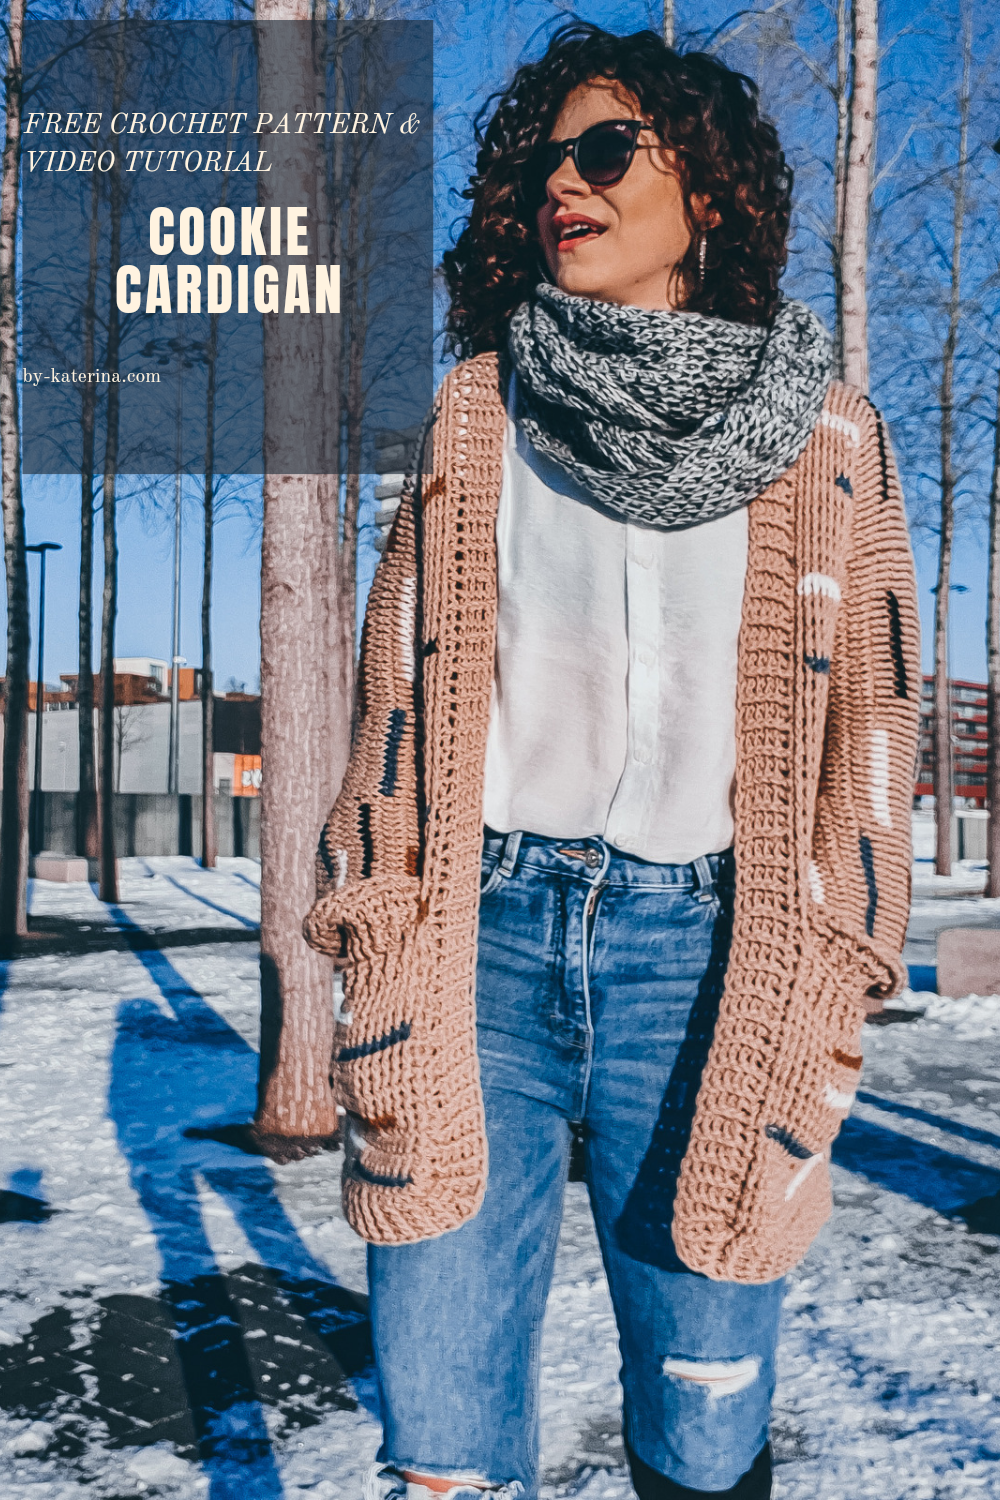
This time I tried a different texture and worked the entire cardigan using front post stitches. I love the ribbing effect, and I love the drape and how cozy and comfortable it is.
I chose to use a bigger crochet hook size than the one recommended on the yarn label, and this is what I am constantly doing lately because I love how the fabric feels working like so.
So here I am sharing with you how to make this beautiful Cookie Cardigan. It was named after my daughter, who told me that this cardigan reminds her of sprinkled cookies 😊.
Oh, and by the way, if you have any scrappy yarn around, this will be the perfect project to use them for those color lines. I would love to see a colorful Cookie Cardigan with multicolored sprinkles.
But let’s see what it is all about, what you will need and how to make this cardigan.
Just to let you know, I made a video tutorial for it too, and you can find it on my YouTube Channel, but it doesn’t have the ribbing because I don’t really know what happened with that part of the video.
You can Purchase the easily printable PDF version of this pattern here:

MATERIALS
- Yarn
-
- Category 3 ( Light Weight Yarn)
- Crochet Hook
- 5.5 mm crochet hook and a 4.5 mm for cuff’s ribbing (I used Furl Odyssey Black and Furls StreamLine Galaxy )
- You will need a yarn needle for weave in ends
- Scissors
- stitch markers (optional)
NOTES ABOUT DESIGN
This pattern requires techniques like double crochet, front post double crochet, and back post double crochet.
This cardigan’s construction comprises 5 panels: 1 back panel, 2 front panels, and 2 sleeves.
The front panels are worked, continuing the back panel and not separately.
The sleeves are worked separately and then stitch into the armhole.
Because the sleeves are worked vertically, there is an option to work those simultaneously with the back panel and front panels, and you will find more notes about it in Pattern Notes Section.
All pieces have small color insertion. These are added free form, meaning that there is no a certain amount of stitches worked in a different color.
More details about how to add colors you will find in the Pattern Notes Section.
The pattern is available in 8 sizes, from Small to 2X Large, and wrote in US terms.
MEASUREMENTS AND SIZES
The Cookie Cardigan has a slightly oversized fit, with a positive ease of about 12 cm around the bust circumference.
Final measurements of the Cookie Cardigan Cardigan are listed below.
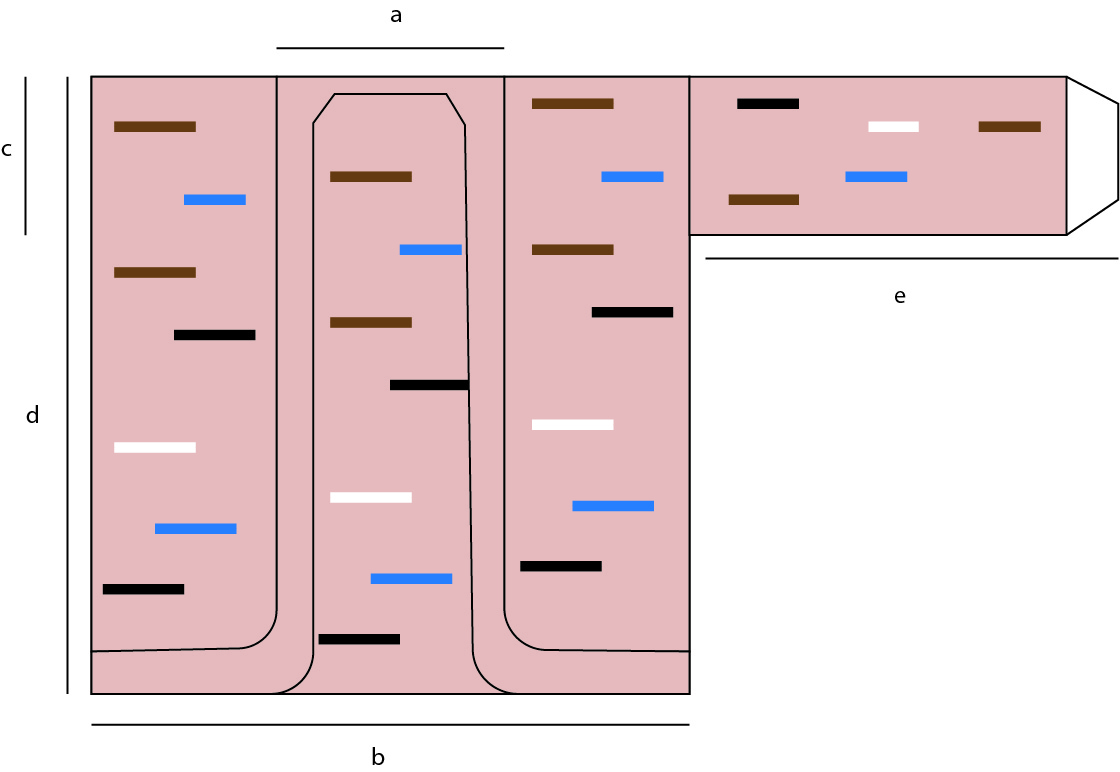
Neck Line a: 15 cm (15, 15, 15, 15, 15, 15, 15)
Bust Width b: 49 cm (53, 59, 63, 69, 73, 79, 83)
Armhole Depth c: 17 cm (20, 20, 23, 23, 26, 26, 26)
Length d: 65 cm (68, 68, 71, 71, 74, 74, 74 )
Sleeve Length e: 45 cm (45, 47, 47, 48, 48, 49, 49)
These measurements will fit:
| To Fit cm |
S |
M |
L |
XL |
2XL |
XL |
2XL |
3XL |
4XL |
5XL |
| Bust | 86 | 96 | 106 | 116 | 126 | 116 | 126 | 136 | 146 | 156 |
How much yarn do you need?
I used Basic Merino by Katia Yarns in Light Beige as the main color, and for other colors accents, I used Grey, Blue, Black, Off White, and Light Brown.
Each ball has 50 grams and approximately 120 meters.
Below you can find how much yarn you will need for each size.
For each size, you will approximate need:
| Katia Basic Merino | S | M | L | XL | XXL | 3XL | 4XL | 5XL |
| Light Beige | 13 | 15 | 16 | 17 | 19 | 21 | 22 | 24 |
| Black | 0.5 | 0.6 | 0.6 | 0.7 | 0.7 | 0.8 | 0.8 | 1 |
| Off White | 0.5 | 0.6 | 0.6 | 0.7 | 0.7 | 0.8 | 0.8 | 1 |
| Light Brown | 0.5 | 0.6 | 0.6 | 0.7 | 0.7 | 0.8 | 0.8 | 1 |
| Grey Blue | 0.5 | 0.6 | 0.6 | 0.7 | 0.7 | 0.8 | 0.8 | 1 |
*for the colors insertion, you can use any scraps you have.
STITCH PATTERN AND TECHNIQUES
The entire cardigan is worked in front post double crochet because all pieces are worked flat, on the right side work front post double crochet and the wrong side, back post double crochet.
For the ribbing, alternate 1front post double crochet with 1 back post double crochet.
ABBREVIATIONS
- Ch – chain
- Dc – double crochet
- Fpdc – front post double crochet
- Bpdc – back post double crochet
- Inc – Increase: 3 sts in one st (used for ribbing bottom corners; can be 3 Fpdc or 3 Bpdc)
- Dec – Decrease: 3 sts worked together (used for the neckline ribbing, where front panels are joined with back panel
- St(s) – stitch(es)
- R – rows
- ** – repeated section.
TENSION (GAUGE)
Using a 5.5 mm crochet hook in front post double crochet
- 14 sts and 10 rows = 10 cm
NOTES
Always ch3 at the end of each row. Ch3 does count as the first dc.
Each row starts with a ch 3 and ends with one double crochet in the 3rd st of the turning chain.
All pieces are worked flat. Turn after each row.
Count the rows on the wrong side; it’s easier to figure out the rows.
How to insert color
The contrasting colors are inserted during one row, free form. For the back panel, I inserted a section of color on 2 consecutive rows, and the next row was worked just in the main color. For the front panels and sleeves, because the rows are shorter, insert the color at every 2 rows (1 row with color, 1 row just in the main color) or even with 2 rows in the main color in between.
On average, each section of color has between 10 and 15 sts.
There are 2 methods in which you can add the colors:
- (the one I used) When you want to add color, cut the main color and make a knot with the other color, you will want to use. Measure roughly about 1,5 meters and make a knot at the other end. Work the sts as normal.
To use this method, you have to make sure that your knots are safe and there is no risk for them to get looser and the knot to untie. You can use in the end some silicon glue for fabric to secure the knots.
- Change the color and leave long ends. You will have to weave in the ends. You can’t carry on the yarn and work the stitches over yarn strands because of front post stitches.
Use any other method you find and think it will work.
As I said in the Notes about Design, the front panels are worked, continuing the back panel, and the sleeves are worked separately.
Because the sleeves are worked vertically, you can work the sleeves simultaneously with the back and front panels.
How to do that:
Work the back panel until the armpit, then extend the sts with the sts needed for sleeves. After finishing the armpit length, chain in both sides the number of sts needed for the sleeves.
Continue working the pattern until you will get to the back panel length.
When moving to the front panel, you have to work the sts for the sleeve and the same number of rows as you did on the back panel.
After completing the sleeve width, decrease the number of sts you added at the armpit, and continue working the pattern for the armpit’s length to the bottom of the cardigan.
Pockets
The front panels have hided pockets. The pocket width is the same for all sizes. In case you want them wider, you can let more sts for the pocket hole. If you choose that, you have to divide the remaining sts by 2 to know how many sts you will need before and after the pocket.
You can Purchase the easily printable PDF version of this pattern here:
INSTRUCTIONS
Numbers for sizes M, L, XL, XXL, 3XL, 4XL, and 5XL are written between brackets.
The instructions below do not include the color changing. Follow the instructions you can found in the Pattern Notes Section.
BACK PANEL
Start: ch 71 (75, 85, 91, 99, 105, 113, 119)
R1: ch3, starting with the 5th st, 1dc in each st until the end of the row.
R2: 1Fpdc in each st until the end of the row.
R3: 1Bpdc in each stitch until the end of the row.
Repeat R2 and R3 until you have 59 (61, 61, 65, 65, 67, 67, 67) rows.
FRONT PANEL
Start: from where your yarn is, 1Fpdc in the next 24 (26, 31, 34, 37, 41, 45, 47) sts.
Repeat R2 and R3 from the back panel until you have in total 40 (42, 42, 44, 44, 46, 46, 46) rows
On the next row, we will create the pocket hole.
Pocket Hole Row:
1Fpdc in next 1 (2, 5, 6, 8, 10, 12, 13) sts, ch 20, skip next 20 sts, 1Bpdc in last 3 (4, 6, 8, 10,11, 13,15) sts.
Next row: 1Bpdc in next 2 (3, 5, 7, 9, 10, 12, 14) sts, 1dc in each of the 20 ch sts, 1Bpdc until the end of the row.
Repeat the pattern until you have in total for the front panel the same number of rows as for the back panel.
Repeat the same pattern for the other front panel with a few notes:
- Rejoin Yarn in the st number 25 (27, 32, 35, 39, 42, 46, 49) counting from the edge.
21 sts left for neckline for all sizes.
- When working the pockets, you will have to follow the pattern in the mirror. It doesn’t count for sizes that have the same number of sts before and after pocket holes.
You will have on the edge next to the back panel: 2 (3, 6, 7, 9 11, 13, 14) sts, and on the other side 3 (4, 6, 8, 10, 11, 13, 15) sts.
SLEEVES (make 2)
Start: ch 56 (56, 59, 59, 60, 60, 62, 62)
R1: rep R1 Back Panel
R2: rep R2 Back Panel
R3: rep R3 Back Panel
Rep. R2 and R3 until you have 34 (40, 40, 46, 46, 52, 52, 52) rows.
You can Purchase the easily printable PDF version of this pattern here:
ASSEMBLING
Step 1: lay front panels and back panel pieces flat.
Count for the armhole depth, 17 (20, 20, 23, 23, 26, 26 26) rows on the back panel and the front panel. You will have in total for the armhole the same number of rows as the sleeves’ width.
Use st markers to mark the armholes.
Step 2: Fold the piece in half, front panels over back panel, and stitch the edges until the armpit.
Step 3: Stitch the sleeves.
POCKETS INSIDE
Start working on the wrong side of the front panel.
Rejoin yarn in the first st of the pocket hole
R1: 1sc in each of the 20 sts.
R2 to R25: repeat R1
Stitch the pocket inside to the front panel.
RIBBING
Ribbing pattern:
R1: 1dc in each st until the end of the row/round
R2: *1Fpdc, 1Bpdc. *Rep to the end of the round.
Suppose it’s worked in the round, like the neckline ribbing, rep. R1 until the desired width.
If it’s worked flat:
R3: *1Bpdc, 1Fpdc. *Rep until the end of the row.
Rep. R2 and R3 until the desired width.
Cuff Ribbing
Use a 4.5 mm crochet hook.
Each side row represents 1 st.
Repeat the ribbing pattern above until you have 6 rows or until you have the desired width.
Entire Cardigan Ribbing
Bottom ribbing, front panels ribbing, and neckline ribbing are worked in one single piece, in the round, starting from the neckline (top of the back panel)
Use a 5.5 mm crochet hook.
According to the tension, the proportion is 1.4 sts at every 1 row.
This means that we need to make 3 sts in 2 side rows.
You can adjust this while working and space the sts so that the ribbing, in the end, lays flat and does not curl.
Work the ribbing pattern in the same way as for the cuffs with a couple of notes.
- On the first round, when working inside rows, work dc stitches. When working in sts (at the neck and on the bottom), work Fpdc. Starting with the second round, work 1Fpdc and 1Bpdc.
- In the neckline corners, where the back panel is joined with the front panel, 3 sts together to decrease.
- In the bottom, front panel corners work 3 sts in 1 st to increase and have the corner ribbing nice and round.
- Make the Increases and decrease ones at every 2 rows (alternate 1 round with inc and dec, and 1 round without).
TO FINISH
Weave in all ends and block to measurements.
I hope you will like this Cookie Cardigan and I can’t wait to see your makes.
You can Purchase the easily printable PDF version of this pattern here:


3 Comments
Ma bucur mult ca ati revenit cu un nou proiect,imi plac foarte mult toate proiectele d-voastră sunt bine explicate și se poate lucra ușor după ele. Felicitări. 💋💐
Multumesc din suflet! Apreciez nespus❤❤
Hai acasă Cătălina.
Job-ul ăsta îl poți face și din Adjud.