
It’s been a while since I designed this Coaty Sweater!! Almost 2 years!!! Cab you imagine?
I am wearing this Coaty Sweater constantly since I made it and never thought about a pattern remake.

You can purchase the add free, easy printable, instant download PDF version of this pattern here:
If you already purchased the old version of this pattern, please send me an e-mail at contact@by-katerina.com and I will send you the new version. Thanks!
Two years ago, I was at the beginning of this wonderful journey and since then I learned a lot and constantly learning, especially about how to write a proper pattern? What info are most important for the makers? Because, this all designing process is not that simple and is not only about creating the garment.
Now I’m feeling more confident about the patterns and about my designs and this Coaty Sweater deserves a second chance.
I just started a pattern remake series with my oldest designs and the Coaty Sweater is the first.
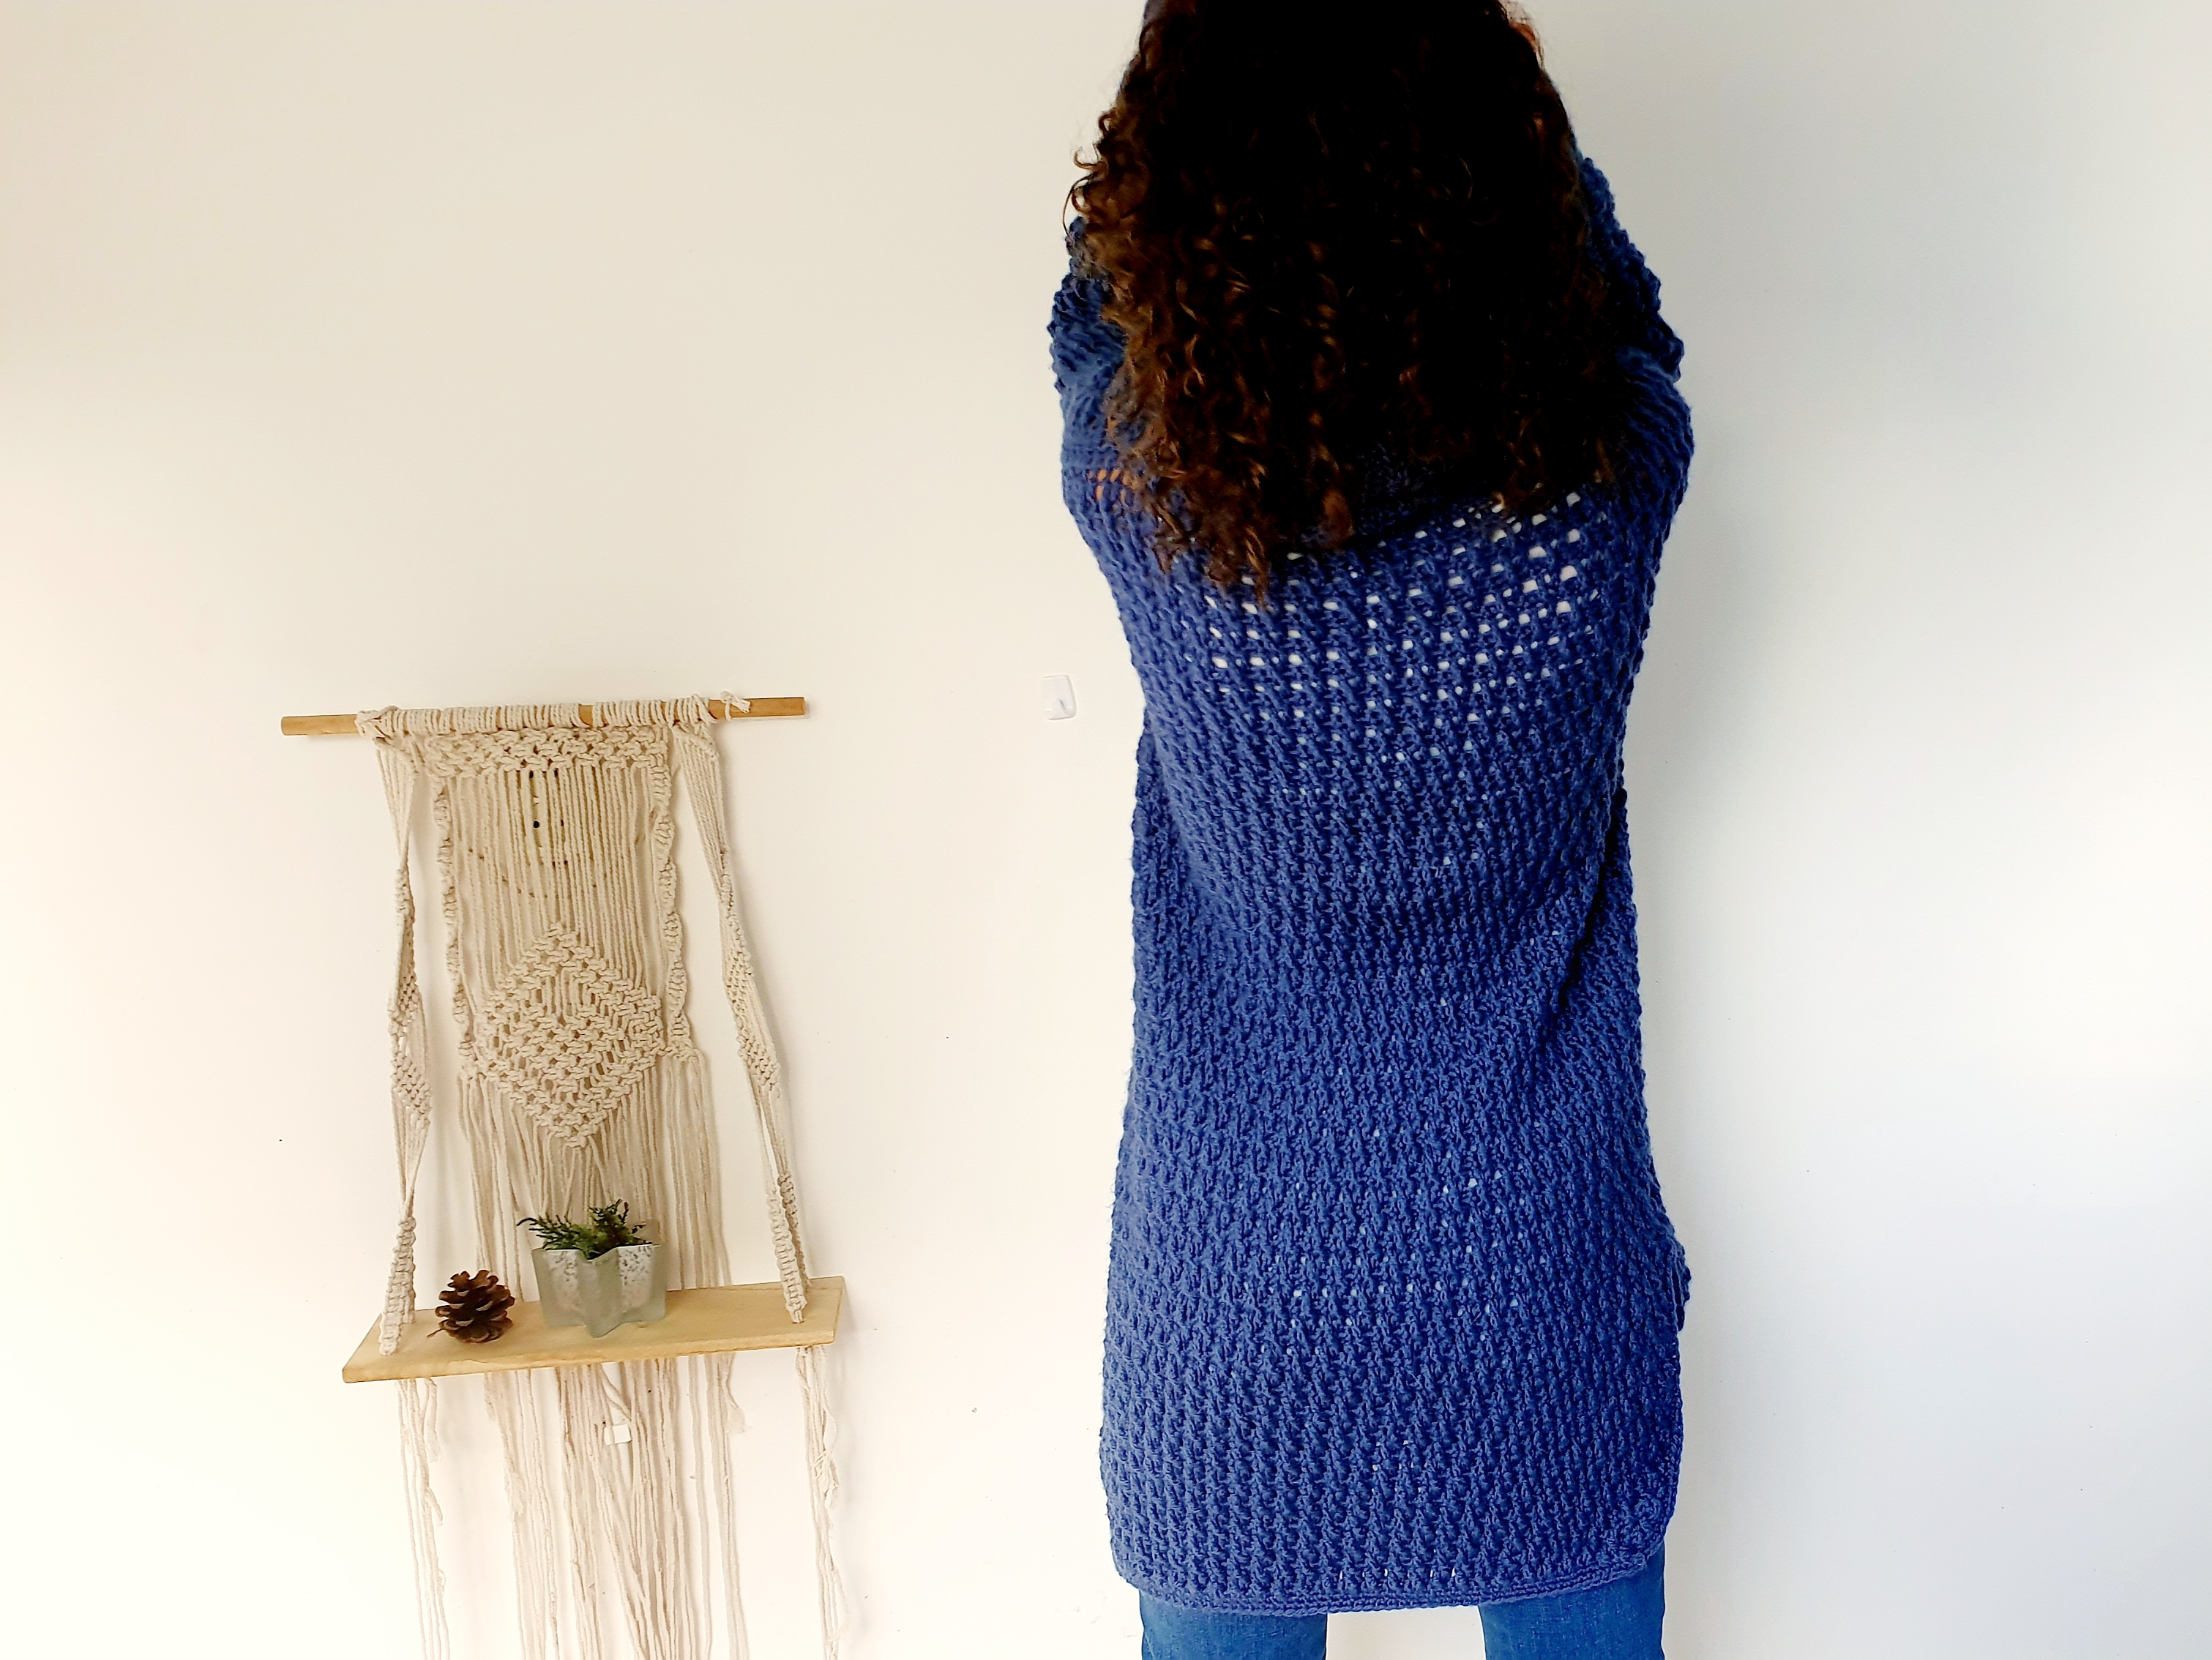
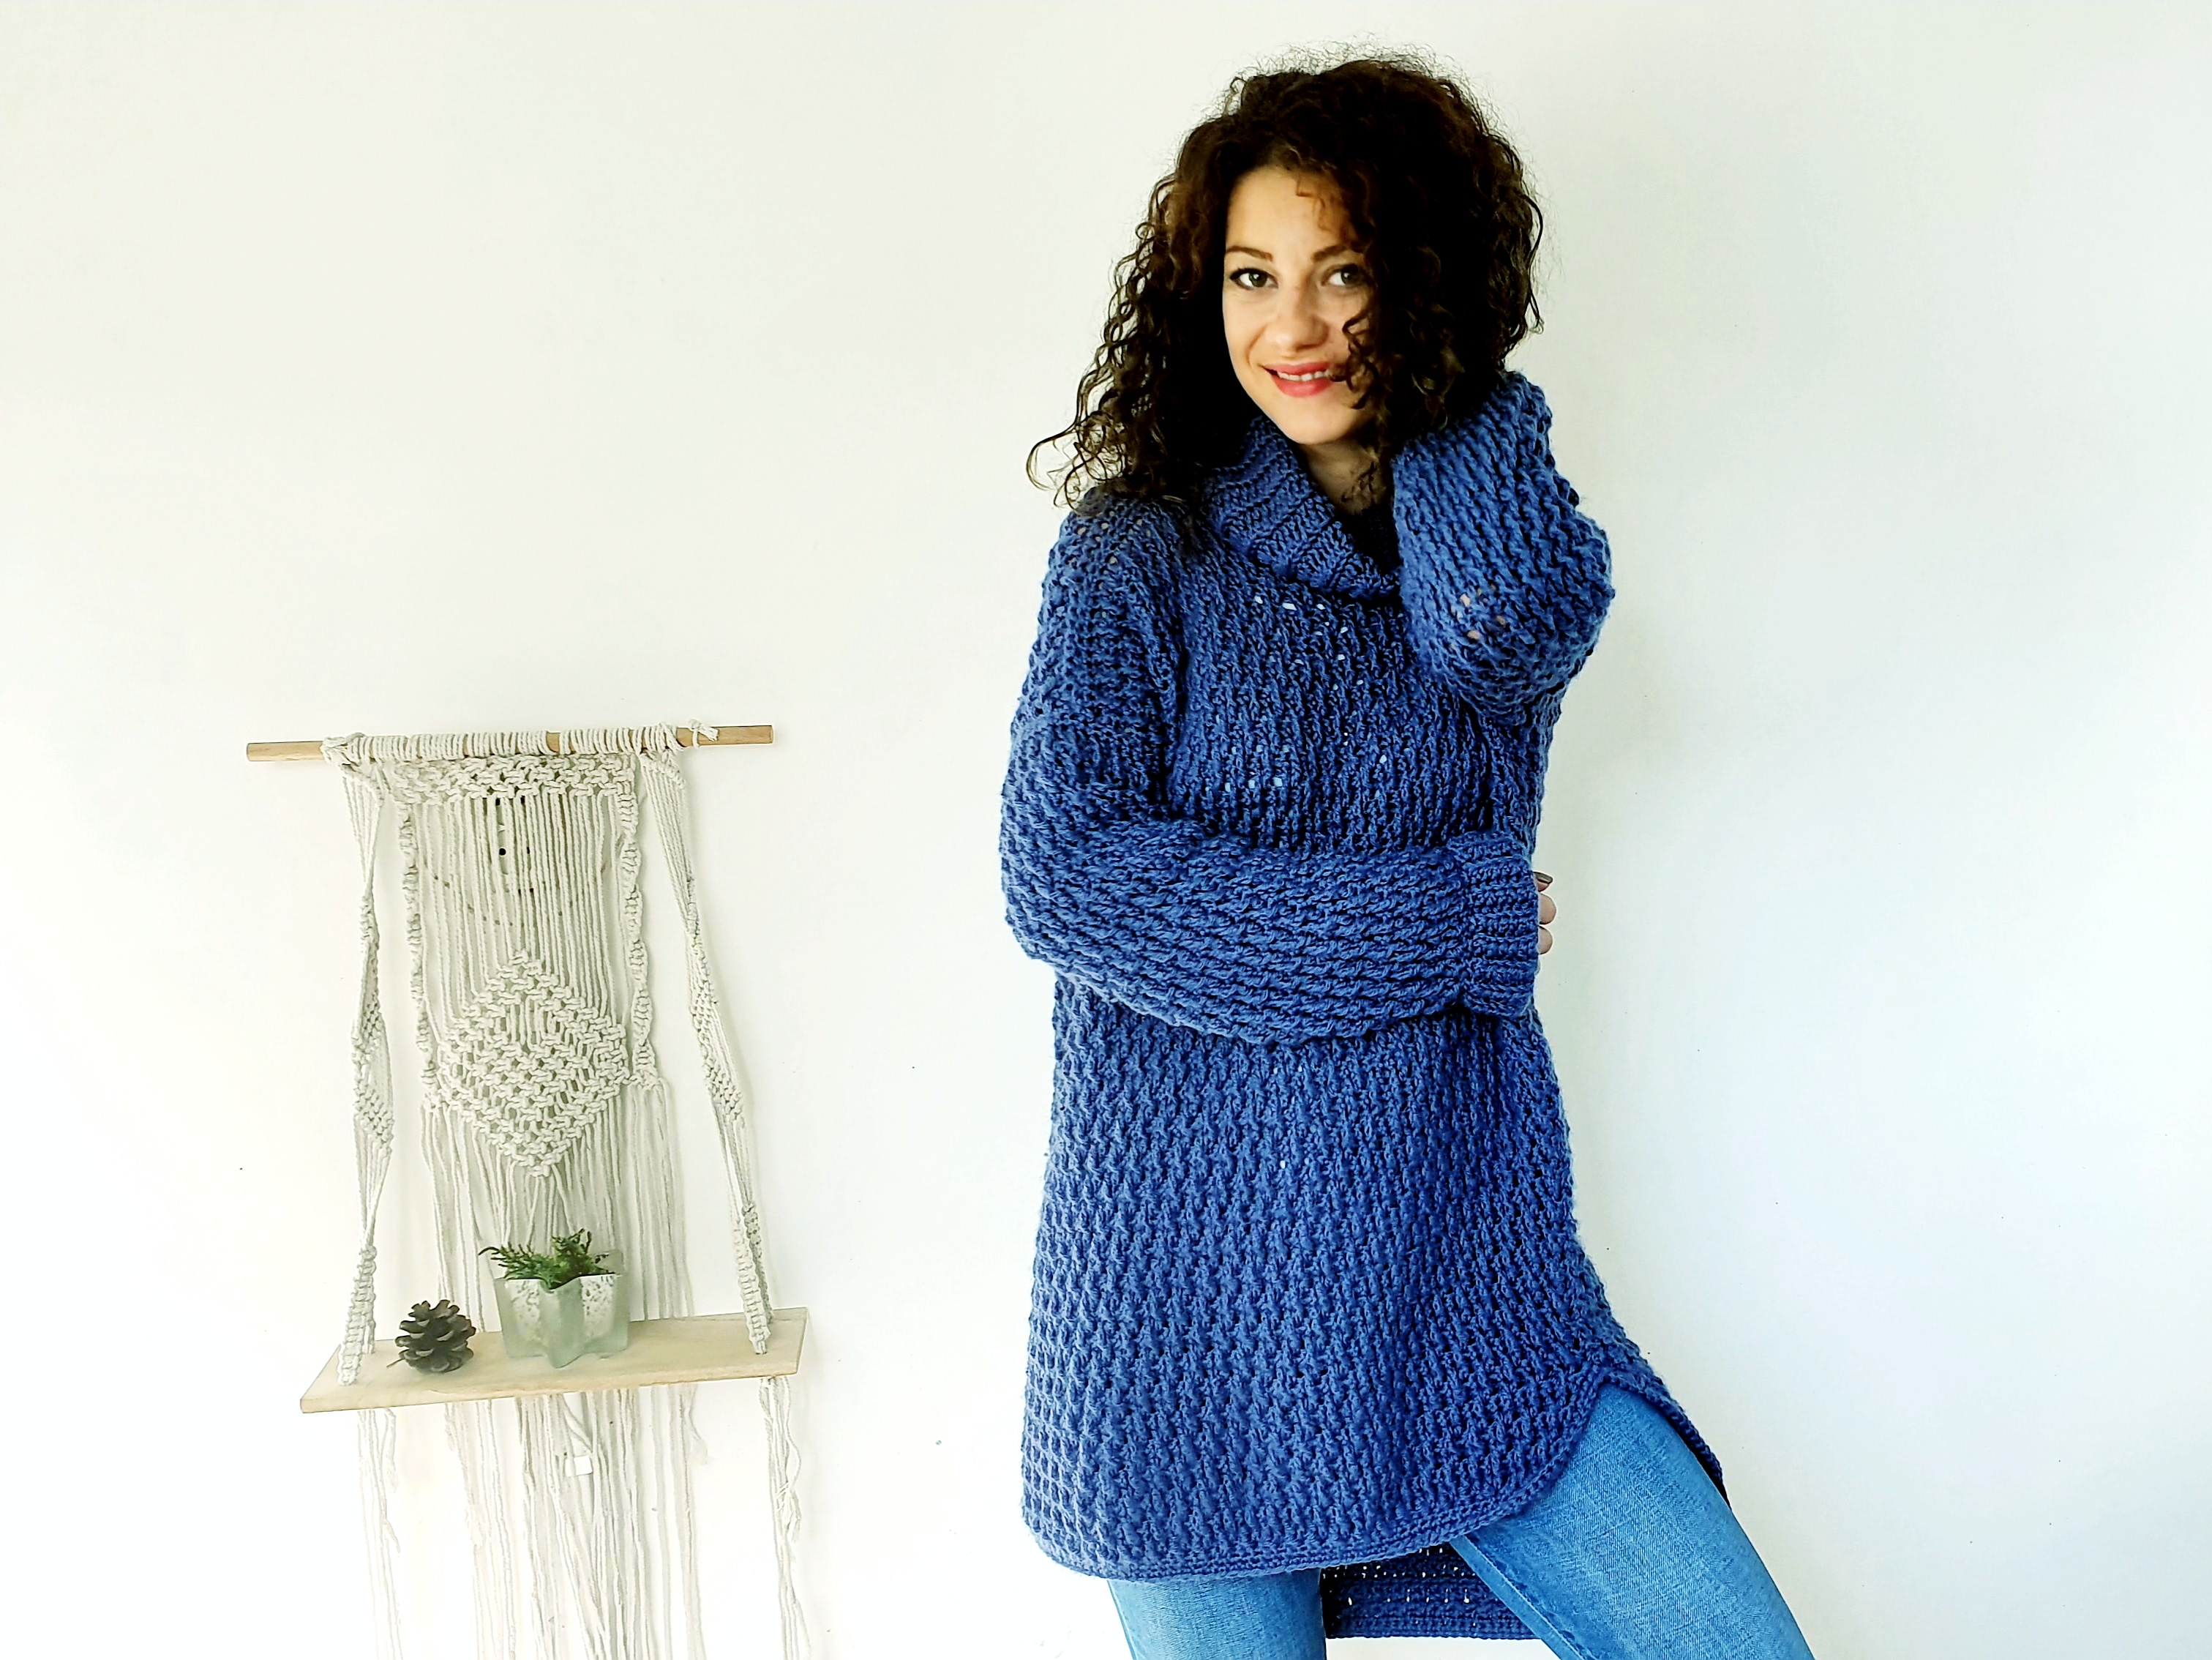
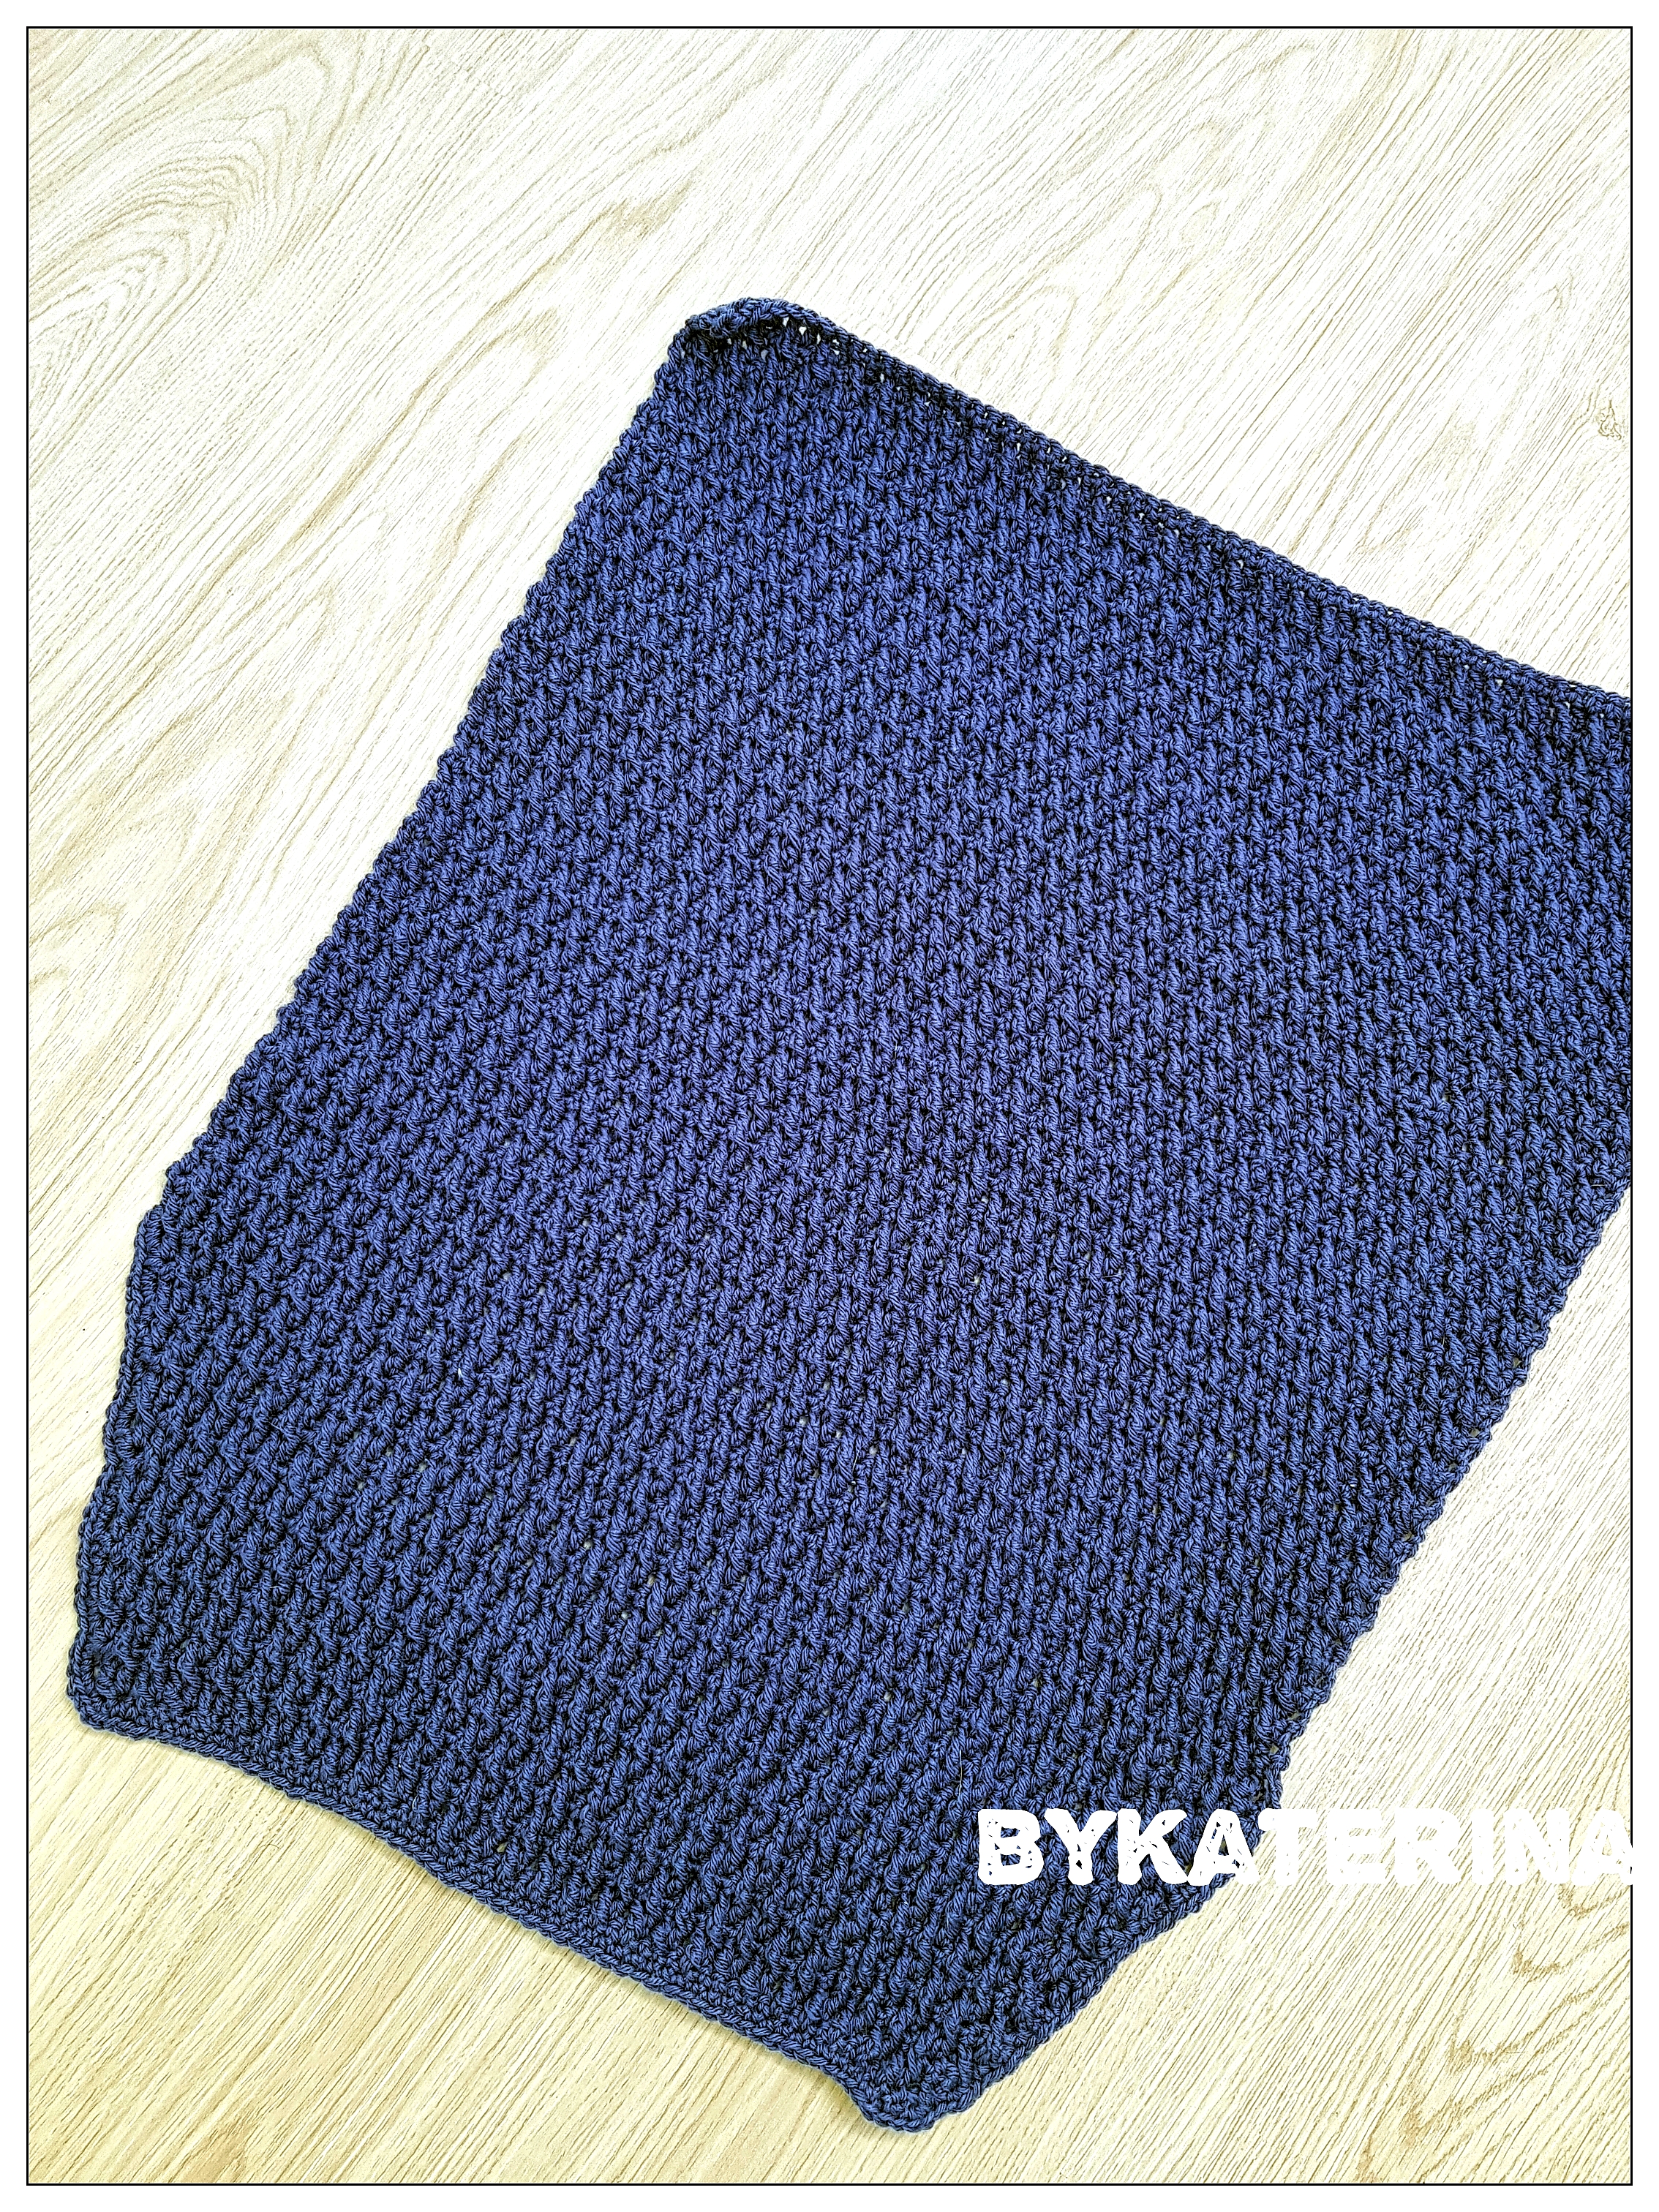
This Sweater has everything: coziness, texture, modernness and most important gives you a great feeling when you wear it.
 About Design
This Coaty Sweater is an over sized Sweater with a positive ease of 15 cm around bust circumference. If you want a closer fit you can start with fewer stitches on the back and front panels or size down.
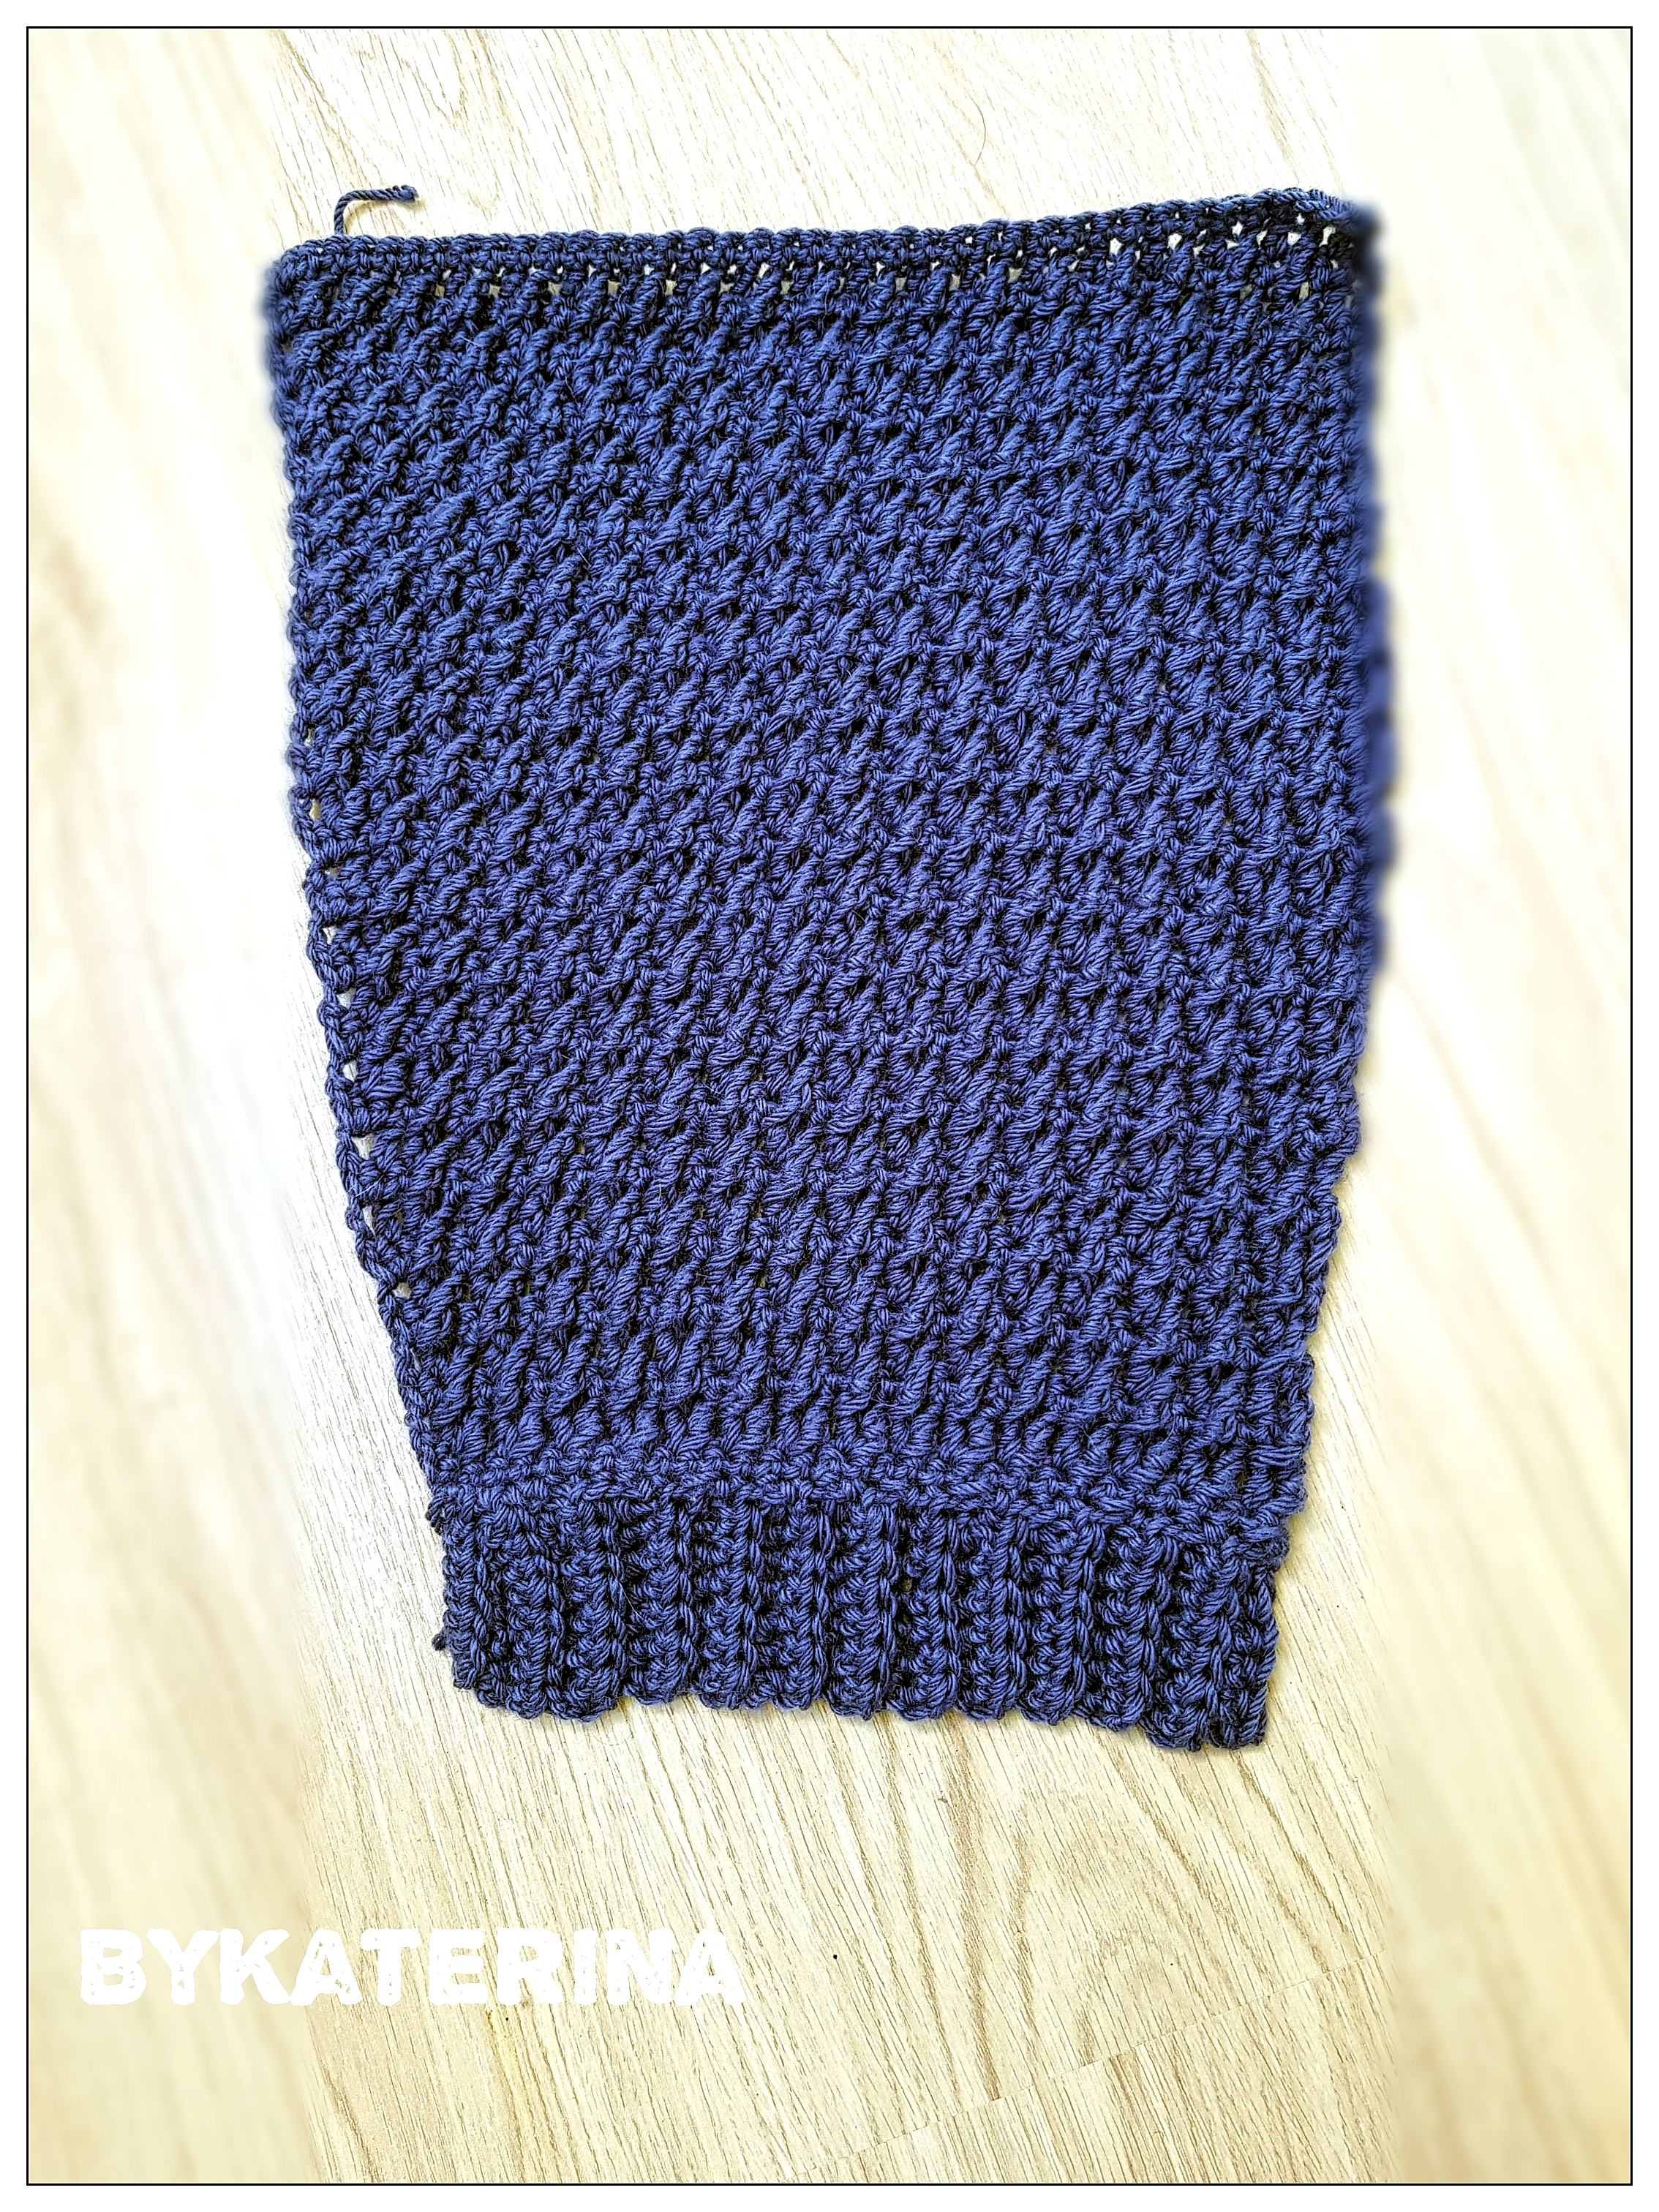
The construction of the sweater is simple. We will work the 4 panels, back, front and sleeves and then sew the pieces together. To finish we will add a collar and cuffs in a ribbed stitch pattern.
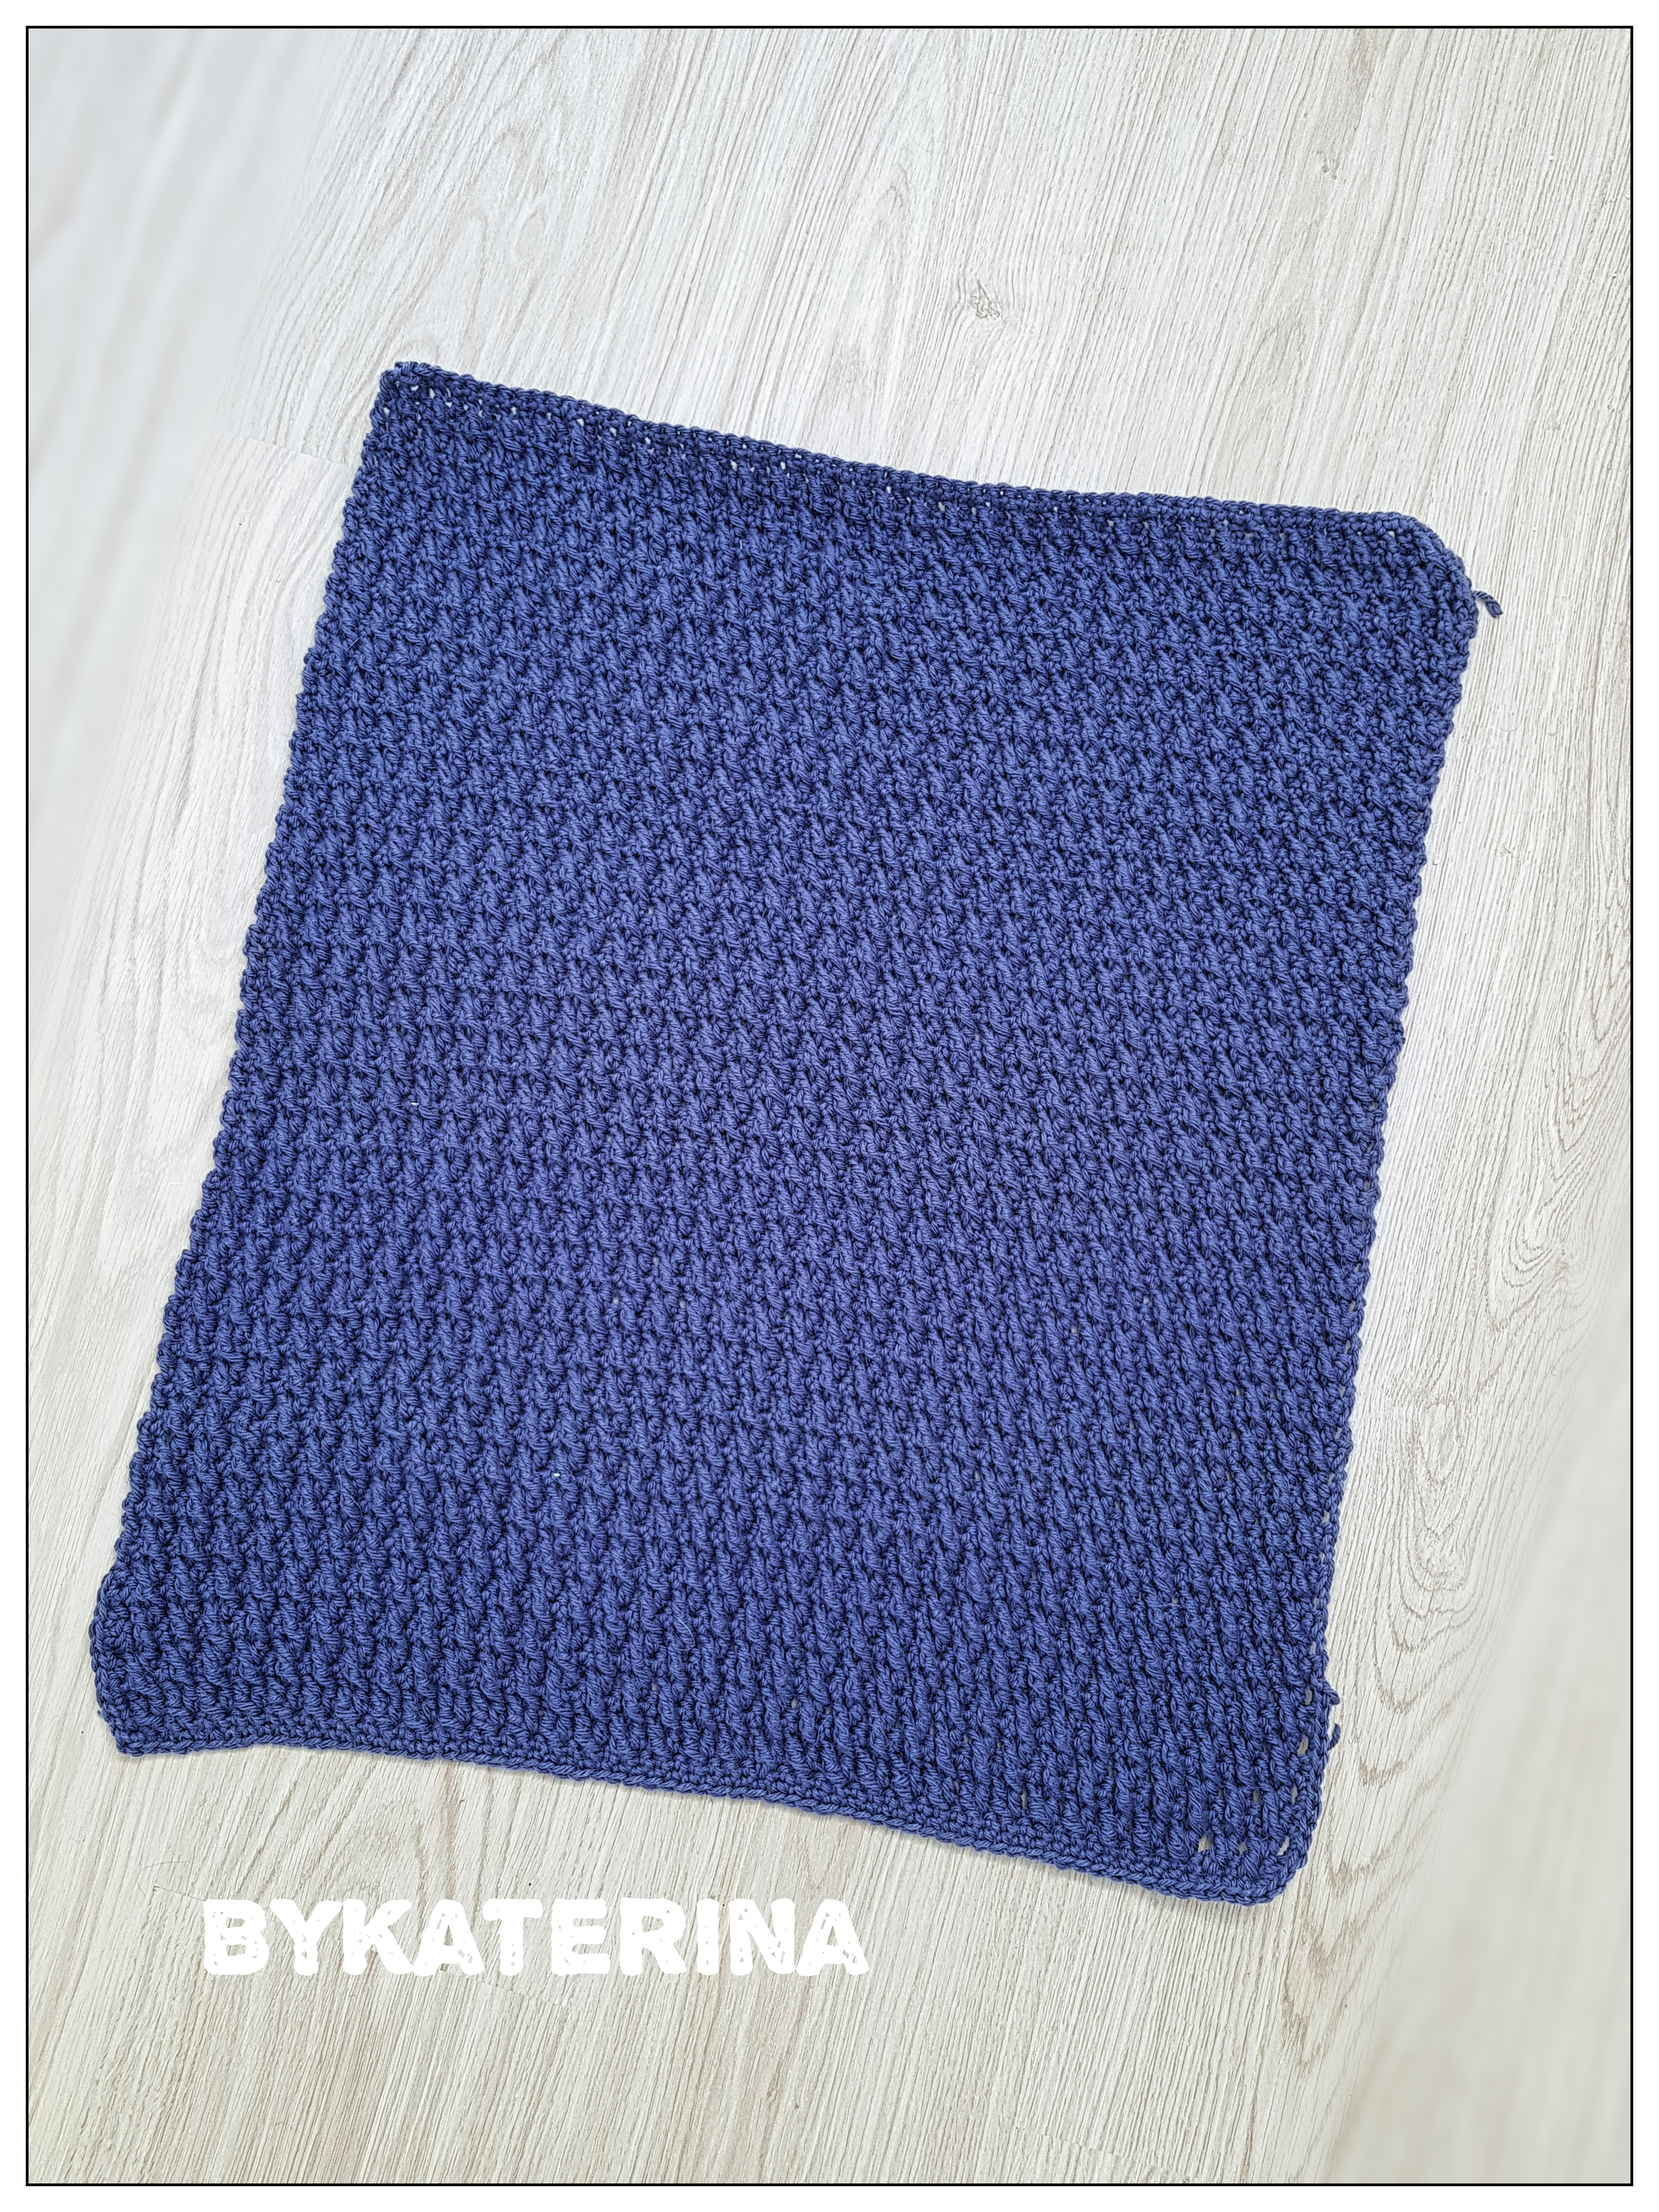
Back panel is designed longer than the front panel, and the bottom of it is narrower than the rest.
Materials you will need
- Yarn
- Category 4, Medium weight yarn
- Needle
- 5.5 mm crochet hook (US I size)
- You will need a yarn needle for assembling and to hide the ends
- Scissors
Pattern notes
Chain 3 at the beginning of each row counts as first double crochet
Chain 1 at the beginning of single crochet row doesn’t count as first single crochet.
The pattern is available in 5 sizes, from Small to 2X large and is written in US terms.
All the measurements are in centimeters unless the pattern specified something else.
Final measurements
The final measurements are listed in the diagram bellow. The figures are in cm
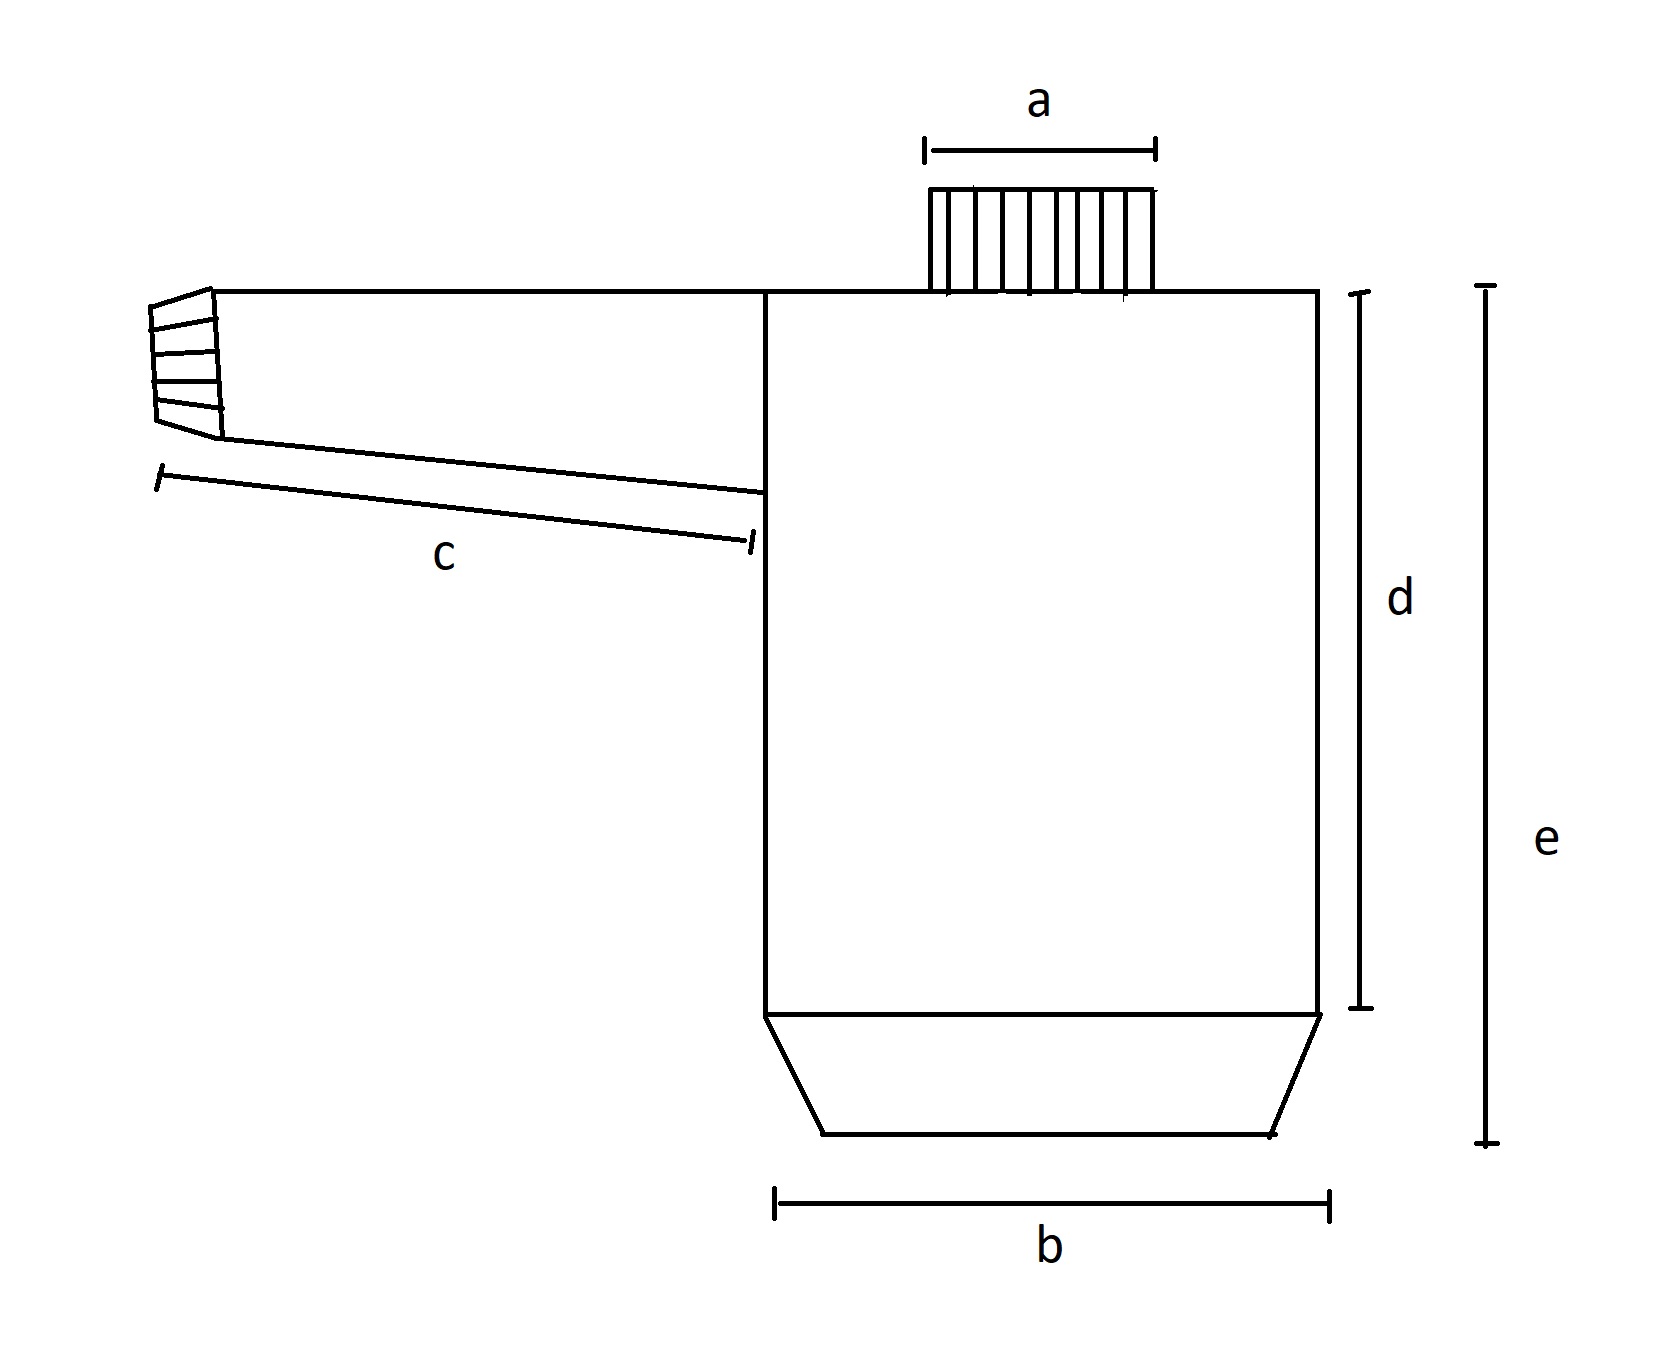
Neck Line a: 28 cm (28, 30, 30, 30)
Bust Width b: 58 cm (63, 68, 73, 78)
Underarm Length c: 42 cm (42, 44, 44, 45)
Front Panel Length d: 63 cm (65, 65, 66, 66)
Back Panel Length e: 72 cm (73, 73, 75, 75)
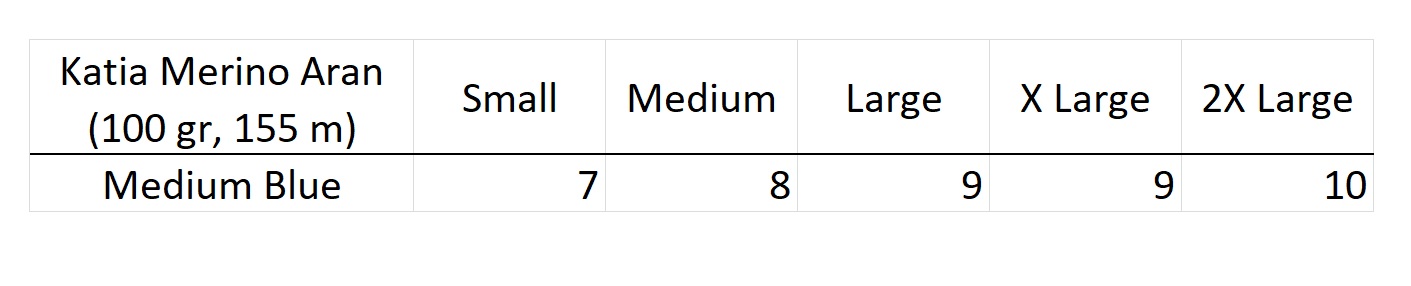
How much yarn do you need?
For this pattern I used Katia Merino Aran in color Medium Blue. Each ball of yarn has 100 Grams and approximate 155 meters.
For each size you will approximate need:
About the stitch pattern.
This Coty Sweater is made using a stitch pattern known as alpine stitch.
You will also use back loop half double crochet for the cuffs and collar
Special Stitches
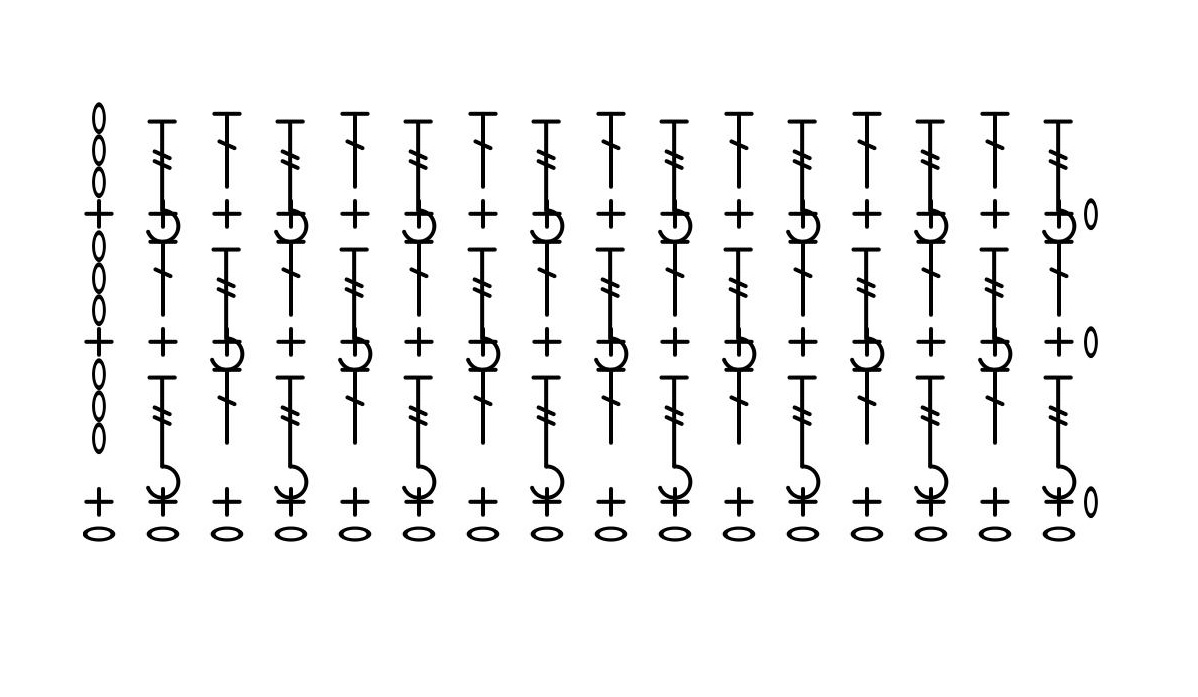
Alpine Stitch
Row 1: 1 sc in each st across
Row 2: [1 FPtr, 1 dc in next] to repeat to the end of the row.
Starting with row 3, repeat rows 1 and 2. When you will work the next row with front post stitches, you will have to intercalate them with the others front post sts made one row before. Meaning the FPtr will be made around dc, and on the top of the sc that is above the FPtr from the previous round you will make a double crochet.
Below you can find the stitch chart:
Abbreviations used in this pattern
- Ch – chain
- Sc – Single crochet
- Dc – double crochet
- FPtr – Front post triple crochet
- Hdc blo – half double crochet worked in the back loop only
- St(s) – stitch(es)
Gauge
13 sts – 10 cm (4”)
11 rows – 10 cm (4”)
*in alpine stitch
Pattern
Back Panel
The bottom of the back panel is narrower than the rest. We will start with less stitches and increase on each side for a few rows until we will get to the desired width.
Start with the foundation ch.
- S – 60 sts
- M – 64 sts
- L – 72 sts
- XL – 78 sts
- XXL – 84
Row 1
Ch 1 more, and starting with second st 1 sc in each st to the end of the row. Ch 3 and turn.
Row 2
[1 FPtr in the next st, 1 dc in next]. Repeat the section to the end of the row, ch 1 and turn.
Row 3
2 sc in the first st (increase), 1 sc in each of the next sts, until the last one, 2 sc in the last st. Ch 3 and turn.
Row 4
[1 dc in next st, 1 FPtr around next dc made 1 row before]. Repeat the section between [ ] to the end of the row. Ch 1 and turn.
Row 5
Repeat row 3
Row 6
[1 FPtr around next dc made 1 row before, 1 dc in next]. Repeat to the end of the row.
Rows 7 – 16
Repeat rows 3 to 6
Next, we will continue working on the back panel but without increasing on single crochet row.
Work the alpine stitch until you will have the desired length of the back panel or until you have in total:
- S – 79 rows
- M – 81 rows
- L – 81 rows
- XL – 83 rows
- XXL – 83 rows
*you can make as many rows as you want, but make the last row in single crochet to be easier when assembling.
And the back panel is done!
You can purchase the add free, easy printable, instant download PDF version of this pattern here:
If you already purchased the old version of this pattern, please send me an e-mail at contact@by-katerina.com and I will send you the new version. Thanks!
Front Panel
Foundation chain:
- S – 76 sts
- M – 80 sts
- L – 88 sts
- XL – 94 sts
- XXL – 100 sts
Start with the first row in single crochet and then continue with the stitch pattern until you will have in total:
- S – 69 rows
- M – 71 rows
- L – 71 rows
- XL- 73 rows
- XXL – 73 rows
Sleeves
We will begin to work the sleeves bottom up. The sleeves will have a ribbed band as cuff. You can add this ribbed band at the end, like I did, or you can make first the back loop Hdc ribbed band and then starting with the actual sleeve pattern.
Foundation chain:
- S – 30 sts
- M – 32 sts
- L – 36 sts
- XL – 42 sts
- XXL – 48 sts
For all sizes
Rows 1 – 6
Alternate the 2 rows of alpine stitch.
Row 7
2 sc in first st (increase), 1 sc in each st until the last one, 2 sc in the last st. Ch 3 and turn.
Row 8
[1 dc in the next st, 1 FPtr around next dc]. Repeat to the end of the row. Ch 1 and turn
Row 9
1 sc in each st to the end of the row. Ch 3 and turn
Row 10
[1 FPtr around the next dc, 1 dc in next st]. Repeat tot the end of the row. Ch 1 and turn.
Rows 11 – 34
Repeat rows 7 to 10
After row 34 we will stop increasing and we will continue with the Alpine st pattern until we have the desired length of the sleeve, or until we have in total:
- S – 41 rows
- M -41 rows
- L – 43 rows
- XL – 43 rows
- XXL – 45 rows
Ribbed Cuff
Start working on the right side of the sleeve and insert yarn in the right corner. Ch 9
Row 1
Starting with the 3rd st, 1 hdc in each st, 1 sl st in the next 2 sts, of the sleeve edge. Turn
Row 2
1 hdc Blo in each st to the end of the row, ch 2 and turn.
Row 3
1hdc blo in each st, 1 sl st in the next 2 sts of the sleeve edge. Turn
Repeat rows 2 snd 3 until you get to the last st of the sleeve width.
One sleeve is now done and you will have to repeat the same pattern for the second one.
Now that we have all panels done is time for assembling, but before that, I made 2 rows in sc crochet on the bottom edge of the front panel and back panel.
Assembling
First we will join the back panel and front panel in the shoulder area.
Overlay the 2 panels on the right side, so the wrong side is in exterior.
Sew on the right shoulder and left shoulder:
- S – 20 sts
- M – 22 sts
- L – 25 sts
- XL – 28 sts
- XXL – 31 sts
Next we will join the sleeves.
Use a safe pin or a stitch marker to fix the middle stitch of the sleeve with the shoulder seam made between back and front panel. Then sew the sleeve. Proceed the same with the second one.
After attaching the sleeve, we will start sewing on sides, from the cuffs to the armpit and then to the hem.
Now that we have a sweater, we only have to make the collar and is done.
Collar
For the collar we will proceed the same as for the sleeves, making a ribbed collar in hdc worked in back loops only.
Make sure you are working on the right side. Join the yarn in one side and chain 32, or as many sts as you want.
Then repeat the same pattern as for the ribbed cuffs until you complete the entire circumference of the neck line.
To finish you can sew the collar, or you can join the sides using slip stitches.
To finish
Wave in all ends and done!
You can purchase the add free, easy printable, instant download PDF version of this pattern here:
If you already purchased the old version of this pattern, please send me an e-mail at contact@by-katerina.com and I will send you the new version. Thanks!

2 years ago, i made also a video for this sweater. Is not the best one, but it might help.


2 Comments
I love this Sweater.
I am a advanced crochet.
Just learning gentry crochet.
Is this possible for me to do?
It’s not that difficult to make. If you get used with the stitch pattern, then the sweater is easy.