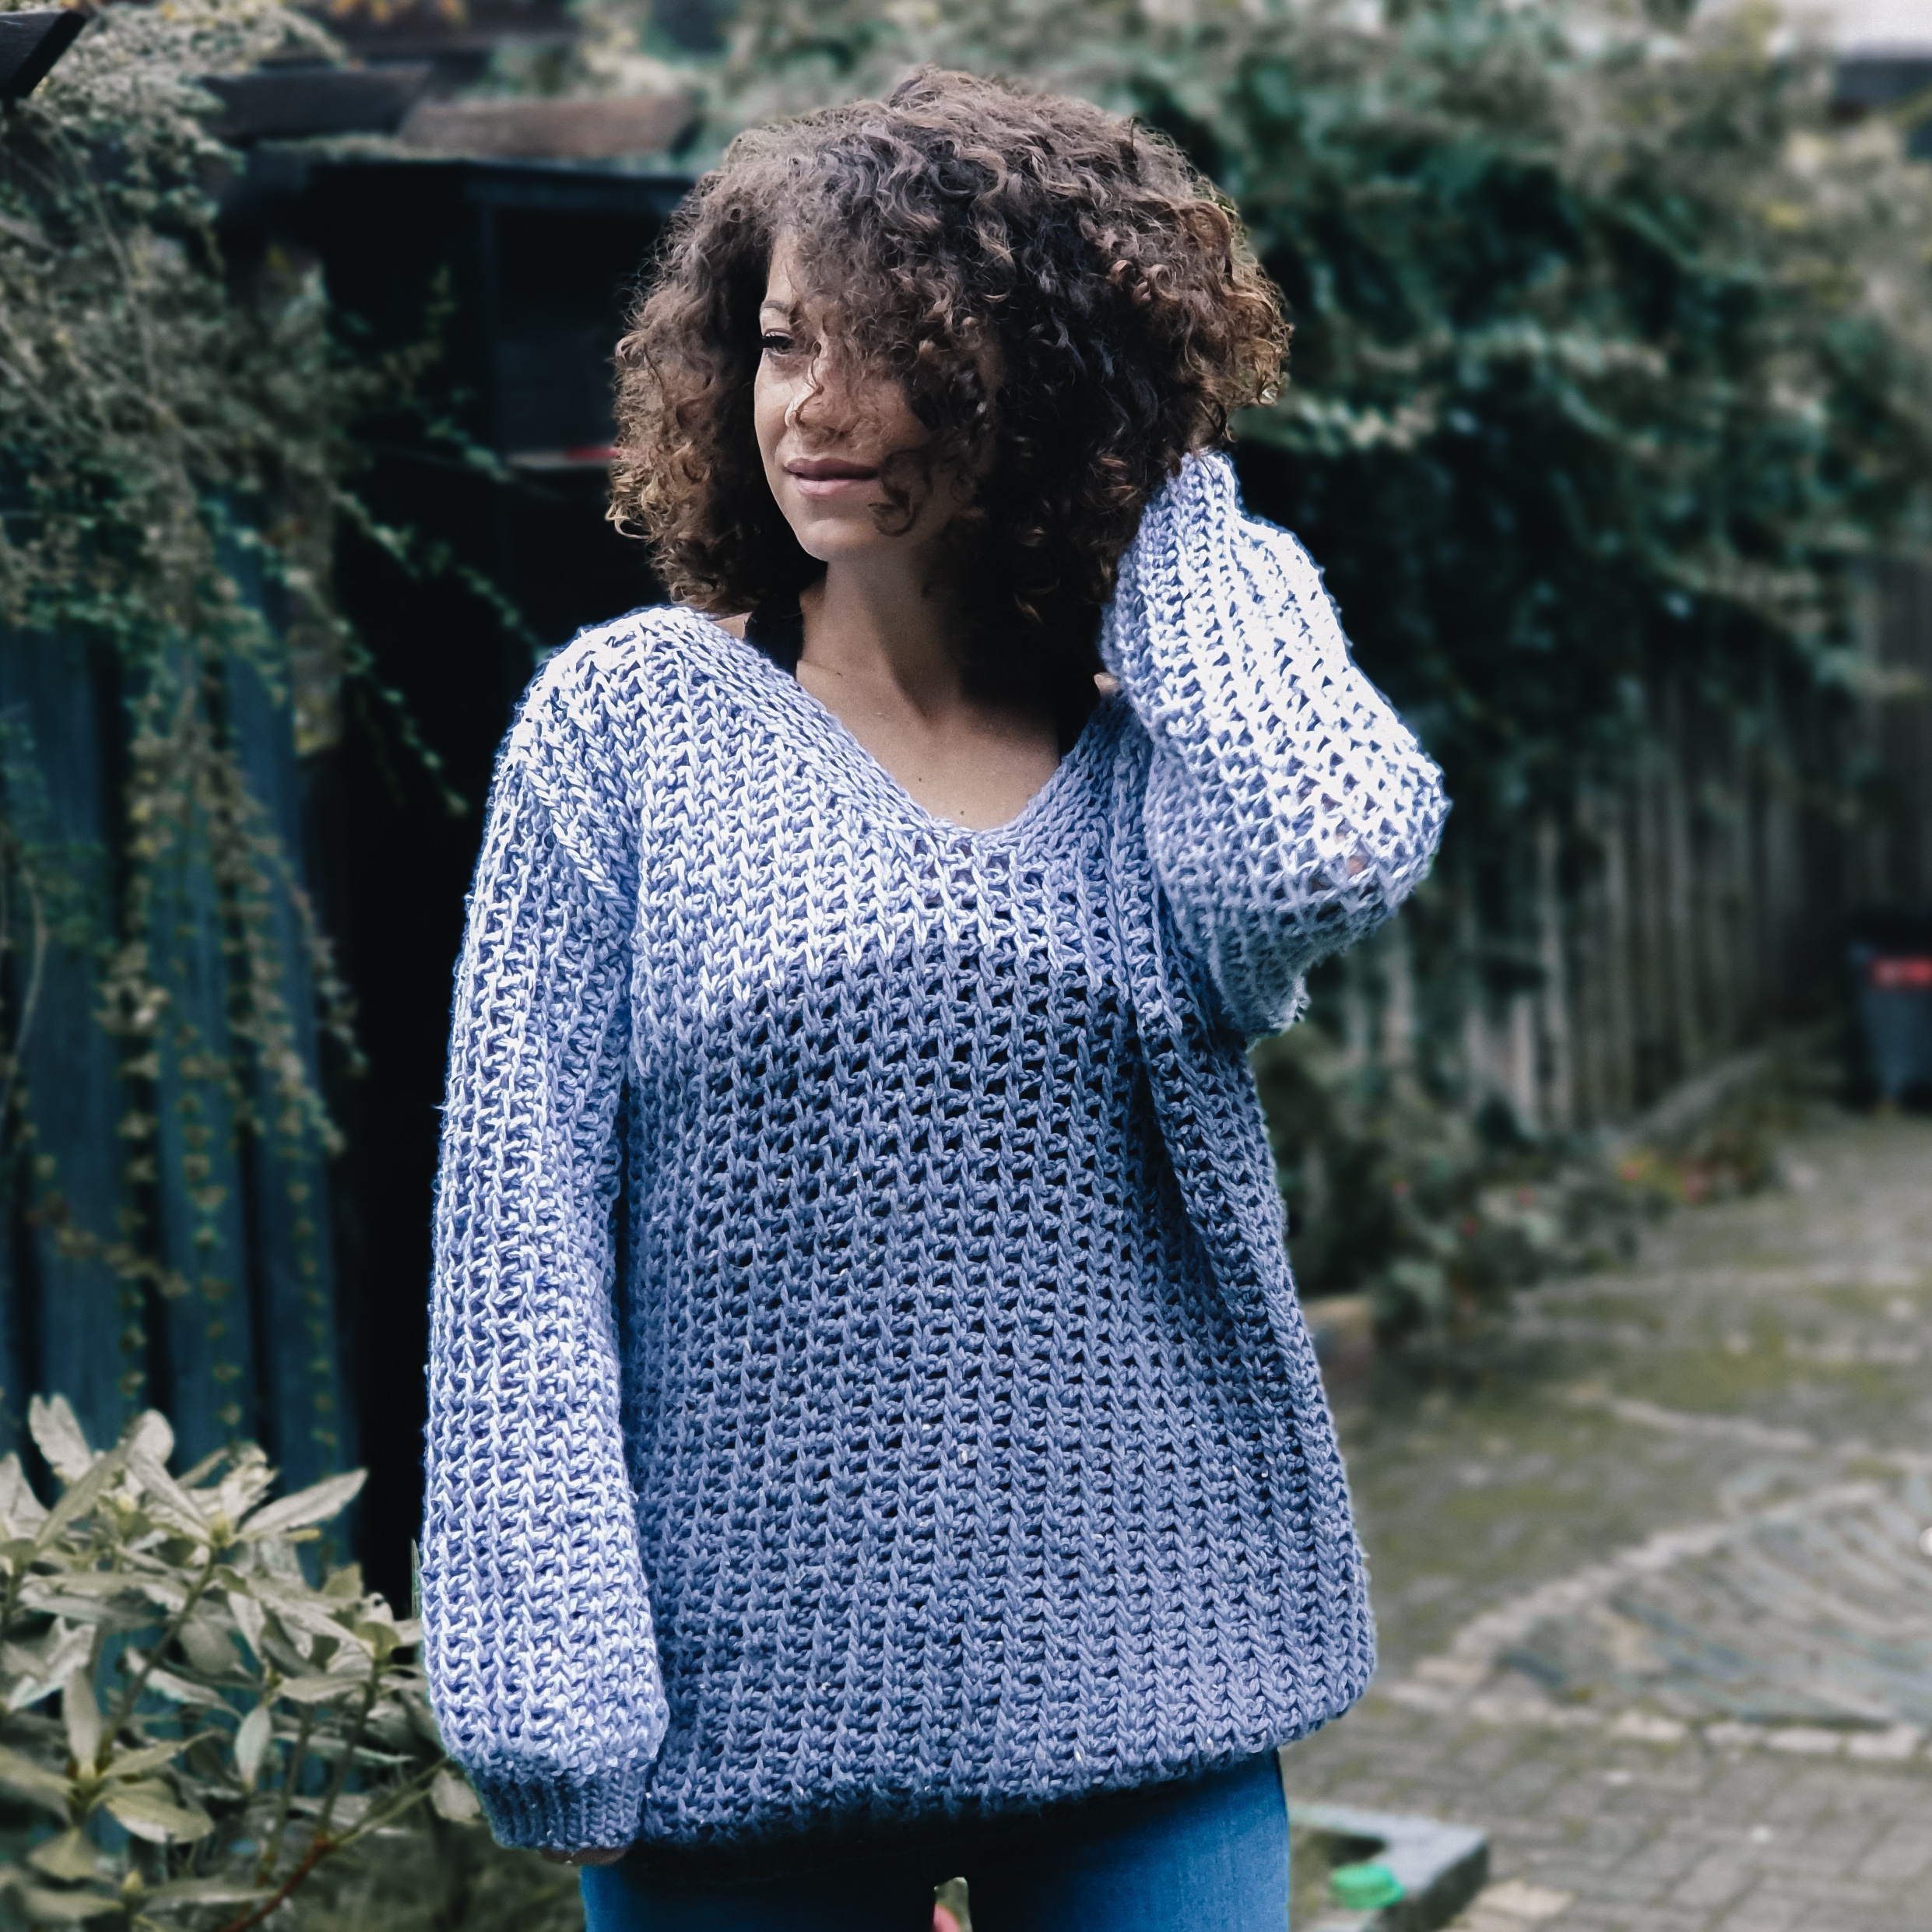
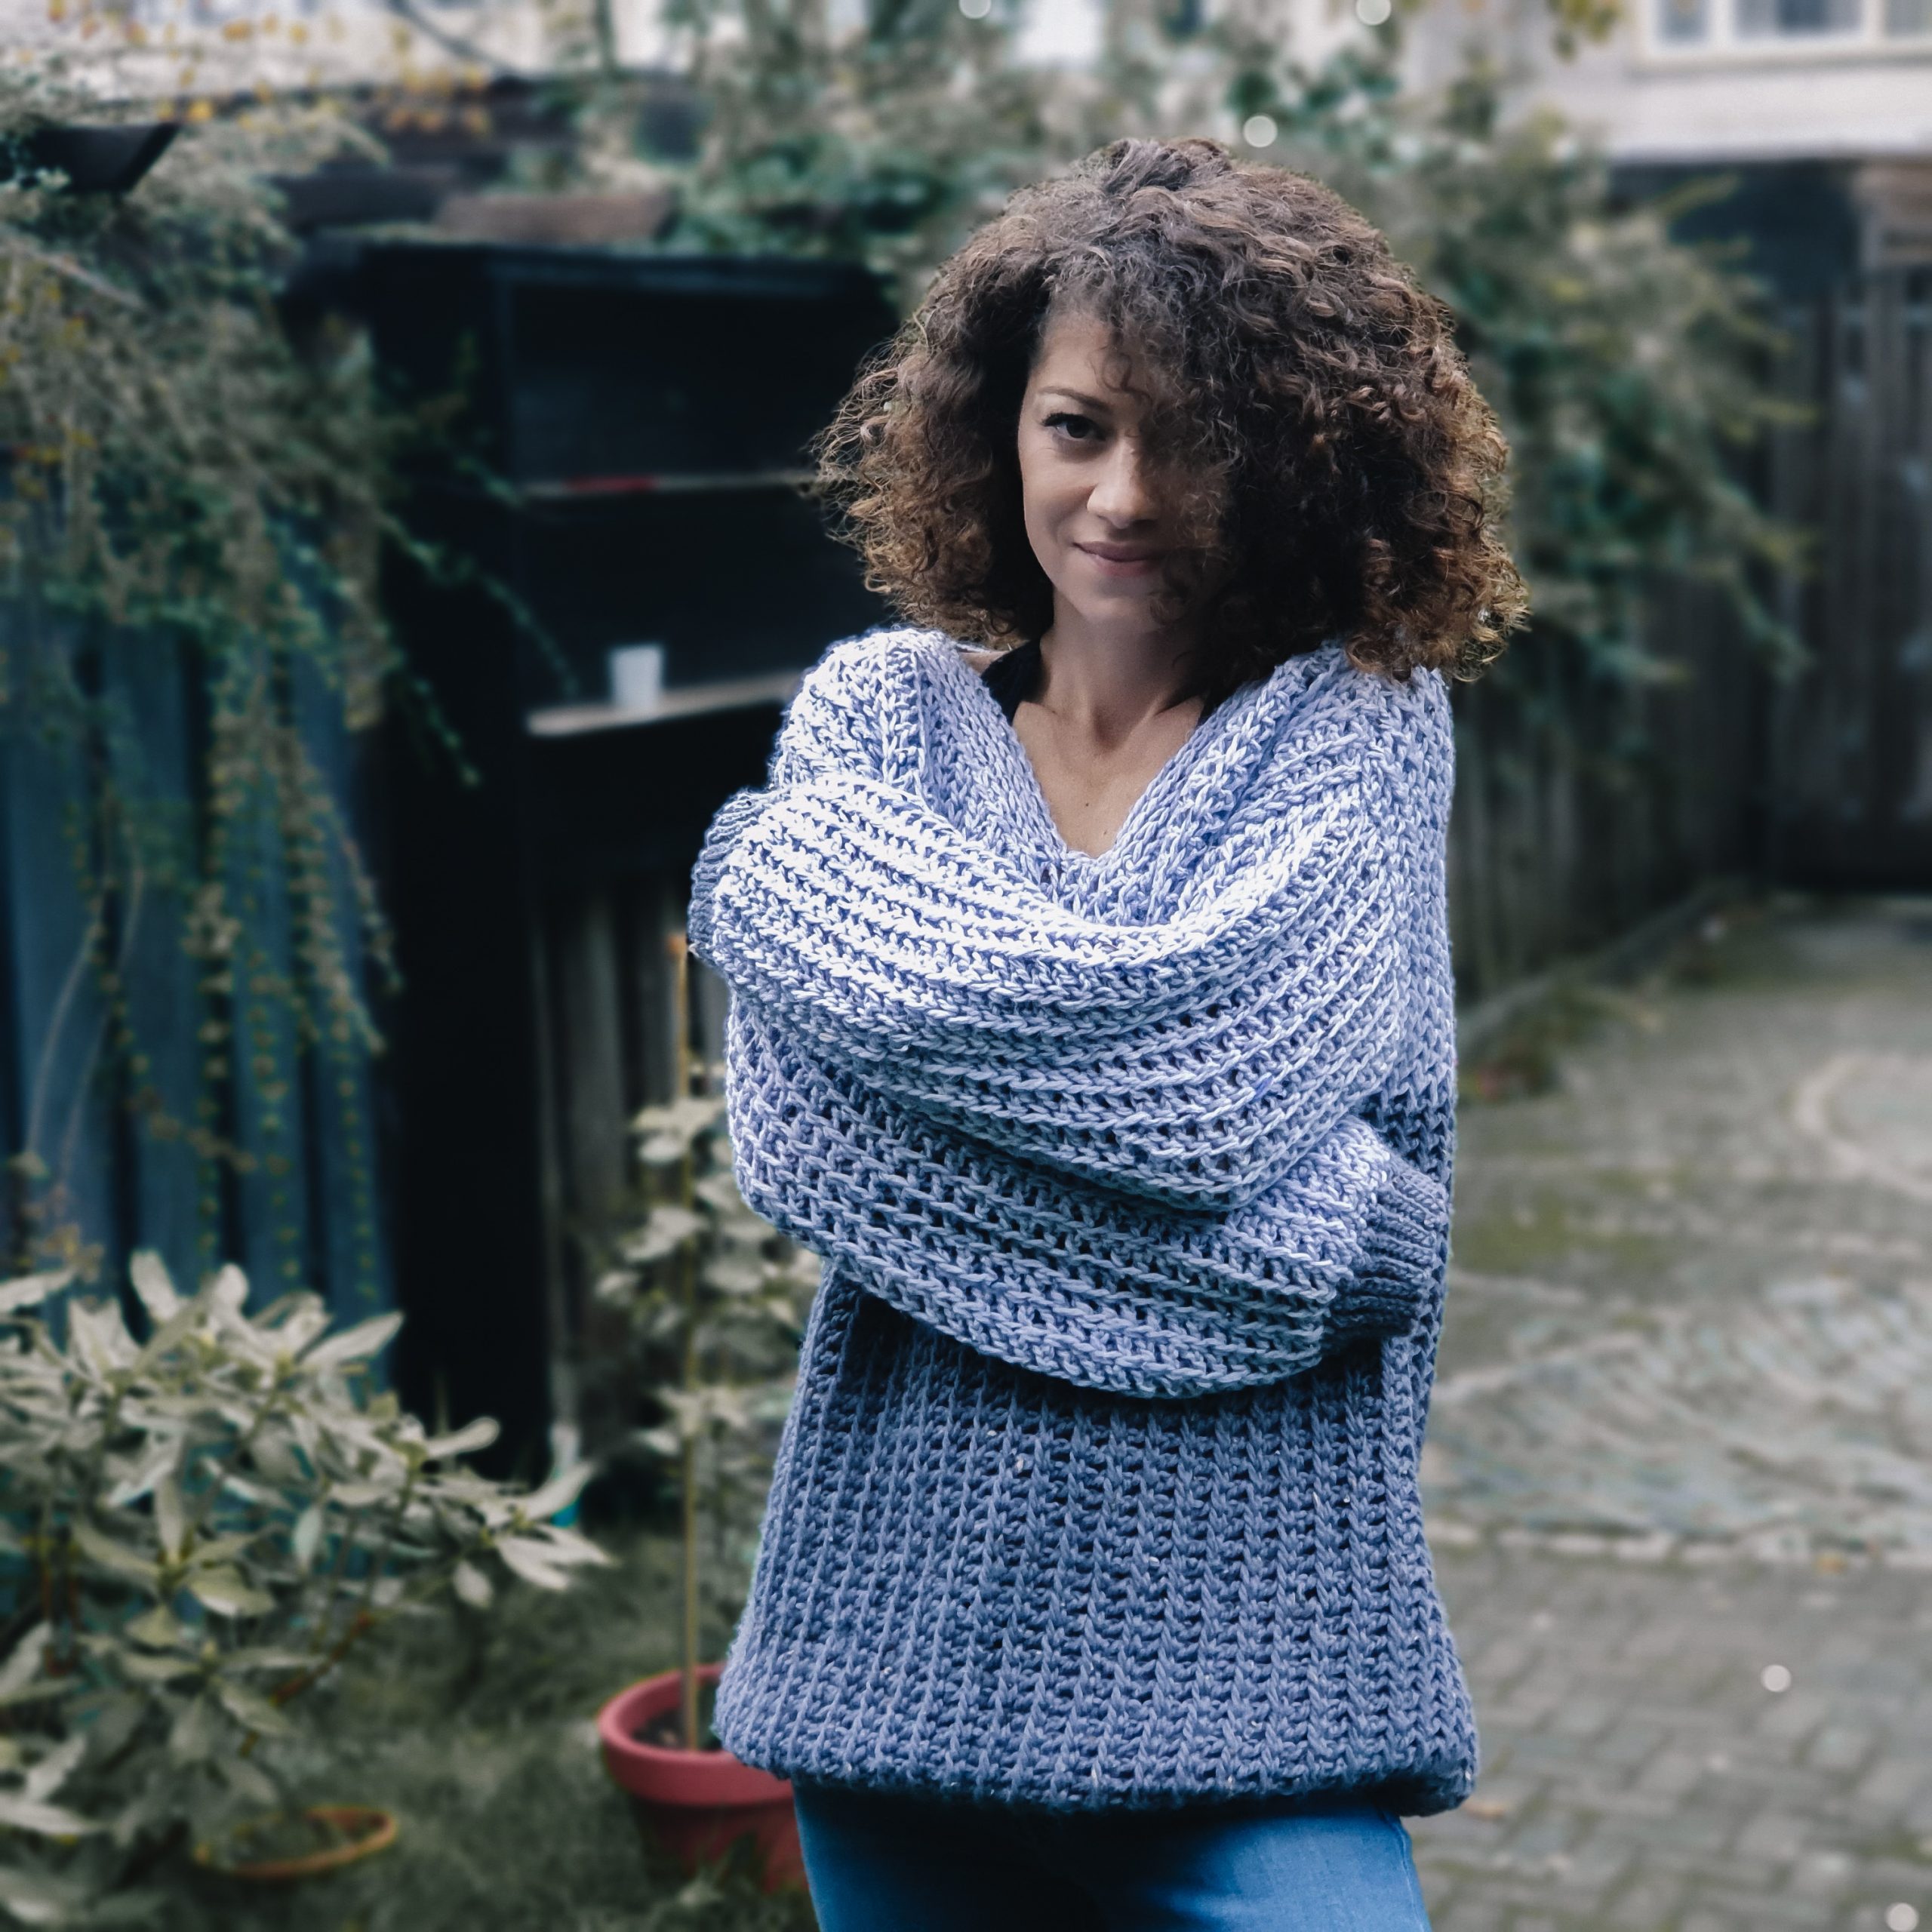
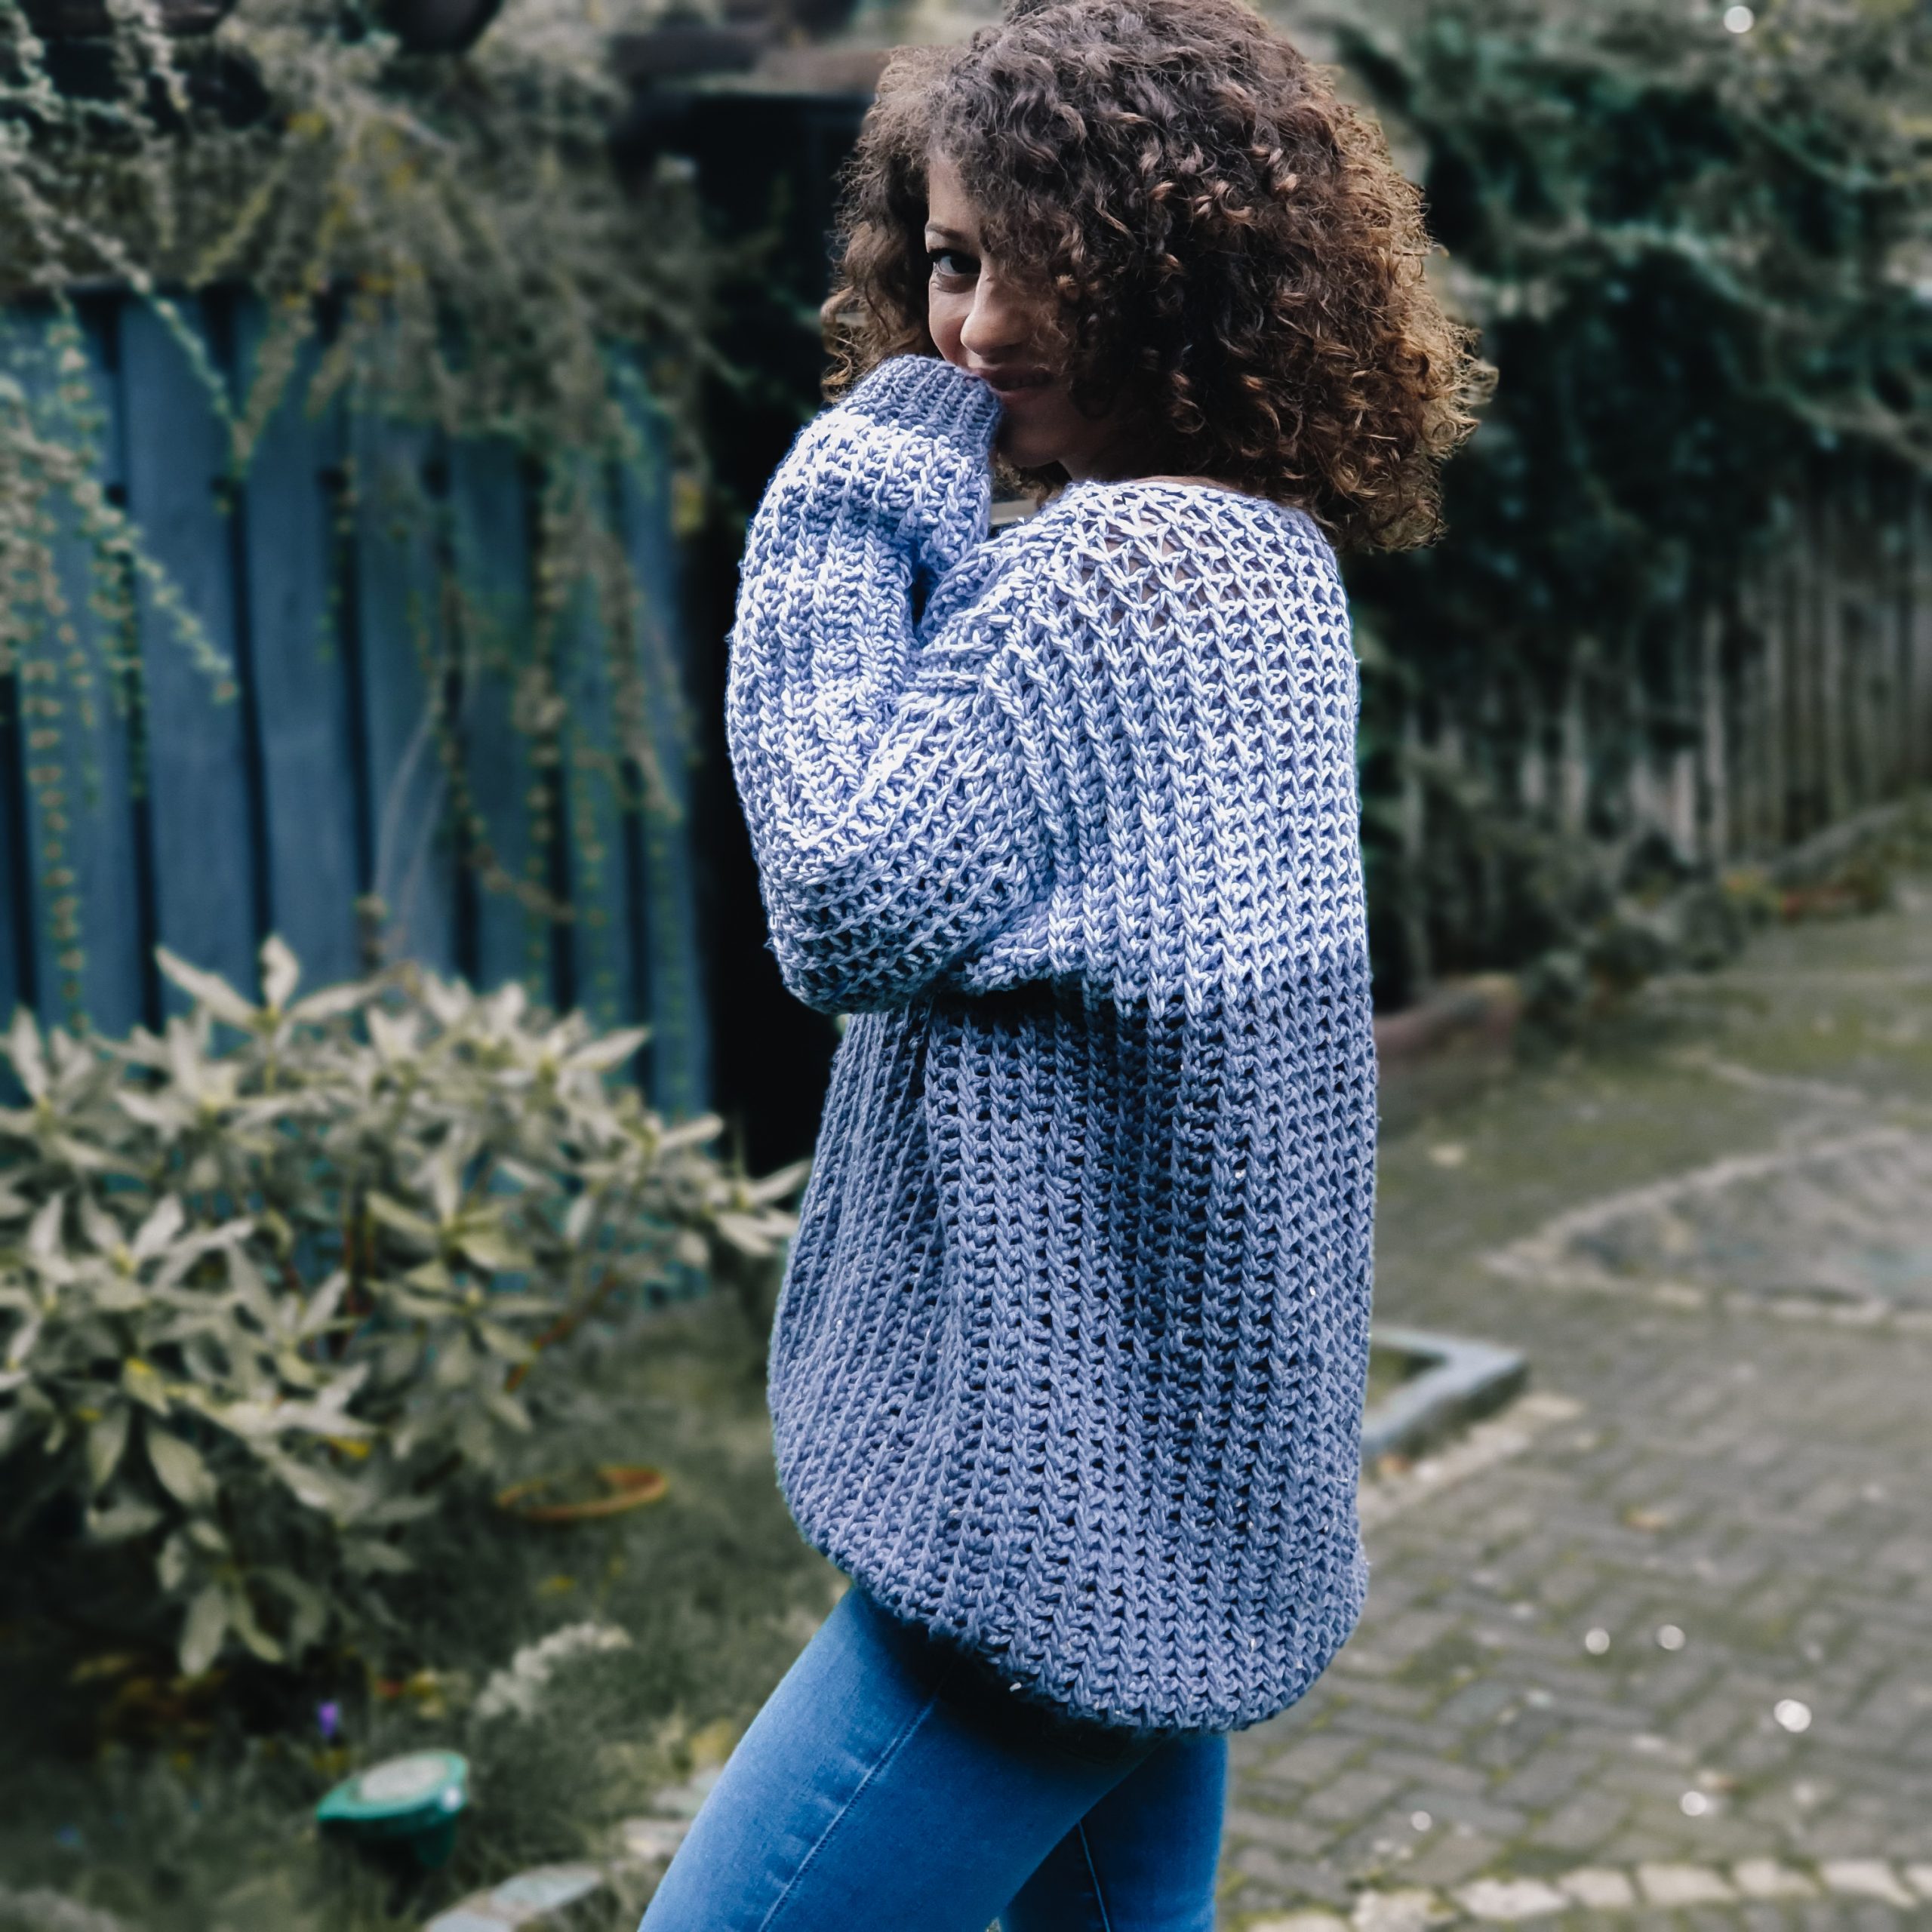
It’s time to share with you another Tunisian Crochet Pattern! This Blue Moon Jumper it’s super soft and comfortable and perfect for the cold, lazy days that are about to come. It’s worked up pretty quick and the pattern is only one row repeat.
You can Purchase the easy printable PDF version of this pattern here:
I discovered Tunisian Crochet long time ago, but I didn’t actually designed something using this technique until the Tunisian Raglan Blouse
I love Tunisian Crochet, because I kind of see it like a bridge between crochet and knitting. If think you are not a faster knitter and that’s why you avoid knitting even if you would love to knit something, then you can make something in Tunisian Crochet. You can use your crocheter skills, but you will also learn a lot of knitting rules, even if you don’t realize them.
I like to think about myself as a designer, that I am an experienced crocheter :), but I love to experiment other fields where you can use yarn. For me a Tunisian Crochet or Knitting project, is like taking a break, mentally and physically. Mentally because I am using simple patterns and physically because my hands are moving differently and I have a different posture when I knit or Tunisian Crochet.
I don’t know if I convinced you to try it, but let’s see what we will need and how you can make the Blue Moon Jumper.
MATERIALS
- Yarn
- Category 4 ( worsted, aran)
- Needles
- 8 mm Tunisian Crochet Hook with cable of 60
- 6 mm Crochet Hook for ribbing
- You will need a yarn needle for wave in ends and assembling
- Scissors
- stitch markers
PATTERN NOTES
This Blue Moon Jumper pattern uses both Tunisian and traditional crochet. We will use traditional crochet only for ribbing, the rest of the sweater is worked just in a variation of Tunisian knit Stitch, Tunisian crochet color changing
This pattern requires techniques as Tunisian knit stitch, slip stitch worked in the back loop only
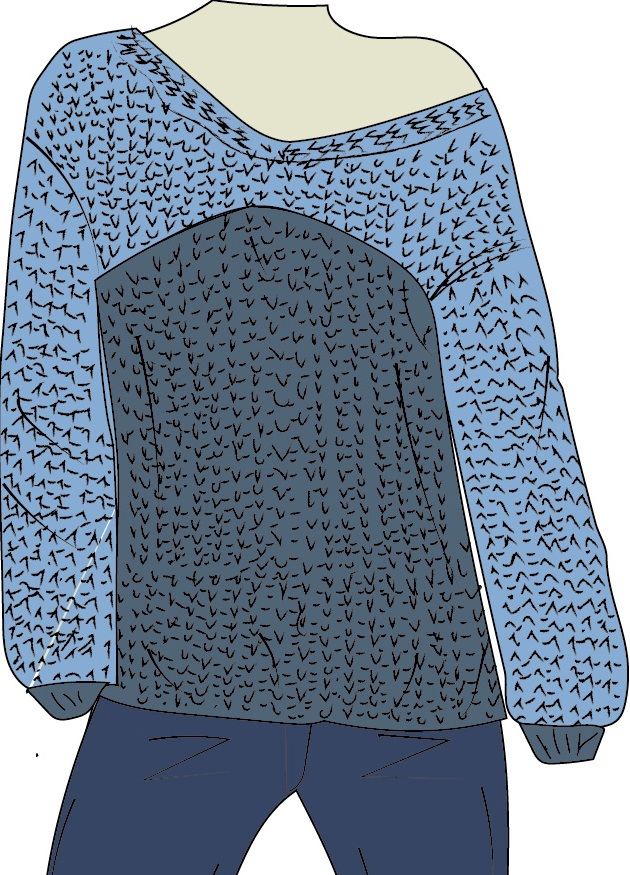
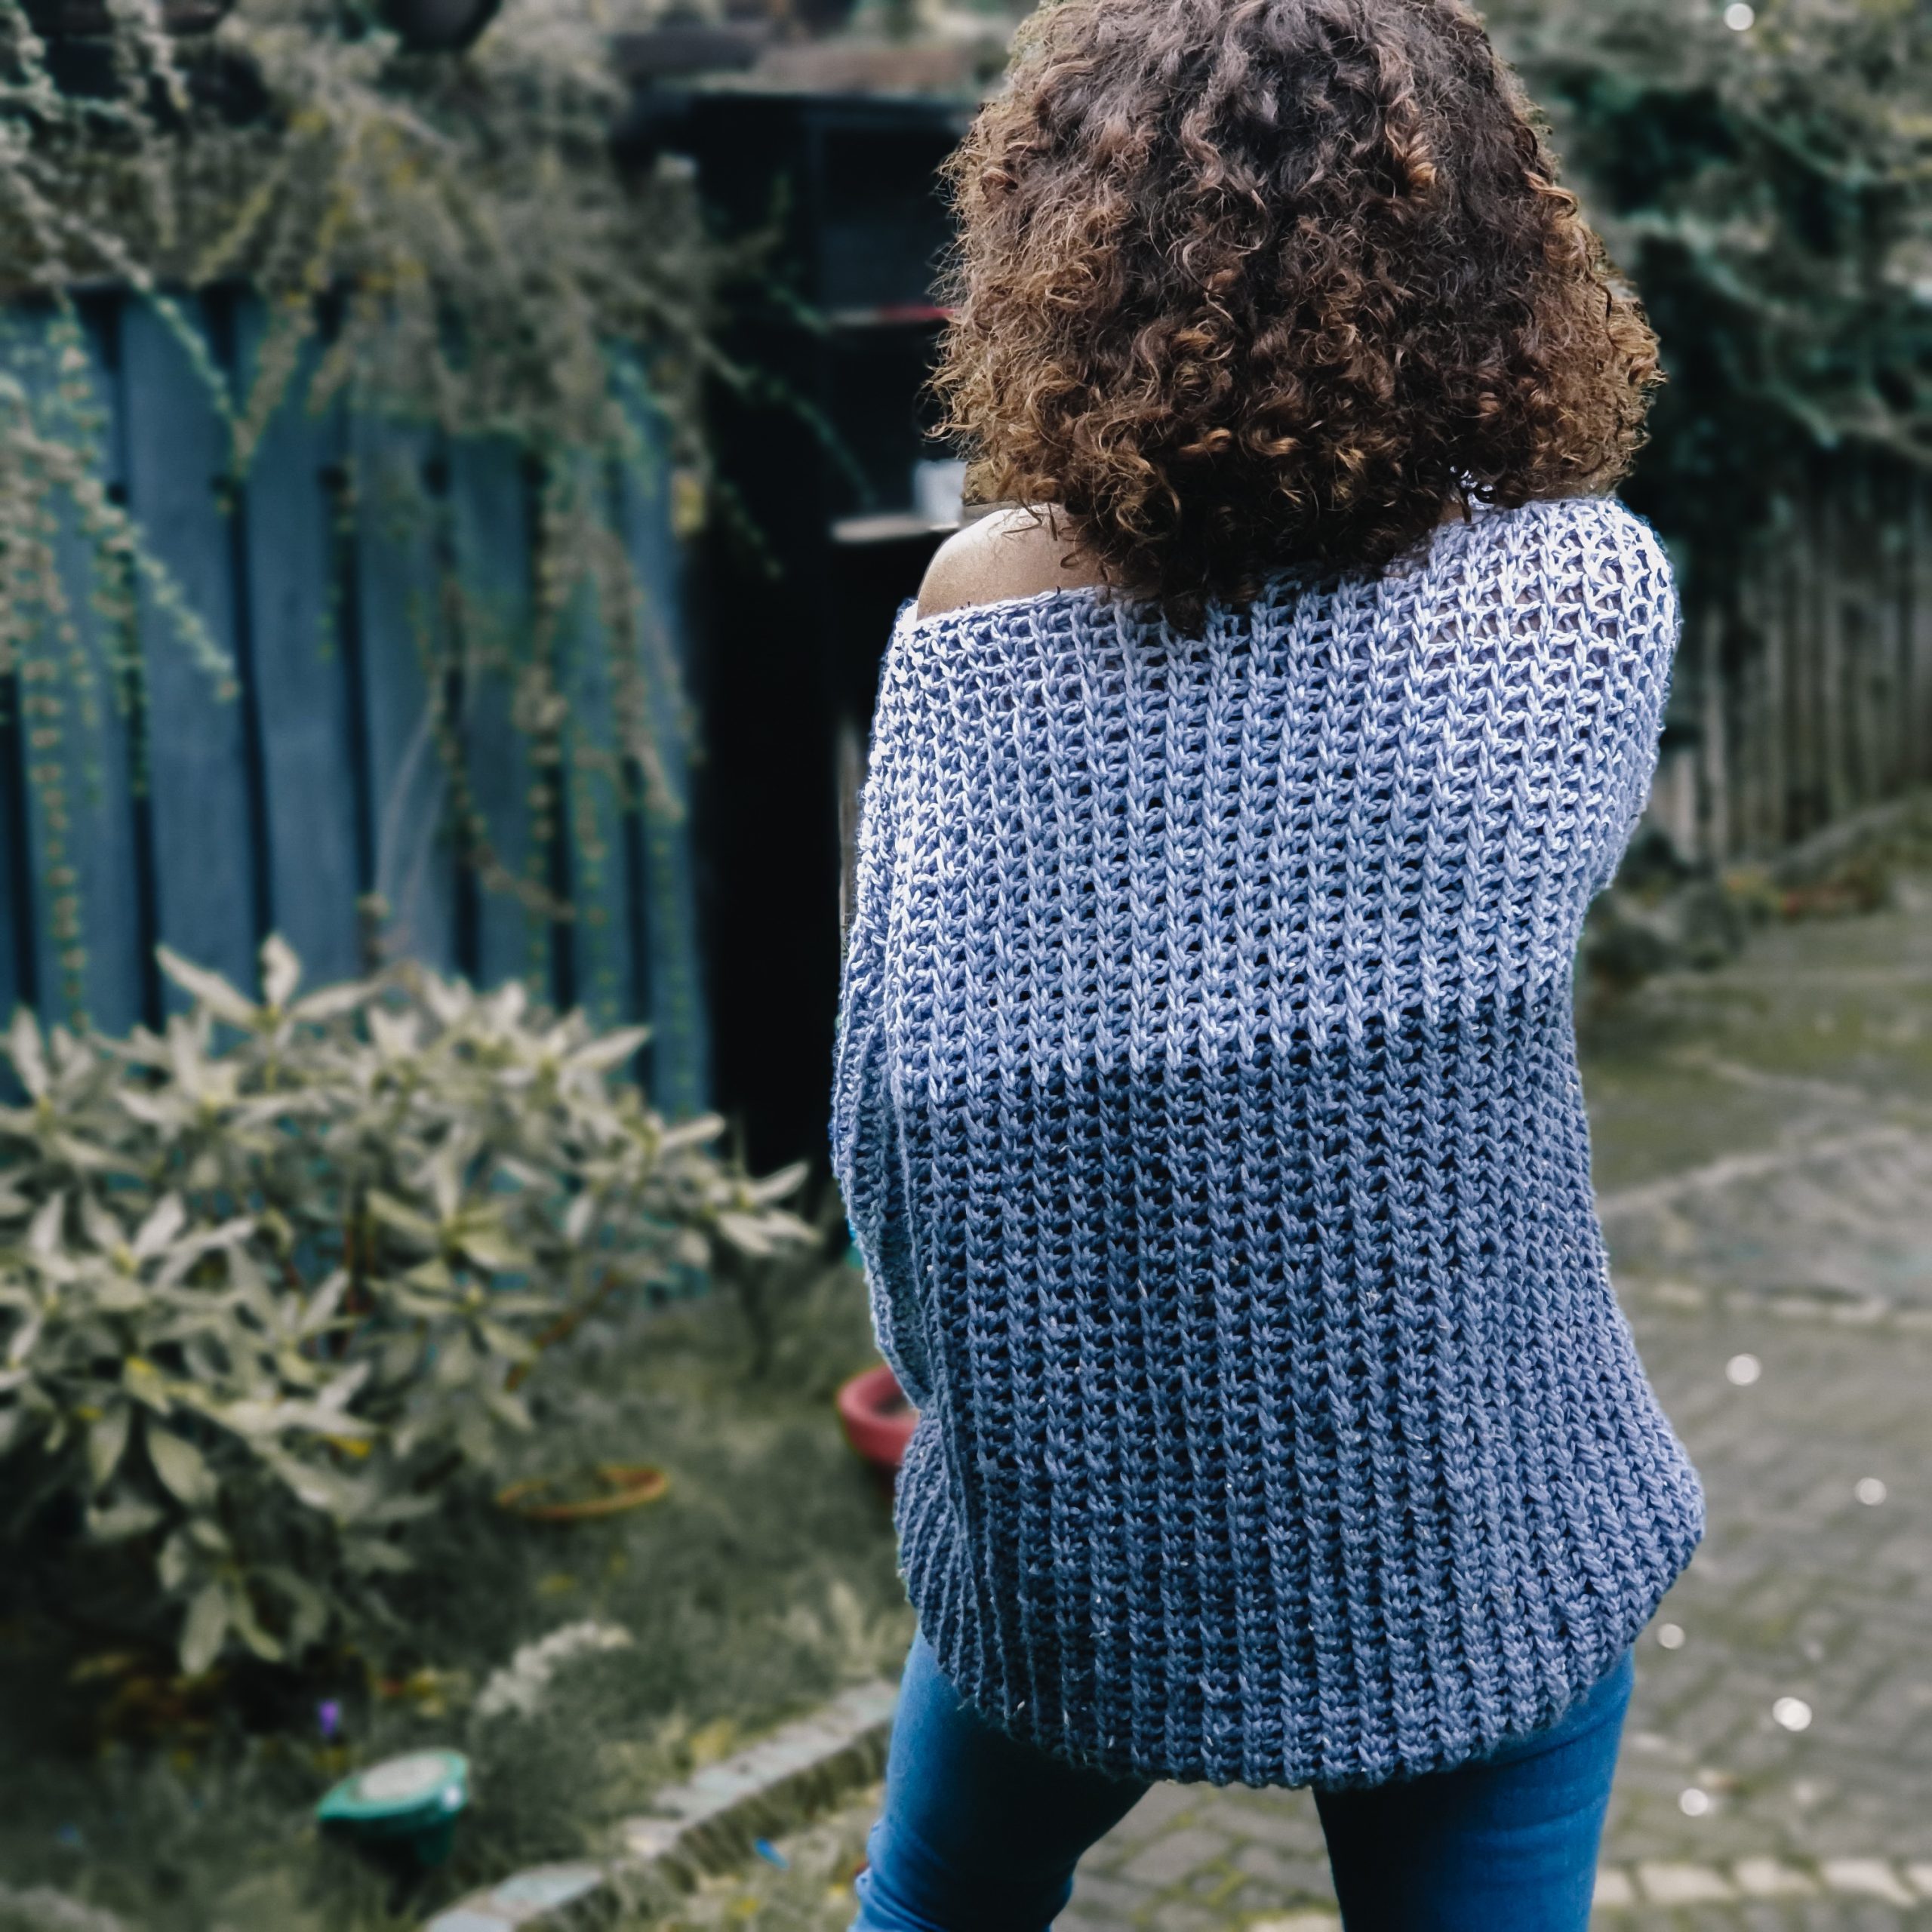
The jumper construction is from 4 panels, back, front and sleeves. The front panel has a V neck line and the sleeves are worked by picking up stitches from the arm-holes edges.
I used 2 colors for this sweater, but it can be made in one single color also
The length to the armpit is the same for all sizes. In case you want adjust length, work more or fewer rows to the armpit.
This sweater has an oversized fit with a positive ease of about 24 cm around the bust circumference.
The written instructions below are only for the forward row (forward Pass). The turning row (return pass) will be always worked the same (see the STITCH PATTERN section.)
All the forward rows are ending by working the edge stitch.
MEASUREMENTS
The pattern is available in 8 sizes, from Small to 5 X Large and is written in US terms
Final measurements of the sweater are listed below.

Neck Line a: 27 cm (27, 27, 27, 27, 27, 27, 27)
Bust Width b: 55 cm (60, 65, 70, 75, 80, 85, 90)
Length to armpit c: 40 cm (40, 40, 40, 40, 40, 40, 40)
Armhole Depth d: 20 cm (23, 23, 26, 26, 29, 29, 29)
Sleeve length e: 43 cm (43, 45, 45, 46, 46, 47, 47)
This measurements will fit:
| To Fit cm | S | M | L | XL | 2XL | 3XL | 4XL | 5XL |
| Bust
width |
43 | 48 | 53 | 58 | 63 | 68 | 73 | 78 |
How much yarn do you need?
For the Blue Moon Jumper I used Kartopu Melange Wool, in color Denim and Baby Blue. Each skein of yarn has 100 grams and approximate 170 meters. It’s a mix of Acrylic, Wool and Viscose.
For each size you will approximate need:
| Kartopu Melange WOOL | S | M | L | XL | XXL | 3XL | 4XL | 5XL |
| 100 gr/170 m | 6 | 6 | 7 | 8 | 8 | 9 | 10 | 10 |
| Denim | 3 | 3 | 3 | 4 | 4 | 4 | 5 | 5 |
| Baby Blue | 3 | 3 | 4 | 4 | 4 | 5 | 5 | 5 |
STITCH PATTERN
The Blue Moon Jumper is worked in a variation of Tunisian Knit Stitch
Row 1 1tks, YO skip 1 st (1 space). Finish the row working the edge stitch
What do you need to know?
Tunisian Knit Stitch
Insert the hook from front to back through the fabric, between the two halves of the vertical loop, yarn over, and pull up a loop
Turning row (Ret P)
Yarn over and pull the yarn through the first loop only. *yarn over and pull the yarn through 2 loops. *Repeat to the end of the row.
Bind off
Insert the hook into the next st, YO, pull out a loop, pull the new loop through the loop on your hook
Decrease (used only to shape the neckline)
To make the decrease 2 stitches are worked together. Considering the stitch pattern, there are 2 different decreases.
Dec 1: Working together a chain space and a Tunisian Knit Stitch.
Version 1
Insert the hook into the chain space, and then into the next stitch, yarn over and pull out a loop through both sts.
Version 2
Skip the space without Yarn over.
Dec 2: Working Together 2 Tunisian Knit stitches.
Insert the hook, through both sts, yarn over and pull out a loop.
You can Purchase the easy printable PDF version of this pattern here:
ABBREVIATIONS
- Ch – chain
- Ss – slip stitch
- Tks – Tunisian knit stitch
- St(s) – stitch(es)
- YO – yarn over
- RetP – return pass
- Sp – space
- Dec – Decrease: 2 sts worked together
- R| – row
- ** – Repeated section
TENSION
- 11 sts = 10 cm [ (1Tks, 1sp)x 5 + 1 Tks)
- 10 rows = 10 cm
*in the stitch pattern used
INSTRUCTIONS
Numbers for sizes M, L, XL, 2XL, 3XL, 4XL and 5 XL are written between brackets. If not the pattern applies for all sizes.
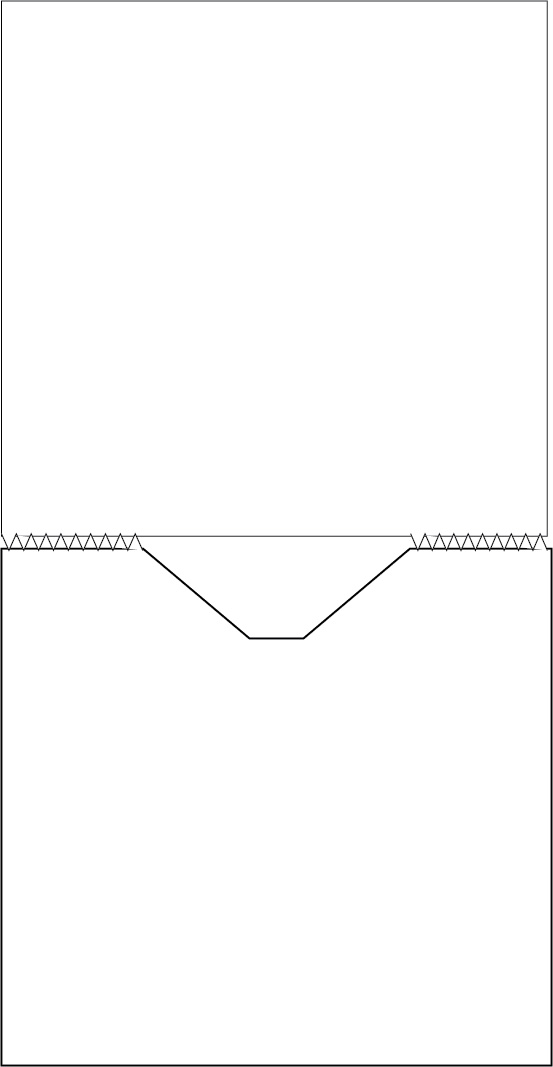
FRONT PANEL
If you want to adjust the length, you can work more or fewer rows on this section.
Using Color Denim
Start| ch 60 (66, 72, 76, 82, 88, 94, 98)
R1| Foundation row:
Starting with the second chain, insert the hook into the next st and pull out a loop to the end of the row, Ret P.
R2| *1 Tks, YO, skip the next st. *Repeat to the end of the row. Finish the row working the edge stitch. Ret P.
R3| *1Tks, YO, skip 1 sp. * Repeat to the end of the row, Ret P.
Repeat R3 until you have 40 rows in total. *change the color at the end of the R40 turning row. When you have 2 loops on the hook, cut the yarn, make a slip knot with the other color you will want to use and pull the loop through the last 2 loops that you have on the hook.
In color Baby Blue
Repeat R3 working with the other color 4 (7, 7, 10, 10, 13, 13, 13) more rows or until you have in total 44 (47, 47, 50, 50, 53, 53, 53) rows in total.
Neck line
Use a stitch marker to mark the middle of the front panel. You should have on either side of the stitch marker 30 (33, 36, 38, 41, 44, 47, 49) sts.
Next Row
Work the Stitch Pattern to the stitch marker. You have 30 (33, 36, 38, 41, 44, 47, 49) loops on your hook. Place the st marker on the hook and continue to work the Stitch Pattern to the end of the row.
For the Ret P, work only the sts to the st marker, 30 (33, 36, 38, 41, 44, 47, 49)
Neck Line A (left side)
R1 1 Tks in the next 3 sts, ( in the space inset the hook into the ch and pull out a loop), 1 Dec 1 (see the STITCH PATTERN section), YO, skip the next space, *1Tks in the next st, YO, skip the next space. *Repeat to the end of the row. Ret P
R2 1 Tks in the next 3 sts, ( in the space inset the hook into the ch and pull out a loop), 1 Dec 2 (see the STITCH PATTERN section), YO, skip the next space, *1Tks in the next st, YO, skip the next space. *Repeat to the end of the row. Ret P
R3 – R15 Repeat R1 and R2.
You will decrease with 1 st per row. So after 15 rows you will have 15 (18, 21, 23, 26, 29, 32, 34) sts.
Bind off.
Neck line B ( Right side)
On the right side the decreases are made at the end of the row, before the neck line border sts.
We will start with the Ret P.
Rejoin yarn and make the Ret P
Use a stitch marker to mark the last 4 sts ( 3 sts + the edge st). The decrease will be made in the 2 sts before these 4.
R1 *1 Tks, yo, skip 1 sp. *Repeat until you have 6 sts left (including the edge st), 1 Dec1, 1 tks into the next 3 sts and finish the row with the edge st. Ret P
R2 *1 Tks, yo, skip 1 sp. *Repeat until you have 6 sts left (including the edge st), 1 Dec2, 1 tks into the next 3 sts and finish the row with the edge st. Ret P
R3 – R15 Repeat R1 and R2.
You will decrease with 1 st per row. So after 15 rows you will have 15 (18, 21, 23, 26, 29, 32, 34) sts.
Bind off.
BACK PANEL
Repeat the same pattern as for the FRONT PANEL, for the length to the armpit. Change the color and then work using the second color, in the same stitch pattern, 20 (23, 23, 26, 26, 29, 29, 29) rows.
Bind off.
Before stating to work the sleeves, stitch the shoulders stitches.
You can Purchase the easy printable PDF version of this pattern here:
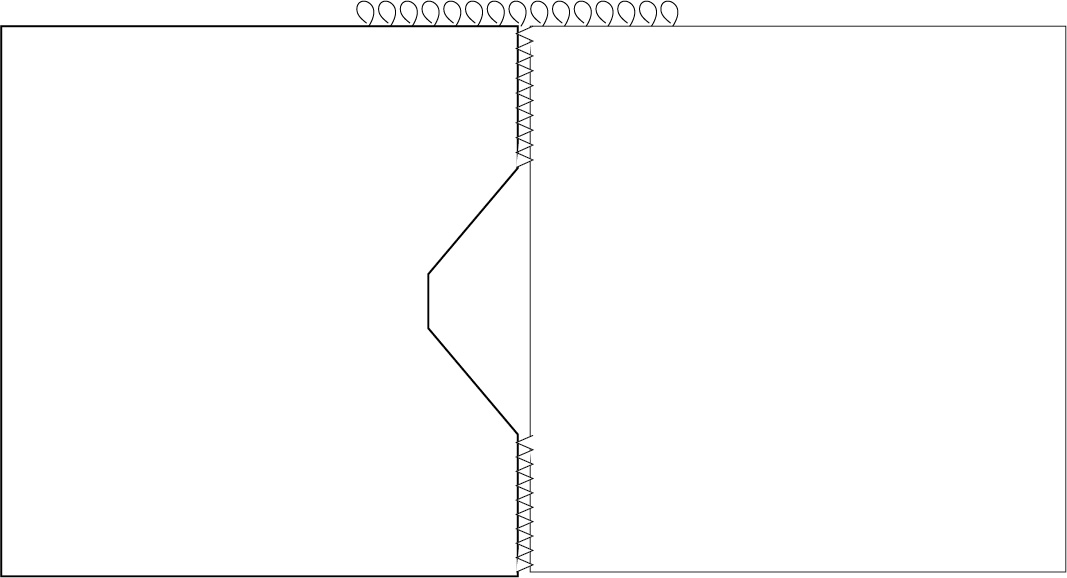
SLEEVES (in Baby Blue Color)
The sleeves are worked starting from the armhole depth. The width of the sleeve will be equal with the number of rows worked with the second color or 20 (23, 23, 26, 26, 29, 29, 29) rows on either side of the shoulder seam.
Before starting to pick up stitches from the armhole edge you have to verify your gauge.
In this case, we have 11 sts and 10 rows per 10 cm square. This means that for every 10 rows we will need 11 sts to have the same measurement.
More exactly, in every 10th side row, you have to pick up 2 sts.
*on size Small you can pick one st per row, but on bigger sizes, because the width is bigger, is better to follow the proportion sts/rows as explained above.
R1 Foundation row (Picking up sts)
Insert the hook into the *(1st st and pull out a loop ) x 9, (Insert the hook into the next st and pull out a loop) – repeat one more time into the same st.
*Repeat until you finish all the stitches. Ret P
R2| *1 Tks, YO, skip the next st. *Repeat to the end of the row. Finish the row working the edge stitch. Ret P.
R3| *1Tks, YO, skip 1 sp. * Repeat to the end of the row, Ret P.
Repeat R3 until you have 38 (38, 40, 40, 41, 41, 42, 42) rows in total.
Bind off.
Repeat the pattern for the other sleeve.
RIBBING
In the ribbing pattern are worked the cuffs and the bottom hem. All ribbing edges can be worked before or after assembling.
For the Ribbing it’s used regular crochet and a 6 mm crochet hook.
Use color Denim
Start| rejoin yarn in the first right st, facing the right side of the work. Ch 9
R1| Starting with the 2nd st, 1 ss into each of the next 8 sts, 2 ss into the next 2 sts of the sweater edge (sleeves or bottom hem). Turn
R2| 1 ss into the back loop only in each st. Ch 1 and turn.
R3| 1 ss in the back loop only, into each of the 8 sts. 1 ss in the next 2 sts of the sweater edge. Turn.
Repeat R2 and R3 until you complete the entire width.
Fasten off.
Repeat the pattern for both sleeves and bottom hem.
ASSEMBLING
Fold the piece you have in half and stitch together the edges, starting from the cuff and finishing with the bottom hem

TO FINISH
Wave in all ends and block to measurements.
And done! you have now a new sweater to be proud of!
You can Purchase the easy printable PDF version of this pattern here:
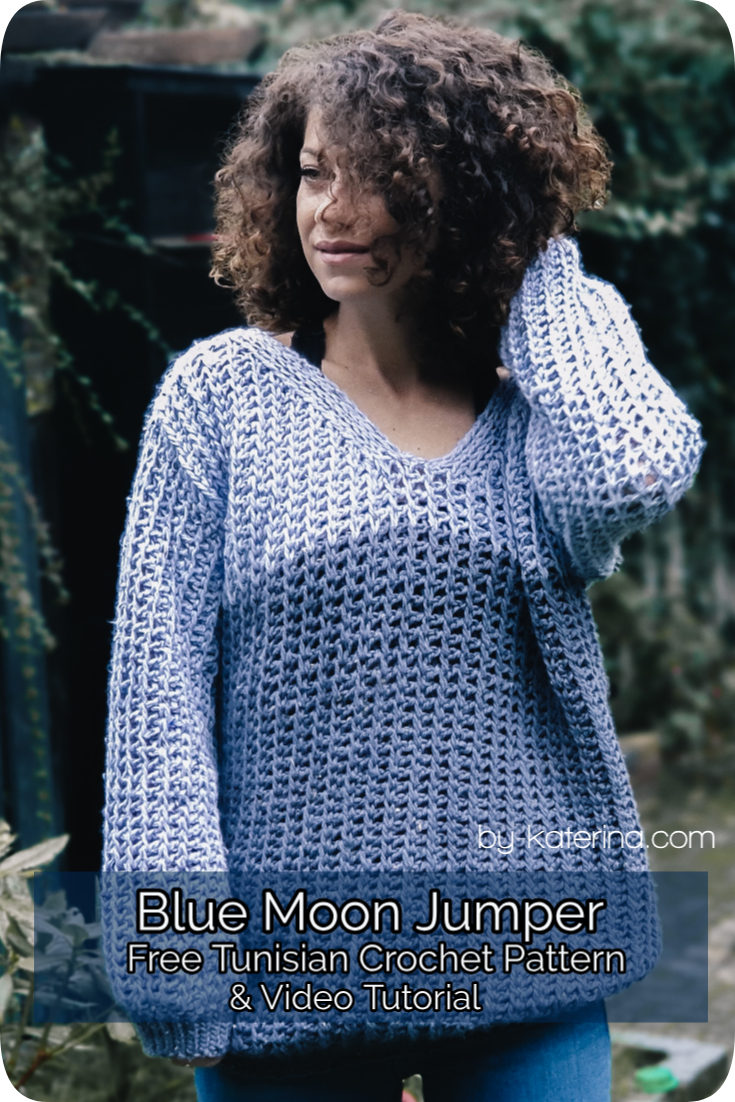
You can find a step by step video tutorial here


Comments are closed.